

Scenario actions and operators
After triggers, actions and operators make up the rest of your scenario flow. Actions run campaigns when customers reach them. Operators control how customers move through the flow.
Actions
Actions run when customers reach them in the flow. Each action type has a unique action_id. Learn more in System events.
| Action | Description |
|---|---|
Sends an email with your content. Learn how to create an email campaign. The email attribute must have a value for a customer to receive an email campaign. | |
| Facebook message | Sends Facebook messages to customers. |
| HTML | Saves HTML content to show customers on connected webpages. Use it, for example, to customize your homepage by customer segment. |
| Mobile push notifications | Sends push notifications to mobile phones. |
| Retargeting | Updates your Facebook or Google audience. Matches customers by email, phone number, or Facebook ID. |
| SMS | Sends an SMS with your content. Learn how to create an SMS campaign. The phone attribute must have a value for a customer to receive an SMS campaign. |
| Web push notifications | Sends push notifications to web browsers. |
| Webhook | Sends custom HTTP requests to your API. Learn more about webhooks. |
Find a node's ID
Go to the Evaluation tab and hover over any node to see its ID in the format #(number).
Manual recipientsIf you choose email recipients manually, the campaign ignores frequency delivery policies.
Operators
Operators control how customers move through your flow.
| Operator | Description |
|---|---|
| A/B split | Splits customers into 2 or more groups based on the ratios you set. A/B tests with automatic winner distribution work only with the Now and Scheduled triggers. A/B tests with a manually set distribution also work with On event. |
| Add event | Records new events. Define the events in data management first. Use Jinja tags to include contextual information in properties, like in email templates. One node can add up to 50 events, with up to 100 properties per event. When you use a custom timestamp in the node, the timestamp is in the past, so the event falls under event expiration. The event isn't added and fails. |
| Condition | Works as a gate. Customers who match the condition go through the (green) match output. Customers who don't match go through the (red) don't match output. When you allow personalization, you can use some Jinja tags in the condition, such as trigger event properties or report values. This reduces performance, so use it with caution. Learn about performance limits in Save and clone scenarios. |
| Customer limit | Limits the number of customers that go through a scenario flow to an absolute number. See Customer limit. |
| Label | A text label to name flows and add descriptions. |
| Segmentation | Divides customers into smaller groups based on common characteristics. Works like a Condition node. A Condition node has one green and one red output. A Segmentation node has one green output per segment. To use a customer segmentation in a scenario, a Segmentation node is easier, faster, and cleaner than a Condition node. Learn about Segmentation fork. |
| Set attribute | Assigns a new value to a customer attribute. Works with string, number, boolean, list, and JSON attributes. One node can set up to 100 properties. Set up the node in the visual or code editor. |
| Wait | Holds customers for a set time before they continue through the flow. Use a fixed time period, a dynamic period based on other events, or each customer's optimal send time. See Wait node. |
To set up the Set attribute, Add event, and Condition nodes in the code editor, see Flexible operators in Advanced features in scenarios.
Time zones in scenario filters
If your time zone isn't UTC+0, your scenario results can differ from your reports and segmentations. This happens because:
- Relative time filters use UTC.
- Absolute time filters use your time zone from Settings > User settings > Time zone.
- Relative filters apply only to scenarios, not your whole project.
If you see differences between your scenario results and your reports or segmentations, check your time zone settings and how your time filters affect your data.
To apply each customer's local time instead, for example in silent hours, see Time zones.
Customer limit
The customer limit node sets the maximum number of customers that pass through it. This helps when your scenario leads customers to a channel with limited capacity. For example, your call center might handle only a set number of calls per day.
The customer limit node creates 2 outputs: a successful one for customers within the limit and an unsuccessful one for customers over the limit.
Which customers does the customer limit node let through first?
The customer limit node lets customers through in the order they arrive, until it reaches the limit.
- Bloomreach decides which output a customer goes to at the moment they arrive at the node.
- Customers who arrive before the limit is reached go to the successful output.
- After the limit is reached, all other customers go to the unsuccessful output.
- This continues in later campaign runs until the count resets to zero. To reset the count on a schedule, set Specify customer limit reset period.
Set the limit
Enter a value in Limit to # of customers. Use an absolute number or a Jinja reference to metrics, reports, report_value_by_key, or catalogs. Learn more about Jinja references.
Set limit per group
Select Allow drill-down group to add multiple limits per node with Jinja. Each customer segment then gets its own limit. For example, run a first-come, first-served competition with a set number of winners from each customer segment.
Use the same variables as in webhooks, such as customer attributes, trigger event properties, or webhook responses. To use the drill-down group in the limit's Jinja, use the limit_group parameter.
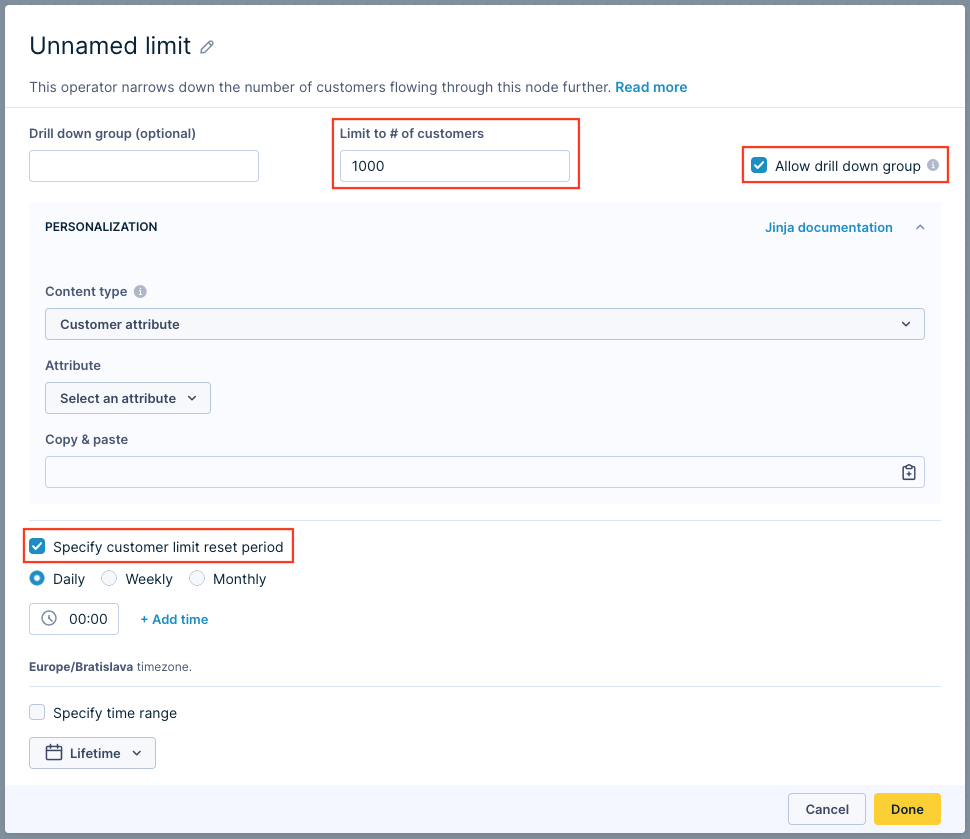
Example of a limit with a limit groupTo find the item used as the drill-down group in the
subsidiariescatalog and reference itslimitattribute, use:{{ catalogs.subsidiaries.item_by_id(limit_group).limit }}
Preview a customer limit node
The preview estimates how customers pass through a customer limit node, so it can show more customers than your limit. The live scenario lets through exactly the number you set. Learn more in Preview your scenario before launch.
Wait node
The wait node holds customers for a set time before they continue through the flow.
Fixed time period
Set a wait time from minutes up to years. A day is 24 hours, and a week is 7 days. Months follow the calendar, so a 1-month wait takes 28–31 days. The goal is the same date the next month. For example, a 1-month wait that starts on February 16 ends on March 16, not after 30 days.
Customers who already entered the wait node keep the original wait time. For example, if you change the wait time from 7 days to 6 days, customers already in the node still wait 7 days. New customers wait 6 days. You can't release waiting customers sooner by reducing the wait time.
Learn how other changes affect a running scenario in Start and stop a scenario.
Optimal send time
Delays each customer's message until their predicted peak engagement hour, optimizing for clicks by default. The messaging channel selector in the wait node requires the Loomi Journey Orchestration package.
For full details on how optimal send time works and how to configure it, see Optimal send time prediction.
Dynamic time period
Use Jinja to calculate a custom wait time for each customer. Reference metrics, aggregates, trigger event attributes, or any type of personalization. For examples and rounding rules, see Dynamic wait time.
Silent hours
Pause campaigns during hours or days when you don't want to disturb customers. Set global silent hours in your project settings, and override them in individual wait nodes if needed. For setup and time zone options, see Silent hours.
Updated 20 days ago