

API Webhook in a Scenario
This guide will walk you through creating a new API call webhook from scratch.
Prerequisites
Ensure the prerequisites are set up in the Bloomreach application to make a successful API call. This includes:
- Setting up an API Group with a relevant access type and saving the API keys.
- Configuring permissions.
Follow the API Prerequisites guide.
Implement webhooks in scenarios
Create the webhook.

Double-click on the webhook node. To ensure this functionality works properly, refer to the API documentation.
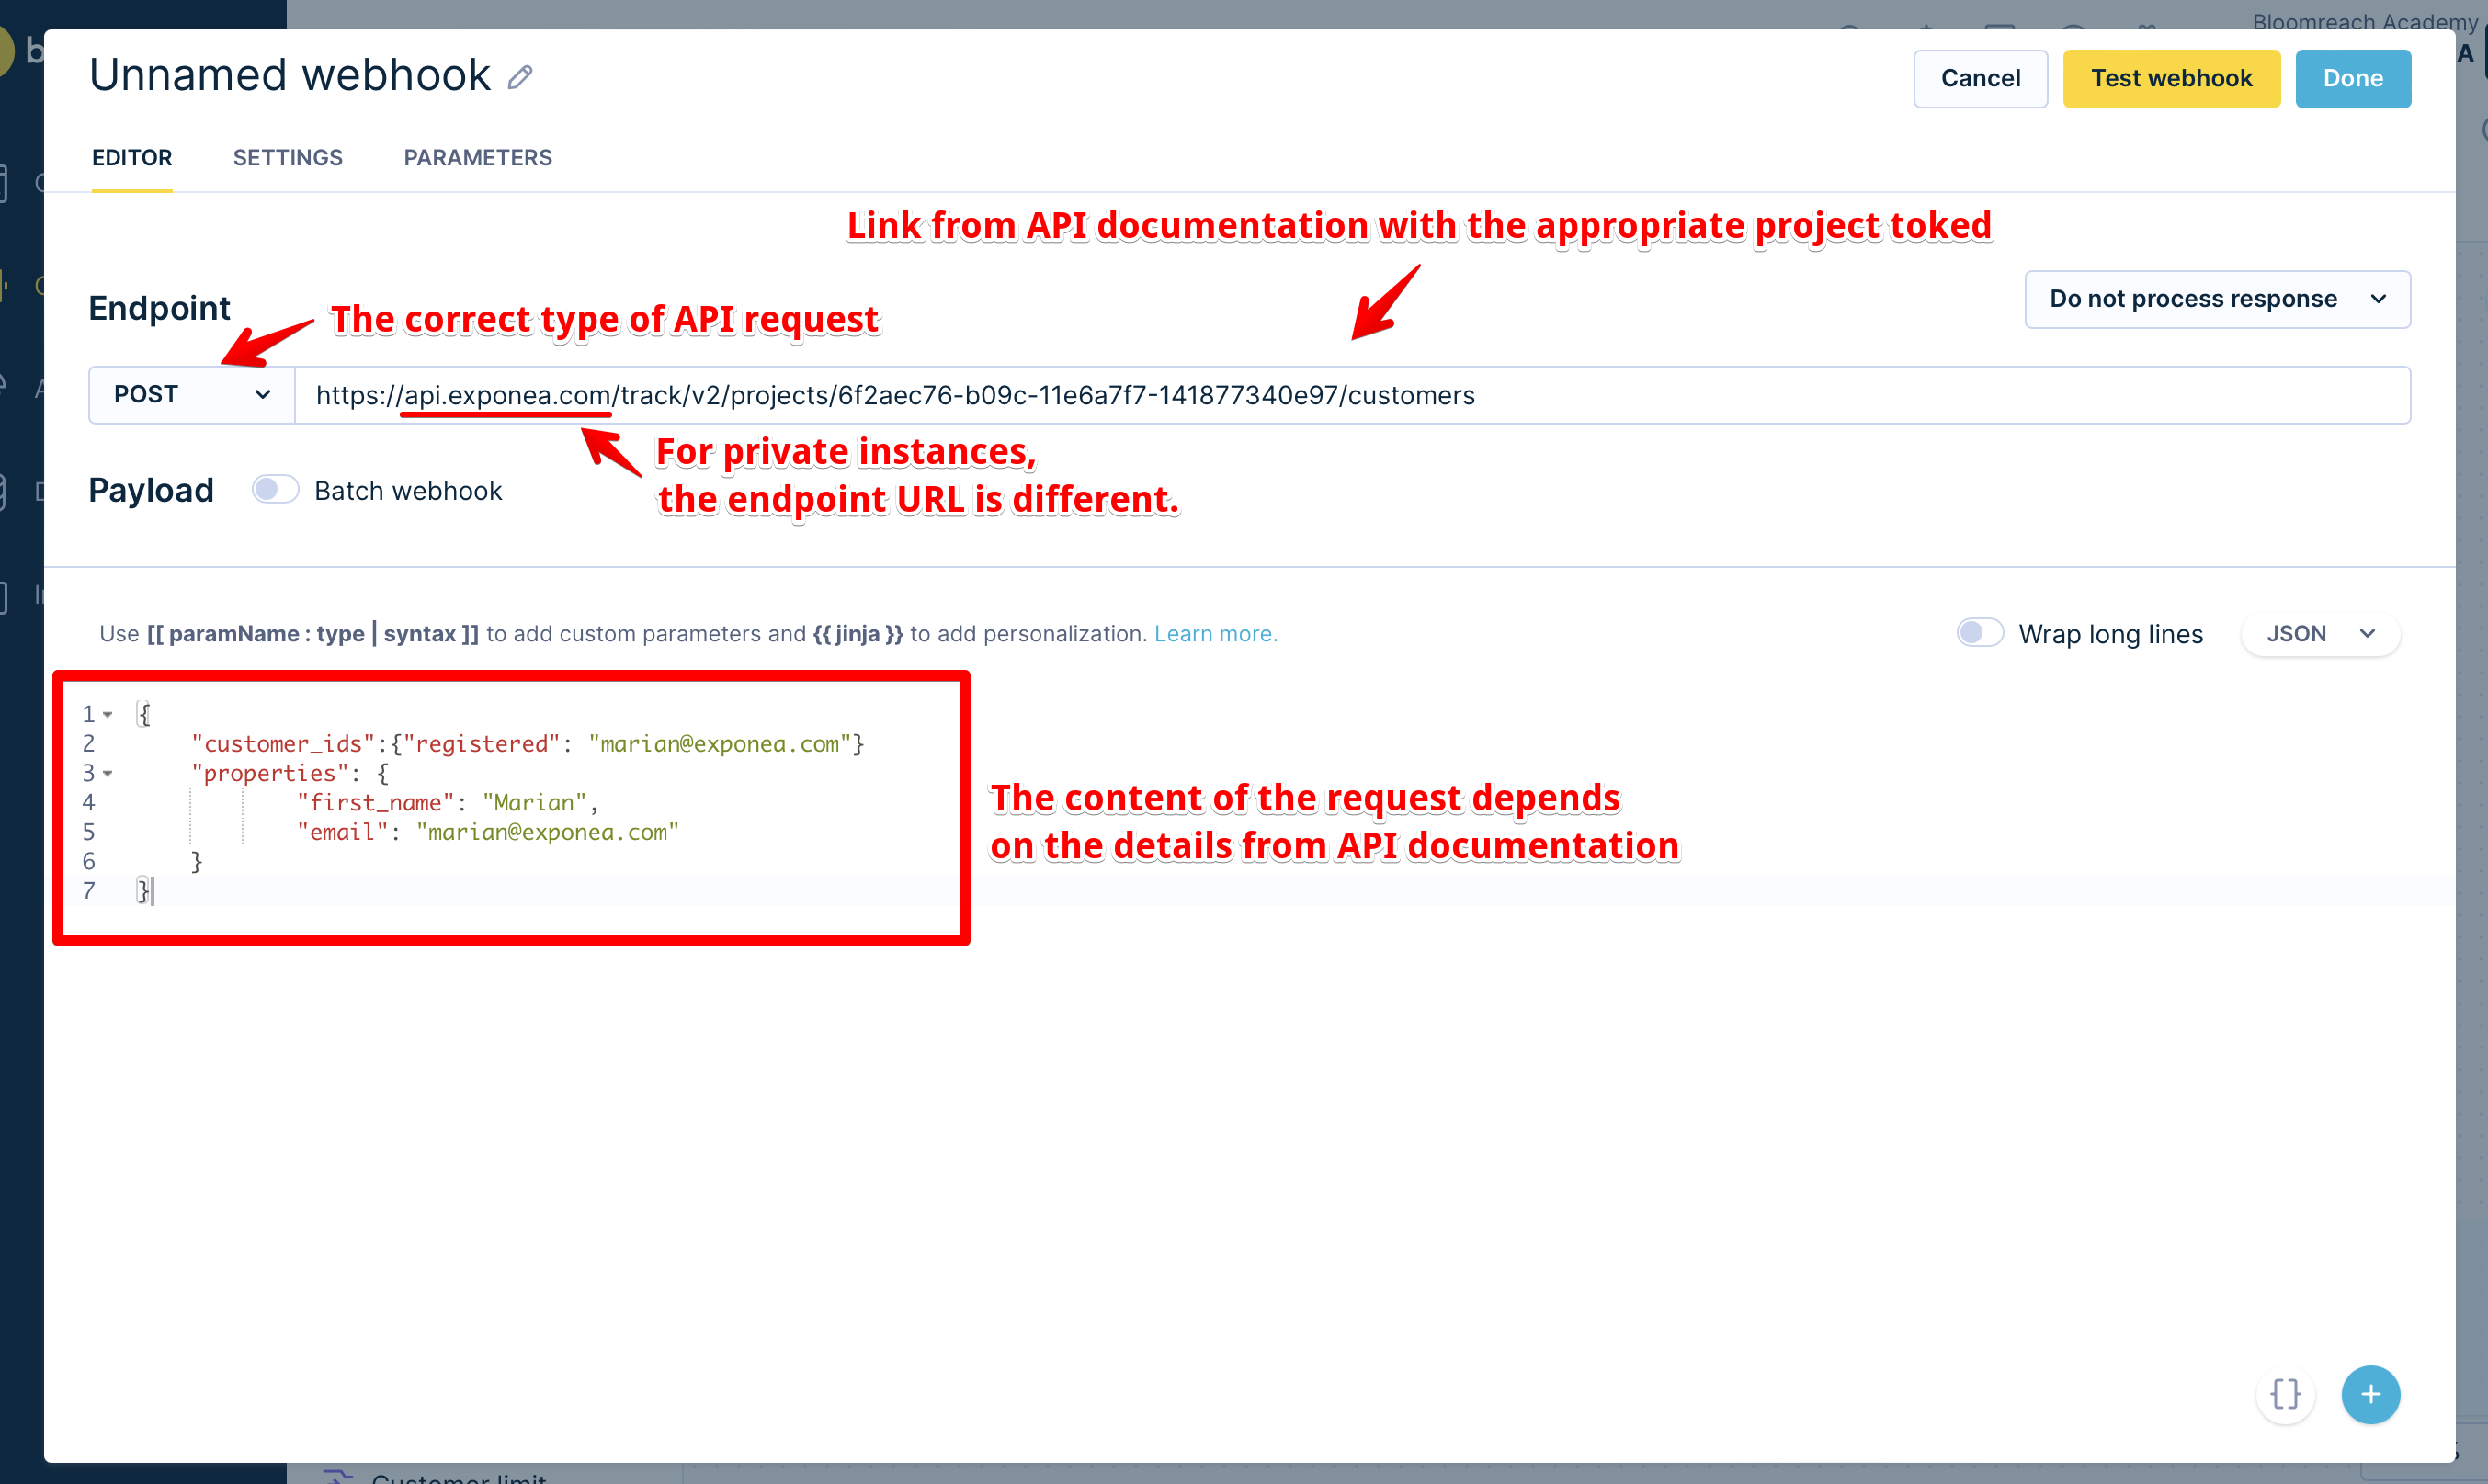
Remember to:
- Set the right communication policy.
- Set the response processing correctly at the bottom of the webhook screen.
After this, you are good to go to attach this webhook to a branch of your scenario and execute.
Updated 3 months ago
Did this page help you?