BigCommerce
Integration
Connect your BigCommerce store with Bloomreach to analyze store data, run omnichannel marketing campaigns, and use AI-driven capabilities across your ecommerce operations.
This integration eliminates custom development work. It saves you time and reduces integration costs. Without it, you'd need to hire a system integrator, agency, or in-house development team to build your own solution.
BigCommerce availability in BETA
This feature is currently available in the BETA version, but we are working on its improvement.
Prerequisites
Before you begin, make sure you have:
- Store Owner access to your BigCommerce account.
- Admin access to your Bloomreach project.
- Basic familiarity with Tag Manager concepts.
Add the integration
Follow these steps to connect BigCommerce with Bloomreach:
- Go to Data & Assets > Integrations.
- Click + Add new integration and select the BigCommerce integration.
- Copy the Integration URL that appears.
- Go to BigCommerce Marketplace and search for the Bloomreach Discovery app.
- Install the Bloomreach Discovery app.
- Open the Bloomreach Discovery app and go to Engagement settings.
- Paste the Integration URL.
- Click Activate integration.
- Activate storefront data layer tracking.
Note
You must be logged in as the Store Owner to install the Bloomreach app. If the marketplace link doesn't work, replace your store ID and use this link instead.
After you complete the setup, Bloomreach downloads all historical data and begins tracking new data from the BigCommerce API. The app also exposes identification and other useful data in the data layer. This works on the default Stencil storefront theme.
Don't rotate or delete API keys
Never rotate or delete API keys created by this integration. Changing these keys breaks the integration and stops data synchronization.
Configure tracking
BigCommerce integration is enabled by default on multi-tenant instances. For other instances, contact the support team to activate it.
You must add the JavaScript SDK manually by editing theme files or using Google Tag Manager. You can add tracking manually using the data layer helper in Tag Manager.

Add data layer helper tracking
-
Go to Tag Manager > Create new.
-
From the templates, select dataLayer helper.
-
Update lines 126 and 127 by pasting the following code:
if(m.event_name==="identification") exponea.identify(m.event_properties.customer_ids);else exponea.track(m.event_name,m.event_properties); -
Go to the Settings tab.
-
Select General Consent and set priority to 999.
-
Click Save and start the Data Layer.
Set up web integration
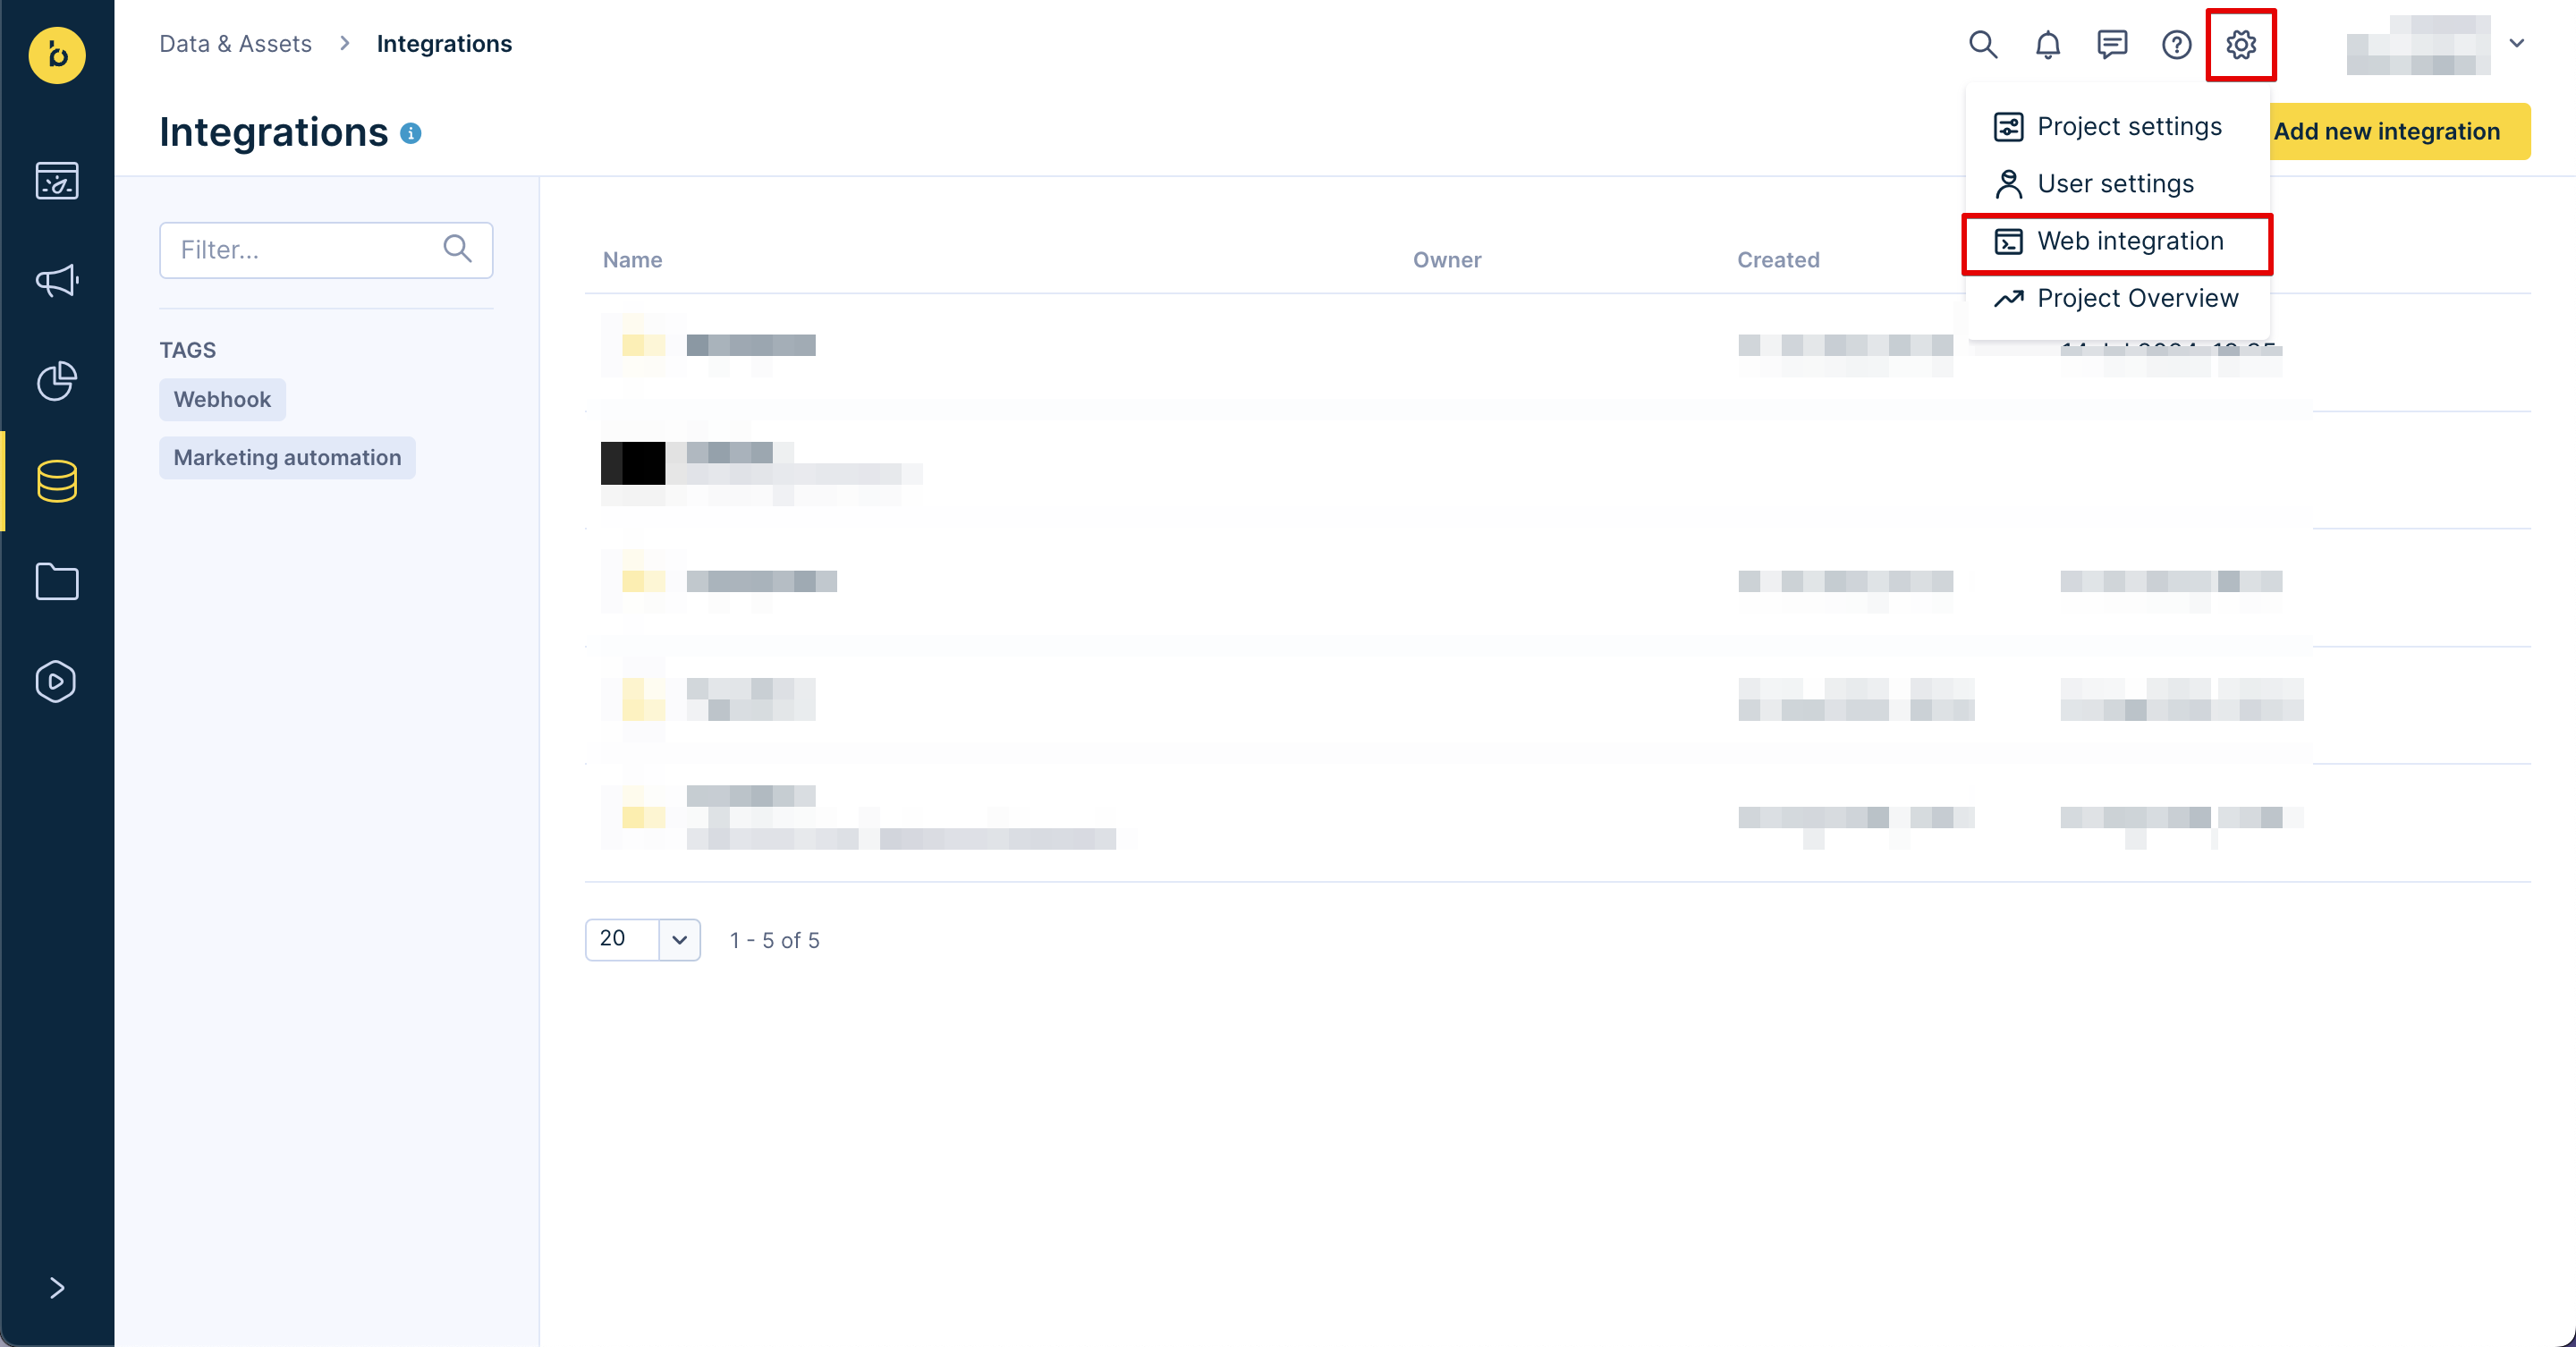
- Go to Settings > Web integration.

-
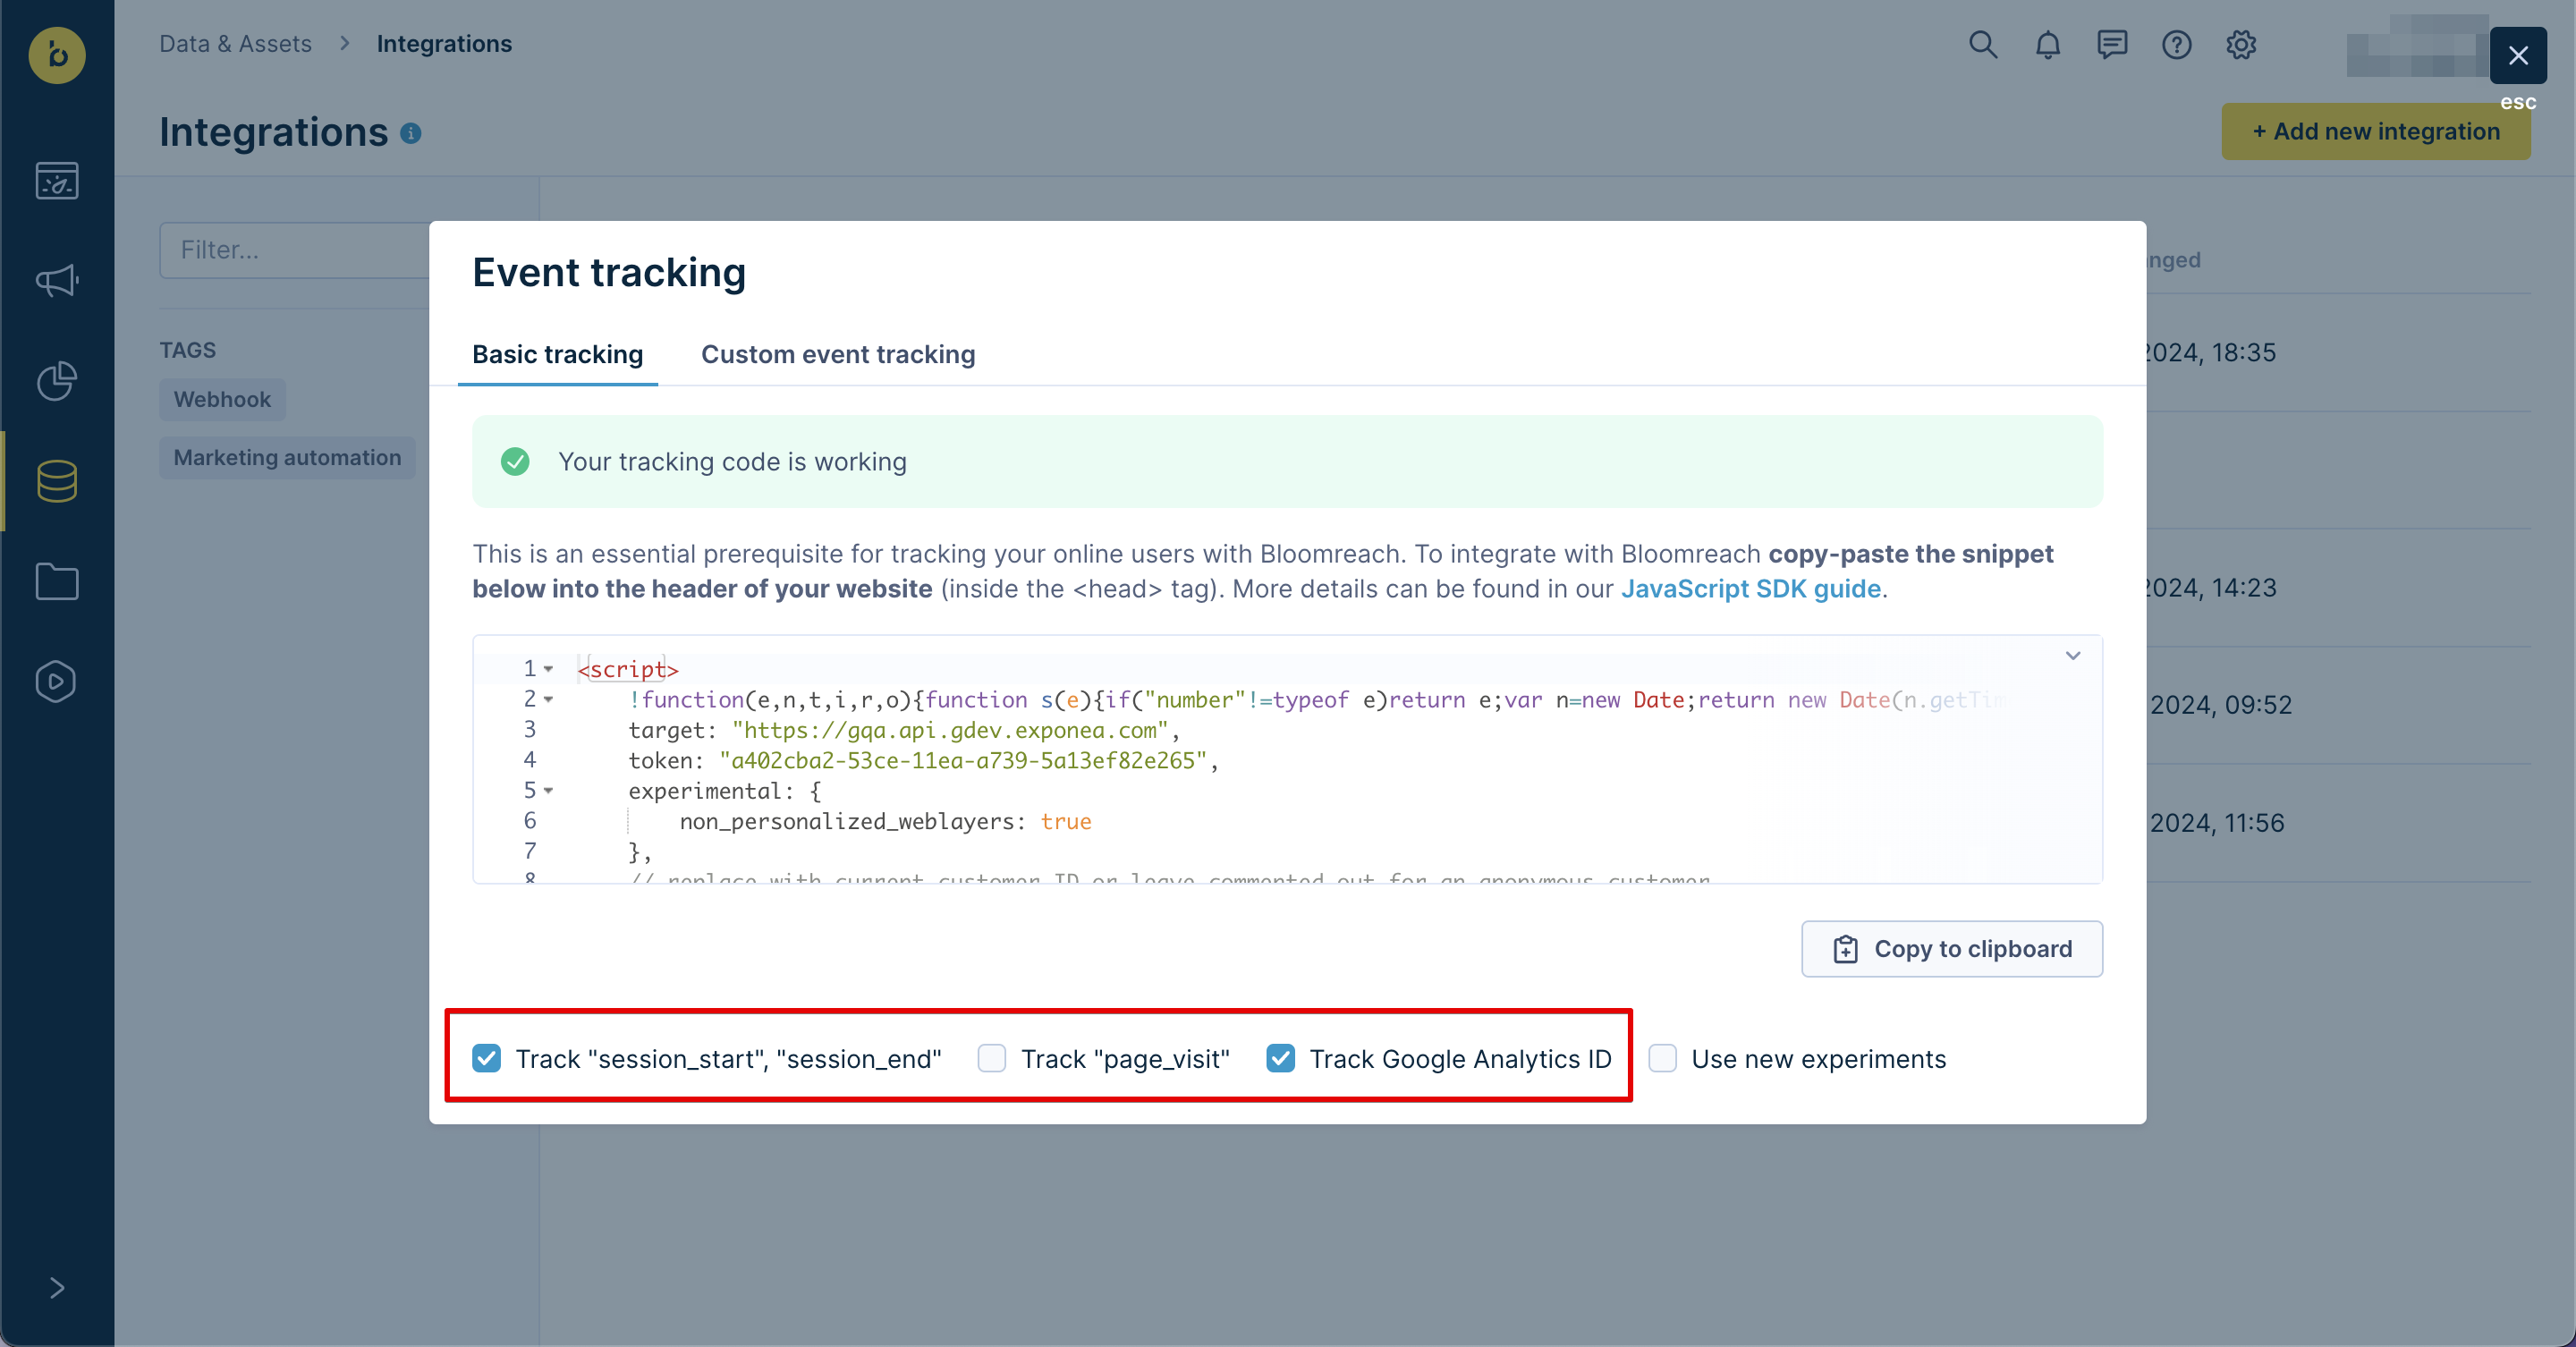
Make sure these actions are selected:
-
Track
page_visit(tick this box) -
Track
session_start(ticked by default) -
Track
session_end(ticked by default)
-
-
Click Copy to clipboard to copy the web integration snippet.
Now choose one tracking method below. Don't use both methods at the same time.
Option 1: Use BigCommerce Script Manager
- In BigCommerce, go to Storefront > Script Manager.
- Check that
bloomreach-engagement-datalayer.jsappears in the Installed Scripts listing. If it doesn't, restart the data layer helper. - Click Create a Script.
- Fill in the script name (for example, "Bloomreach Snippet").
- Select Head as the location on page.
- Select all pages where the script should run.
- Leave the script category as default, or select based on your preferences.
- Select Script as the script type and paste the web Integration snippet.
- Click Save.
Option 2: Use Google Tag Manager
For detailed Google Tag Manager implementation, see our complete guide.
- In Google Tag Manager, configure your tag.
- Under Tag Configuration > Triggering, select Initialization - All Pages.
- In BigCommerce, go to Advanced Settings > Google Analytics.
- Paste the Google Tag installation code into the tracking code field.
- Click Connect.
Check frontend tracking
Check that tracking works correctly:
- Go to your BigCommerce store and accept cookies.
- Open the Exponea console Chrome extension.
- Check that these events and attributes are tracked:
page_visitsession_pingcookie
- Copy the
cookievalue. - In the Bloomreach app, go to Data & Assets > Customers.
- Paste the cookie into the search bar and click search.
- Click the filtered customer profile and check that event tracking appears.
Don't delete integration catalogs
Never delete catalogs created by the BigCommerce integration. This integration creates 2 catalogs:
bigcommerce productandbigcommerce variant. Deleting these catalogs breaks the integration and stops data synchronization. If you need to modify catalogs, contact Bloomreach Support with your integration details and requirements.
Understand data synchronization
Initial data load
When you first activate the integration, Bloomreach Engagement imports:
- Customer base (customers and their attributes)
- Subscriber base (email addresses and consent preferences)
- Order history (created orders and line items)
- Product catalogs (products and variants)
Near real-time webhooks (2 minutes)
Bloomreach Engagement subscribes and listens for webhooks from the BigCommerce API. These webhooks keep your data synchronized:
Product updates
- Product created: intg-bigcommerce-webhook-received/product/created
- Product updated: intg-bigcommerce-webhook-received/product/updated
- Product deleted: intg-bigcommerce-webhook-received/product/deleted
Customer and order updates
- Customer changes (create, update, delete)
- New orders (order placed)
- Cart updates
- Consent changes (subscriber create, delete)
Events loaded from BigCommerce
The integration loads these events from BigCommerce:
purchasepurchase_itemconsent
Customer attributes loaded from BigCommerce
The integration loads personal information and customer attributes from BigCommerce to Bloomreach Engagement.
Web tracking
The data layer is populated with:
- identification (
email_id,customer_id) view_itemevent data
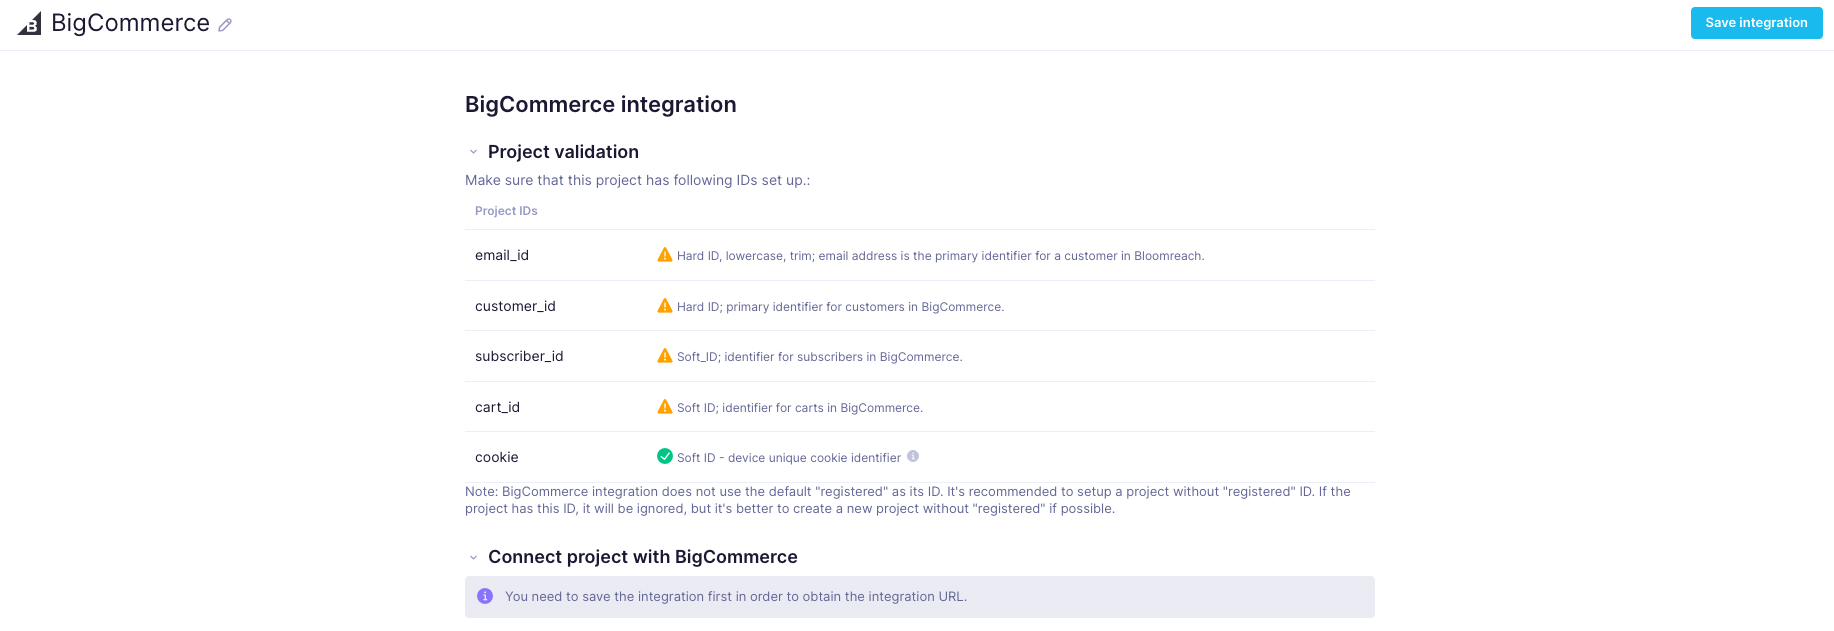
Required project identifiers
The integration uses these identifiers to connect customer data.
| Identifier | Type | Description | Format |
|---|---|---|---|
| email_id | Hard ID | Primary customer identifier. If multiple BigCommerce customers, subscribers, or guest orders share the same email address, they merge into one customer profile in the Bloomreach app. | Lowercase, trimmed |
| customer_id | Hard ID | Numeric BigCommerce customer identifier. | Numeric |
| subscriber_id | Soft ID | Numeric BigCommerce subscriber identifier. | Numeric |
| cart_id | Soft ID | Unique cart identifier that merges web and webhook tracking. | String |
| cookie | Soft ID | Device-unique cookie identifier used in web tracking. | String |
Important considerations
Customer anonymization and privacy
Manual anonymization required: You must manually anonymize customers in Bloomreach Engagement. BigCommerce doesn't have a built-in anonymization feature for GDPR or CCPA compliance.
When a customer requests data deletion:
- BigCommerce admins delete private field values in the BigCommerce Admin UI.
- The integration transfers these empty values to Bloomreach Engagement but doesn't automatically anonymize the customer profile.
- Anonymization only happens automatically when you delete a customer on the BigCommerce side.
You can always manually anonymize specific customers in Bloomreach Engagement's Customer UI. For more information, see Implementing CCPA with BigCommerce - Deleting Personal Information.
Guest orders: The integration tracks guest orders as purchase events in a customer profile identified by email address. These profiles aren't automatically anonymized. You can set up an automated scenario to anonymize guest customers or anonymize them manually.
Subscriber deletion: When BigCommerce admins delete all subscribers manually, it doesn't revoke consents in customer profiles on the Bloomreach Engagement side. BigCommerce doesn't send a webhook for full subscriber list deletion. The workaround is to manually revoke consent on the Bloomreach Engagement side.
Anonymization scenario: The integration doesn't include an automated anonymization scenario. You need to create one manually:
- Trigger: Repeat daily
- Condition:
subscriber_idhas value ANDcustomer_idhas no value AND customer BigCommerce consent isn't valid AND last BigCommerce consent timestamp is older than X days - Action: Anonymize customer
Integration limitations
No customizable backend tracking: Only the customer attributes and events listed in this documentation are available. You can't customize backend tracking.
Single store per project: The integration doesn't support multiple BigCommerce stores in one Bloomreach Engagement project. BigCommerce customer IDs aren't globally unique, and since customer_id is a Hard ID, importing from multiple stores causes customer collisions.
Updated 11 days ago
