

Advanced weblayers use
Weblayers are powerful engagement tools. To unlock their full potential, go beyond the default templates. You can customize fonts, extend countdown timers, or embed weblayers into your site layout to create seamless, branded experiences.
Check what font a weblayer uses
To check what font displays in your weblayer:
- Right-click on the element and choose Inspect.
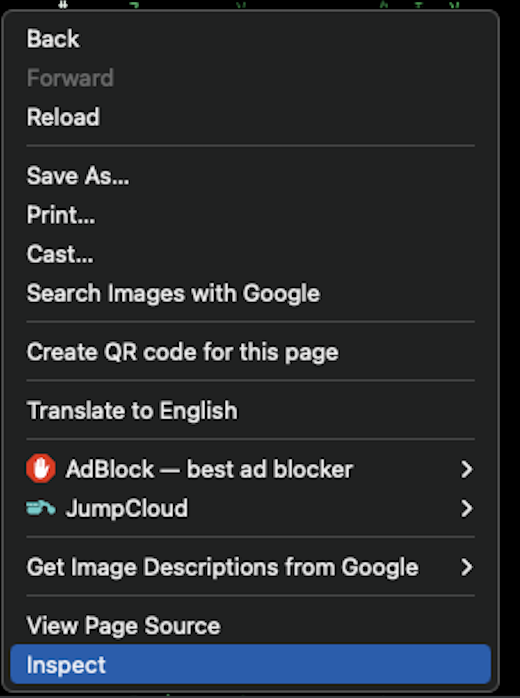
- In the developer tools, go to the Computed section in the Elements tab.
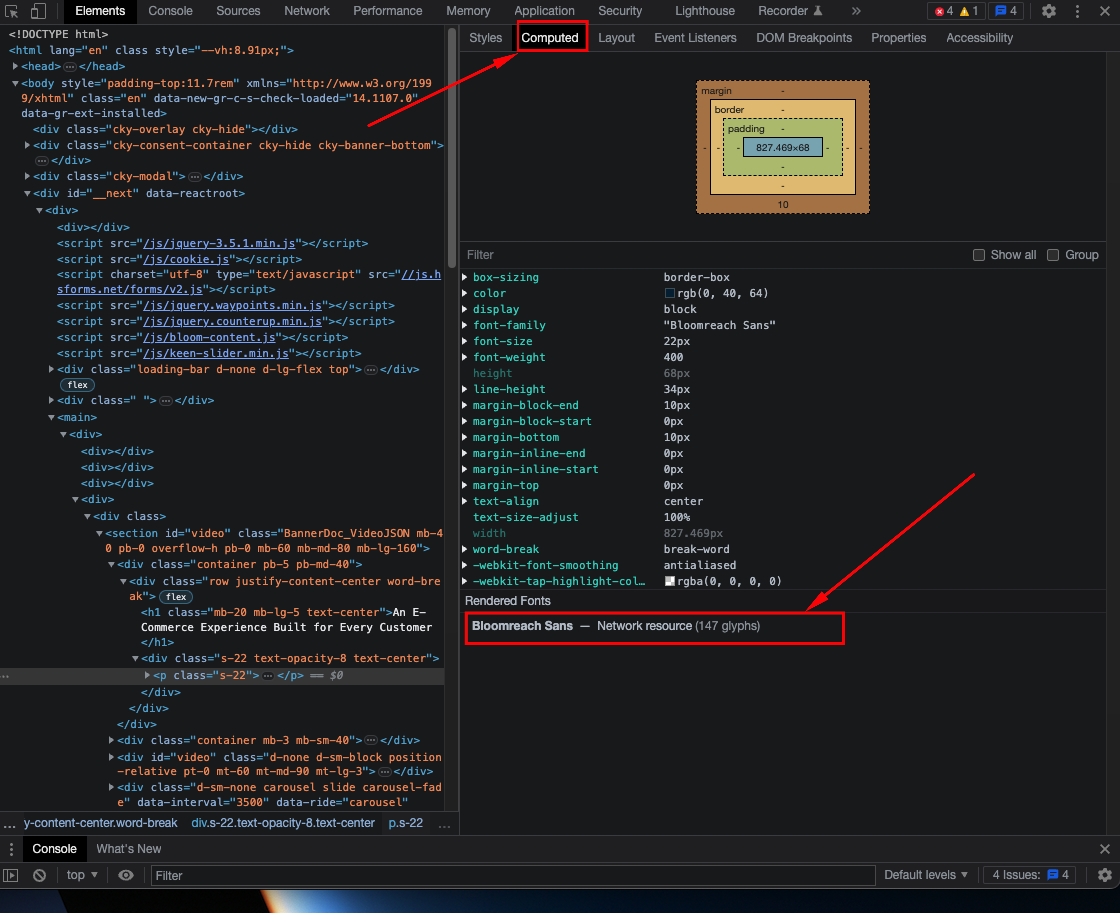
- Scroll to the bottom to see the rendered fonts.
These steps apply to Chrome, but other browsers work similarly.
Add custom fonts
Requires HTML and CSS knowledge. Custom fonts may affect how weblayers render.
Add one custom font
To add a single font to a weblayer:
- Make the font file publicly available. You can:
- Upload it to the asset manager.
- Use public font hosting like Google Fonts.
- Host it on your own server.
- Link to the font in your CSS: You can find an example of such CSS in our guide on email custom fonts . You don't need to add the font to Project settings - that's only required for custom fonts in the Email Visual Editor. You can include the CSS file in HTML with a link tag, in CSS with the
@importrule, or directly in the weblayer CSS with the@font-faceCSS rule. - Set the font rules in your CSS using the
font-family. Useinheritto apply parent fonts.
Add multiple custom fonts with template parameters
To create a template where you can choose from multiple fonts:
- Make the font file publicly available: Upload the font files to the asset manager, use public font hosting like Google fonts, or host them on your server.
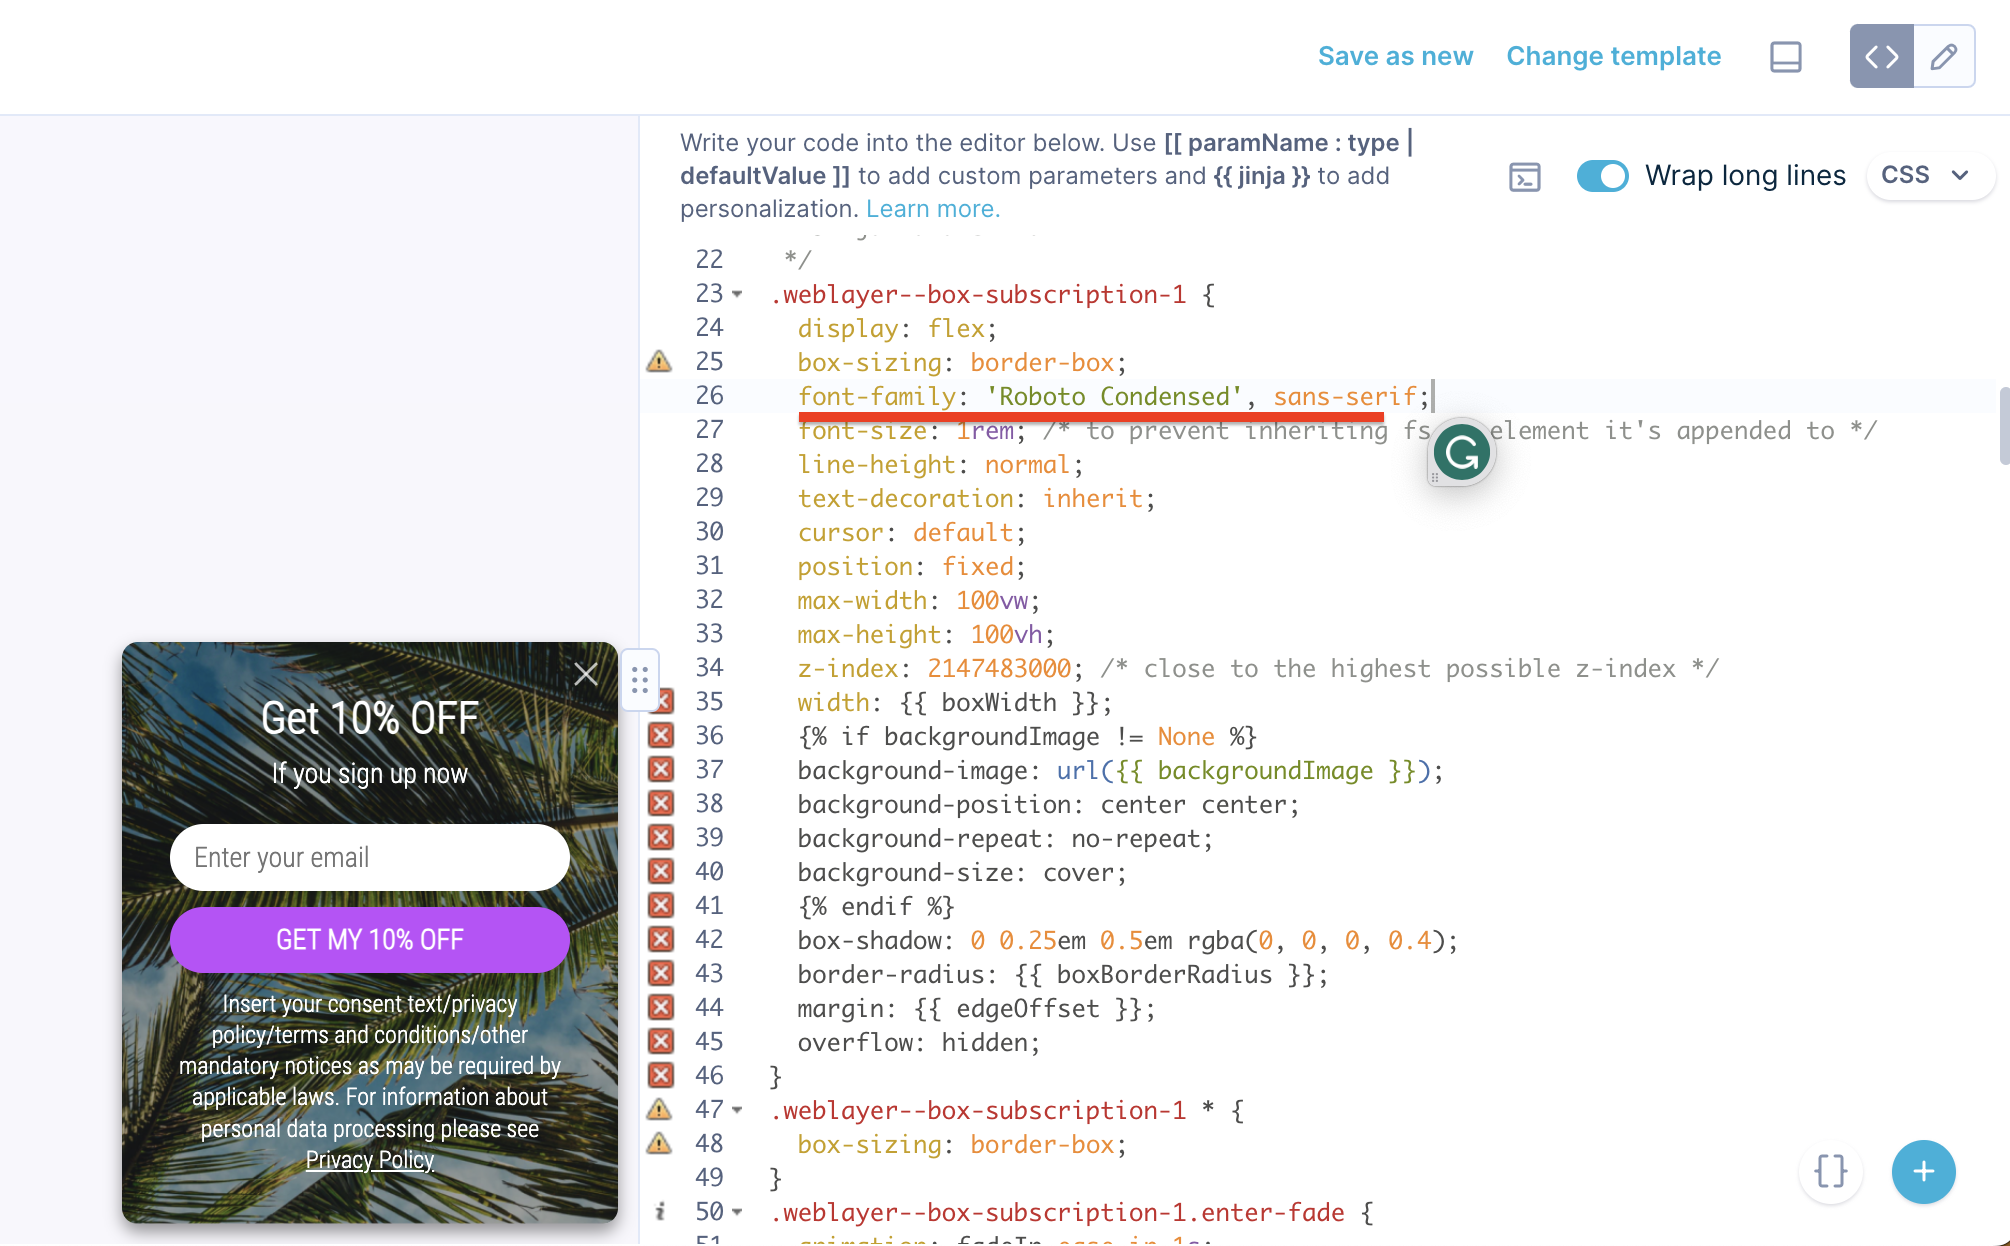
- Include CSS file with font links: For this example, let's include the Google font "Roboto Condensed." Add the following @import rule at the top of your Weblayer CSS:
@import url('https://fonts.googleapis.com/css2?family=Roboto+Condensed:wght@300&display=swap'); - Create a Jinja variable: A Jinja variable will store a template parameter, allowing you to choose the Roboto Condensed font from the weblayer configuration. If added correctly, you will see a dropdown in the weblayer configuration panel. You can add multiple variants to the enum parameter, for example,
enum('Roboto Condensed',' Custom font 2','Custom font 3').This allows you to choose from 3 variants. Add the following Jinja code to add a parameter:{% set textFont="[[ { name: 'textFont', tooltip: 'Font', category: 'Typography', isJsonParam: true } : enum(Roboto Condensed) ]]" %}. - Add font-family rule: In the weblayer CSS, add the following rule to elements where the font should be used:
.selector { font-family: {{ textFont }}; }See the screenshot below for reference. - Repeat these steps for each font you want to add.
Fix countdown timers over 99 hours
By default, countdown timers only display 2 digits for hours. When the value exceeds 99, the first digit gets cut off.
To fix this:
-
Find the
initializeClockfunction in your weblayer JavaScript. -
Locate the line that sets the
hoursSpancontent.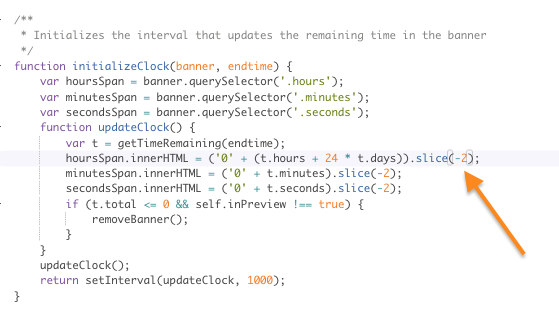
-
Change
slice(-2)toslice(-3)to allow 3 digits.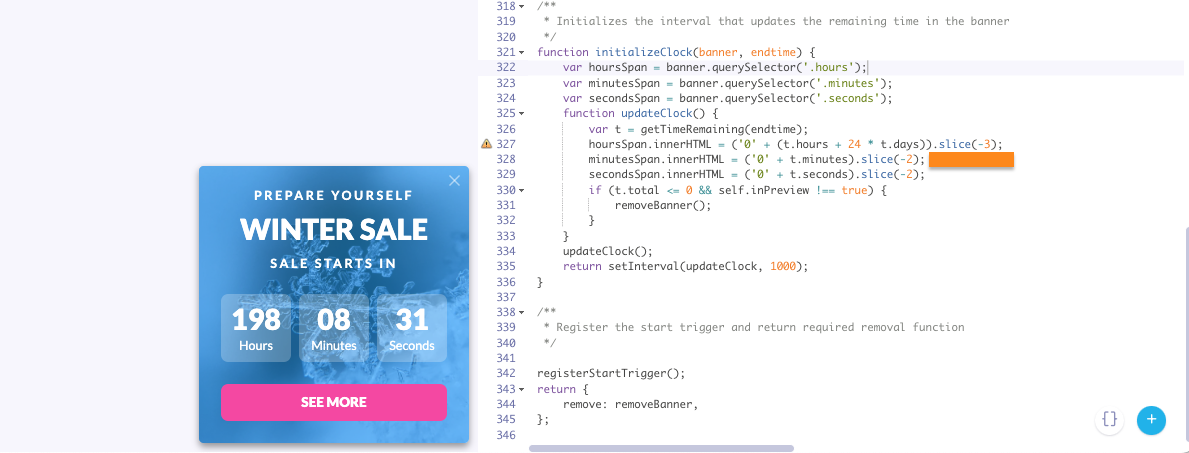
This ensures countdowns show the full hour value (for example, 198 instead of 98).
Embedded weblayers into your page
Most weblayers display as overlays. You can also embed one directly into a page layout.
However, it's also possible to embed a weblayer inline so it blends into the page design. To embed a weblayer:
- In the weblayer editor, select the Code editor (<> icon), and select CSS.
- Find the main CSS class for the weblayer (for example,
.weblayer--box-subscription-1) and make sure that:- The
positionattribute is set torelative(instead offixed). - Remove the
z-index,box-shadow, andborder-radiusattributes.
- The
- Find the class for the close (X) button (for example,
.weblayer--box-subscription-1 > .close) and adddisplay: none;to hide it. - Switch back to the Visual editor.
- In the Parent Element field, enter the CSS selector for the element where you want the weblayer to be embedded in your page. For example:
body > div#weblayer. Make sure this element exists on the page in the right position.
In addition to the above steps, you are likely to want to make further changes to fine-tune the embedded weblayer to your needs. Our tech consultants can provide guidance if needed.
Updated 4 months ago