

How to test the banner in the Use Case Center
This guide will walk you through how to test the banner in the Use Case Center.
Testing the banner before hitting the yellow "Start" button allows you to double-check for errors and make final adjustments in the copy and design before customers see it.
Test the banner in the following way:
- Make a copy of the banner
- Hit the three dots in the upper right corner next to the yellow "Start" button
- Click on Save as new
- Save the banner copy
- Now that you are in the banner copy, go to banner settings and delete all Customer Filters in the Audience section
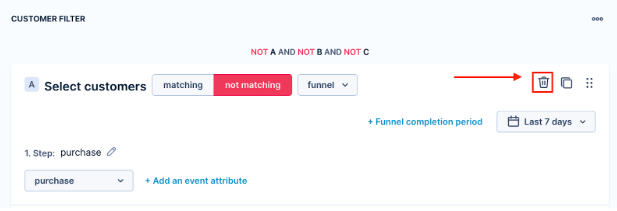
- After deleting all the filters, insert a new one with your cookie. This step ensures that the banner appears only on your website linked to the specific cookie
- Click on + Add filter condition
- Choose Customer and click on a cookie from the list of IDS
- Insert your cookie -> learn how to get your cookie in this article
- Hit the "Start" button
- Go to your website to see the banner in action
WarningSome banners are related to products and are displayed only on specific pages of your website. Find this detail in use case documentation.
Suppose you adjust the pre-defined Audience settings by adding more customer filters. We recommend testing the banner use case with all the customer filters to ensure the banner will perform as expected.
Updated 8 days ago
Did this page help you?