

Sendtric
The following is a guide on how to integrate Sendtric with Bloomreach Engagement.
Sendtric allows you to create customizable countdown timers to maximize conversions, generate more sales, and inject urgency into your emails.
With the Sendtric integration in Bloomreach Engagement, you can include Sendtric timers in your Email Campaigns.
Integrate Sendtric in Campaigns
This guide will cover the basics of integrating Sendtric countdown timers into the Bloomreach Engagement platform.
Add countdown timer
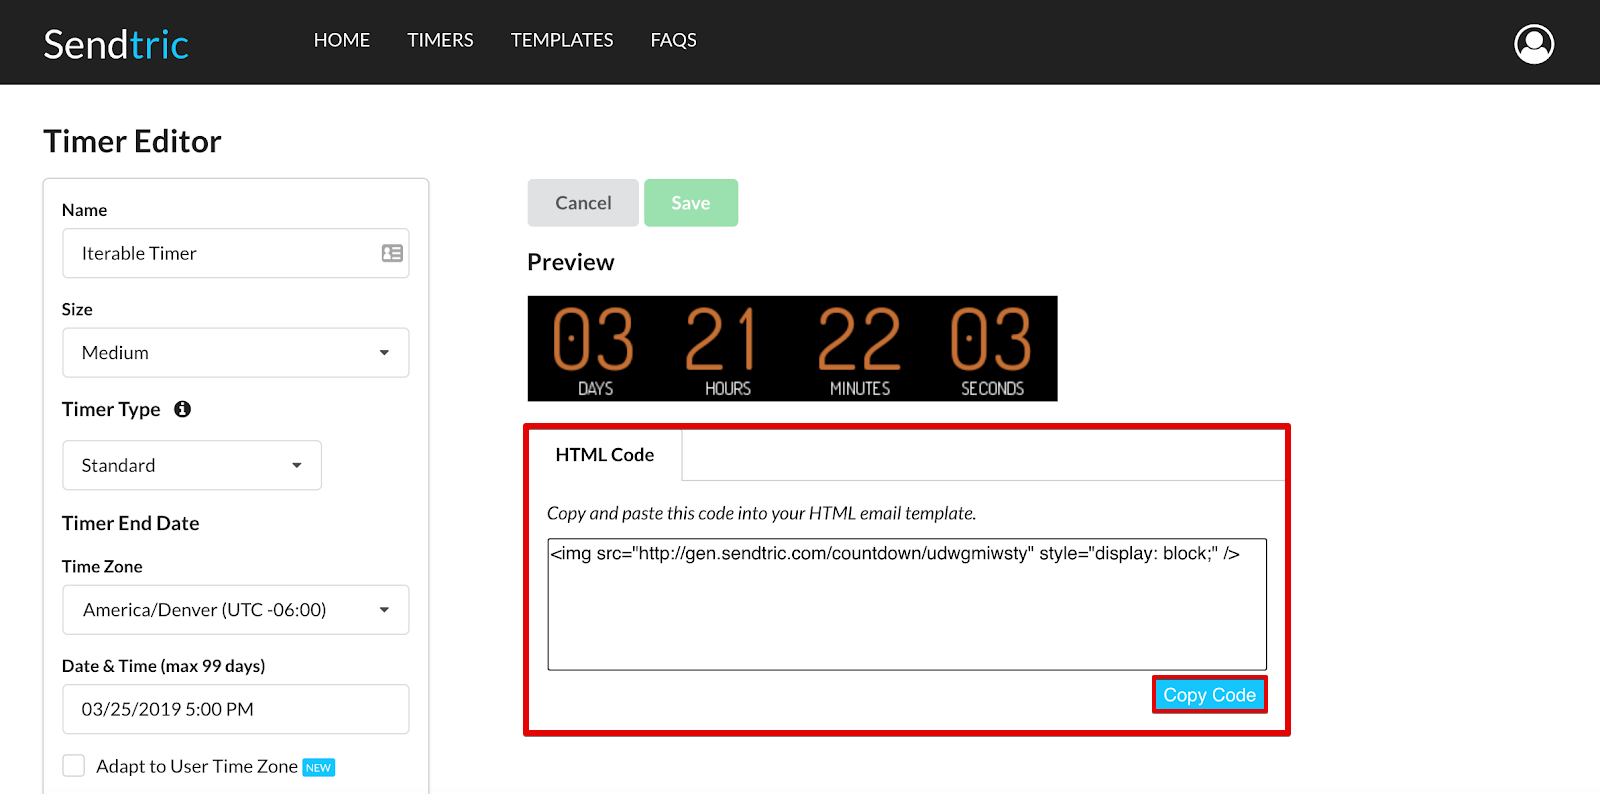
- Create your timer in Sendtric and copy the HTML Code.
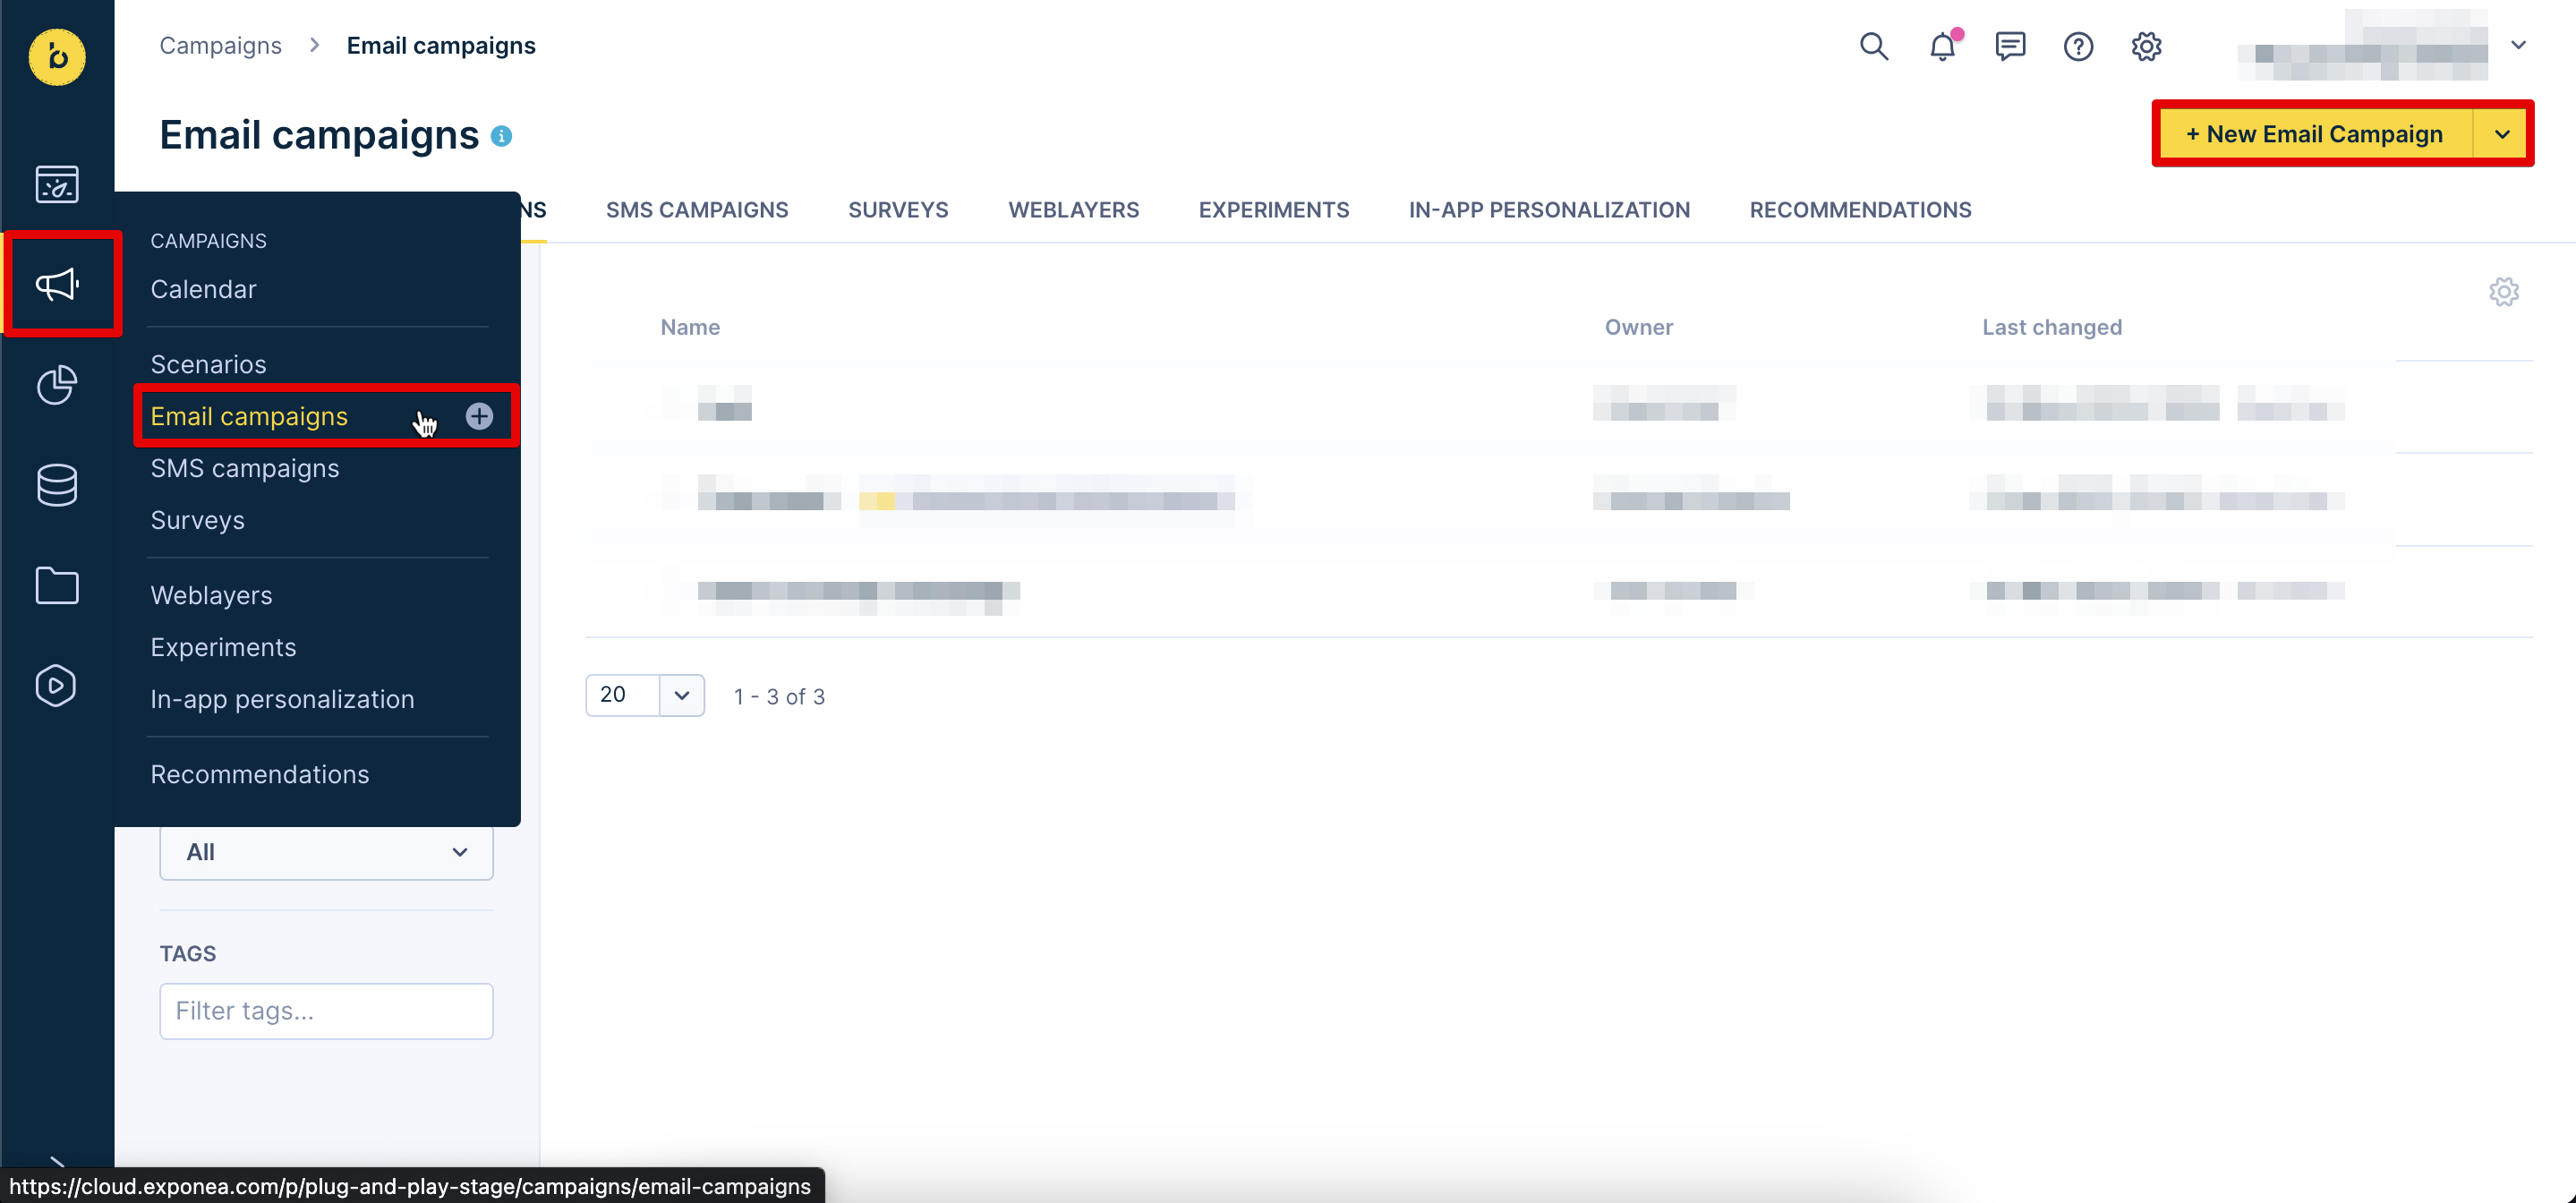
- If you do not already have an email template, go to Campaigns > Email campaigns and press + New Email Campaign.
- In your email template, drag and drop the HTML component where you want the countdown to appear.
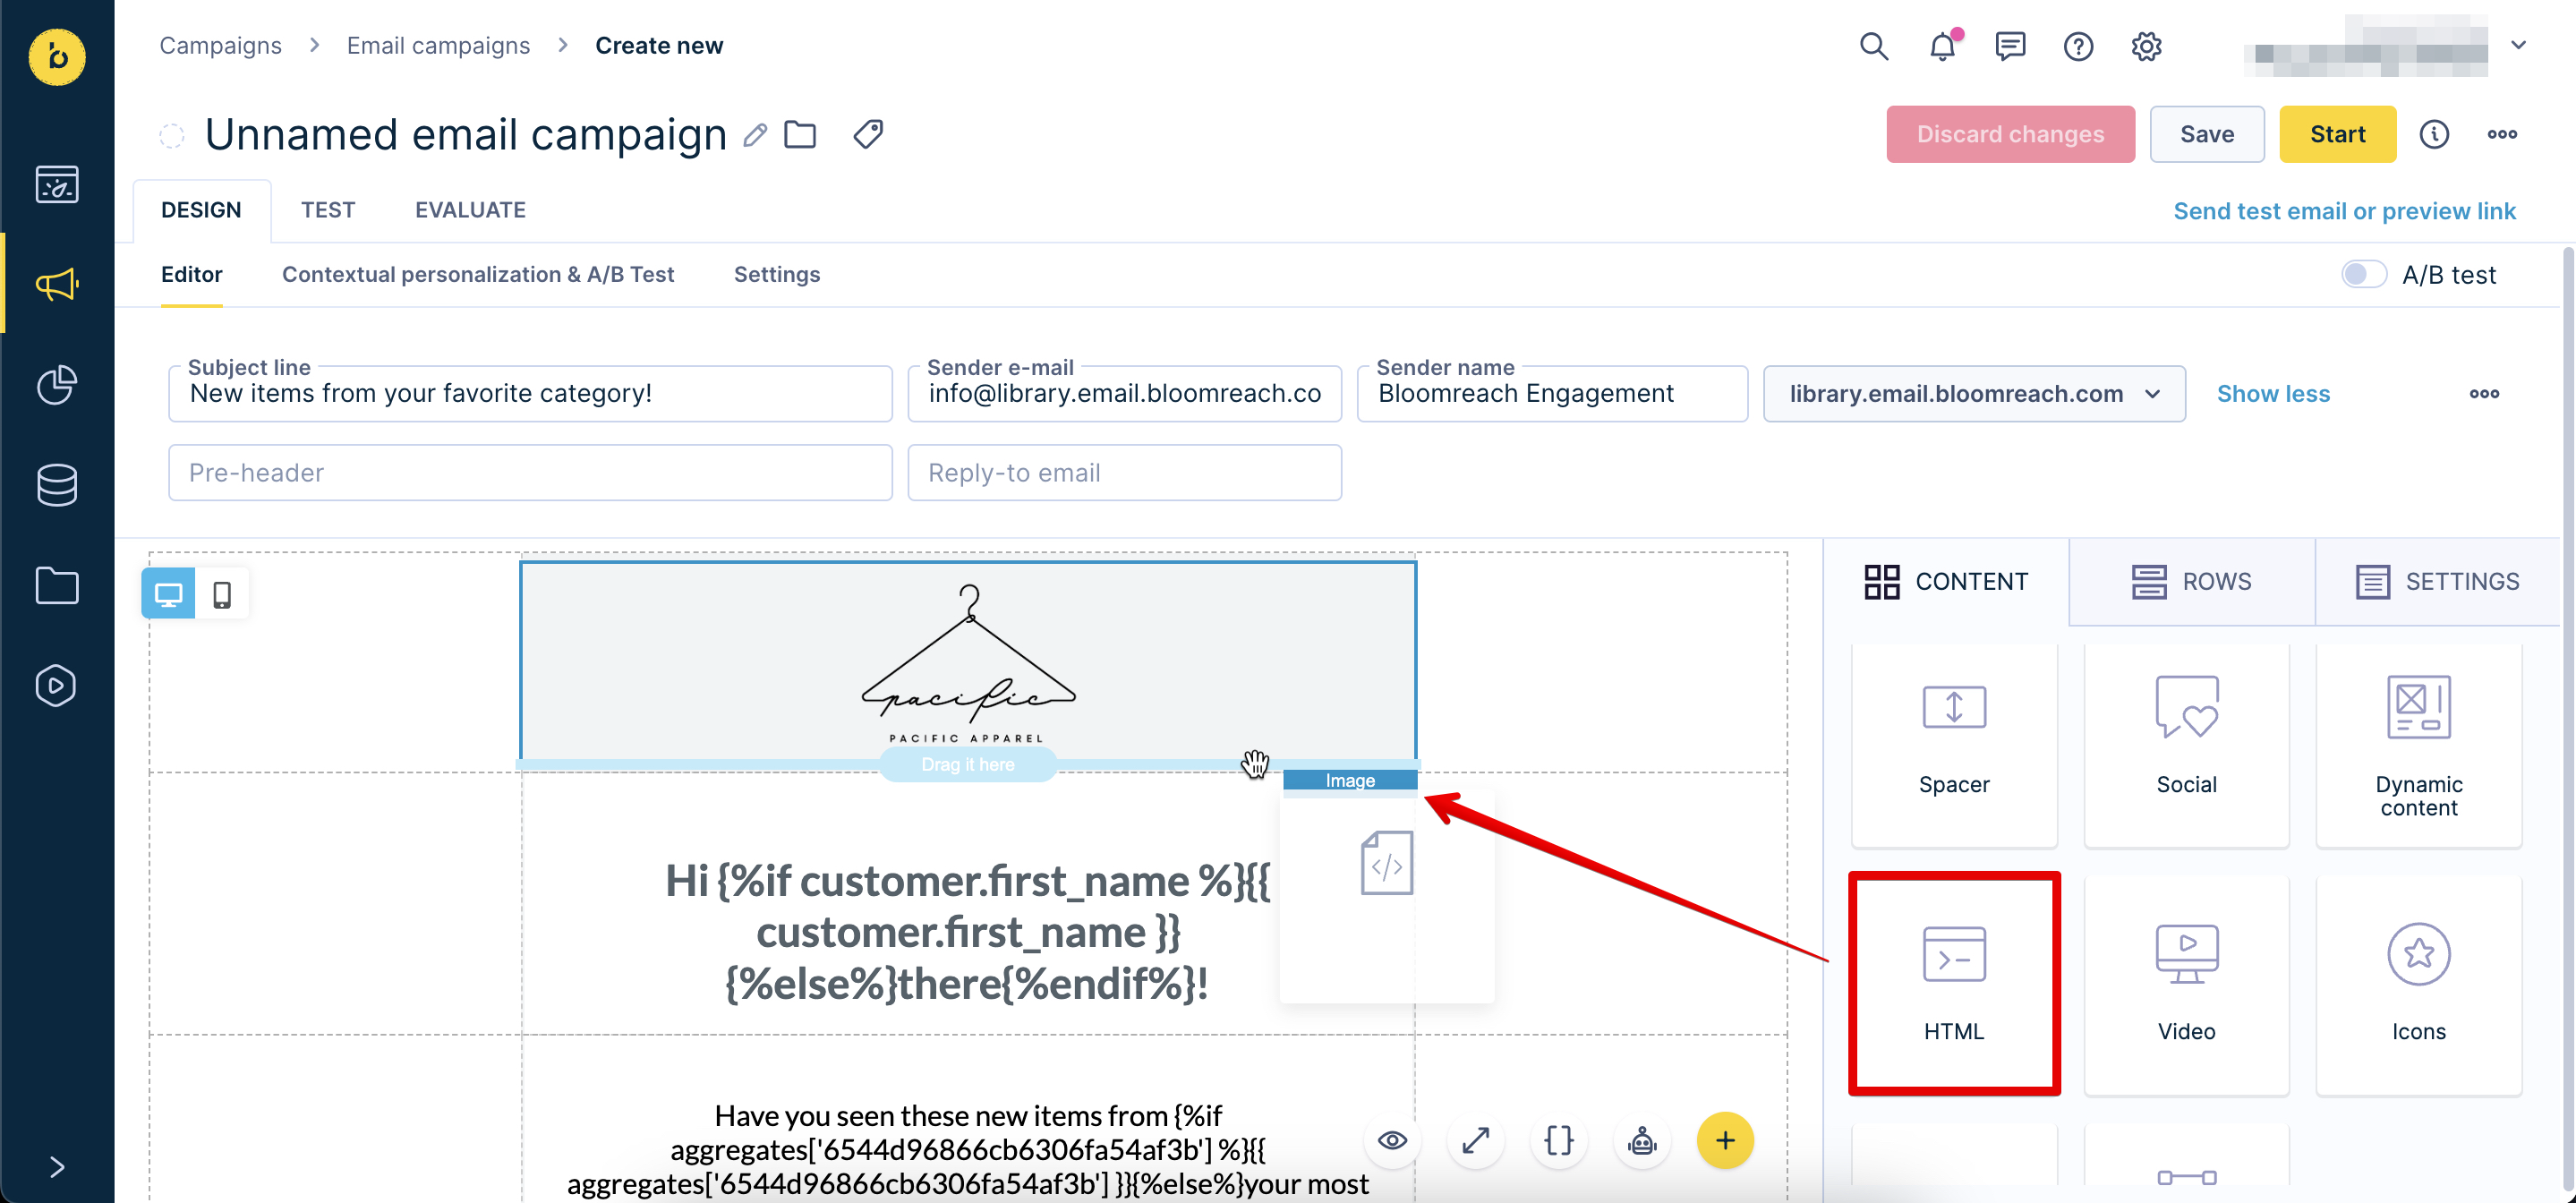
- Click on the new HTML Block and paste the Dynamic Code from Sentdtric into Content Properties.
Add a Dynamic timer
Dynamic Timers allow the creation of timers programmatically that use a variable to represent the end time as a Unix timestamp. This means that you can set when you want the timer to start and end.
This can be useful for special offers that should be active for 24 hours after being sent to a user. In such a case, the timer will start as soon as the user receives the email with the timer. The timer will last 24 hours.
NoteDynamic Timers are only available in the Power and Enterprise plans in the Pro Edition. To view all the plans, have a look at Sendtric's Pricing page.
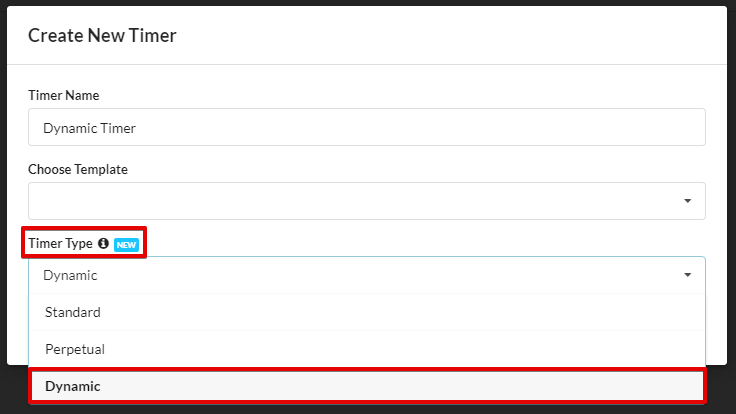
- In Sendtric, go to Timers and press + Create New.

- Go to Timer Type and choose Dynamic.
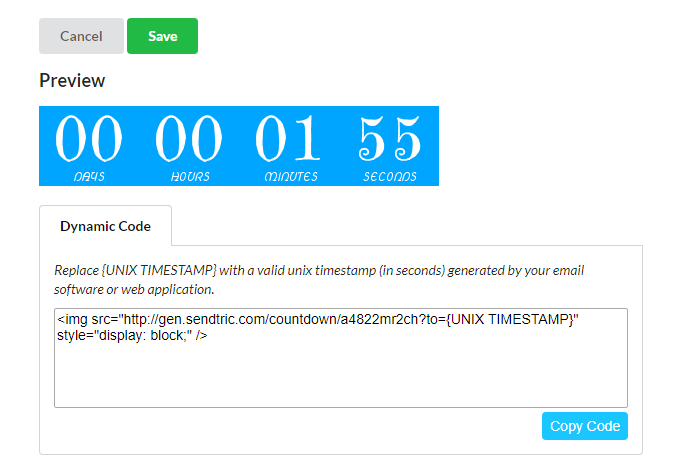
- Customize your timer and copy the Dynamic Code.
- If you do not already have an email template, go to Campaigns > Email campaigns and press + New Email Campaign.

- In your email template, drag and drop the HTML component where you want the countdown to appear.

- Click on the new HTML Block and paste the Dynamic Code into Content Properties.
- Replace
{UNIX TIMESTAMP}in the Dynamic Code with a Jinja timestamp in your email template.
NoteBloomreach Engagement offers a number of different
DATEandTIMESTAMPSthat you can use.For example,
{{ event.timestamp }}, or{{ time }}.Check out our Jinja documentation for more information on useful Jinja snippets that you can use in Bloomreach Engagement.
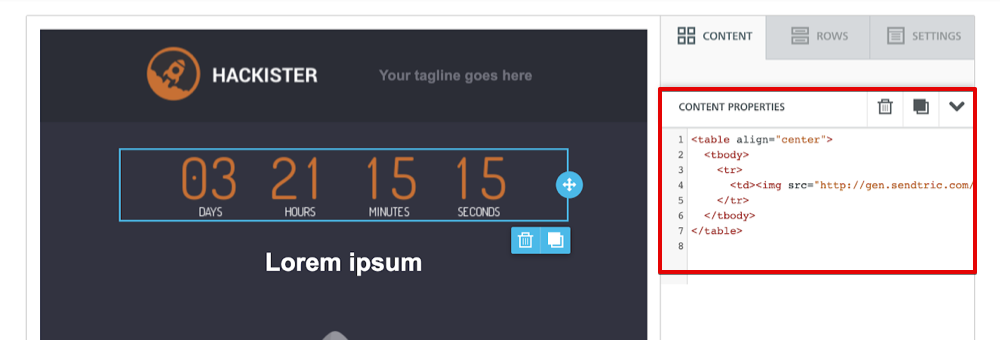
Make your timer centered
If you wish to make your timer appear centered in the email, paste the following code to Content Properties. Replace {your timer code goes here} with the HTML code from Sendtric.
You can also use other align options. To do so, replace center with one of the following:
left: timer is aligned to the left (default alignment),right: timer is aligned to the right.
<table align=”center”>
  <tbody>
    <tr>
      <td>{your timer code goes here}</td>
    </tr>
  </tbody>
</table>
Visit the Sendtric documentation for more information about specific countdown timers. The set-up remains the same for any countdown timer.
Updated 4 months ago