

NiftyImages
About Nifty Images
NiftyImages allows you to create highly personalized images, timers, and dynamic content that demand your email subscribers' attention. Using NiftyImages, you can create and customize data-driven content, then easily use them in your emails, mobile in-app messages, landing pages, or even your website. Examples of the sorts of personalized experiences you can add to engage your audience include:
- Personalized images (images, with added overlays using multiple data attributes, dynamically rendered for each message recipient)
- Countdown timers (static and dynamic using dates such as open date, site visit, etc.)
- Calendars (dynamically attach email client relevant invites to events)
- Critical Messages (switch on and off messages post send, related to delays or issues and remove once resolved)
- Charts (display data, such as year to date aggregated information with customers)
- Polls (one-click email polls, to capture first-party data, or create progressive profiles)
- Rule-based images (dynamically change images based on customer context, such as temperate, location, device or any data point)
- Maps (nearest store widget, with customizable markers for your brand)
- Static data source images (e.g., via one-time file import, e.g. live scores, stock levels, local weather, or loyalty points balance at a point in time)
- Real-time data source images via API (e.g., like past purchases, recommended products, or current loyalty point balance at time of message open).
You can set up a free trial account at Nifty Images. Visit https://www.niftyimages.com to sign-up. This will allow you 10k image previews (impressions) to test before you need to pay for your subscription; plenty for initial testing. Alternatively, speak to your Bloomreach CSM ( Customer Success Manager) for more information or to arrange a demonstration.
Integration
No integration is required in order to start using dynamically personalized images. Some integration may be required, if you want to bring your real-time data-driven personalization to the next level using API data source. Reach out to your Customer Success Manager if you are interested in setting that up, and they can provide some guidance.
Use NiftyImages with Bloomreach Engagement
Creating images with NiftyImages is simple, and adding them to your Bloomreach Engagement messaging is easy too. NiftyImages' self-service platform allows you to create and modify images for use across your entire email strategy. The NiftyImages platform includes how-to blogs and videos for each image type, along with dedicated support and live chat.
After creating an image with your NiftyImages account, an HTML code snippet containing your unique image URL will be generated for that image, as in the screenshot below.
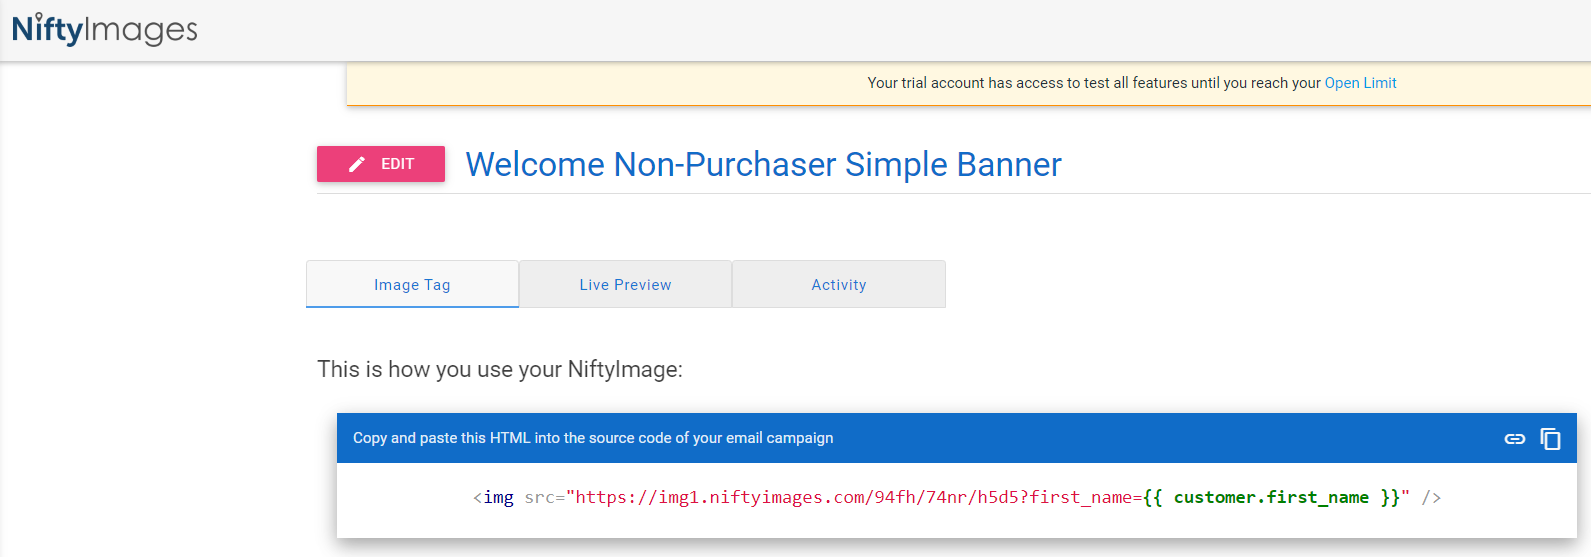
Copy the code snippt for use in your Bloomreach Engagement email template.
Images may contain placeholders for data attributes stored within Bloomreach Engagement that you wish to use to personalize your content.
You can manually configure these in the image URL within the code snippet using the standard format {{ table.field-name }}, for example:
<img src="https://img1.niftyimages.com/xblh/gwtr/gcf5?name={{ customer.first_name }}" />It is possible to save commonly used fields in Nifty Images, such as First Name, Surname, etc. (see below).
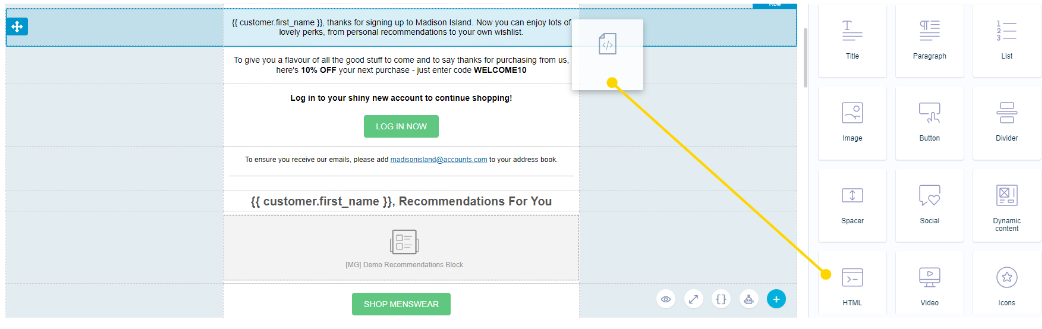
Open your Bloomreach Engagement email message template and drop in the HTML component to the location in your email where you wish to place the dynamic content, as in the screenshot below.
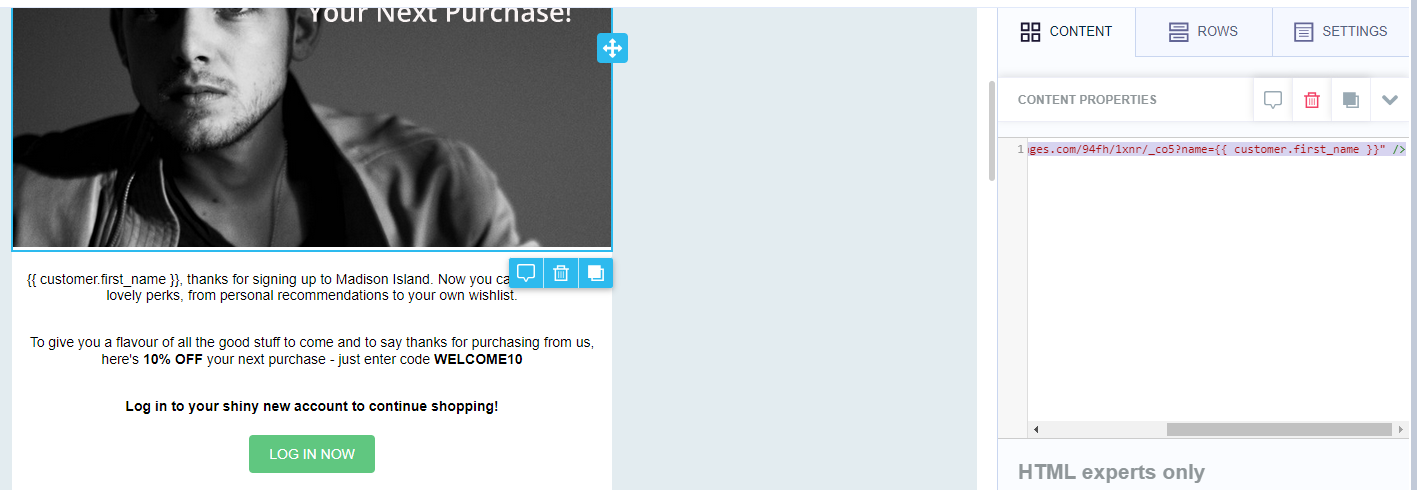
Paste the NiftyImages code snippet into the HTML component's Content properties field in the Bloomreach email message editor, as in the screenshot below.
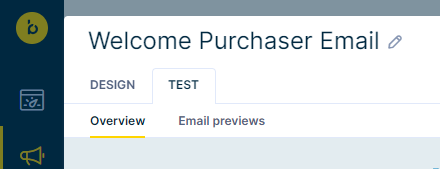
Now you will be able to see the image appear in your template, along with your data attribute, if you defined one. This is replaced based on the values stored in your Bloomreach Engagement customer profile upon email send. You can use the TEST tab in the editor to preview. Click TEST at the top of the Bloomreach email editor screen, as in the screenshot below.
Change the Preview for the field, to see how the data from customer profiles will show the data attribute cycling through changing underlying data-driven values prior to sending.

Set up data attribute mapping for commonly used fields in NiftyImages
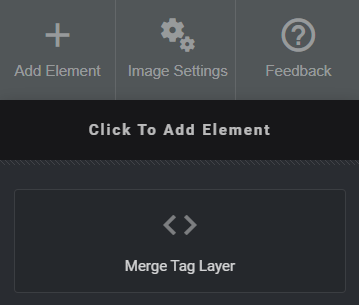
Open the image that you wish to add personalization to. Click on Merge Tag Layer on the top right hand side.
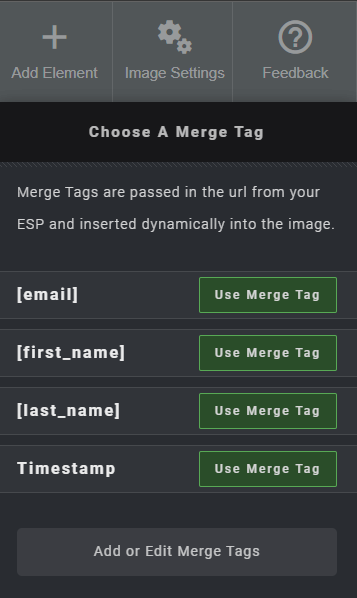
Data Attributes stored in your Bloomreach Engagement profiles are entered for instance, as {{ customer.first_name }}. Any you have already defined can be seen on the left hand side. In NiftyImages, these are known as Merge Tags. On the left hand side, click Add or Edit Merge Tags to create a new one.
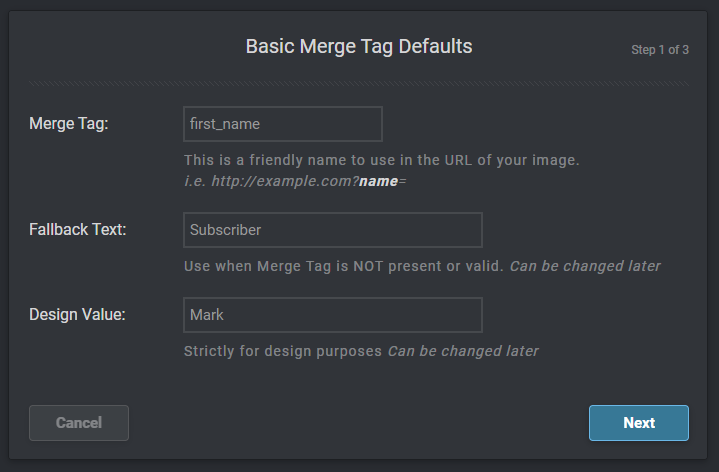
Enter the friendly name of your Merge Tag (as it will appear in the URL of the image, which in this example, we have added first_name). Here you can also add Fallback Text, i.e. a value that appears if the customer profile has a blank value, in this instance we have used "Subscriber". Then add a Design Value which is just used aesthetically, for testing out your design. Then click Next.
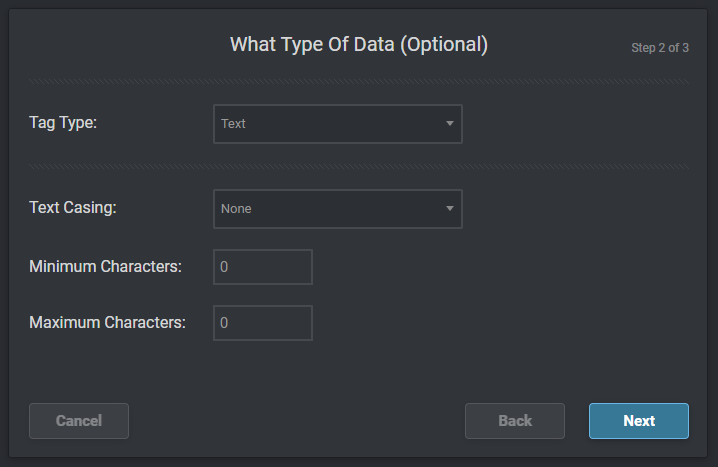
You can set up rules to control how the data attributes in Bloomreach customer profiles will render in your image. For instance, define whether the data attribute is text or numeric, also select whether you want to apply formatting, such as choose how you want to show the values as Title, UPPER or lower case or with no formatting. Then click Next.
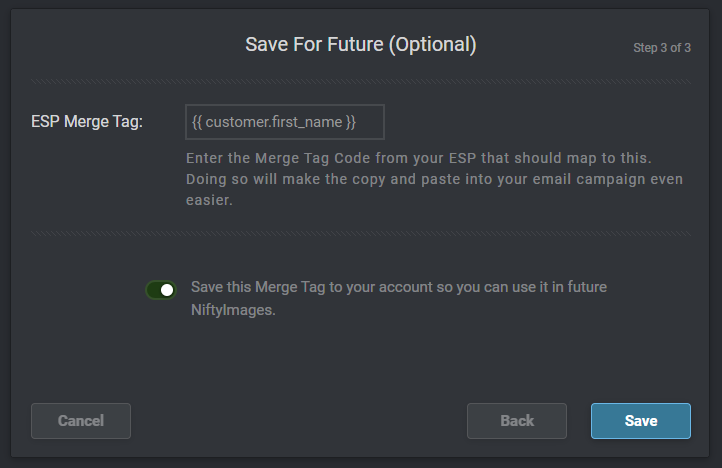
Last, but not least enter your Bloomreach Merge Tag in our acceptable format, in other words, in this example for first_name, {{ customer.first_name }}. Make sure that you click the option Save this Merge Tag to your account so you can use it in future NiftyImages. This way, it is available without having to repeat this process in any future personalized images that you generate. Click Save to finish.
To use more advanced NiftyImages features such as data through API from different sources, for example weather, calendar events, loyalty, etc. some data setup will be required. If you wish to use this, please speak to your Bloomreach CSM (Customer Success Manager) who will work with you, and a TPM (Technical Project Manager) to have this set up.
Updated 4 months ago