Net Promoter Score Survey
This guide will help you understand
- What is NPS
- How to create a responsive NPS survey in Bloomreach Engagement
- How to create and read the evaluation of the survey
What is NPS
The Net Promoter Score is an index ranging from -100 to 100 that measures the customer's overall satisfaction with a company's product or service and the customer's loyalty to the brand. It is possible to target customers with the survey through different channels, such as a web layer or a survey .
This guide explains how to create an advanced email template that can be properly evaluated and also point the customer to additional questions based on the score they've selected.
How to create a responsive NPS survey in Bloomreach Engagement
To create a complete campaign, you need to either:
- create a survey for each possible answer of the scoreboard
- create an email scenario
Creating the survey
As you will need to ask different questions based on what answers the customer selected, you need to have different surveys for that, one per every NPS score option. You can ask detractors what you would need for them to award you a 10 instead of a 5 (depending on their response), or what you should do better, or simply thank promoters for their support.
To create these surveys, please follow our guide here.
Email scenario
- Open the scenario editor by going to Campaigns > Scenarios > Create new.
- Add a set of components connected to a flow. Click on the output connector and drag the line to the input connector
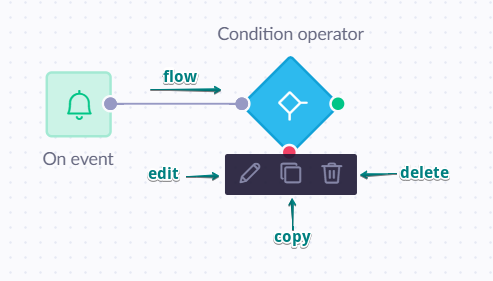
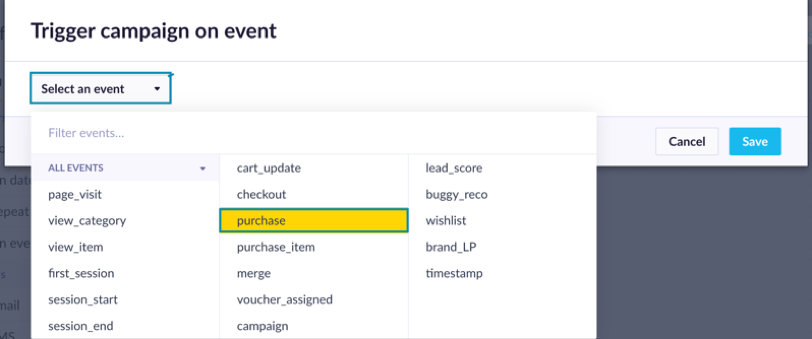
- Add trigger on event purchase
Selecton eventfrom the trigger > click oneditbutton > choose an eventpurchasefrom the drop-down menu.
- Add operators.
a) From the list of operators select wait node > click edit >the time period in our case is 8 days > click save > link the wait node with the trigger created in the previous step.
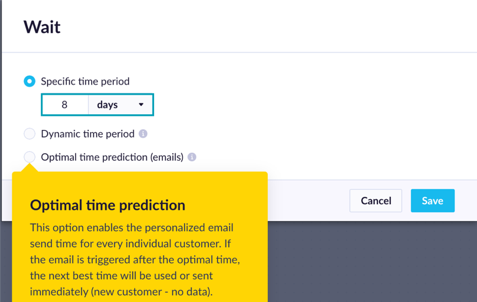
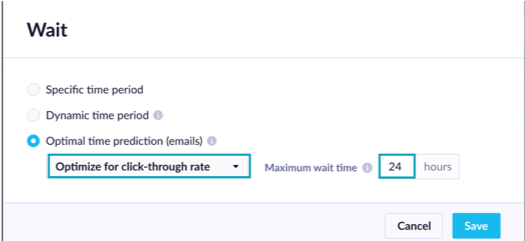
After entering this component a customer will wait here for the specified amount of time before he is streamed to the flow again. Wait node can be set as a fixed time period, dynamic period based on other events or it set based on the optimal send time for the specific customer to be most likely to engage with the email.
If you decide to use optimal send time in the Wait node you can specify whether you want to optimize the “open rate” the “click-through rate” depending on whether your priority is for your customers to open your email or click on the link inside. Also, you can set the maximum wait time which will be used if optimal send time was not generated for a particular customer because of a lack of data (default is 24hours).
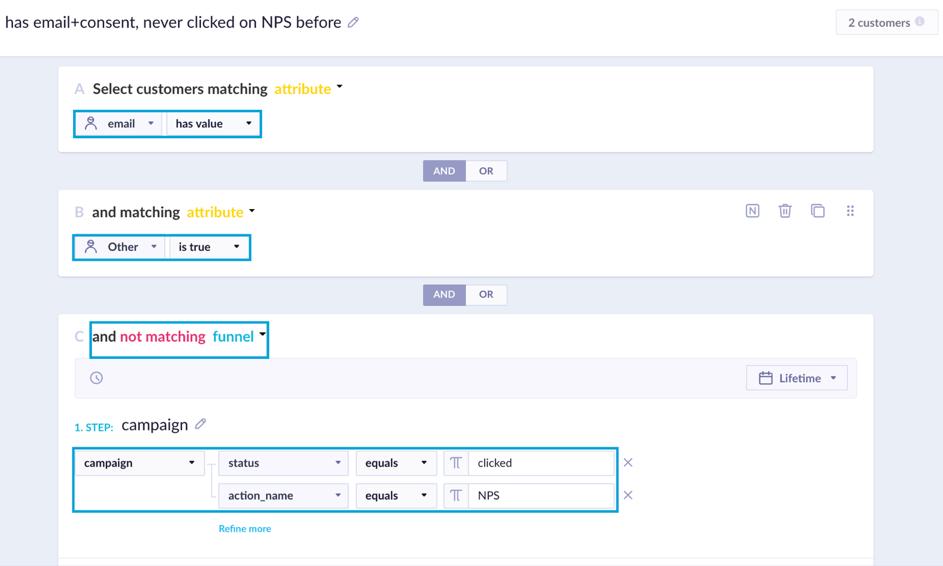
b) From the list of operators select condition node > click edit > click on the + add filter condition. Now we will filter customers based on 3 conditions:
- Customers that have email: under the customer tab select
emailproperty > choose the operatorhas valuethat is understringtab >save
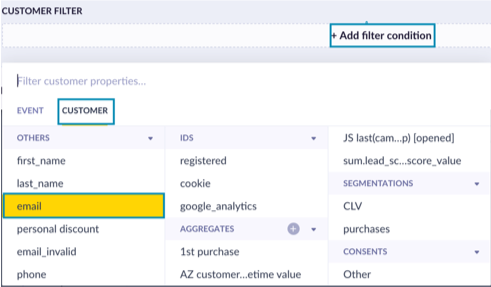
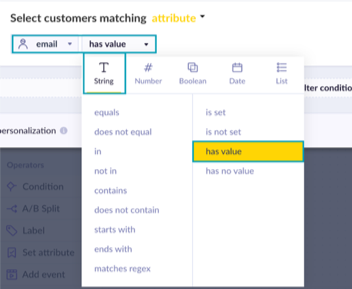
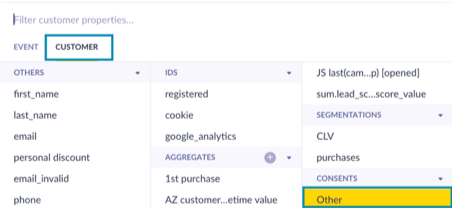
- Customers that have the right consent: click on the
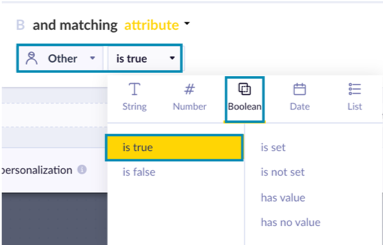
+ add filtercondition > under thecustomertab findconsents> selectothersproperty > choose the operatoris truethat is underbooleantab >save
Customers that have never clicked on NPS campaign before: click on the + add filter condition > under the event tab find campaign > click on the + add event attribute > select status > choose the operator equals that is under string tab --> type value delivered
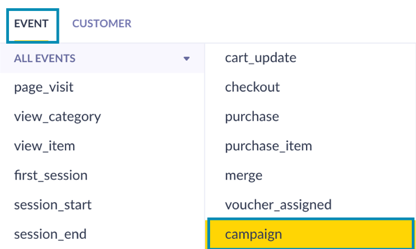
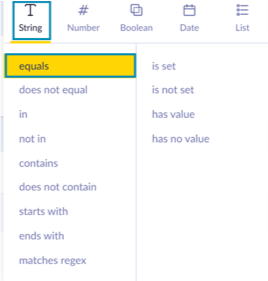
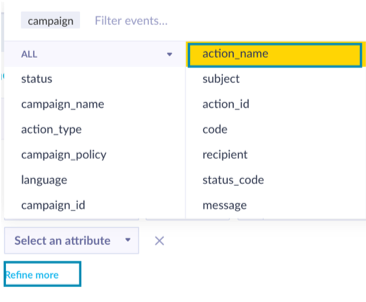
Next click on refine more in order to add an attribute to the 3d condition > select action name > operator is equals > the name of the action (in our case the action will be an email with the name NPS) > type "NPS" > click on negate button as we need customers who did not click on this campaign before.

The filters of the condition operator should look like this:
- Add action – email.
a) From the list of actions select email node > click edit > create or choose the appropriate template > Click on Show more in the upper control menu to reveal features like pre-header and reply to email > type in subject line and pre-header > save. Do not forget to review the settings tab to define the campaign policy.
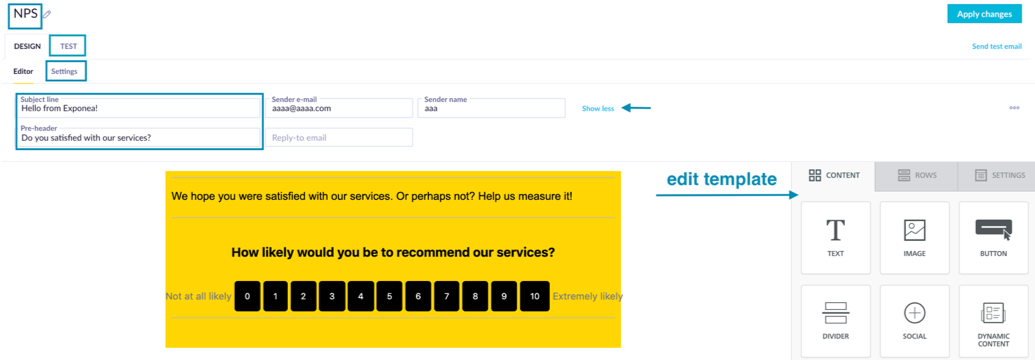
b) In the settings tab check the policy and category for the scenario.
c) In the TEST tab, you can see the actual preview of your email for every customer individually. You can specify which customer using the arrow buttons or typing their email into the input field. You can also click on the filter icon (1) to only filter a specific segment of customers to see the preview for. This is especially useful if you use personalization in the email. You can also switch between a desktop and a mobile view (2) and send a test email to yourself. (3) It is possible to send an email to a specific email address to examine the appearance of the email from a customer's point of view.
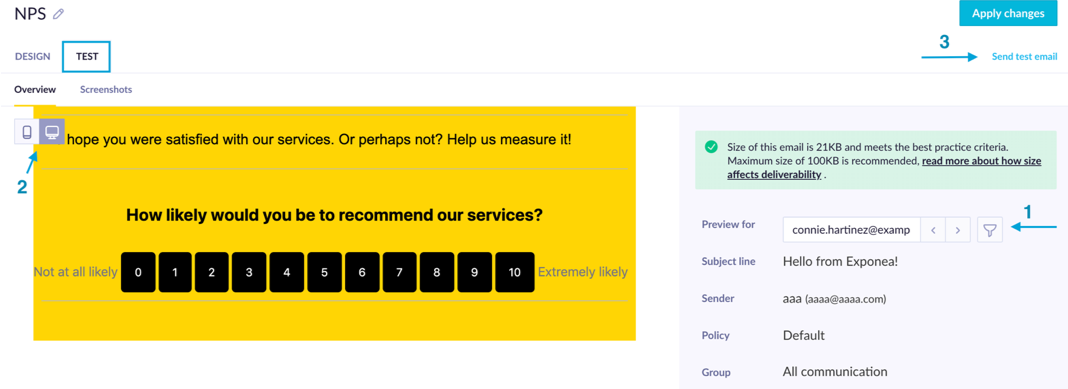
The final set up of the scenario should look like this:

Evaluation
NPS Score
NPS is generally evaluated as ((number of promoters (score 9-10) - number of detractors (score 0-6)) / total responses)*100. To achieve this, create a new segmentation with 3 segments: promoters, detractors, and passives, each segment is done in the following fashion:
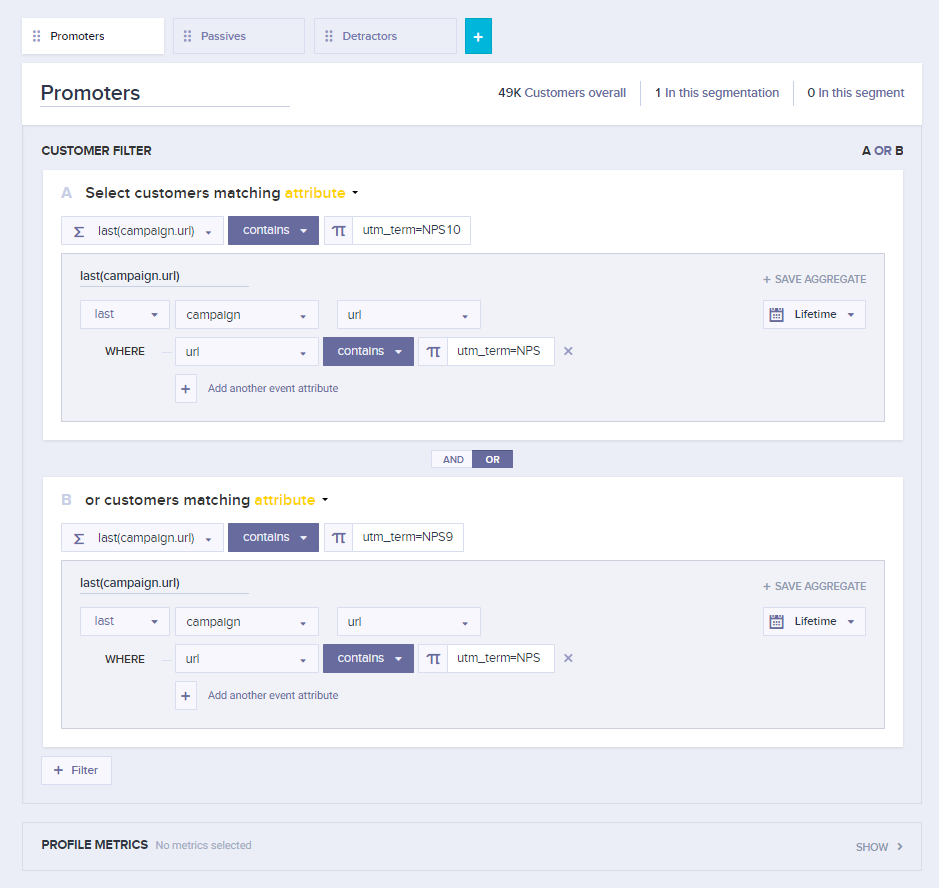
This is done specifically like this because:
- As the evaluation is done based on campaign with status clicked (this allows you to evaluate also when a customer does not fill in the survey; separate answers can be acquired from a report), it is necessary to have a filter for each NPS score separately, and in segments, have a logical
ORbetween the conditions. - filters matching customer aggregate of last campaign URL will allow the customers to move between segments when they select another option in different surveys throughout time, so always their most up-to-date status is considered.
- It is necessary to include the common term in the event filter, in this case utm_term=NPS, so when a customer clicks another link, she does not disappear from the segment.
When the segmentation is ready, create a new metric called NPS in the following way:
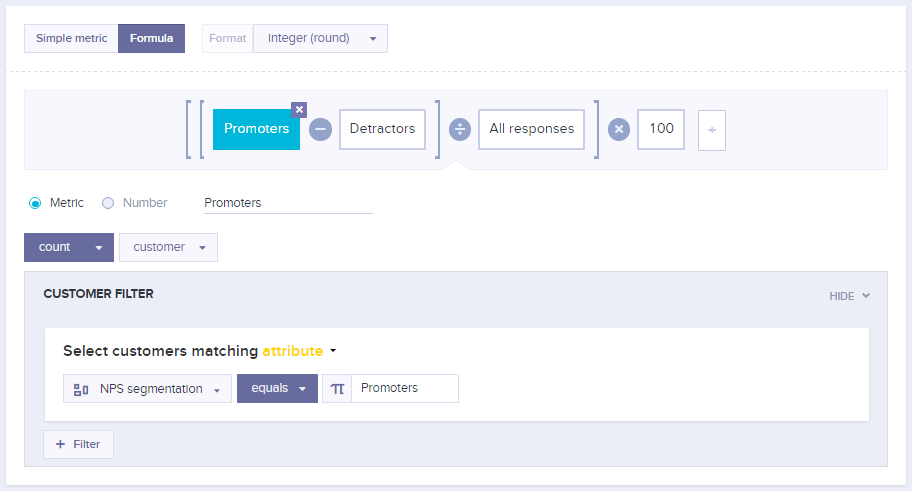
The difference between the components is that Detractors need to match a different segment, and All responses are set as "NPS segmentation has value".
Positive NPS is good, above 50 is excellent.
Individual answers
You get the individual answers for survey questions in the survey event, attribute answer. There is an event for each question in each survey, so a survey below would result in 2 events.
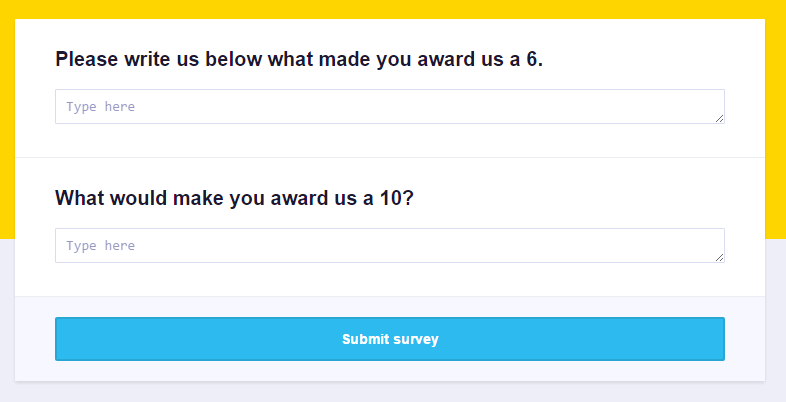
Next create a report which will create a survey/question/answer combo, like in the image below. Feel free to remove any metric to see the unique answers. To also see the occurrences, add metric count event survey and select the option first.

This would result in the following result in a table with the answers exactly like customers wrote them:

Updated about 2 years ago
