

Double Opt-in for Email Campaigns
Every business wants a healthy email list for communication. One of the ways to ensure this is having double opt-in implemented. This step-by-step guide will help you to create a double opt-in scenario for your website.
A prerequisite for using the double opt-in is to have email value as ID.
Why you should use double opt-in
When someone fills in an email address into your website’s signup field, you shouldn’t sign them up directly. Instead, it is strongly recommended to send a confirmation email to their inbox to double check they are the owners of that email address.
This way, your email database will be healthier, containing a larger percentage of active users. This improves your sender reputation, deliverability and significantly decreases any risks related to GDPR-related complaints.
How to do this
We will show you how to create an automatic Scenario that will send a confirmation email to the subscriber. When they click "confirm subscription" in the email, the appropriate consents will be assigned to their profile.
| Requirements | |
|---|---|
| Overview | You will need to: Set up tracking of a new event using API (preferably) or JS Create a scenario with webhooks * Create 2 simple aggregates |
| Skills | Intermediate - we will show you step-by-step how to create every part of this use case. However, you will need a technical person to set up the tracking. We assume you can navigate and work with basic functions. |
| Data and tracking | Tracking of the event double_opt_in with attributes: action, consent_list, email and source.Consent management enabled and running. * Email template for the confirmation email. |
This scenario works only if you identify your customers (
registered) by their email address. If not, contact us for more information.
1. Set up tracking of an event "double_opt_in" on your signup field via API that will be fired when the customer submits their email address. It needs to contain an attribute "action" with the value "new" in it. An attribute "consent_list" is also required. This is an array of objects that track all information about consents that you want to track with this action.
{
    "customer_ids": {"registered": "[email protected]"},
    "event_type": "double_opt_in",
    "properties": {
        "action": "new",
        "email": "[email protected]",
		"consent_list": [
			{
			"action": "accept",
			"category":"newsletter",
			"valid_until":"unlimited"
			},
			{
			"action": "accept",
			"category":"sms",
			"valid_until":"unlimited"
			}
		]
    }
}
exponea.track('double_opt_in', {
action: 'new',
email: '[email protected]', // you need to adjust the email here
source: 'subscription banner', // adjust this to have more information about where the consent comes from
consent_list: [ // adjust the consents and their attributes here
{
action: "accept",
category:"newsletter",
valid_until:"unlimited"
},
{
action: "accept",
category:"sms",
valid_until:"unlimited"
}
]
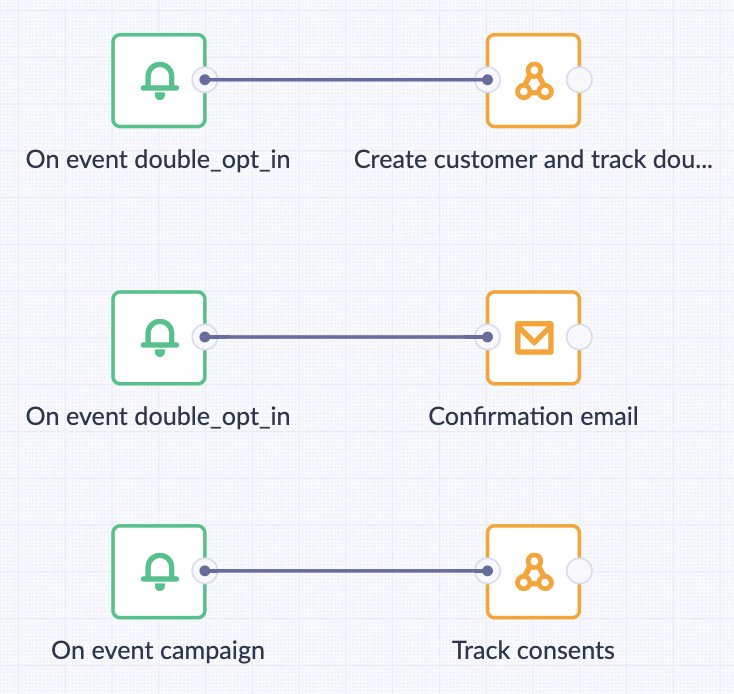
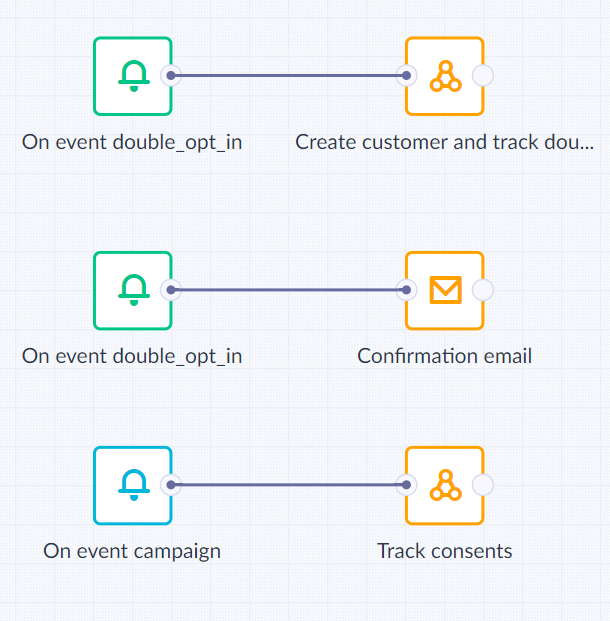
});2. Now create the first part of the scenario. Add the "on event" trigger, double-click on it and specify it as shown below. This will ensure the scenario is launched every time someone signs up for your newsletter.


3. Add a webhook (available under "Action" nodes > "Other" > "Webhook") and copy the code below into the payload.

{
    "commands": [
        {
            "name": "customers/events",
            "data": {
                "customer_ids": {
                    "registered": "{{ event.email }}"
                },
                "event_type": "double_opt_in",
                "properties": {
                    "action": "transferred",
                    "email": "{{ event.email }}",
                    "source": "{{ event.source }}",
                    "consent_list": {{ event.consent_list | json }}
                }
            }
        }
    ]
}The webhooks are set according to the Batch commands request to Bloomreach Data API.
4. This webhook essentially sends the event "double_opt_in" with "action = transferred" to a customer that is identified by the email address entered. If no such customer exists, a new one is created. See the Technical reference section at the end to understand what exactly (and why) the webhook does.
5. We want this event to trigger a second part of the scenario. Add another "On event" node and set it as follows:

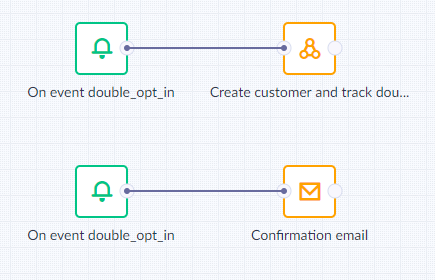
6. Add an email node and attach it to the last trigger, as shown above. This email will be sent to the email address provided. In the email, the customer will be able to confirm that they have indeed subscribed to the newsletter - by clicking through to a landing page (or your homepage).
7. Double-click on the email node and go to settings. For the "Recipient", enter {{event.email}} as shown in the screenshot below. Next, set the "Category" to "General consent" to ensure the email won't be blocked by consent restrictions. Check the "Transfer identity to URL links" if you want to identify the customer on the website, when the customer clicks through the email to your landing page.

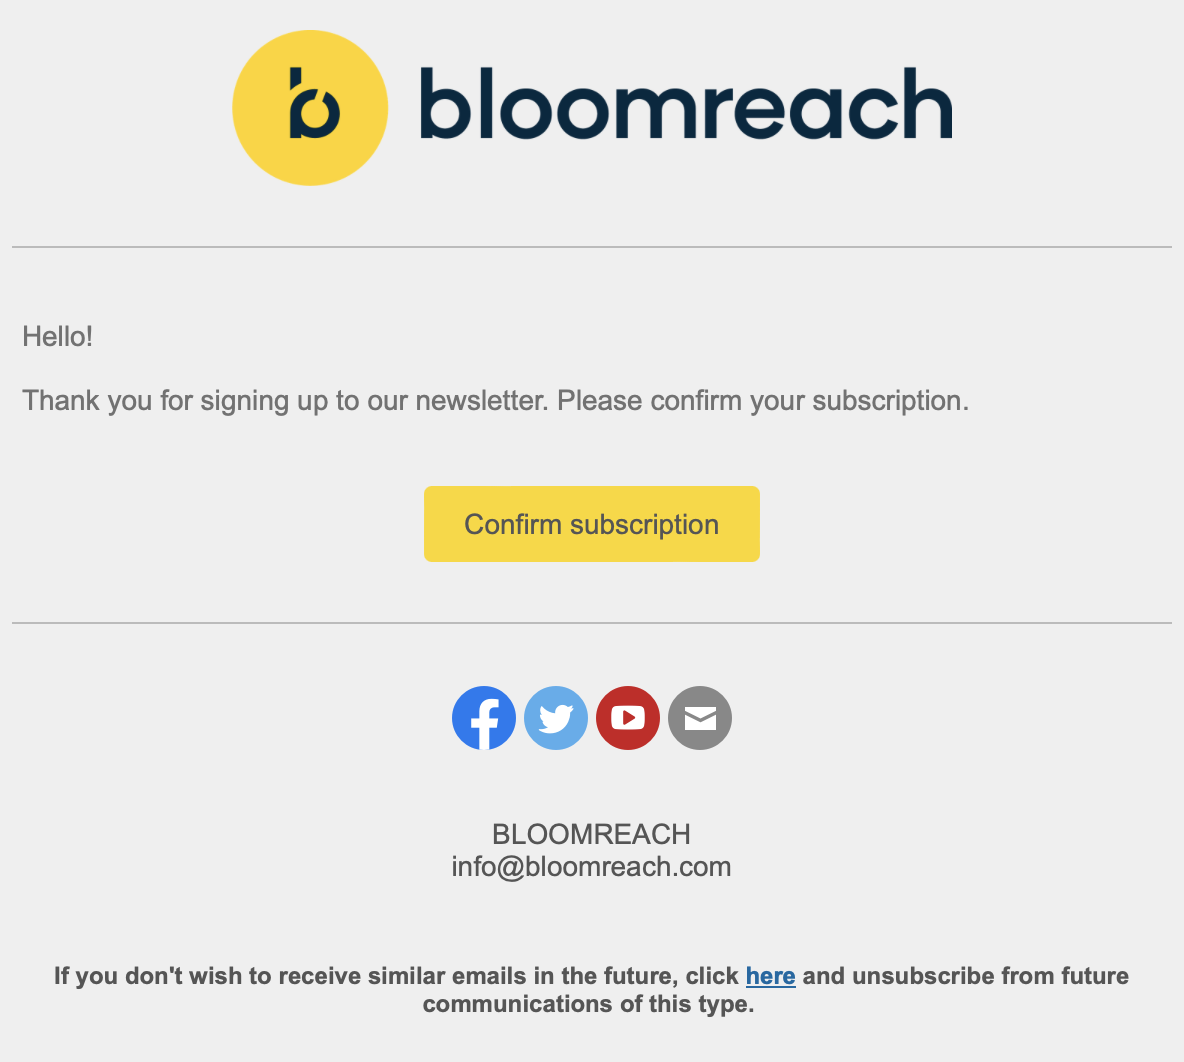
8. Set the URL where the confirmation button in the email will redirect to. You need to include a specific keyword that will identify that this customer has just confirmed a double opt-in, such as www.yourwebsite.com?newsletter-confirmation. This will be used in the last on event trigger node in step 9.
Note: You can use any keyword in your URL as long as you place it after a ? or # symbol.
9. When the customer clicks through the email to your landing page (or your homepage), a campaign event is tracked automatically. Set up the last "On event" node as shown below.
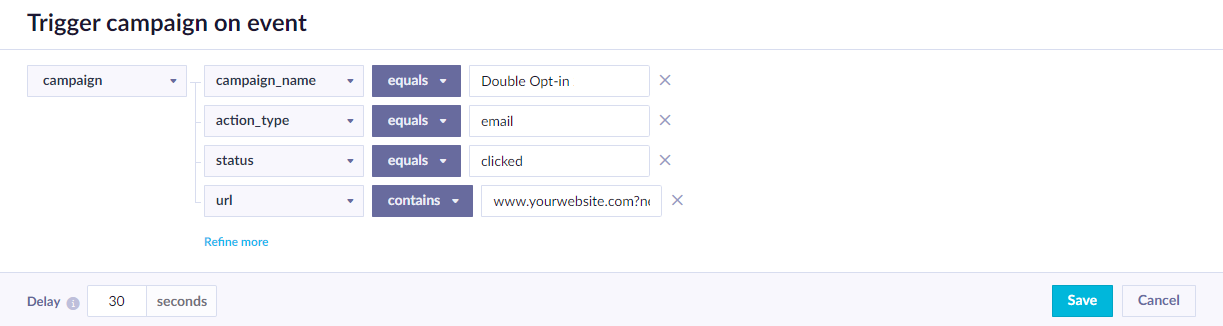
"campaign_url" must mirror the URL you used in step 8. "campaign_name" is equal to the name of your scenario.
You might want to use
campaign_idinstead ofcampaign_name. Click here to learn more.
Warning about spam filter botsTracking the consent event triggered by a campaign click event have certain limitations.
Namely, certain email domains might use spam filter bots, which could automatically scan and click through all email links.These campaign clicks are indistinguishable from human clicks and therefore some campaign clicks used in double opt-in setup might not originate from the targeted human customer. Thus, for some customers, these false automatic clicks can reduce double opt-in to just single opt-in.
If you want to be more certain, that only a real human confirmed your email, instead of the trigger by campaign click, you can implement a small confirmation page with a submit button.
After submitting, this page would track the consent event directly (replacing this and the following step).
10. Now add and attach a webhook "Track consents". This webhook will track the consents you specified in the initial tracking (step 1) to everyone who will visit the dedicated URL (step 8).
{
    "commands": [
        {
            "name": "customers",
            "data": {
                "customer_ids": {
                    "registered": "{{ customer_ids.registered }}"
                },
                "properties": {
                    "email": "{{ aggregates['5c125e43e9f1d9001501be08'] }}"
               }
            }
        },
    {% set consent_list = aggregates["5bae01a6defa930014bd5e38"] %}
    {% for item in consent_list %}
        {
            "name": "customers/events",
            "data": {
                "customer_ids": {
                    "registered": "{{ customer_ids.registered }}"
                },
                "event_type": "consent",
                "properties": {
                    "action": "{{ item.action }}",
                    "category": "{{ item.category }}",
                    "valid_until": "{{ item.valid_until }}"
                }
            }
        }

        {% if not loop.last %}
        ,
        {% endif %}

    {% endfor %}

    ]
}
11. There are two aggregates used in this webhook, the first starting with "email":"aggregates[...]" and the second {% set list = ...%}. You need to create these aggregates in definitions, copy their ID and replace it in the brackets in the code above. See the screenshots below:

The first aggregate identifies the customer. The ID is located in URL.
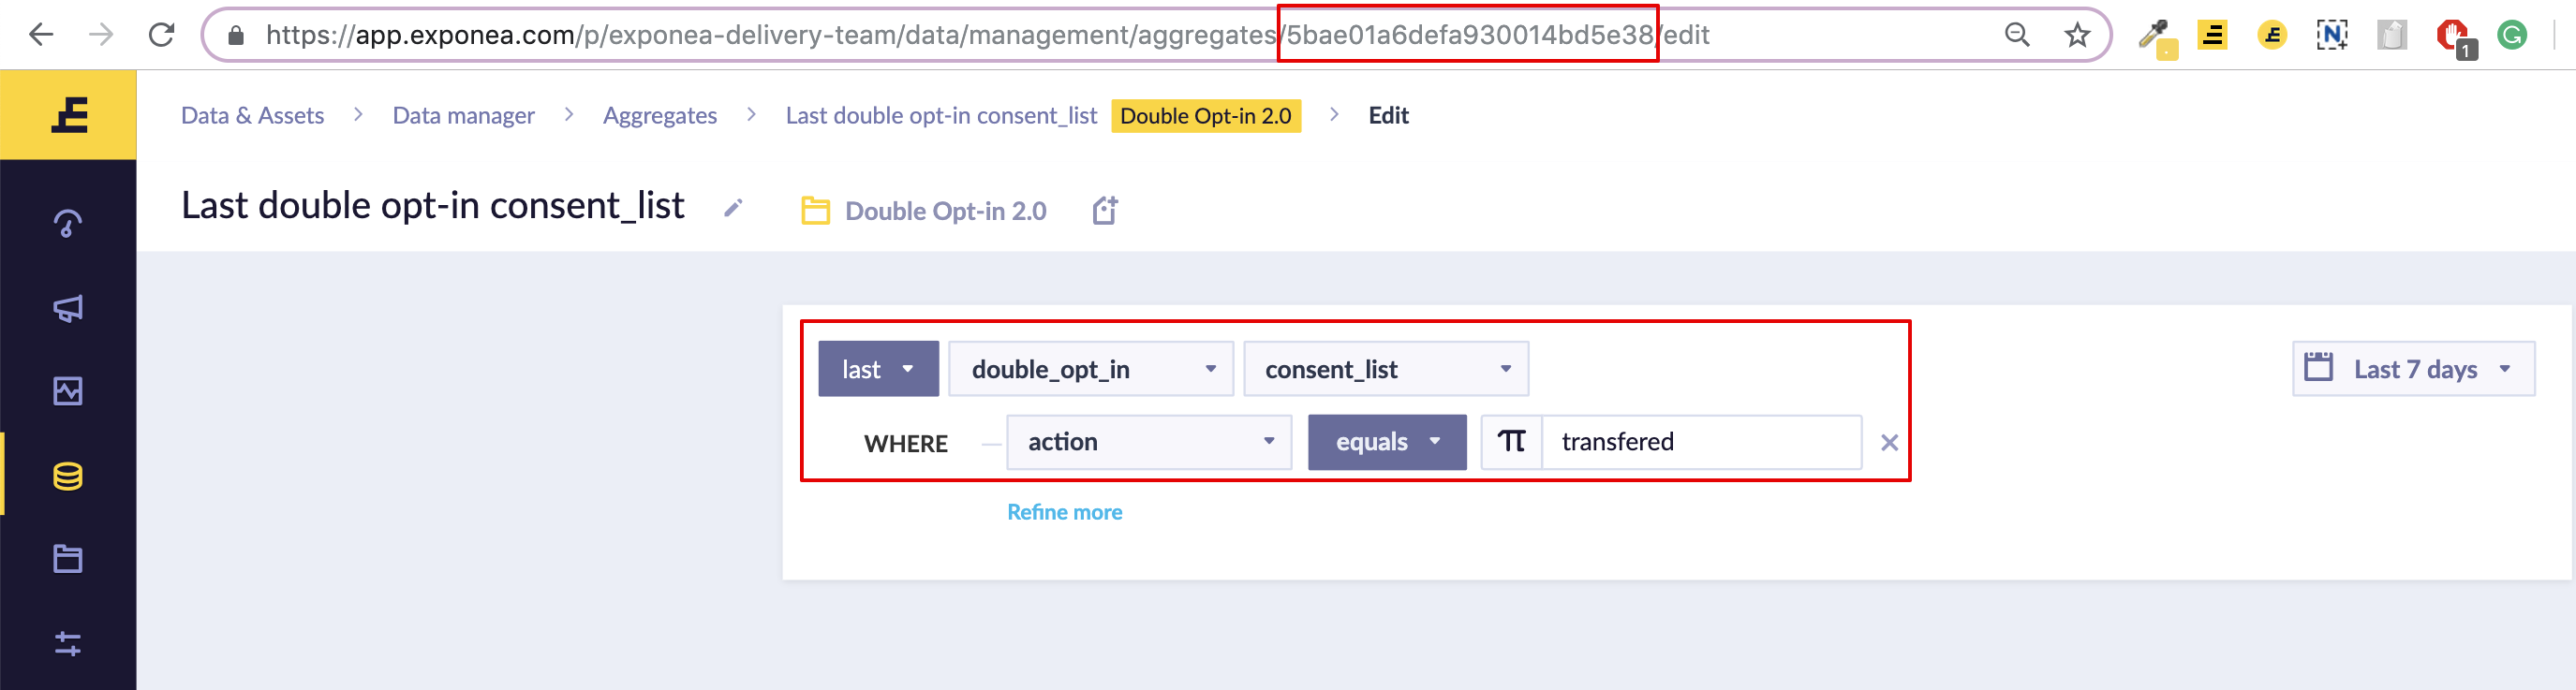
The second aggregate loads and saves all consents that you defined in your tracking.
Technical reference
The webhooks are set according to the Batch commands request to Bloomreach Data API.
Why do you need to use the webhooks instead of a simple scenario?
Using webhooks ensures the highest GDPR-compliant standards to protect your customers' data in case someone else would try to use their email address.
So what exactly the webhooks do?
This first webhook essentially creates a customer with a hard ID that equals the entered email. If the current user is already identified, they will be automatically merged. If he or she is anonymous (meaning not identified by hard ID), then the new customer in Bloomreach app will be different than the one browsing and submitting the email. This webhook then tracks the event "double_opt_in" with "action = transferred" to that customer.
Once they click "confirm" in the email, these 2 customers are merged, which is done in the webhook "Track consents".
Updated 6 days ago