JS SDK Integration
To integrate your website with Bloomreach Engagement using our Javascript SDK, you need to copy-paste the integration snippet into the header of your webpage. This step is the essential prerequisite for identifying your customers, tracking their actions, and running campaigns. It will initialize Bloomreach Engagement with your project token (your unique project identifier) so that every action will be tracked into your project correctly.
Protecting the Privacy of Your Customers
Make sure you have obtained and stored consent from your customers before initializing Bloomreach Engagement JS SDK.
To ensure no events are tracked before obtaining consent from visitor, use the
compliance.opt_inoption when visitors opt-in to tracking (this applies to new visitors or returning visitors who have previously opted-out). This option also prevents re-using existing cookies for returning visitors.
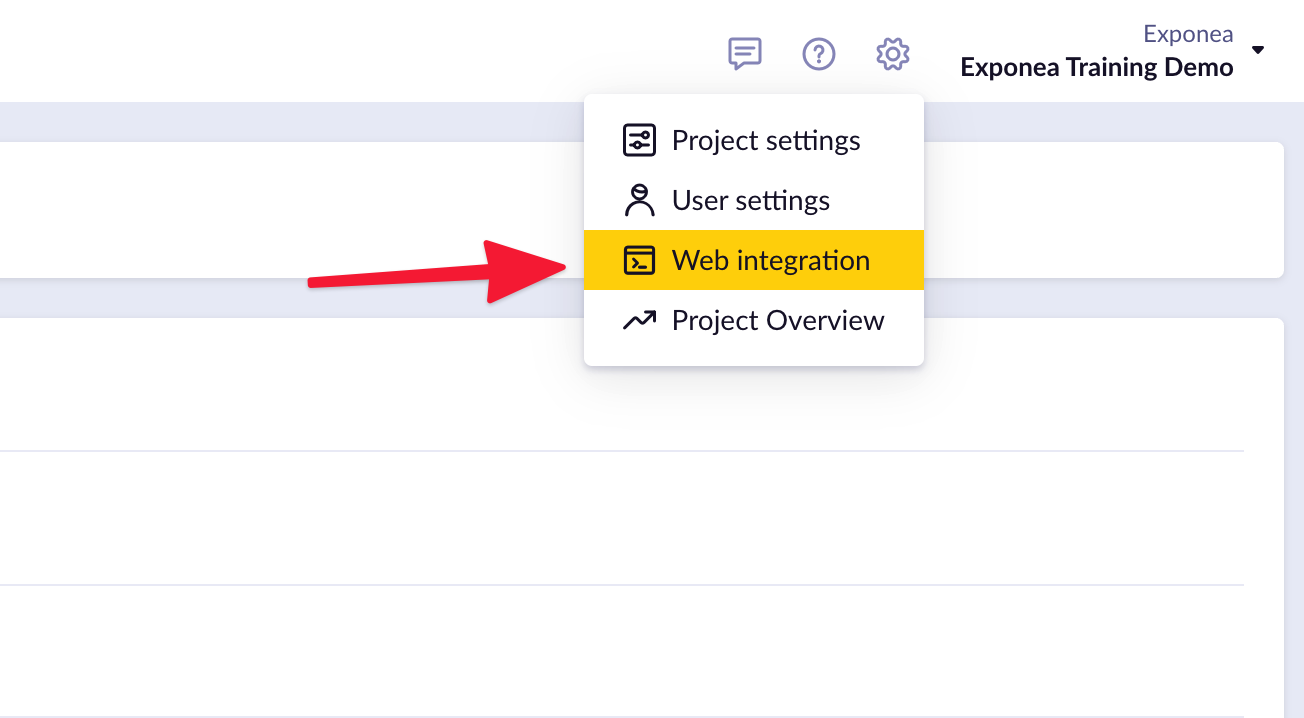
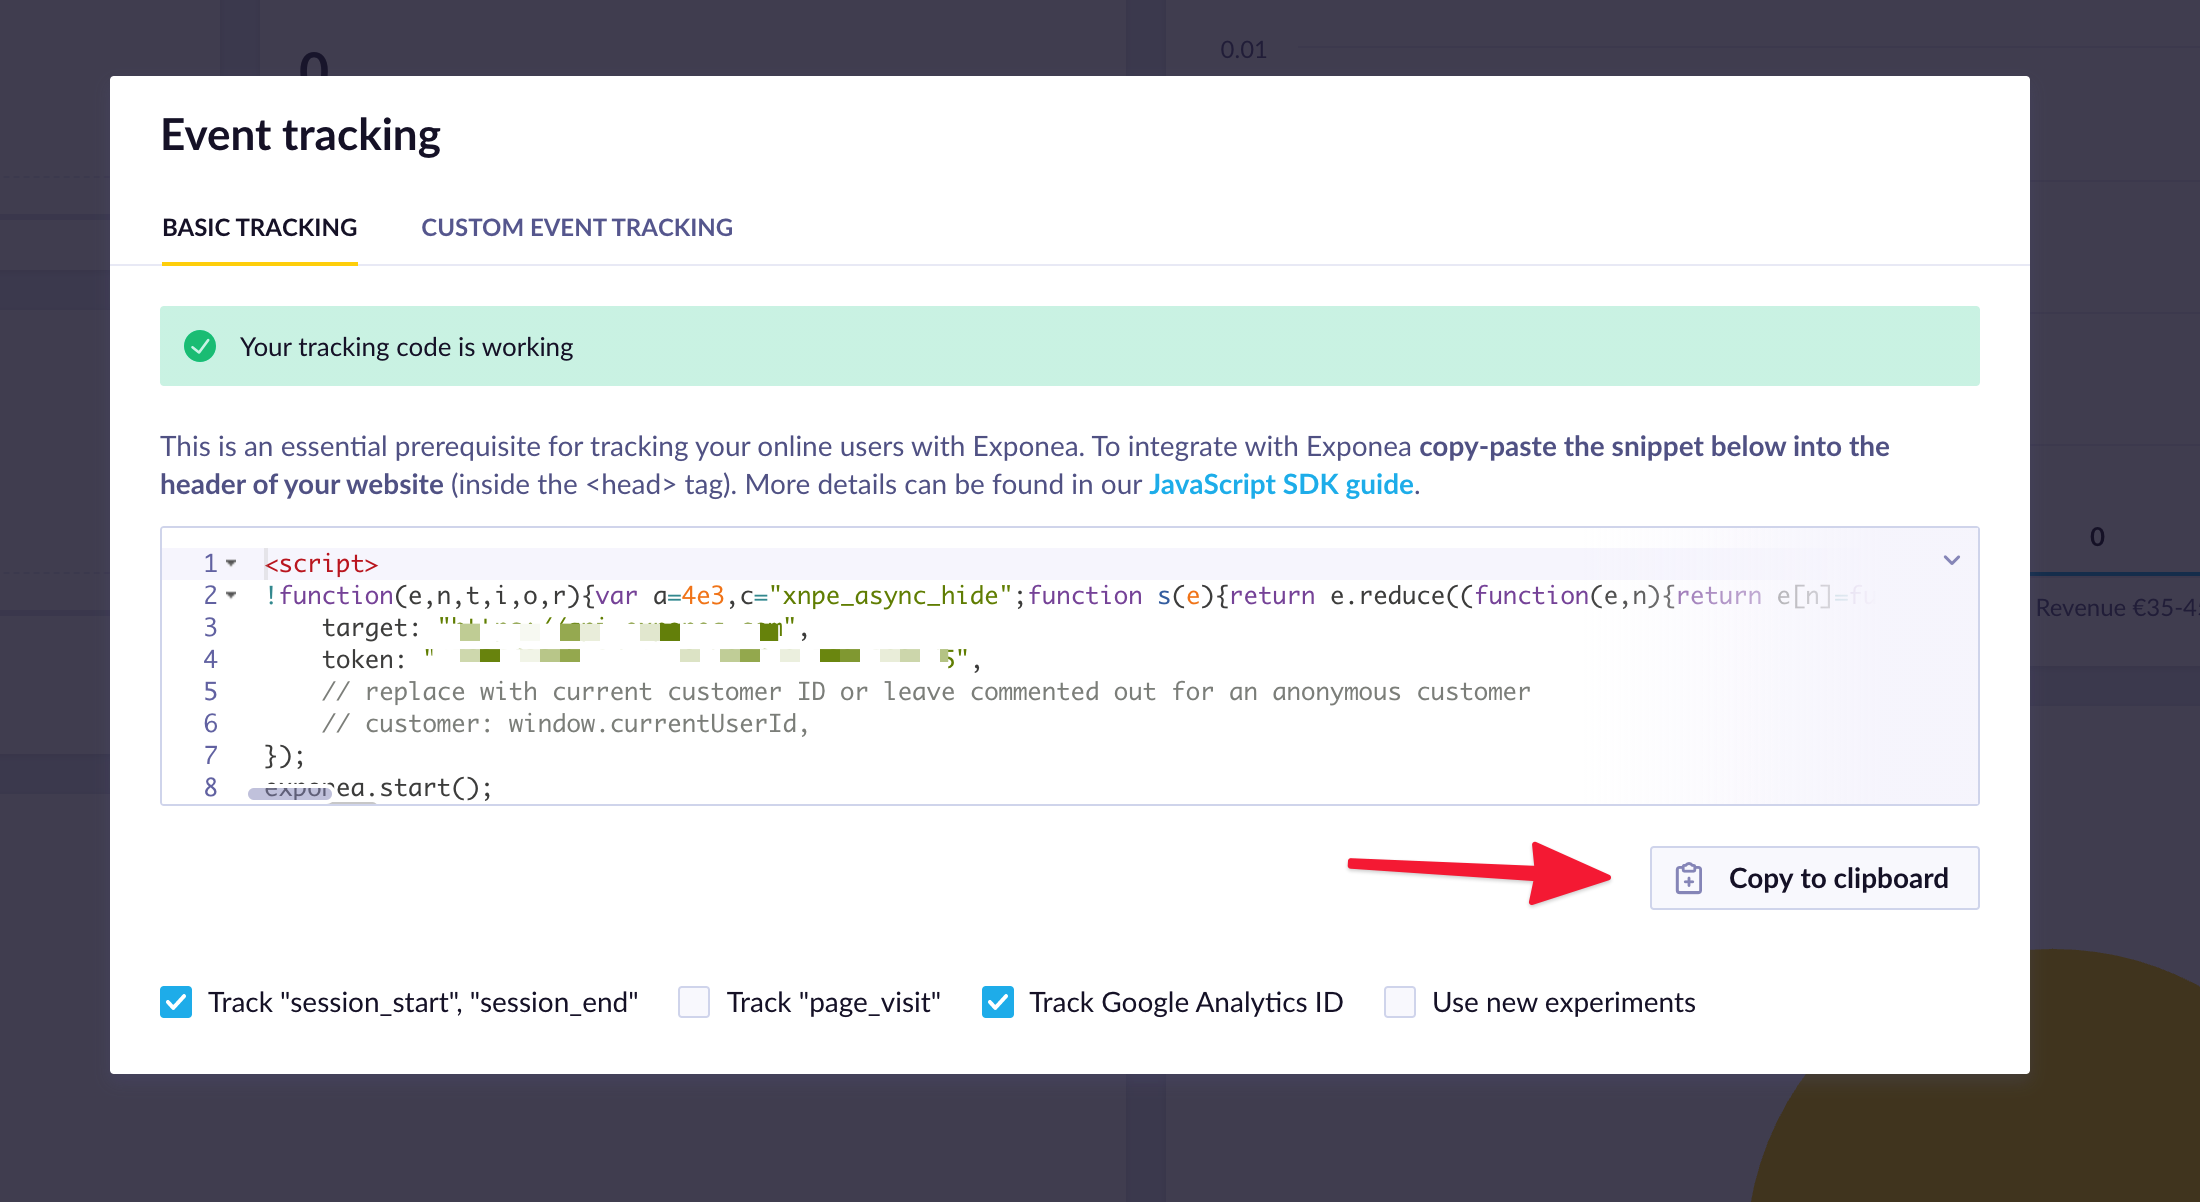
To find the integration snippet, open your Bloomreach Engagement project and go to Settings > Web integration.


Click on the Copy to clipboard button and paste the snippet into every page of your website where you want to track your customers. Make sure to paste the snippet into the <head> tag of the page.
Note that the new integration snippet is available in Bloomreach Engagement app since version 1.172.
Using the older integration snippet
If you've been integrated with Bloomreach Engagement for a while, it is possible that you are using an older integration snippet. The older snippet looked like this:
<script>(function(b,c){if(!b.exponea){var a=function(a,g){function k(d){return function(){var e=arguments;""==a&&"initialize"==d&&e&&e[0].modify&&e[0].modify.overlay // ... the rest of the snippet ... </script>
<script type="text/javascript">
    exponea.initialize({
        "token": "xxxx-xxx-xxxxxxxxx-xxxxx-xxxx"
        //, customer: window.loggedInCustomer // replace window.loggedInCustomer with id of your web site customer, e.g. "[email protected]"
});
</script>
You can notice that the most important visible difference is that the old snippet contains a call to exponea.initialize(), whereas the new snippet contains a call to exponea.start().
This snippet is now quite old. If you are still using it on your website, it is recommended that you update to the newer integration snippet mentioned in the top of this page, if you have the chance. Simply delete the old snippet from your website and follow the steps on this page to use the new one.
The new integration snippet has support for Non-flickering experiments and some additional features which the old snippet lacks. Plus, the old snippet contains some really old code that is not used by SDK anymore.
Initialization
When you initialize SDK, it starts communicating with Bloomreach Engagement - tracking the customer and their events, showing web layers, experiments, etc. By default, SDK is initialized as part of the integration snippet by calling exponea.start() (see the snippets above).
The SDK integration snippet takes in a configuration object. By default, this configuration is pre-filled with your project token and the API target. You can also customize other SDK options, see the Configuration page and also the basic configuration section on this page. Here's how:
!function(e,n,t,i,r,a,c){function // ... the rest of the snippet ...
    target: "https://api.exponea.com",
    token: "323d7a16-ba47-12c9-8c2d-0a770a310d68",
    customer: "[email protected]",
    ping: {
      enabled: true
    },
    new_experiments: {
        mode: 'async',
        timeout: 1000,
        hide_class: 'exponea-hide',
    }


});
CSP compliance
For sites with Content Security Policy requirements, set
csp_script_integration: truein your configuration. See CSP-compliant personalization for complete setup instructions including nonce generation and header configuration.
start()
This function is only supported in the newest integration snippet (from the release 1.172). If you are still using the older integration snippet, please update it to the newest version.
When called, SDK is initialized and starts doing its job. This function is part of the default integration snippet so you don't have to call it manually in your code. The function can take 1 optional parameter, which is a configuration object. If specified, this configuration extends the existing configuration specified in the integration snippet.
Note that some configuration options such as
targetandtokencan only be used in the configuration section of the integration snippet, and not in the call tostart().
Arguments
| Name | Value | Description |
|---|---|---|
options (optional) | object | Configuration object which extends the existing configuration in the integration snippet. See the Configuration page and the basic configuration section on this page for the list of supported options. |
Examples
Initialize SDK with the configuration specified in the integration snippet:
exponea.start();
Extend the SDK configuration and initialize it. This can be useful if you have to request a configuration value asynchronously and then initialize SDK asynchronously using that value. For example, you can request your customer ID and use it when initializing Bloomreach Engagement SDK:
// requestCustomerId would be your implementation
requestCustomerId()
  .then(id => {
    exponea.start({
      customer: {
        system_id: id
      }
    });
  });
Basic configuration
The SDK integration snippet takes in a configuration object pre-filled with your project token and API target. You can customize key options below.
For a complete list of all configuration options, see Configuration.
Note that these configuration options can only be used in the configuration section of the integration snippet, and not in the call to
start().
| Name | Default value | Possible values | Description |
|---|---|---|---|
target | 'https://api.exponea.com' | string | URL of the Bloomreach Engagement API. This value is pre-filled in the integration snippet provided by the Bloomreach Engagement app. |
token | none (this value is required) | string | Token of your Bloomreach Engagement project. This value is pre-filled in the integration snippet provided by the Bloomreach Engagement app. The SDK tracks data into this project. |
compliance.opt_in | false | boolean | If set to true, track commands called before the start() will not be executed and resets the vistor cookie after calling the start() command.If set to false (default), commands called before the start() will be executed right after the start() command and existing visitor cookies will be used. |
new_experiments (new since version v2.4.0) | false | boolean or an object with options (see below) | Used to enable and control how Experiments are applied on your page. This option specifically enables the improved implementation. Read more in the documentation for experiments. |
new_experiments.mode (new since version v2.4.0) | async | sync or async | Specifies whether experiments are applied synchronously (blocking the page rendering) or asynchronously (hiding the page while they are loading). |
new_experiments.timeout (new since version v2.4.0) | 4000 | number | Maximum amount of time (in milliseconds) that the main page is blocked or hidden while the experiments are loading. Read more in Integrating and using Experiments. Note that the integration snippet does not contain any validation for correct values here. It only makes sense to provide a positive number for this option so have that in mind. 0 is also not valid here and the snippet will use the default timeout value instead. |
new_experiments.hide_class (new since version v2.4.0) | xnpe_async_hide | string | The CSS class name of the element used to hide the main page content. This is only used in the async mode. |
Utilities
version
You can use exponea.version to find out what version of SDK you are using.
console.log(exponea.version);
snippetVersion
You can use exponea.snippetVersion to find out what version of the integration snippet you have on your website.
console.log(exponea.snippetVersion);
Updated 17 days ago
