

Snowflake
Snowflake is a cloud-based data platform for warehousing, storage, and analytics. Using the Snowflake integration, you can power Bloomreach with data stored in your Snowflake tables.
You can import the following data from Snowflake:
- Customers
- Events
- Catalogs
The integration automatically syncs changes in the source data to Bloomreach as often as every 15 minutes.
This integration adds Snowflake as an additional data source to Bloomreach's existing import features. For more background, read:
NoteContact your Customer Success Manager to enable Snowflake support for catalog imports in your project.
How the integration works
The integration connects directly to Snowflake and only needs to be configured once. Once set up, it can import from tables, views, and user-defined queries. When importing from a table or view, enable change tracking in Snowflake to allow the integration to detect and sync only what's changed since the last import.
Prerequisites
Access requirements
You need a Snowflake account with account admin privileges to set up the integration on the Snowflake side. You can use either the SnowSQL CLI client or the Snowsight web interface.
Data format requirements
Bloomreach has flexible data format requirements. When setting up an import, you map the source data format to the relevant data structure.
The following columns must be present in the source tables or views:
| Data category | Required columns | Optional columns |
|---|---|---|
| Customers | ID to be mapped to the customer ID in Bloomreach (typically registered) | Timestamp to be mapped to updated_timestamp (see below) |
| Events | ID to be mapped to the customer ID in Bloomreach (typically registered) - Timestamp | |
| Catalog | ID to be mapped to the catalog item ID in Bloomreach (typically item_id) |
The following attribute data types are supported: text, long text, number, boolean, date, datetime, list, URL, and JSON.
Delta update requirements
Change tracking
Delta updates let you import only the changes in your source data since the previous import. This requires CHANGE_TRACKING to be enabled on the source table or view in Snowflake. Sync updates are only available when using Table as the source type. They aren't supported for Query mode—custom queries don't have a stable structure the connector can subscribe to for changes.
Table example:
ALTER TABLE CUSTOMER_100 SET CHANGE_TRACKING=TRUE;View example:
ALTER VIEW VIEW_CATALOG_100 SET CHANGE_TRACKING=TRUE;Customer update timestamp
Add an extra column to your customer table with a timestamp indicating when customer properties were last updated. Set the timestamp to the current time on every change of customer data imported to Bloomreach.
Map this column to update_timestamp when setting up the import.
This prevents delta updates from overwriting customer property values tracked in Bloomreach since the previous import.
Set up the Snowflake integration
- Go to Data & Assets > Integrations and click + Add new integration.
- In the Available integrations dialog, search for "snowflake" and click + Add integration next to Snowflake Data Source.
- Configure your Snowflake connection by filling in the following fields:
| Field | Description |
|---|---|
| Account identifier | The account name prefixed by its organization — for example, myorg-account123. Run SELECT CURRENT_ORGANIZATION_NAME() | CURRENT_ACCOUNT_NAME(); to get your identifier, or find it in Snowsight under Account > View account details. |
| Username | The Snowflake username to connect with. Find users in Snowsight under Admin > Users & Roles. |
| Warehouse | The warehouse to connect to. Run SHOW WAREHOUSES; or find warehouses in Snowsight under Admin > Warehouses. |
| Database | The database to connect to. Run SHOW DATABASES; or find databases in Snowsight under Data > Databases. |
| Schema | The schema to use. Run USE DATABASE <your_database_name>; then SHOW SCHEMAS;, or find schemas by clicking on the relevant database in Snowsight under Data > Databases. |
| Role (optional) | The user role that defines access permissions. If left empty, the default user role applies. |
-
In the Key pair dropdown, select Generate new key.
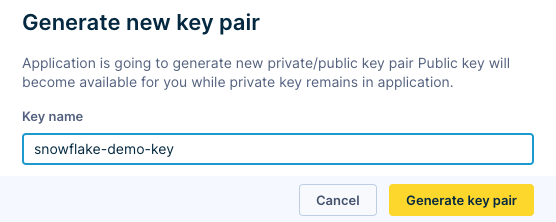
-
In the Generate new key pair dialog, enter a Key name and click Generate key pair.
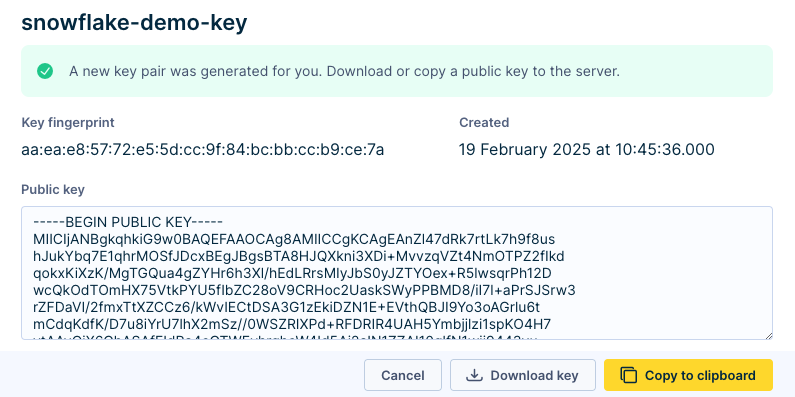
-
Copy or download the new key, then add it to the relevant Snowflake user:
ALTER USER <username> SET RSA_PUBLIC_KEY='<public_key>';- Replace
<username>and<public_key>with the appropriate values.
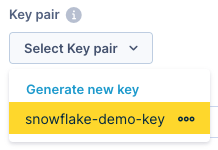
- Select the new key in the Key pair dropdown.
- Click Save integration.
You are now ready to import data from Snowflake into Bloomreach.
ImportantRemoving the integration won't delete data already imported from Snowflake, but it cancels all future delta updates.
Import data from Snowflake
Import customers
-
Navigate to Data & Assets > Imports and click + New import.
-
Select Customers.
-
Enter a name for the import — for example, "Snowflake customers import".
-
On the Database tab, select the Snowflake integration in the SQL Integration dropdown.
-
Select Table, then select the source table in the Source Table dropdown.
-
Click on Preview data to verify the data source is working, then click Next.
-
Map your customer ID (typically
registered) to the matching column in the Snowflake table, then click Next. -
Optionally, map the
update_timestampfield to avoid overwriting customer properties tracked since the previous import. -
Under Schedule execution for customers, select an import type:
Import type Description Single import A one-off import of all records. Repeated import A scheduled, recurring import of all records. Sync updates A scheduled, recurring delta import of changes since the previous import. Specify the schedule (every 15/30/45 minutes, 1 hour, or 2 hours) and optionally a time range. -
Click Finish to start the import.
ImportantDeleting a customer profile in Bloomreach doesn't delete it in Snowflake. The record remains in Snowflake and will only be recreated in Bloomreach if it is updated in Snowflake, which triggers the import job to re-import it.
Import events
-
Navigate to Data & Assets > Imports and click on + New import.
-
Select Events, enter the event type to import (for example, "view"), and click Next.
-
Enter a name for the import — for example, "Snowflake events import".
-
On the Database tab, select the Snowflake integration in the SQL Integration dropdown.
-
Select Table, then select the source table in the Source Table dropdown.
-
Click Preview data to verify the data source, then click Next.
-
Map your customer ID (typically
registered) to the matching column in the Snowflake table, then click Next. -
Under Schedule execution for customers, select one of the following:
Import type Description Single import A one-off import of all records. Use for fixed data that doesn't change. Repeated import A scheduled, recurring import of all records. Sync updates A scheduled, recurring delta import of changes since the previous import. Recommended for keeping both platforms in sync — use for your most critical data only, as it generates computation costs on your side. It depends on the case, but we generally recommend Sync Updates to keep both platforms synchronized. You will have what you have in your source of truth - Snowflake, in Bloomreach. This approach generates computation costs on your side, so use it only for the most crucial data. Use Single imports for cases where you want to bring some fixed data that don't change, and there is no need for regular imports.
-
Click Finish to start the import.
Note
- Each import covers one event type (for example,
view). To import multiple event types (for example:view,purchase,campaign), set up a separate import for each.- Events in Bloomreach are immutable. Delta updates import new events but won't update previously imported ones.
Import catalogs
-
Go to Data & Assets > Imports and click + New import.
-
Select Catalog, choose the catalog to import, and click Next.
-
Enter a name for the import — for example, "Snowflake catalog import".
-
Under Import settings, select an import type:
Import type Description Full feed Imports all data and replaces all existing records. Delta feed (Replace items/rows) Replaces existing records based on matching IDs or adds new records. Delta feed (Partial) Partially updates data without overwriting existing data if no matching column is found, or adds new records if no matching IDs exist. -
On the Database tab, select the Snowflake integration in the SQL Integration dropdown.
-
Select Table, then select the source table in the Source Table dropdown.
-
Click on Preview data to verify the data source, then click Next.
-
Map your item ID (typically
item_id) to the matching column in the Snowflake table, then click Next. -
Under Schedule execution for customers, select an import type:
Import type Description Single import A one-off import of all records. Repeated import A scheduled, recurring import of all records. Sync updates A scheduled, recurring delta import of changes since the previous import. Only available with Delta feed import type. Specify the schedule and optionally a time range. -
Click Finish to start the import.
ImportantDeleting a catalog item in Bloomreach doesn't delete it in Snowflake. The record remains in Snowflake and will only be recreated in Bloomreach if it is updated in Snowflake, which triggers the import job to re-import it.
Permissions
The following privileges are required to set up an import:
USAGEon the desired warehouse.USAGEon the desired database.USAGEon the desired database schema.SELECTon the desired database.SELECTon the desired database schema.SELECTonFUTURE TABLESin the desired database schema.SELECTonFUTURE VIEWSin the desired database schema.
For more details, see Snowflake access control.
ImportantPrivileges are granted to roles, and roles are granted to users. If a user has both a super admin role (like
ACCOUNTADMIN) and a read-only role, the super admin role takes precedence and the read-only role is ignored. To restrict a user to read-only access, make sure read-only is the only role assigned. Streams must be created before integration setup by a higher-level role.
Export data from Bloomreach to Snowflake
Exports run in scheduled mode only.
- Export your data using the Exports to GCS option.
- Store your data in a GCS-based data lake.
- To load files into Snowflake database tables, use LOAD. See Snowflake's overview article for details.
- Trigger automatic file loading by calling the public REST API endpoints. To bulk load data from Google Cloud Storage, read Bulk loading from Google Cloud Storage.
Delete data
Using the API, you can anonymize customers individually or in-bulk. To delete customers, mark them with an attribute and delete them manually in the UI. You can delete events by filtering in the UI. Catalog items can be deleted using the Delete catalog item API endpoint.
Limitations
- Sync updates don't support delete operations. If you delete a record in Snowflake that was previously imported, it won't be deleted in Bloomreach on the next sync.
- Deleting a record in Bloomreach doesn't affect Snowflake. The record remains in Snowflake and will only be recreated in Bloomreach if it is updated in Snowflake, which triggers the import job to re-import it.
- Importing from Snowflake doesn't support static IP addresses. Bloomreach import workers connect from dynamic IP addresses, so IP allowlisting isn't available for this integration.
- Sync updates are only available when using Table as the source type, not Query mode. To use sync updates, enable
CHANGE_TRACKINGon the source table or view in Snowflake. See Delta update requirements.
Updated 8 days ago