

Voucherify
Integration
The following is a guide on how to integrate Voucherify with Bloomreach Engagement.
Voucherify functions as a low-code Promotion Engine designed to execute high-impact promotions. It is fully capable of integration with Bloomreach Engagement. This guide explains how to set up the integration with Voucherify and provides two example use cases showing how you can use Voucherify to your advantage.
How the integration works
The Voucherify integration allows for the flow of data from Voucherify to Bloomreach. Customer-related events from Voucherify are sent to Bloomreach Engagement and are associated with customers. These events can be used to update the customer’s parameters with additional information from Voucherify. It can also trigger event-based messaging.
This integration also enables you to update customer data in the Voucherify database for more personalized promotions. It also lets you initiate specific promotions from Bloomreach scenarios in real time.
How to set it up
1. Authenticate the Webhook
In Bloomreach Engagement, set up the webhook authentication for Voucherify to ensure a secure data transfer in the webhook request. This webhook authentication will come into play when you create a scenario in a later step.
To configure the webhook authentication in Bloomreach Engagement:
- Go to Data & Assets > Integrations.
- Press +Add new integration.
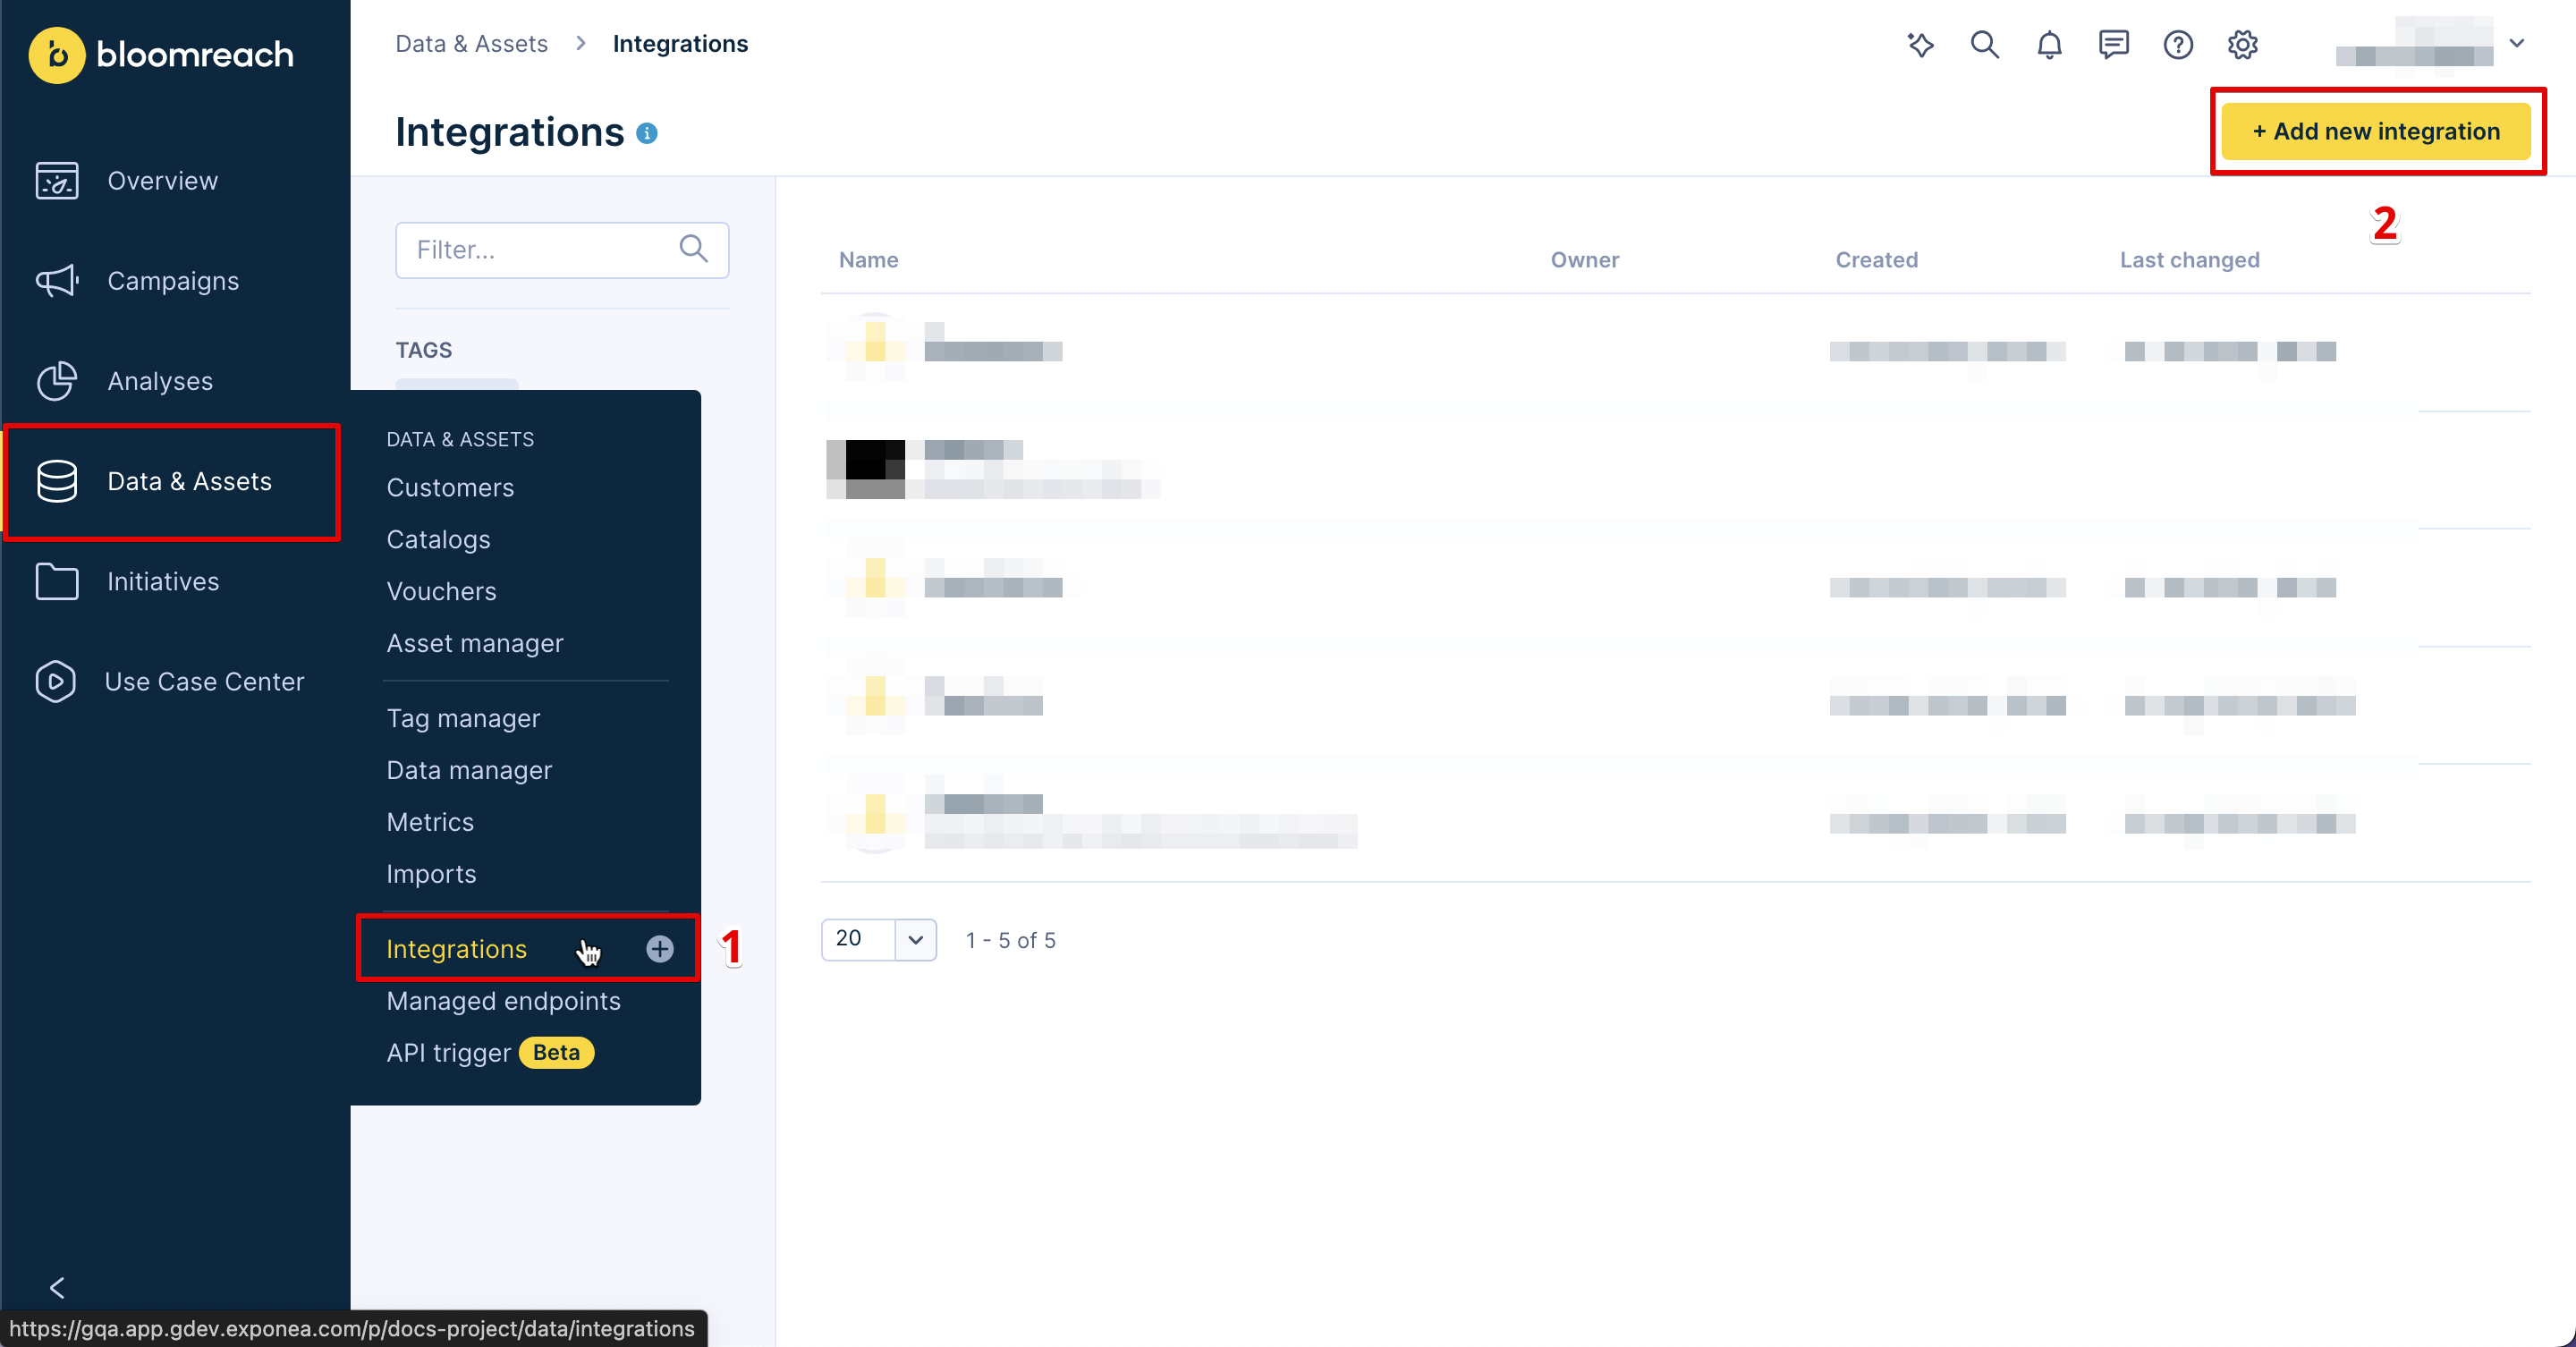
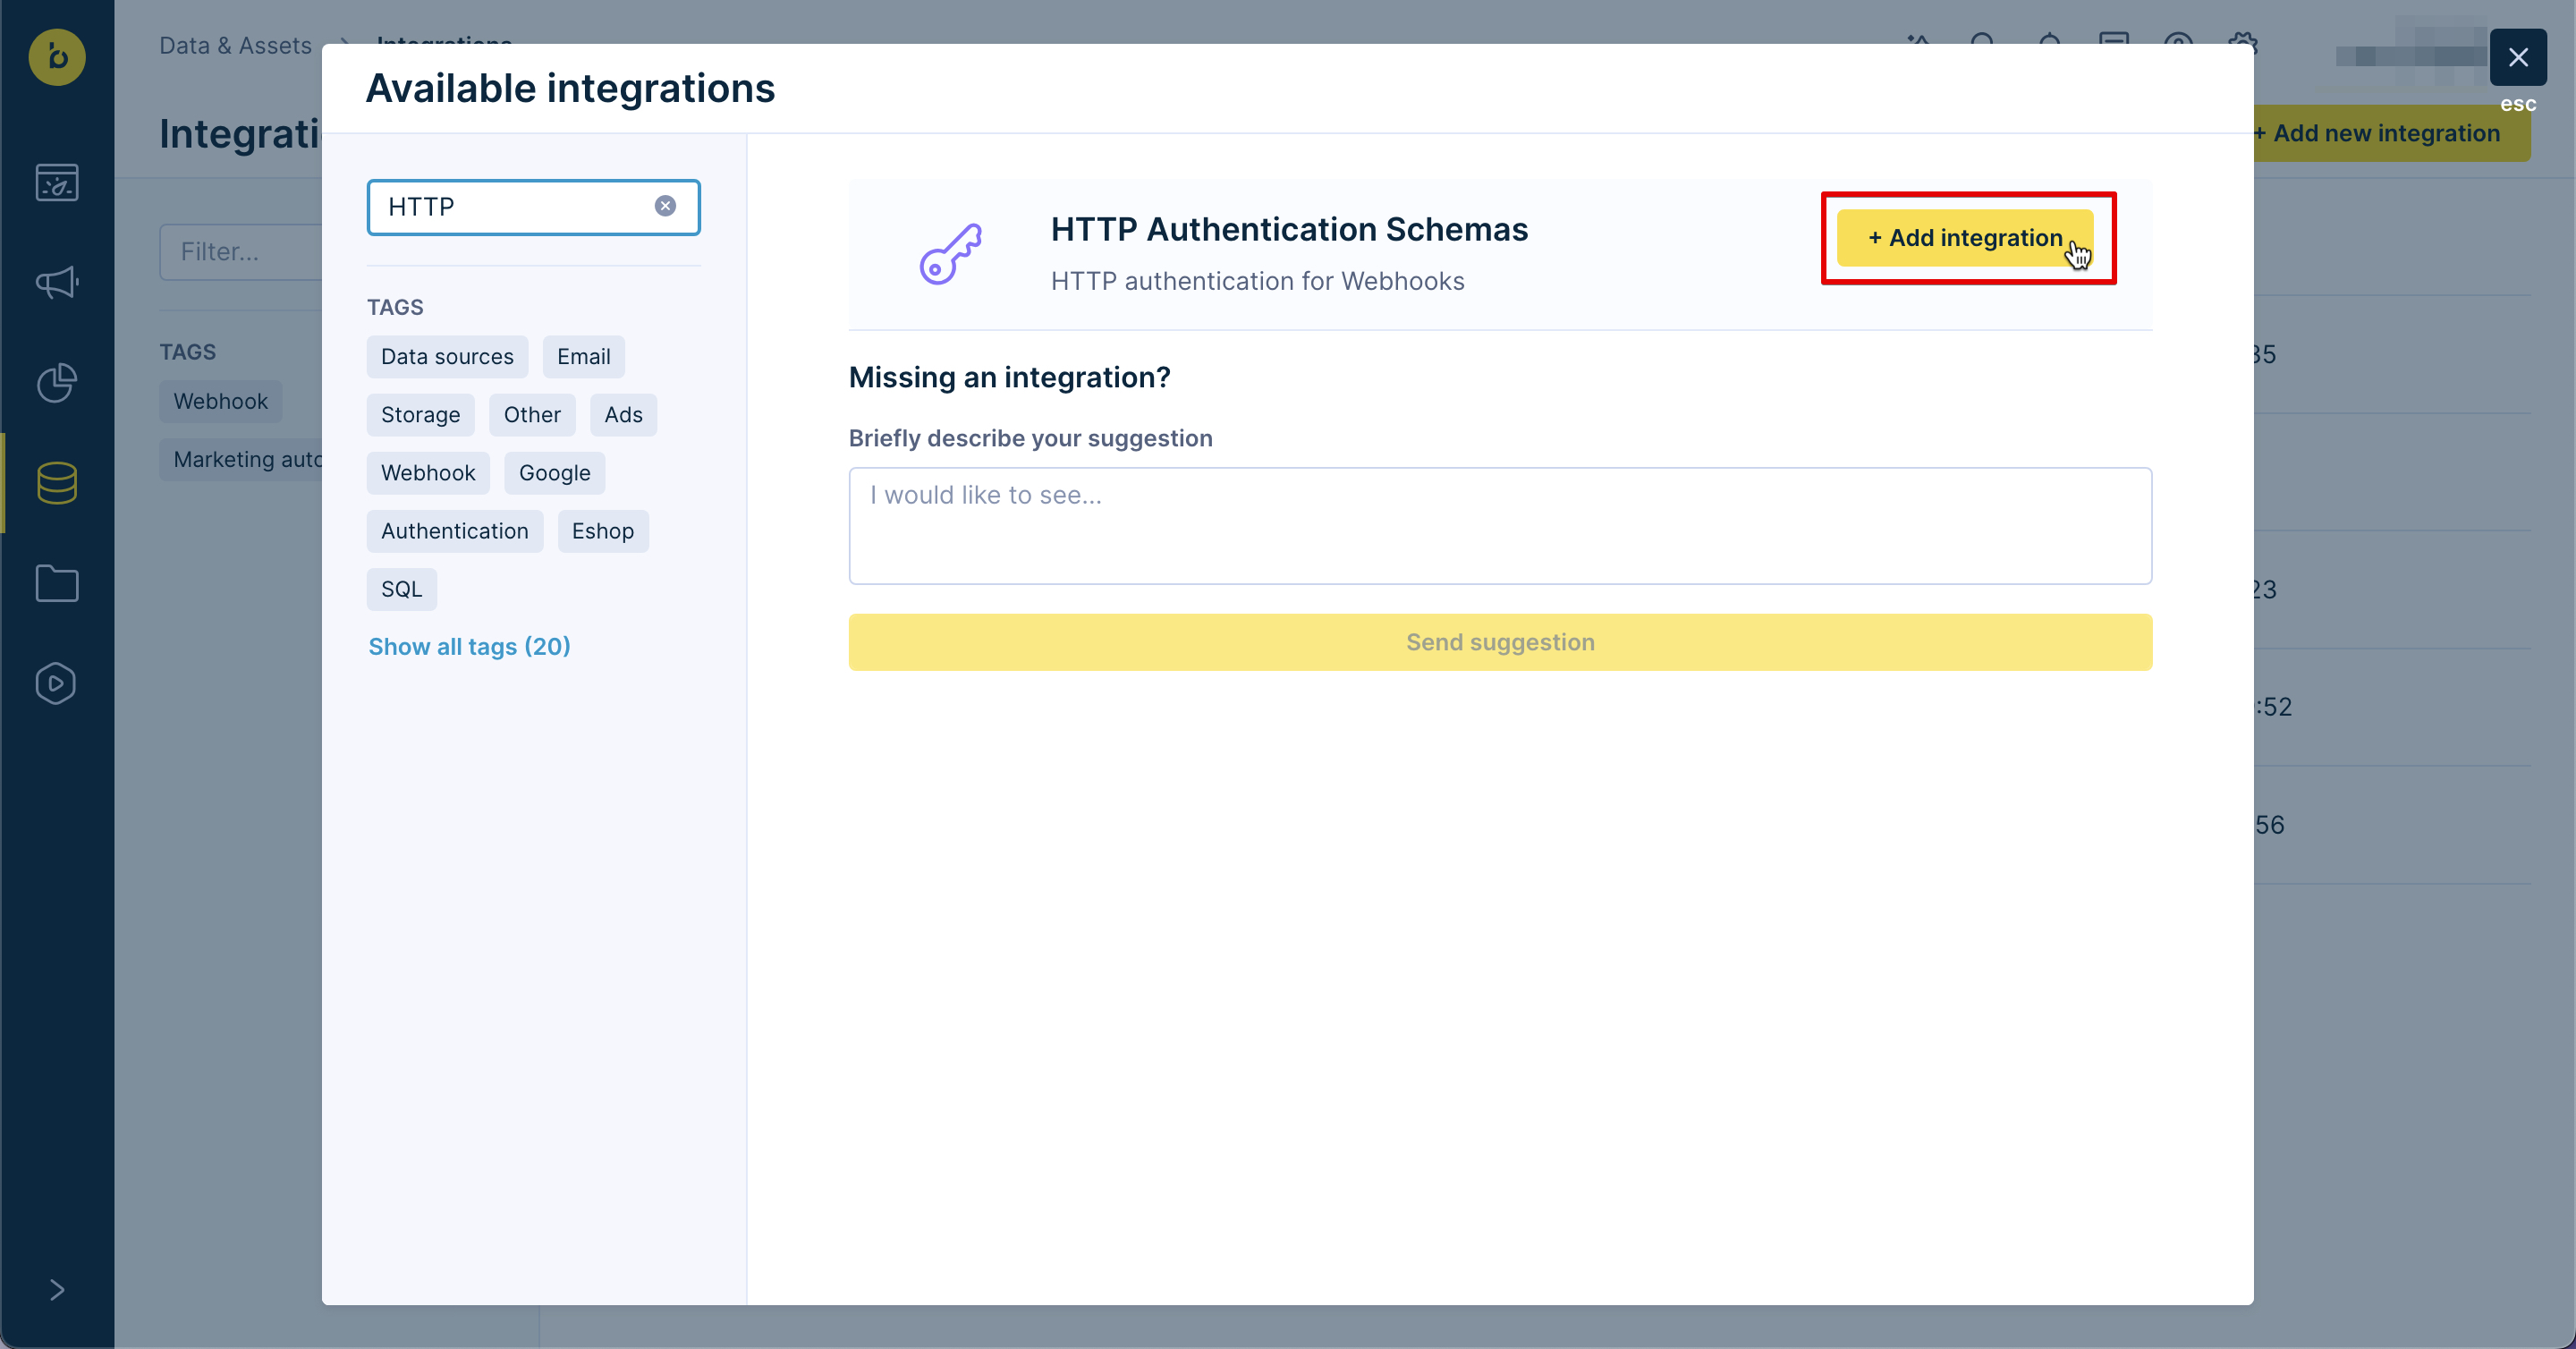
- Search for HTTP Authentication Schemas and press + Add integration.
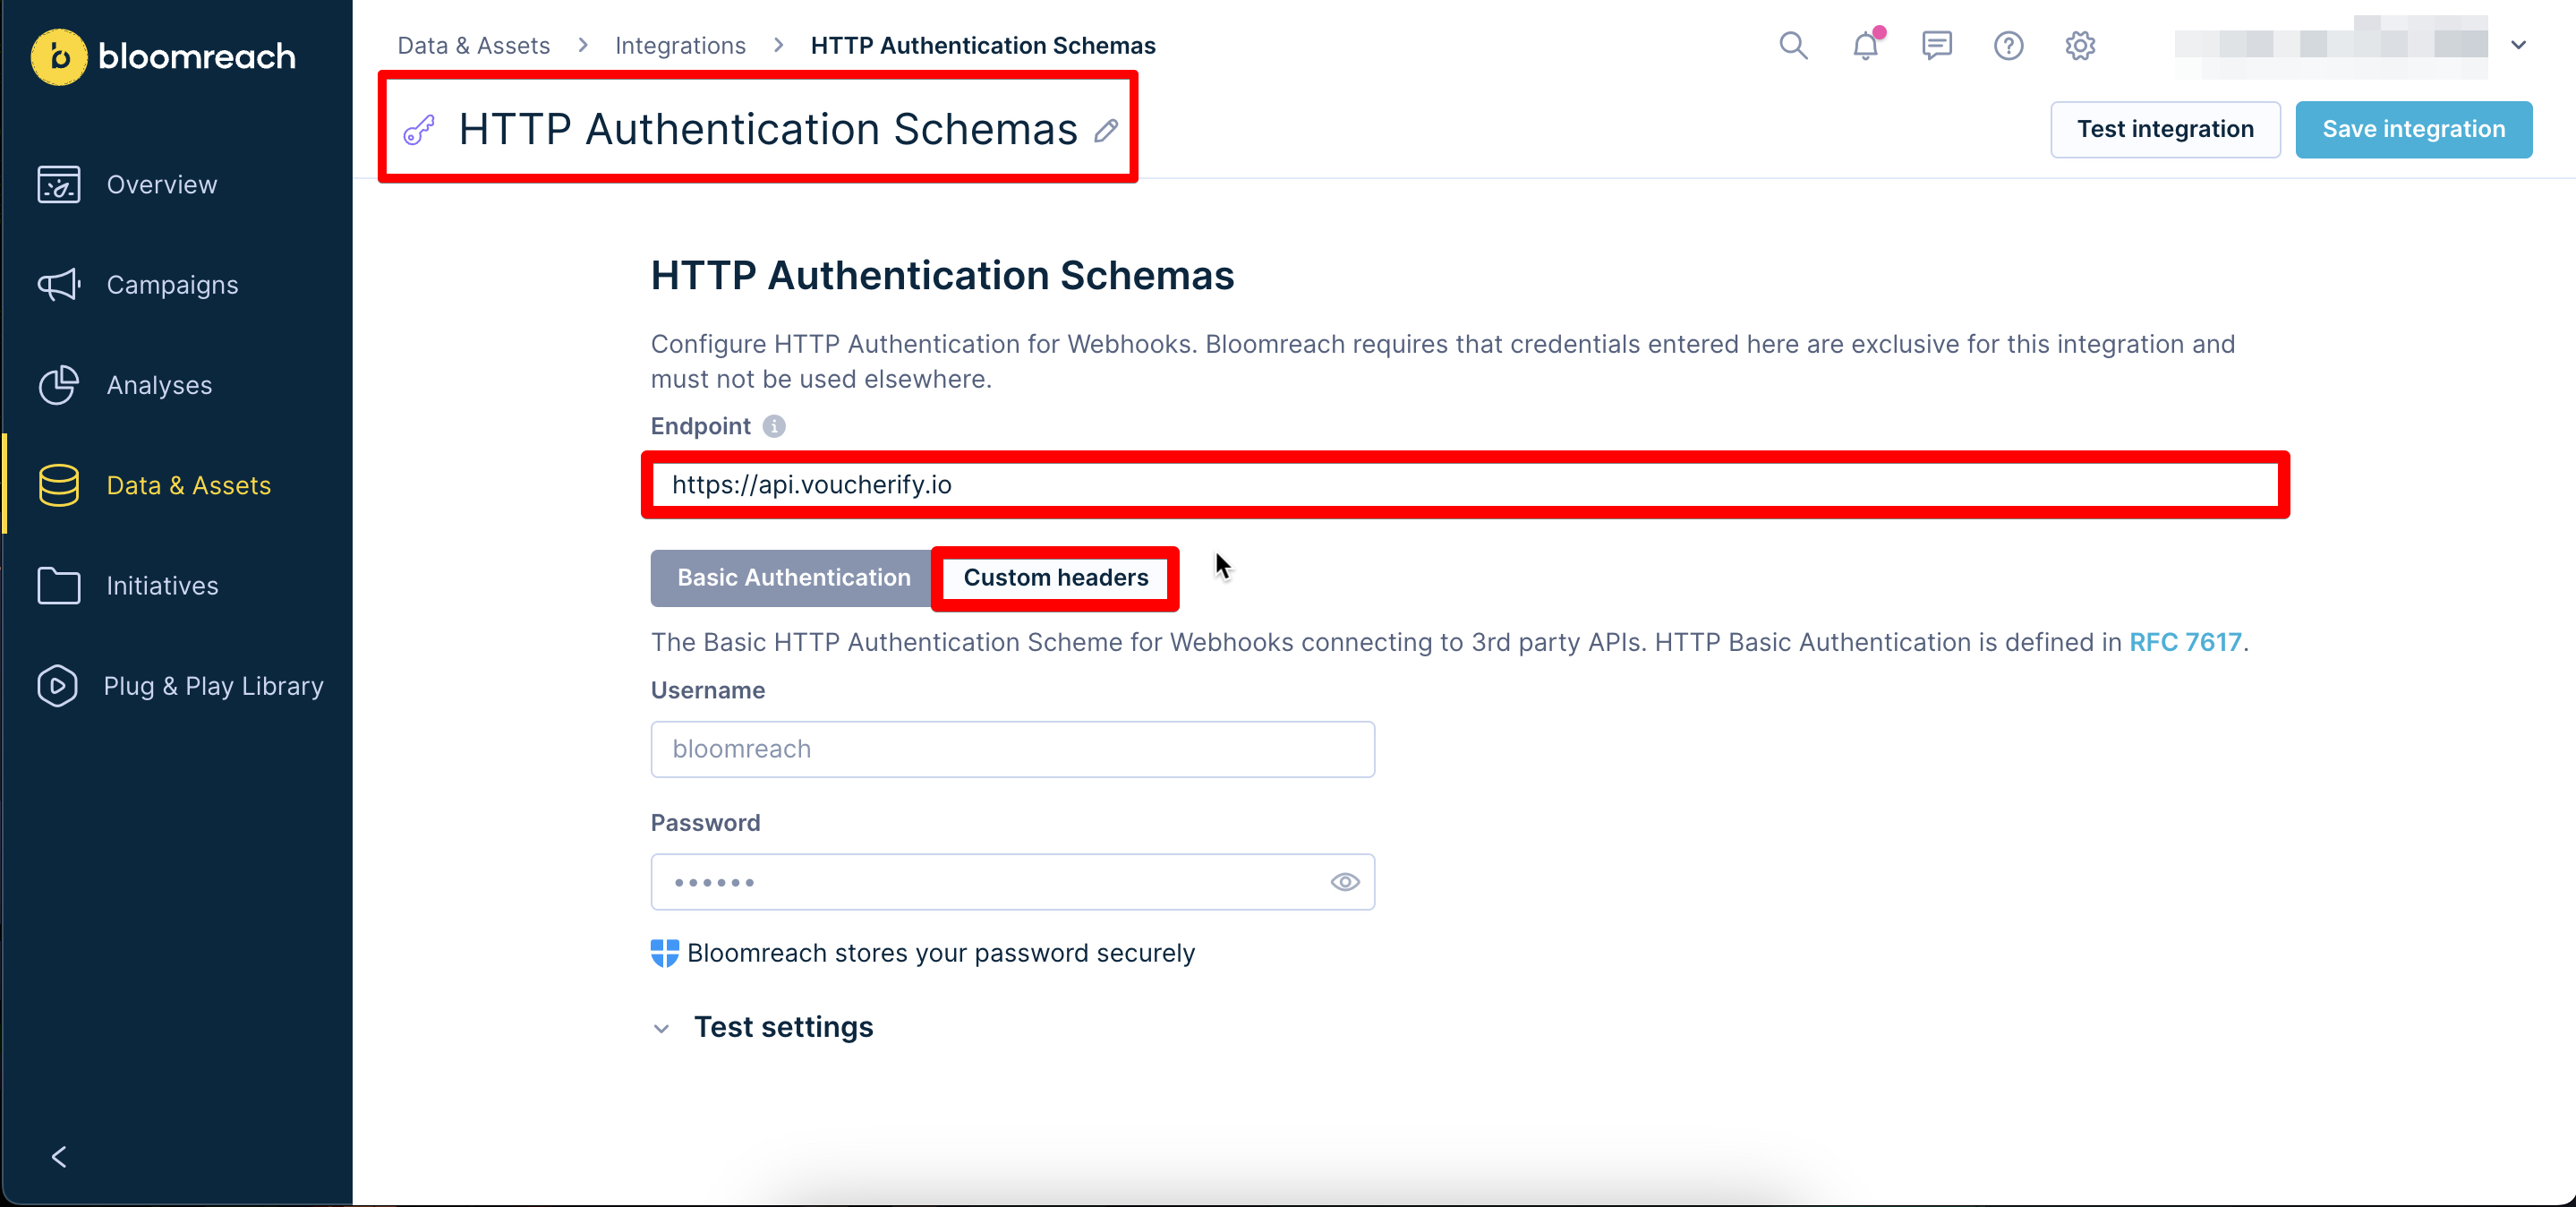
- In the Endpoint field, enter the Voucherify API base URL. The base URL differs based on your area.
- Use
<https://api.voucherify.io>for Europe - Use
<https://us1.api.voucherify.io/>for USA - Use
<https://as1.api.voucherify.io>for Asia
- Name the integration "VoucherifyAuthenticationGeneral" and press Custom headers.
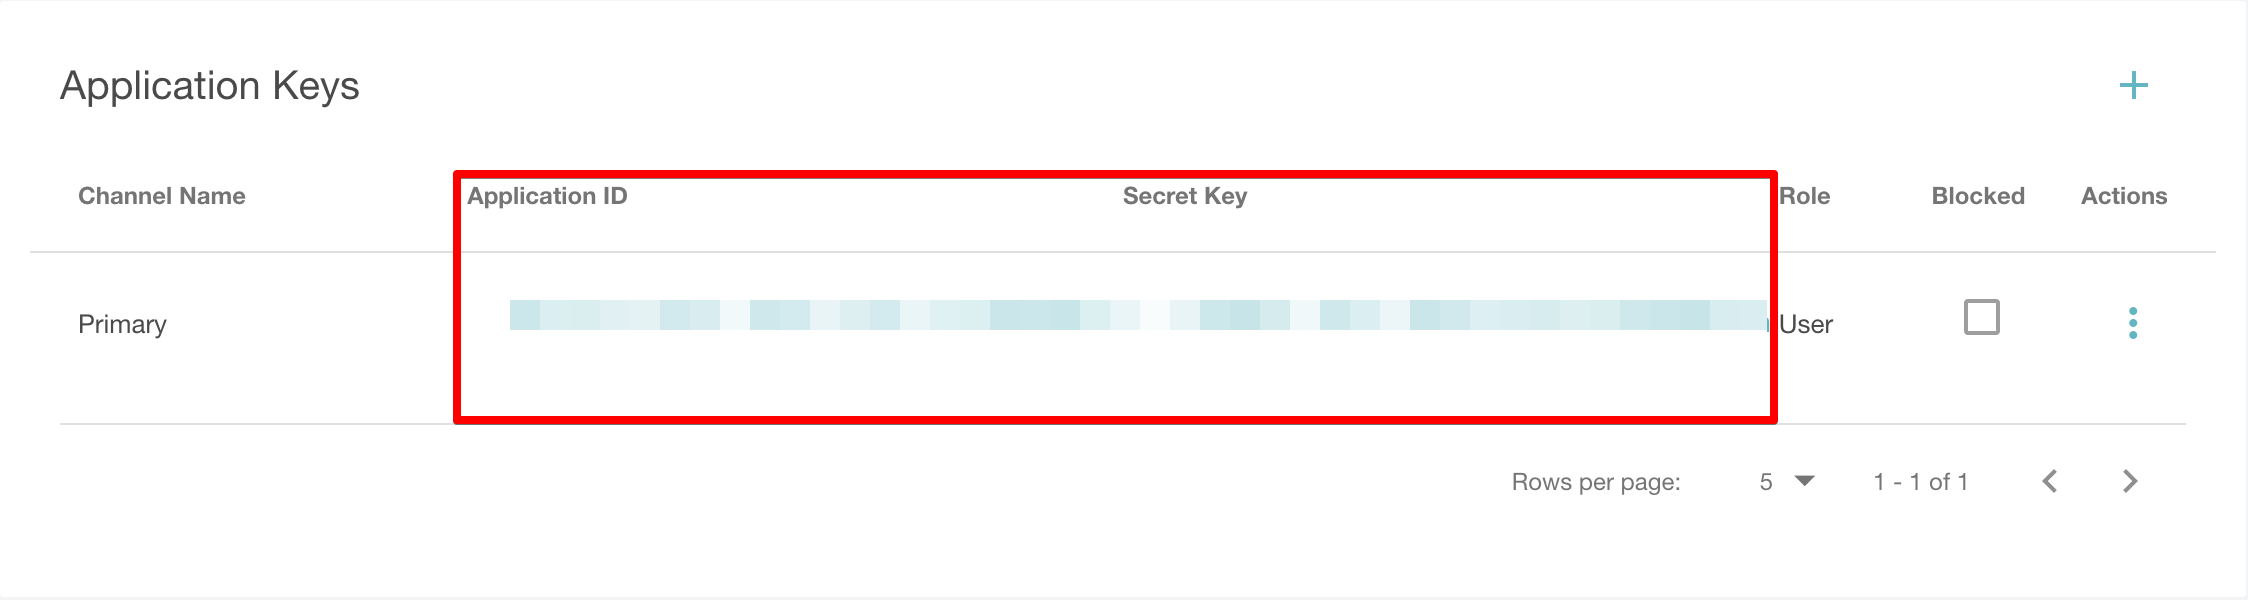
- Go to your Voucherify project.
- Press Your Project Name > Project Settings. Scroll down to Application Keys and copy the Application ID and Secret Key.
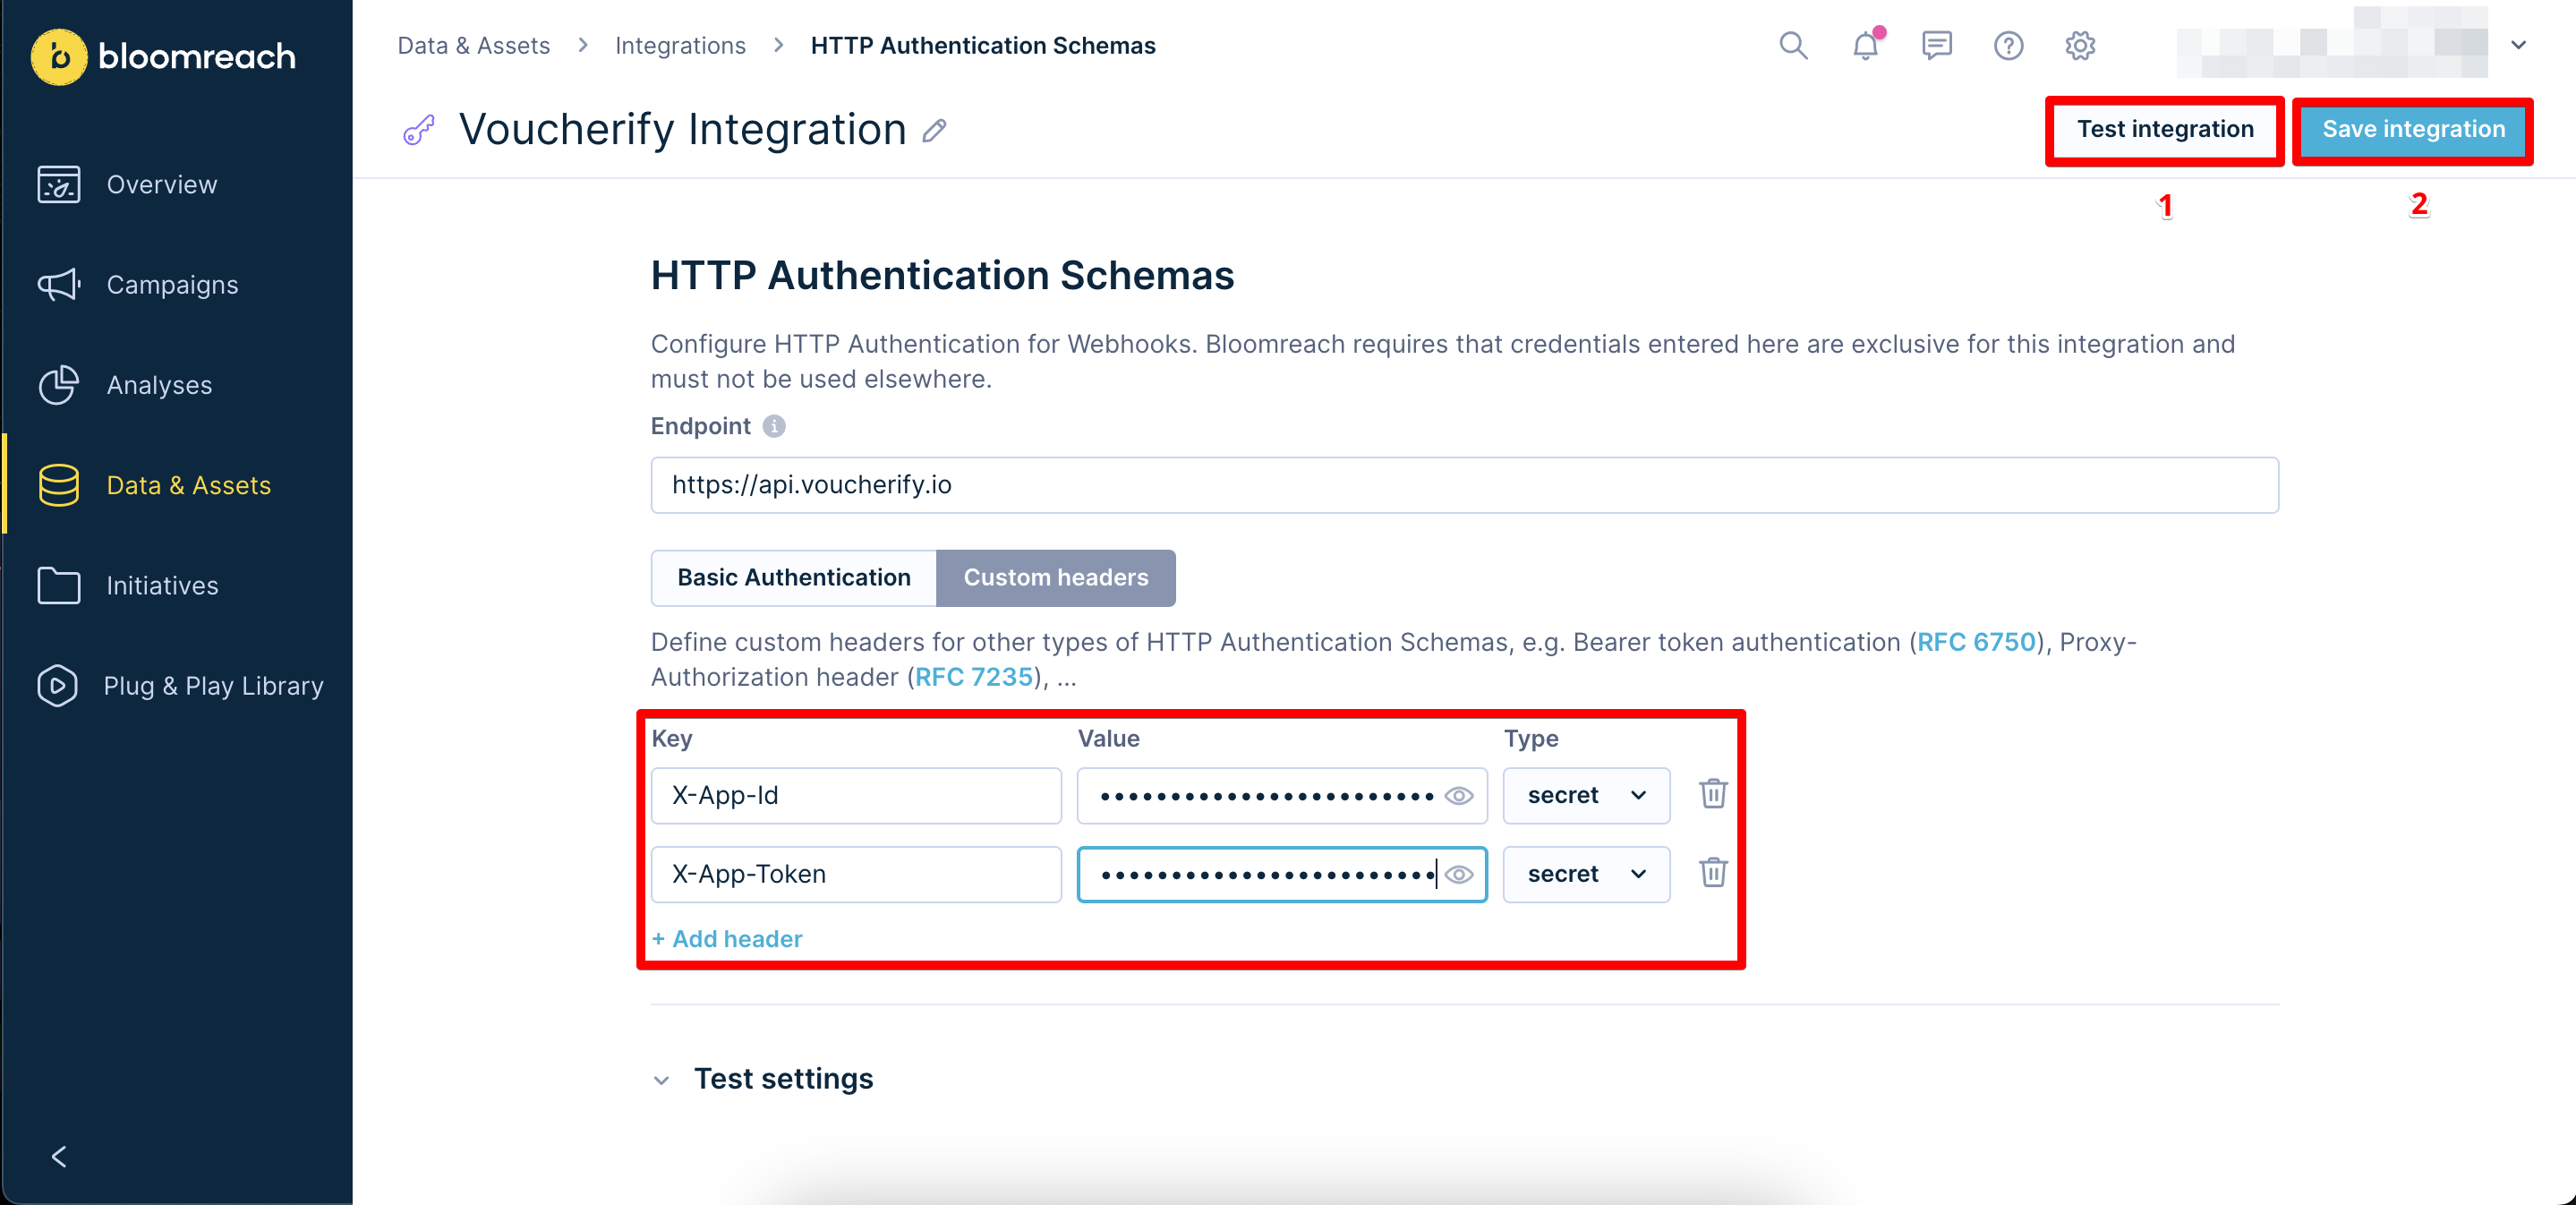
- In Bloomreach Engagement, set the first key to
X-App-Idand paste the Application ID value. - Press Add header.
- Set the second key to
X-App-Tokenand paste the Secret Key value. - Press Test integration. If the authentication is successful, press Save integration.
2. Generate Bloomreach API keys
The integration moves data from Voucherify to Bloomreach Engagement. Bloomreach Engagement associates these events with customers. This association uses new Voucherify information to update customer parameters. It also initiates event-based messaging. Lastly, it improves Bloomreach's segmentation options.
To use Voucherify with Bloomreach Engagement you first need to generate API Keys.
- In Bloomreach Engagement, go to Settings > Project Settings.
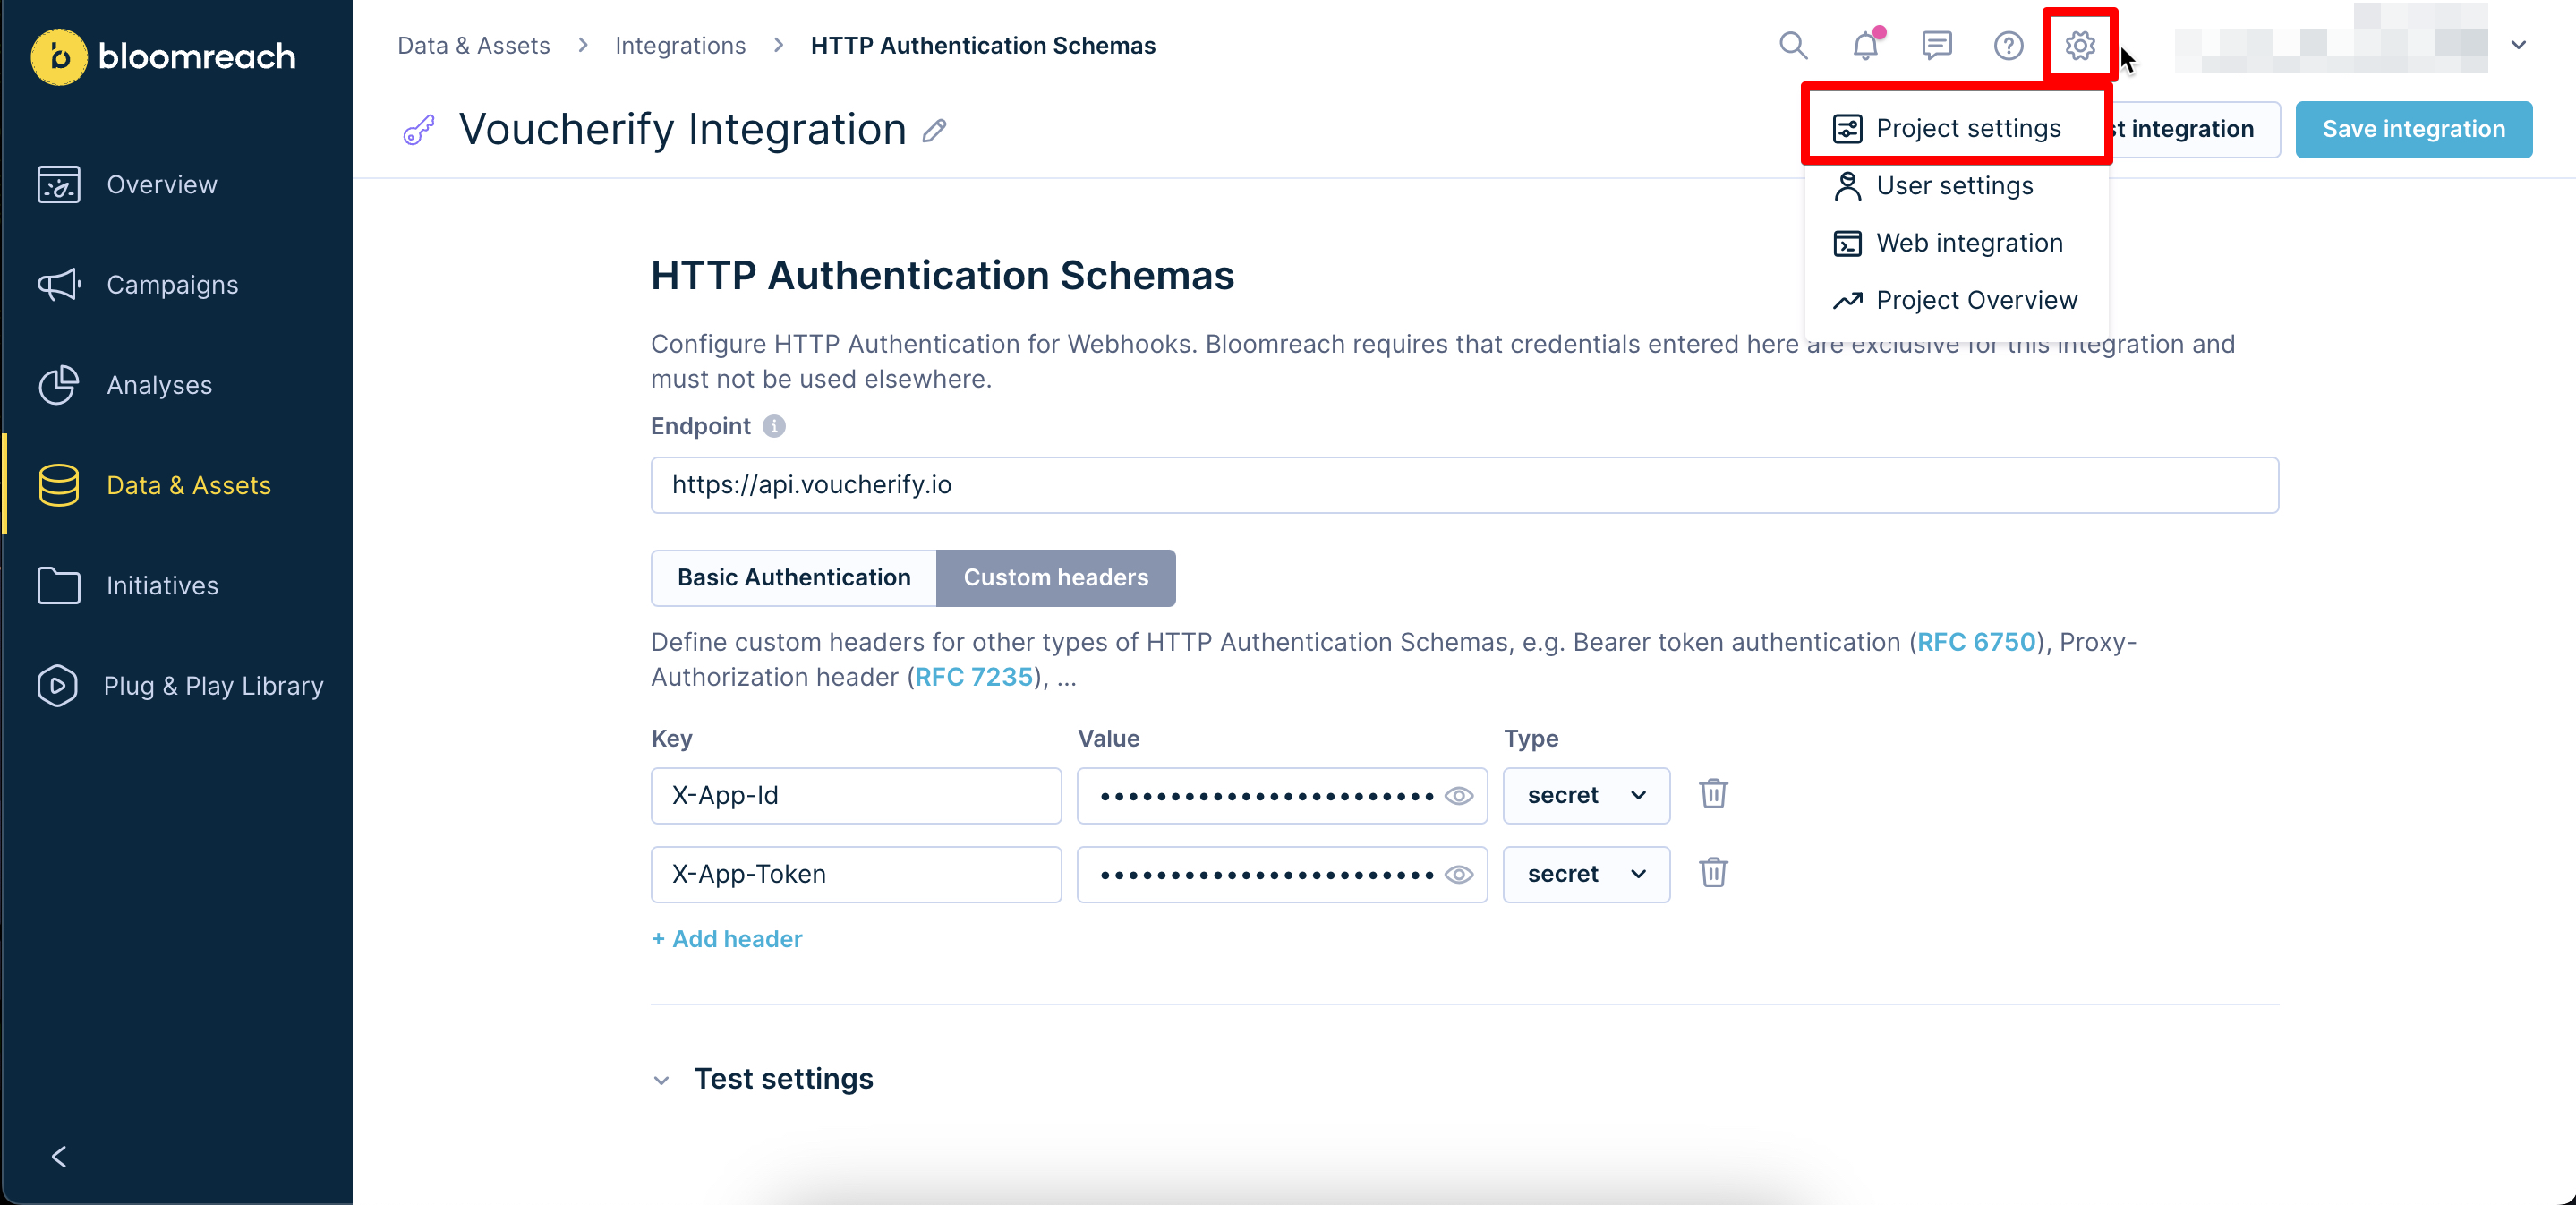
- Under Project, go to Access management > API.
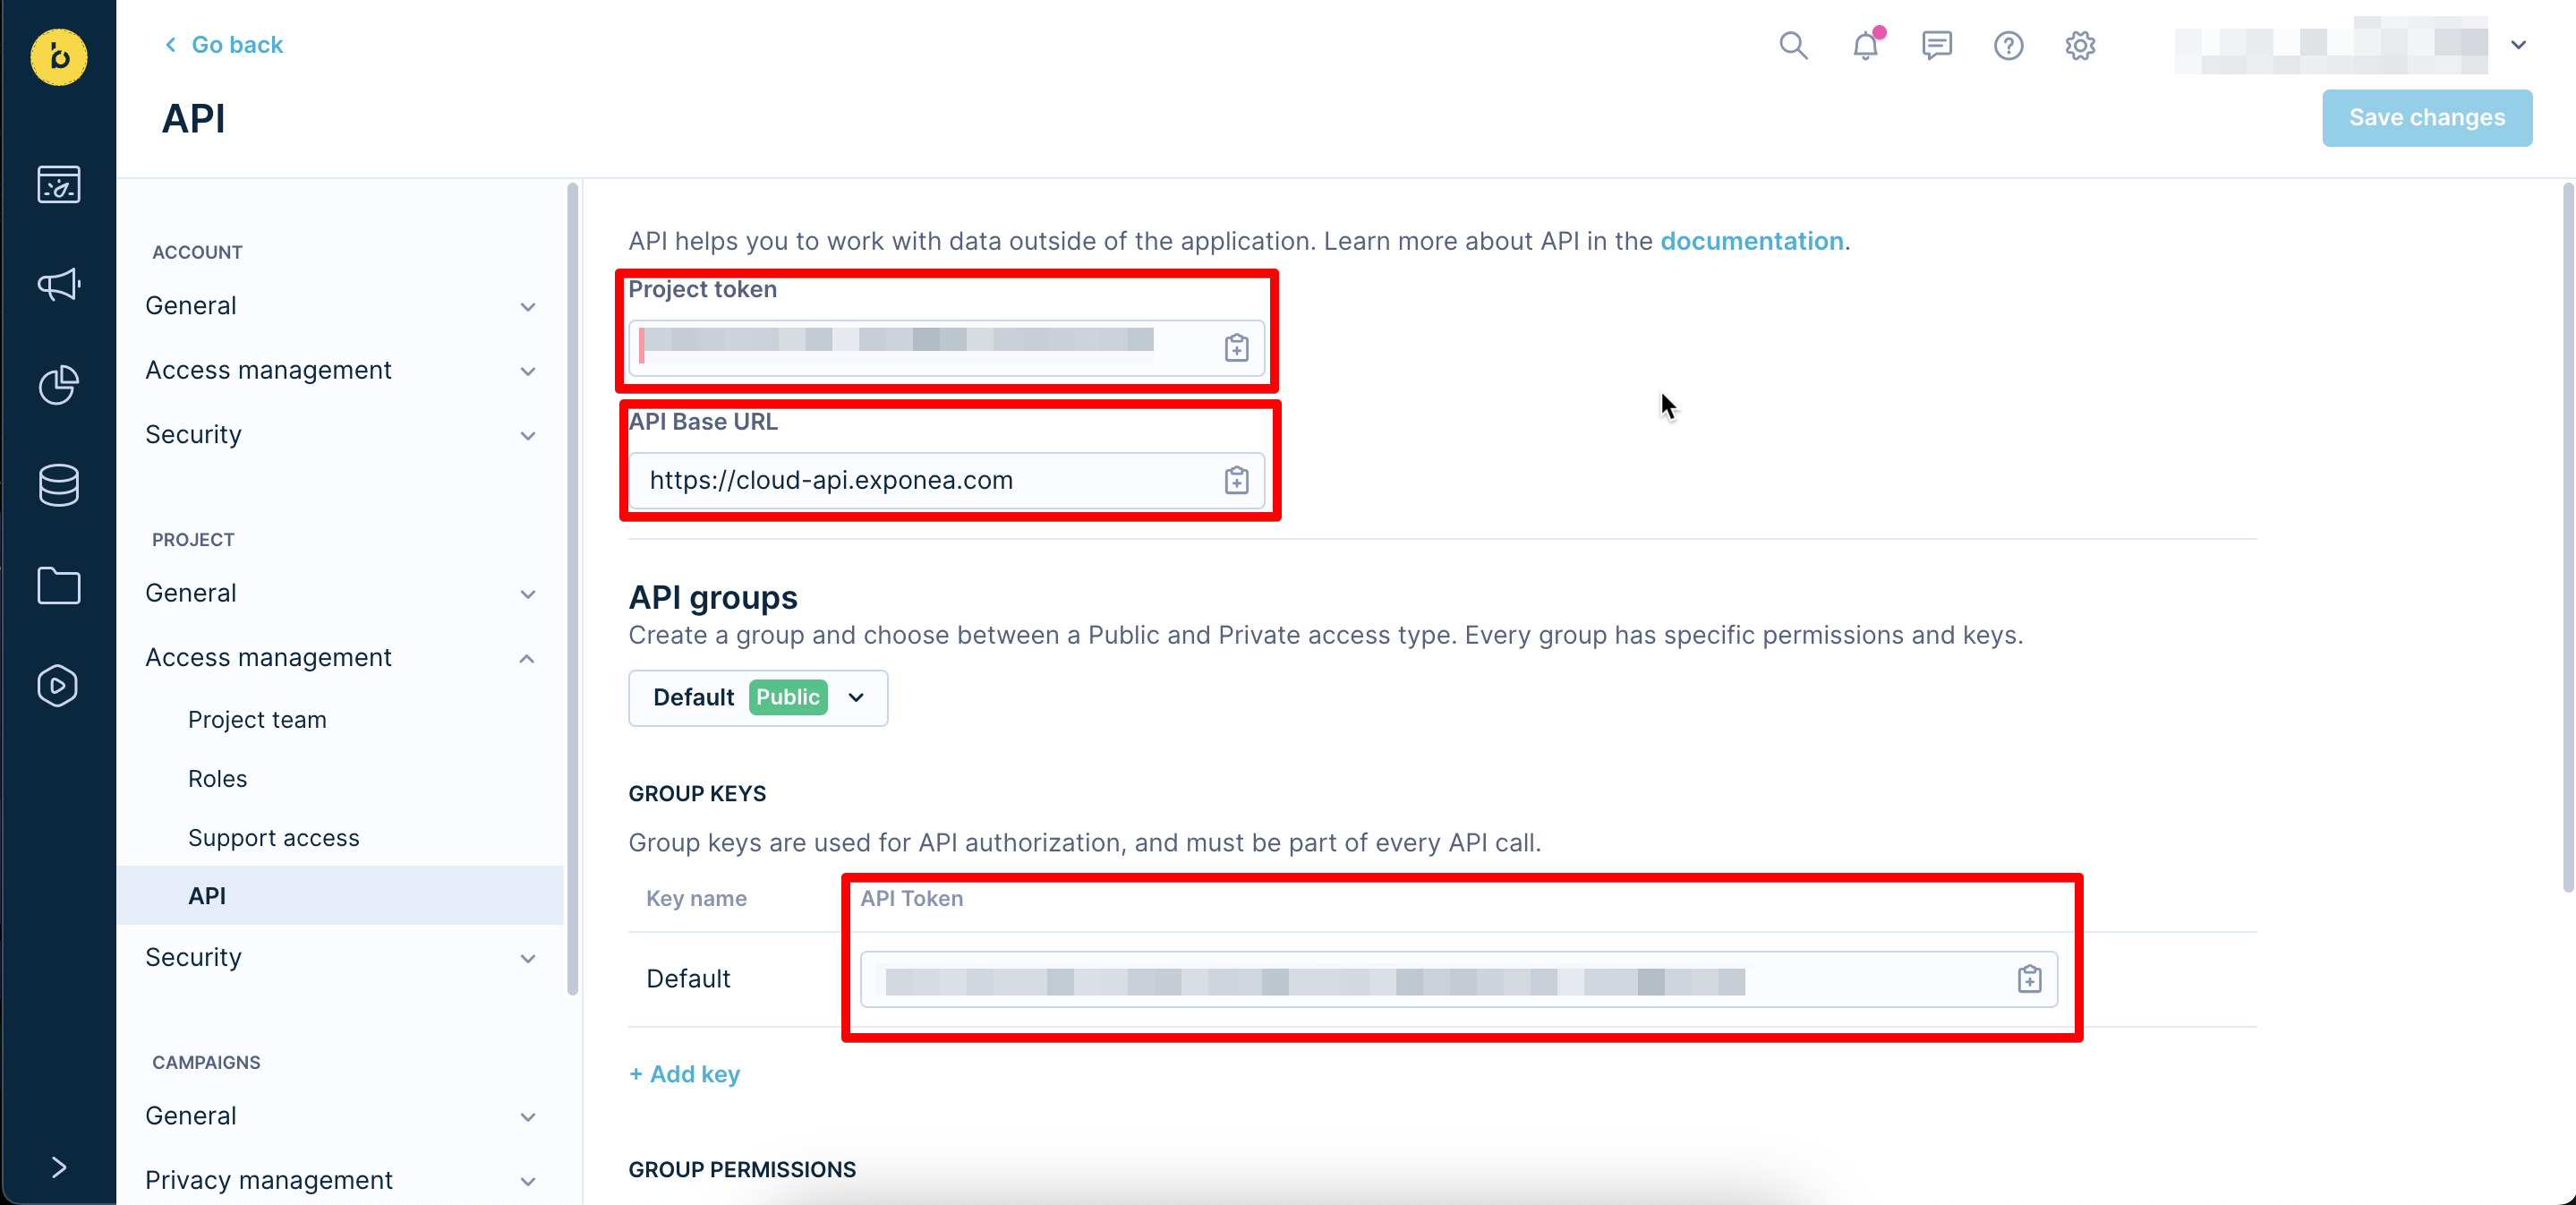
- Save your Project Token and API Base URL.
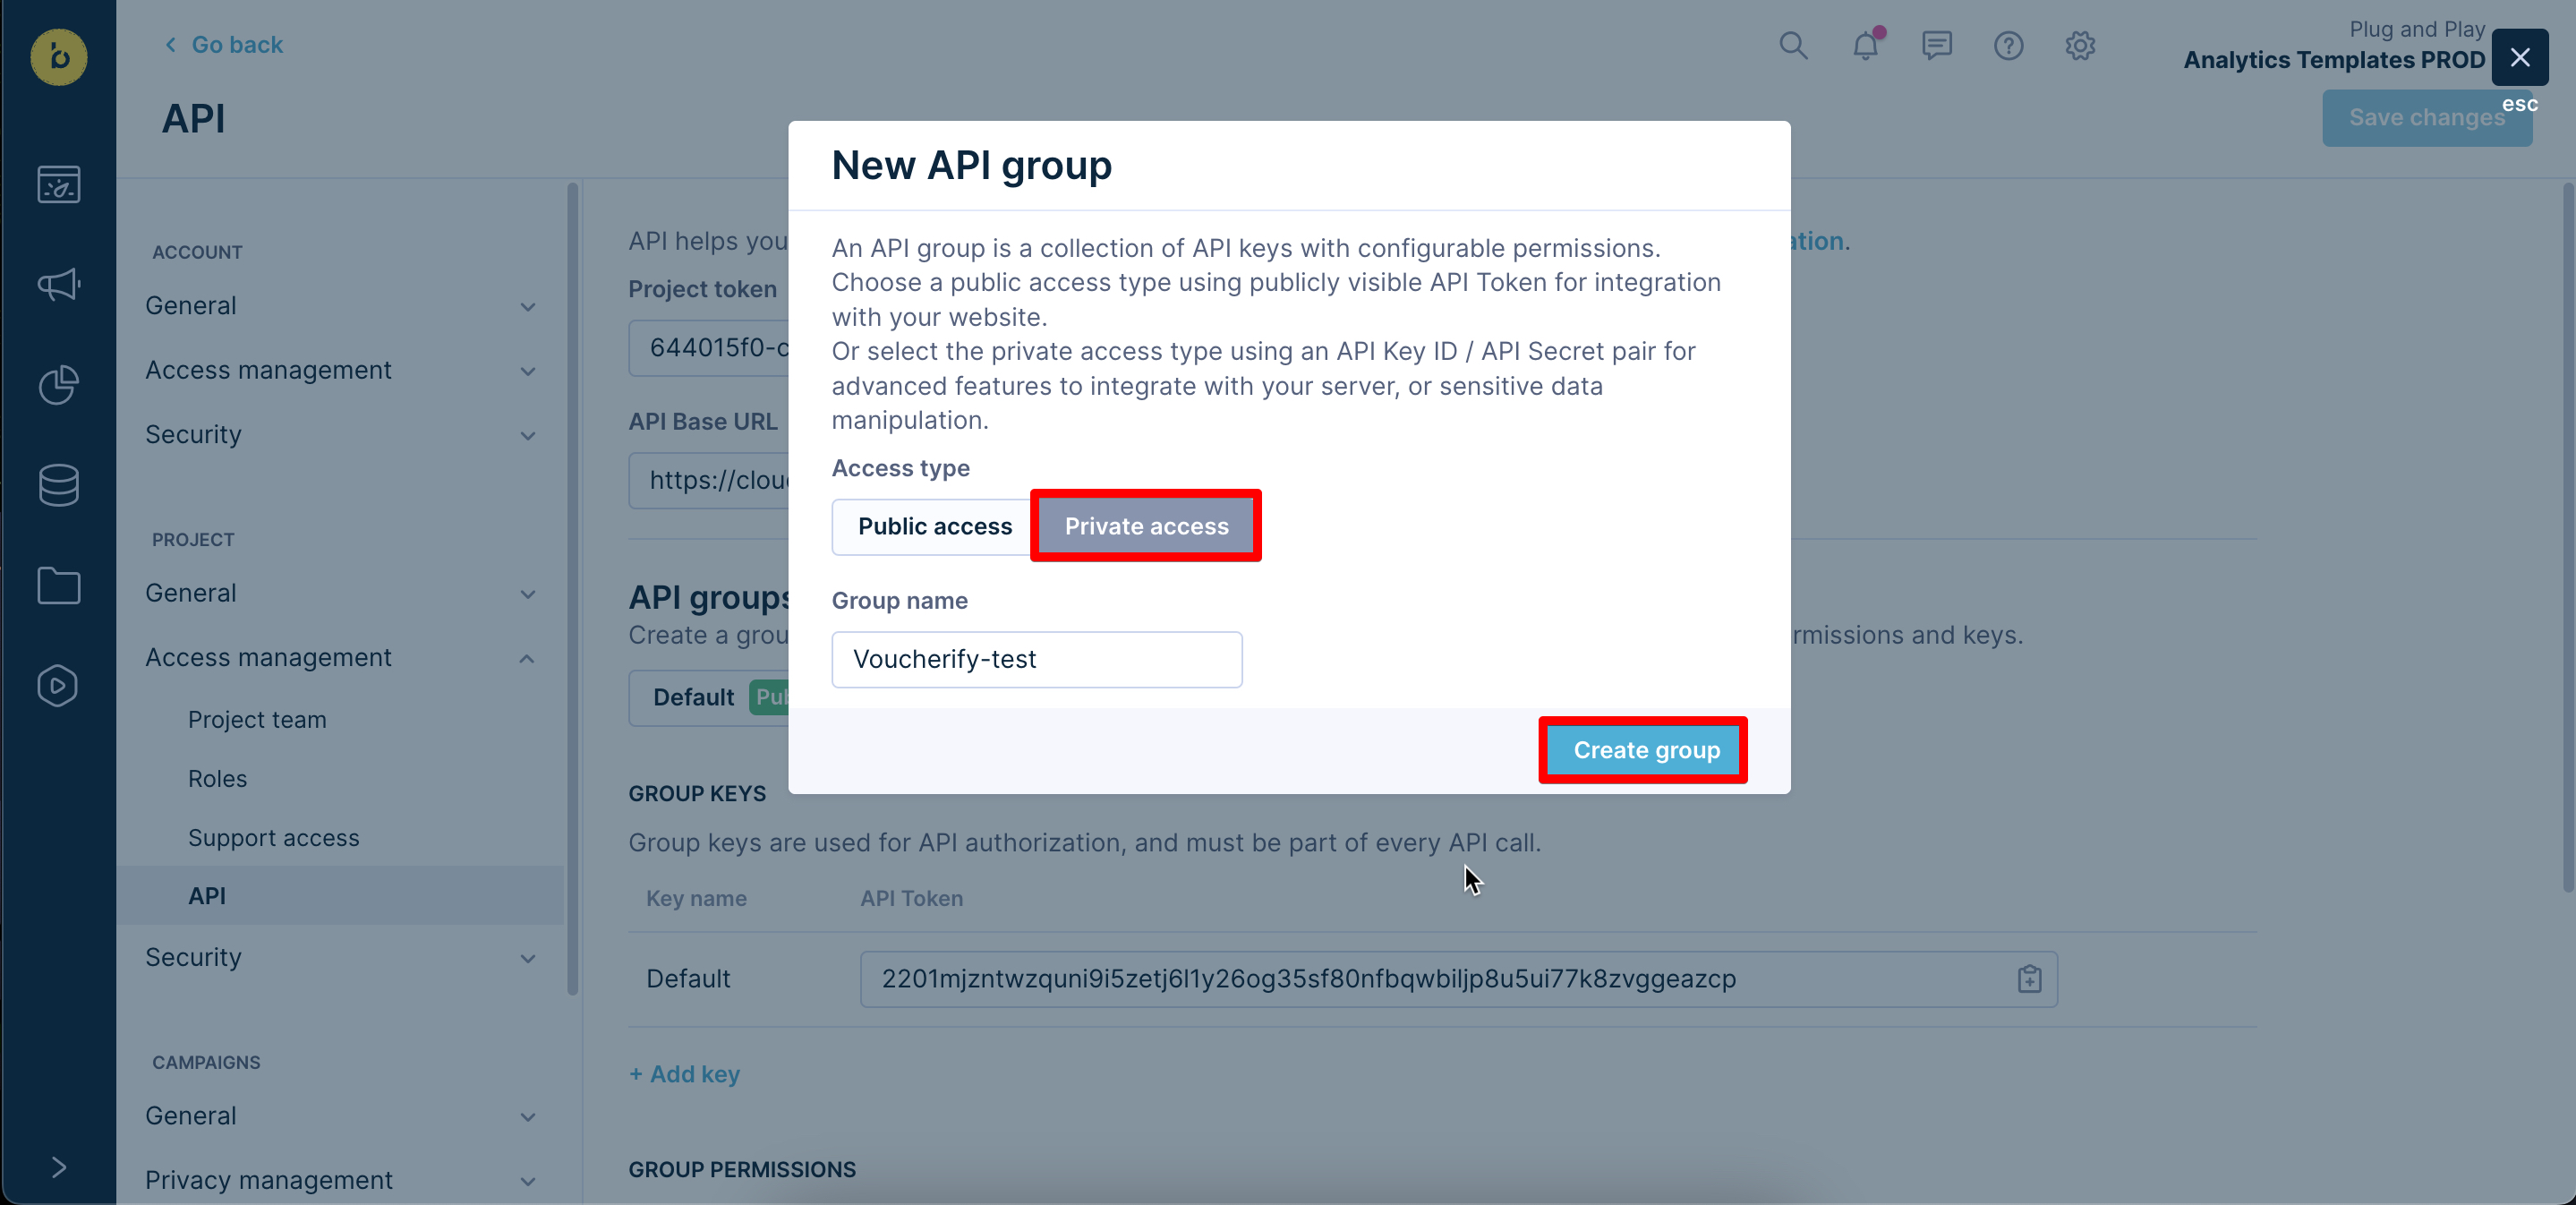
- Create a new API group with Private access. Set the name which will help you distinguish this permission set, for example Voucherify.
- Press Create group.
- Save your API Secret Key. You will not be able to see it again.
- Save the API Key ID from the newly created group - usually named Default
- Scroll down to Group Permissions > Events. Assign permission for events that you want to process through the API.
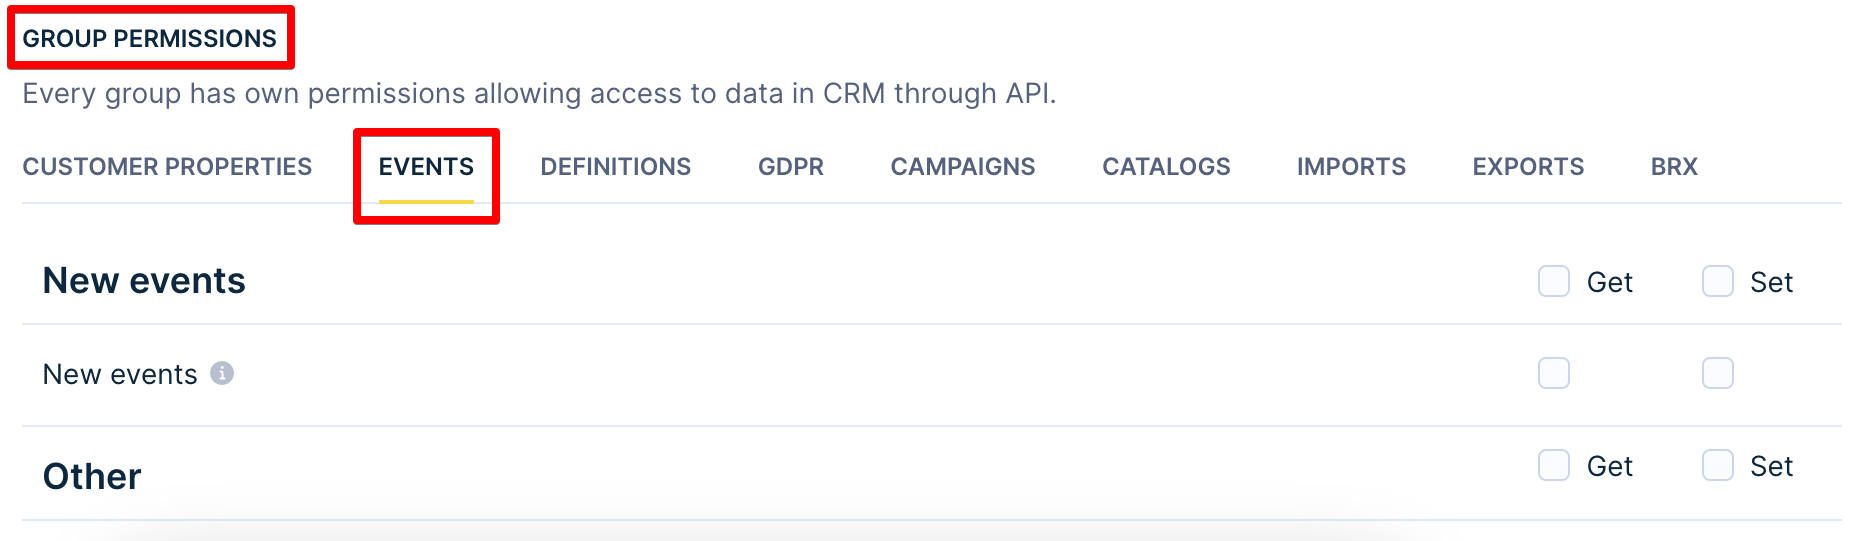
- (Optional) If you don’t have defined events or you want to allow processing of all new events sent by Voucherify, check the New Events checkbox in the Set column
- Press Save Changes.
3. Configure Bloomreach Engagement in Voucherify
To activate the integration between Bloomreach and Voucherify, provide specific details in Voucherify's integration section. Follow these steps to set up the integration:
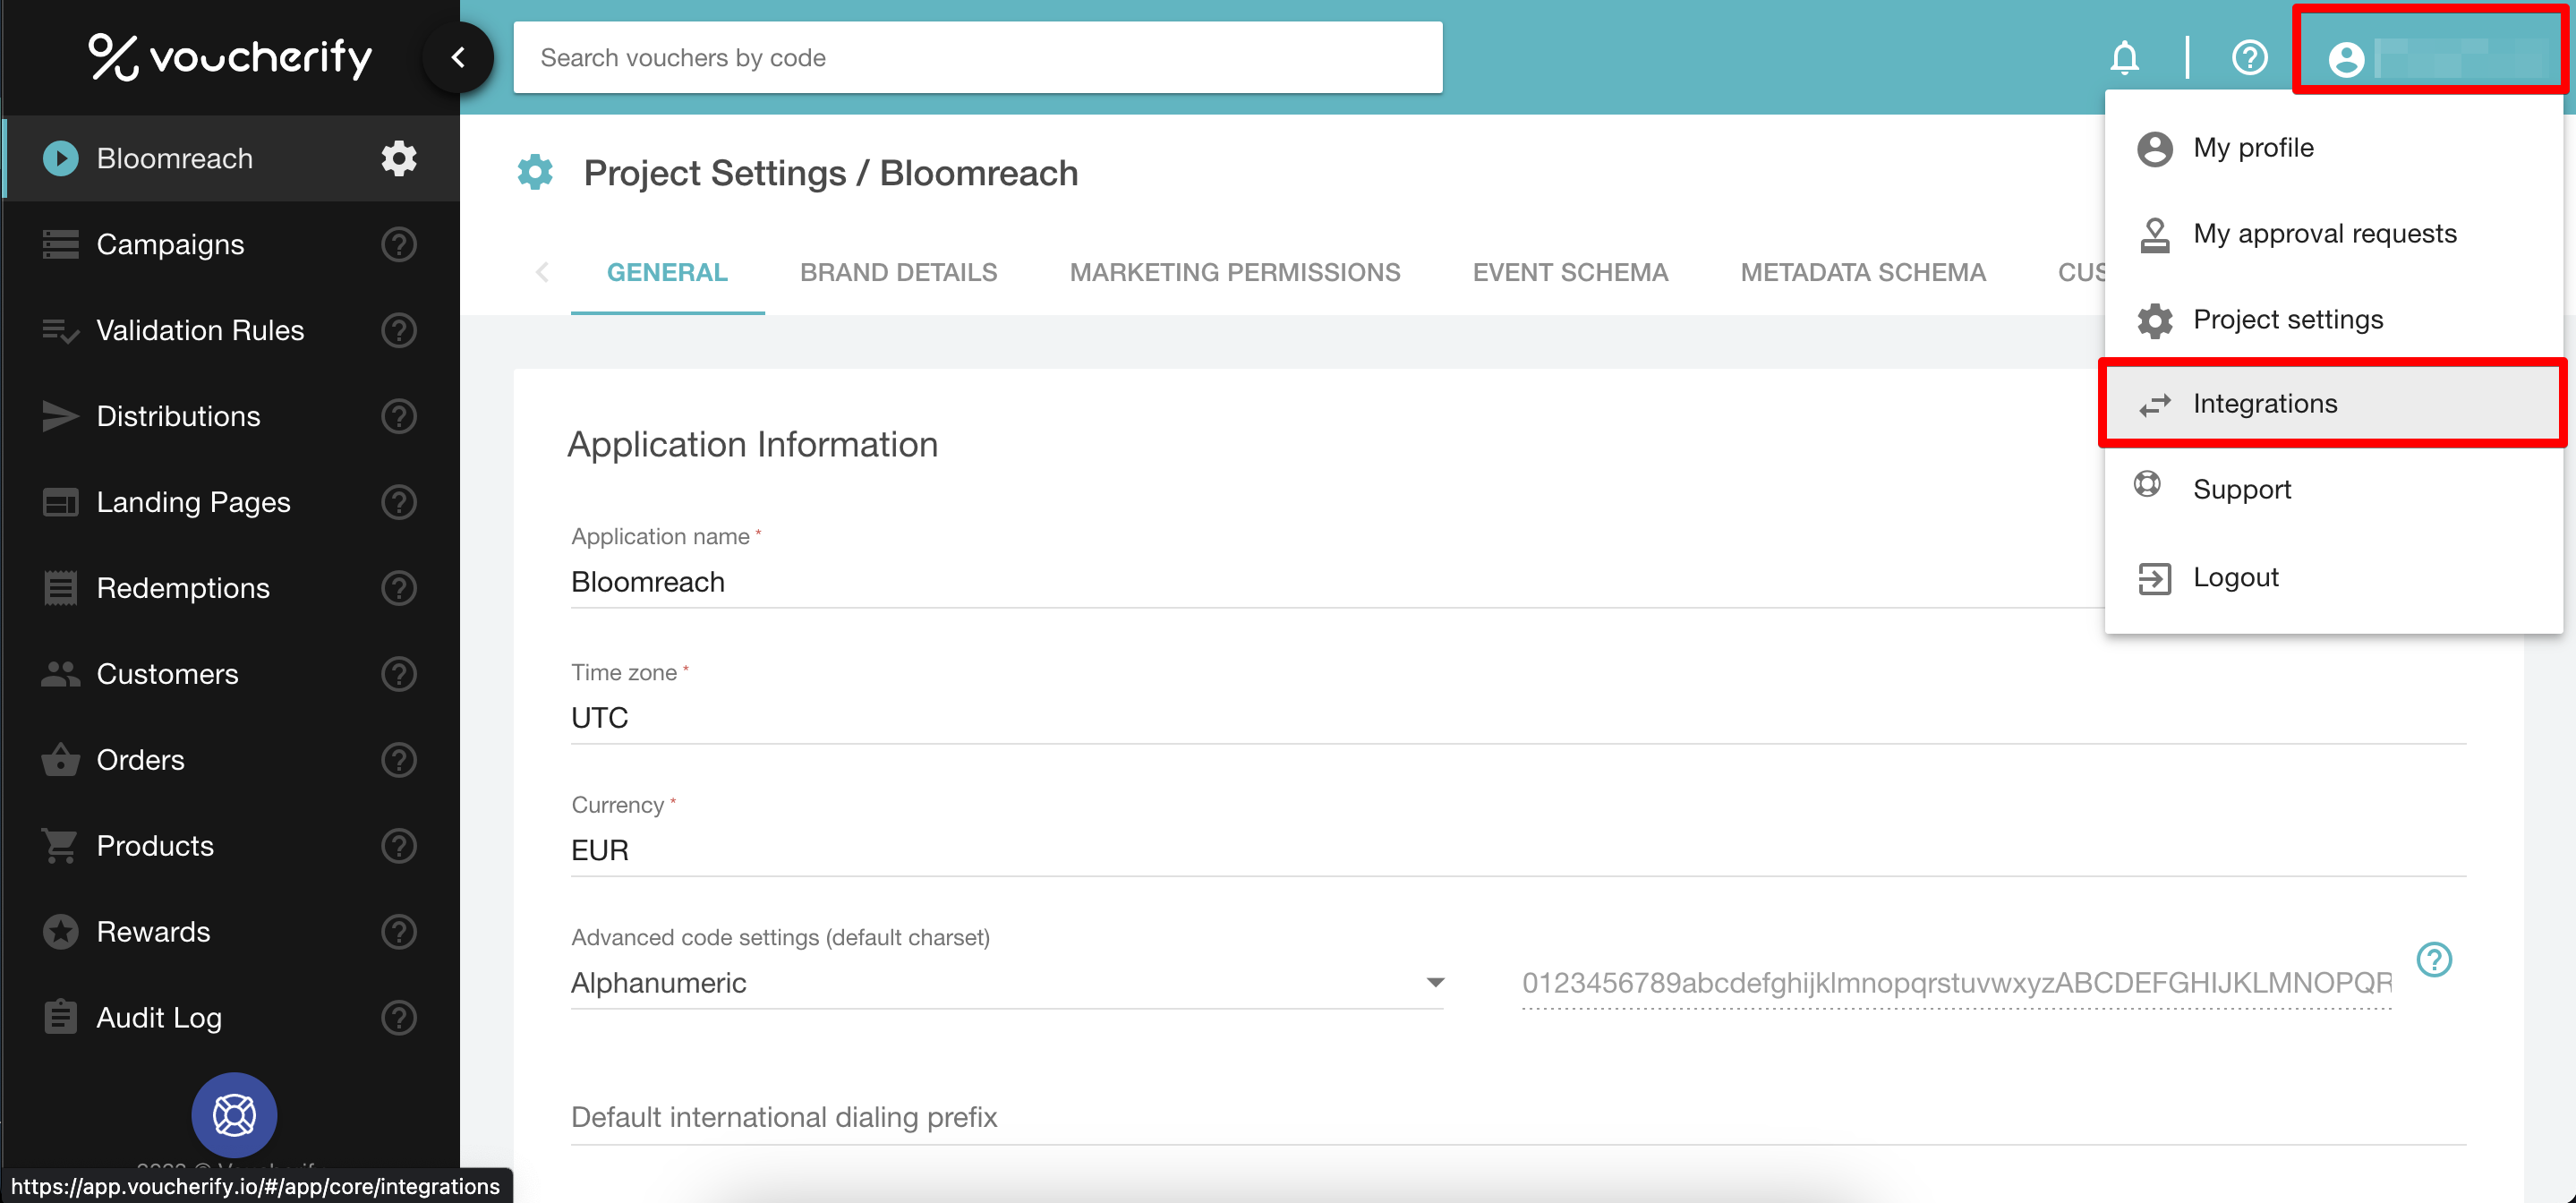
- In Voucherify, go to Profile > Integrations.
- Scroll to Bloomreach Engagement and press Connect.
- The following items are displayed in the basic menu view:

- Bloomreach Engagement Main Hard ID – Bloomreach Engagement customers use various IDs to identify customers. Select which Customer's Hard ID will serve as the source_id in Voucherify
- Send events – This instructs Voucherify to send Voucherify events tied to customers to Bloomreach Engagement. If activated, provide Bloomreach Engagement API keys below
- Sync Voucherify Customer's ID – If enabled, the Voucherify Customer’s ID will be stored in Bloomreach Engagement as a Hard or Soft ID
The Bloomreach Engagement full menu view includes the following fields:
- Bloomreach Hard/Soft ID for storing Voucherify Customer's ID – Access to this setting is available only when 'Sync Voucherify Customer's ID' is enabled. It defines the Hard or Soft ID that stores the Voucherify customer ID.
- Bloomreach Engagement API keys – If 'Send events' or 'Sync Voucherify Customer's ID' is enabled, you must fill in these fields. Use the Project Token, API base URL, API Key ID, and API Key Secret you created in the previous step in Bloomreach API.
Once the configuration is done, Bloomreach Engagement will receive all customer-related events from Voucherify.
4. Configure Webhook Authentication
Once configured, the webhook authentication allows the transfer of data from Bloomreach to Voucherify. To configure the Bloomreach Engagement webhook authentication:
- Repeat steps 1-3 from the ‘Authenticate the Webhook’ section.
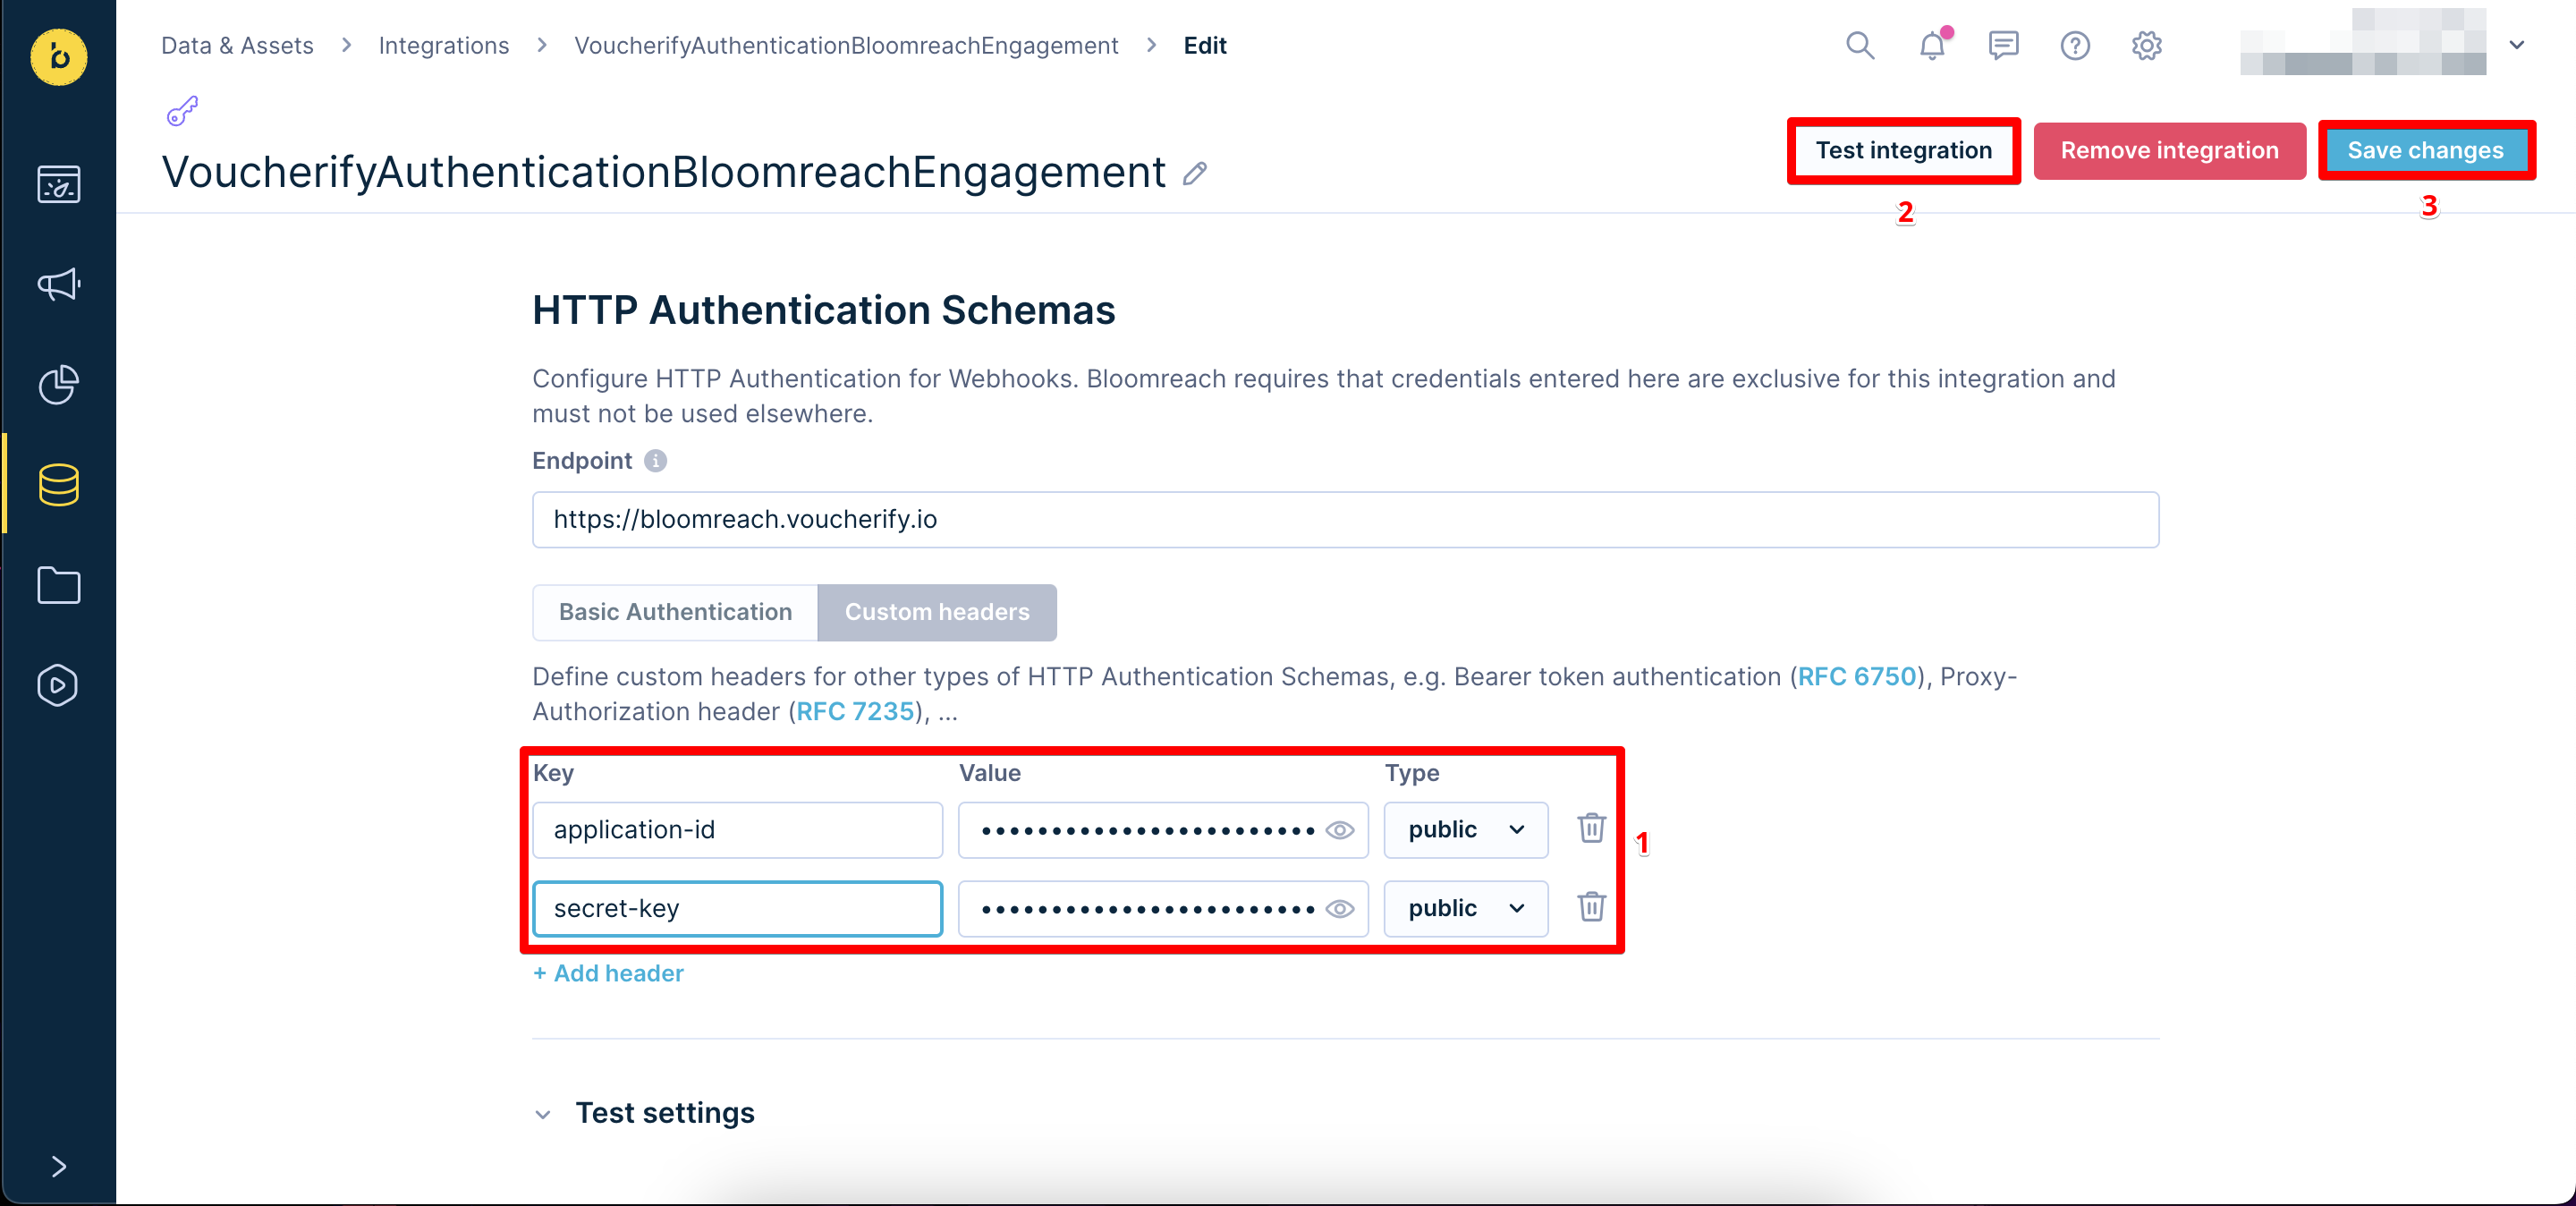
- Name the integration "VoucherifyAuthenticationBloomreachEngagement" and select Custom headers.
WarningThe endpoint URLs are different than in the ‘Authenticate the Webhook’ section.
- Use
<https://bloomreach.voucherify.io>for Europe- Use
<https://us1.bloomreach.voucherify.io>for USA- Use
<https://as1.bloomreach.voucherify.io>for Asia
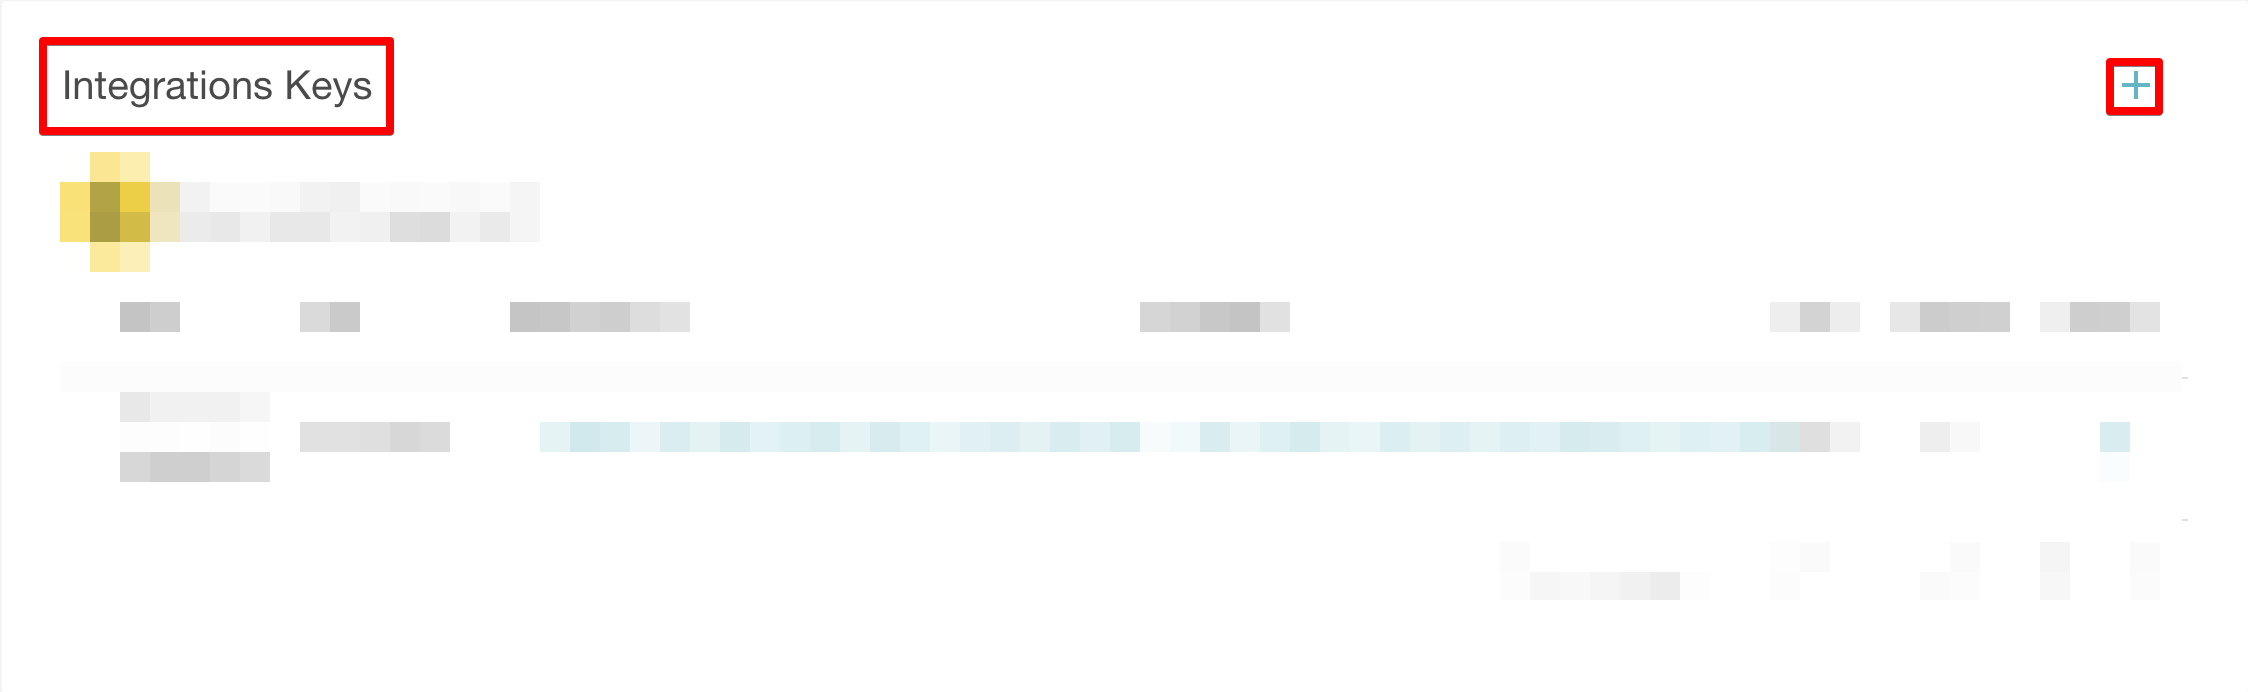
- In Voucherify, go to Your project > Project Settings > General.
- Scroll down to Integration Keys and press +.
- Choose a Name and select the Role.
- Choose Bloomreach Engagement from the Integration drop-down list.
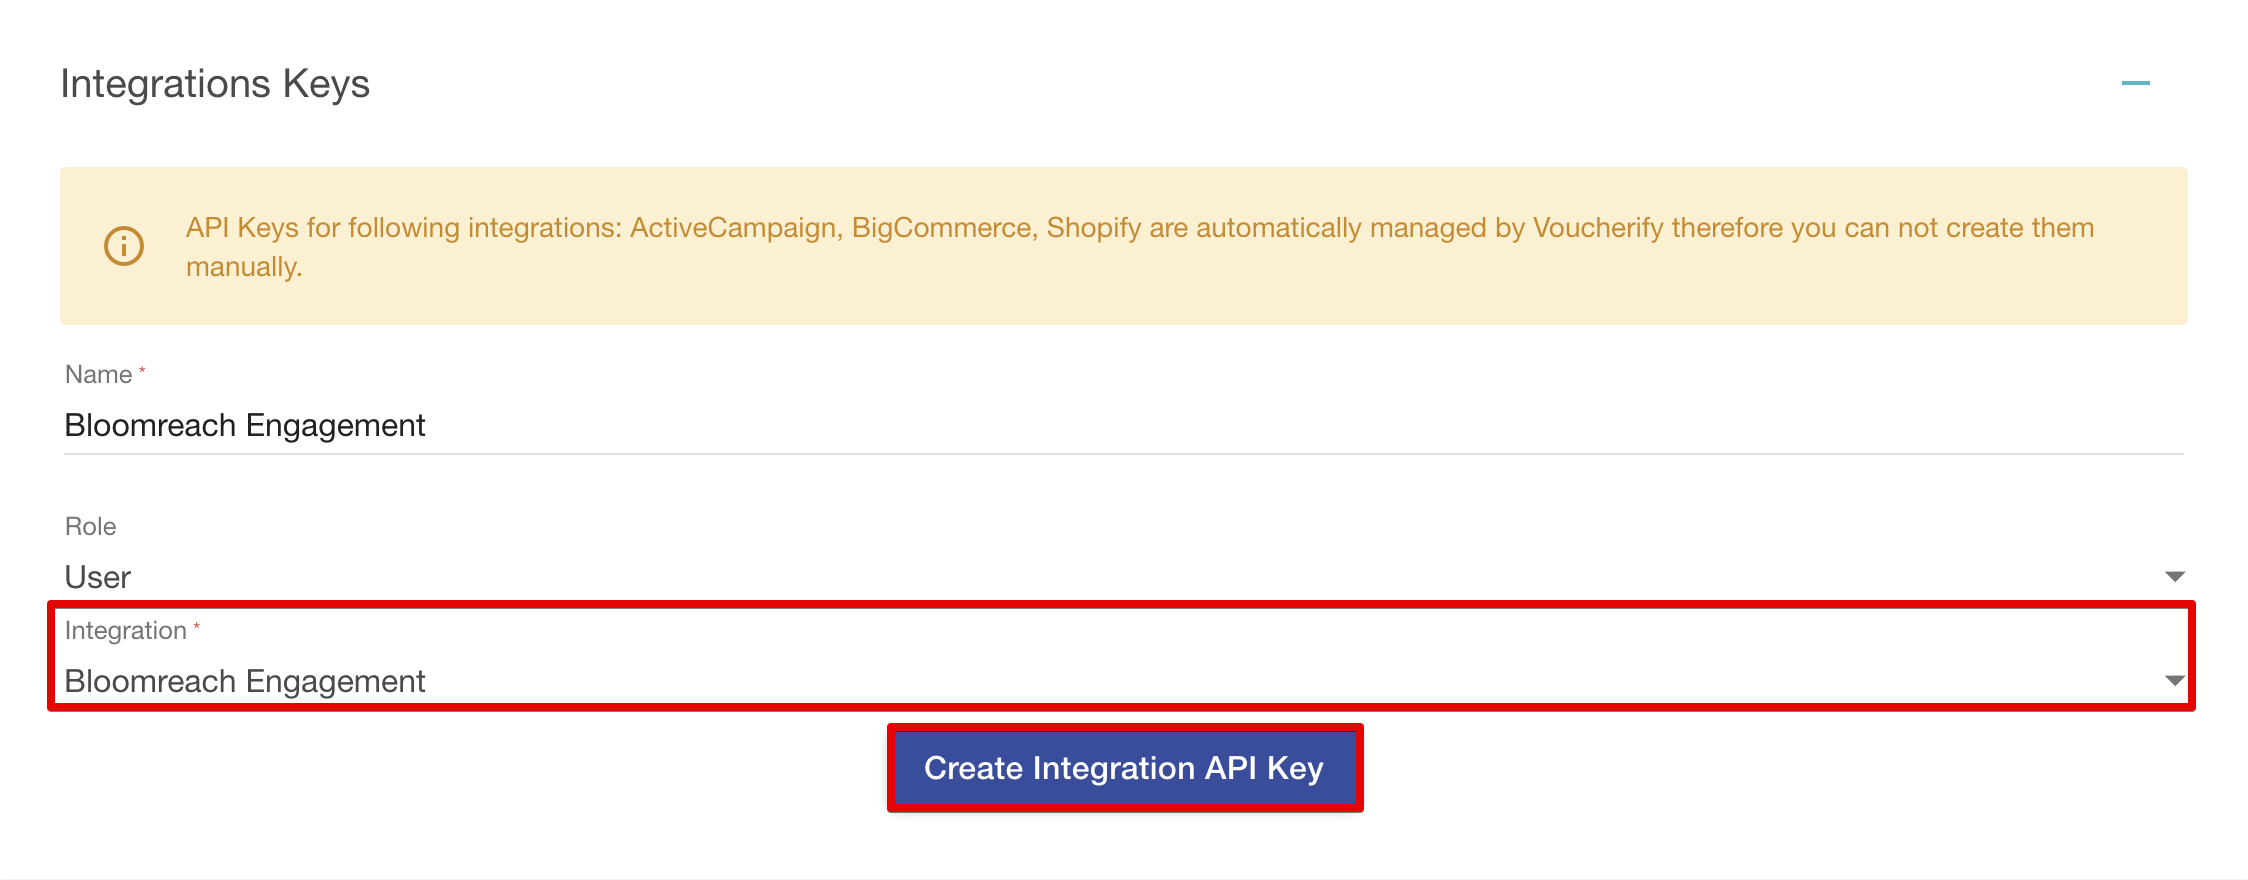
WarningThe Bloomreach Engagement integration is different than Bloomreach.
- Press Create Integration API Key.
- In Bloomreach Engagement, set the first key to
application-idand paste the Application ID value. - Set the second key to
secret-keyand paste the Secret Key value. - Press Test integration. If the authentication is successful, press Save integration.
Use Cases
Assign New Voucher
Note:This preset uses the
<https://api.voucherify.io/v1/publications>endpoint.
The Voucherify API boosts marketing campaigns managed in Bloomreach Scenarios. It allows to send unique coupon codes, customer loyalty points, recent discounts, and more to each customer.
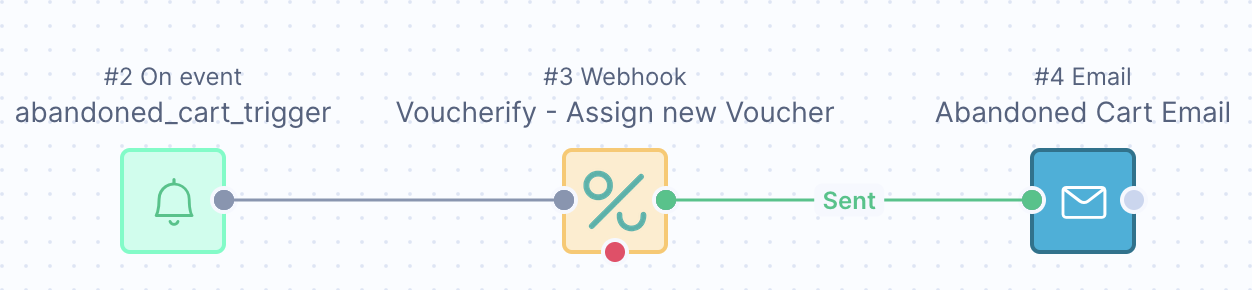
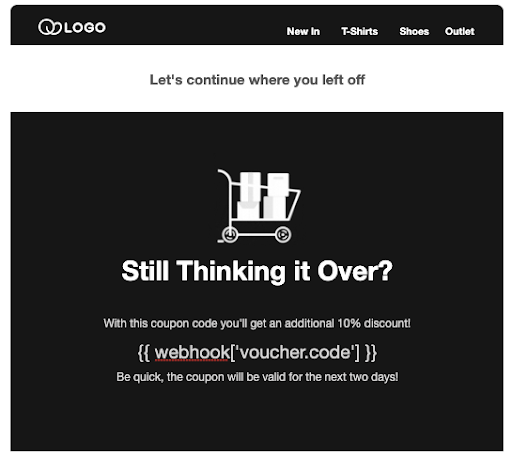
In this scenario, the abandoned cart email includes a Voucherify discount code. This coupon motivates the customer to complete the purchase by providing an extra perk. The scenario contains three parts:
- An On event trigger that will start the process
- A Voucherify - Assign new Voucher preset retrieves a unique customer coupon code from Voucherify
- An email action that sends a message with the allocated voucher code to the customer
Voucherify - Assign new Voucher preset requires the following configuration:
- In Bloomreach Engagement go to your Scenario.
- On the left-hand side go to
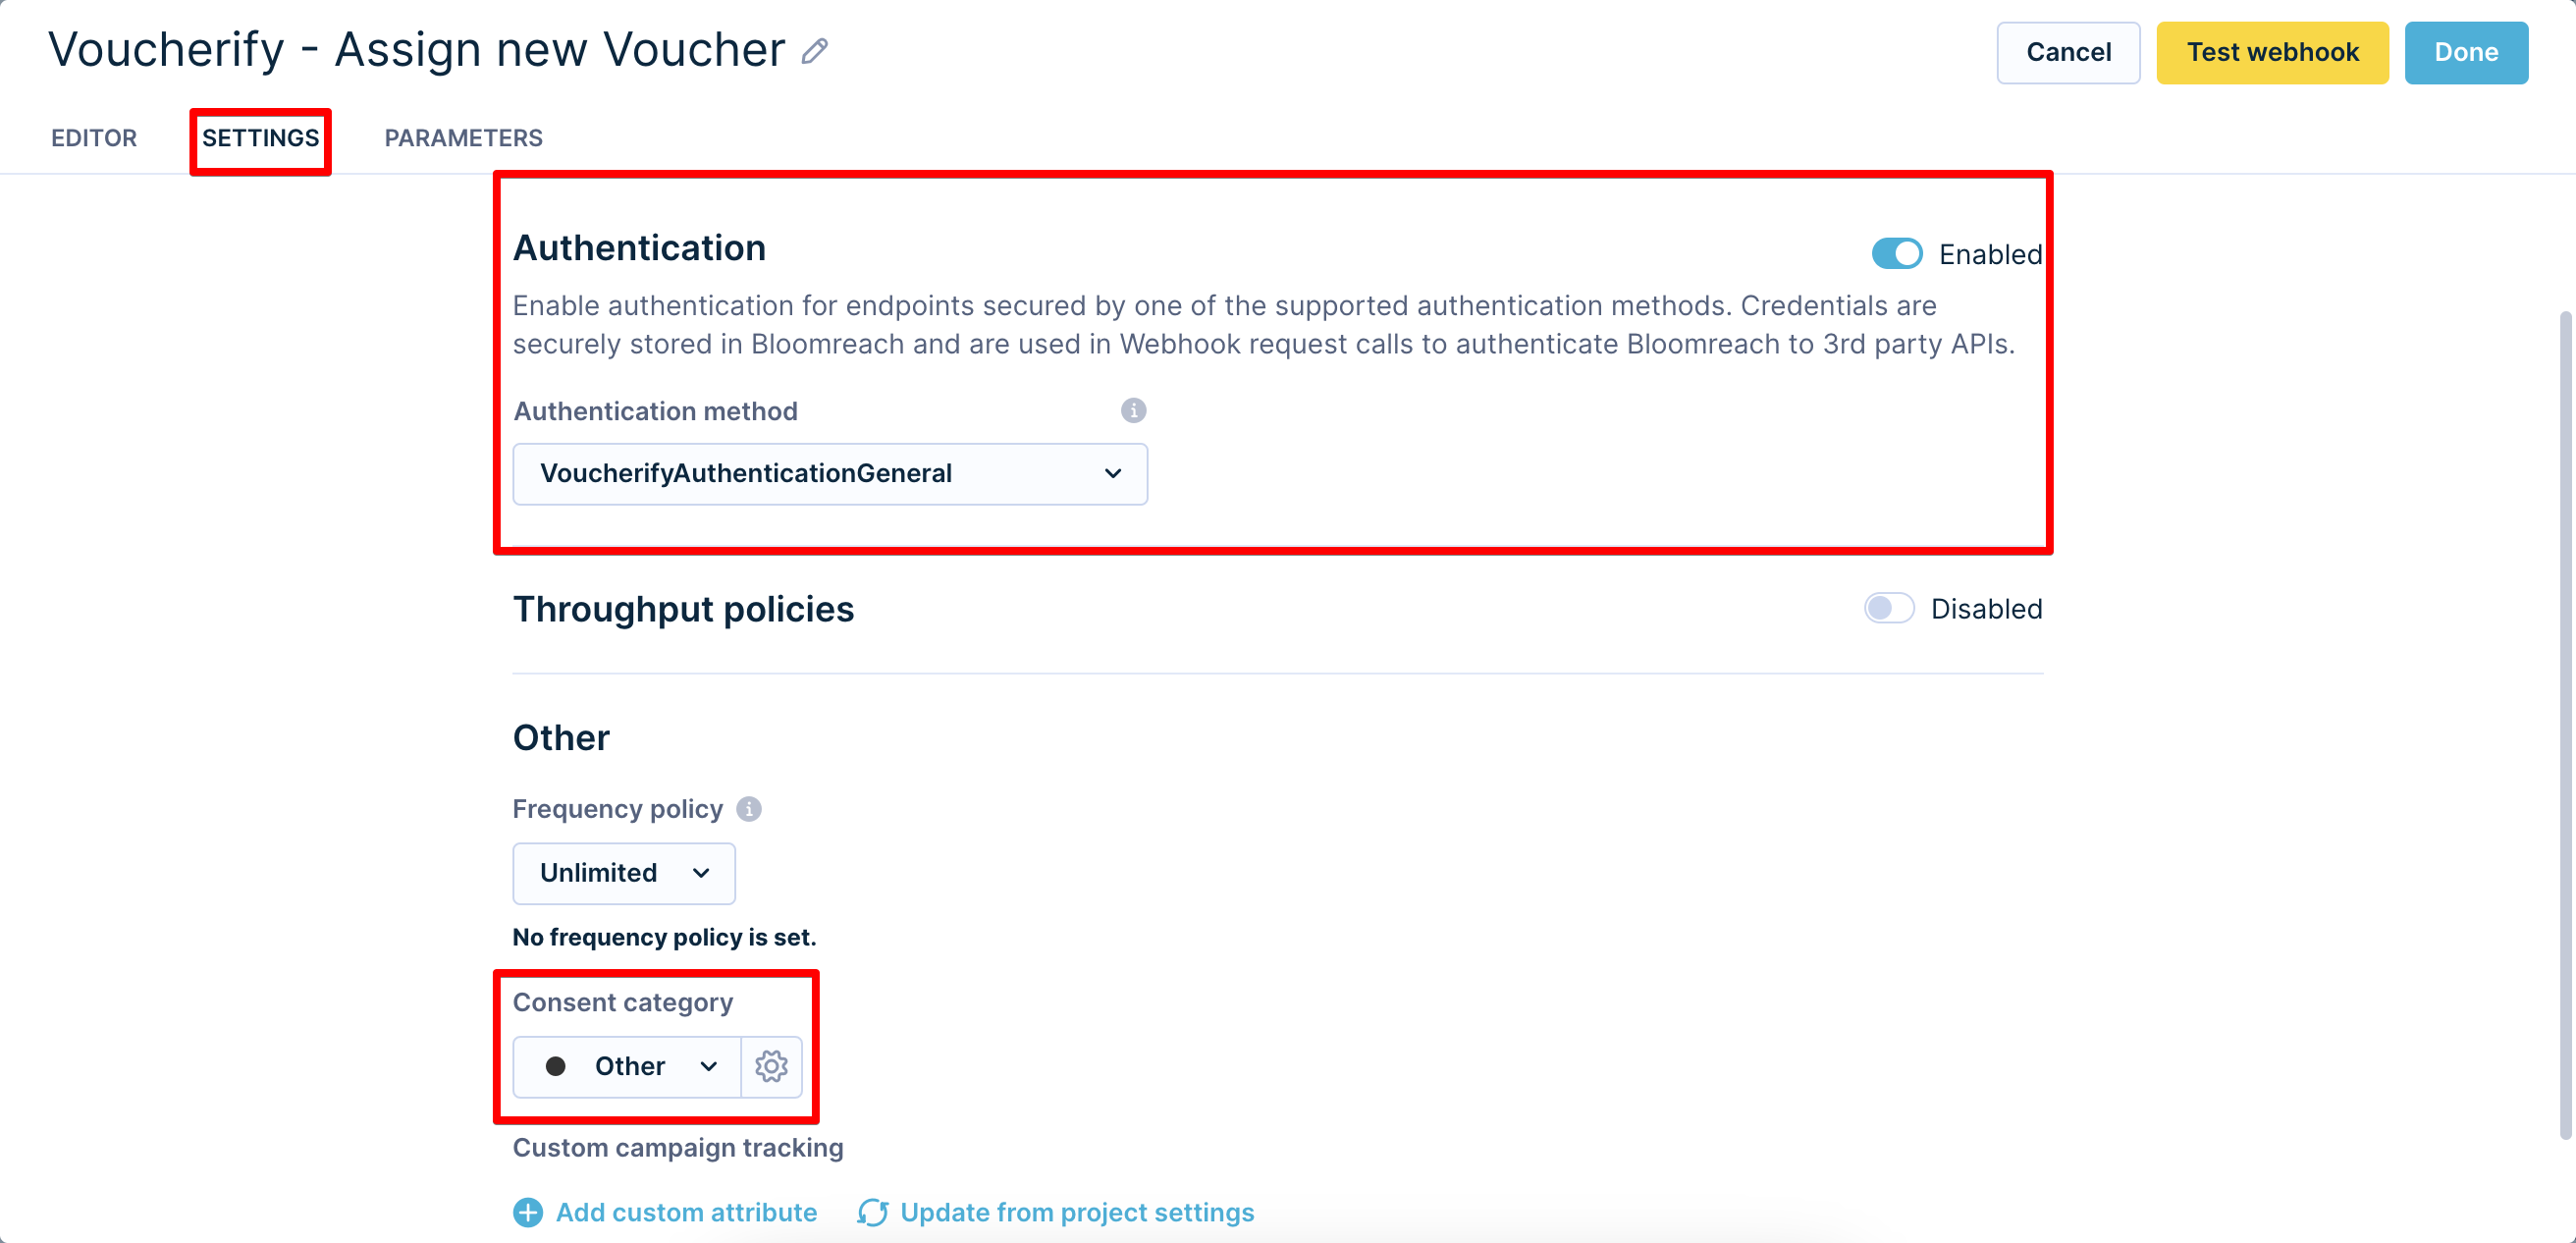
Actions > Other > Voucherify - Assign new Voucher. - Double-click on the Webhook (or click on the
Editbutton) and go toSettings. - Choose VoucherifyAuthenticationGeneral in Authentication and select your consent category.
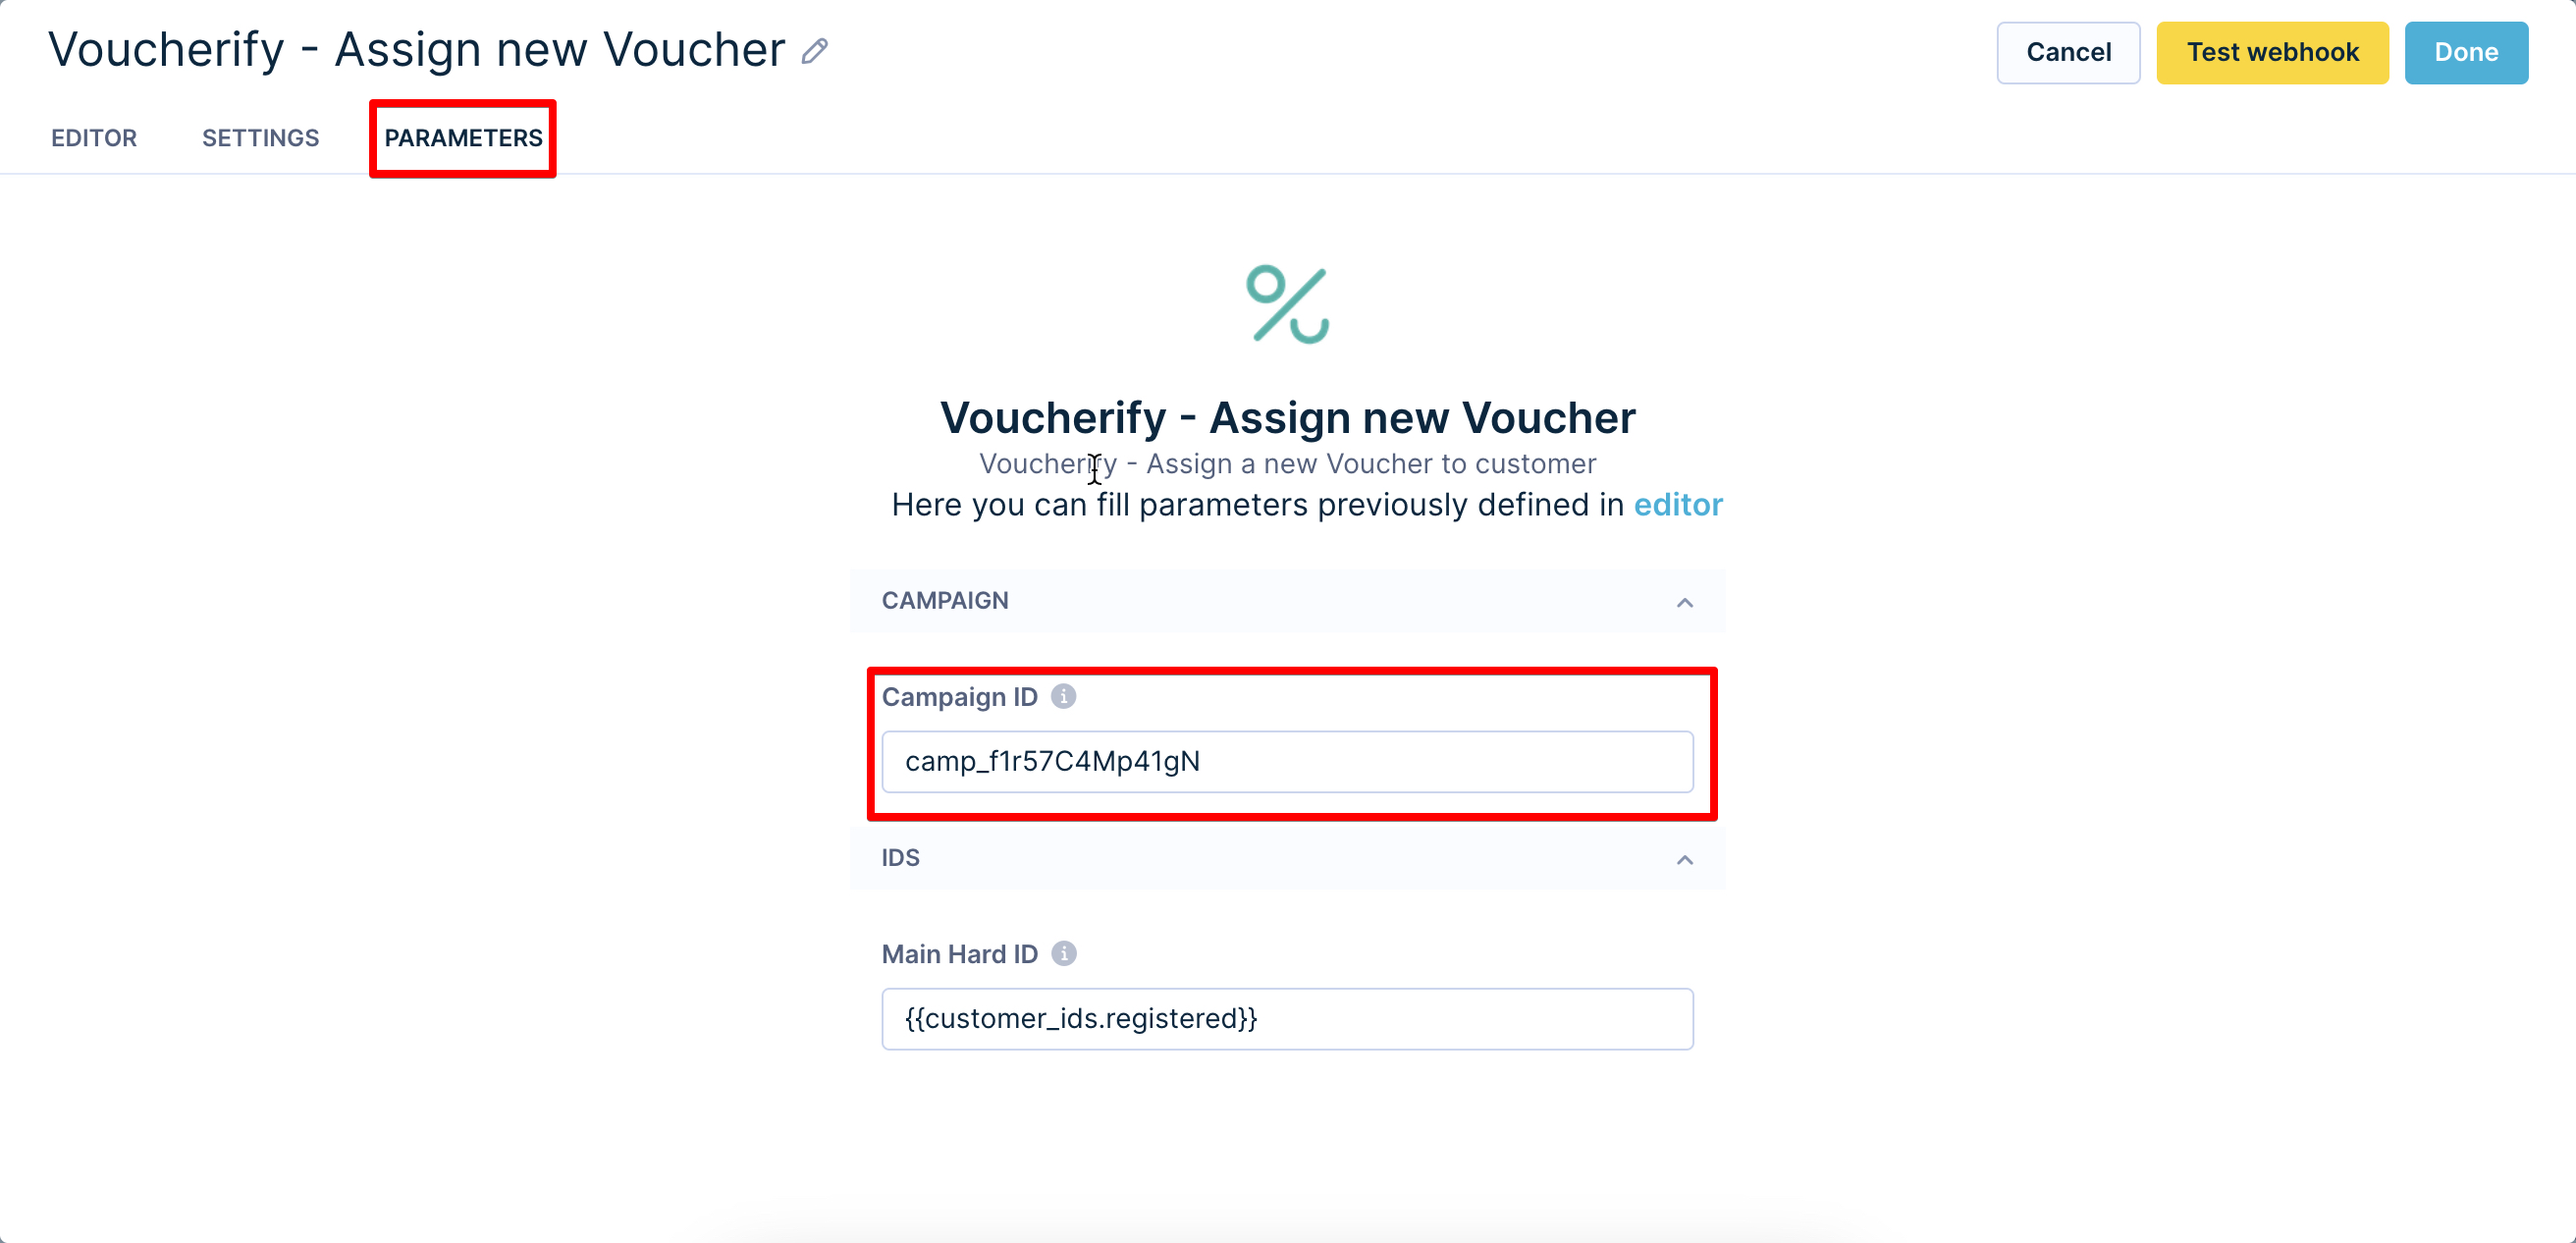
- In Voucherify, go to Campaigns and select the Campaign you want to use. Copy the Campaign ID.

- Go to Parameters and paste your Campaign ID.
When the preset becomes operational, you can use the returned values in marketing automation. The returned values can be implemented using Jinja tags, as seen here:
{{ webhook['voucher.code'] }}
Update customer records
You can use the Voucherify - Update Customer Records preset to modify customer properties or add new customers.
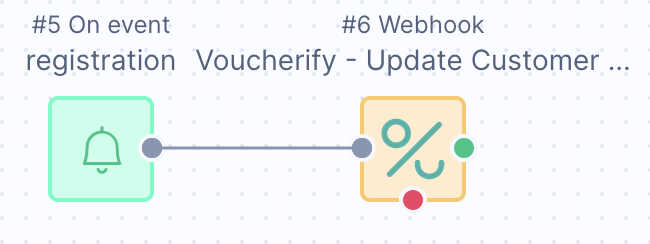
Here's an example: If a new customer registers (triggering the 'registration' event), we also want to add that customer to Voucherify. This scenario includes two components:
- An On event trigger that will start the process
- A Voucherify - Update Customer Records preset that will communicate with Voucherify to transfer the customer data
Voucherify - Update Customer Records preset requires the following configuration:
- In Bloomreach Engagement go to your Scenario.
- On the left-hand side go to Actions > Other > Voucherify - Update Customer Records.
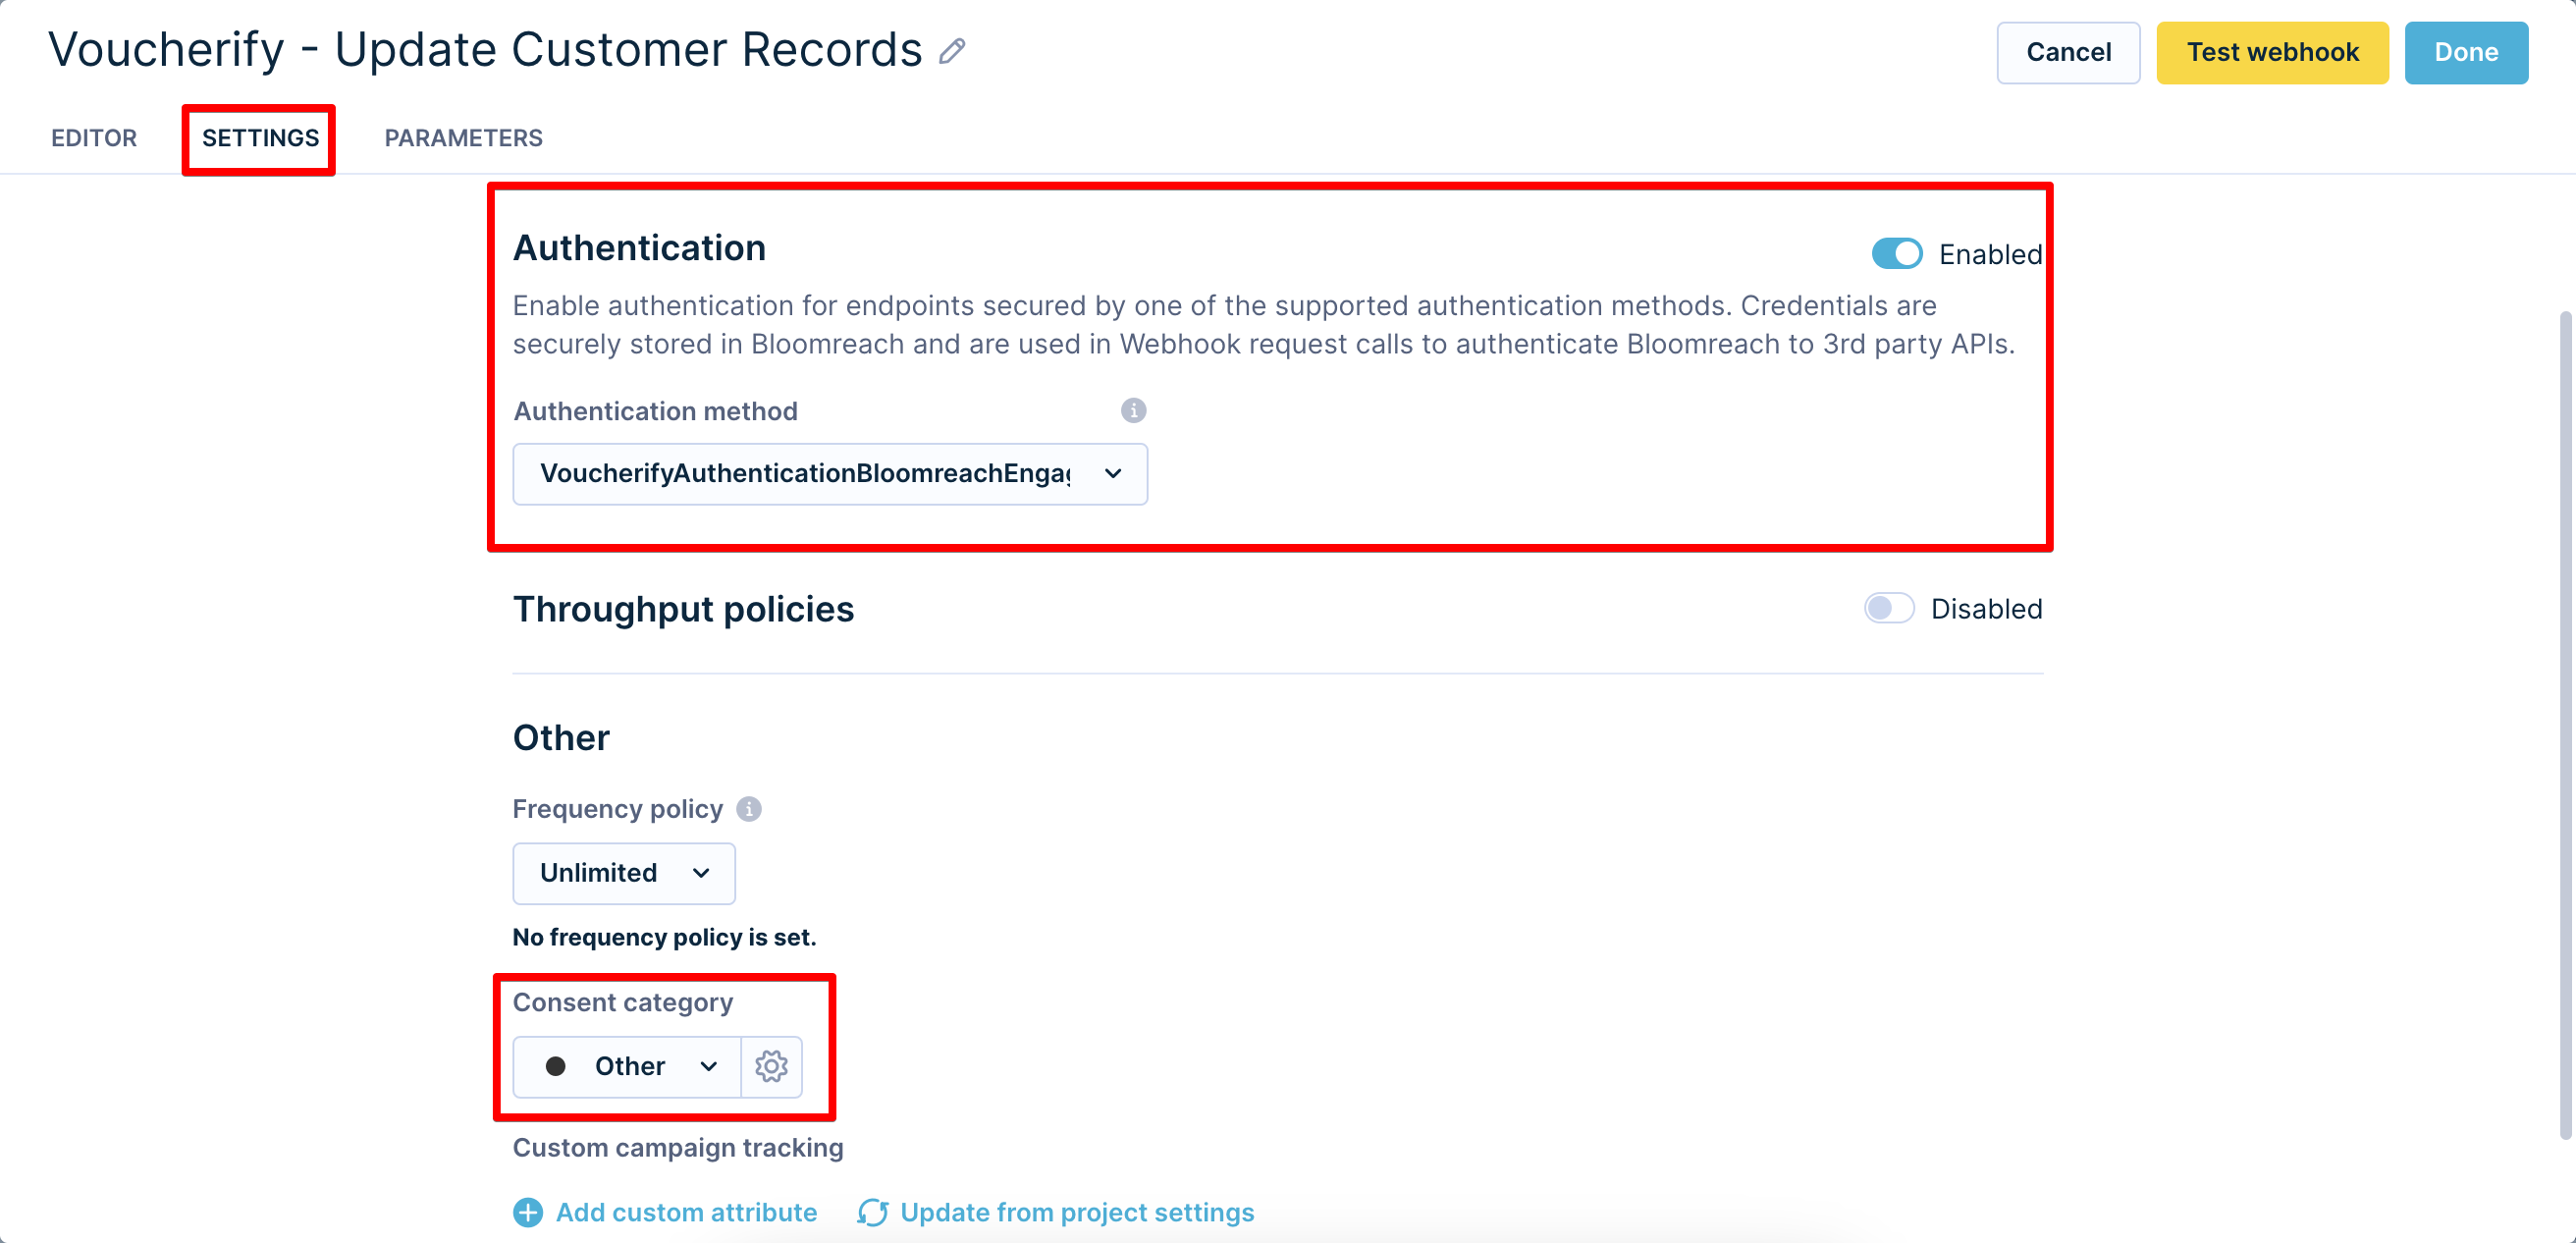
- Double-click on the Webhook (or press Edit) and go to Settings.
- Choose VoucherifyAuthenticationBloomreachEngagement in Authentication and select your consent category.
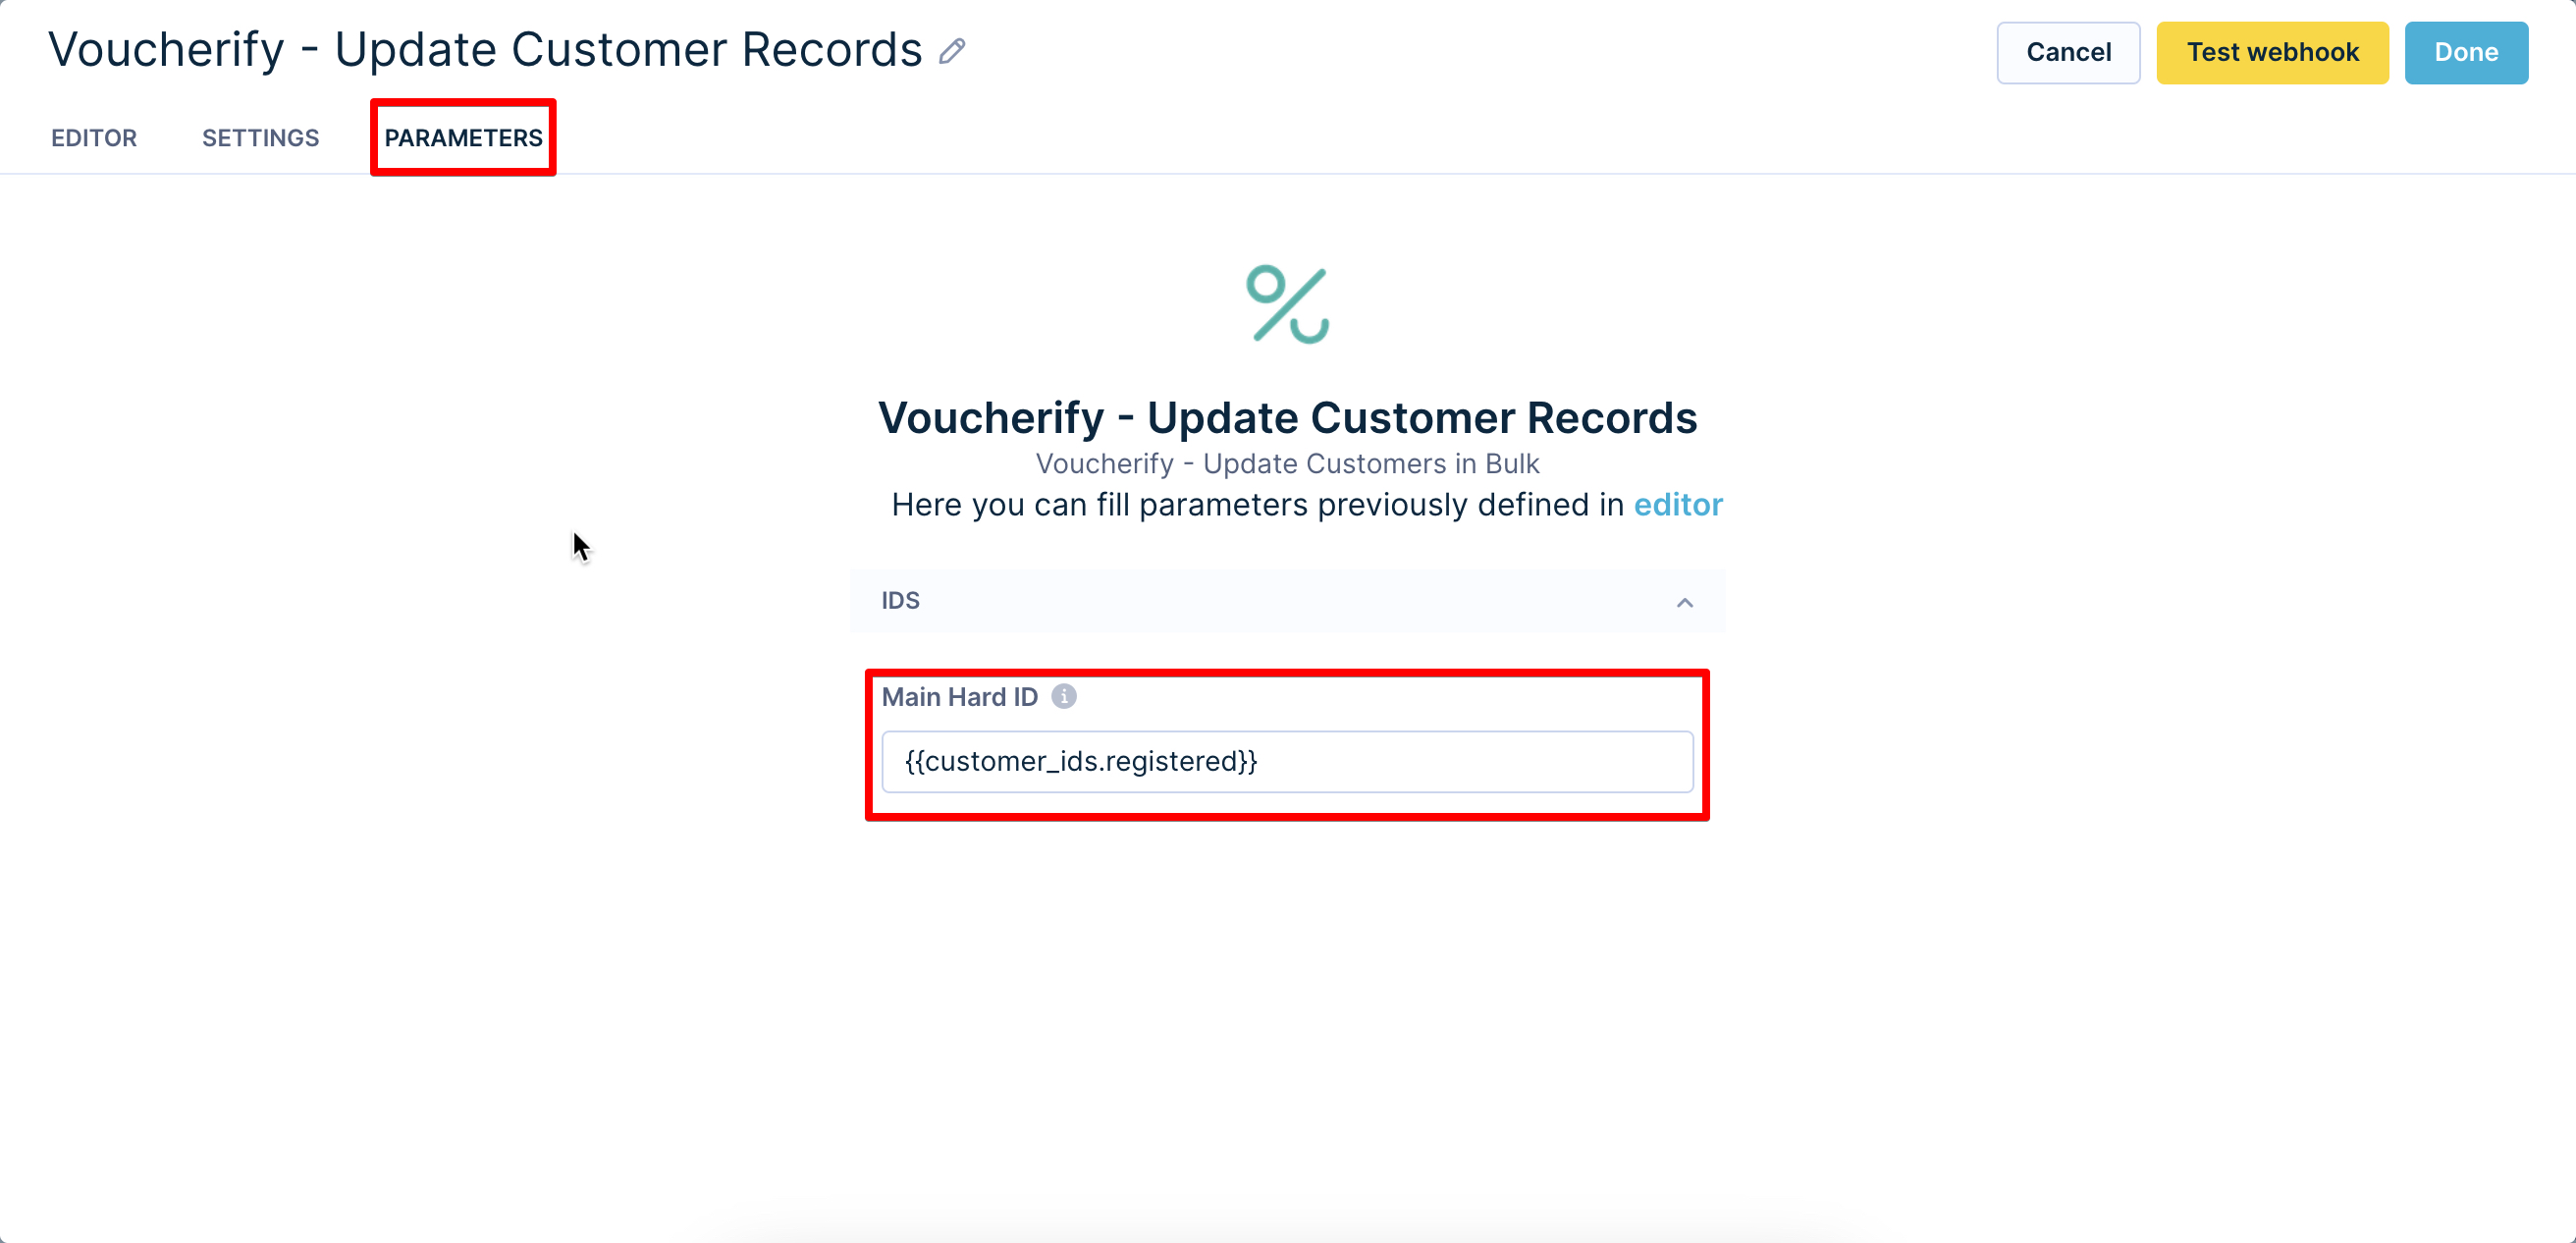
- Go to Parameters and enter your campaign Hard ID.
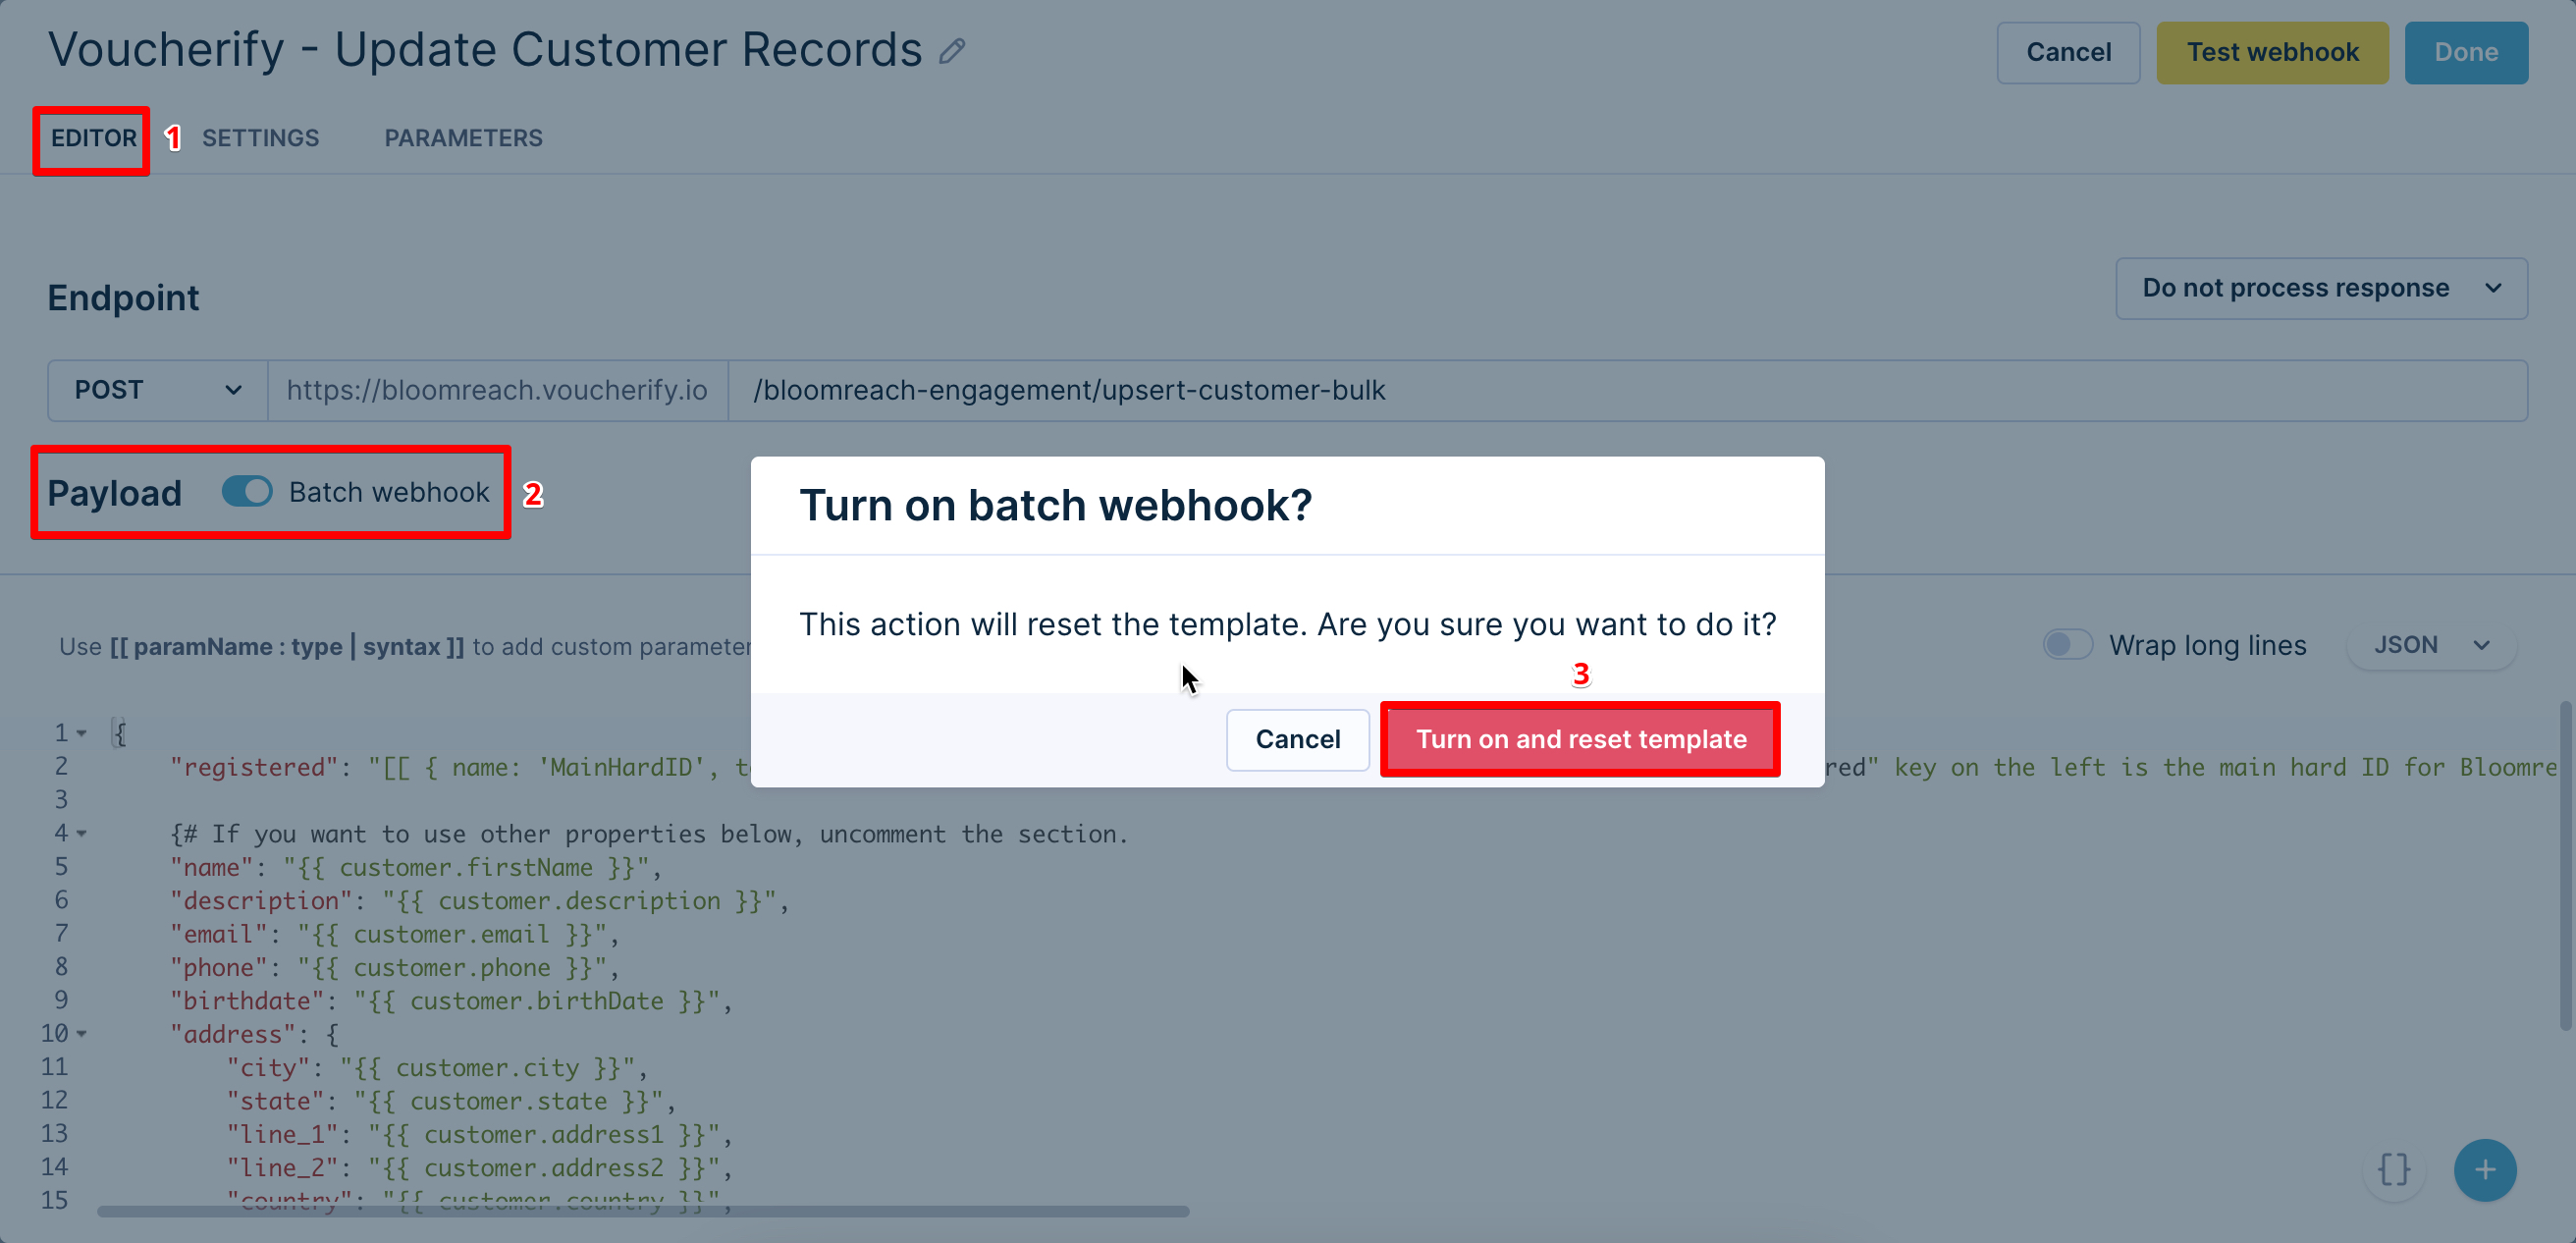
NoteBy default, the "registered" key in the Editor tab is Bloomreach's main hard ID. This ID needs to match the Main Hard ID set in Voucherify's Bloomreach Engagement configuration.
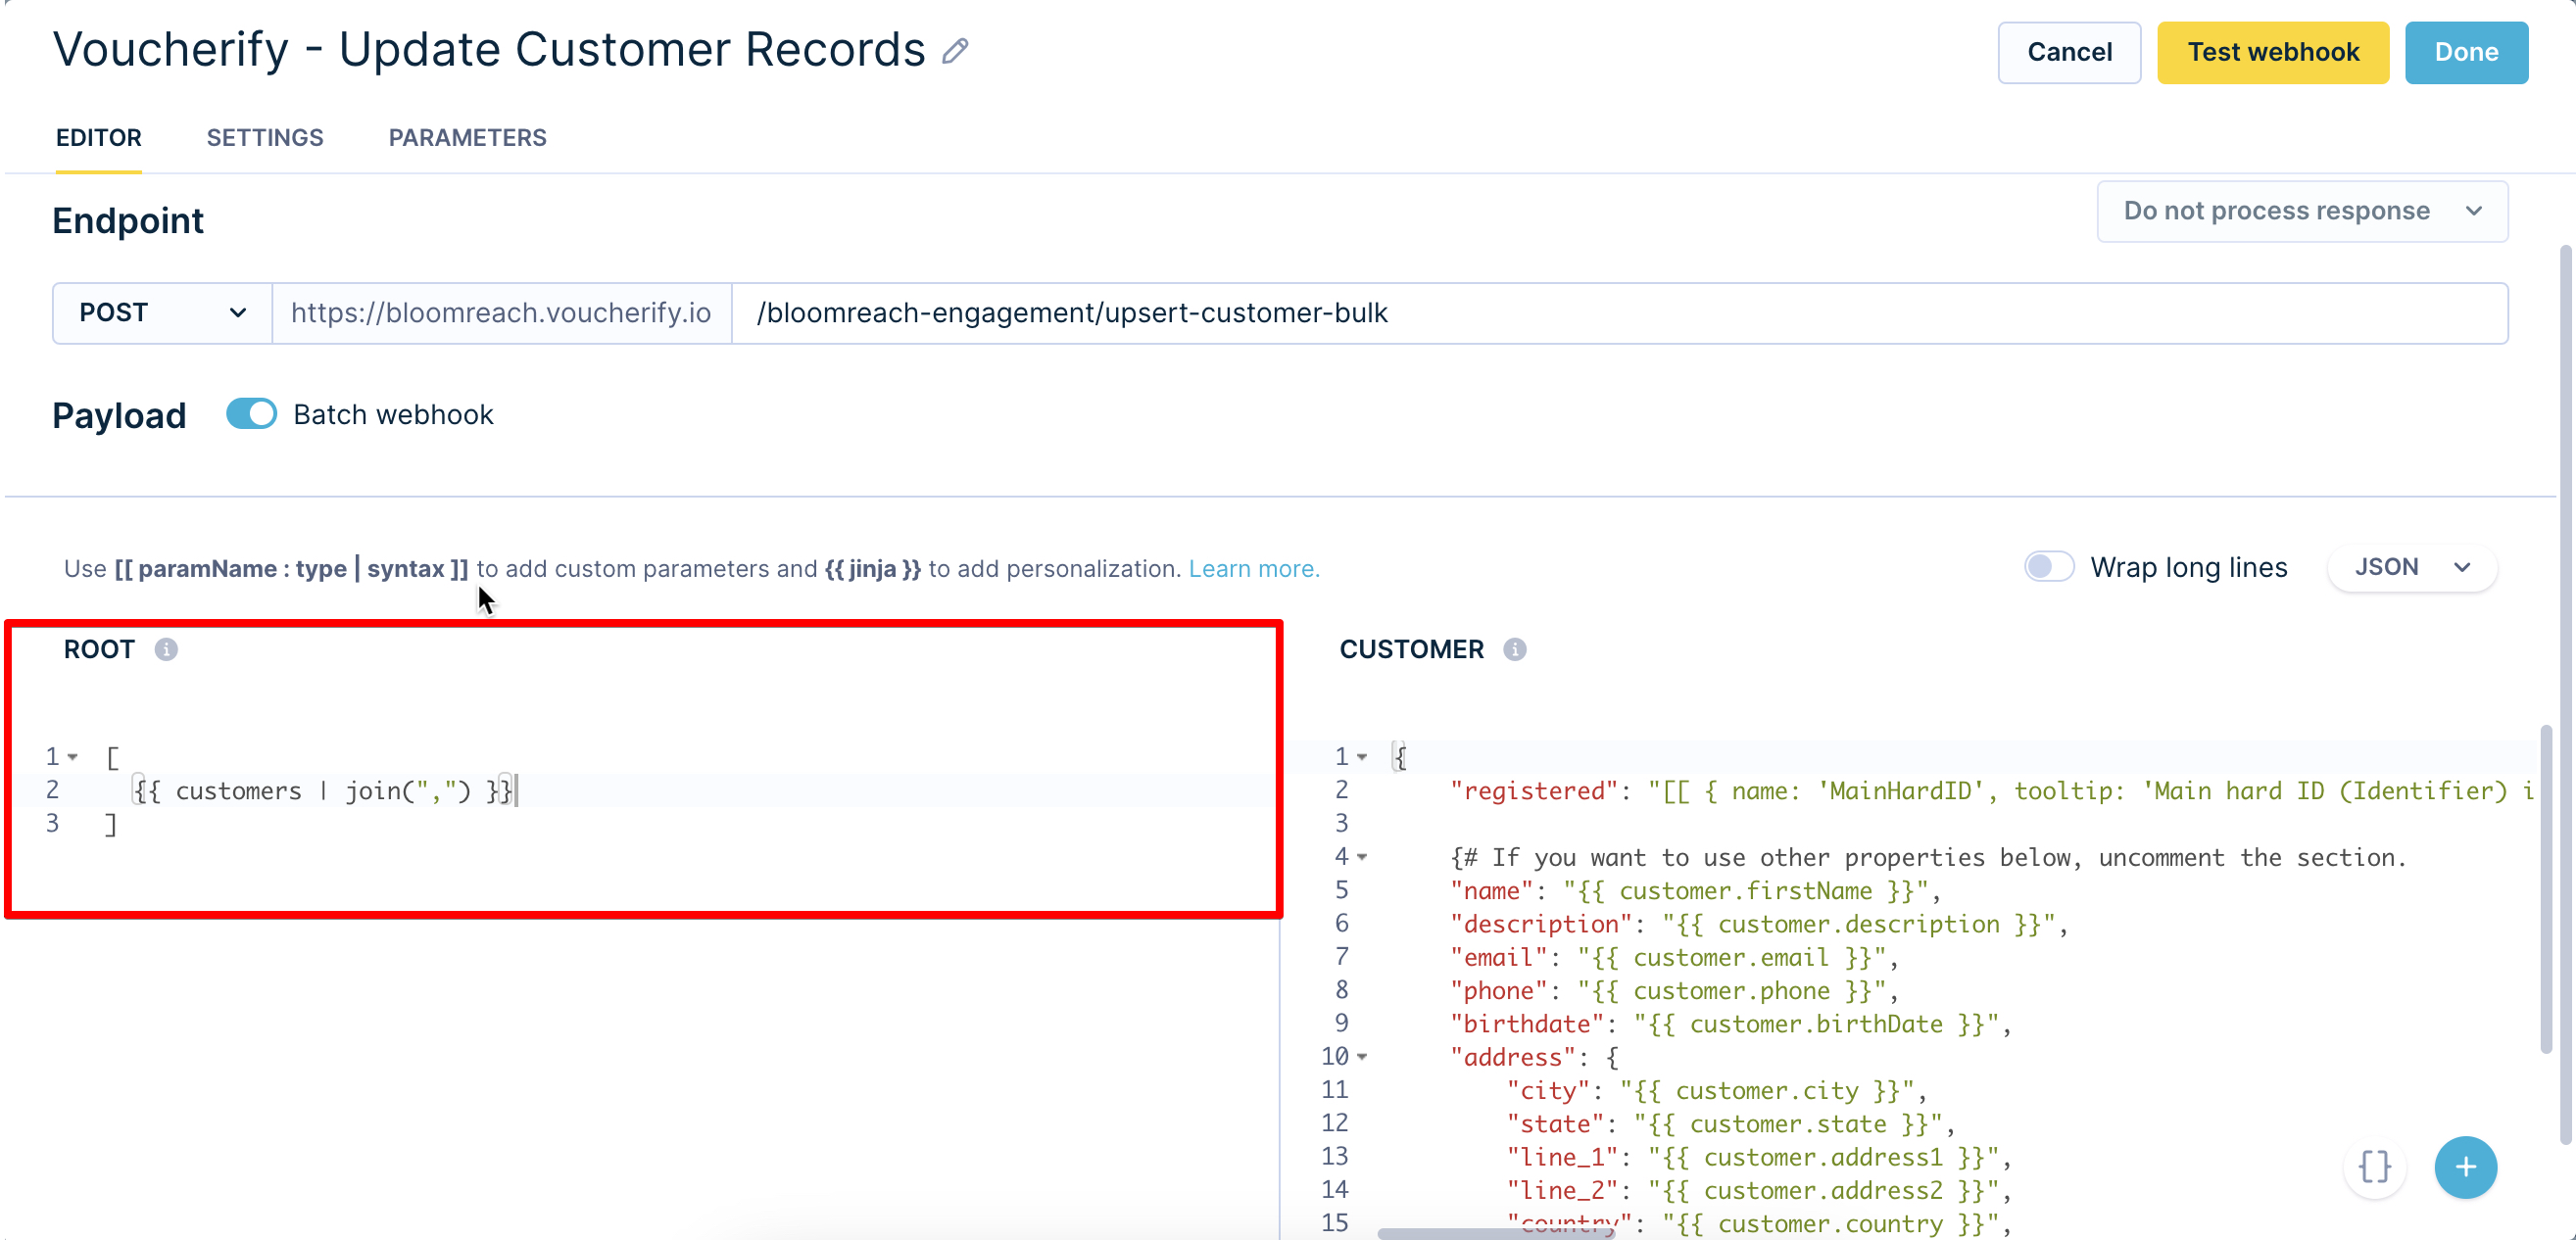
- Go to Editor, check Batch Webhook, and press Turn on and reset template.
- Paste this code into the root part:
[
	{{ customers | join(",") }}
]
Send Events
Use the Voucherify - Send Events preset to create and send events to Voucherify.
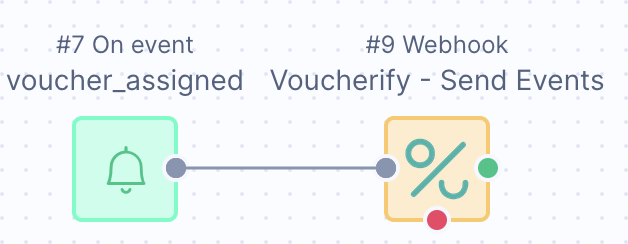
For example, when a voucher gets assigned to a customer (which triggers the 'voucher_assigned' event), we also want to send this event to Voucherify. This scenario includes two components:
- An On event trigger that will start the process
- A Voucherify - Send Events preset that will communicate with Voucherify to transfer the event data
Voucherify - Send Events preset requires the following configuration:
- In Bloomreach Engagement go to your Scenario.
- On the left-hand side go to
Actions > Other > Voucherify - Send Events. - Double-click on the Webhook (or click on the
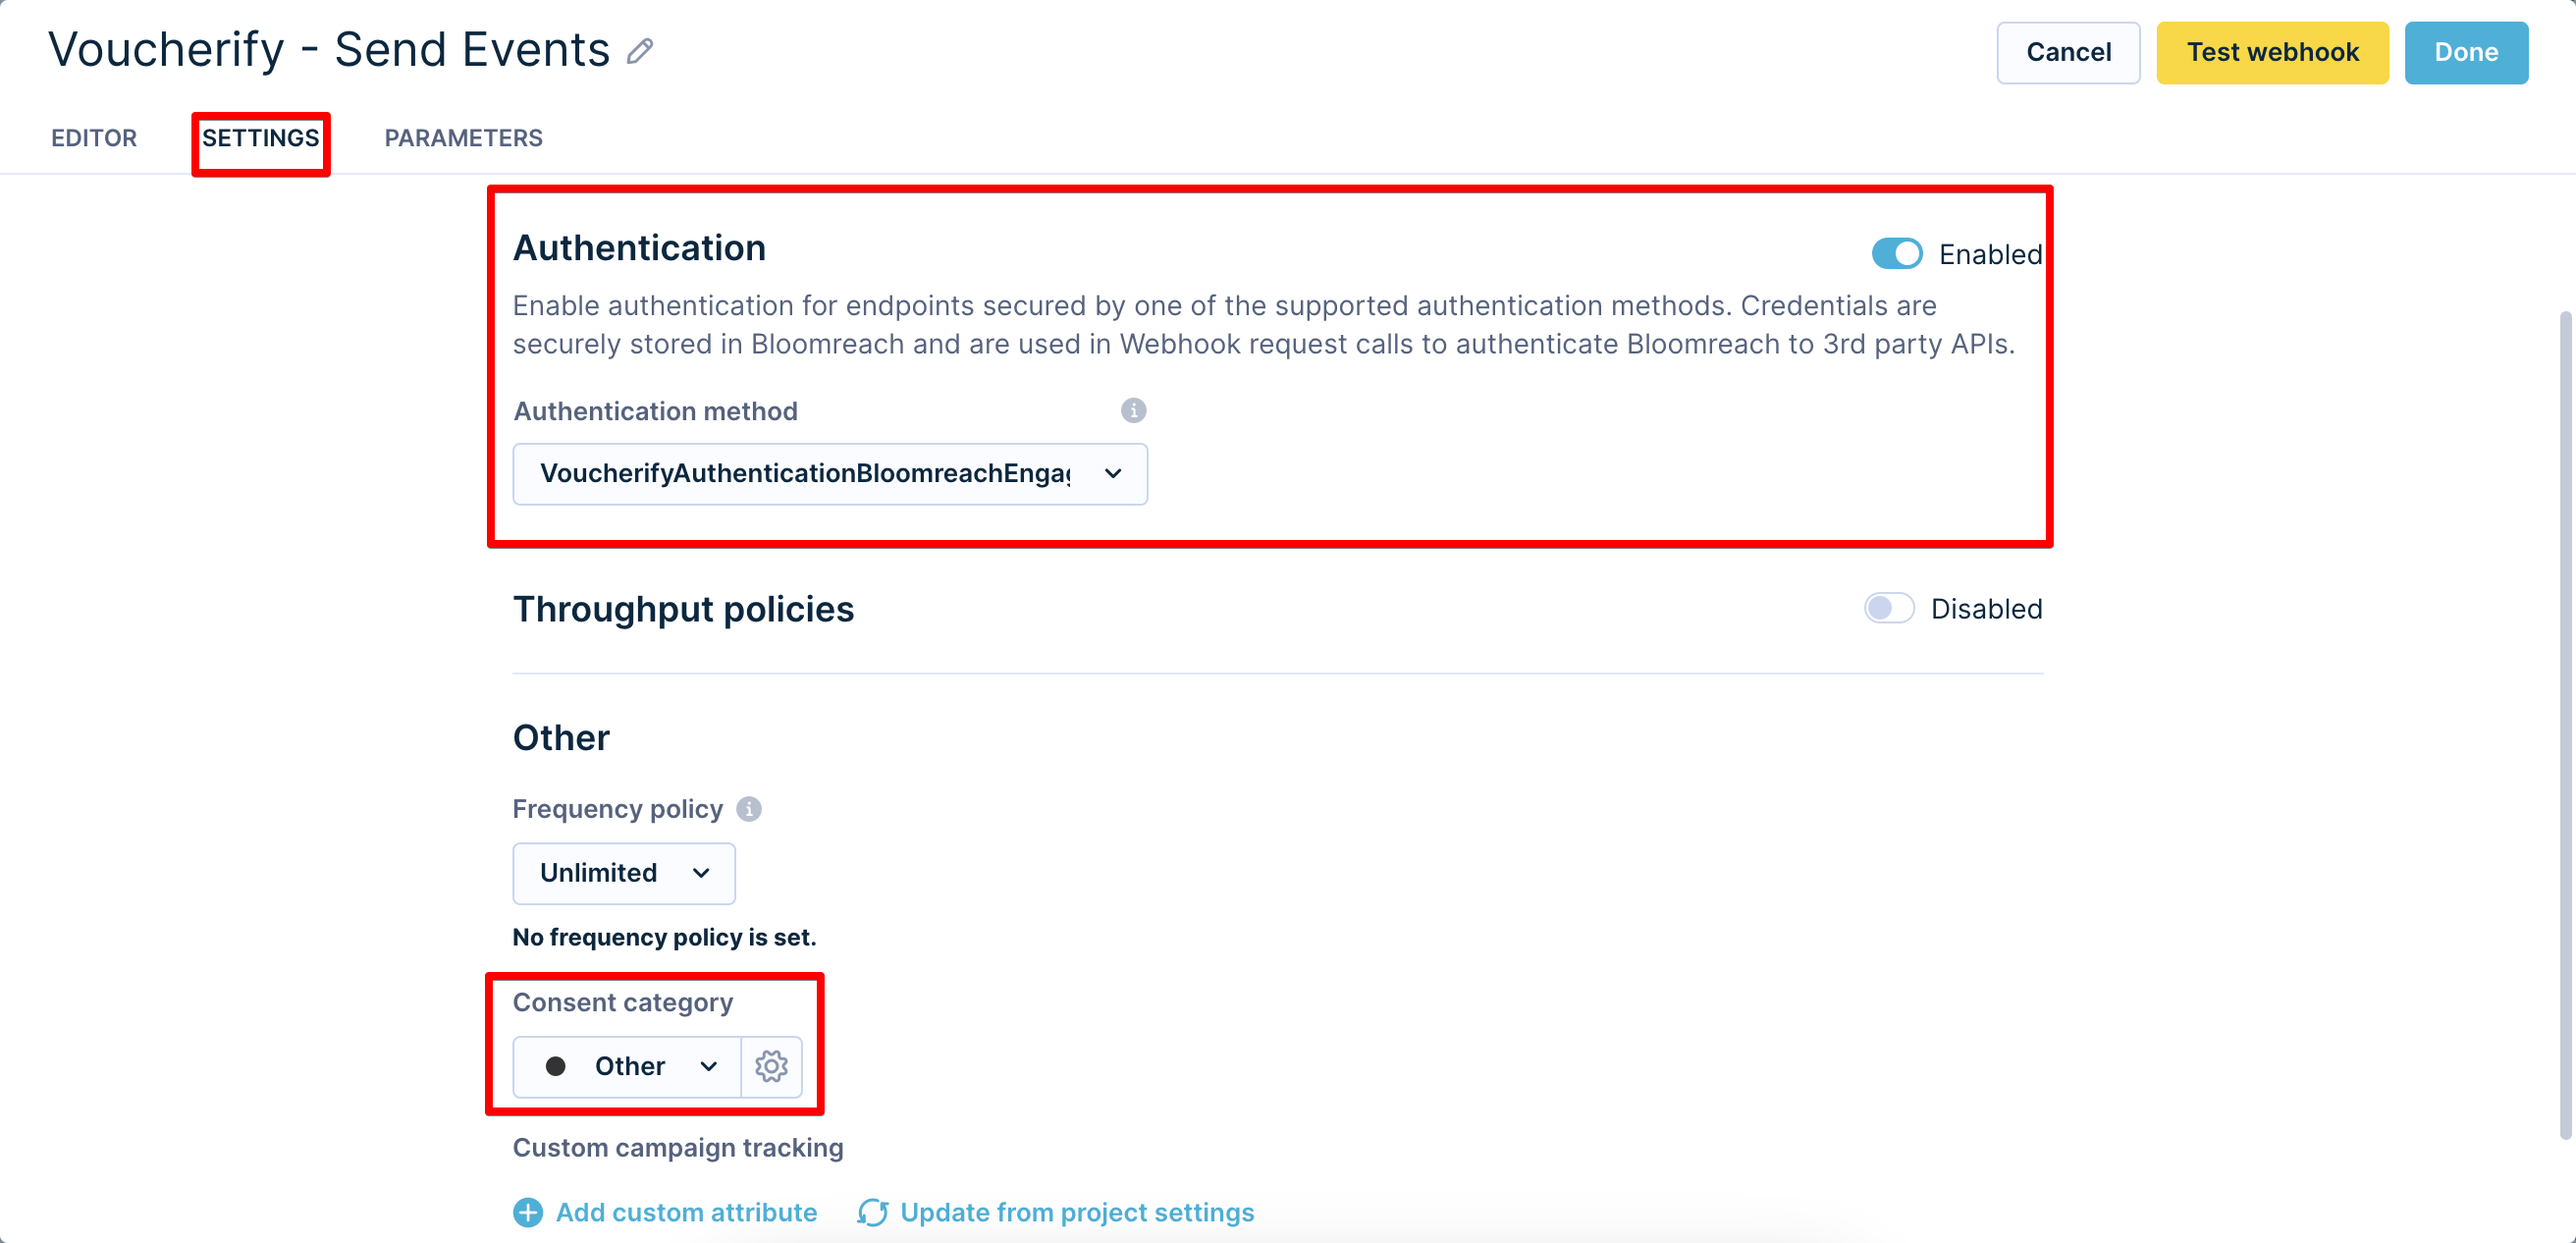
Editbutton) and go toSettings. - Choose VoucherifyAuthenticationBloomreachEngagement in Authentication and select your consent category.
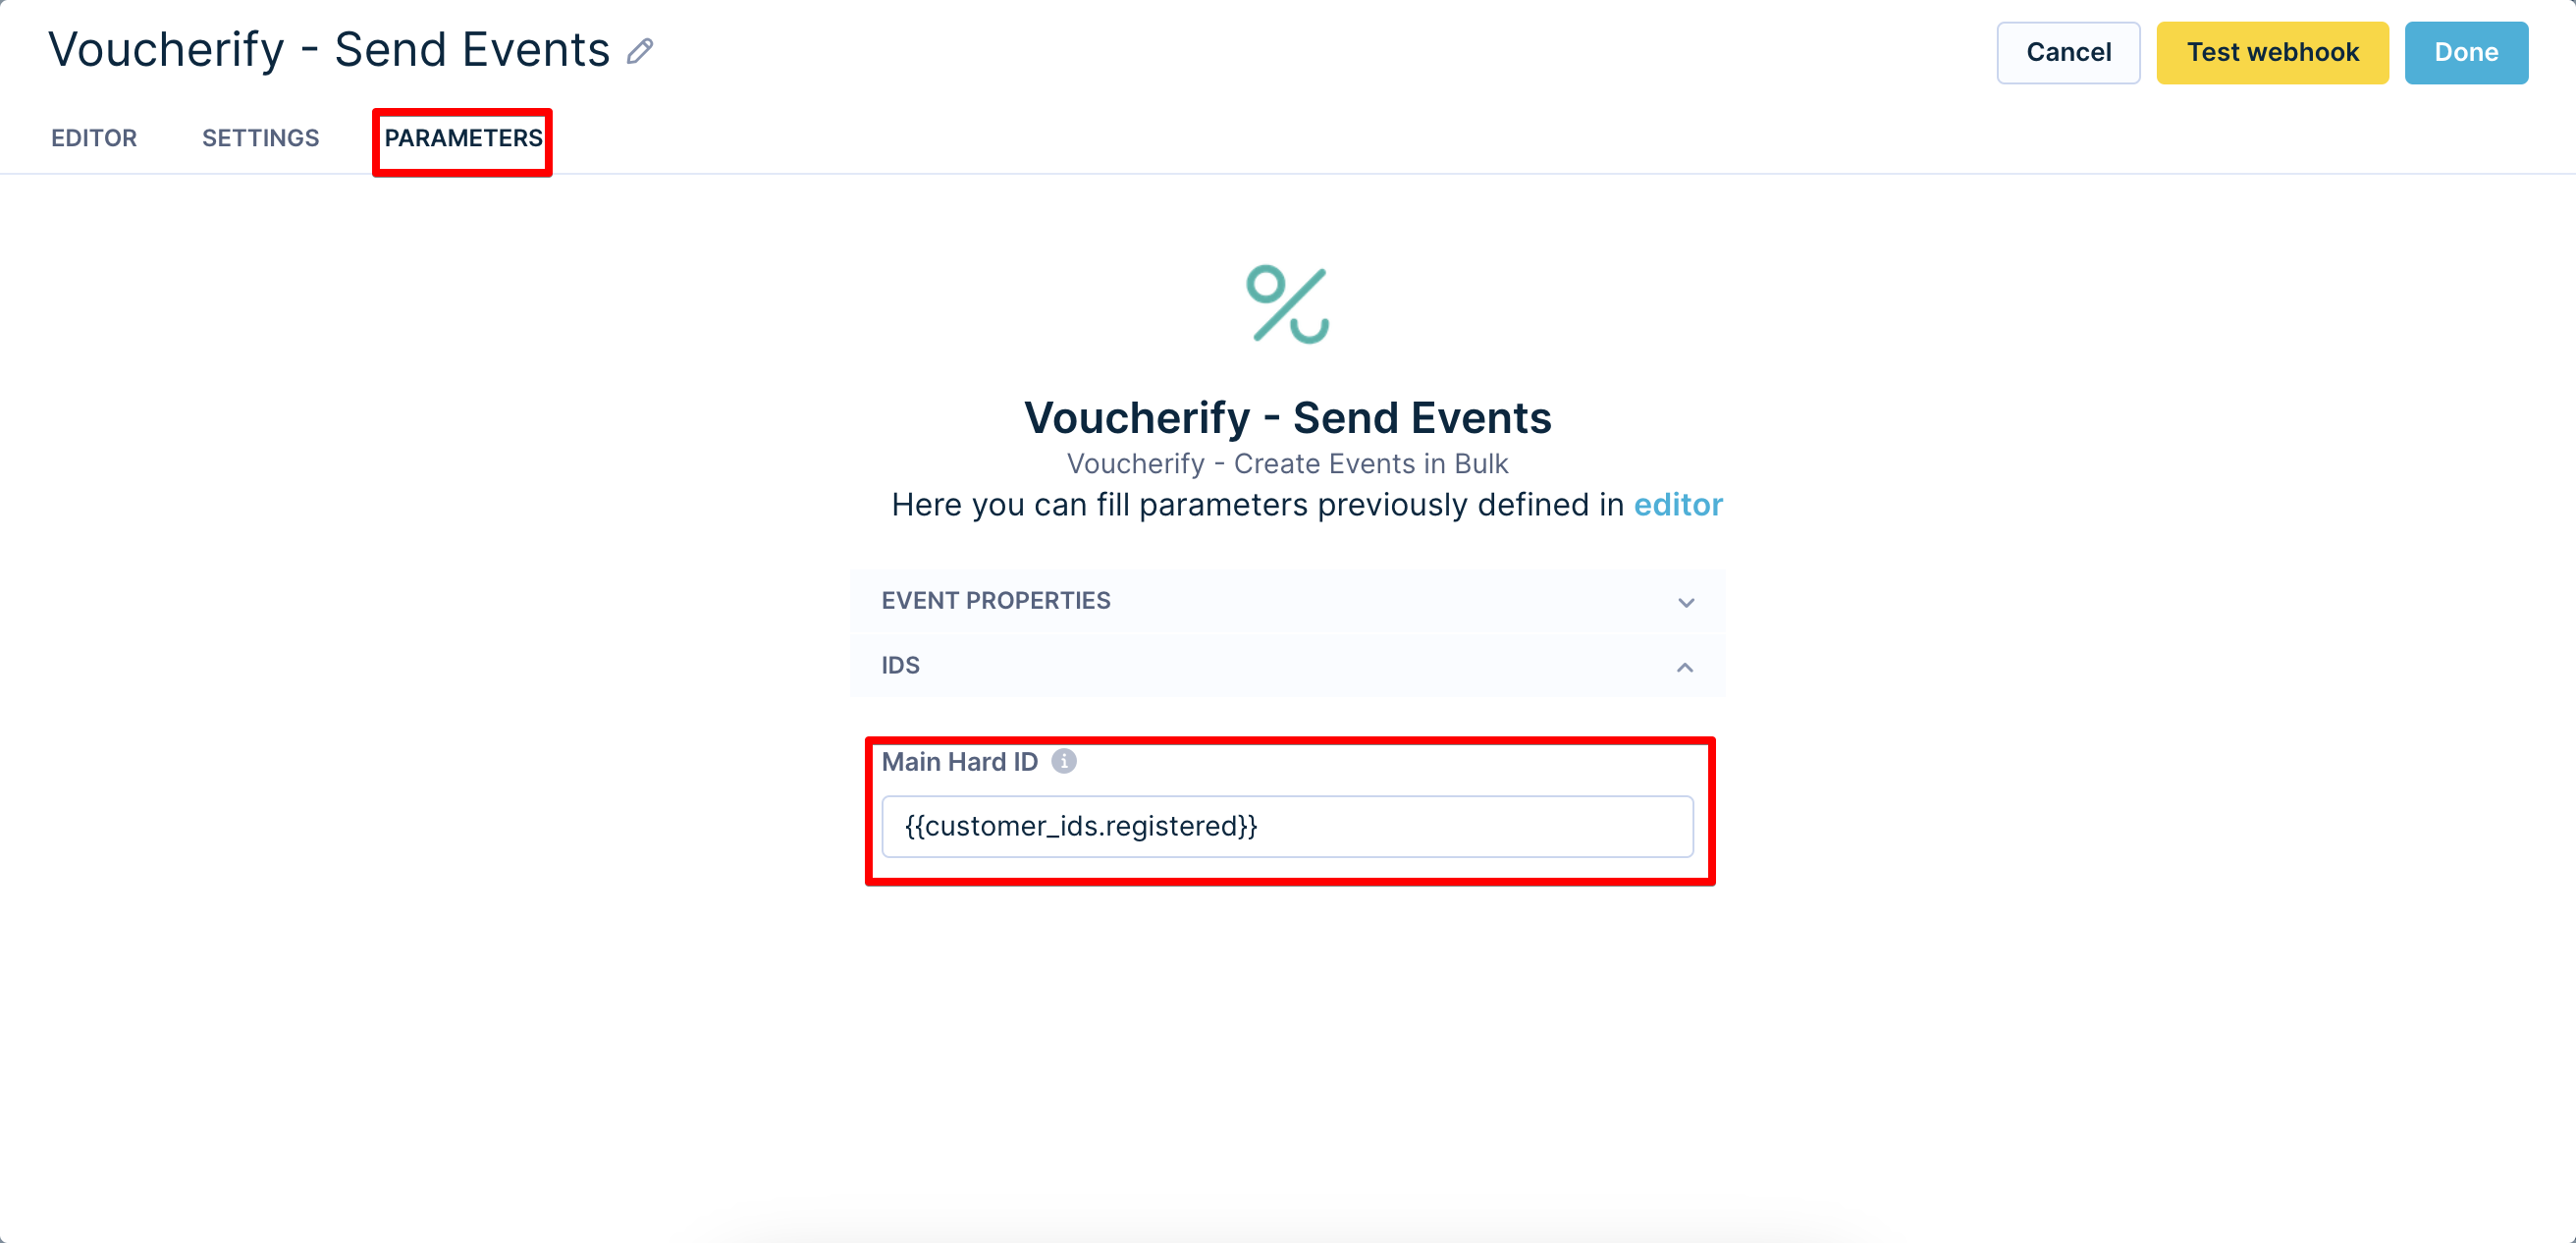
- Go to Parameters and enter your campaign Hard ID.
NoteBy default, the "registered" key in the Editor tab is Bloomreach's main hard ID. This ID needs to match the Main Hard ID set in the Voucherify's Bloomreach Engagement configuration.
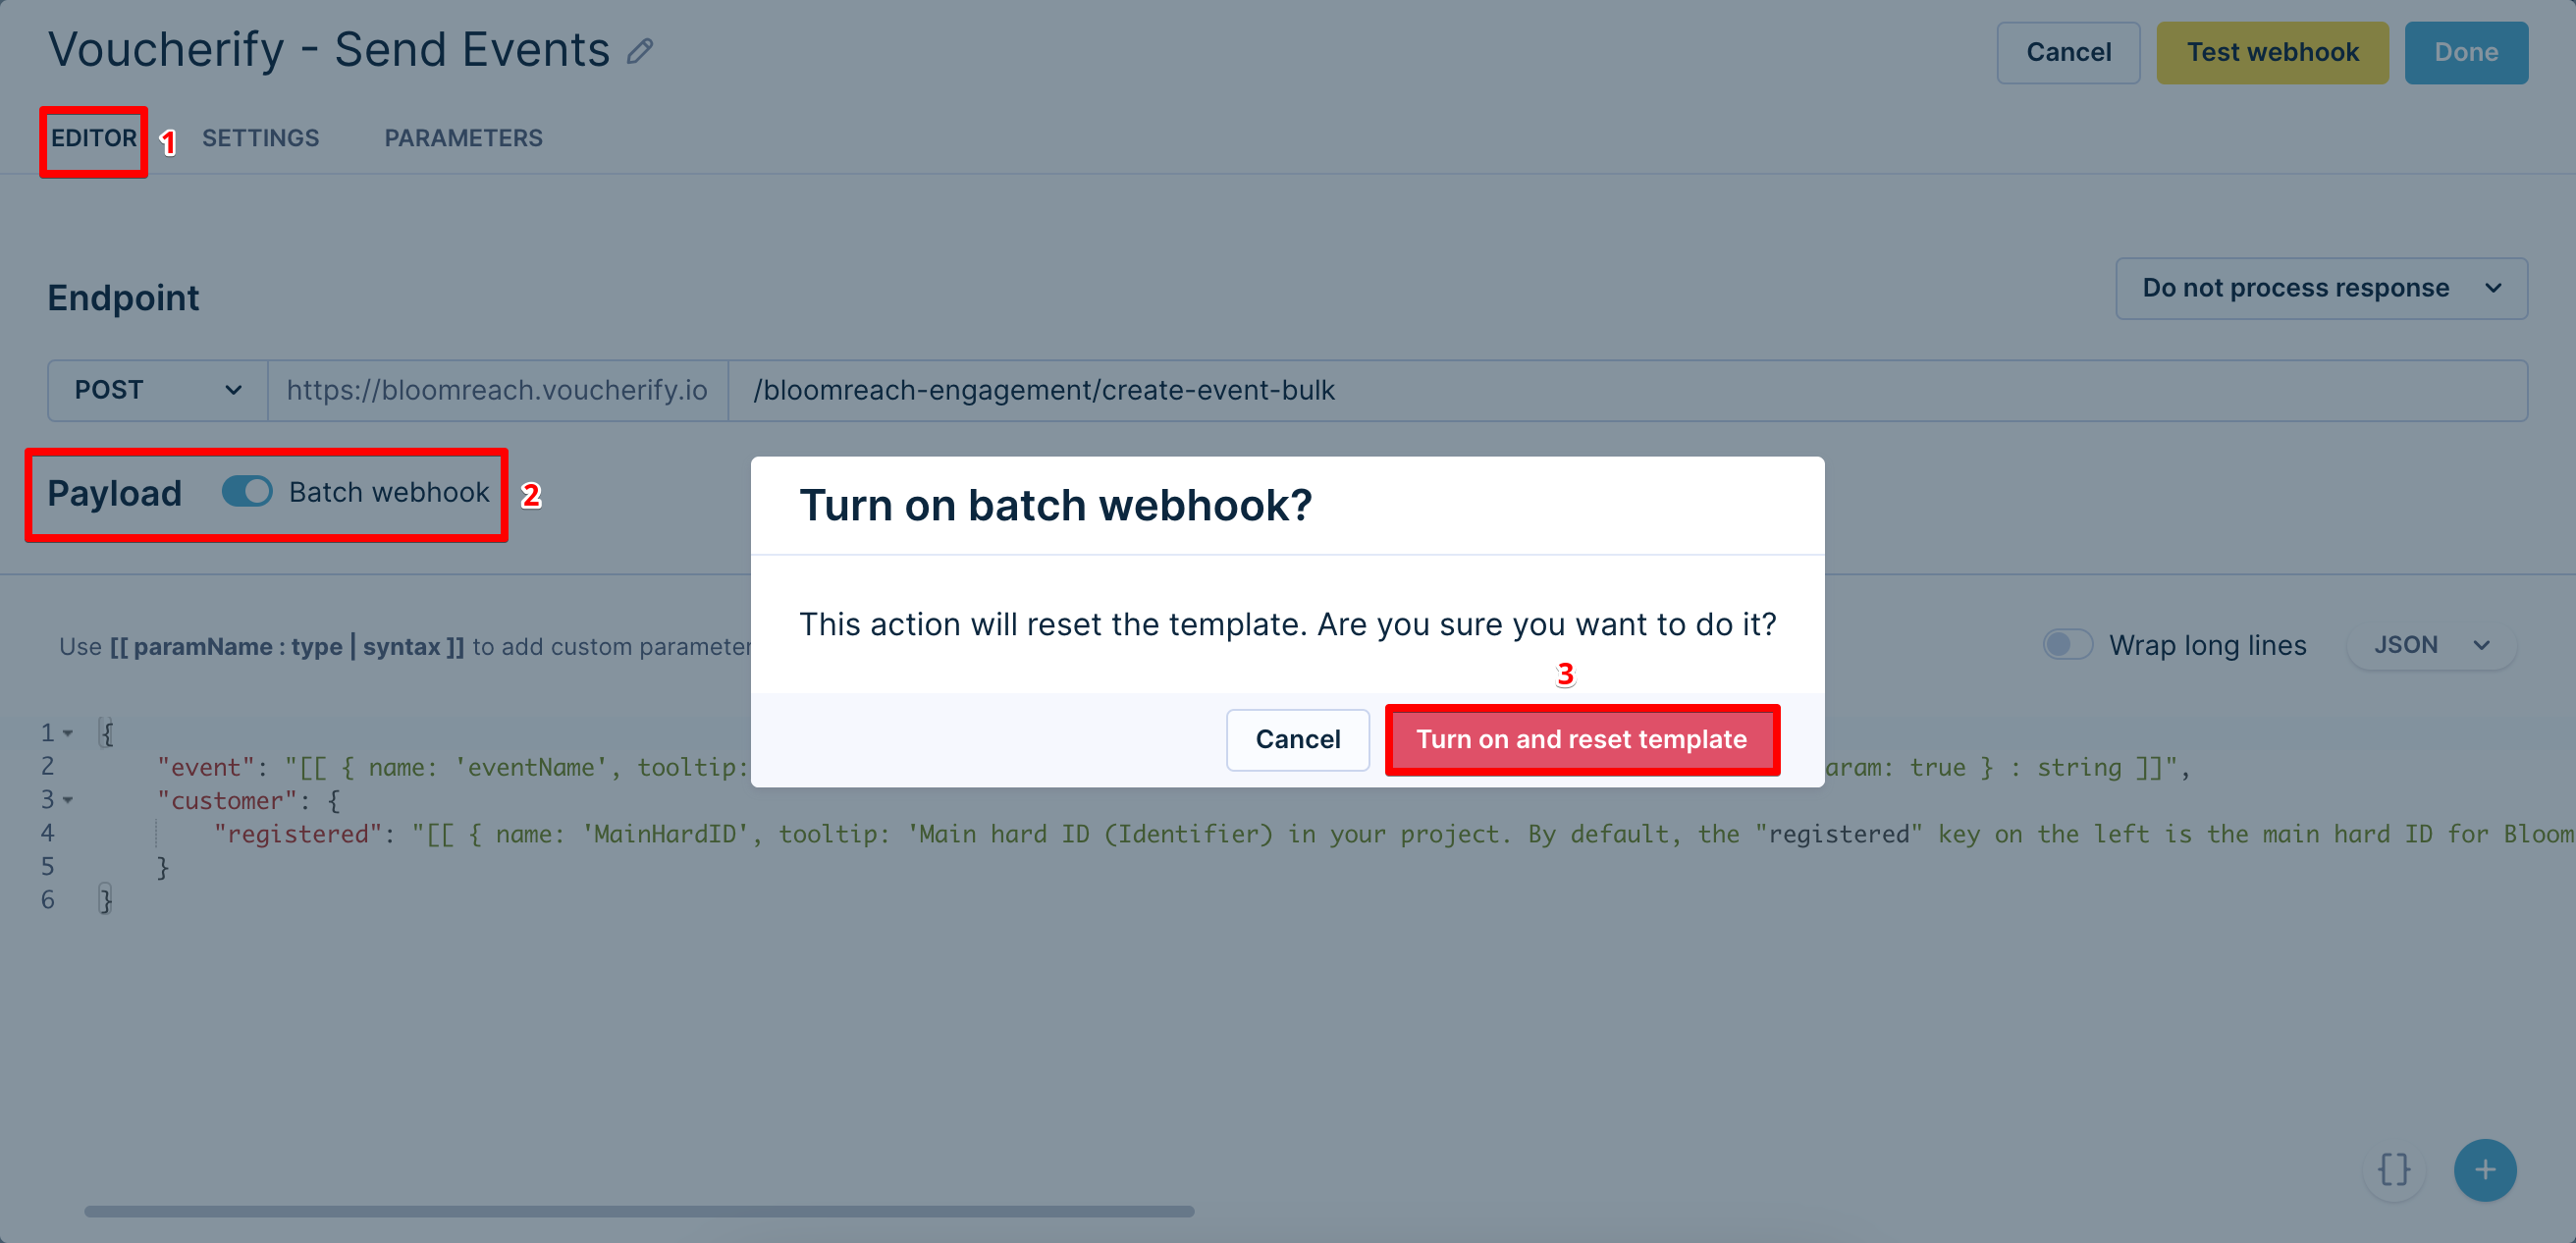
- Go to Editor, check Batch webhook, and press Turn on and reset template.
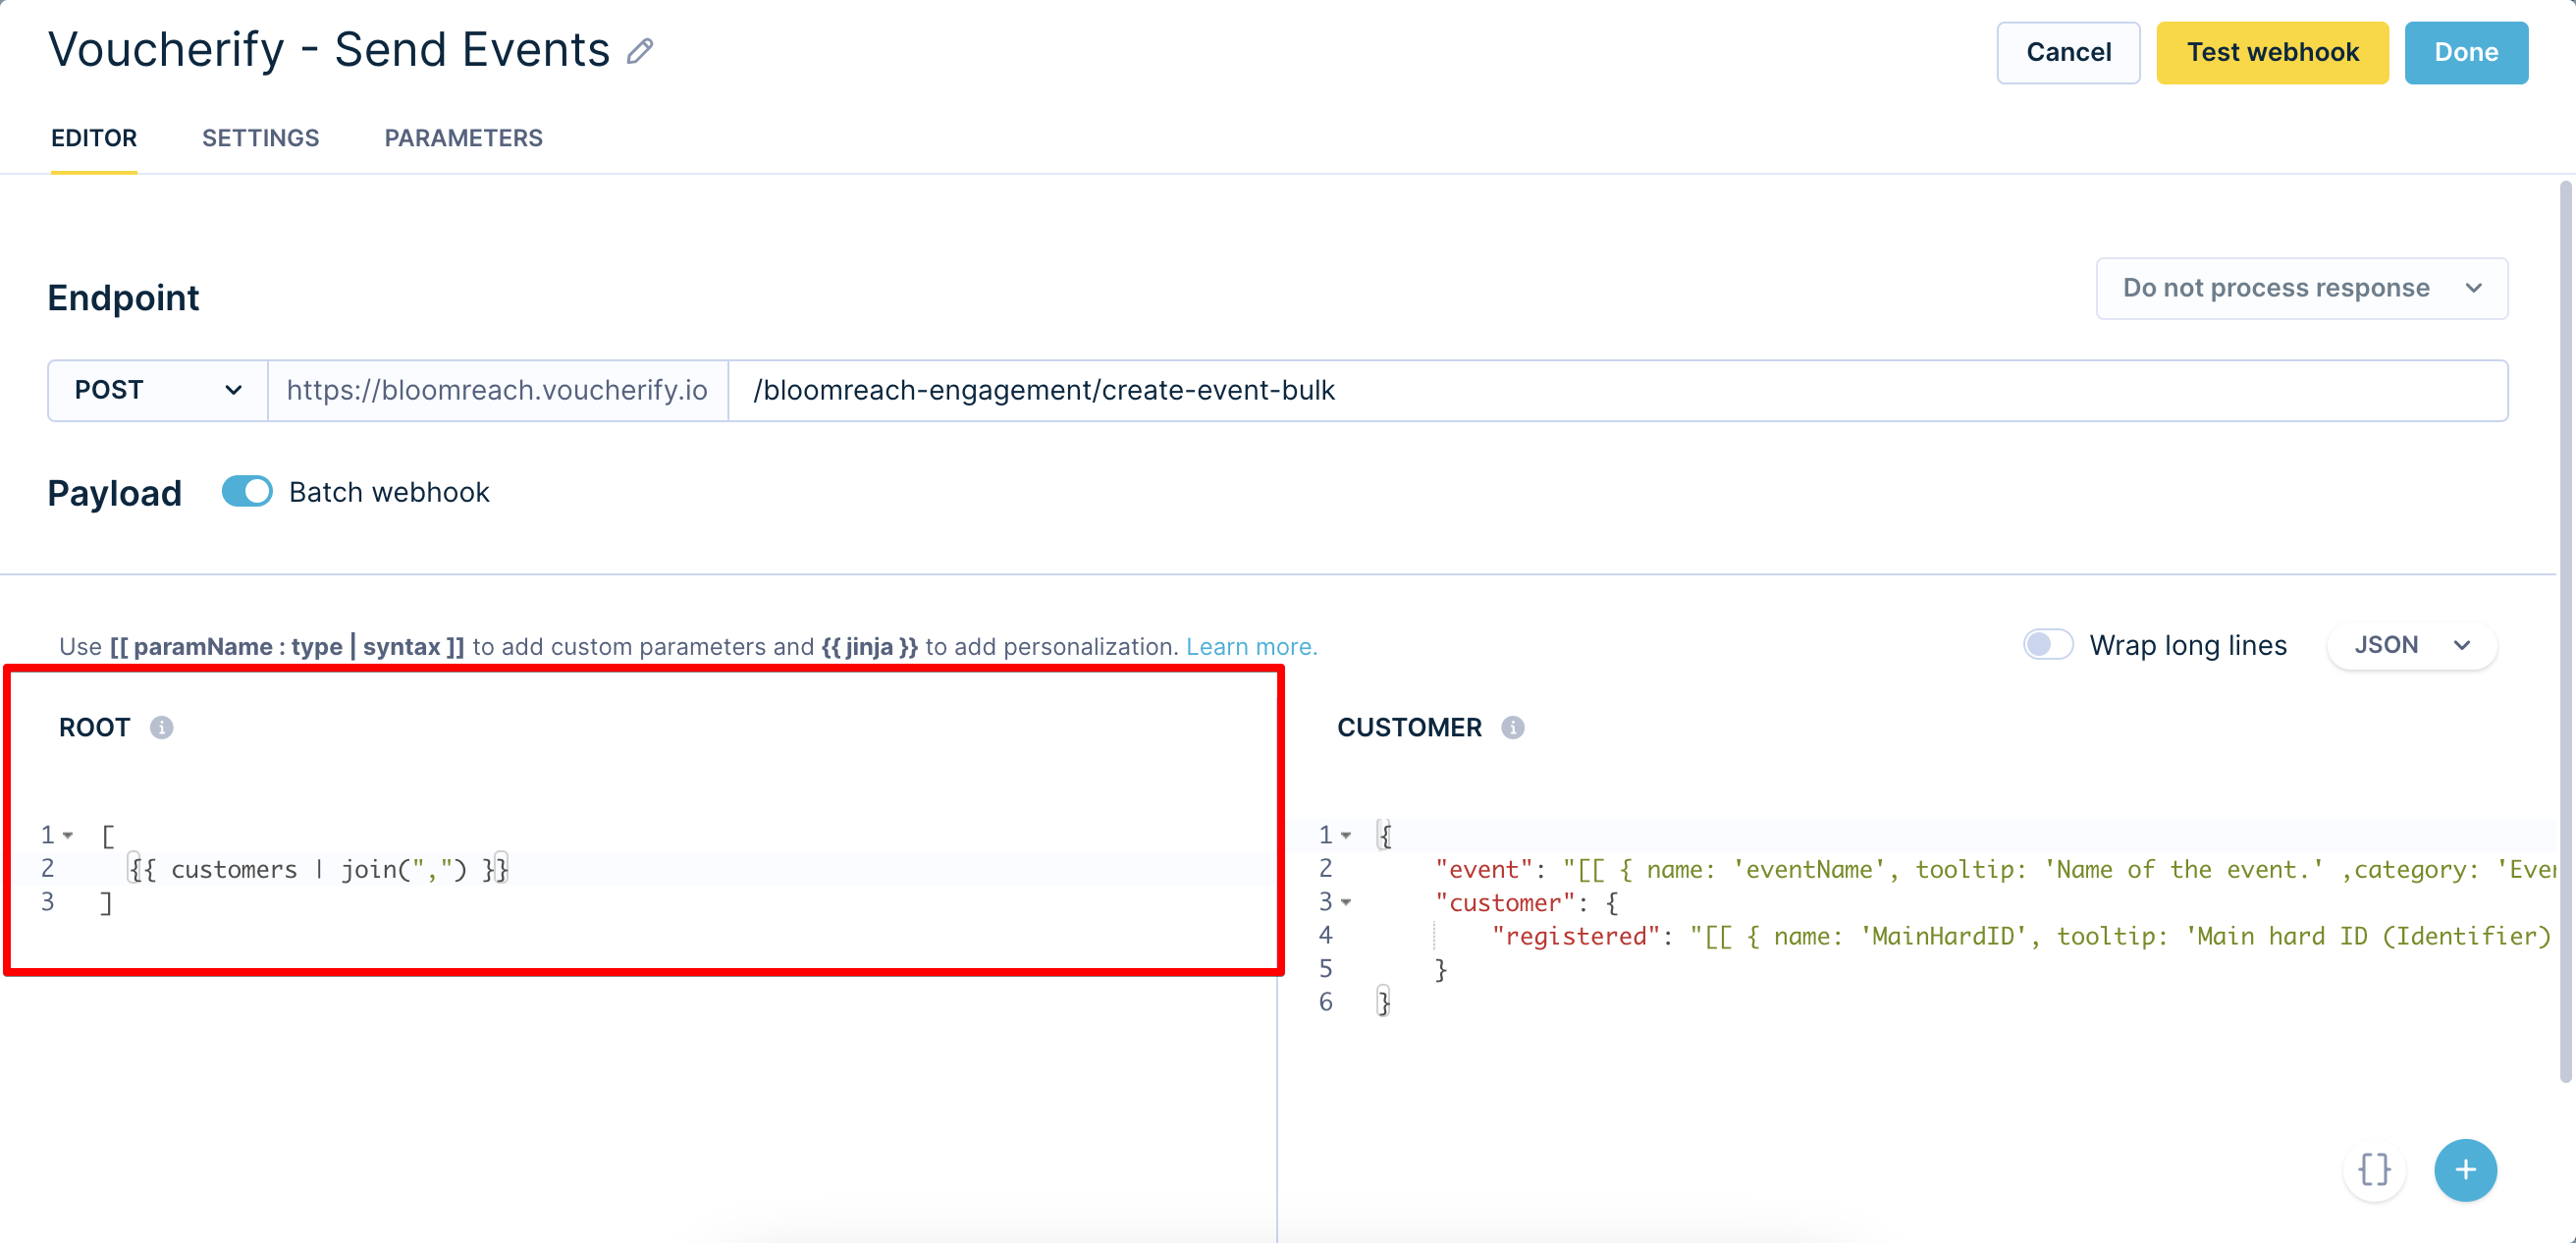
- Paste this code into the root part:
[
	{{ customers | join(",") }}
]
Updated 4 months ago