

Customers
Customers and their events are the core entities around which Bloomreach's tracking and analysis capabilities are built. This guide explains what the customer database contains, how customer profiles are structured, and what information you can find in the single customer view.
To learn about customers and events as data entities, see the Data structure article.
Interactive tourSee how we help marketers like you build a Single Customer View with an interactive tour.
E02 15 steps, 3 minutes
What are customers
In Bloomreach, a customer is a profile that represents a single individual interacting with your website or app. Each profile stores a combination of identifiers, attributes, and a full event history — together forming what's known as the single customer view.
Customer profiles can be created automatically, imported in bulk, or added manually. For more on how profiles come into existence, see How customers are created below.
How to create customers
Bloomreach automatically creates a customer record the first time a visitor lands on your website and triggers the initialization code. This generates a hard identifier — typically called registered — and a cookie that enables ongoing tracking of that customer's actions and sessions.
The nature of the hard identifier depends on how your project is integrated. It's usually the customer's email address or an internal ID your company uses.
You can also create customer profiles by:
- Importing them in bulk.
- Adding them manually from the customer list view.
In some situations, Bloomreach creates multiple records for the same customer — for example, when they browse from different devices. Bloomreach automatically merges these records when matching identifiers are found, such as when the customer logs in from a second device.
Single customer view
To open the single customer view:
-
Go to Data and Assets > Customers and click on any customer profile.
-
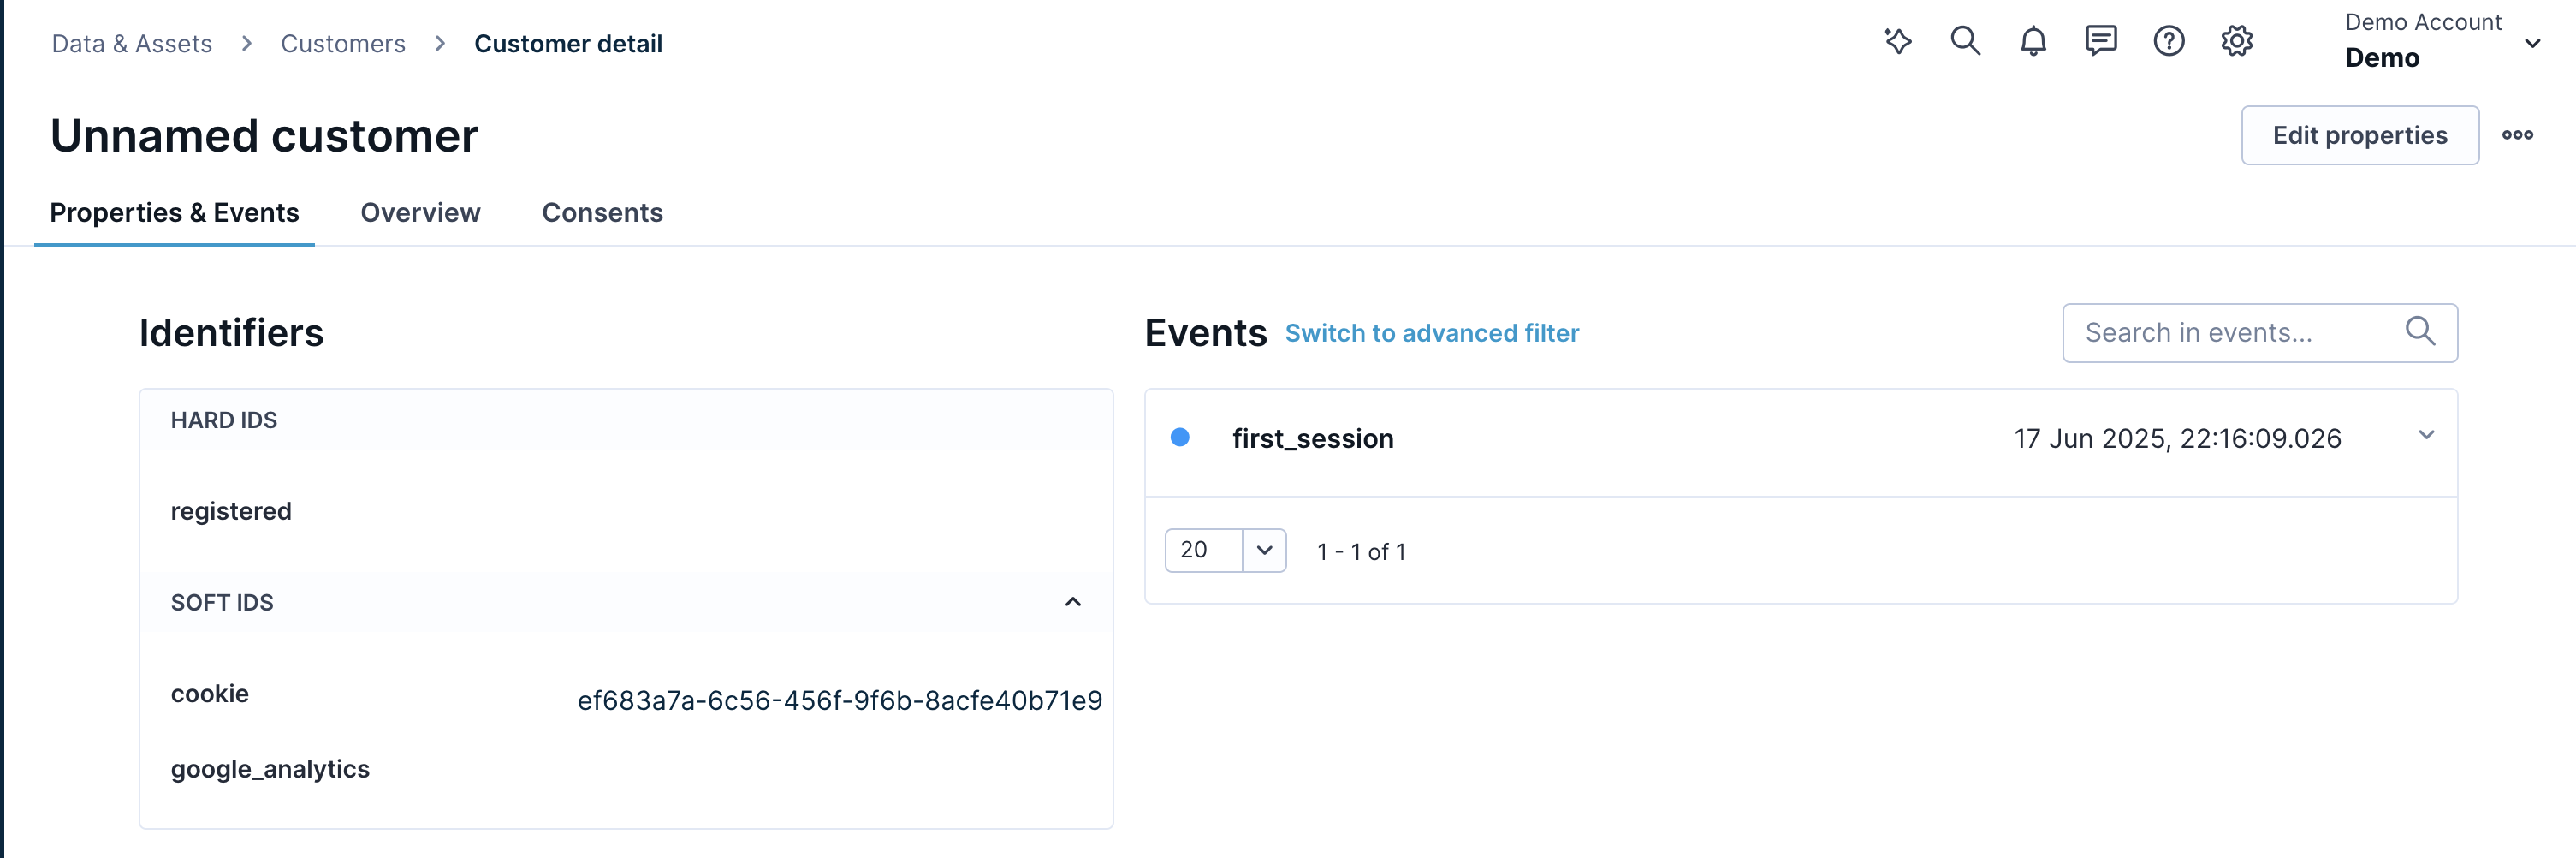
This opens a consolidated view of everything Bloomreach knows about that customer, organized into three tabs: Overview, Properties and events, and Consents.
-
From the three-dot menu in the top-right corner of the profile, manually add an event for that customer, download their full data as a JSON file, anonymize them, or delete the profile.
The single customer view
Overview tab
The Overview tab gives you a snapshot of the customer's key information and recent activity, organized into two sections.
Basic information
This section displays the following, where available:
- Contact details: Email address, postal address, and phone number.
- Personal details: Gender and date of birth.
- Selected predictions and segmentations. Go to the Properties and events tab to see the full list.
Profile
This section shows the customer's recent activity:
- Items viewed: count of
view_itemevents in the last 30 days. - Purchases: count of
purchaseevents in the last 30 days. - Revenue: sum of
purchase > total_pricevalues in the last 30 days.
Below these counts, find additional details such as the last purchase date and the most recent campaign received. If you have an active recommendations model running, you also see which products would be shown to this customer. Switch between recommendation models by clicking on the model name.
Multiple catalogs
If your project contains multiple catalogs, the product source shown in the profile reflects the first catalog in alphabetical order that contains a match.
Properties and events tab
This tab gives you full visibility into a customer's attributes and event history.
Left panel — attributes
The left panel lists all identifiers and properties associated with the customer. This includes dynamically calculated analyses such as Aggregates and Segmentations, organized into expandable categories. The grouping reflects the structure configured in the Data manager.
When a profile loads, all dynamically calculated analyses are collapsed by default. Expand a section to load its data. To manage the volume of items shown, click Load more or use the search field to find a specific analysis by name.
You can also search for properties by name using the search field, or use the filter to show only properties tied to specific initiatives or created by you.
Hovering over a property value lets you edit it inline. The delete button clears the value for that specific customer only. To remove an attribute from the entire project, use the Data manager.
Attribute types
Customers can have the following types of attributes:
| Attribute type | Description |
| Identifiers | Soft and hard IDs used to identify unique customers. |
| Static attributes | Set via the SDK or updated through imports. These change infrequently, for example first_name, last_name, email, and subscription status. |
| Aggregates | Calculated in real time for each customer from their associated events. |
| Segmentations | Calculated in real time. When a customer belongs to a segment, that segmentation becomes available as a customer attribute. |
| Expressions | Calculated in real time. These attributes are derived from existing ones using custom expressions. |
| Predictions | Calculated in real time. |
Right panel — event history
The right panel shows the full history of all events tracked for this customer. Click on any event to expand its attributes and values. Use the text search to find events by name, or apply filters to search using specific criteria.
Consents tab
The Consents tab lets you monitor and manage a customer's consents manually. For more information, see Managing consents in customer profile.
Manage customer database
To learn how to search, filter, download, delete, and edit customer profiles, see Manage your customer database.
Limitations
Customer attributes
The maximum number of customer attributes per profile depends on your contract:
- 255 attributes per customer, with a maximum size of 128 Kbits (16 KB) per attribute.
- 1,024 attributes per customer, with a maximum size of 2 KiB per attribute.
Once the storage limit is reached, any tracking that includes new customer attributes is discarded. You receive an alert as you approach your limit.
Events
There is a limit of 500,000 events per customer profile.
Events tracked beyond this limit are flagged as archived, starting from the oldest. Archived events are excluded from all analyses. If you need access to archived events, you can export them from the customer profile using the menu in the top-right corner.
When an impacted profile is open in the application, properties such as segmentations, aggregates, and expressions won't load, and a warning message is displayed.
The list of profiles at or near the 500,000-event limit (above 400,000) is available in the health dashboard of every project. An email notification is also sent to the supervisory email address for each affected project and to health dashboard subscribers.
Under normal circumstances, profiles typically have up to 10,000 events. Significantly higher counts may indicate an incorrect import or tracking configuration and are worth investigating.
Note that:
- Archived events don't expire and can't be deleted using the in-app delete feature.
- Archived events are available in Engagement BigQuery.
- Archived events aren't included in Data Exports.
- Archived events can be exported directly from the customer profile.
- To delete archived events, the entire customer profile must be deleted.
Updated 3 months ago