Settings and Administration
You can access project and user settings by clicking on the cogwheel button in the top right corner.
In user settings, you can set your localization (to change the timezone, number and date formats), change your personal details, password, or enable Two-step verification.
Project settings contain access management and settings for campaigns - languages, policies, consents, and channels. You can also set up SSH tunnels here.
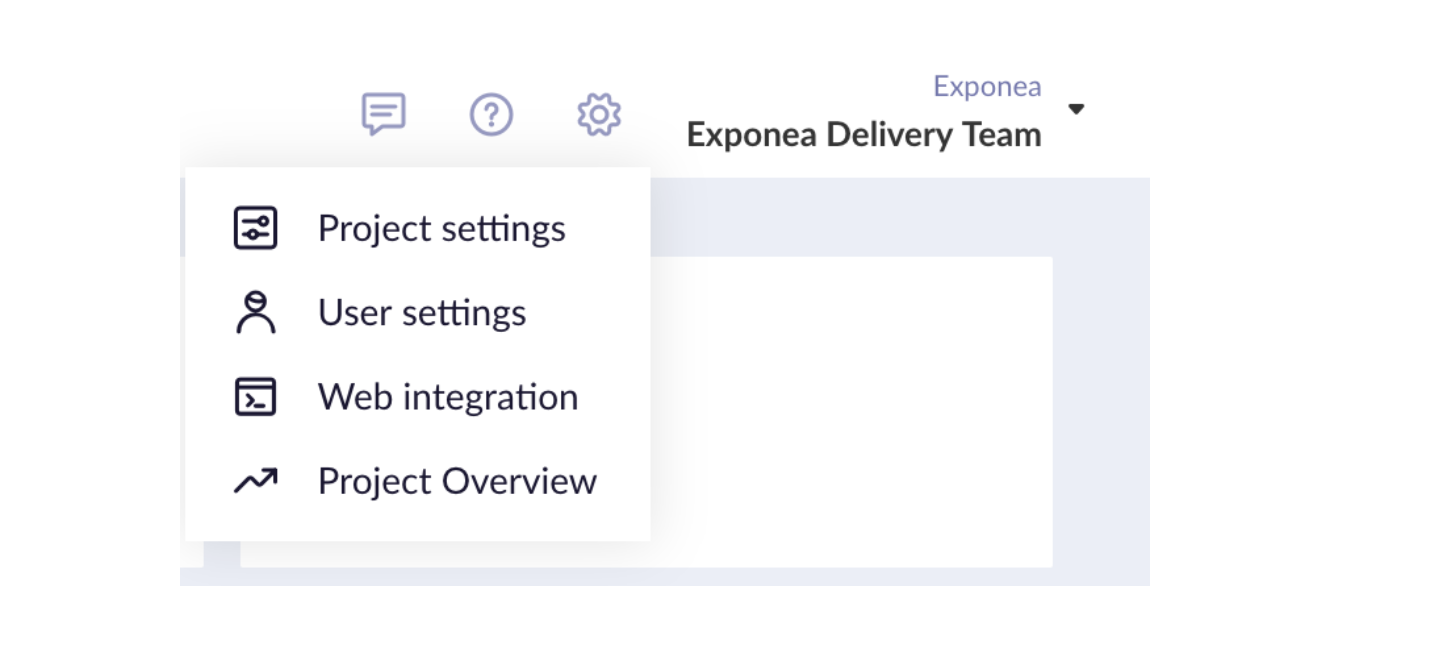
You can also switch between projects by clicking on the name of your current project.
Users, projects and accounts explained
Users in Bloomreach Engagement are linked to specific people. Each user can have access to multiple projects, even across different accounts. Inviting a new user is free of charge and can be done in the access management part in project settings.
Projects in Bloomreach Engagement are used to differentiate between businesses. Each project has its own project token (ID) that is used when setting event tracking on the website or in mobile apps. Projects are independent of one another, each one has different customers and events, own independent analyses, campaigns, etc. An example would be a company having multiple projects for different countries under the same account. Each project has separate access management.
Accounts are a group of projects for a single client. They share billing, limits for the number of events and other limits. It is possible to set roles in accounts to grant access automatically to all projects under the account.
Permission Scope
Do not forget the hierarchy between Accounts and Projects. Role granted on a higher scope (account) is applied to all lower scopes (project). Similarly, if users operate on their own single tenant instance, that instance has the highest hierarchy (instance -> account -> project)
For instance, if a user is granted "Analyses Viewer" on Account scope, the user will have "Analyses Viewer" in all projects under that Account.
This might be critical, as you might be granting Account rights to someone, who is supposed to see/edit one Project ONLY.
Learn more about the permission hierarchy in our article.
Create a new project
You can create a new project via a preexisting account. Click on your account and add a project.
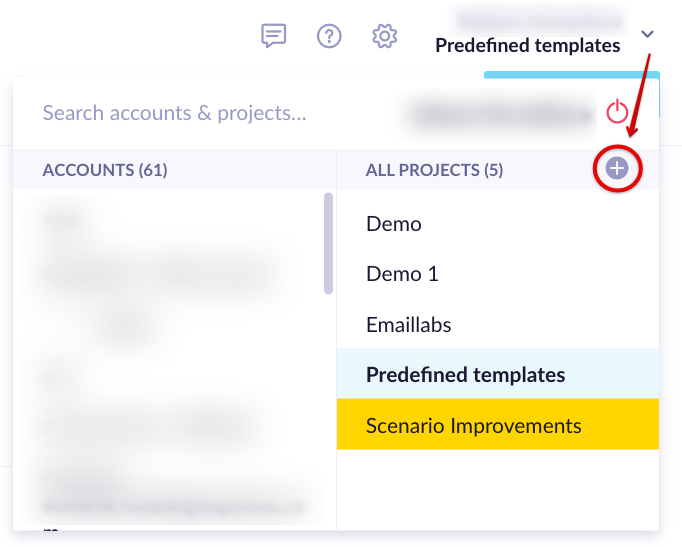
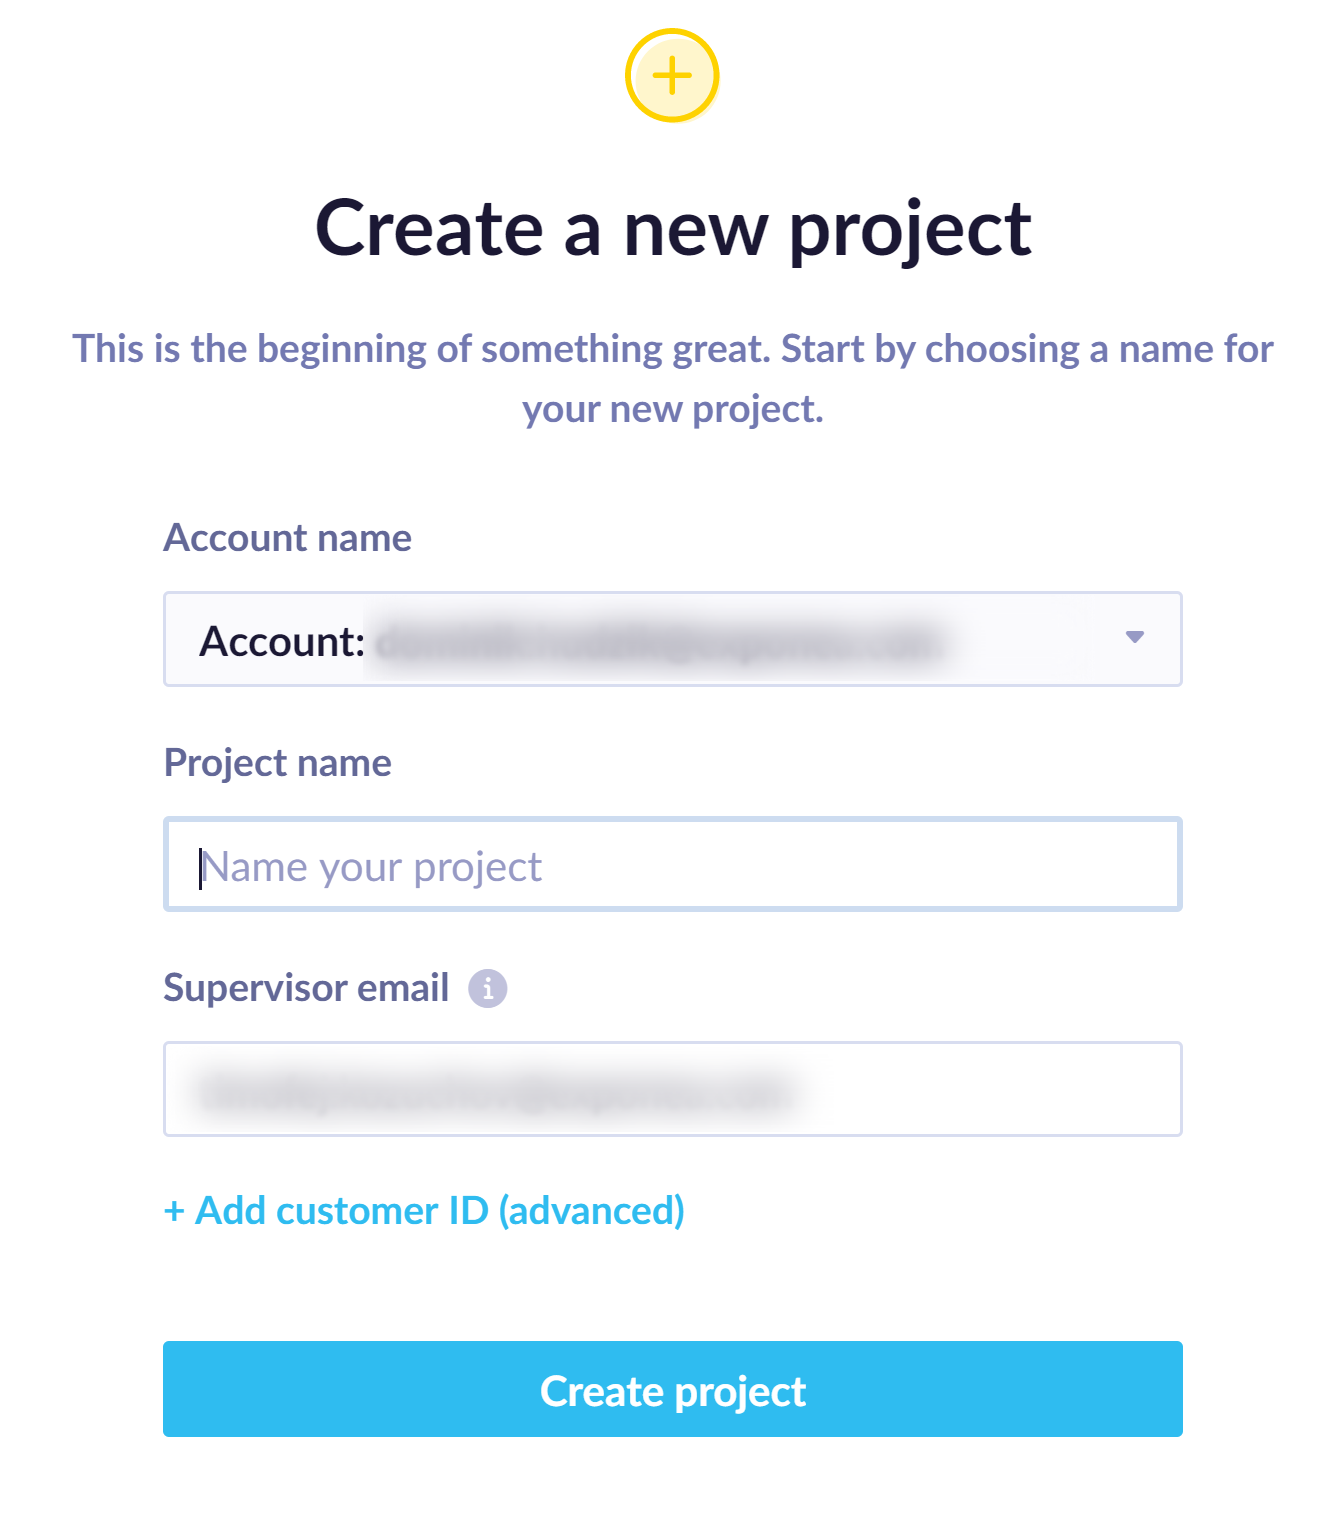
You have to select the account in which you are going to create the project, name it, and write its supervisor. You can create advanced customer ID roles for more people, however, this is not a prerequisite.
Only users with Account Admin role can create new projects.
Do not forget to click on '+add customer ID (advanced)' and check the trim and lower case checkboxes if that applies to you.
User settings and timezone
In User Settings, under the "Basic settings" tab, you can edit your personal details, including your name and phone number and also set your timezone. Navigate the left menu to change your password or set up 2-step verification in the "Security" tab.
Your choice of the timezone impacts how dates, hours, and times are displayed within the application. This is because the application acknowledges and accommodates the historical changes in time zones as well as the daylight saving time practices.
An example is Spain's time zone switch in 1940 from UTC+00 to UTC+01 and following discrepancies in dates older than this transition (compared to other countries in the same time zone).
Project settings
Project settings contain access management and settings for campaigns - languages, policies, consents, and channels. You can also set up SSH tunnels here.
Depending on your role and access rights, you might not see or be able to edit some of the sections visible in the screenshot below.
Project - General
You can change the project supervisor here, who serves as the main point of contact for important notifications and billing information. Project token and project secrets are also shown here. These are used for integration and tracking purposes.
Access management
You can read more about the role and access management in the following article.
API settings
- Located under "Access management"*
Read more about API settings here
Security
You can set up SSH tunnels here.
Campaigns - General
You can set the default utm_source
parameter under "General campaign settings". Read more about UTM parameters.
Language
You can define which languages your project uses to create multilanguage templates used in campaigns. "Name" is a human-readable name displayed in the UI (English). "Value" is the value tracked in the customer attribute language
(en).
Example
When you want to send an email campaign to customers in 3 different countries, you can create just one campaign with 3 different versions. In the screenshot below, all customers with an attribute language
= en
will receive the English version. The same logic applies to any language. Customers who don't have this attribute filled will receive the campaign in the default language, which would be Polish in this case.
Setting up multiple domains under one project
Sometimes you might prefer to create one project with several language versions/domains. In this case, follow these recommendations.
- Add all the languages to Project settings
- Make sure the language attribute of the customer matches the language in Project settings (i.e. both „cs“ for Czech, not „cs“ and „cz“).
- Languages in Project settings define the languages of email templates that you’ll be able to add. If you are going to need a different email for German and Austrian customers (different logo etc.), you might have to deal with the fact that it is not an actual language, and add „Austrian“ to Project settings as well.
- Remember to set the language attribute for every new customer. Import them with a language attribute through a scenario triggered by the subscription banner that assigns the language attribute based on the banner country_code.
Fonts
You can define custom fonts in the Email Visual Builder. To set up a custom font, follow the step-by-step instructions:
- Make a CSS file for every font-weight you want.
- Update the font-family to the name of the font.
- Update the source (src) to have the URL of the font-file (which is the Asset Manager link). Update also the format depending on the font format (in our example this corresponds to 'woff')
@font-face {
font-family: ‘My Awesome Font’;
font-style: normal;
font-weight: 400;
src: url( https://brxcdn.com/eng-app-storage/8239ddb6-f687-11ee-a211-f217ee5e7c05/media/original/a81cf69e-53d4-11ef-8937-ba2c61377898) format(‘woff’);
}
- Upload the CSS file to the Asset Manager.
- Set up the font in Project Settings > Fonts:
- Now you should be able to find the font in the list in the Visual Builder.
Google fonts already have ready-made CSS files on the Google Fonts site which are recommended to be used. Creating a new CSS file for Google fonts can cause issues.
Make sure to use single quote in the CSS value field, and not double quotes.
Throughput policies
Read about how to set up a throughput policy in the Webhooks article.
Privacy management
Frequency policy
Read about frequency policy and how to set it up in our dedicated article Frequency Policy
Consents / Campaign Groups
Campaign Groups have been replaced with our new Consents management. If your project is still using campaign groups, we recommend switching to consents for easier GDPR compliance.
After enabling consent management, the setting of campaign groups will be no longer available.
You can define categories of emails or SMS from which customers can unsubscribe separately. This will also create a customer attribute unsubscribed_from, which is a list attribute.
Each campaign sent has to belong to a campaign group. By default, there is only one campaign group called All Communication. Campaign groups with their names and descriptions will be shown as options to subscribe to/ unsubscribe from on the unsubscribe page ( the link to it can be sent via {{ email.unsubscribe }} ).
Once a customer chooses to unsubscribe from a campaign group, an event subscriptions_changed will be generated, and an attribute unsubscribed_from will be updated. This attribute can also be changed manually when editing the customer or through imports.
If you are using our consent management, apart from setting the consent and legitimate interest categories, you can also access and edit the consent page here:
Channels
Push notifications
You can set up mobile and/or browser push notification IDs and keys here.
Read more about our web push notifications and mobile push notifications.
Updated 30 days ago