Attentive
Integration
The following is a guide on how to integrate Attentive with Bloomreach Engagement.
Attentive is a marketing automation platform that allows you to send personalized SMS & Email campaigns to your customers. Attentive integration enables the real-time export of opt-ins, opt-outs, and SMS & Email campaign events. So, with this integration, you can send SMS messages from Bloomreach via Attentive Journey. Start using the Attentive integration that saves time and increases your conversion rates!
In this guide, you will learn about:
- how the exports of your data work,
- how to set up the integration,
- its use cases and limitations.
How the integration works
The Attentive integration exports in real-time the following events:
Consent events:
- SMS subscribe
- Email subscribe
- SMS unsubscribe
- Email unsubscribe
Campaign events:
- SMS sent
- Email sent
- SMS clicked
- Email clicked
- Email opened
All campaigns and consent events triggered after successfully integrating Attentive will automatically be exported to Bloomreach Engagement.
Manual deletion of subscribers in Attentive
Please bear in mind that if you manually delete subscribers in Attentive, this action will not be reflected in Bloomreach Engagement. To maintain consistency between the two platforms, affected customers must be manually removed in Bloomreach Engagement as well.
Setup in a nutshell
Prerequisites
Before you get to setting up the integration, make sure your project has the following IDs set up correctly:
- email_id - Hard ID, lowercase, trim; email address is the primary identifier for customers in Bloomreach Engagement.
- attentive_id - Soft ID - attentive_id refers to external_id from Attentive webhook.
- phone_id - Soft ID - phone from subscriber entity from Attentive webhook.
Step 1: Authentication
After you have checked your prerequisites, you need to set up the authentication first. Please follow these steps to do so:
- To start integrating with Attentive, you need to go to your Bloomreach Engagement account. For that, go to
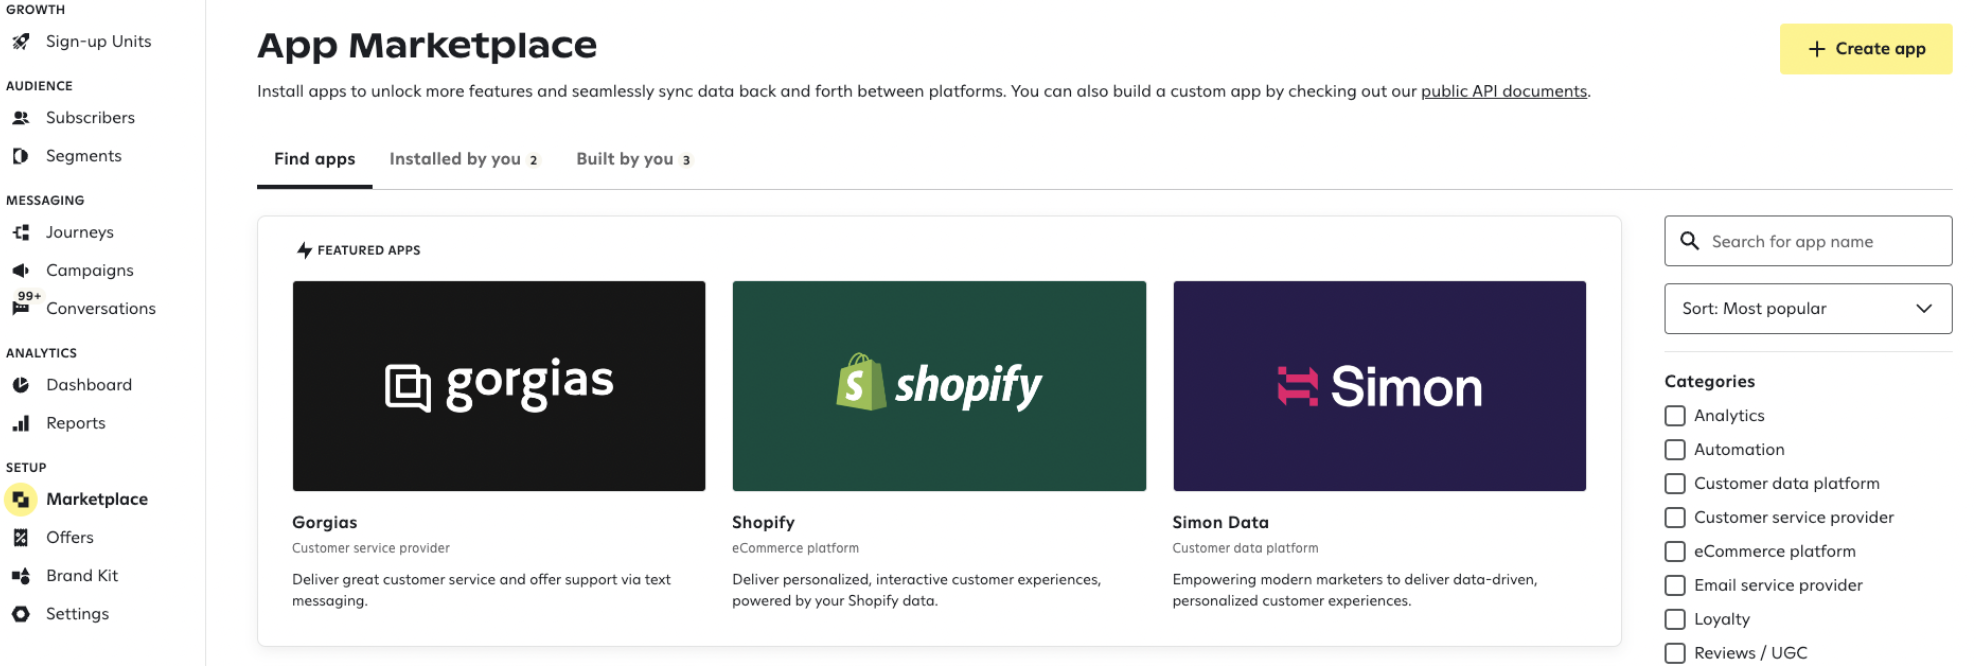
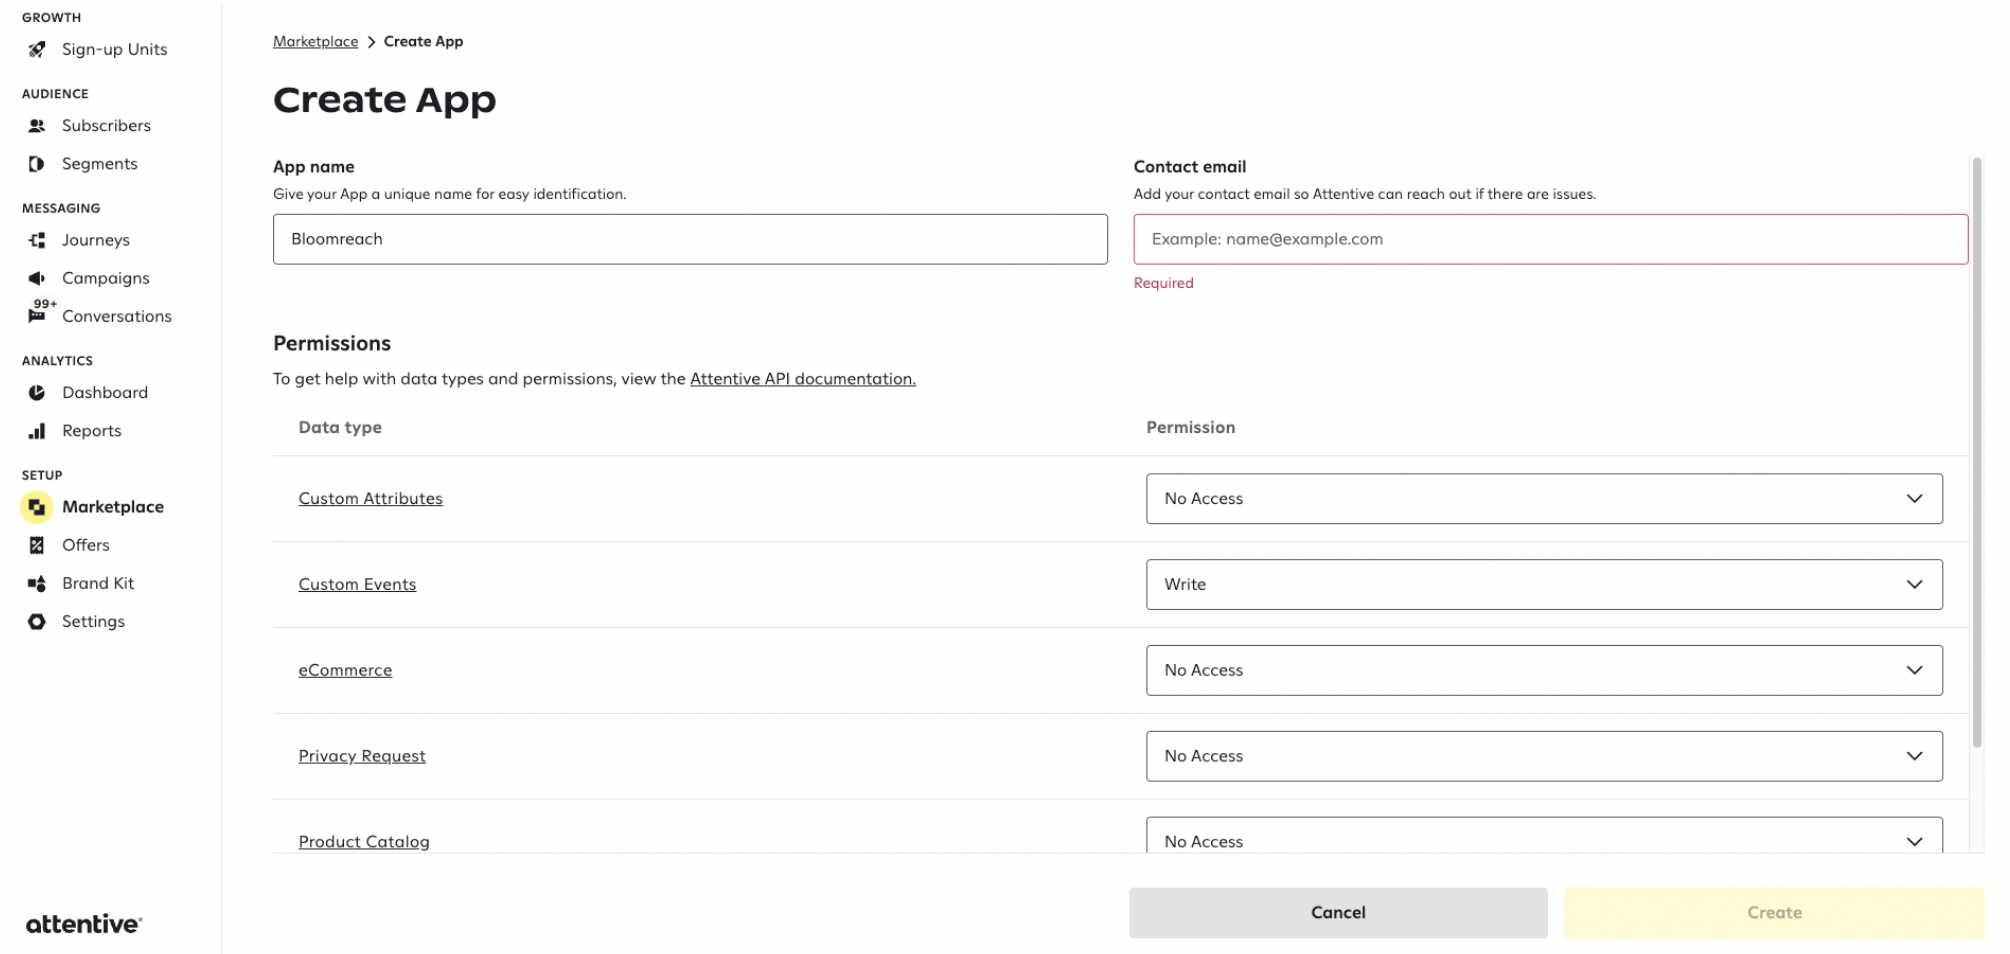
Data & Assets>Integrations> and selectAttentive. - You will need the Attentive private API key. For that, go to your Attentive account > Marketplace > 'Create app' > Fill in the App name and Contact email fields >
Permissions>Custom Events = Write> clickCreate
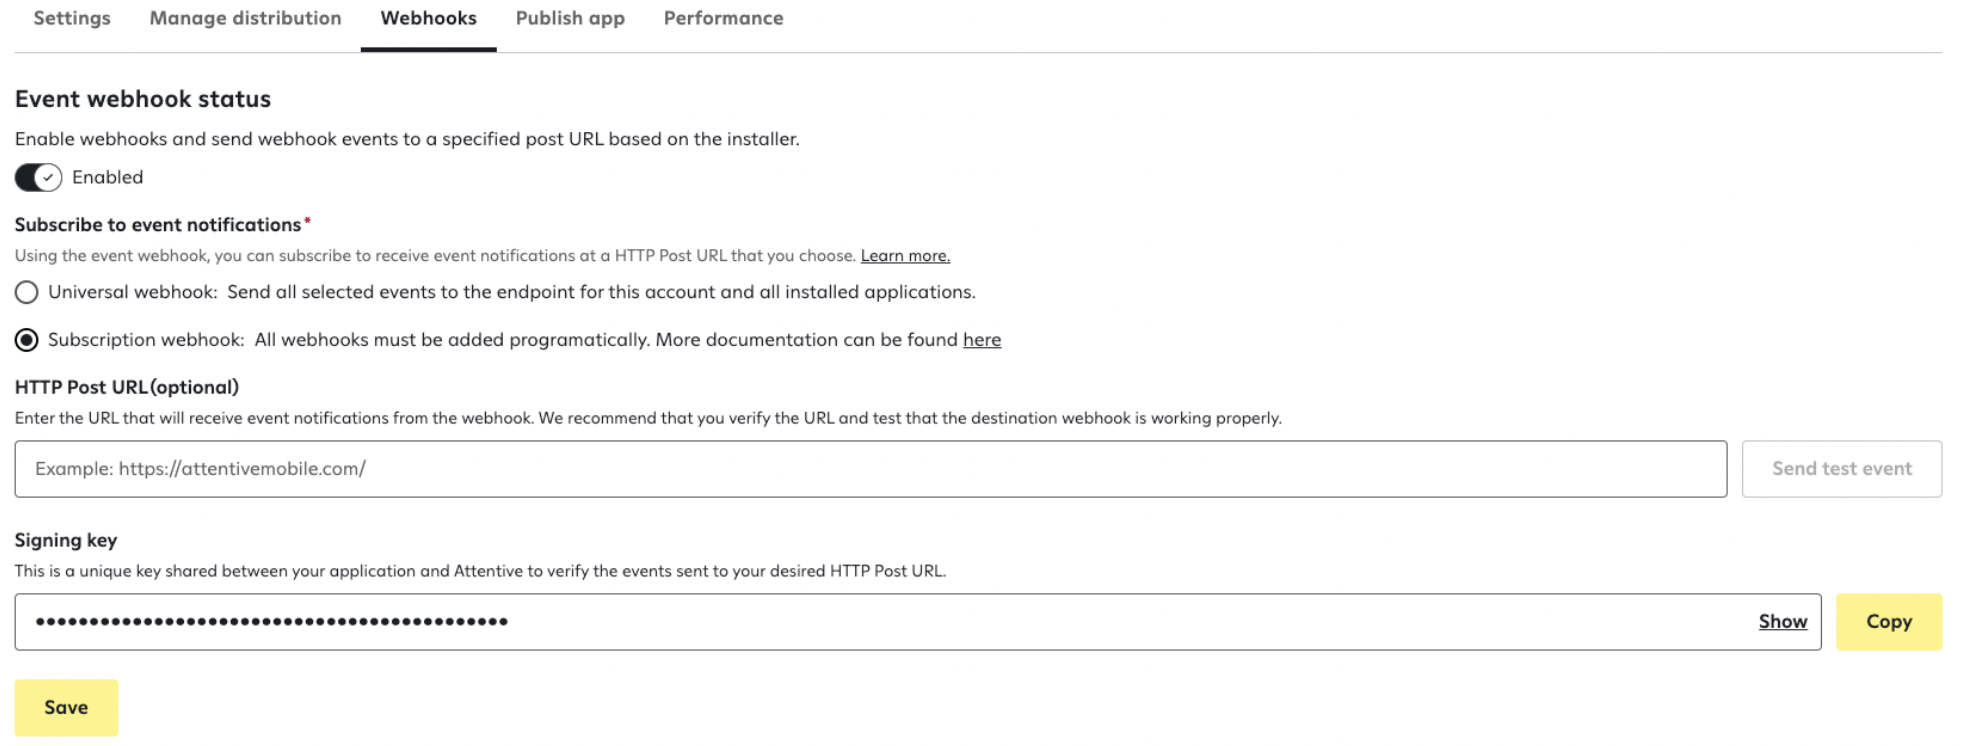
- Now you should be able to see your app under the 'build by you' tab in the App Marketplace. Click on your app, go to the webhook sub-tab inside your app, and set up the following configuration:
- Event webhook status: Enabled
- Subscribe to event notifications: Subscription webhook
- Save the configuration
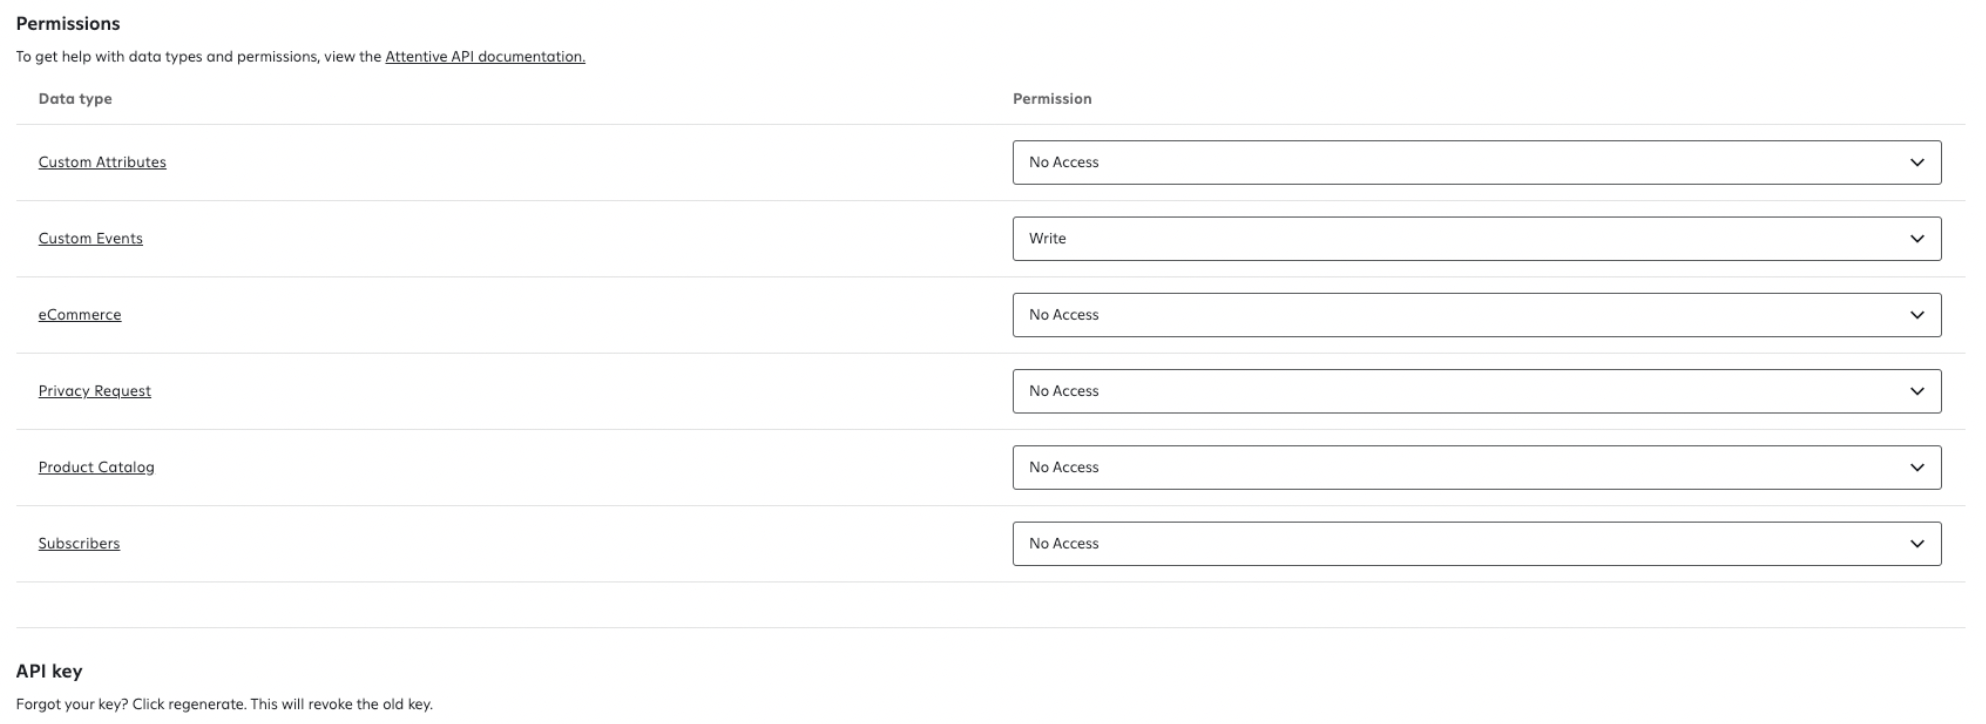
- Return to the Settings sub-tab inside your app, scroll down to the API key, and copy it.
- Paste the API key to Bloomreach Engagement.

Step 2: Customer ID and their property mapping
Define how to display Attentive identifiers like email_id, attentive_id, and phone_id in the Bloomreach Engagement platform.
Step 3: Consent mapping
The next step is mapping the Attentive campaign channels you want to track (email and sms) to your consent categories in Bloomreach Engagement.
For example, if you map the Email Attentive channel to the Consent category = Email Newsletter in Bloomreach, every customer who opt-ins for email communication will receive a consent event = Email Newsletter - accept.
Warning
Do not skip this step, otherwise, Bloomreach Engagement will not track any consent events from the Attentive platform. The consent mappings that you save cannot be changed (new consent mappings can be added, though).
Step 4: Save the integration
Once all steps above are done, click the 'Save' button, and the integration is successfully created. Every Attentive campaign or consent event triggered after setting up the integration will be present in your Bloomreach Engagement project.
Trigger sending an SMS from Engagement via Attentive Journey
- Go to
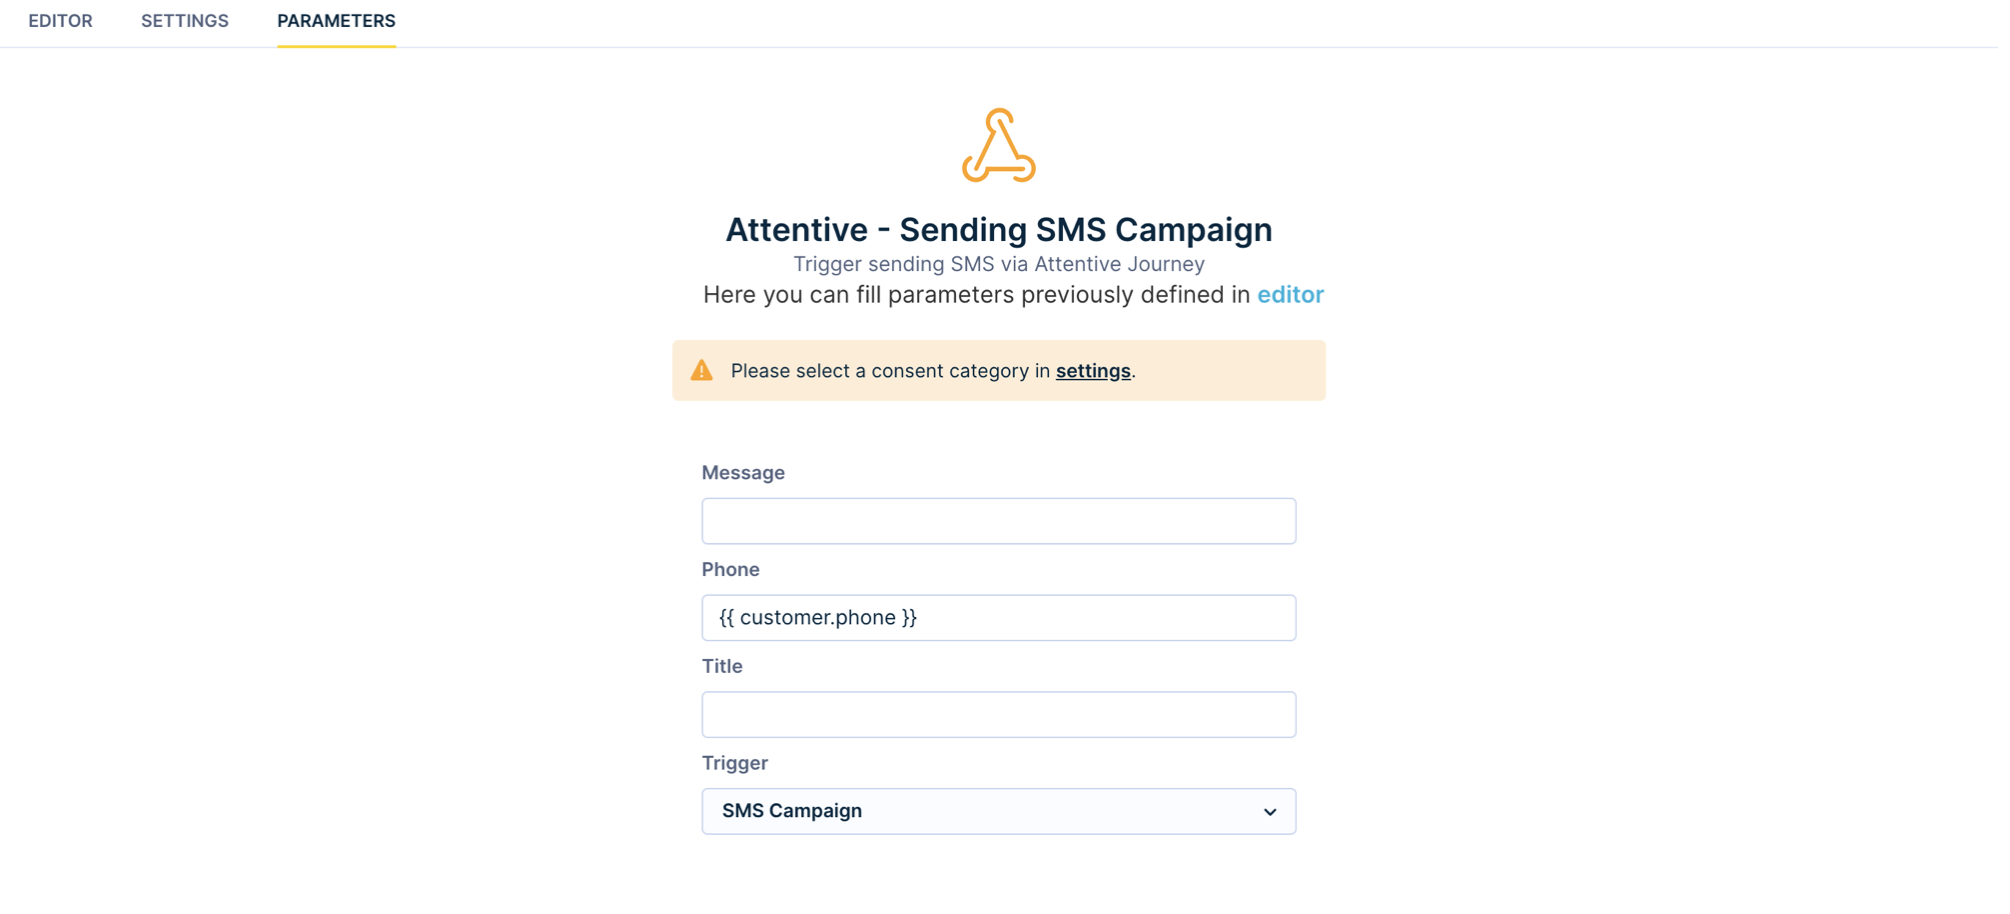
Scenarios>Actions>Other> selectAttentive - Sending SMS Campaign.

- Fill in all the necessary information, like the title and message.
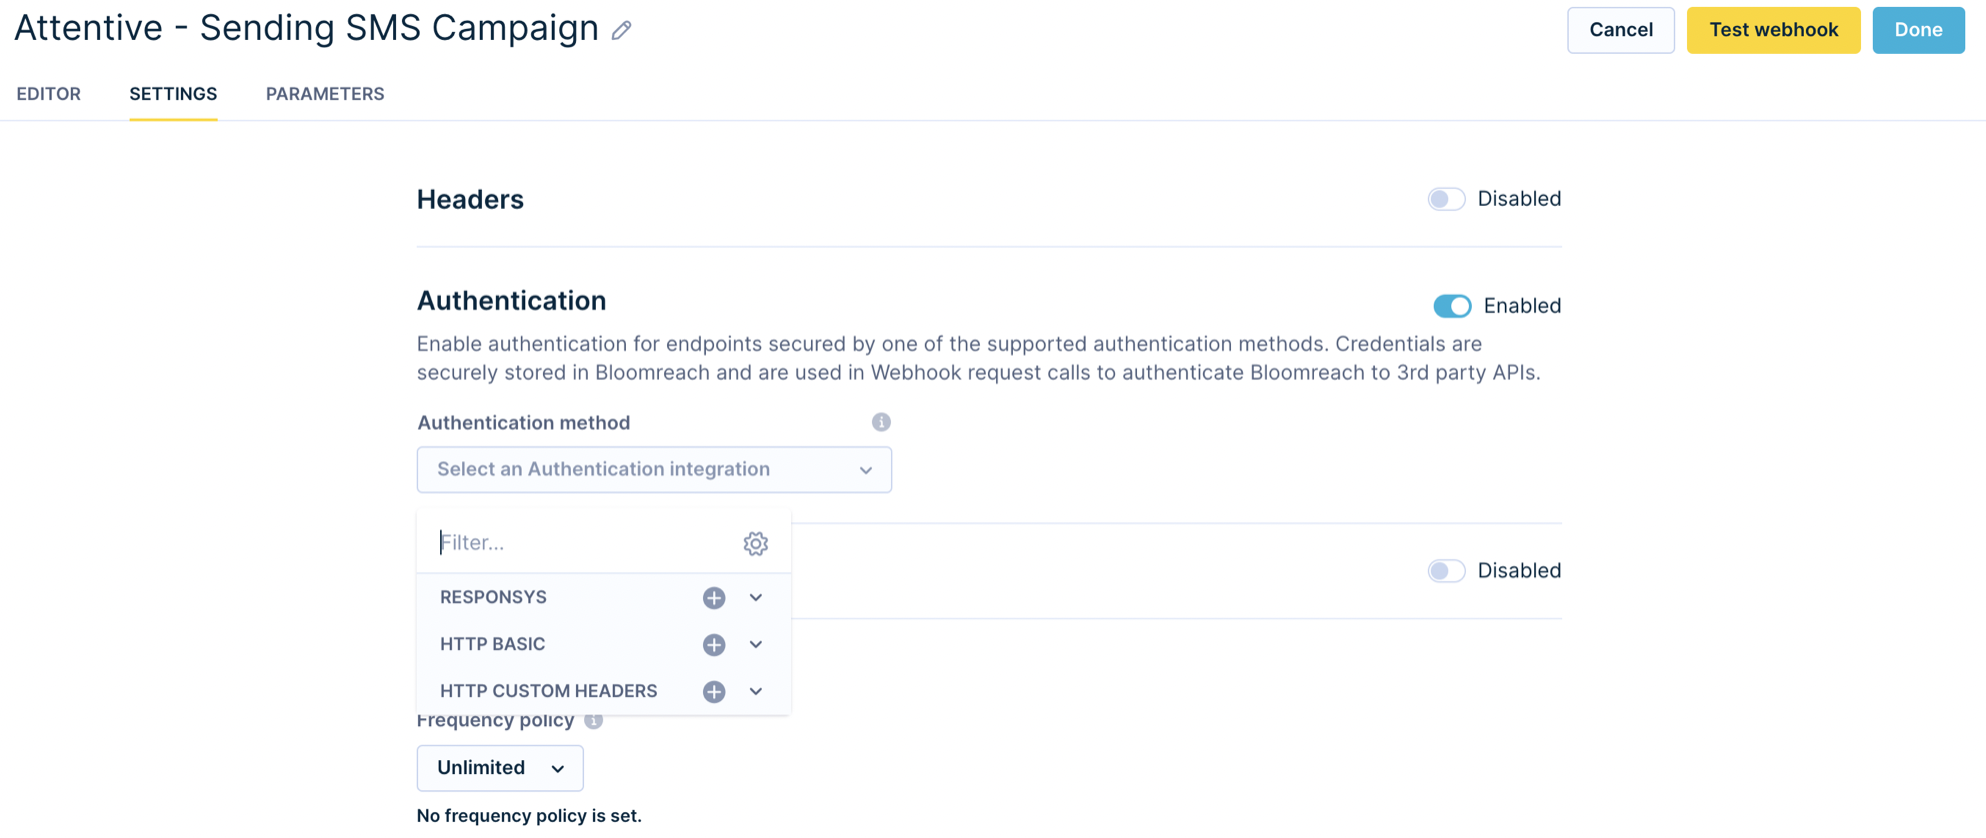
- Under the Setting tab, Enable Authentication and create a new authentication method dedicated to the Attentive webhook. Select HTTP Custom Headers.
- Name the authentication schema and fill in as below.
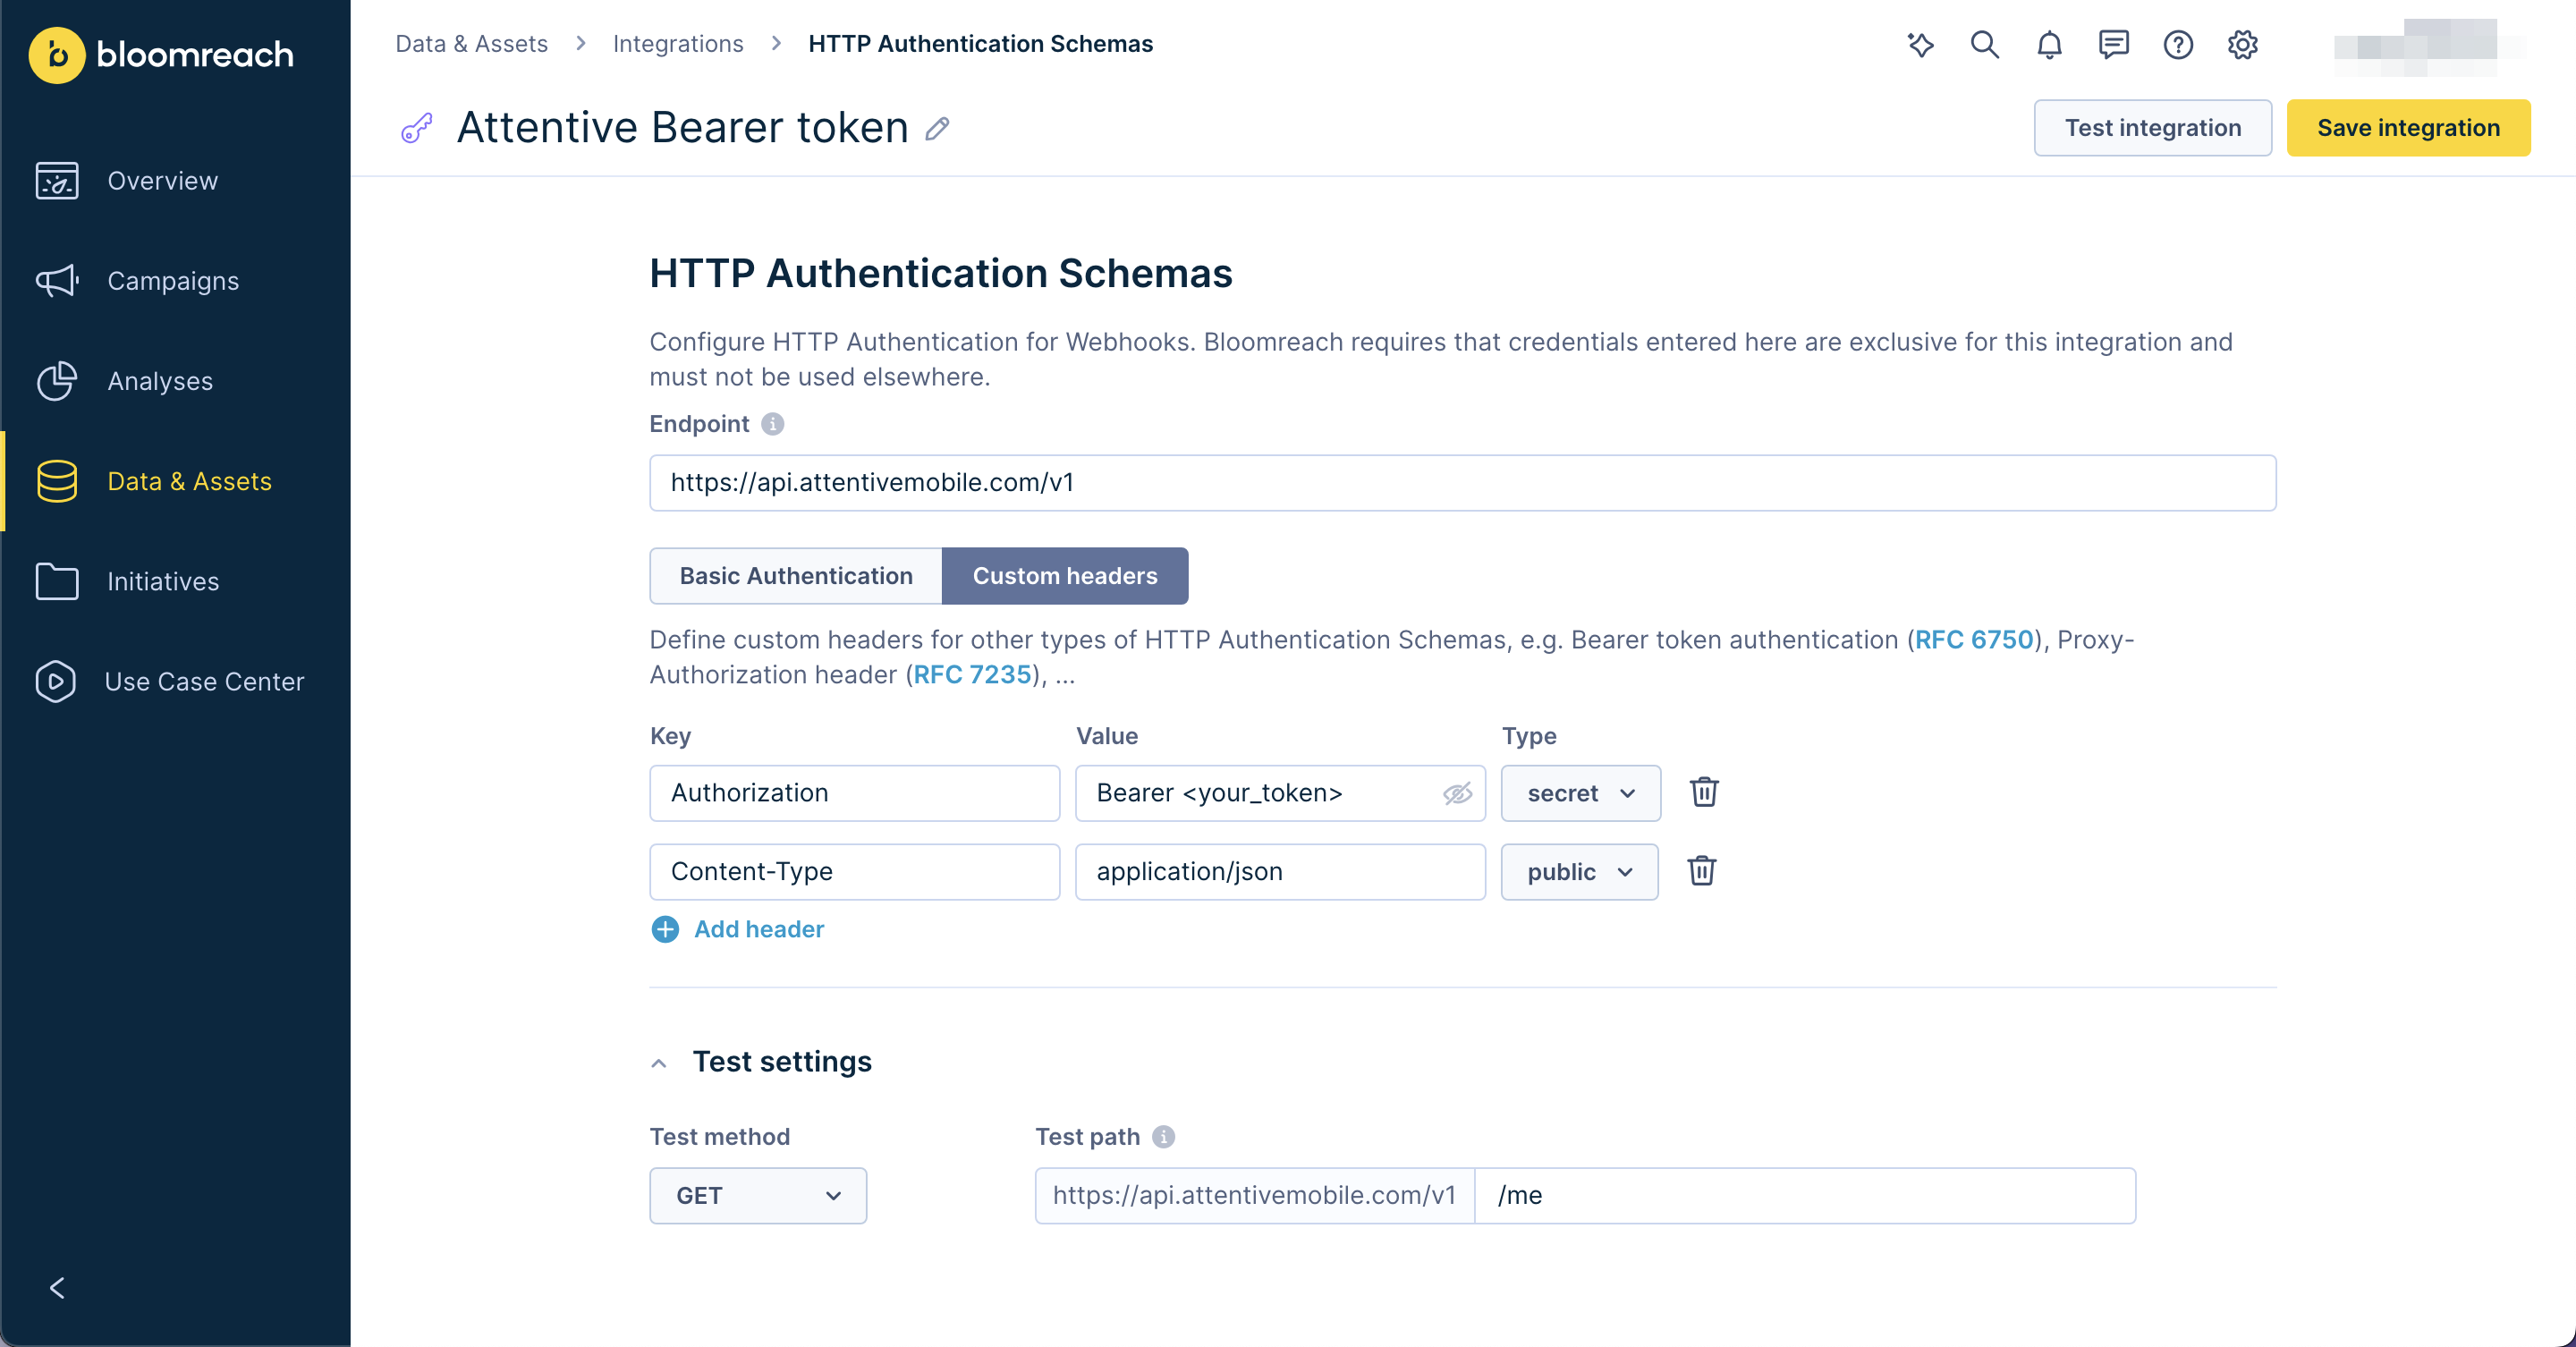
- Replace <your_token> with the same API key used in that field.

- Once done, you can use the Attentive webhook preset to trigger sending an SMS from Engagement via Attentive.
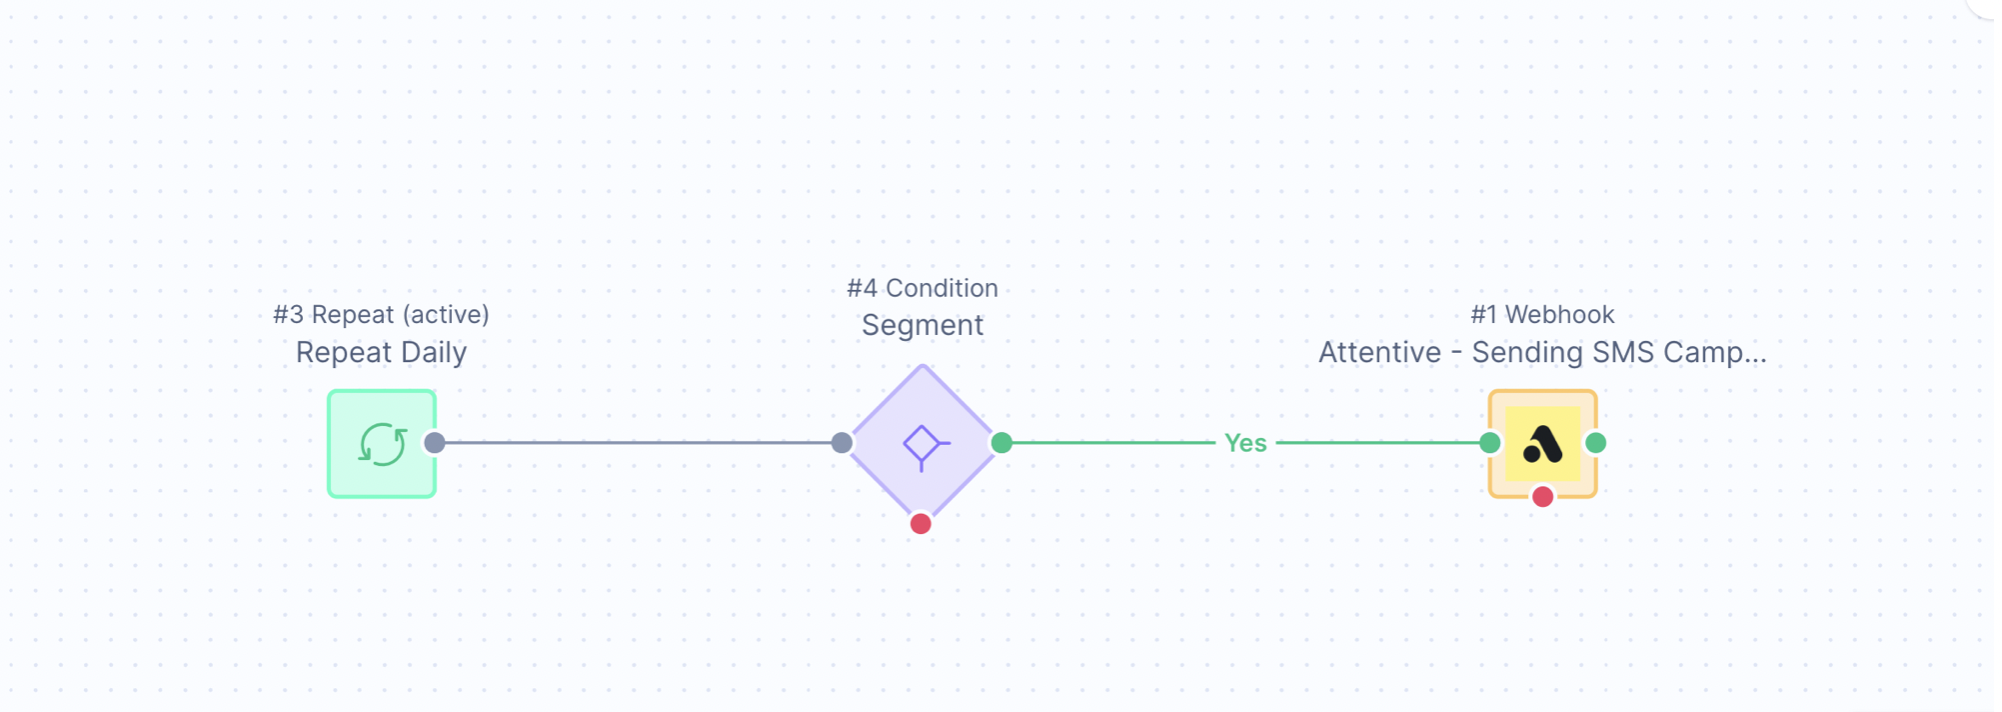
- To send the SMS campaign, you need to create a Journey in Attentive, which will be triggered by an SMS Campaign event from Engagement and will send the SMS campaign from Attentive.
Use cases
- Advanced reporting - including profiles and campaign events from Attentive
- Segmentation using complex criteria - using running aggregates, expressions, etc.
- Saving time by using Customer Data Platform - all data sources sync into one platform, no need to switch between platforms
Limitations
Historical import needed
Bloomreach does not pass segments to Attentive due to the limitations of the Attentive API. Instead, the individual phone numbers that should receive a message will be determined by Bloomreach and then sent as individual API calls to Attentive for the actual message sending.
Thus, a one-time historical import of all contacts is needed to ensure Bloomreach and Attentive have the same contact records on both platforms. The integration will manage opt-ins/outs moving forward, but the historical import is needed to close that gap.
Separate apps for each integration
For each Attentive integration inside Bloomreach, you need to create a separate app in Attentive. That is because the Attentive API key cannot be shared between integrations - only 1 Attentive Api Key per integration. Unless you validate this rule, none of the Attentive integrations will work properly, and events will be randomly shared between integrations.
Javascript snippet in sign-up unit
For Bloomreach to track web behavior, a javascript snippet needs to be added to the sign-up unit in Attentive to ensure that cookied data is passed back to Bloomreach.
Available on some instances only
The Attentive integration is available on some instances only. This means that some single-tenant instances and new multi-tenant instances may need manual activation of the Attentive integration by the engineering team first. This is generally requested during a new instance setup or can be requested any time later by contacting our Live chat or your Customer Success Manager.
Updated about 1 year ago
