

MMS in Campaigns Module
MMS campaigns let you create personalized multimedia messages with images, videos, and contact cards. Adding media can boost user engagement and brand awareness. This guide shows you how to build an MMS campaign in the SMS Campaigns module.
MMS are handled by the third-party providers Sinch and Infobip. Both provide support only in the US and Canada. Note that due to regulatory requirements, service to Canada is fairly limited.
For detailed information on MMS project settings, integration, SMS fallback, and message tracking, see our main MMS campaigns documentation.
Create your MMS campaign
Start a new campaign
Go to Campaigns > SMS campaigns and click + New SMS campaign.
Choose your template
Build your MMS campaign from scratch or use existing templates:
- Project templates: Custom templates you build in Asset Manager and reuse across campaigns
- Predefined templates: Built-in library templates you can reuse for any campaign.

Customize template settings
Template settings are turned off by default. When you create a campaign using a template with enabled settings, they fill in automatically. This saves time - you don't need to configure the same settings repeatedly.
When you change templates in an existing campaign, you can apply the template settings or keep your current ones.
Create sender profile
To use the integration, set it up as a sender profile in Project settings > Campaigns > SMS / MMS / RCS. For details, read the SMS or MMS campaign documentation. The process is the same for MMS and SMS.
Customize the message
Set up your content
- Sender: Use a short code (US), toll-free number (US and Canada), 10DLC number (US and Canada), or long number (Canada and Australia).
- Subject: Add up to 80 characters (no emojis or Unicode characters).
- Message text: Write up to 1,600 characters with Jinja personalization if needed.
Add media
You can include one of these supported media types:
- Image: GIF, JPG, or PNG files
- Video: MP4 files
- Contact card: VCF files
Other contact card types such as text/directory, text/directory; profile=vcard and text/x-vcard are deprecated. The supported media type for contact cards is text/vcard.
Pro tipKeep media files under 1MB for best performance.
Set up SMS fallback
Configure a fallback message (160 characters max) that sends if MMS delivery fails. Enable automatic message splitting for longer fallback messages.
Configure campaign settings
You can access SMS/MMS campaign settings through the SMS campaigns module in Project settings. In this tab, you can configure various SMS/MMS parameters.
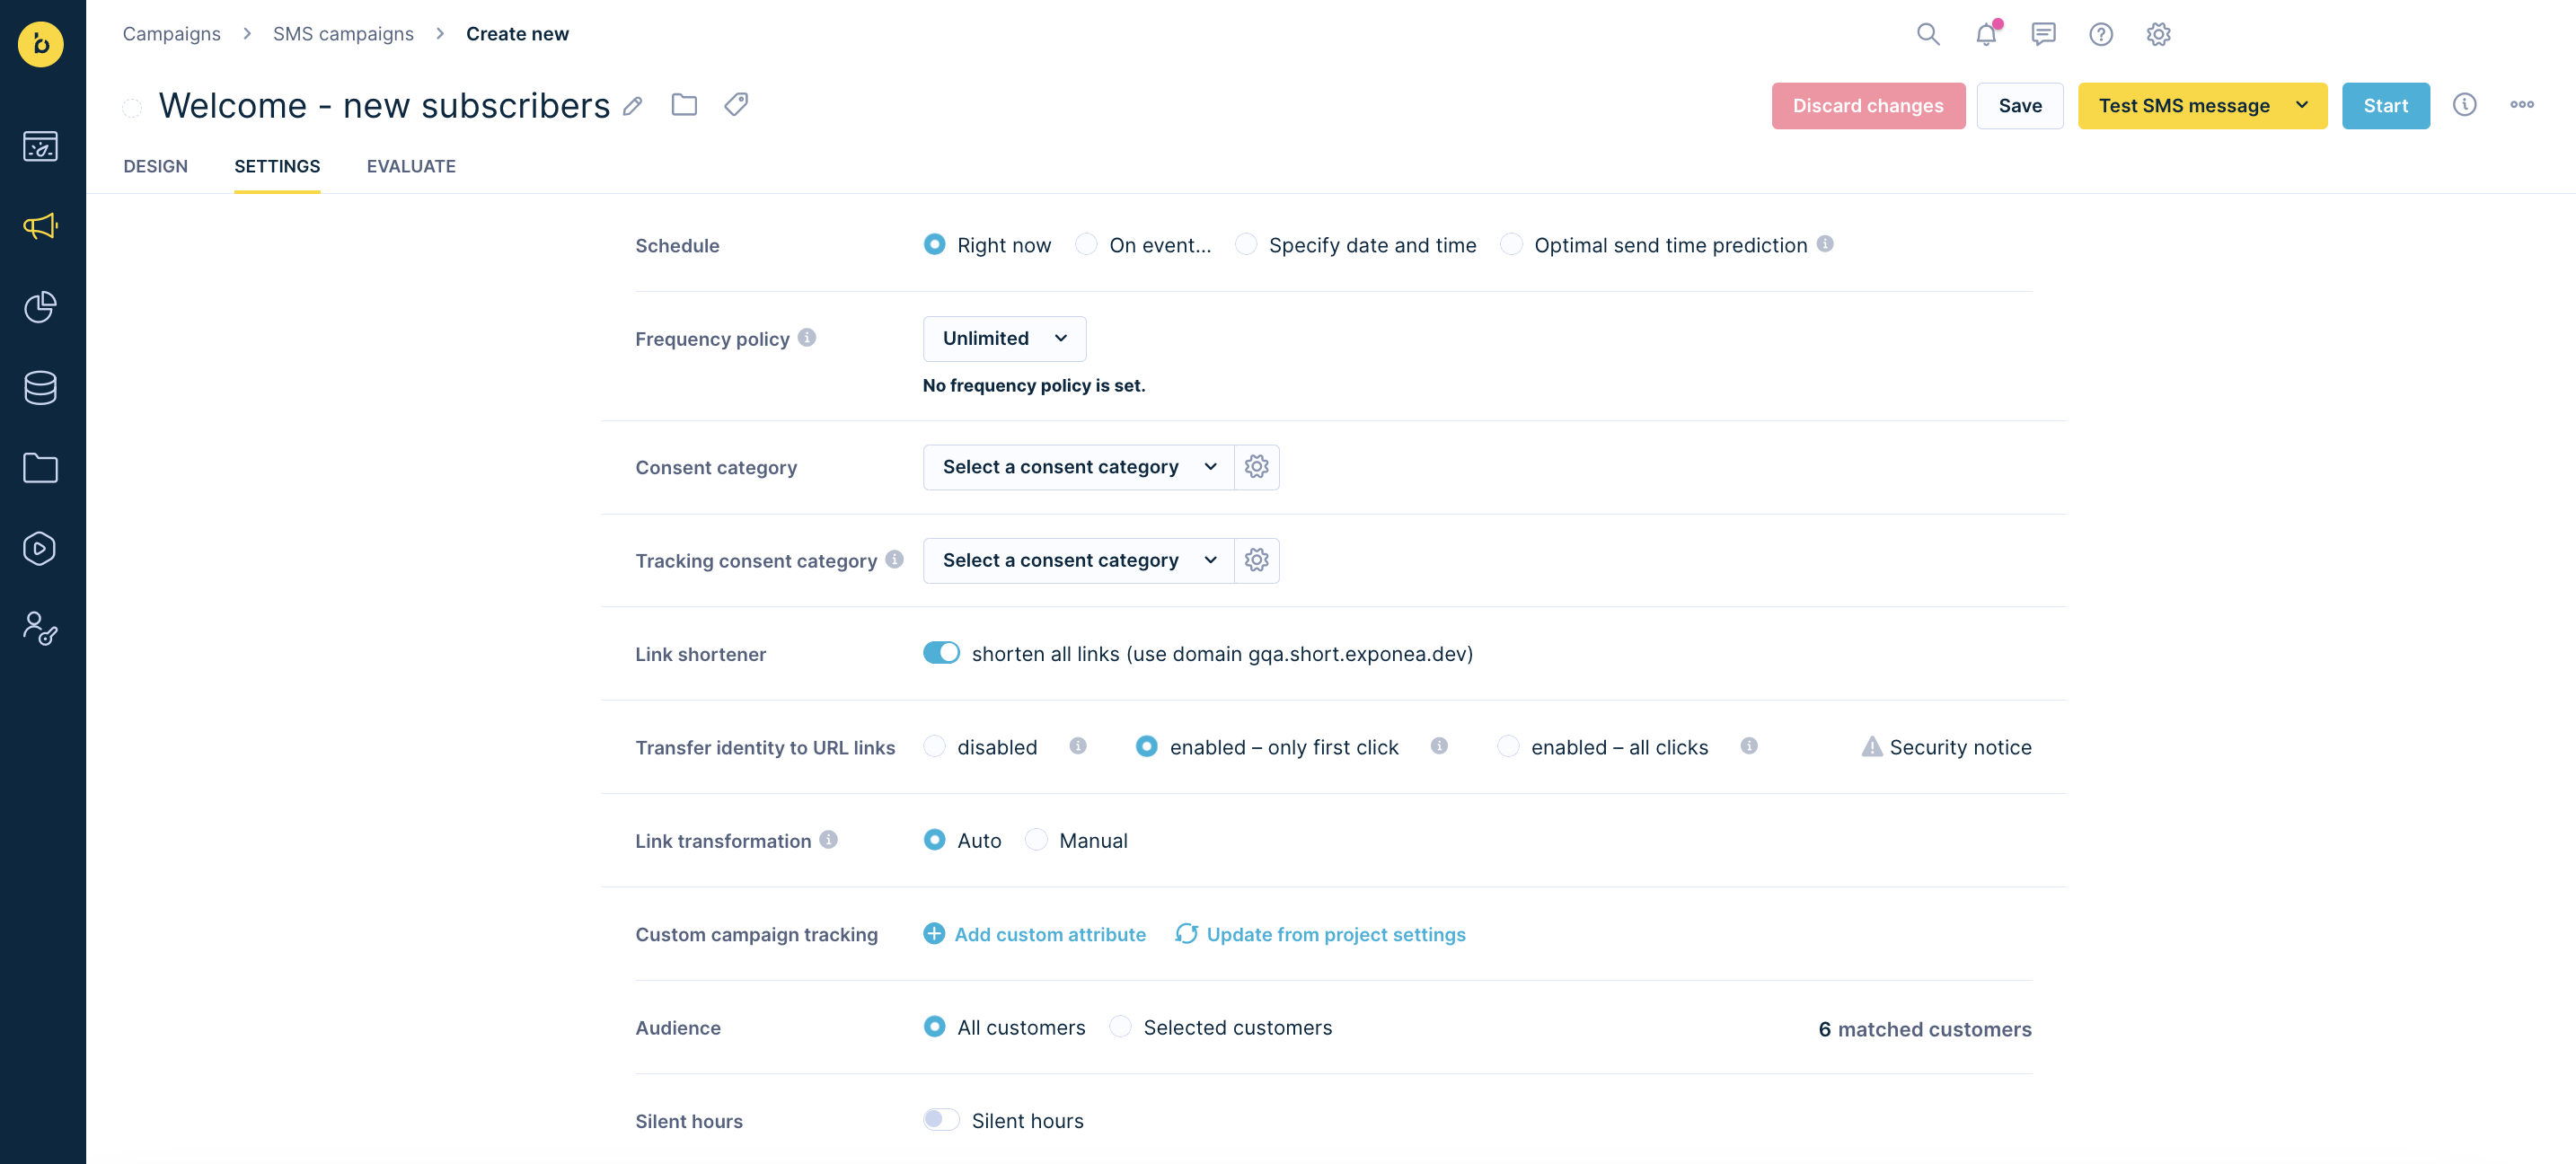
Schedule your campaign
Choose when to send your MMS:
- Right after launching: Sends immediately when you start the campaign.
- Event-triggered: Sends every time a specific event happens for each customer.
- Scheduled: Sends on a specific day and time you choose.
- Optimal timing: Sends when the customer is most likely to click the MMS link.
Set delivery controls
- Frequency limits: Control how many messages a customer can receive within a timeframe.
- Consent requirements: Choose which consent customers need to receive this campaign.
- Silent hours: Pause sending during specific times (like nighttime or weekends).
Best practice: Avoid sending between 9 PM and 8 AM in recipients' local time zones to reduce unsubscribes and spam reports.
ImportantAlways set the right consent category to comply with applicable regulations. Read more about managing consents.
Configure links and tracking
Read the following articles for more information on:
- Link shortener: Automatically shortens all hyperlinks in MMS to save character space.
- Add links to SMS messages: Transfer identity to URL links for customer identification.
- UTM parameters: Configure link transformation settings for campaign tracking.
- Custom tracking: Add custom event attributes to track all campaign statuses.
Target your audience
Use customer filters to choose exactly who receives your MMS campaign.
Test your message
Always test your MMS before sending it to your full audience:
- Click Send test SMS in the editor.
- Choose your testing method:
- Send to a specific phone number (like your own).
- Send to the previewed customer.
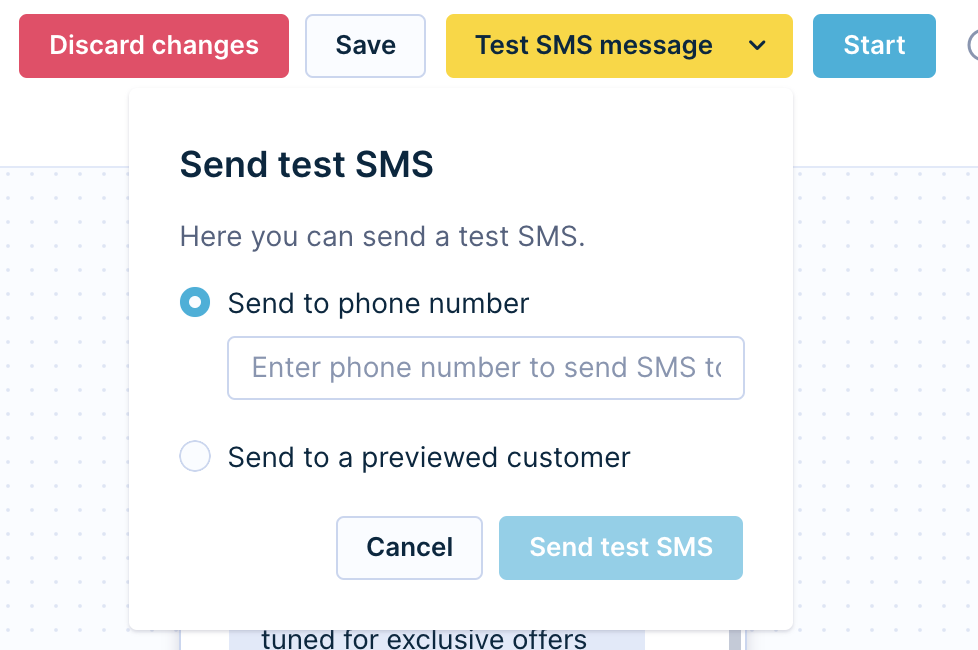
This lets you see how your message and media look before it goes live.
Launch your campaign
Once you've created your MMS campaign and made all necessary changes, you're ready to launch.
Important limitations
- Subject: 80 characters max, no emojis or Unicode characters.
- Message text: 1,600 characters max per message.
- Media size: 1MB recommended maximum. Read these Sinch and Infobip recommendations.
- Phone numbers: Must be in international format (starting with "00" or "+") for the customer attribute
phone. - Sender profiles: 100 sender profiles max per project.
- Fallback SMS: 160 characters max, longer messages split automatically
Media best practices
File formats
- Images: Use JPG format
- Animations: Use GIF format
- Videos: Use MP4 format
- Contact cards: Use VCF format (text/vcard)
Design tips
- Don't use transparency - colors may display unpredictably.
- Test your MMS to ensure media displays correctly.
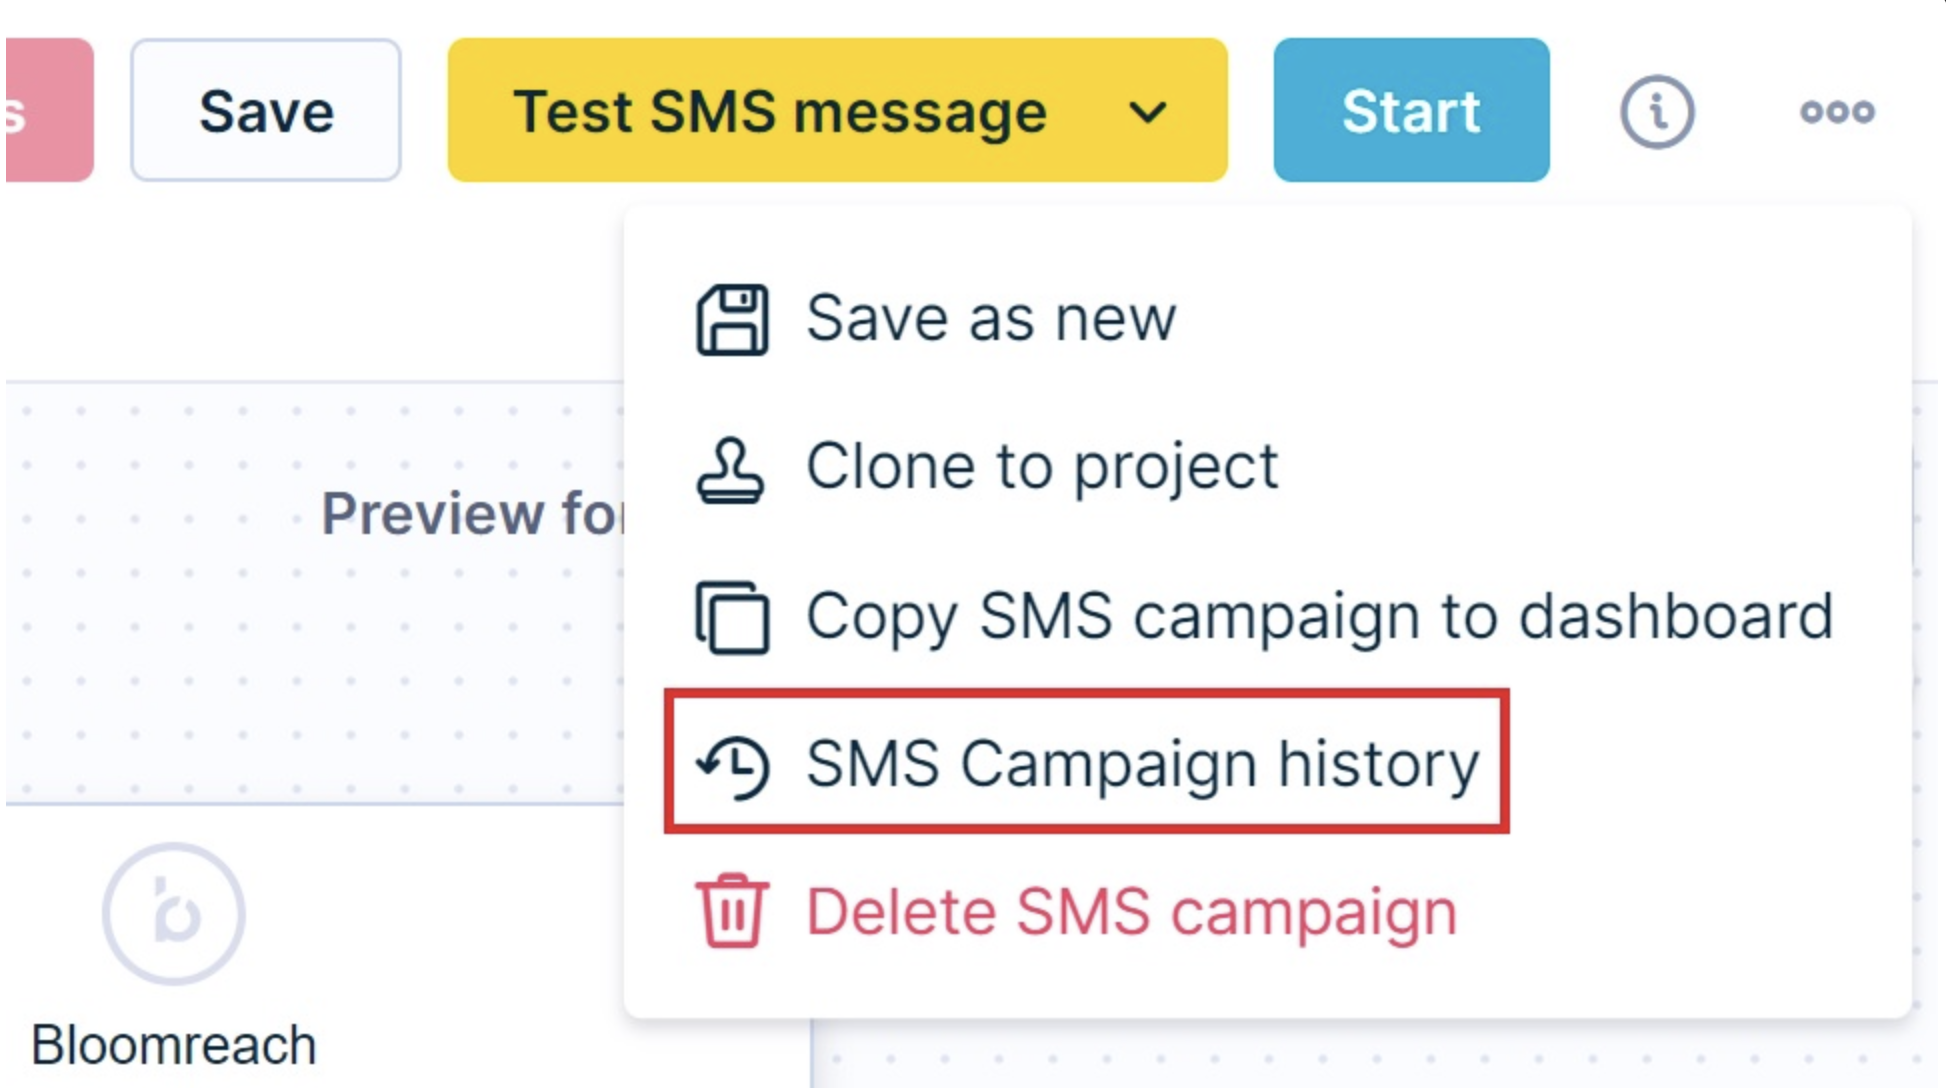
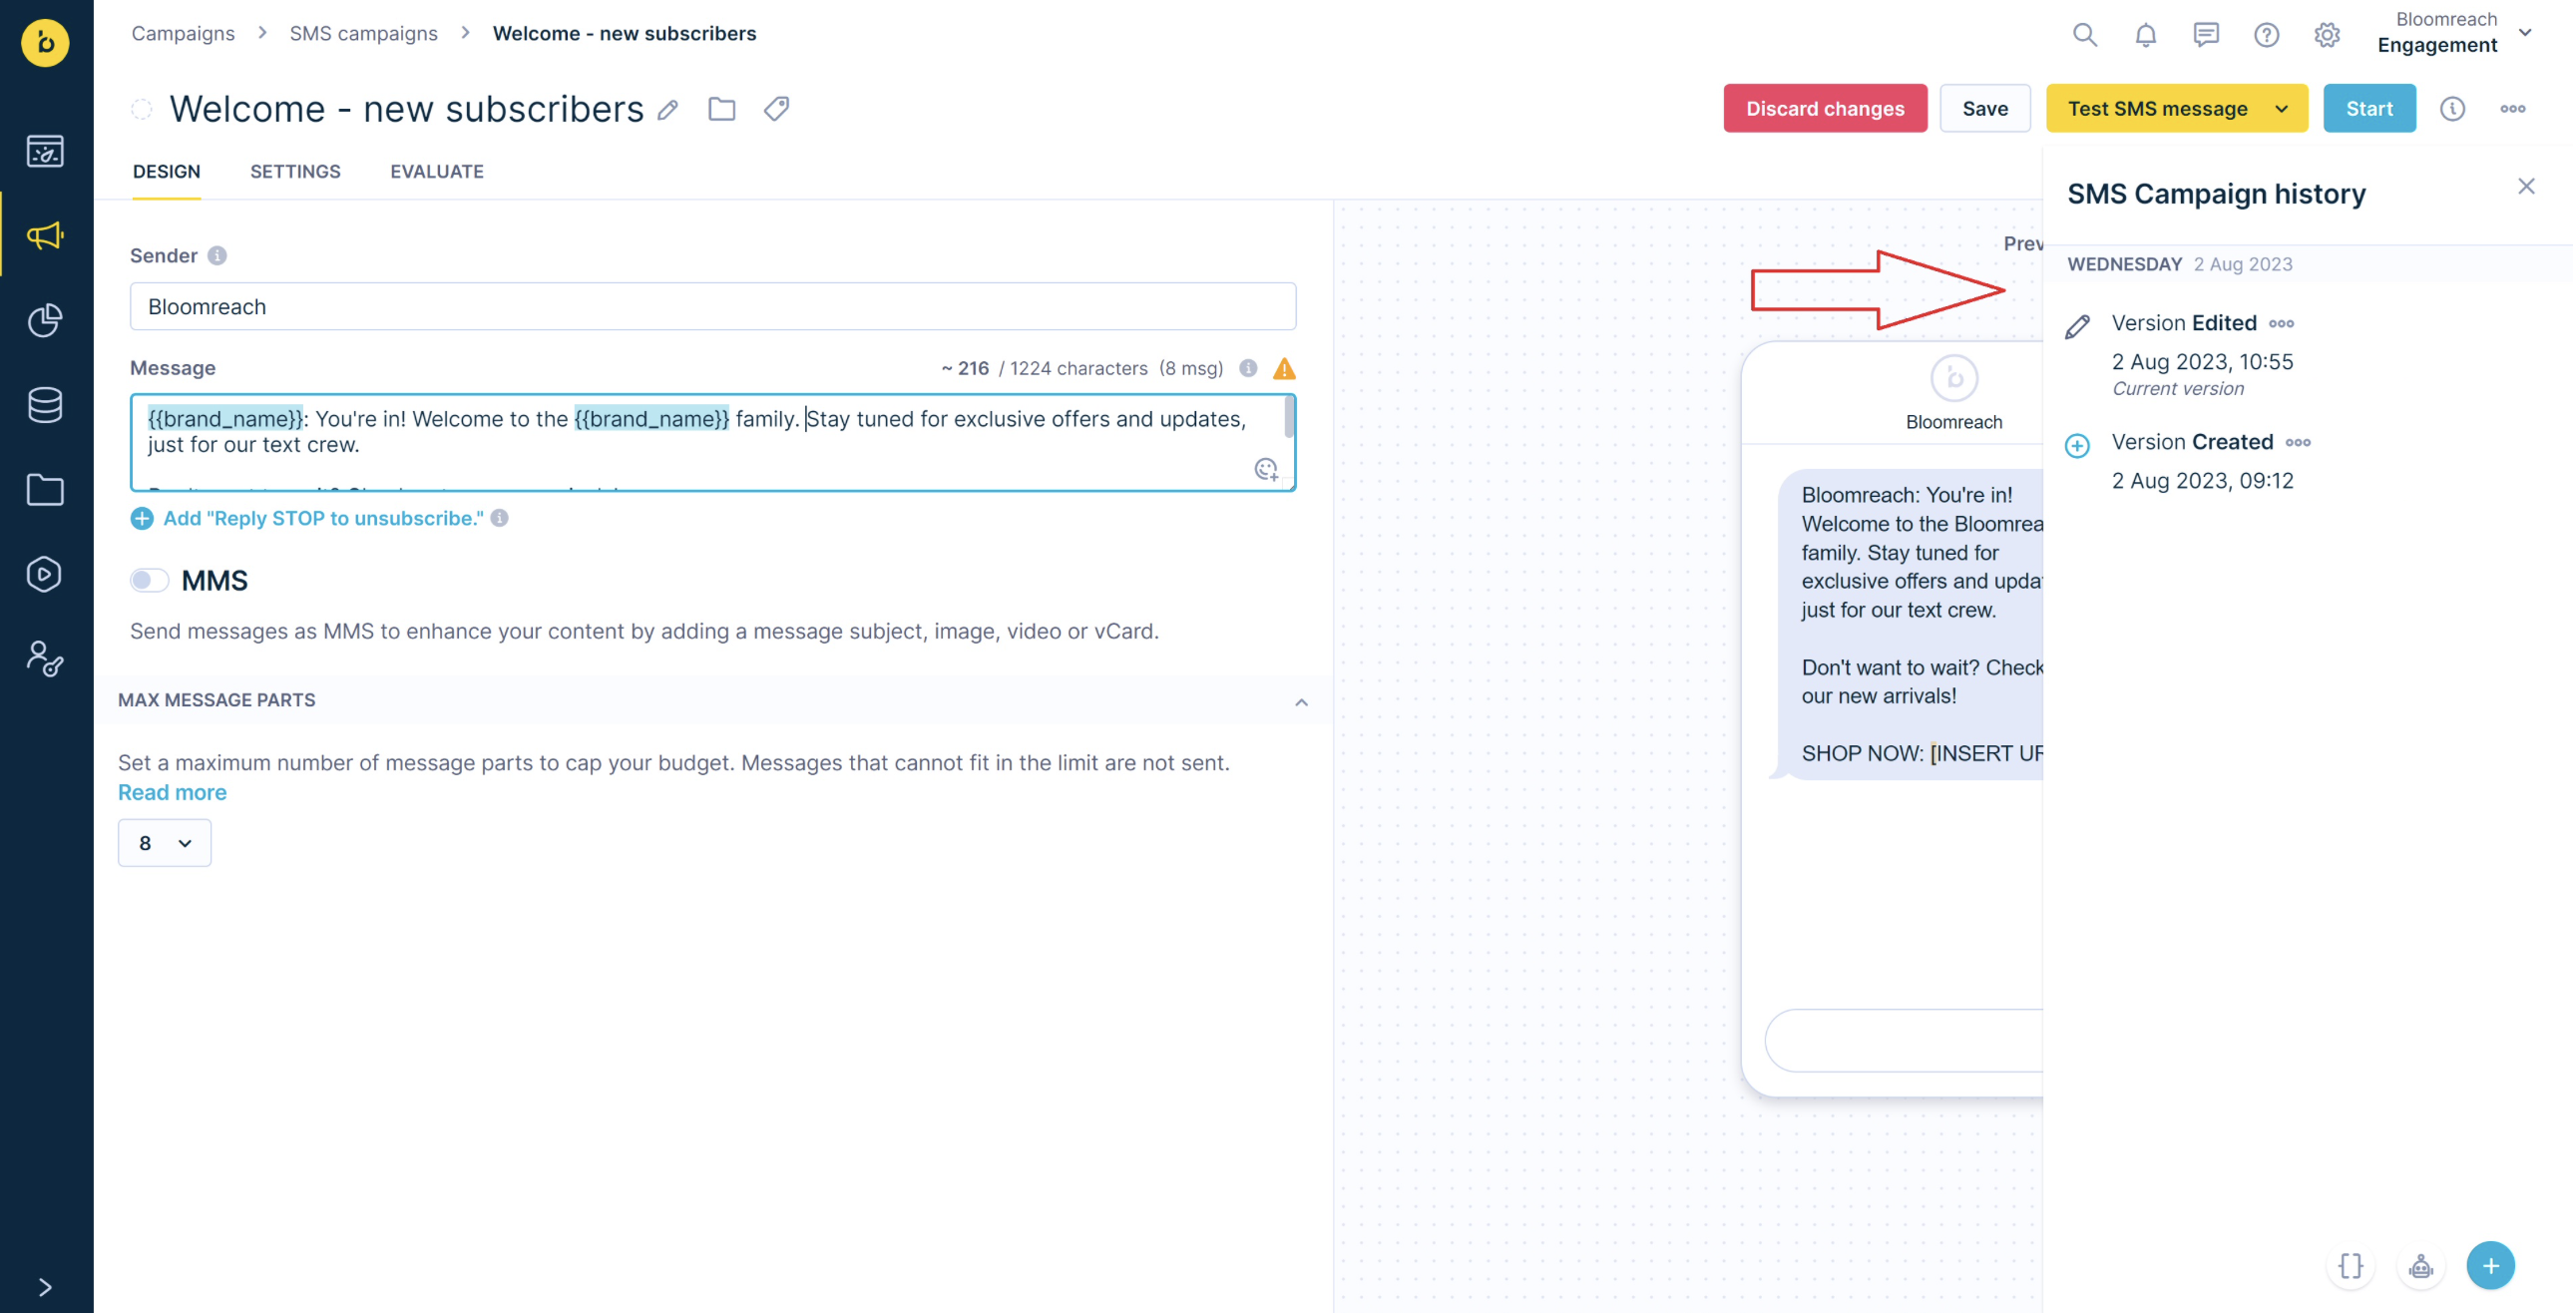
Manage campaign versions
MMS campaigns include version history to help you track and restore changes:
Access version history
- Open your SMS/MMS Campaign.
- Click on the three-dots menu.
- Select SMS campaign history.
Use version history
- Preview historical changes for each version
- Revert to a previous version if needed
- Make a copy of any version
- Restore deleted MMS campaigns from the campaigns list view
This feature protects your work and lets you experiment without losing previous versions.
Track campaign performance
The SMS campaigns module includes an evaluation dashboard with performance metrics:
- MMS performance data
- Audience engagement rates
- Conversion funnel analysis
- Failed send reports
- Delivery statistics
For detailed information on campaign evaluation, see our MMS campaigns documentation.
Updated 4 months ago