

Testing campaigns on yourself
In this article, you will find four methods to test your ideas in Bloomreach.
- Weblayer campaign test:
- Using your cookie
- Using incognito mode
- Showing just on a specific URL
- Email campaign test:
- Sending yourself an email through scenarios
Weblayer campaign test
Use your cookie
While creating your campaigns, it may be useful to try them just for yourself to see whether they look and work as you planned. This way, you can run the campaign as the only person to whom it will apply.
This can be done by applying a filter where you insert your cookie. Find your cookie in the Bloomreach console.
Now, as you have your cookie, you can test Weblayers, Experiments, or Scenarios just for yourself.
While setting the audience for your campaigns in Bloomreach, you can use a customer filter.
To filter out just yourself (or any other specific cookie), set the customer attribute by adding the filter. You can find it in Customer > IDs > cookie. Now, copy your cookie from the Bloomreach console, as shown above, and paste it into the filter.
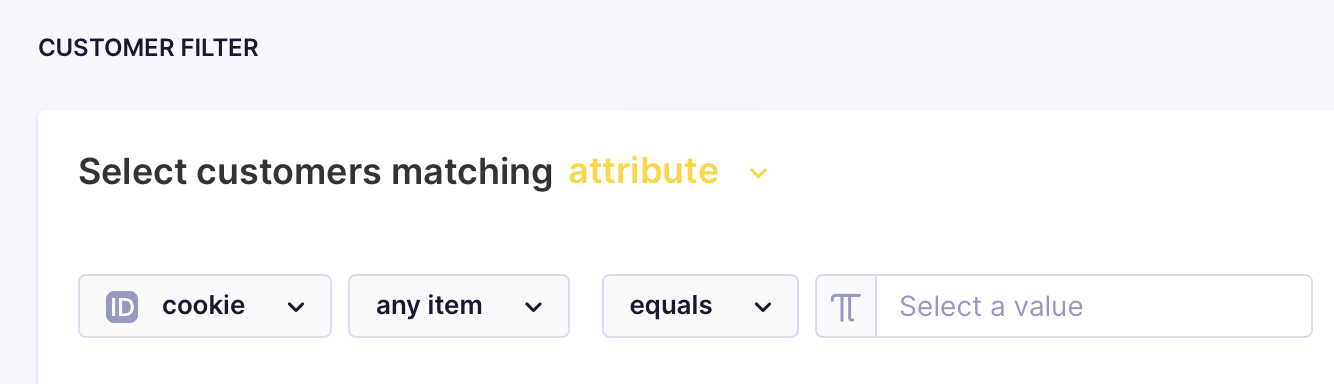
This customer filter will filter out everyone except you so you can test your ideas.
Use incognito mode
Incognito mode can be a valuable tool for trying out your Weblayers or Experiments, or in general, anytime you need to see how a new customer views the website.
Incognito mode is a setting on Chrome that prevents your cookies and web history from being stored. Due to this, using incognito mode will result in tracking a random cookie, making the webpage appear as if you were a new customer.
As to how to use incognito mode, you can open a new incognito tab in two ways:
a) Using a keyboard shortcut - Windows/Linux/Chrome OS - Ctrl + Shift + N, Mac - ⌘ + Shift + N
b) After you open Chrome, go through More>New Incognito Window.

To check, Google Chrome opens an incognito window in a darker color. In addition, check for this symbol.

Show on a specific URL
You can also use the approach of displaying the campaign on a specific URL. The setting can be found, for instance, while working with weblayers under Weblayers > New > Design > Settings.

Set the option to Page with URL to insert the URL you want to use.

As shown in the picture, you may add a # at the end of any URL together with a portion of the text. As a result, only if you add the same thing to the URL in the search bar in your browser will you see the desired weblayer. This way, you can also test your ideas just for yourself.
It is beneficial to combine the approaches mentioned in this article as well. For example, you can use this last tip about the specific URL, and in addition, you can use the incognito mode for a random cookie.
Email campaign test
Send yourself an email through scenarios
-
Open the scenario editor by going to Campaigns > Scenarios > Create new.
-
Add a set of components connected to a flow. Click on the output connector and drag the line to the input connector.
- To add a component, click on the component you want to add, or you can drag & drop it onto the board with your left mouse button.
- Double-click the component with your left mouse button to edit a component. This will open a component-specific edit window. Click
saveafter you are done. - To remove a component, select the component by clicking it with your left mouse button and then click on the trash icon, or hit backspace or delete on your keyboard.
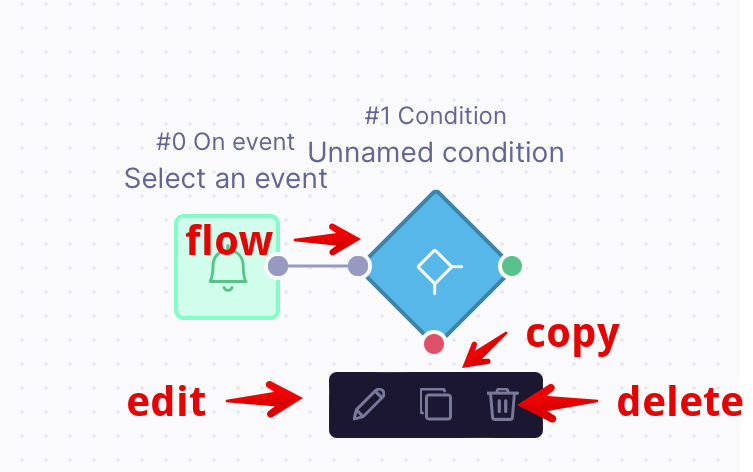
- To connect two components, click on the output connector on the right side of the first component and drag the line to the input connector on the left side of the second component, as shown below. Release your mouse once connected. Now you have created a flow. Customers will pass through this flow starting from a trigger (
On event) to operators (Condition).
-
Add trigger
Now. -
Add operator. From the list of operators, select condition node and click
edit. -
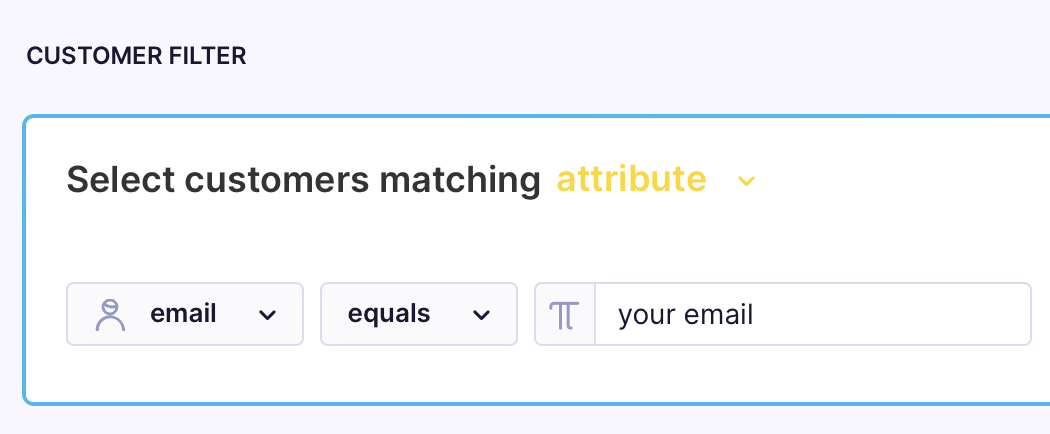
Click on the
+ add filtercondition. Filter only your email address: under a customer tab selectemailproperty. Choose the operatorequalsthat is understringtab and write your email address.
-
Add action:
email-
From the list of actions, select
email nodeand clickedit. You can choose visual, HTML builder, or project templates. For now, choose the visual builder. -
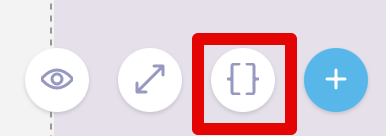
Customize the subject line to include your name. At the bottom of the visual editor, click on the button, as shown in the screenshot below.
-
You will see a pop-up window on the right. Under customer attribute, select the property
first name. Jinja code will appear below. Copy and paste it to the subject line.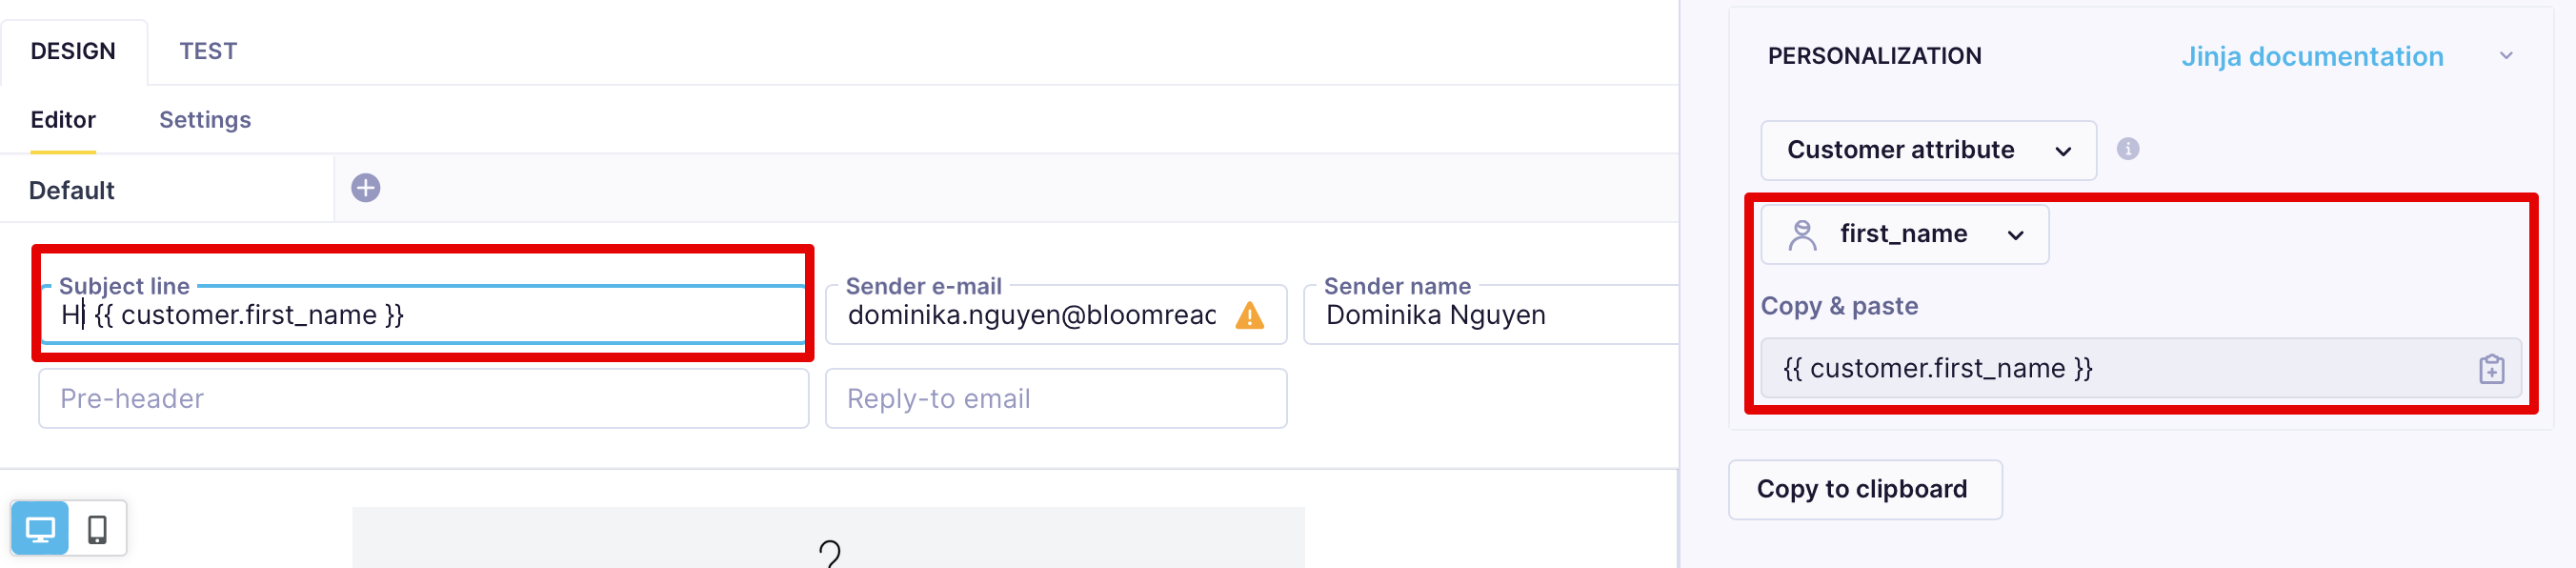
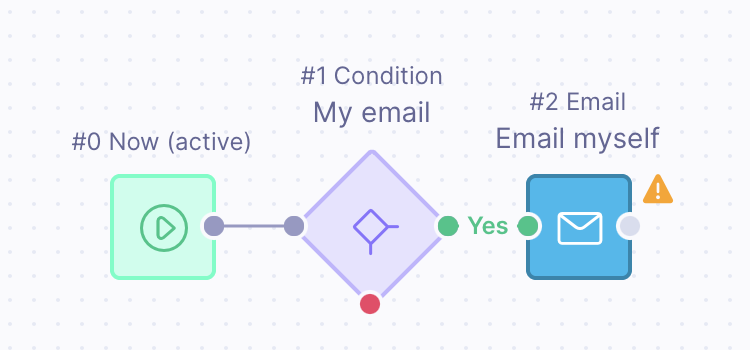
-
The final setup of the scenario.
-
- Click
Startand check if the email is received. Note: check the spam folder too.
Updated 8 days ago