

Starting and Stopping a Scenario
Starting a Scenario
After the scenario flow is ready and contains all necessary nodes, it can be activated via "Start" button in the upper right corner of the scenario screen.
Confirmation of Scenario Execution
When you click the “Start” button to begin your scenario, a “Confirm Scenario Execution” window will appear. This window shows the total number of interactions that will be processed by the scenario.
It is important to note that this number does not always correspond to the number of unique customers.
This can be for the following reasons:
- The number displayed represents the total interactions, which includes repeated actions for the same customer.
- For example, if a scenario sends 3 emails to a single customer, the “Confirm Scenario Execution” window will indicate that 3 interactions will occur. This means the same customer will receive 3 emails, not that 3 different customers will each receive an email.
Understanding this distinction is crucial for accurate scenario planning and execution. The number reflects the total volume of interactions, helping you anticipate the load and impact on your resources.
Imagine you have set up a scenario to send three emails to a single customer. The "Confirm Scenario Execution" window will display the number "3". In this case, the number 3 indicates that there will be three email interactions, all targeting the same customer. By keeping this in mind, you can better interpret the number shown in the "Confirm Scenario Execution" window and make more informed decisions regarding your scenario executions.

Scenario version historyRemember that you can restore deleted versions and continue working on them. These were either accidental changes or you made them for testing purposes. Find out more about Scenarios version history here.
Scenario Usage Warnings
In specific cases the “Confirm Scenario Execution” window may display a scenario usage warning. See Scenario Usage Warnings for more info.
Editing a Running Scenario
When you change a running scenario, current users on that node (usually a small number, except for wait nodes) finish the scenario with the old version. All new customers arriving on that node (no matter where they're coming from) will flow according to the latest version.
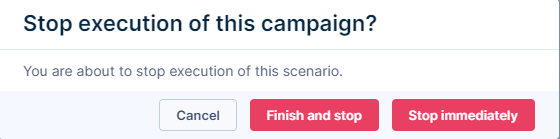
Stopping a Scenario
A running scenario may be stopped by clicking on a "Stop" button in the upper right corner of the scenario screen. A follow-up window will appear with two options:
(1) Cancel
- Cancel stopping of the scenario. The scenario will continue to run.
(2) Finish and stop
- The scenario will wait for all customers (especially those waiting in the wait nodes) to finish their scenario flow.
(3) Stop immediately
- The most common choice is to stop the scenario immediately (all customers waiting in the wait nodes or flowing in between the nodes will be aborted immediately).
Updated 15 days ago