

Shopify Setup
Integration
This page shows you how to integrate using our out-of-the-box solution. The Shopify Customization page explains integration using custom solutions, like a custom app and custom web integration. You can choose different options when integrating Bloomreach and Shopify.
Loomi AI for ShopifyThis page describes our previous Shopify integration. The guidance on this page doesn't apply if you are using Loomi AI for Shopify via Data hub.
Loomi AI for Shopify is our latest Shopify integration that powers both Discovery and Engagement through Data hub. If your store is connected via the Loomi AI for Shopify app in Shopify, follow the Loomi AI for Shopify documentation in Data hub instead.
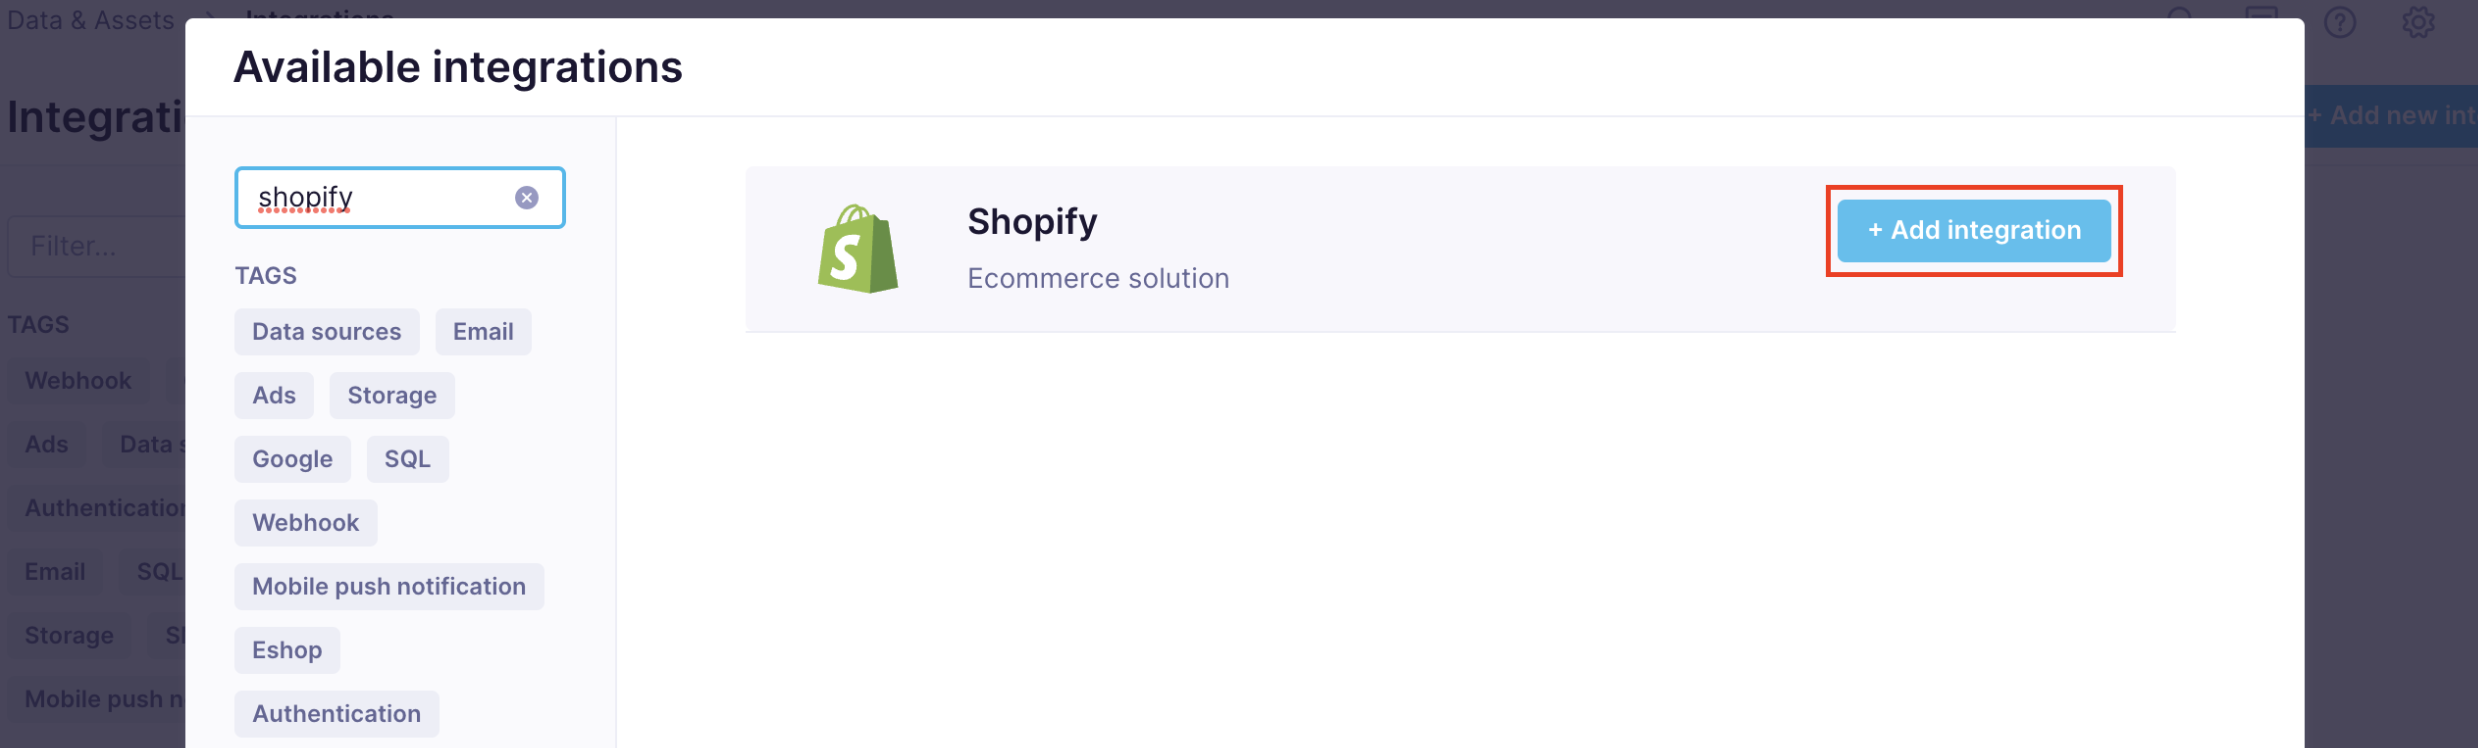
1. Add new integration
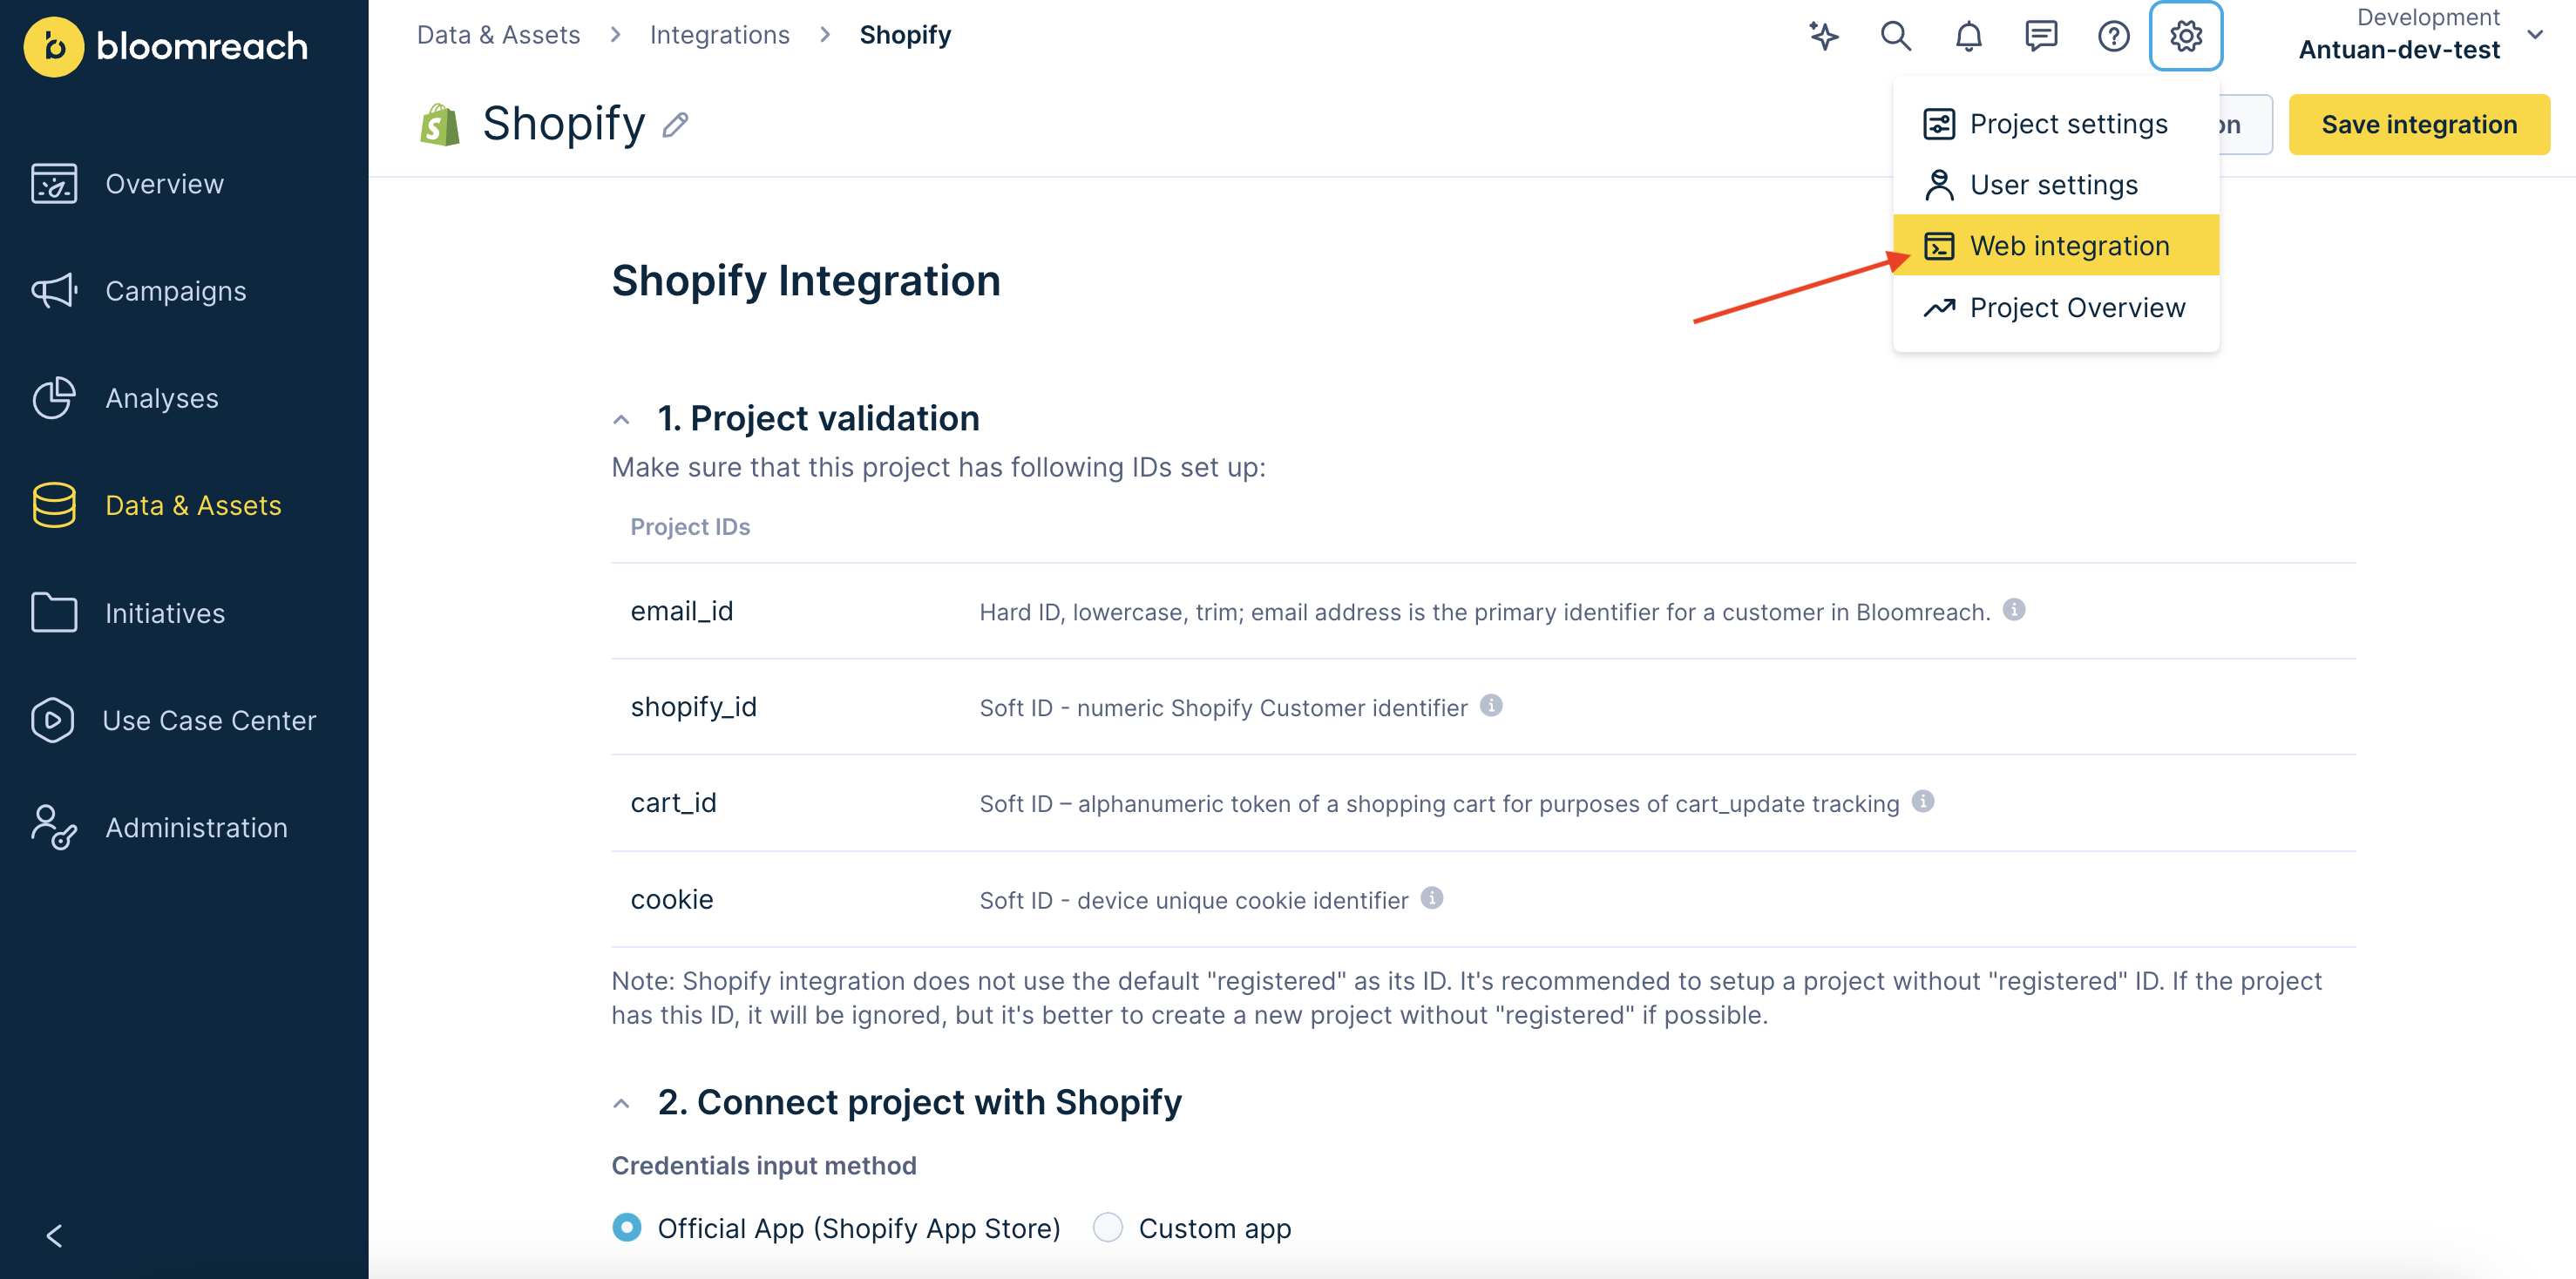
Open the app and go to Data & Assets > Integrations > + Add new integration and look up Shopify. Click + Add integration.
ImportantMake sure you have all prerequisites from the Shopify and Shopify Plus Overview prerequisites section.
2. Connect your project with Shopify
There are two ways to authenticate with Shopify and connect your project.
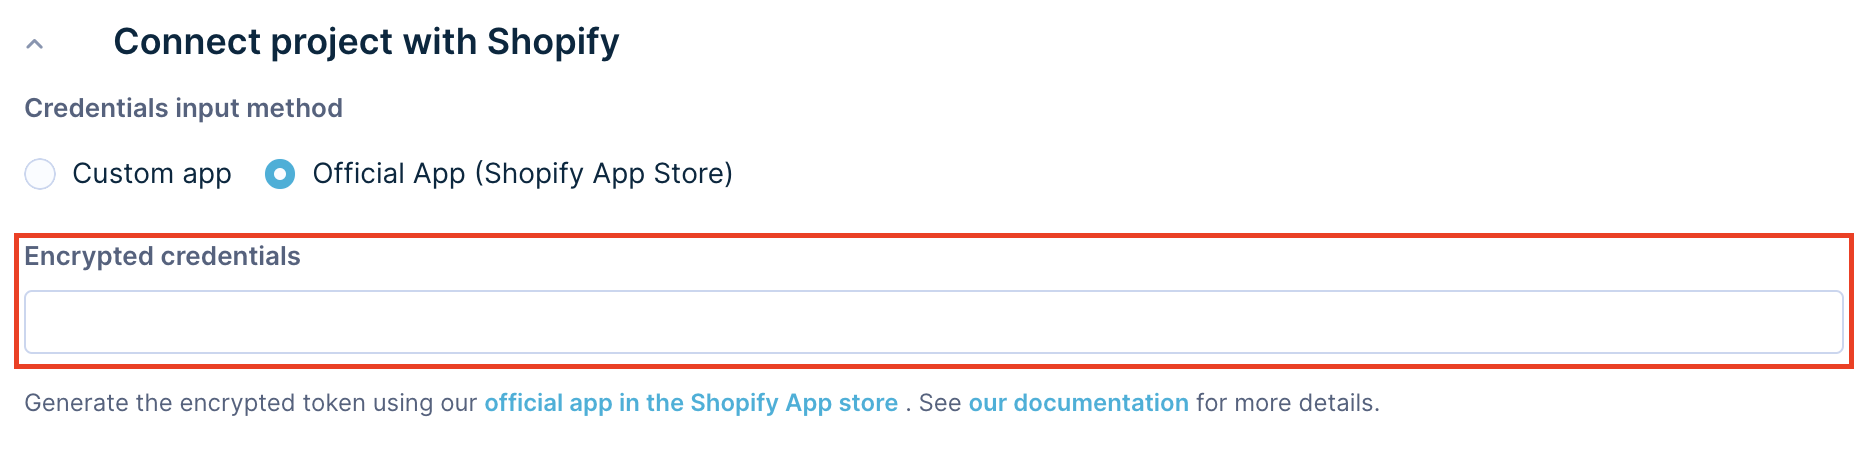
NoteThe next section is about connecting your project with Shopify using the Official App - available in the Shopify App Store. For a guide how to connect your project using a Custom App, click here.
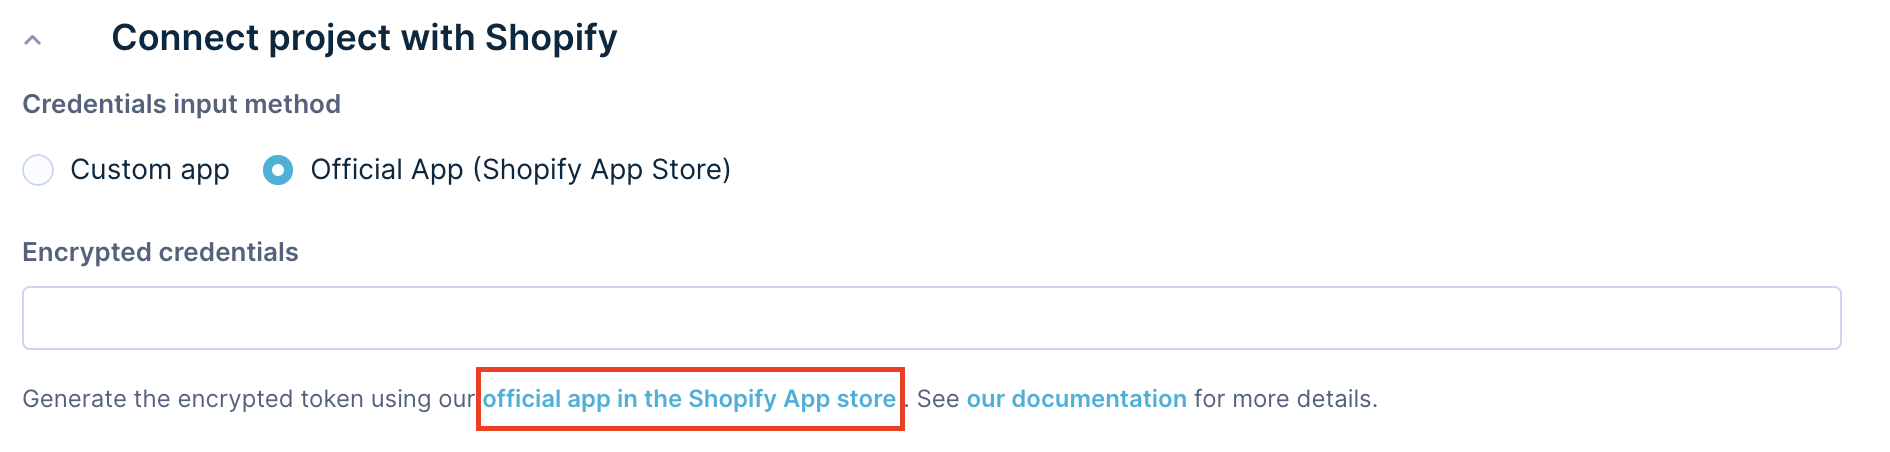
Official App
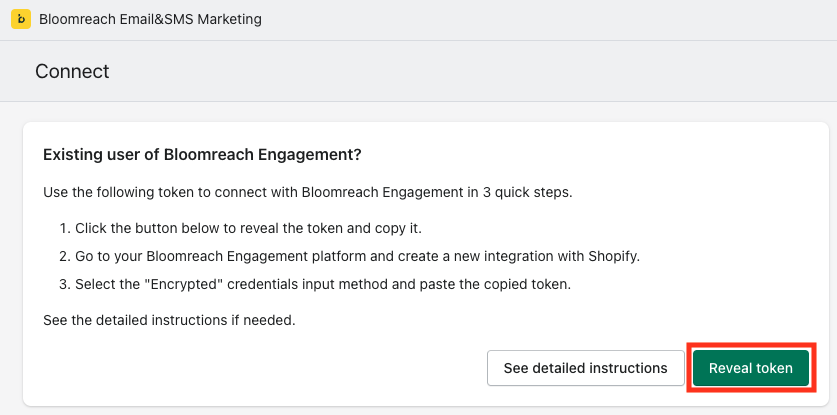
- After reviewing the prerequisites, connect your project with Shopify via the Official App. To generate Encrypted credentials, click on the official App in the Shopify App Store link, which redirects you to the Shopify App Store.
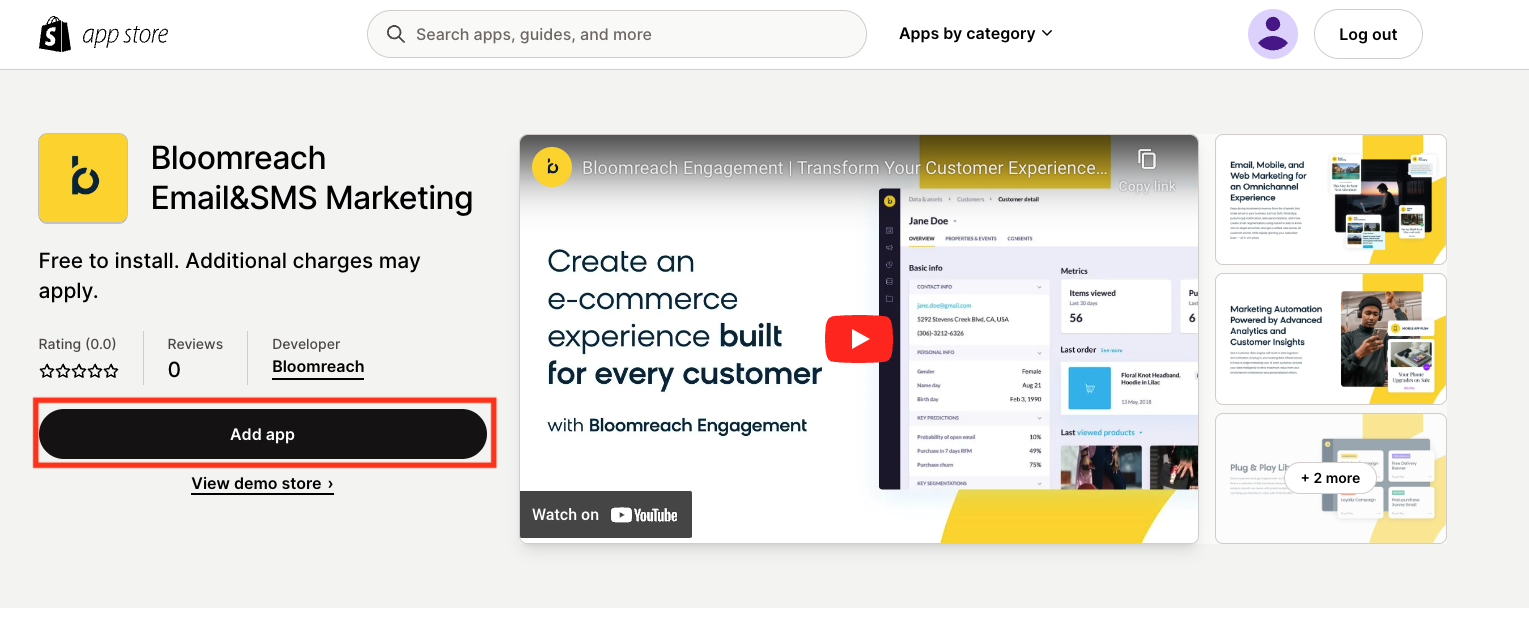
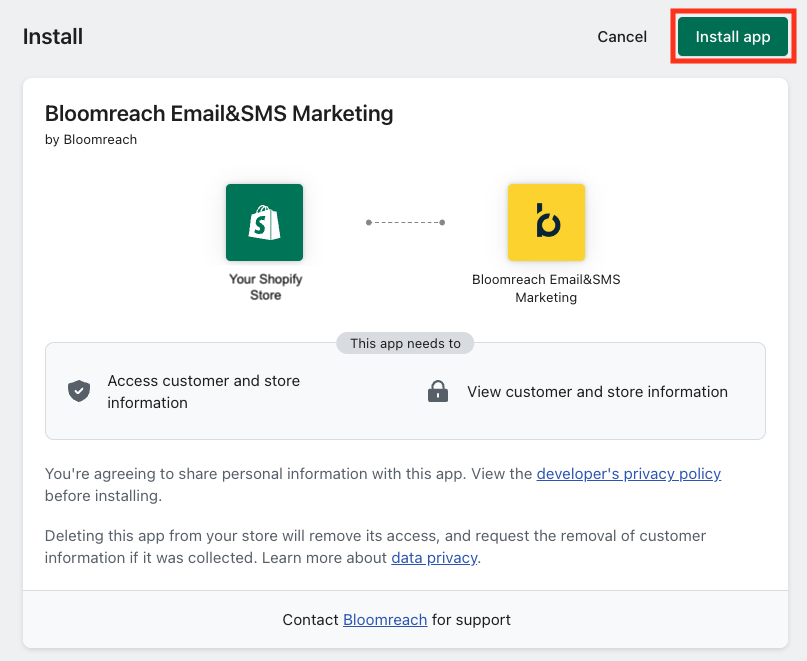
- Click Add app, then approve permissions by clicking the Install app button.
- To connect your Shopify account with Bloomreach, click the Reveal token button. Copy and paste it into the Encrypted credentials field in the Bloomreach platform.
3. Web integration
The next section is about tracking frontend events (such as view_item, view_category, and more) using a Shopify Web Pixel. For a guide how to track frontend events using Custom Web Integration click here.
Main differences between
Custom Web integration and Shopify Web Pixel
- Attributes not tracked by webpixel:
-
view_category: browser, device, location and os -
view_item: browser, device, location and os -
search: browser, device, location and os -
checkout: browser, device, location and os
-
Checkout event is triggered when any of the checkout steps is changed:
checkout_started,checkout_contact_info_submitted,checkout_address_info_submitted,checkout_shipping_info_submitted,checkout_completed -
In the checkout event the
step_titleattribute is changed to be representative of the checkout state, so for examplestep_titlethankyoubecomescheckout_completed.
We take thesestep_titleattributes from checkout event names. -
Checkout tracking is supported only by the Shopify Web Pixel due to changes on Shopify's side.
Shopify Web Pixel
Prerequisites
Shopify Web Pixel is part of our official app in the Shopify App Store. That's why this method is supported only via the Authorization method through the Official App (Shopify App Store).
A single store can only have one web-pixel integration. This usually means 1 project = 1 integration = 1 pixel. You won't be able to create 2 web pixel integrations on the same store (and the same app).
ImportantThe Web Pixel requires Marketing and Analytics consent to send data to Bloomreach. Make sure you have this consent category set up in your cookie acceptance banner, whether you use Shopify Native or another provider. If you're not seeing
view_item,view_category, orsearchevents, check that your website sets the correct cookie acceptance policies.
Integrating with Web Pixel
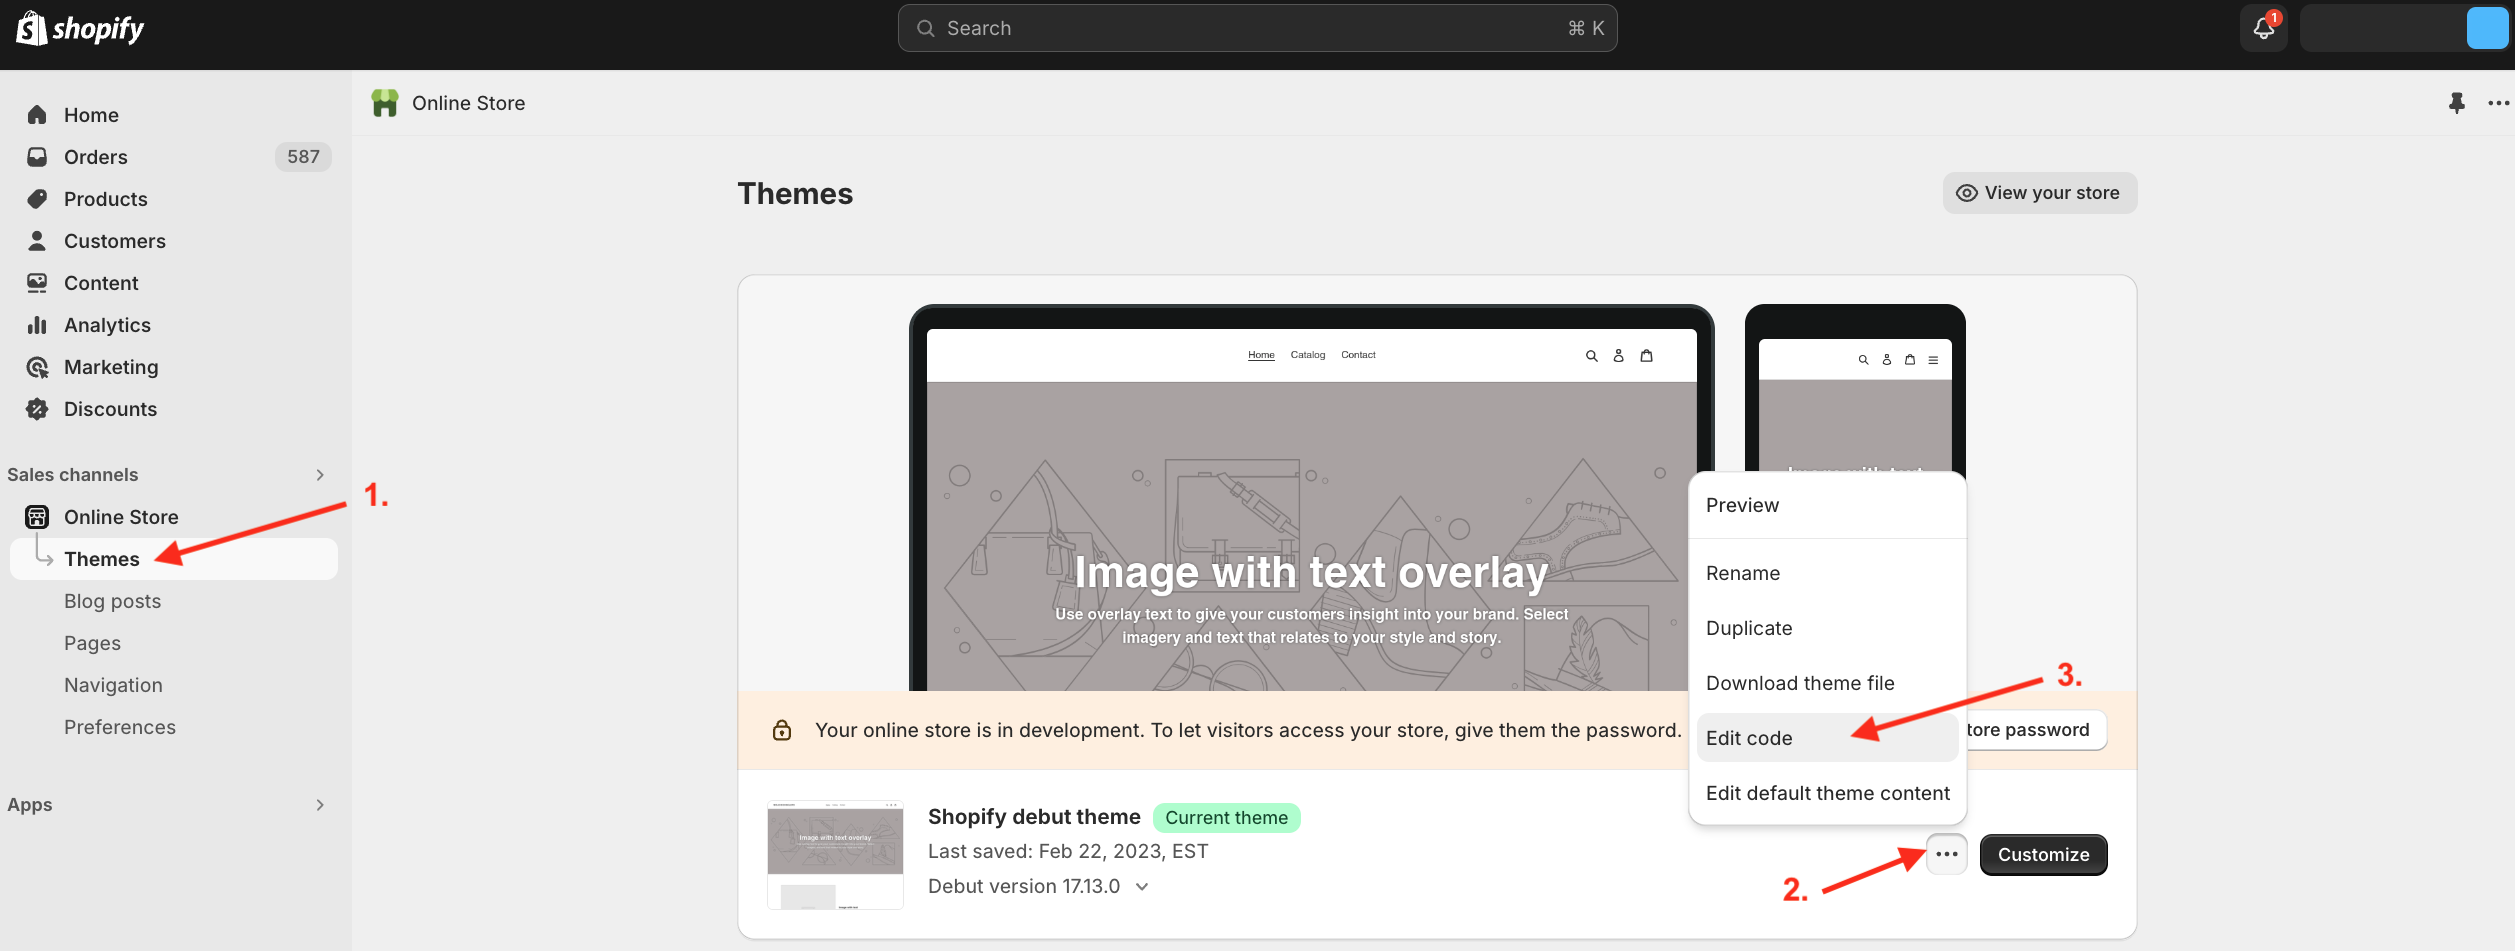
- You need to add the Bloomreach Web Integration snippet to your Shopify store. Access the Themes tab and click on Edit code to insert the snippet.
- Open the theme.liquid file.
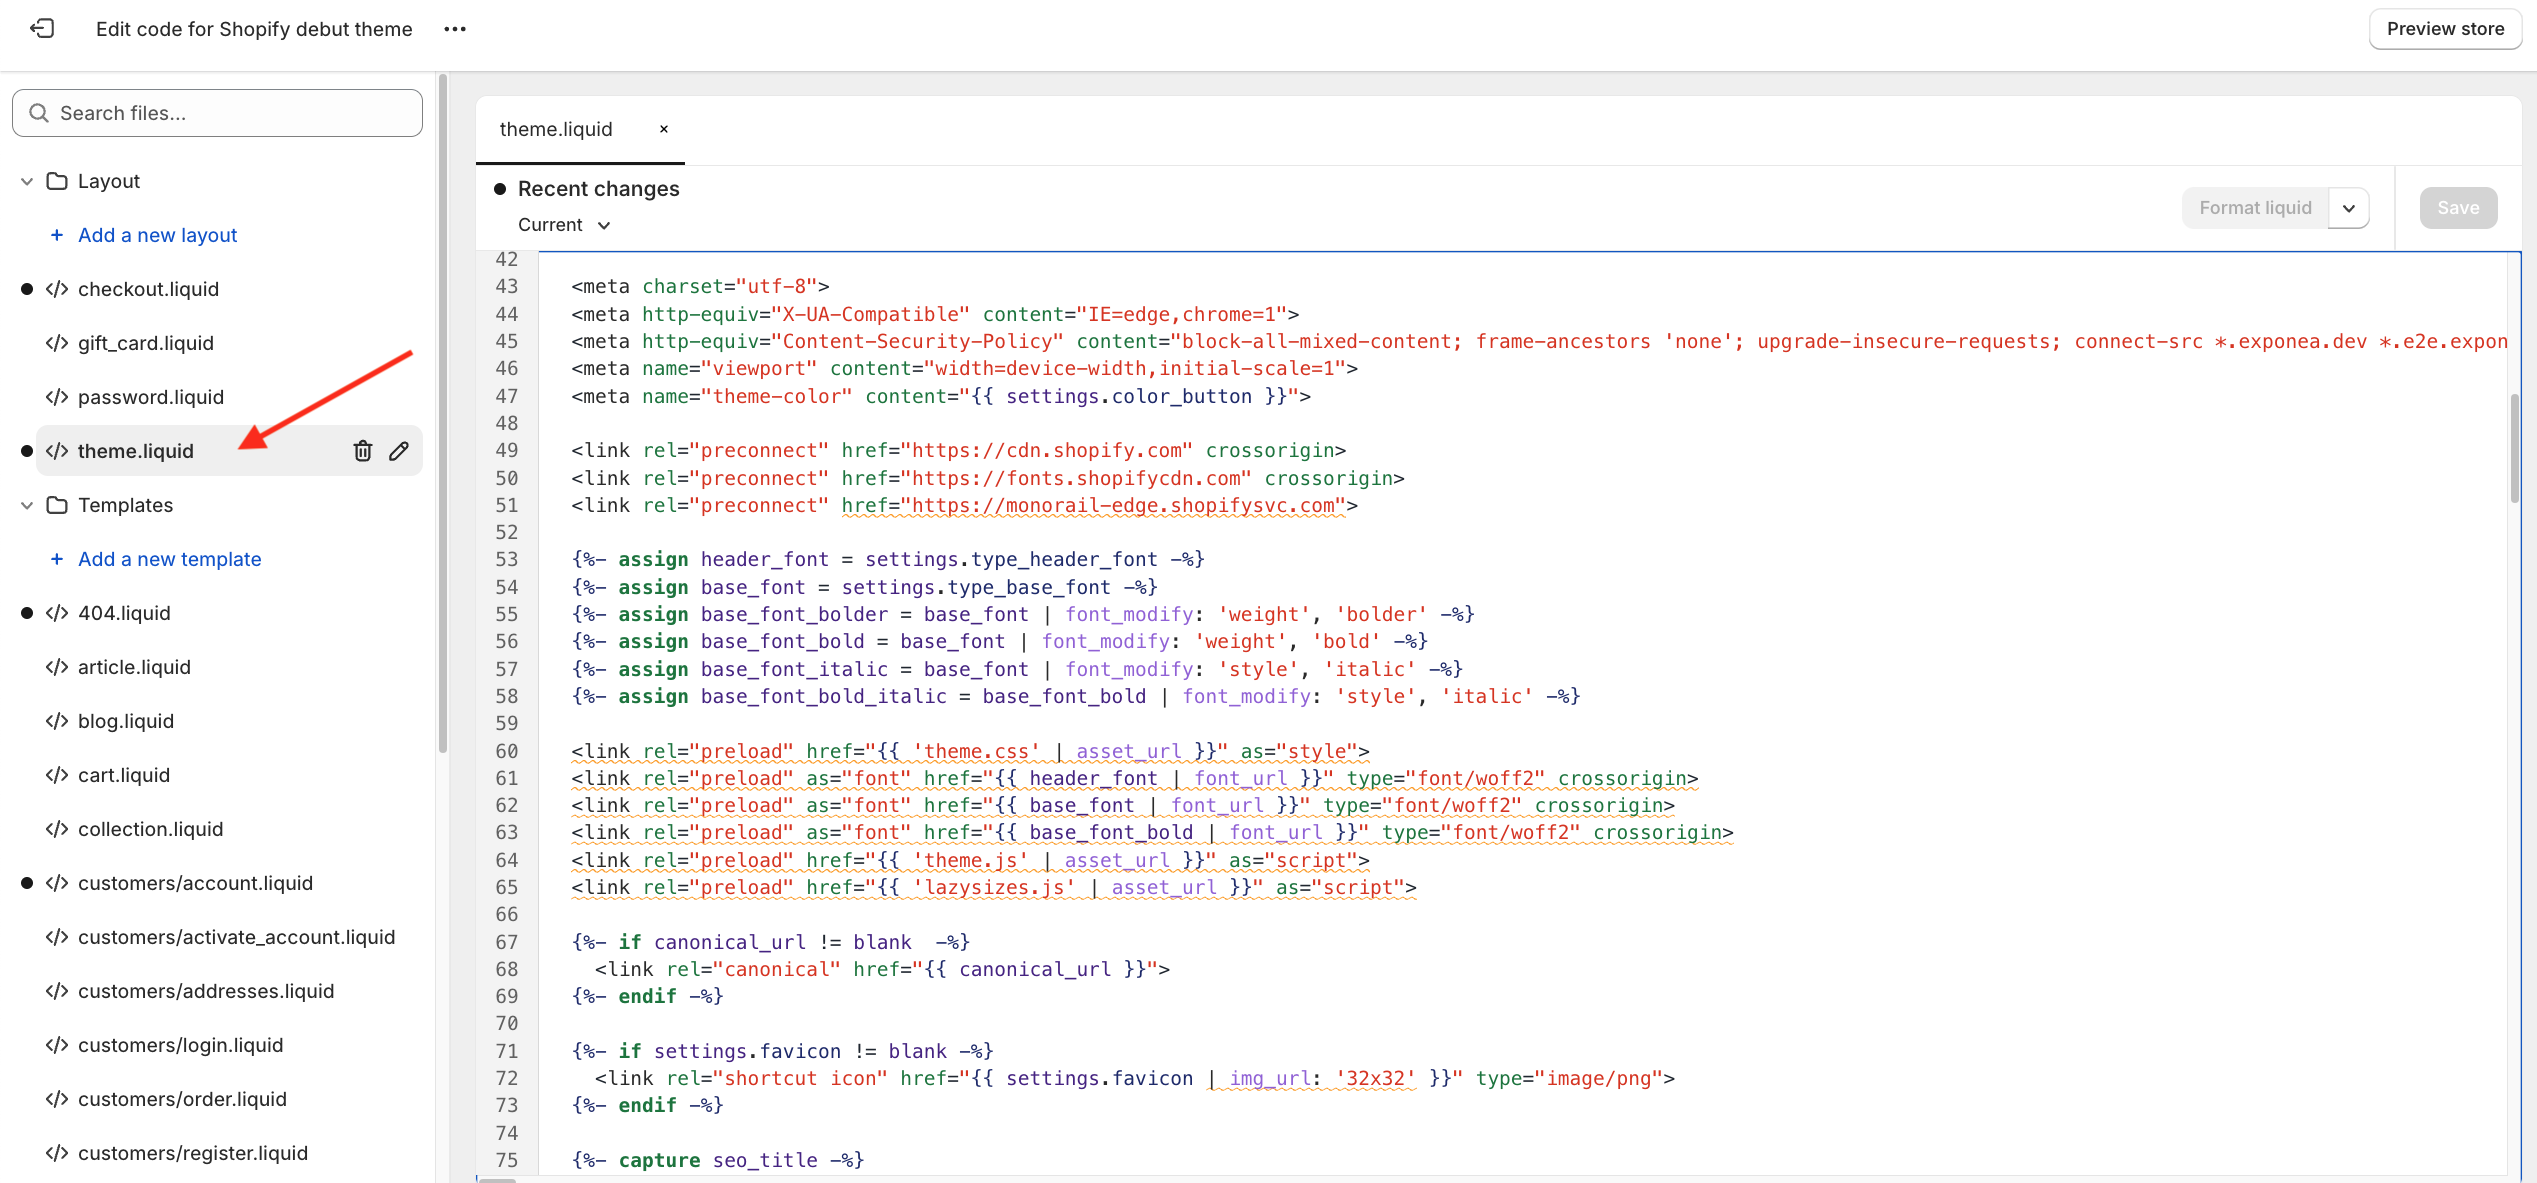
- Copy the following data-layer snippet and paste it on a new line above the closing header tag
</head>inside your theme.liquid file.
<script>
  window.dataLayer = window.dataLayer || [];

  function subscribeCookieListener(dataLayer) {
    // Step to process information already existing in the datalayer
    dataLayer.forEach(processDatalayerEvent)

    // Set-up a "listener"
    const originalPush = dataLayer.push;
    dataLayer.push = function() {
        originalPush.apply(dataLayer, arguments);
        Array.from(arguments).forEach(processDatalayerEvent);
    };

  }
subscribeCookieListener(window.dataLayer);

function processDatalayerEvent(event){
  if(event.event === "bre.cookie"){
    Shopify.analytics.publish("bre.cookie",event);
  }
}

</script>- Now go to your project in Bloomreach, click on Web integration, and decide whether you want to track
page_visitevents. If yes, tick the relevant checkbox.
- Click Copy to clipboard and paste the snippet from Bloomreach directly under the data layer script in your Shopify
theme.liquidfile. - Copy the following line data_layer: true and place it below the token parameter. Make sure they're on the same hierarchical level. This exposes the cookie and its changes to the dataLayer object for use in other tools, like Google Tag Manager. If set to false or omitted, dataLayer won't be updated.
data_layer: true,- Replace
exponea.start();with the following code:
function getCookie(cname) {
        var name = cname + "=";
        var ca = document.cookie.split(';');
        var cookie = undefined;
        for (var i = 0; i < ca.length; i++) {
            var c = ca[i];
            while (c.charAt(0) == ' ') {
                c = c.substring(1);
            }
            if (c.indexOf(name) == 0) {
                cookie = c.substring(name.length, c.length);
                break;
            }
        }
        cookie = decodeURIComponent(cookie);
        cookie = cookie.split('?')[0];
        return cookie;
    }
    var customer = {};
    var cart_id = getCookie('cart');
    if (cart_id) customer.cart_id = cart_id;
    {% if customer and customer.email %}
    customer.email_id = {{ customer.email | json }};
    customer.shopify_id = {{ customer.id | json }};
    {% endif %}
    exponea.start({
        "customer": customer
    });
Here's an example of the Web Integration snippet. Make sure to specify your target and token.
<script>
  window.dataLayer = window.dataLayer || [];

  function subscribeCookieListener(dataLayer) {
    // Step to process information already existing in the datalayer
    dataLayer.forEach(processDatalayerEvent)

    // Set-up a "listener"
    const originalPush = dataLayer.push;
    dataLayer.push = function() {
        originalPush.apply(dataLayer, arguments);
        Array.from(arguments).forEach(processDatalayerEvent);
    };

  }
subscribeCookieListener(window.dataLayer);

function processDatalayerEvent(event){
  if(event.event === "bre.cookie"){
    Shopify.analytics.publish("bre.cookie",event);
  }
}

</script><script>
!function(e,n,t,i,r,o){function s(e){if("number"!=typeof e)return e;var n=new Date;return new Date(n.getTime()+1e3*e)}var a=4e3,c="xnpe_async_hide";function p(e){return e.reduce((function(e,n){return e[n]=function(){e._.push([n.toString(),arguments])},e}),{_:[]})}function m(e,n,t){var i=t.createElement(n);i.src=e;var r=t.getElementsByTagName(n)[0];return r.parentNode.insertBefore(i,r),i}function u(e){return"[object Date]"===Object.prototype.toString.call(e)}o.target=o.target||"https://api.exponea.com",o.file_path=o.file_path||o.target+"/js/exponea.min.js",r[n]=p(["anonymize","initialize","identify","getSegments","update","track","trackLink","trackEnhancedEcommerce","getHtml","showHtml","showBanner","showWebLayer","ping","getAbTest","loadDependency","getRecommendation","reloadWebLayers","_preInitialize","_initializeConfig"]),r[n].notifications=p(["isAvailable","isSubscribed","subscribe","unsubscribe"]),r[n].segments=p(["subscribe"]),r[n]["snippetVersion"]="v2.7.0",function(e,n,t){e[n]["_"+t]={},e[n]["_"+t].nowFn=Date.now,e[n]["_"+t].snippetStartTime=e[n]["_"+t].nowFn()}(r,n,"performance"),function(e,n,t,i,r,o){e[r]={sdk:e[i],sdkObjectName:i,skipExperiments:!!t.new_experiments,sign:t.token+"/"+(o.exec(n.cookie)||["","new"])[1],path:t.target}}(r,e,o,n,i,RegExp("__exponea_etc__"+"=([\\w-]+)")),function(e,n,t){m(e.file_path,n,t)}(o,t,e),function(e,n,t,i,r,o,p){if(e.new_experiments){!0===e.new_experiments&&(e.new_experiments={});var l,f=e.new_experiments.hide_class||c,_=e.new_experiments.timeout||a,g=encodeURIComponent(o.location.href.split("#")[0]);e.cookies&&e.cookies.expires&&("number"==typeof e.cookies.expires||u(e.cookies.expires)?l=s(e.cookies.expires):e.cookies.expires.tracking&&("number"==typeof e.cookies.expires.tracking||u(e.cookies.expires.tracking))&&(l=s(e.cookies.expires.tracking))),l&&l<new Date&&(l=void 0);var d=e.target+"/webxp/"+n+"/"+o[t].sign+"/modifications.min.js?http-referer="+g+"&timeout="+_+"ms"+(l?"&cookie-expires="+Math.floor(l.getTime()/1e3):"");"sync"===e.new_experiments.mode&&o.localStorage.getItem("__exponea__sync_modifications__")?function(e,n,t,i,r){t[r][n]="<"+n+' src="'+e+'"></'+n+">",i.writeln(t[r][n]),i.writeln("<"+n+">!"+r+".init && document.writeln("+r+"."+n+'.replace("/'+n+'/", "/'+n+'-async/").replace("><", " async><"))</'+n+">")}(d,n,o,p,t):function(e,n,t,i,r,o,s,a){o.documentElement.classList.add(e);var c=m(t,i,o);function p(){r[a].init||m(t.replace("/"+i+"/","/"+i+"-async/"),i,o)}function u(){o.documentElement.classList.remove(e)}c.onload=p,c.onerror=p,r.setTimeout(u,n),r[s]._revealPage=u}(f,_,d,n,o,p,r,t)}}(o,t,i,0,n,r,e),function(e,n,t){var i;e[n]._initializeConfig(t),(null===(i=t.experimental)||void 0===i?void 0:i.non_personalized_weblayers)&&e[n]._preInitialize(t),e[n].start=function(i){i&&Object.keys(i).forEach((function(e){return t[e]=i[e]})),e[n].initialize(t)}}(r,n,o)}(document,"exponea","script","webxpClient",window,{
target: "YOUR INSTANCE",
token: "YOUR TOKEN",
data_layer: true,
experimental: {
non_personalized_weblayers: true
},
// replace with current customer ID or leave commented out for an anonymous customer
// customer: window.currentUserId,
track: {
visits: true,
google_analytics: false,
},
});
function getCookie(cname) {
var name = cname + "=";
var ca = document.cookie.split(';');
var cookie = undefined;
for (var i = 0; i < ca.length; i++) {
var c = ca[i];
while (c.charAt(0) == ' ') {
c = c.substring(1);
}
if (c.indexOf(name) == 0) {
cookie = c.substring(name.length, c.length);
break;
}
}
cookie = decodeURIComponent(cookie);
cookie = cookie.split('?')[0];
return cookie;
}
var customer = {};
var cart_id = getCookie('cart');
if (cart_id) customer.cart_id = cart_id;
{% if customer and customer.email %}
customer.email_id = {{ customer.email | json }};
customer.shopify_id = {{ customer.id | json }};
{% endif %}
exponea.start({
"customer": customer
});
</script>- Save the changes in the
liquid.fileand navigate back to your Bloomreach project.
Snippets orderThe order of snippets matters for proper functionality.
- Finish the web integration
Enable the flows you want to track.
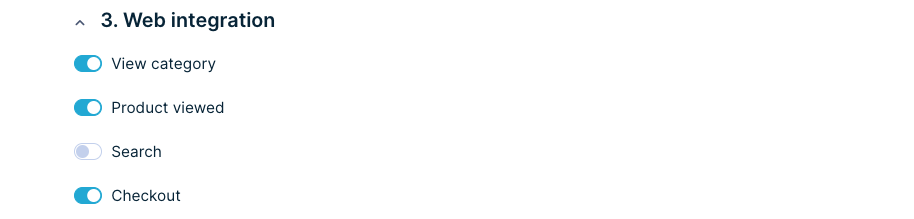
- Save integration, and your Web Integration is done!
4. Manage consents
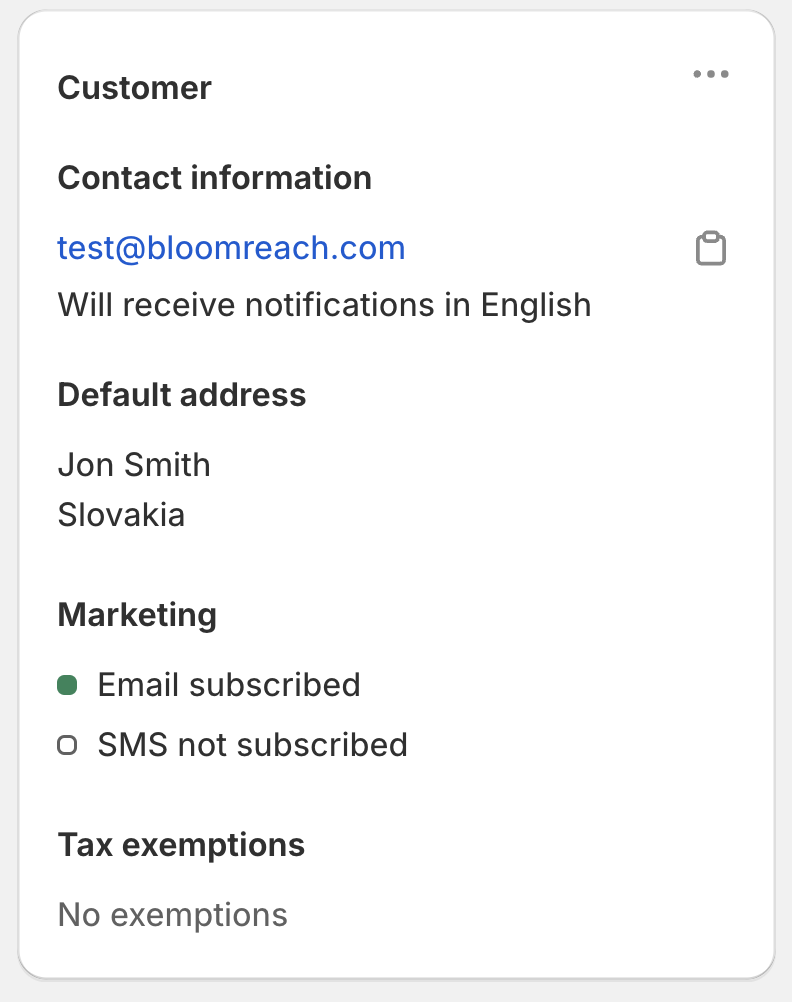
In this step, you decide how to integrate your consents from Shopify into Bloomreach. Learn more about the Shopify Marketing consents.
Shopify has two marketing channels: Email and SMS.
Your consent setup for the Shopify integration depends on whether or where you're managing your marketing double opt-in.
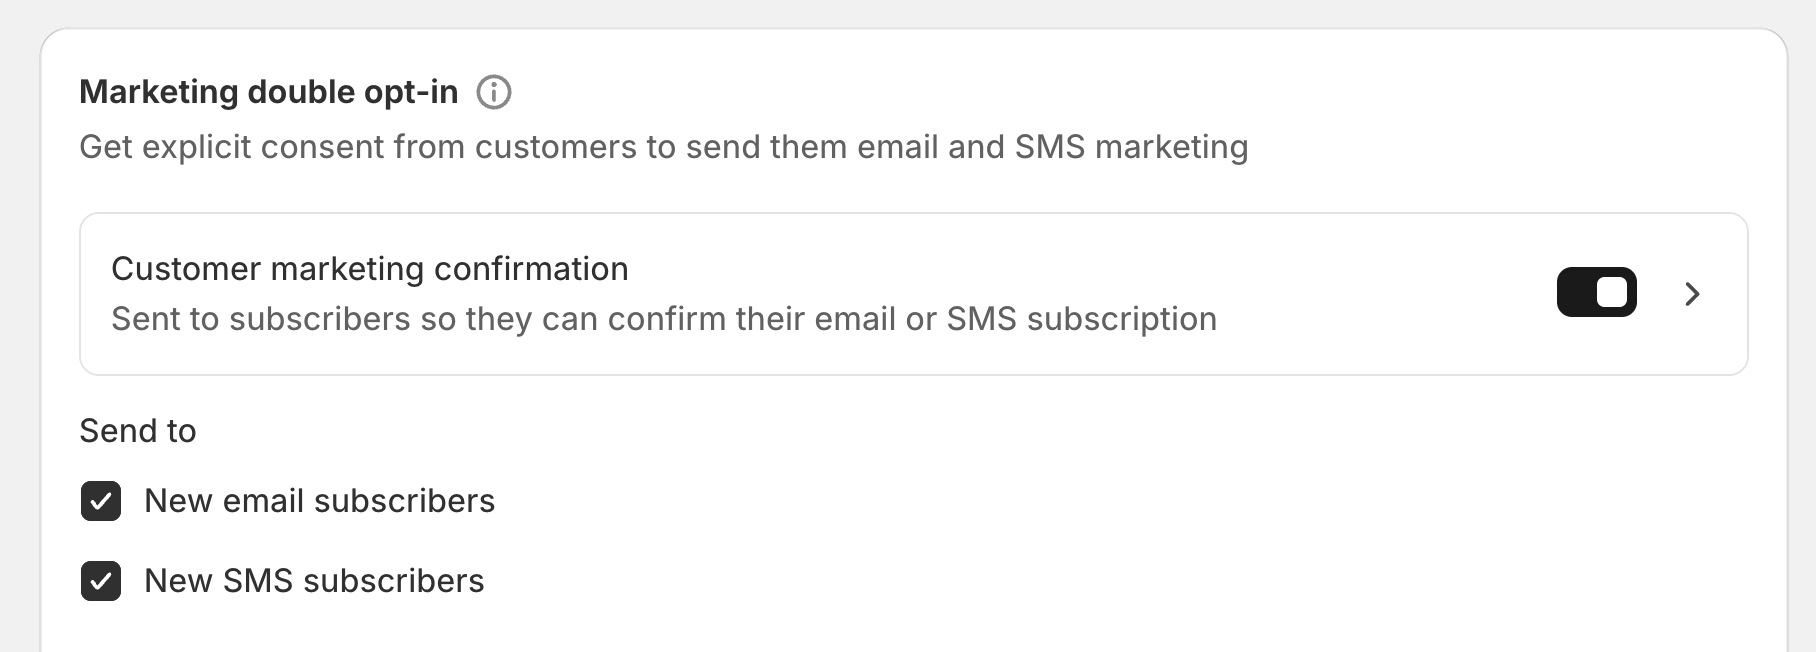
Double opt-in management via Shopify
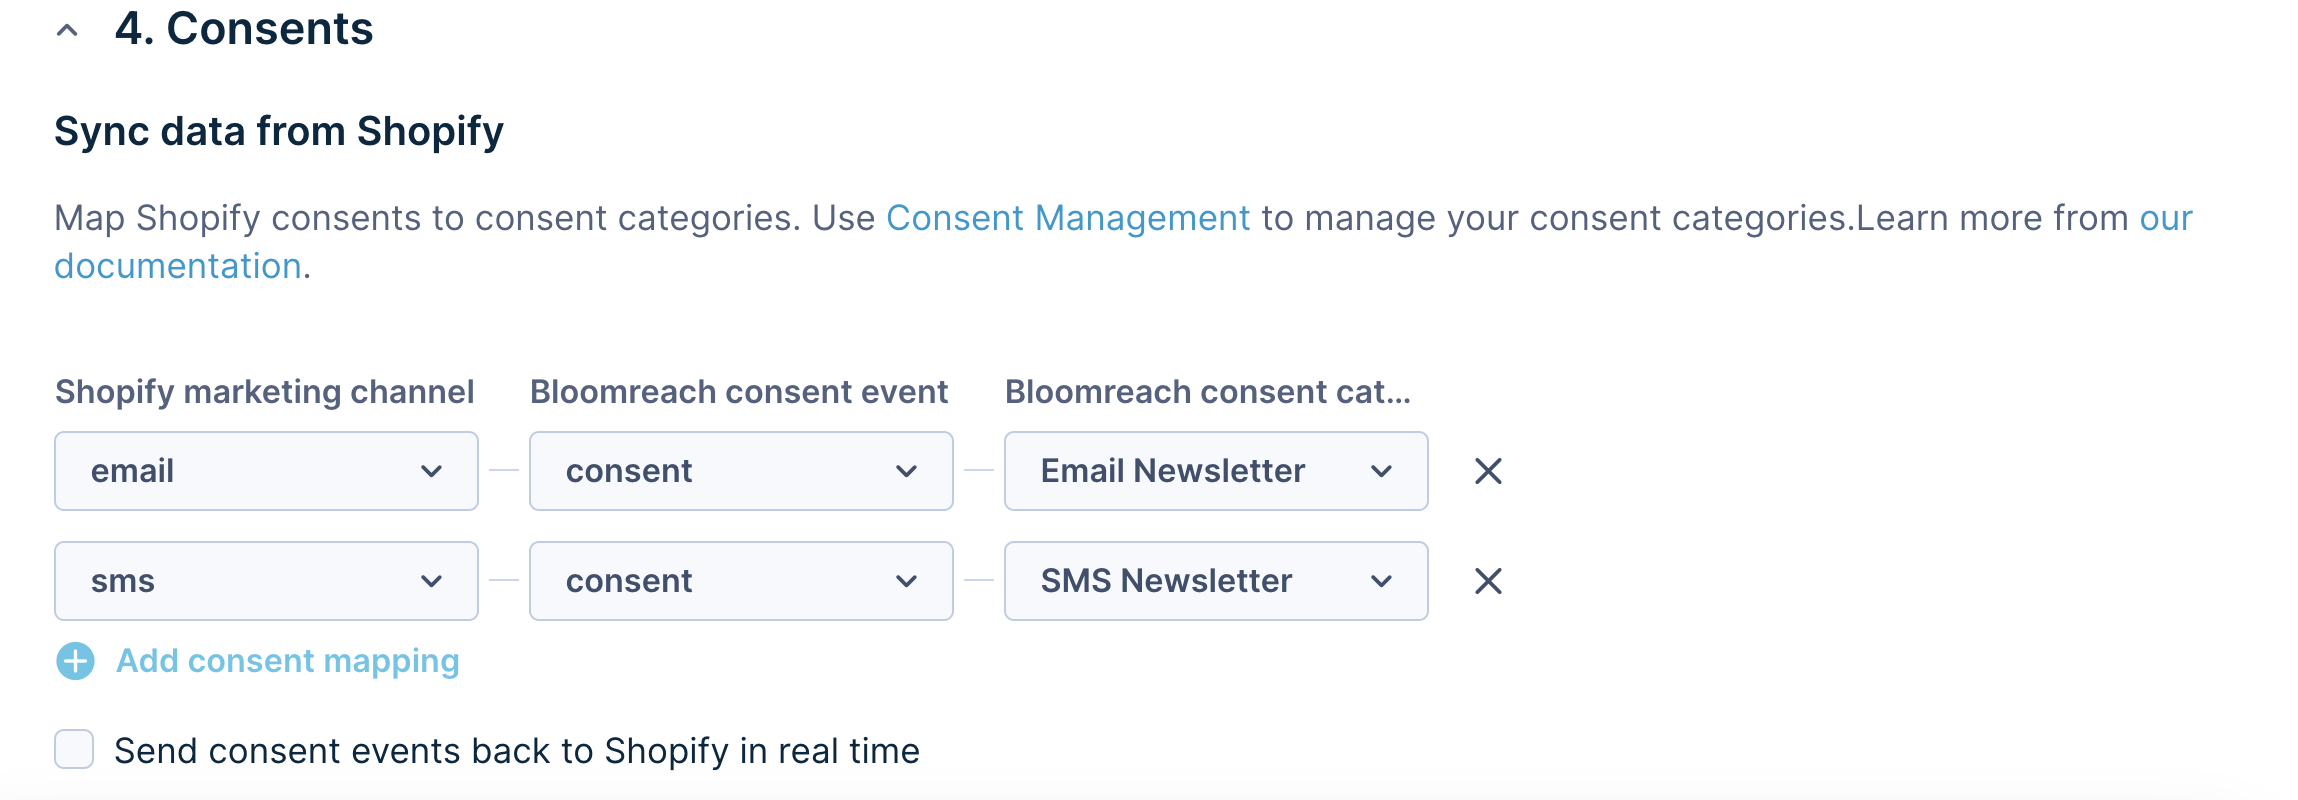
If you manage it via Shopify, you can map Shopify marketing consents to Bloomreach consent, as shown below. This means we'll create a Bloomreach consent event for each consented customer.
Shopify setup
Bloomreach setup
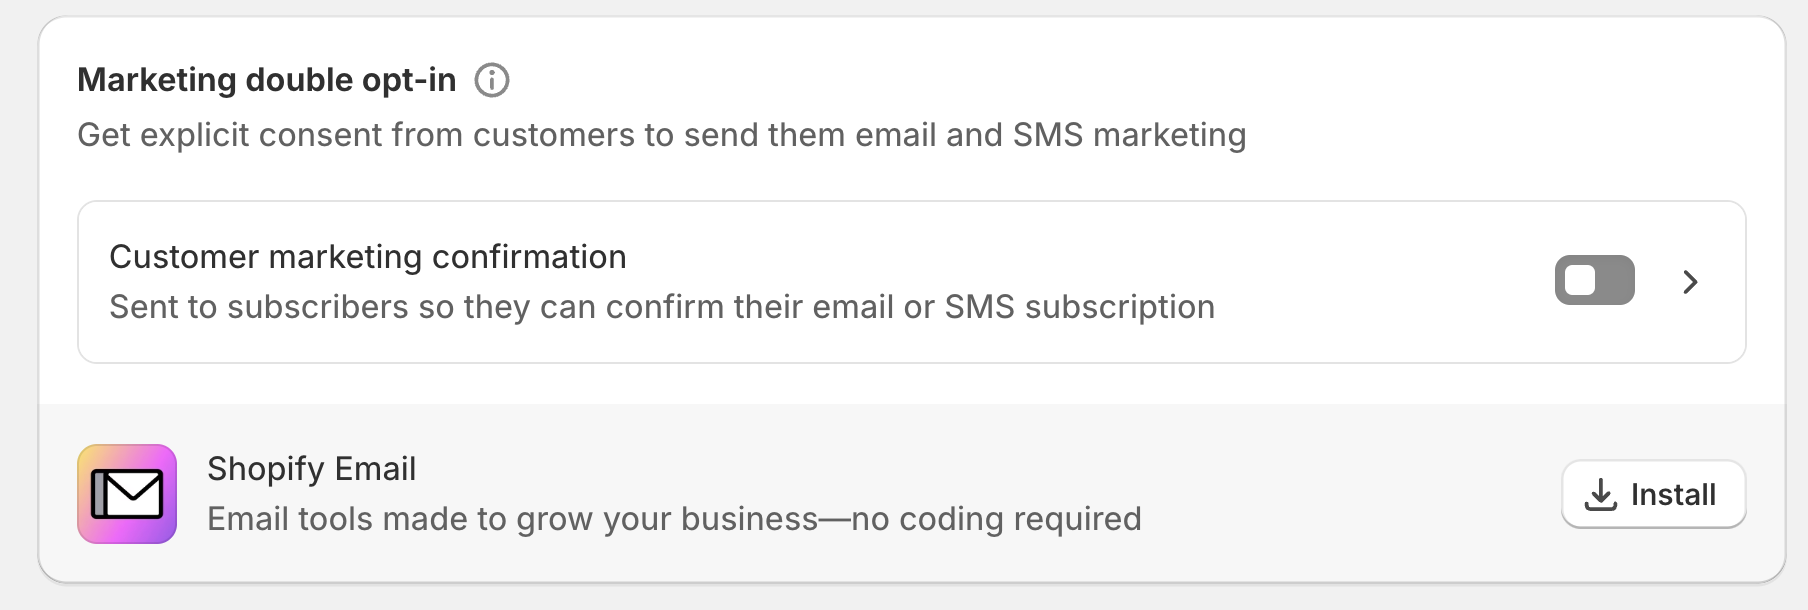
Double opt-in management via Bloomreach
If you want to manage double opt-in via Bloomreach, choose the following setup: When a customer subscribes to your communication, a new double_opt_in event will appear in Bloomreach, which can be used to trigger a double opt-in scenario. Learn how to create a double opt-in scenario.
Shopify setup
Bloomreach setup
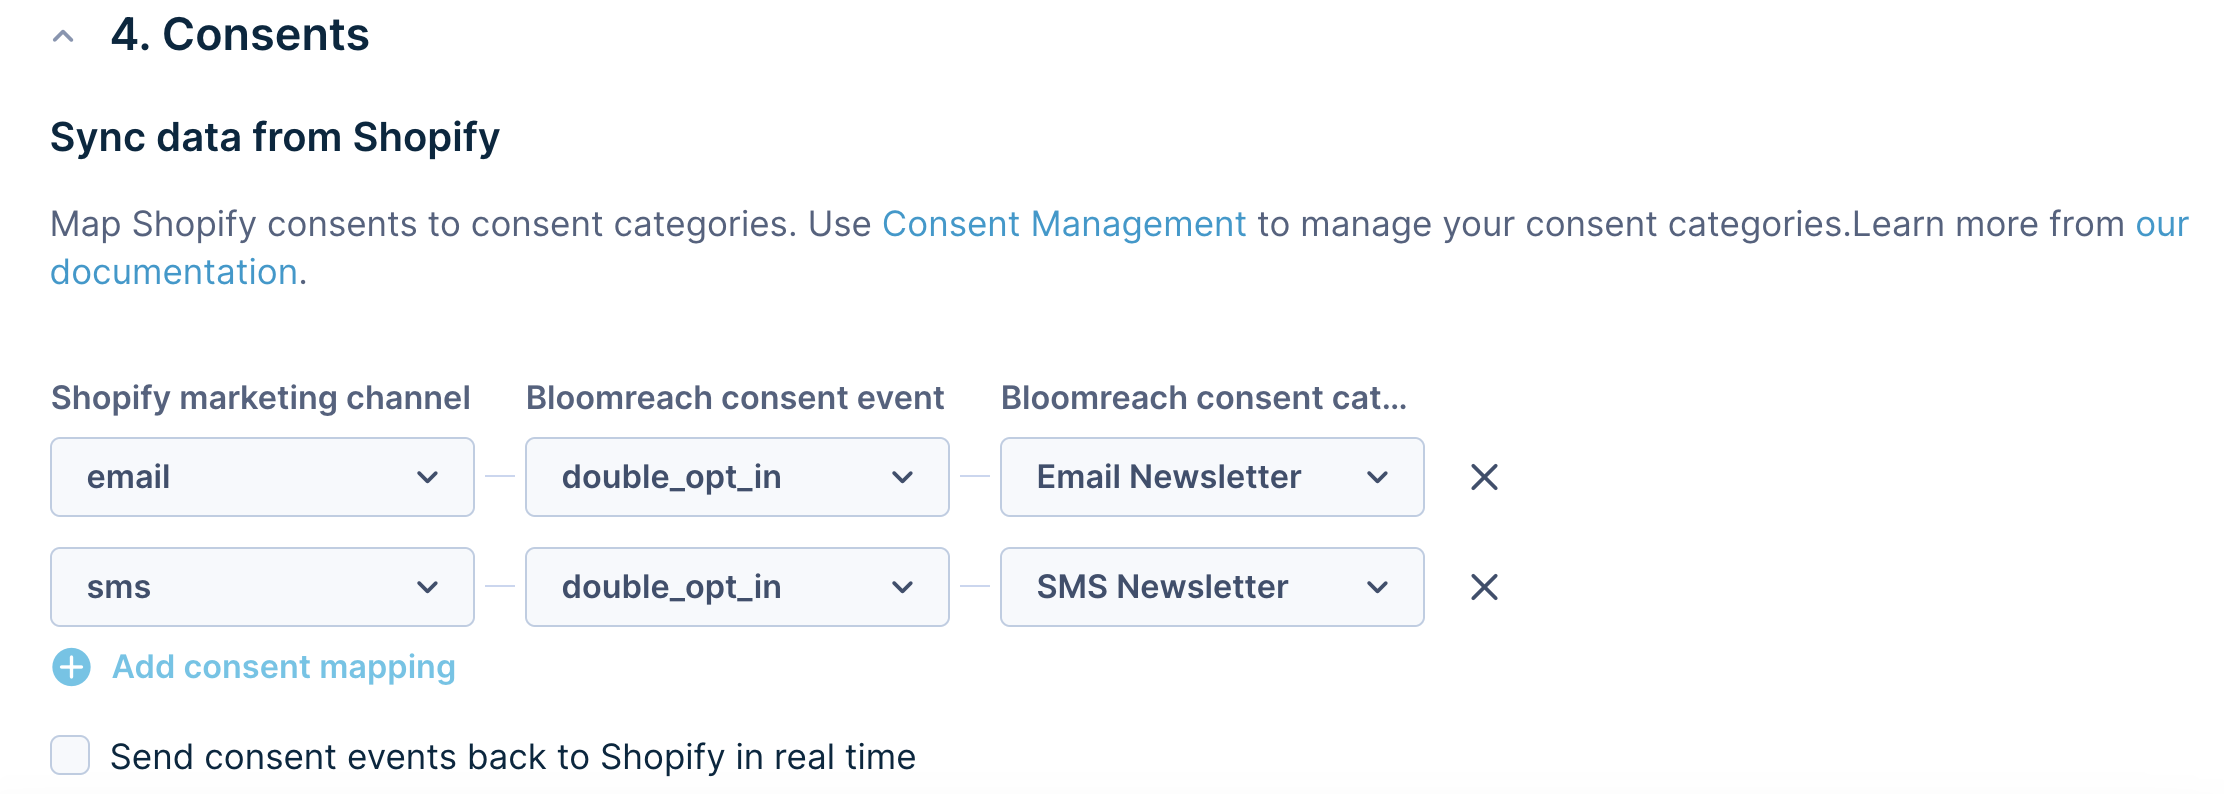
The last option for the Bloomreach consent event is shopify_consent. Selecting it creates a shopify_consent event with each consent change for your customers. This option is for users who want to create custom scenarios to process customer consents.
You must assign a Bloomreach consent category for both the consent and double_opt_in consent events. You can only map one Bloomreach consent category for each Shopify marketing channel.
The last step in consent management setup is deciding about bidirectional sync (Bloomreach to Shopify). You can do this by ticking the Send consent event back to Shopify in real-time checkbox. Enabling this feature means all consent changes made on the Bloomreach side will be reflected in Shopify. We support only official consent statuses: accept and reject. We recommend enabling this feature to keep consents synchronized between both platforms. Match the Shopify opt-in level (single or confirmed opt-in) must with your Shopify store's Marketing double opt-in setting found in Settings > Customer privacy. A mismatch can cause consent data to sync incorrectly.
NoteThe integration can't grant SMS consent "Subscribed" status for customers without a phone number in the Shopify Admin view.
5. Additional settings
Product tags
If you use product tags in Shopify, we recommend bringing them to Bloomreach. This powers the recommendation engine with additional product data and enriches your analytics with product insights.
Catalog naming convention of the Shopify Product Tags
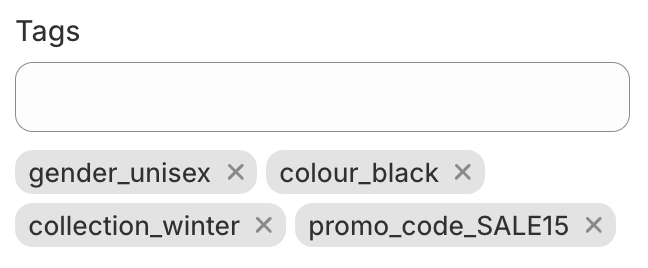
To match Bloomreach cstructure, we recommend using the following naming convention structure for the Shopify Product Tags: name_of_the_tagany separator (, - _ ;), and then value, for example, gender_unisex, collection-winter, promo_code=Sale15.
If you want to, for example, add a tag color_#808080, use color as the tag's name and _ as a separator. In this case, the Shopify color_#808080 will be displayed in a catalog as a column product_tag_color and value #808080. If you add the whole color_#808080 as a name of the tag, it won't work correctly.
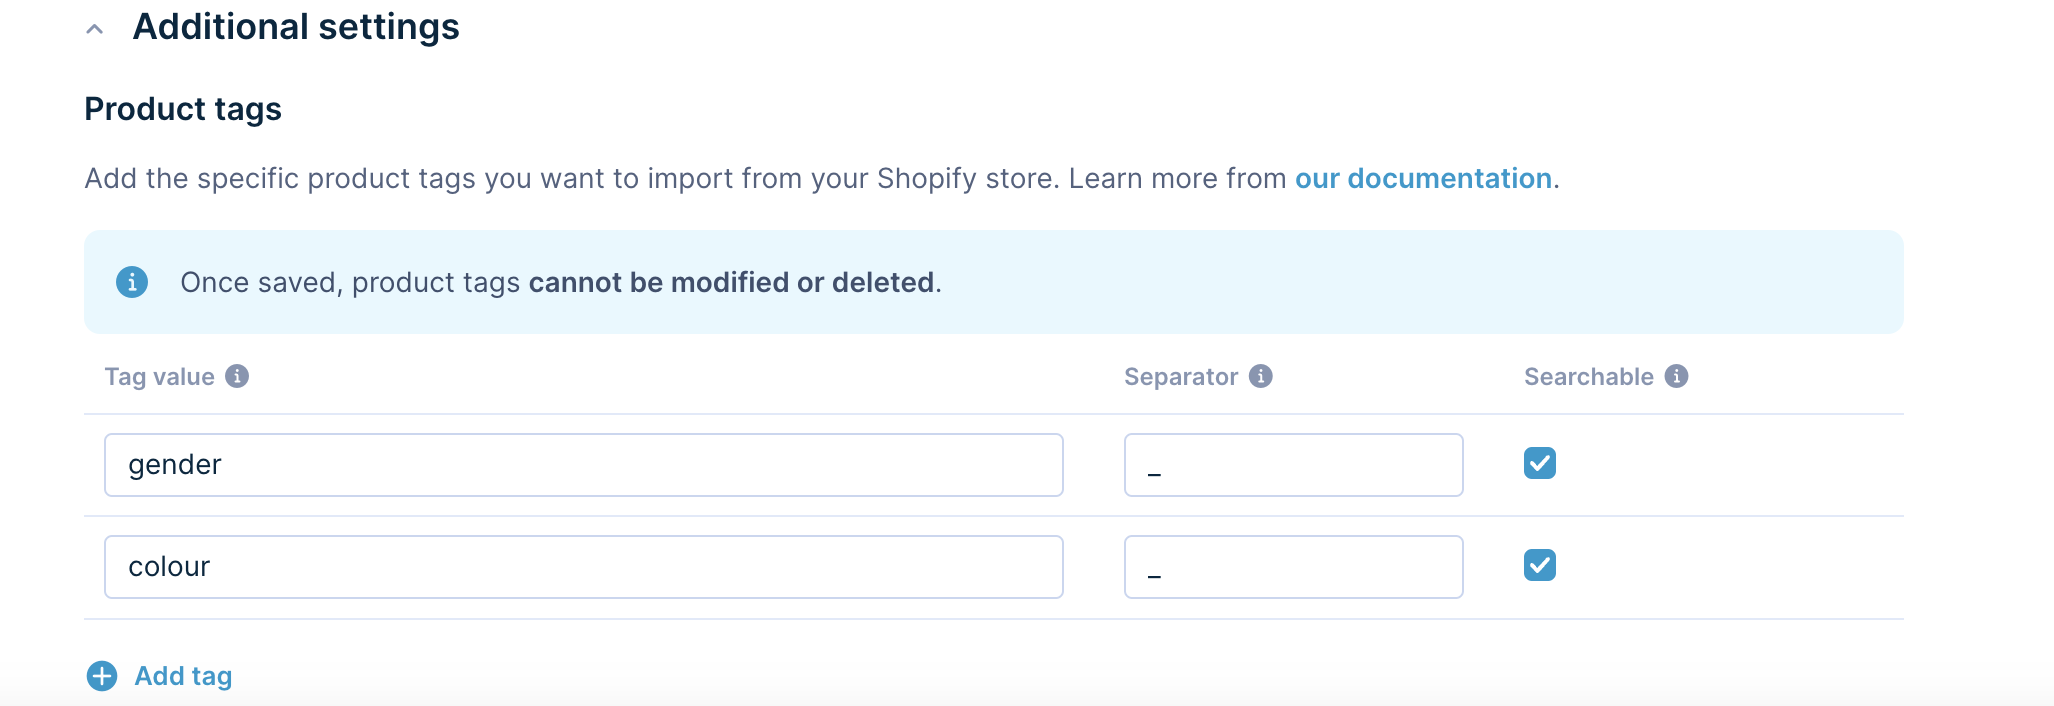
Once you decide which product tags you want to bring to Bloomreach, place them in the Additional Settings section under the Product Tags.
- Tag value: Name of your tag, such as:
color,gender,promo_code. - Separator: Sign separating tag from the value, such as:
_ , - =. - Searchable: Marks this field as searchable inside catalogs, recommendations.
Selected product tags will be visible inside the product catalogs and will be part of the purchase_item events.
Frequency of adding new product tagsEvery time you save the configuration with new product tags, it reimports all catalogs to add those fields. This can take some time. Don't add new product tags frequently.
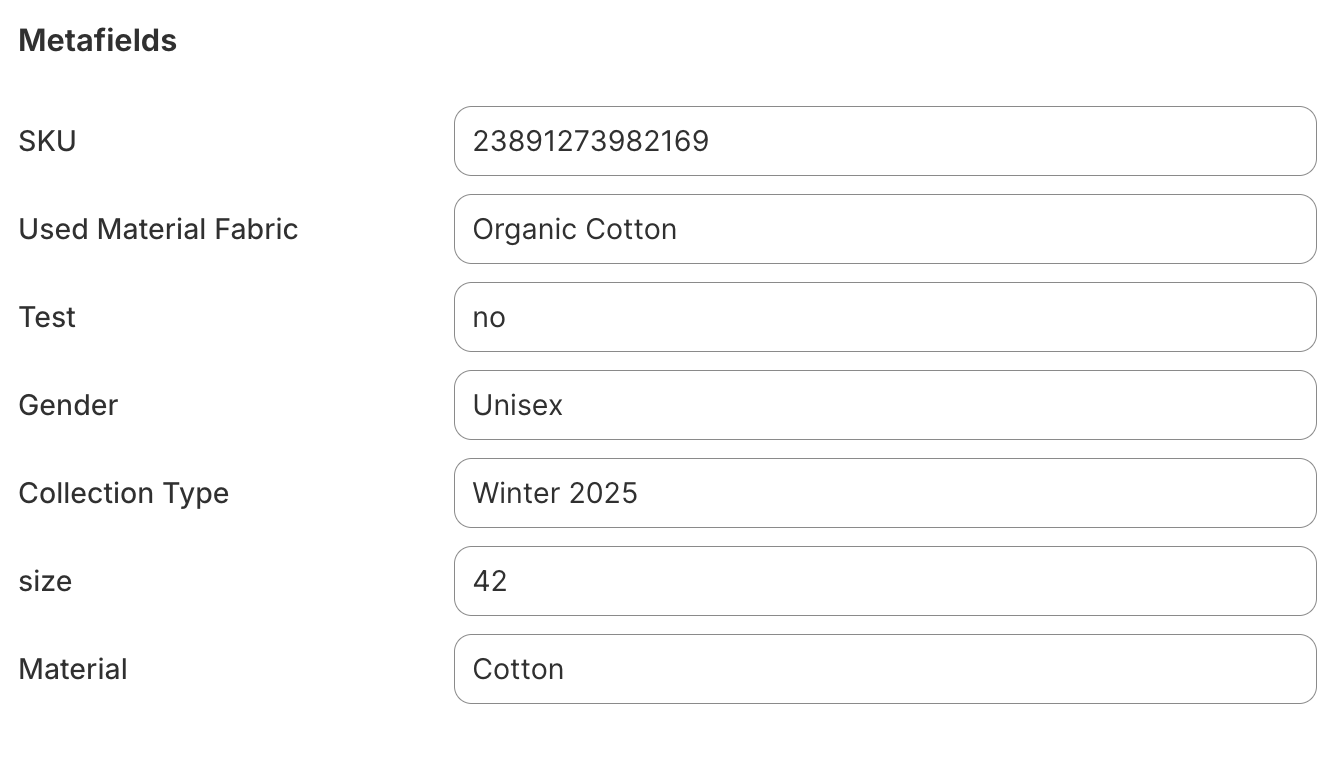
Product metafields
We recommend importing your Product Metafields from Shopify into Bloomreach. This process can enhance your recommendation engine with more comprehensive product data and enrich your analytics with deeper product insights.
NoteWe support the following metafield data types:
boolean,color,date,date_time,multi_line_text_field,number_decimal,number_integer,single_line_text_fieldandurl.
Once you decide which product metafields you want to bring to Bloomreach, you need to place them in the Additional Settings section under the Product Metafields.
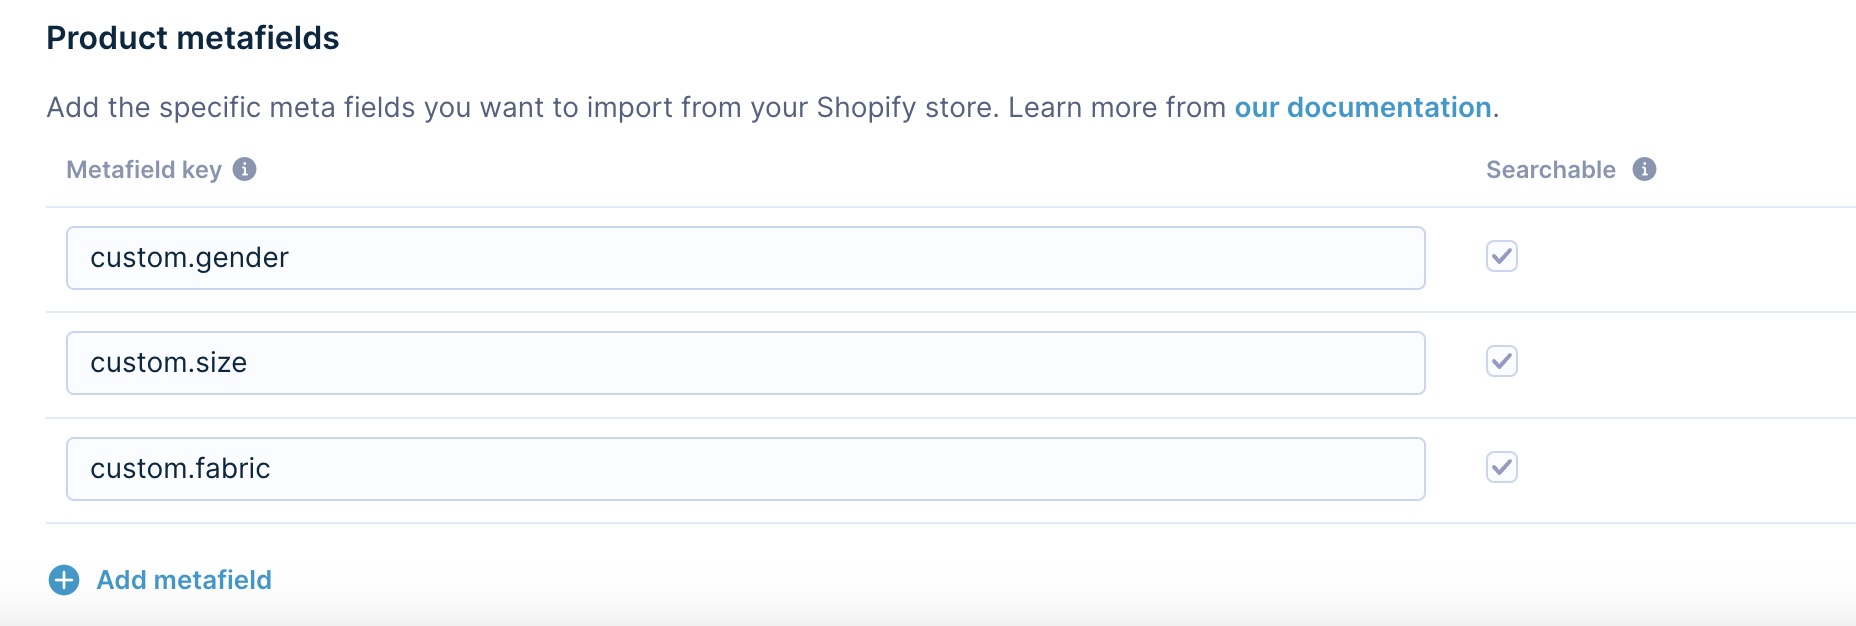
To find the Metafield key go to your Shopify store's Settings > Custom Data > Products > Product metafield definition and copy the value from the Namespace and key field.
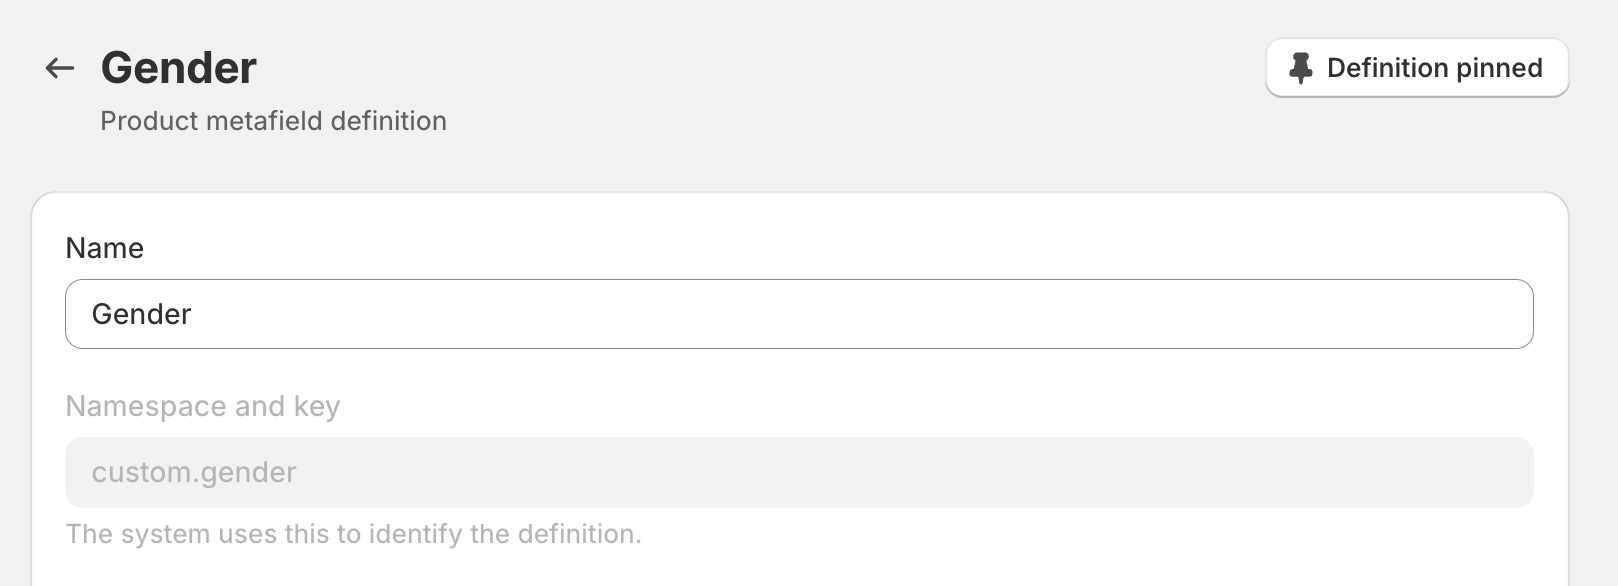
Example - custom.gender
Selected product metafields are visible inside the product catalogs and are a part of the purchase_item events.
Limit of searchable fieldsThe number of searchable attributes is limited and shared across settings like Product metafields and Product catalogs.
Select up to 20 fields (including Product metafields and Product tags) to bring to Bloomreach.
Once saved, the configuration cannot be modified or deleted.
Post purchase events
Track the complete order lifecycle beyond the initial purchase. Post-purchase events help you deliver more relevant customer experiences by capturing order changes like cancellations, refunds, and fulfillments.
Why track post-purchase events
- Avoid irrelevant recommendations: Never recommend products that customers have returned or canceled.
- Send timely communications: Trigger messages aligned with delivery events and order status changes.
- Refine customer segmentation: Identify patterns like serial returners and adjust promotions accordingly.
Available events
- cancelled: Order cancellation events
- refund_created: Full refund events
- partial_refund_created: Partial refund events
- fulfilled: Order fulfillment/delivery events
- partially_fulfilled: Partial fulfillment events
How post-purchase events work
Post-purchase events appear in your project as purchase events with a changing purchase_status attribute. This allows you to track the complete order lifecycle and build scenarios based on order status changes.
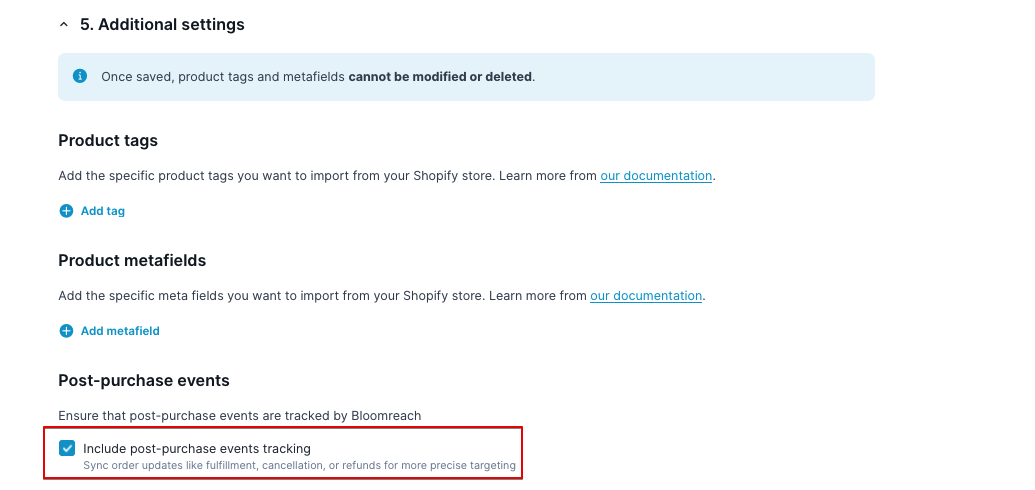
Post-purchase events tracking is disabled by default for existing Shopify integrations. Click Include post-purchase event tracking to enable them manually.
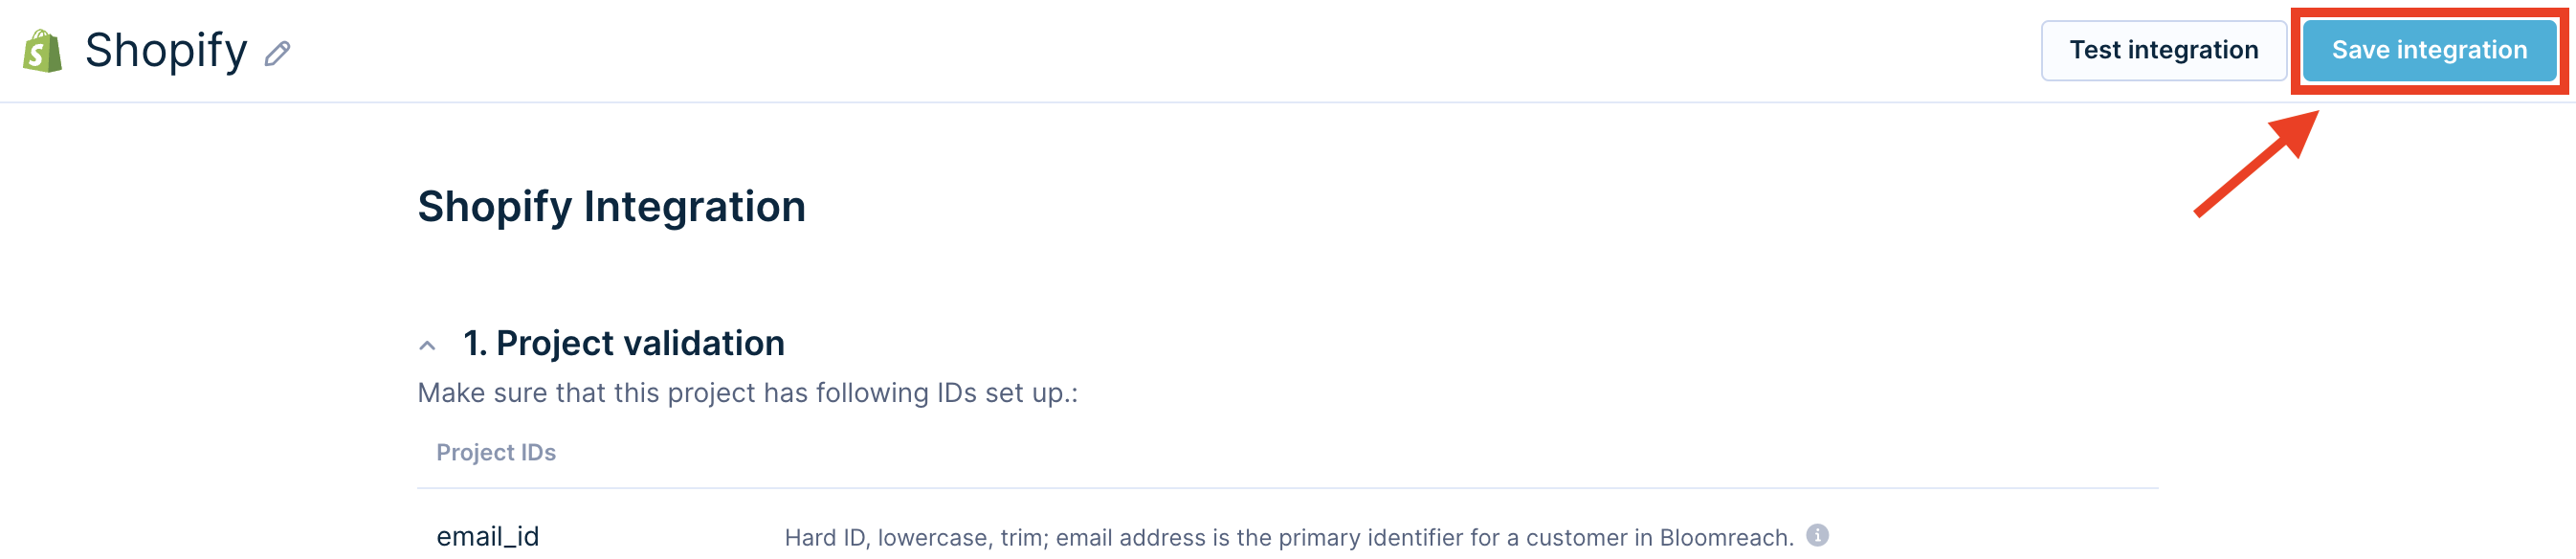
6. Save the integration
Once you save the integration, events will start appearing in your project. This part ensures that Shopify data flows into Bloomreach after setup.
Don't delete integration catalogsNever delete catalogs created by the Shopify integration. These catalogs have names that end with
.myshopify.com, such as:products_[name].myshopify.com,sku_[name].myshopify.com, andvariants_[name].myshopify.com. Deleting these catalogs breaks the integration and stops data synchronization. If you need to modify catalogs, contact Bloomreach Support with your integration details and requirements.
Regular catalog imports and customer and historical purchase data are available under Imports.
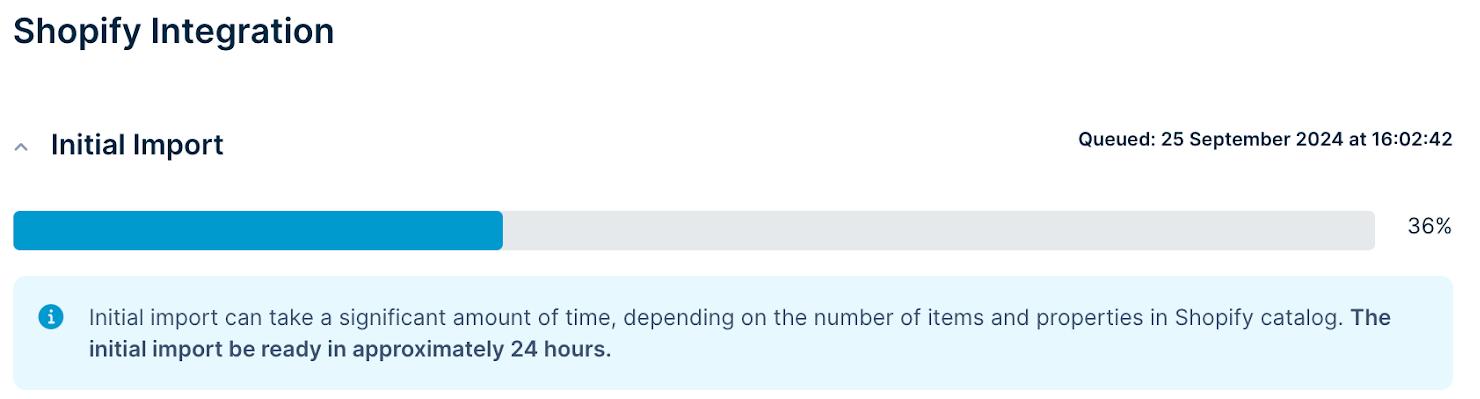
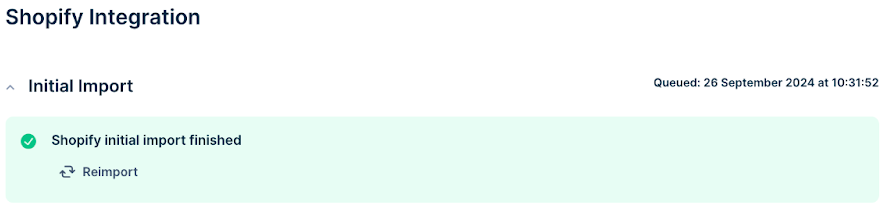
The initial import might take a while to finish. The progress bar lets you track the import progress.
Don't rotate or delete API keysNever rotate or delete API keys created by this integration. Changing these keys breaks the integration and stops data synchronization. API group with these keys have the name Shopify integration.
If you face any issues, follow the recommended steps.
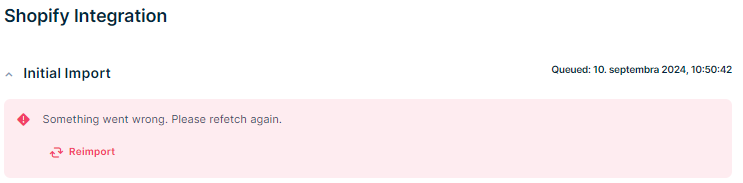
Reimport
The reimport functionality lets you reimport your catalogs, customers, and historical events.
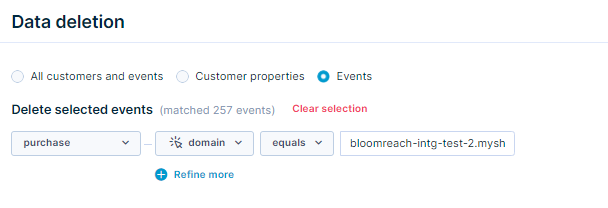
Triggering the Reimport function doesn't automatically delete previously imported events; it brings them back into the project, which can lead to duplication. To avoid this, remove previously imported Shopify events from the project.
Follow the steps in the Delete events and properties article.
Shopify events to be deleted:
purchasepurchase_itemconsentShopify_consent_customer_change
To identify events coming from the Shopify integration, use the domain attribute to filter them out.
Reimport always uses your current Shopify integration configuration. It doesn't replay events with the configuration that was active when the events were first tracked. For example, if you add or change a product metafield and then run Reimport, historical purchase_item events are reprocessed to include that metafield as if it had been tracked from the beginning.
Removing Shopify integration
If you decide to remove the Shopify integration, don't manually remove the webhook from the integration before removing the integration in the application. You can't remove the integration afterward if you do this. Instead, use only the Remove Integration button in the application. It takes care of all steps required to remove the integration, including deleting the webhook.

Troubleshooting
If you encounter any problems, ensure that you are running the most recent version of Shopify.
Shopify updates
If you use an older version, a warning message will appear in the Shopify Admin. To continue using the Shopify integration and access the latest features, we strongly recommend updating to the most recent version in Shopify Admin by clicking the update button.
Updated 2 months ago