

Shopify Customization
Integration
This page serves as a guide on how to customize your Shopify integration with a Custom App and/or Web Integration. The Shopify Setup page shows an out-of-the-box solution. However, you can also use the options on this page when integrating Bloomreach and Shopify.
Loomi AI for ShopifyThis page describes our previous Shopify integration. The guidance on this page doesn't apply if you are using Loomi AI for Shopify via Data hub.
Loomi AI for Shopify is our latest Shopify integration that powers both Discovery and Engagement through Data hub. If your store is connected via the Loomi AI for Shopify app in Shopify, follow the Loomi AI for Shopify documentation in Data hub instead.
Custom app
To connect your project with Shopify, there are 2 ways to authenticate with Shopify and allow the data to flow successfully.
The next section is about connecting your project with Shopify using a Custom App. For a guide how to connect your project using Official App, read about the Official App setup.
- Log in to your Shopify account and click on the > symbol next to Apps.

- Click on App and sales channel settings.

- Click on Develop apps.

- Click on Allow custom app development and re-confirm in the next window by clicking on Allow custom app development again.


- Click Create an app.

- Complete the field App name with a descriptive name (we recommend Bloomreach Engagement). Choose a responsible technical person as the App developer and insert their email address. Then click on Create app.

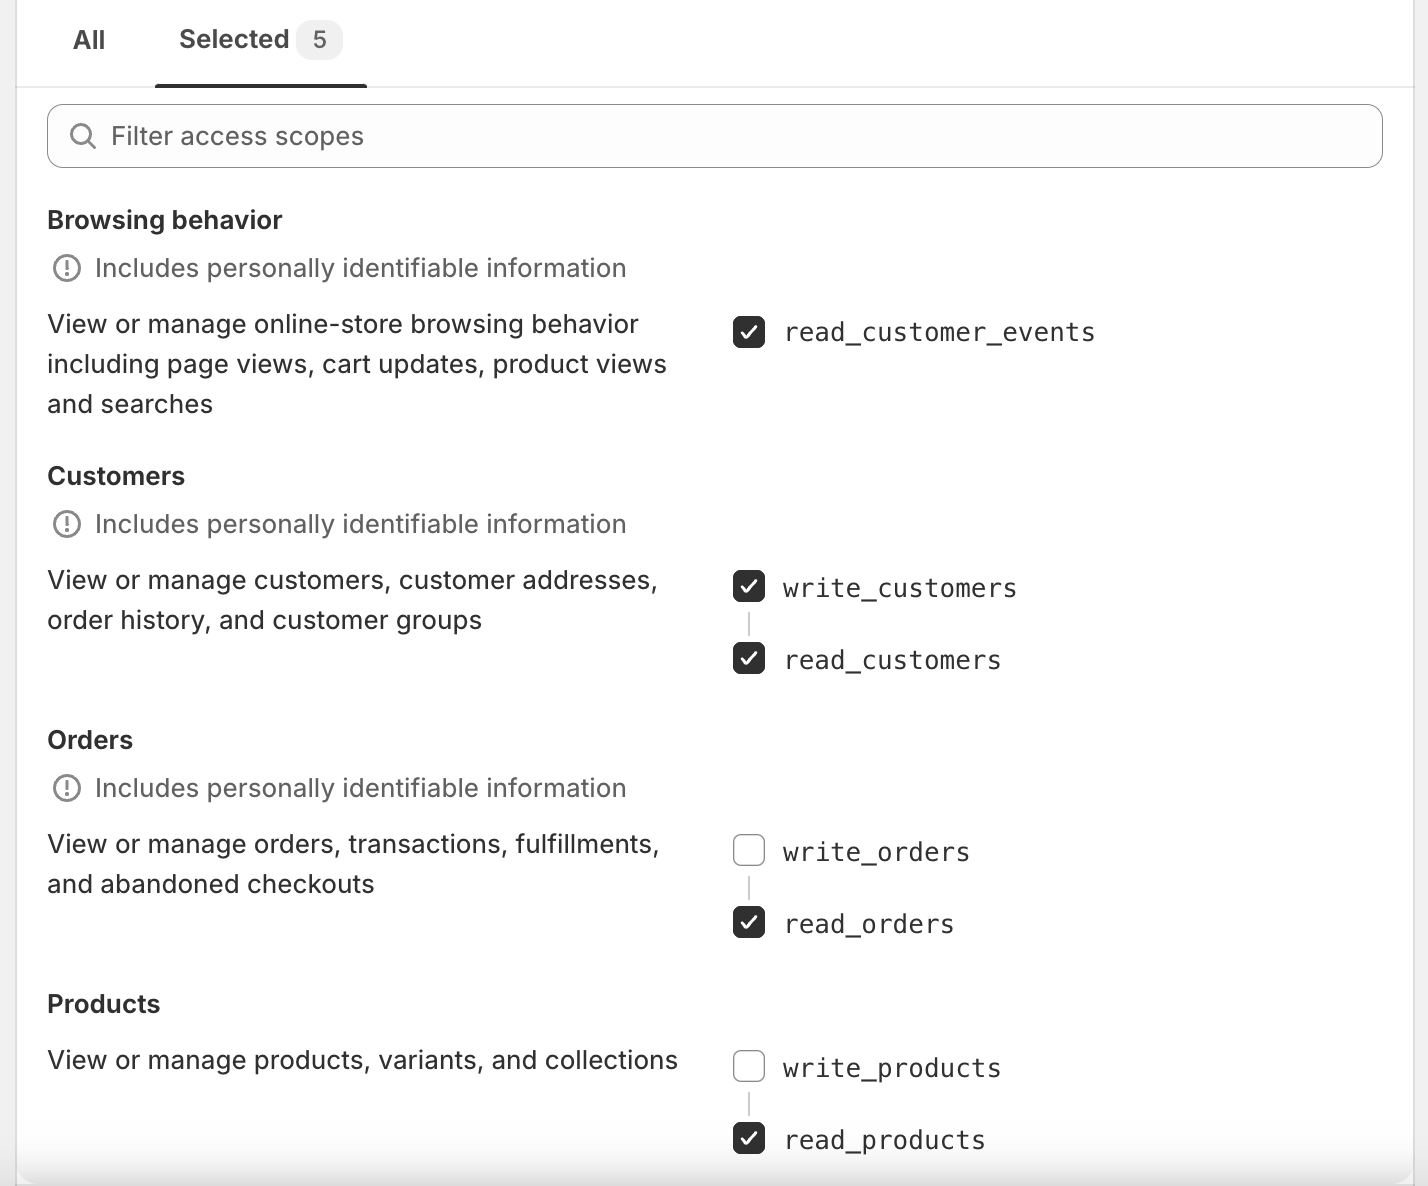
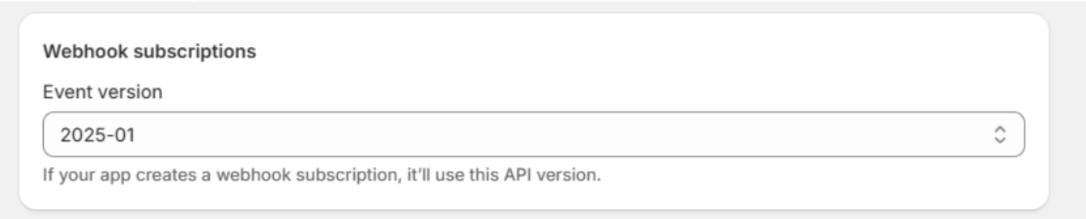
- Go to API credentials and click Configure Admin API scopes.

- In Admin API access scopes, select the required user permissions. Then in Event version under Webhook subscriptions, choose
2025-10.
Required user permissionsRequired user permissions are:
read_customer_events,write_customers,read_customers,read_orders, andread_products.
- Click Install app. Keep your tab with Shopify open to complete the following steps.

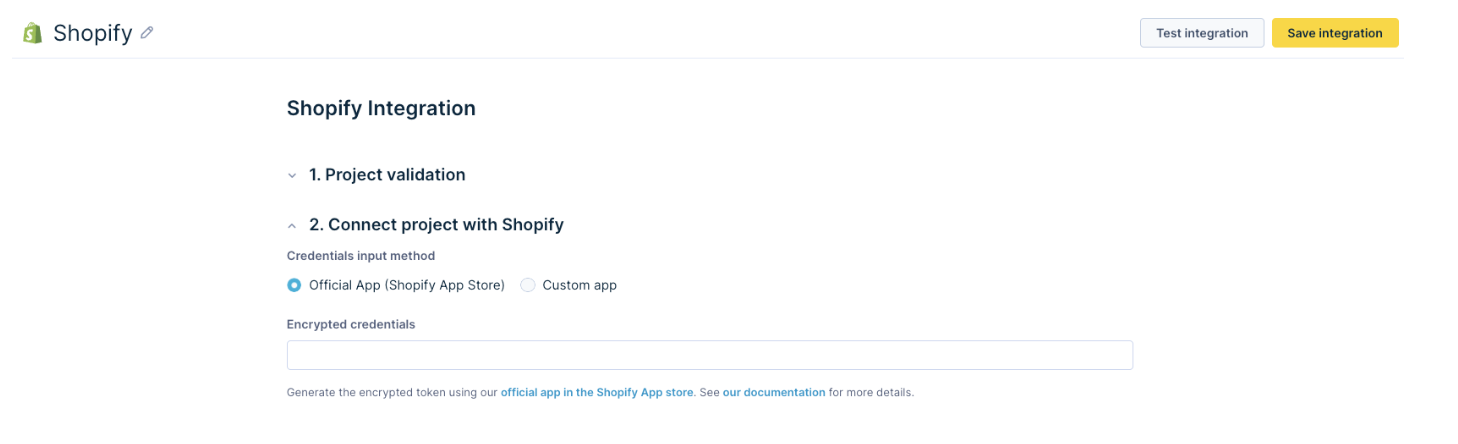
- Go back to your Shopify tab and copy and paste the Admin API access token, API key, and API secret key from your Shopify account to the matching fields in Bloomreach Engagement under the Connect project with Shopify section.
Custom web integration
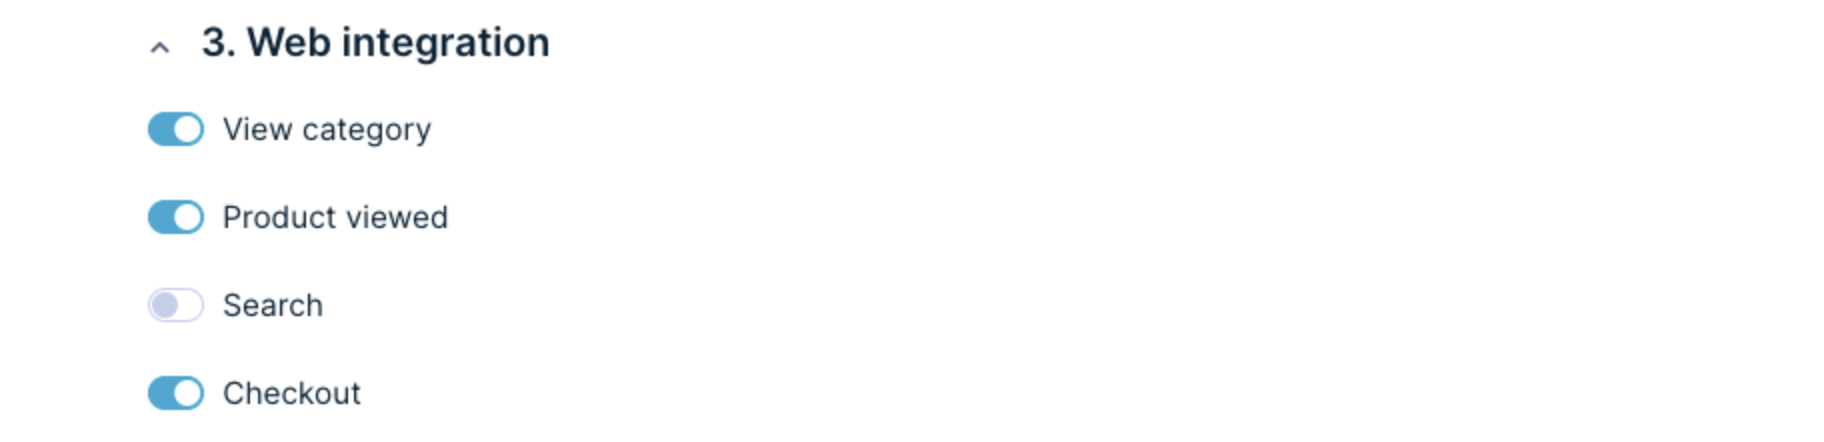
The next section is about tracking frontend events (such as view_item, view_category) using a Custom Web Integration. Read the guide on tracking frontend events using Shopify Web Pixel.
Main changes between Custom Web Integration and Shopify Web Pixel
- Attributes not tracked by webpixel:
view_category: browser, device, location, and osview_item: browser, device, location, and ossearch: browser, device, location, and oscheckout: browser, device, location, and os
- Checkout event is triggered when any of the checkout steps is changed:
checkout_started,checkout_contact_info_submitted,checkout_address_info_submitted,checkout_shipping_info_submitted,checkout_completed - In the checkout event the
step_titleattribute is changed to be representative of the checkout state, so for examplestep_titlethankyoubecomescheckout_completed.
We take thesestep_titleattributes from checkout event names. - Checkout tracking is supported only by the Shopify Web Pixel due to changes on Shopify's side.
You will need a technical person to complete the integration by making a few front-end modifications, which will take less than a few hours.

Shopify Front-end integration for BloomreachThis repository contains .liquid snippets that can enable standardized front-end tracking of e-commerce events on your Shopify Plus website.
Using Shopify instead of Shopify Plus
Using the non-Plus version of Shopify doesn't allow you to customize your checkout page, thus not allowing you to add checkout tracking. This means that Bloomreach Engagement can't track the checkout steps.
Bloomreach Engagement script runs only on the final checkout step; therefore, Bloomreach can't personalize the previous checkout process steps.
How to switch from the Custom Web Integration to Shopify Web Pixel
Remove the Exponea scripts inserted into Shopify liquids during the Custom Web Integration installation to switch to Web Pixel tracking. Read the Custom Web Integration installation guide. These are the files that might contain some tracking snippets, depending on your custom configuration:
- product.liquid
- collection.liquid
- search.liquid
- theme.liquid
- checkout.liquid
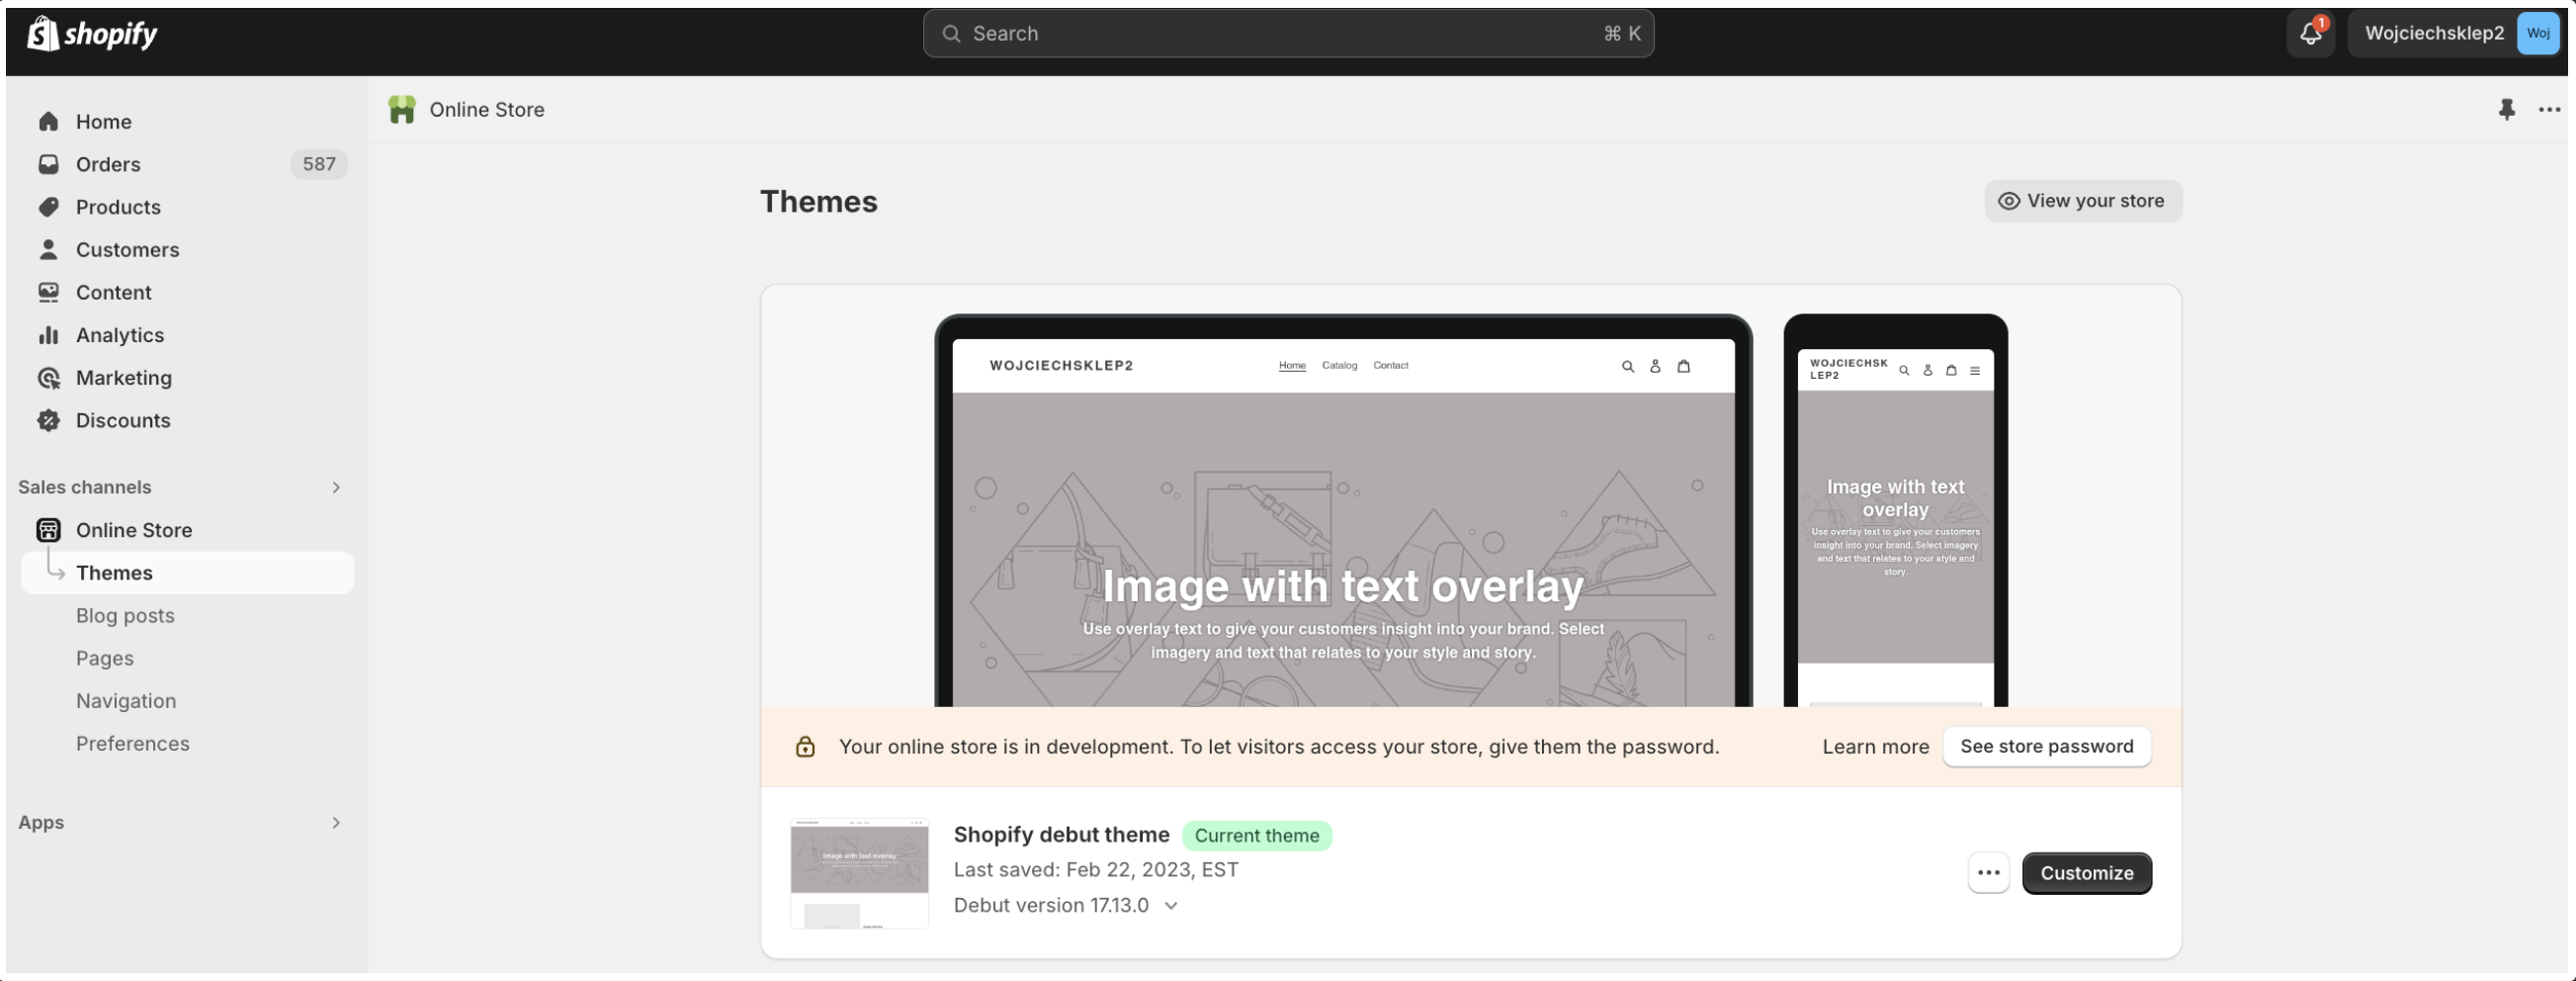
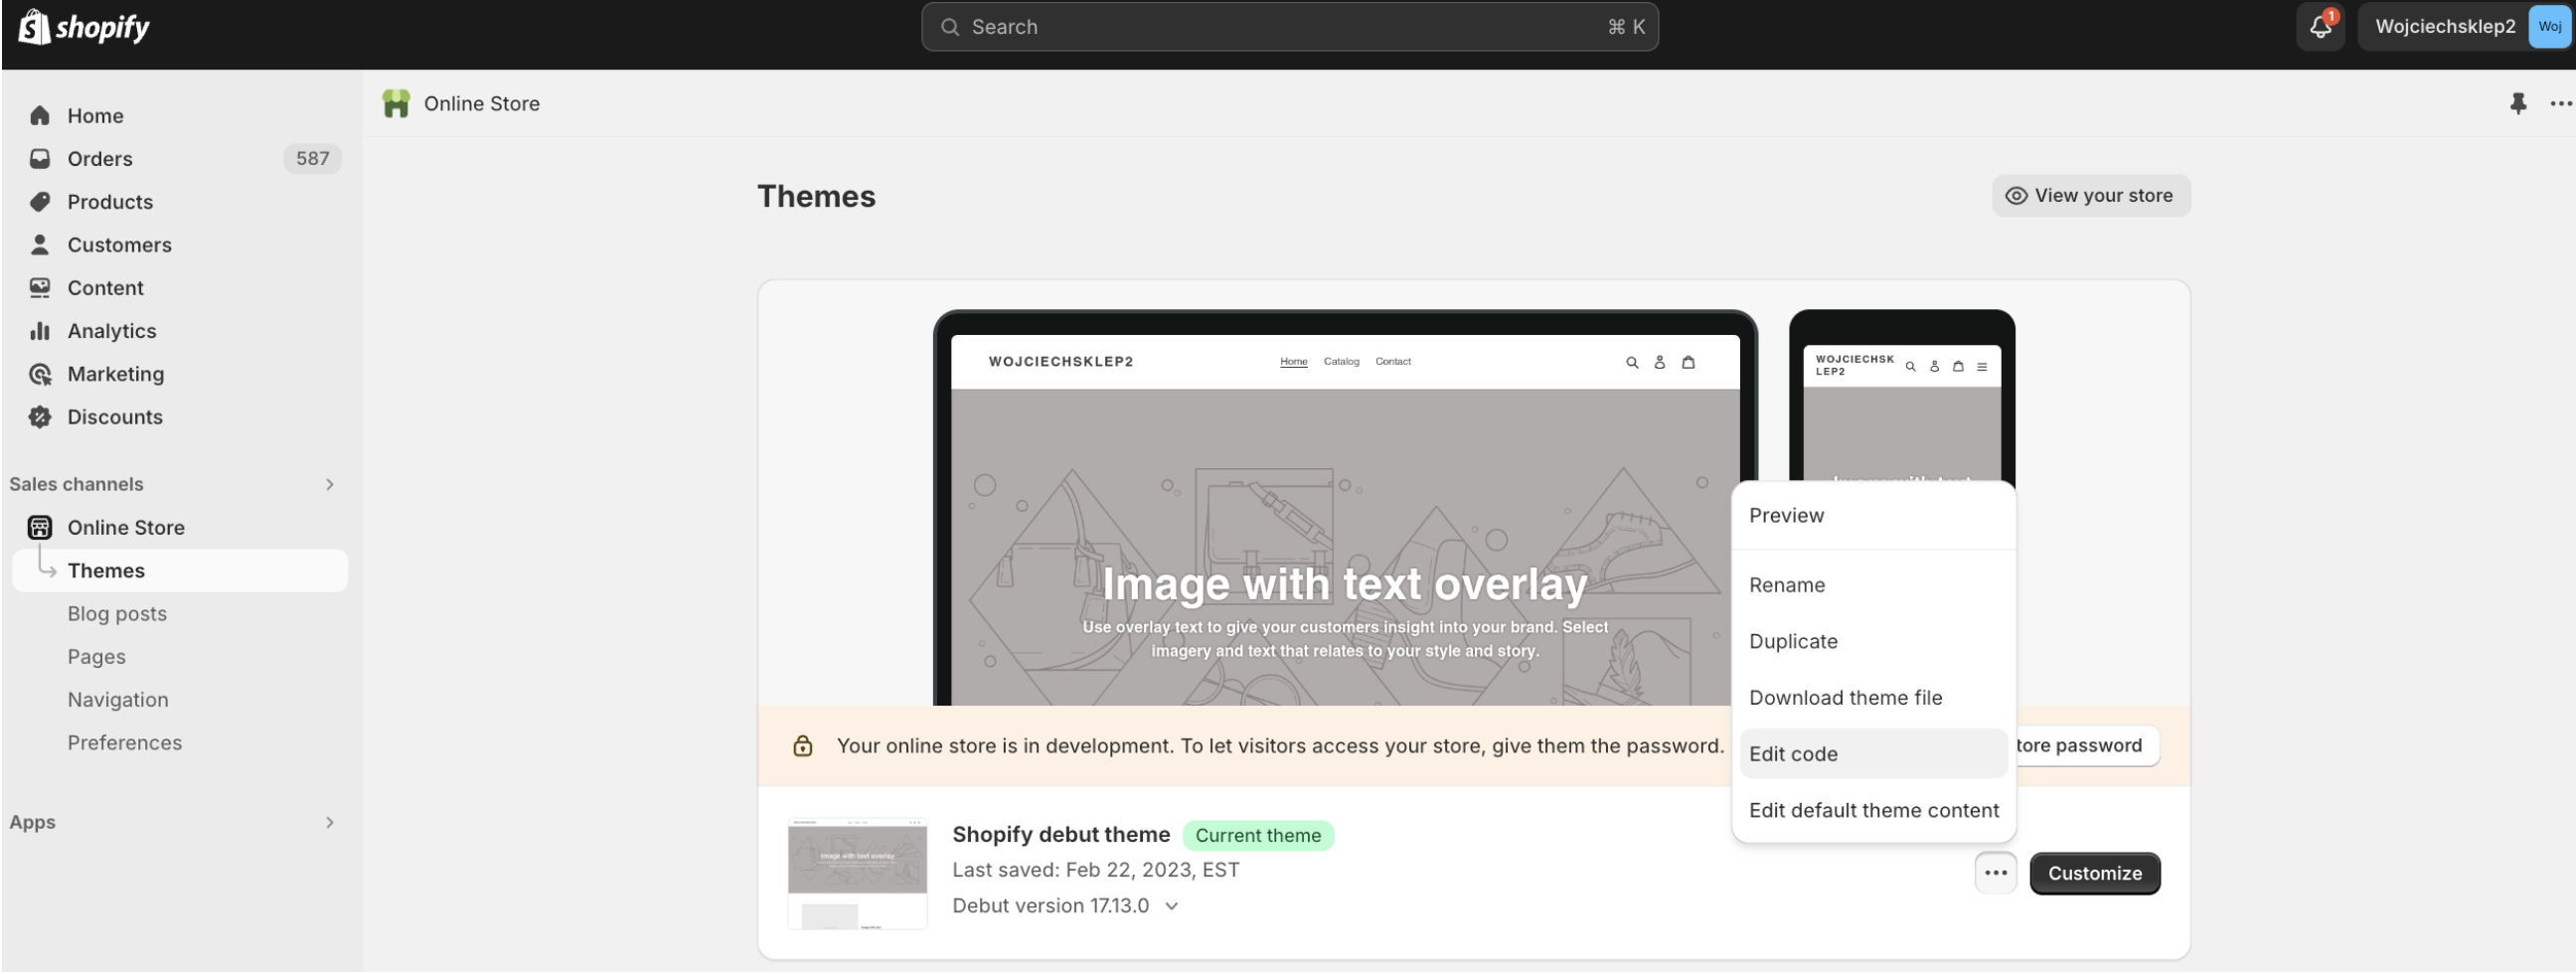
- To find them, go to the Themes tab of your Shopify store.
- Click Edit Code. Then, navigate to theme.liquid and paste the new Bloomreach Web Integration snippets. For more details on how to do this, check the instructions in the section above.
- When the theme.liquid file is updated, navigate to the Bloomreach App and accept new scopes by clicking the upgrade button. Now you can enable the Web Pixel Integration on your Shopify integration page. Remember to save your changes. This is related to existing integrations created via the Official App.
-
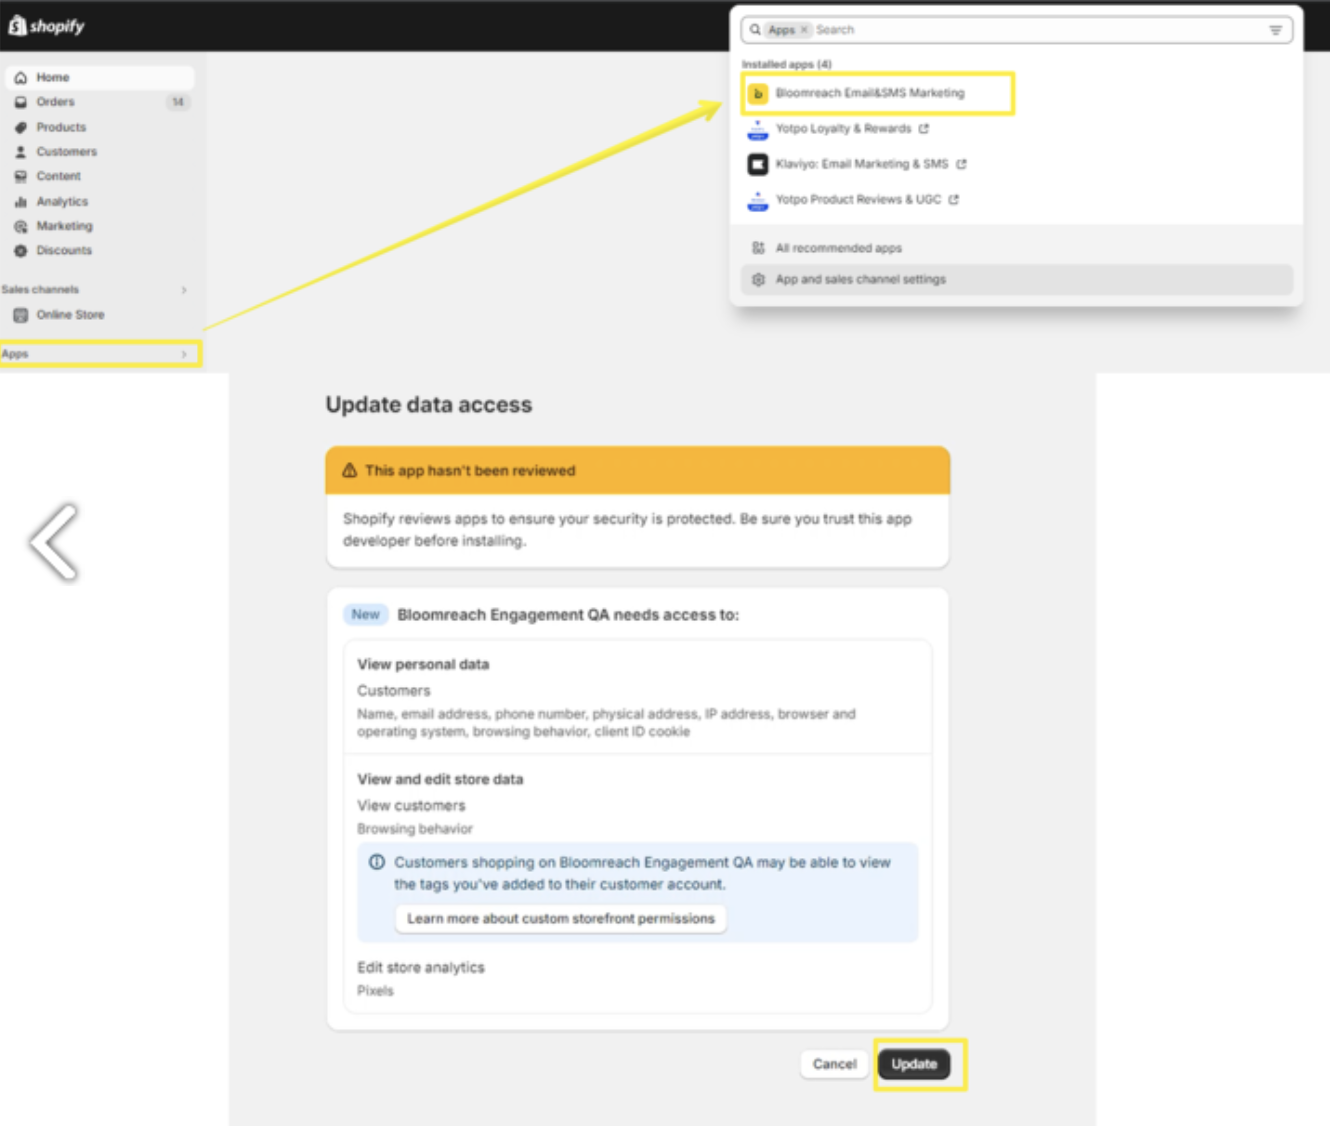
If your integration was created via a Custom App, you need to reauthorize and install the official Bloomreach Email&SMS marketing app.
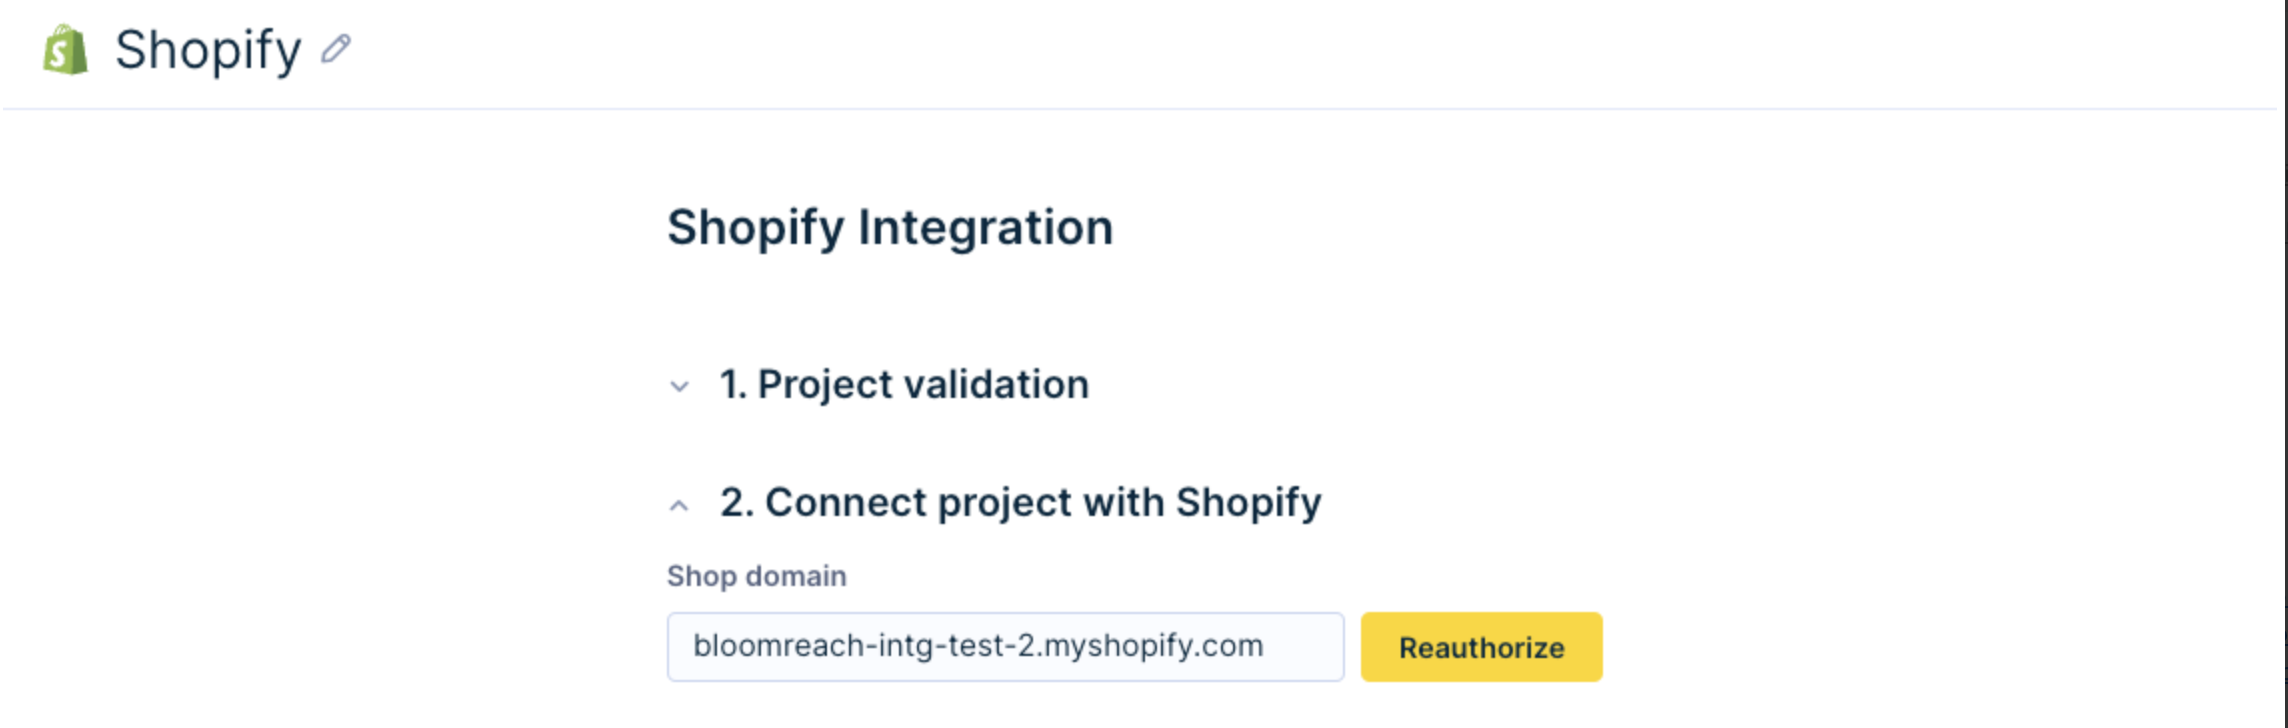
- To do so, navigate to your existing Shopify integration page and click the Reauthorize button.
- Go to your Shopify store, install the Official Bloomreach Email&SMS marketing app (Shopify App Store), paste the revealed token into the Encrypted credentials field in Bloomreach Engagement, and at the end, save integration.
Updated 3 months ago