Eagle Eye
Integration
The following document is a guide on how to integrate EagleEye with Bloomreach Engagement using Omniconnect and Webhooks.
This integration allows you to use EagleEye's token-based functions in Bloomreach Engagement. Use this integration to generate tokens from EagleEye and feed Bloomreach Engagement with token events and customer property updates from EagleEye in real-time.
Use cases
With the EagleEye Token integration, you can:
- Enrich automated emails like welcome emails, birthday campaigns, reactivation campaigns, refer-a-friend campaigns, and other with real-time generated tokens.
- Set up warnings about the expiration of tokens.
- Set up reminders about unused tokens.
- Monitor and analyze real-time customer token usage to adapt campaigns and strategies.
How to set it up
Prerequisites
- A Bloomreach Engagement project with integration access
- Ability to use EageEye API to set up webhooks
- Knowledge of JavaScript
1. Set up Omniconnect
This integration uses Omniconnect. To set it up:
- Go to your Bloomreach Engagement account.
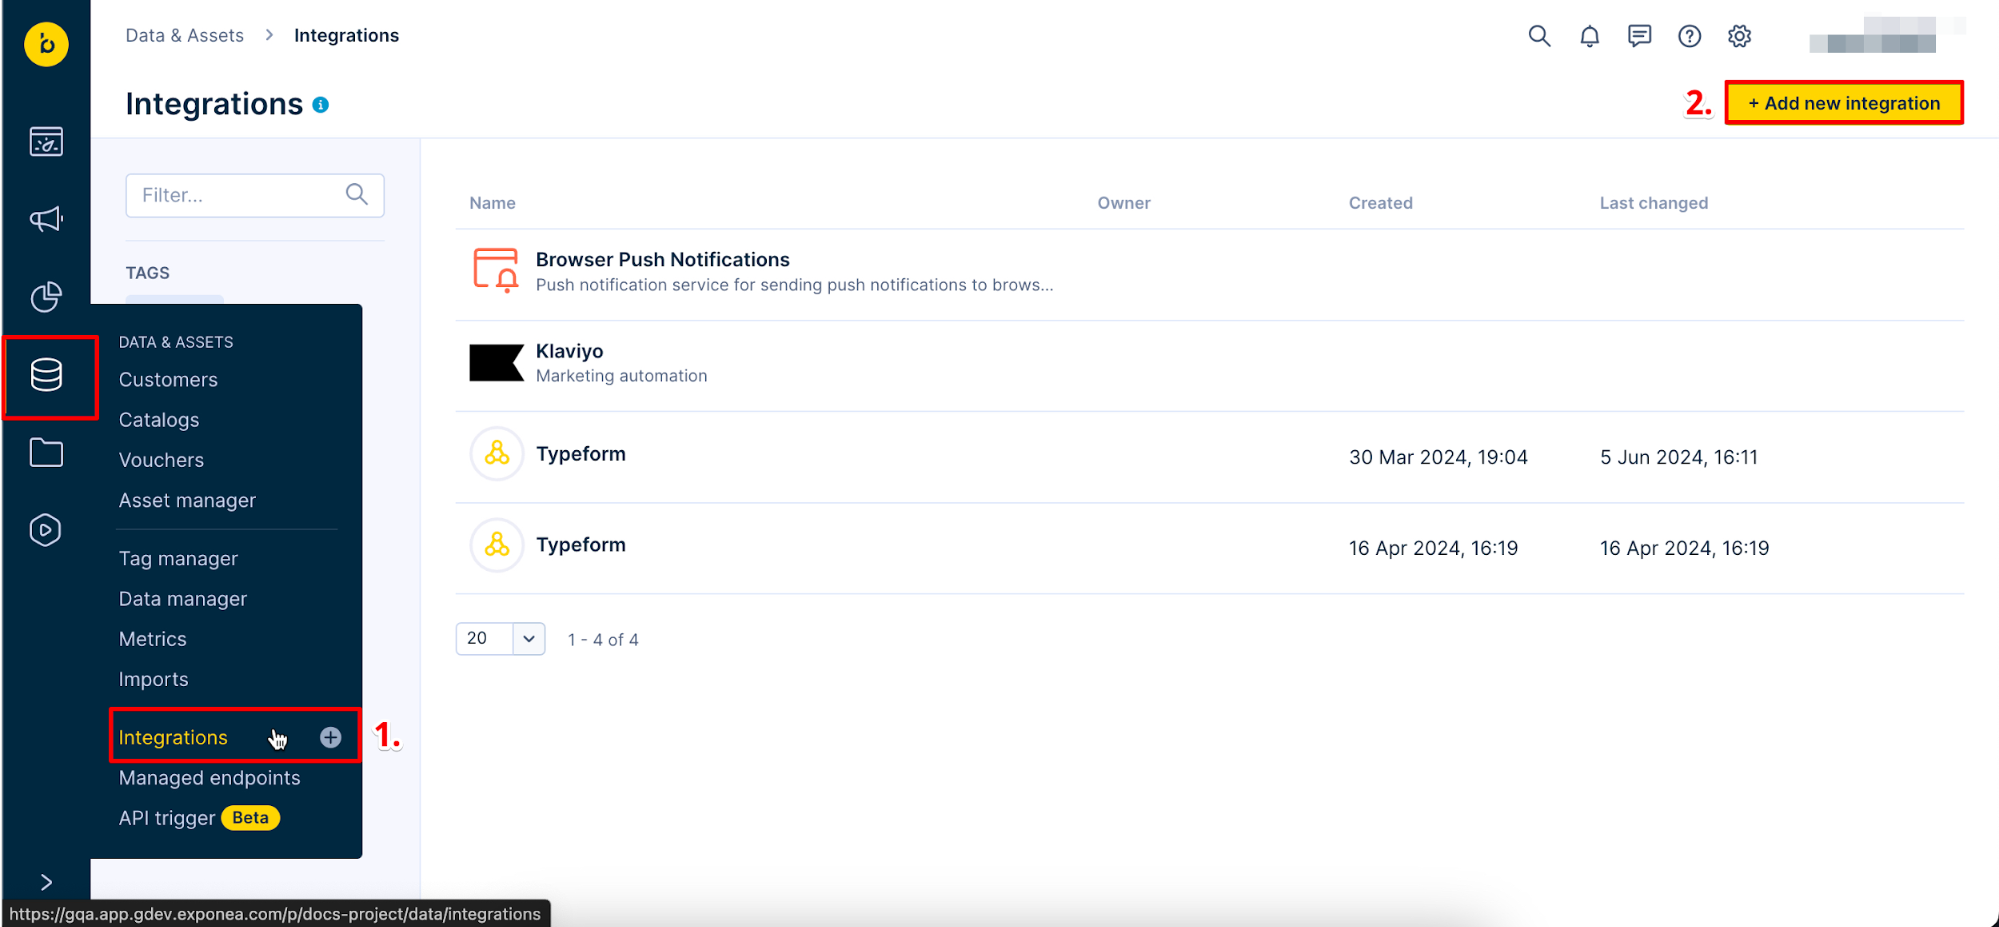
- Go to Data & Assets > Integrations and press + Add new integration.
- Search for Omniconnect and press + Add integration.
- Name the integration and press Save integration.
- Go to the Transformation tab.
- Paste transformation function.
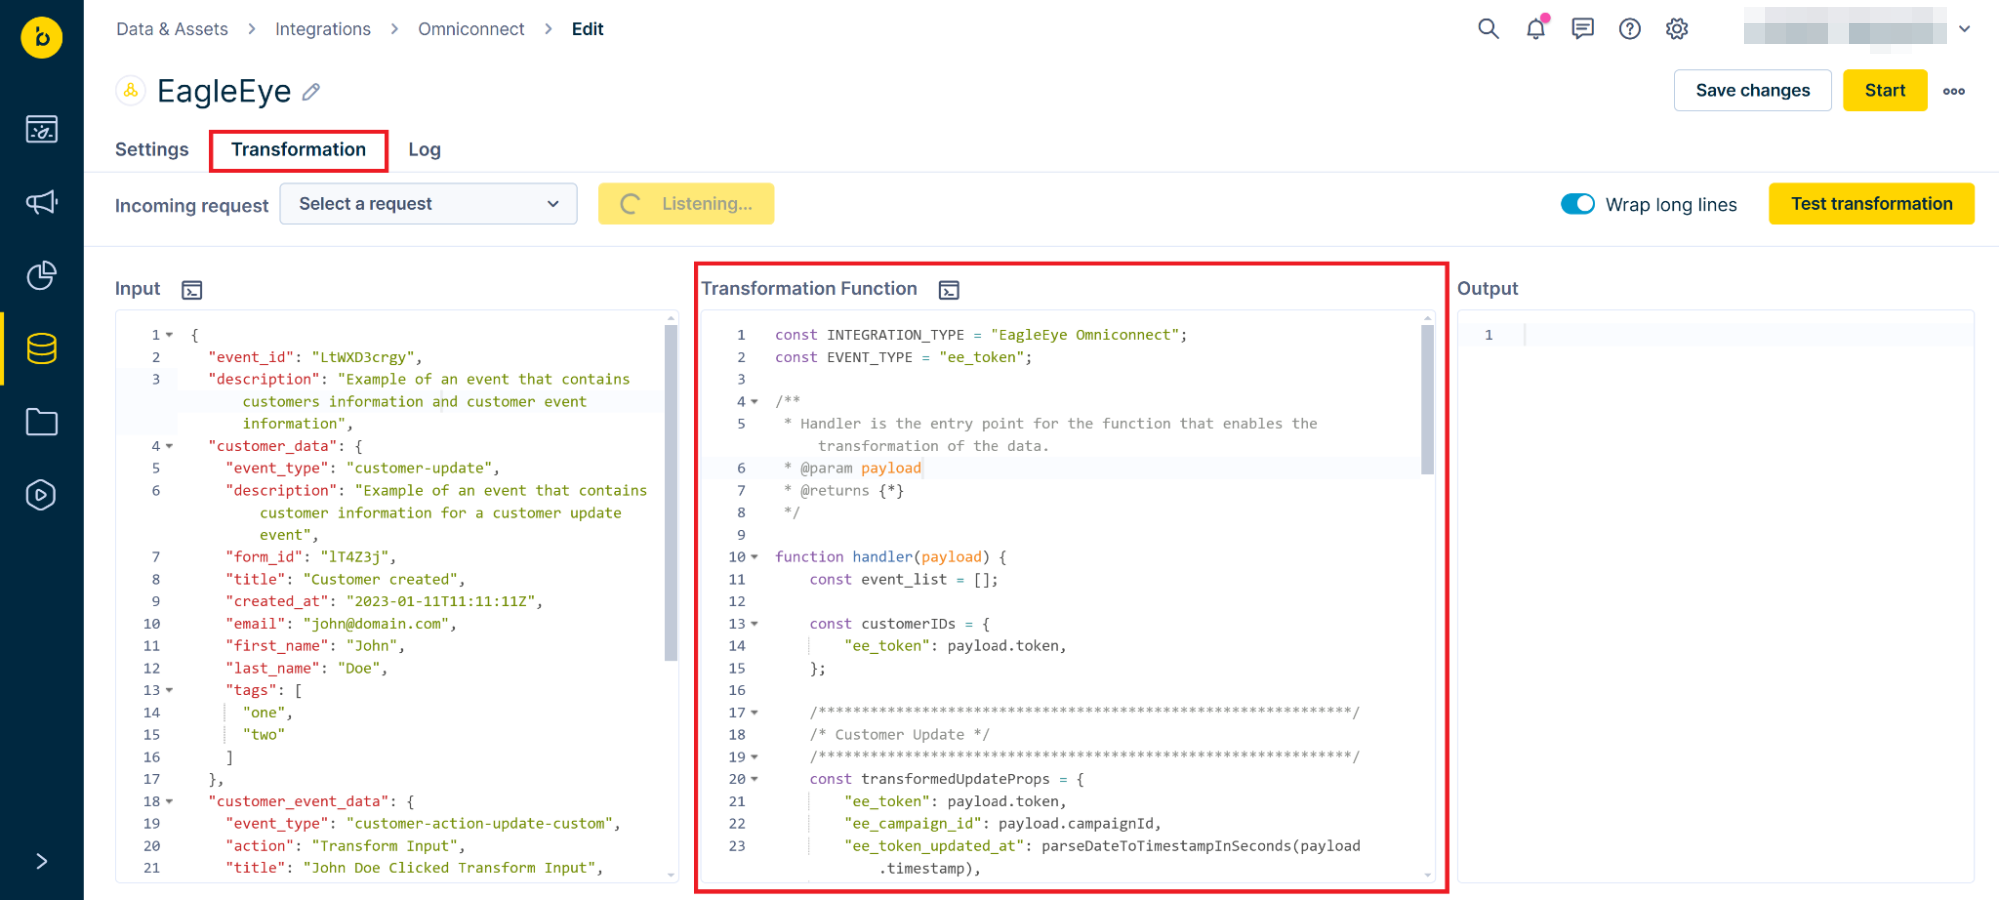
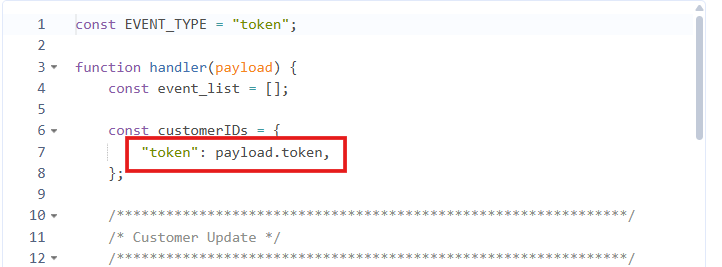
- If required, adjust the
ee_tokencustomer identifier name.
- Go back to the Settings tab and copy the Omniconnect URL.
2. Configure the integration in EagleEye
The configuration in AIR is broken down into the below portions:
- Event Configuration
- Credential Creation
- Authentication
Event configuration
Data flowing out of AIR into Bloomreach Engagement needs events configured for Coupon Create and Coupon Redeem events. These events need to be delivered to the Omniconnect URL generated above. The delivery is simple HTTPS POST events.
Events for the below are required:
- Token Create
- Token Redeem
Credential creation
The Eagle Eye implementation team will need to generate a new set of Authentication details, to keep credentials isolated to an integrating platform. The newly generated Client ID and Secret value will need to be used below when setting up the Authentication mechanics in Bloomreach Engagement.
Authentication
For data inbound to AIR, the unit needs to be enabled to support Basic Authentication. This setting can be enabled by the Eagle Eye implementation team.
3. Authenticate the EagleEye webhook
In Bloomreach Engagement, set up the webhook authentication for EagleEye to ensure a secure data transfer in the webhook request. This webhook authentication will come into play when you create a scenario in a later step.
To configure the webhook authentication in Bloomreach Engagement:
- Go to Data & Assets > Integrations and press + Add new integration.
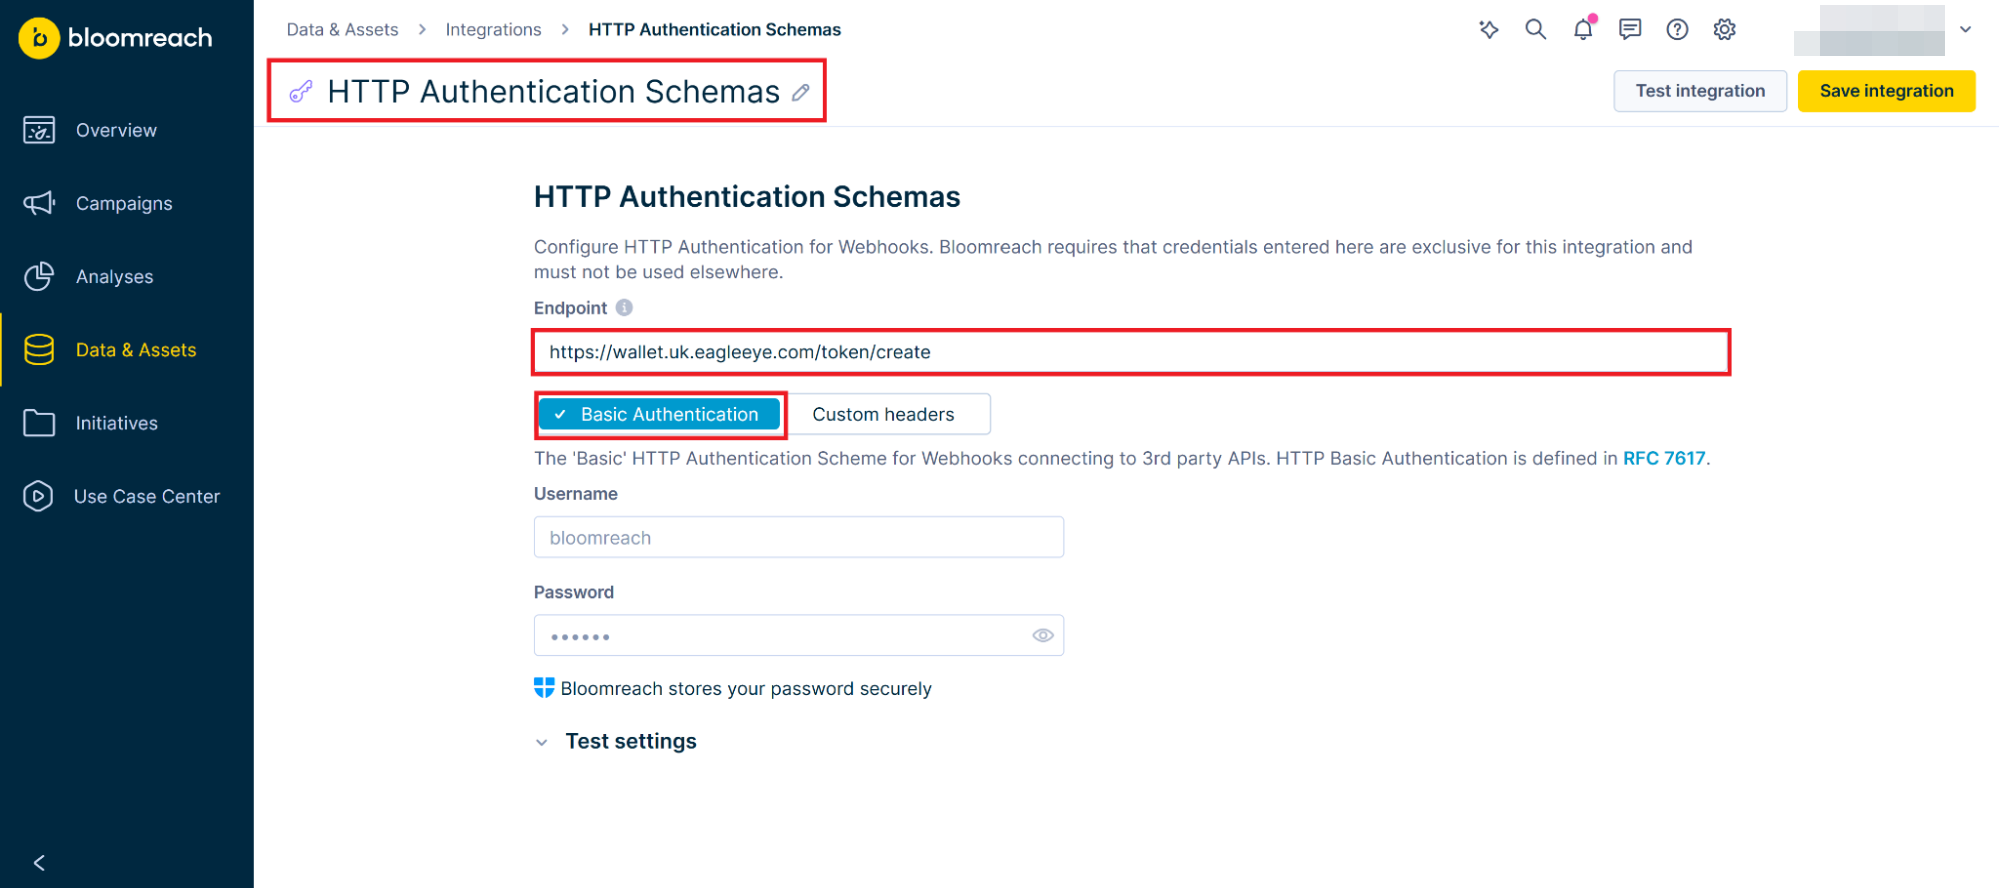
- Search for HTTP Authentication Schemas and press + Add integration.
- Paste the EagleEye API base URL in the Endpoint field. Your base URL differs based on your area:
- UK:
https://wallet.uk.eagleeye.com/token/create - USA:
https://wallet.us.eagleeye.com/token/create - USA 2:
https://wallet.us2.eagleeye.com/token/create - AU:
https://wallet.au.eagleeye.com/token/create
- UK:
- Name the integration EagleEye Authentication.
- Go to your EageEye project.
- Navigate to Project Settings and scroll down to Application Keys.
- Copy your Application ID and Secret Key.

- Back in Bloomreach Engagement, paste the Application ID in the Username field.
- Paste the Secret Key in the Password field.
- Press Test integration. If the authentication is successful, press Save integration.

4. Generate Bloomreach API keys
The integration moves data from EagleEye to Bloomreach Engagement. Bloomreach Engagement associates these events with customers. This association uses new EagleEye information to update customer parameters.
- In Bloomreach Engagement, go to Settings > Project Settings.
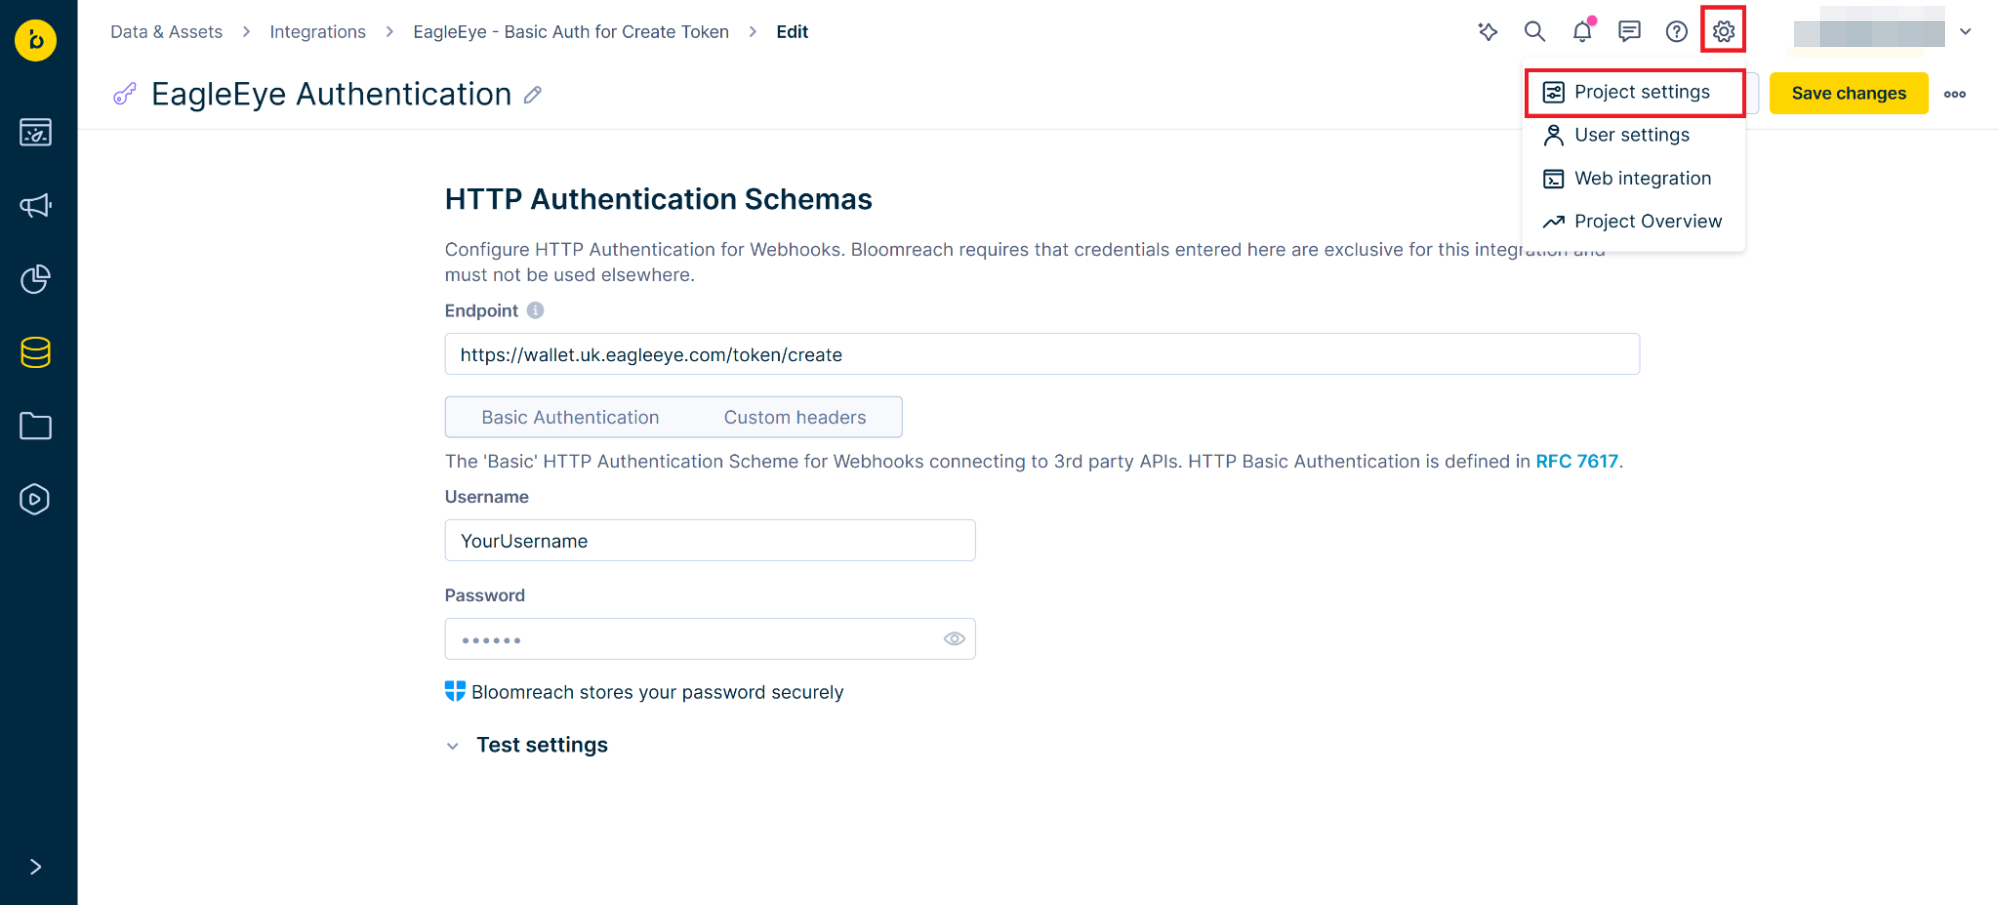
- Under Project, go to Access management > API.
- Save your Project Token and API Base URL.

- Create a new API group.
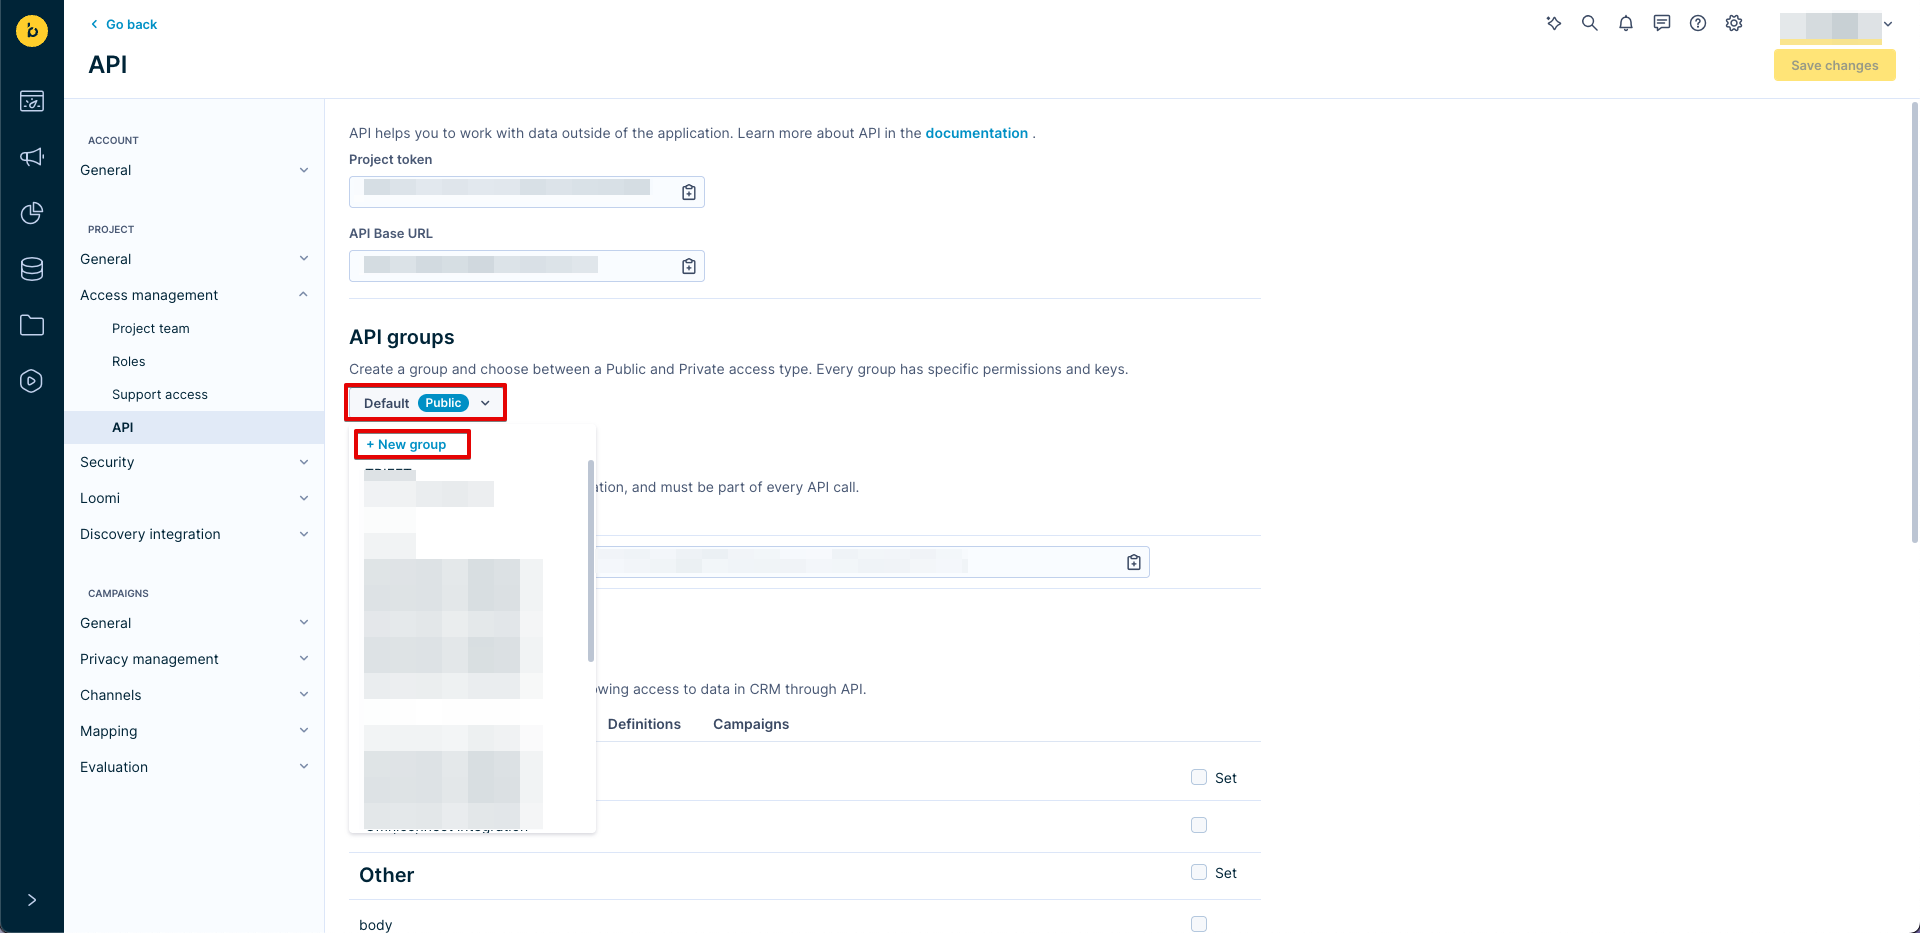
- Choose Private access and name the group, for example, EagleEye.
- Press Create group.
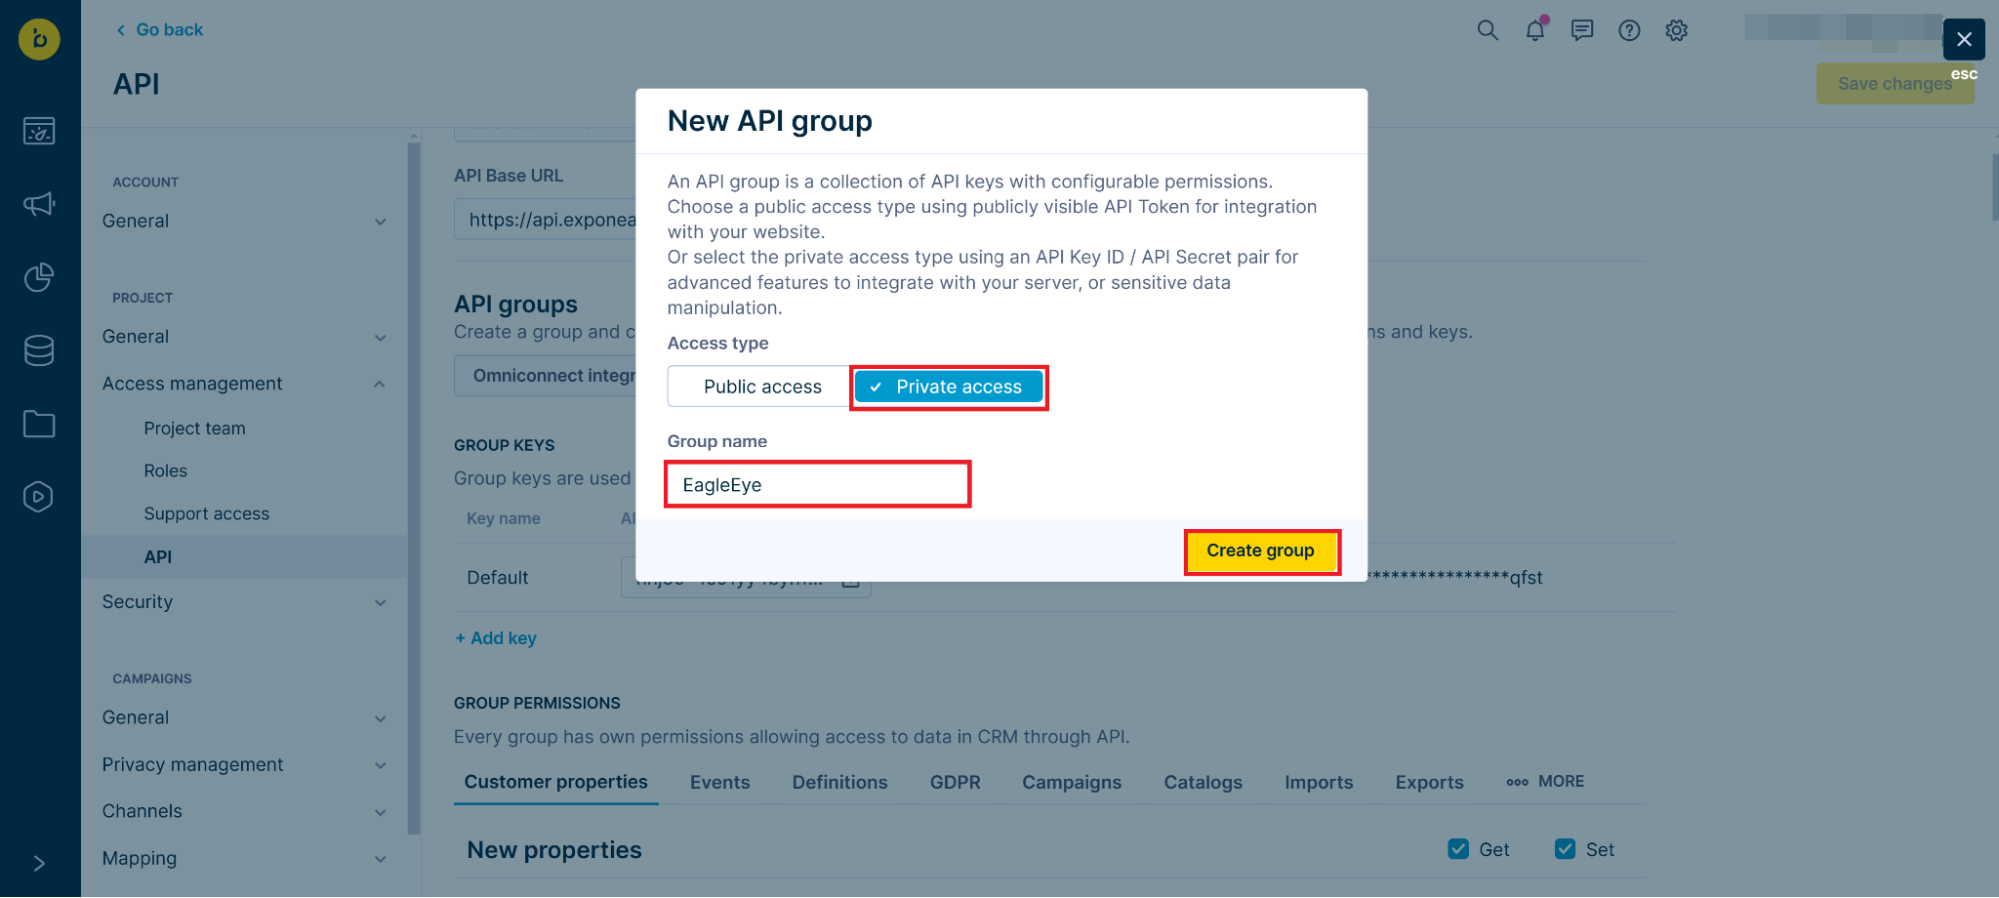
- Save your API Secret Key. You will not be able to see it again.
- Save the API Key ID from the newly created group - usually named Default

- Scroll down to Group Permissions. Set up the necessary permissions for Customer properties and Events for events you want to process through the API.

- (Optional) If you don’t have defined events or you want to allow processing of all new events sent by EagleEye, check the Set permission for New properties and New events.
- Press Save changes.
5. Authenticate the Bloomreach webhook
In Bloomreach Engagement, set up the webhook authentication for Bloomreach to ensure a secure data transfer in the webhook request. This webhook authentication will come into play when you create a scenario in a later step.
To configure the webhook authentication in Bloomreach Engagement:
- Go to Data & Assets > Integrations.
- Press + Add new integration.
- Search for HTTP Authentication Schemas and press + Add integration.
- Paste the Bloomreach Tracking API base URL in the Endpoint field.
- Add
/track/v2/projects/{projectToken}/customersat the end of the URL and replaceprojectTokenwith the ID of your project. - Name the integration Bloomreach Authentication.
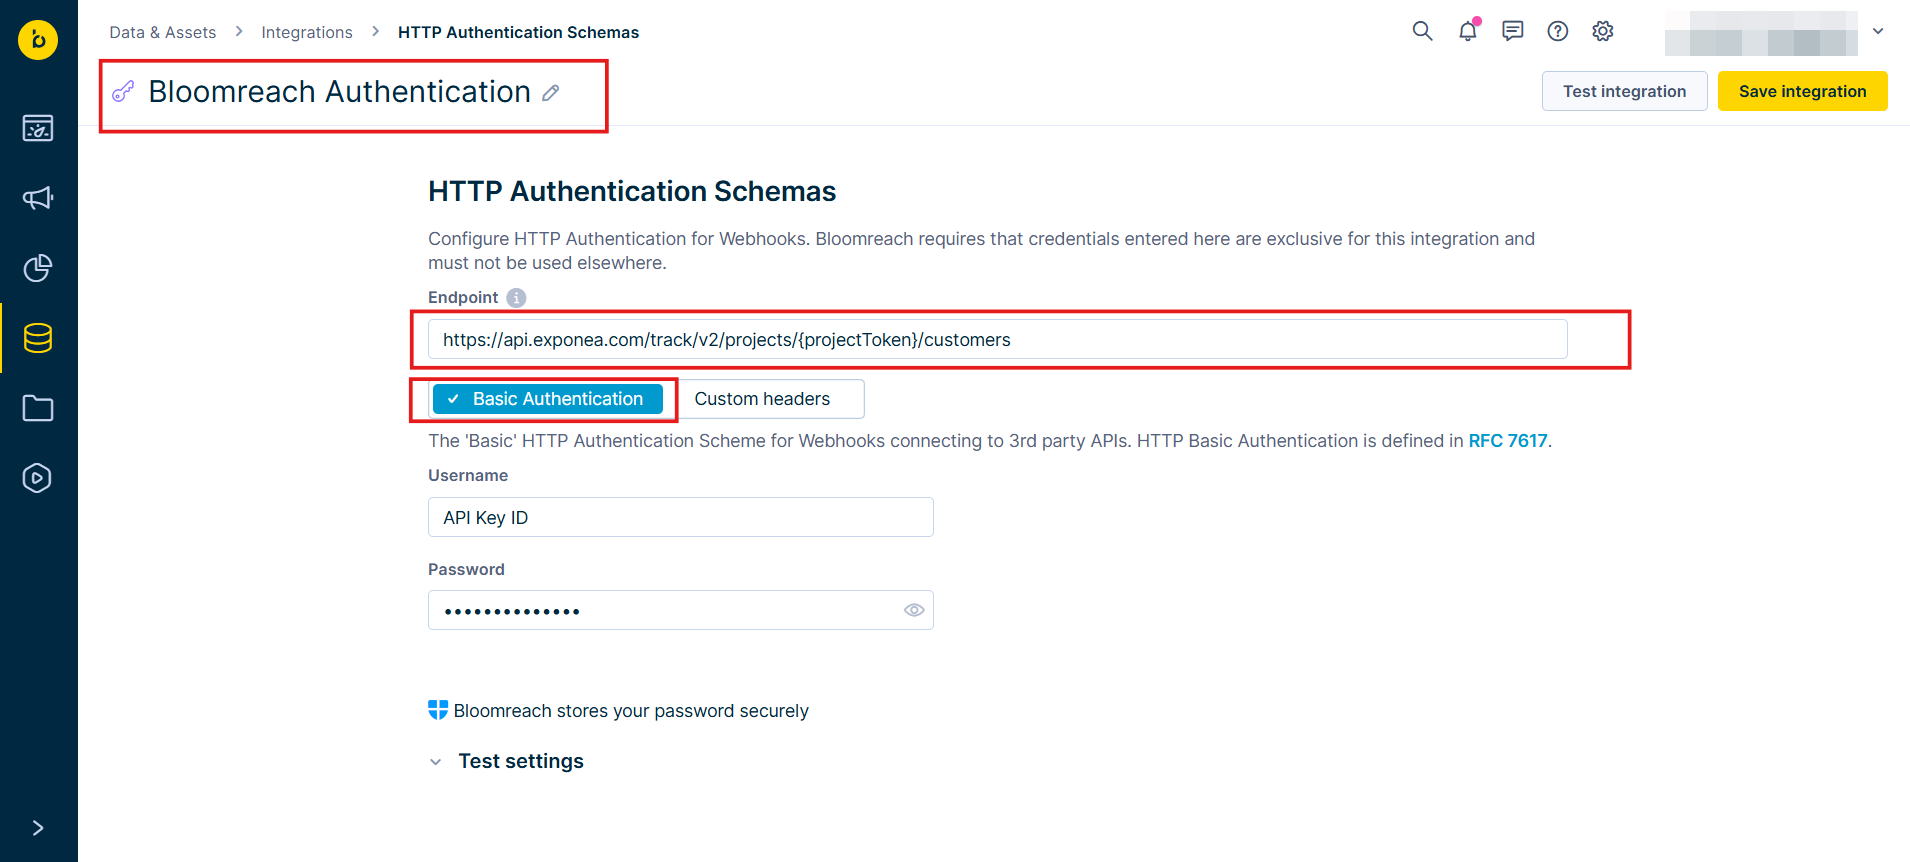
- Paste the API Key ID in the Username field.
- Paste the API Secret Key in the Password field.
- Press Save integration.
Example use case
Assign a new token
The EagleEye Token API boosts marketing campaigns managed in Bloomreach Scenarios. It allows to send unique coupon codes to each customer.
Note
This preset uses the
https://wallet.uk.eagleeye.com/token/createendpoint.
In this scenario, the welcome email includes an EagleEye token. This token motivates the customer to make a purchase by providing an extra perk. The scenario contains four parts:
- An On event trigger that will start the process.
- An EagleEye - Request a new Token preset retrieves a unique customer token code from EagleEye.
- An EagleEye - Assign a new Token preset assigns the unique customer token.
- An email action that sends a message with the allocated token code to the customer.

EagleEye - Request a new Token preset requires the following configuration:
- Go to your Bloomreach Engagement scenario.
- On the left-hand side, go to Actions > Other > EagleEye - Request a new Token.
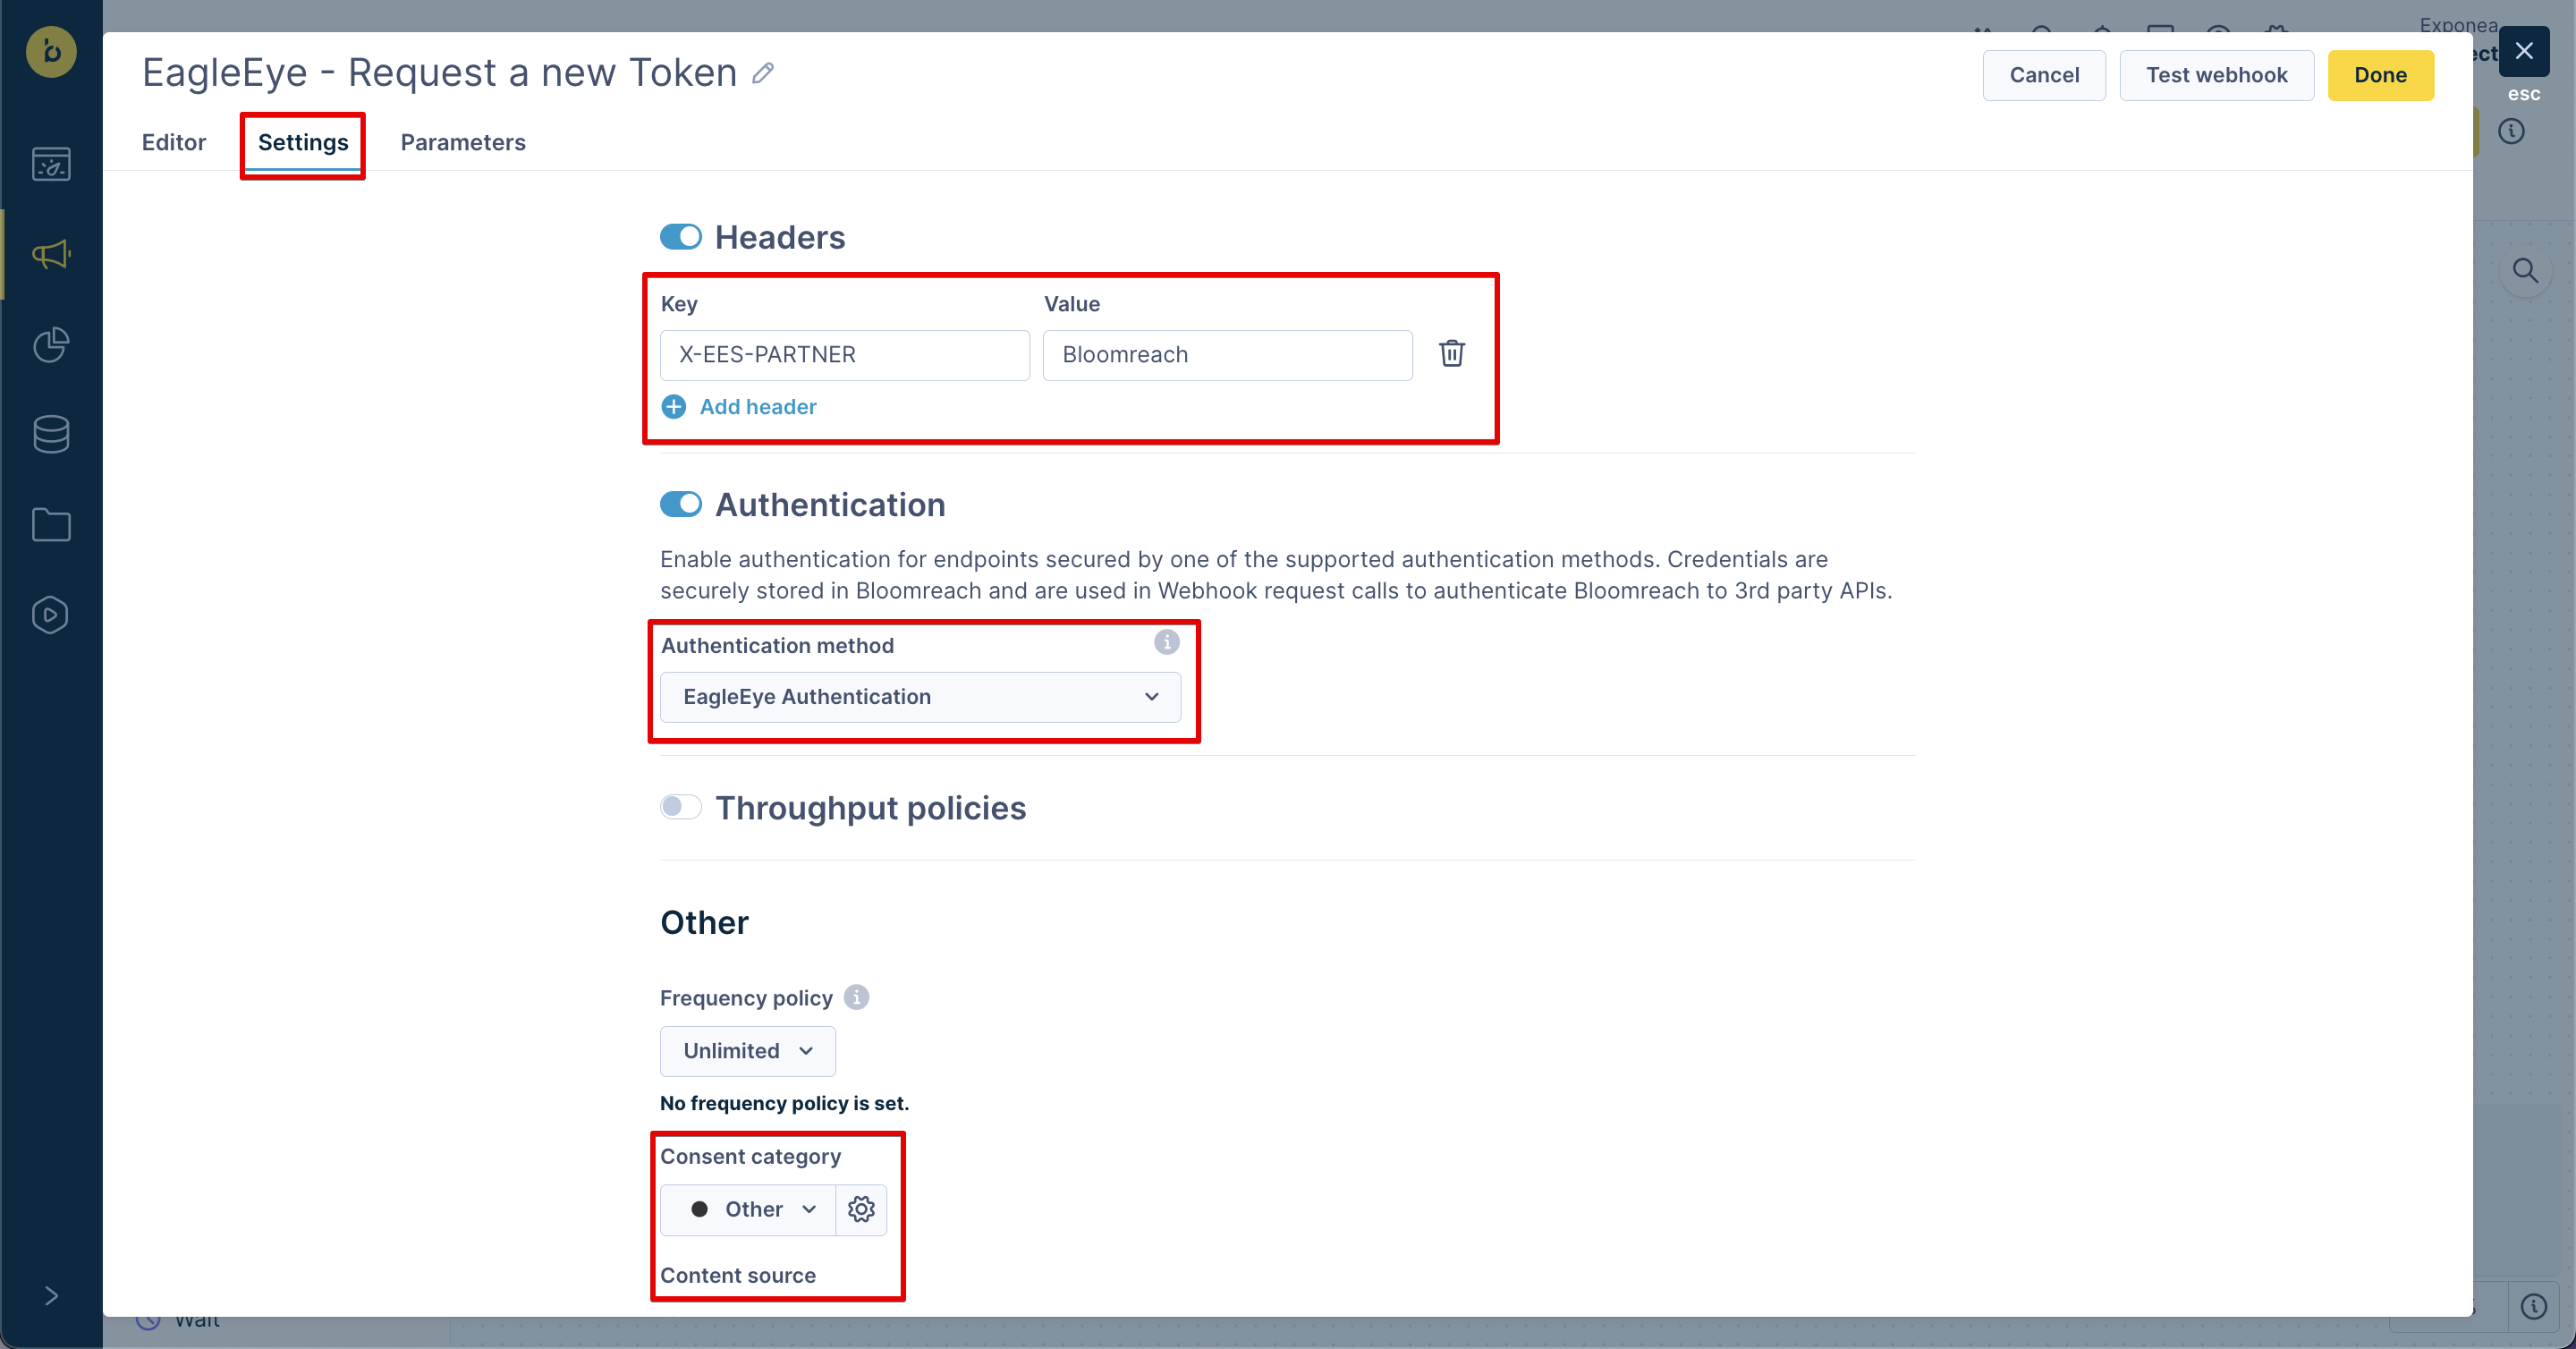
- Double-click on the Webhook (or click on the Edit button) and go to Settings.
- Paste the following into the header:
X-EES-PARTNER:Bloomreach. - Choose EagleEye Authentication in Authentication and select your consent category.
- In EagleEye, go to Campaigns, select the campaign you want to use, and copy its Campaign ID.
- Back in Bloomreach Engagement, go to the Parameters tab and paste your Campaign ID.

- Press Done.
EagleEye - Assign a new Token preset requires the following configuration:
- On the left-hand side of the scenario, go to Actions > Other > EagleEye - Assign a new Token.
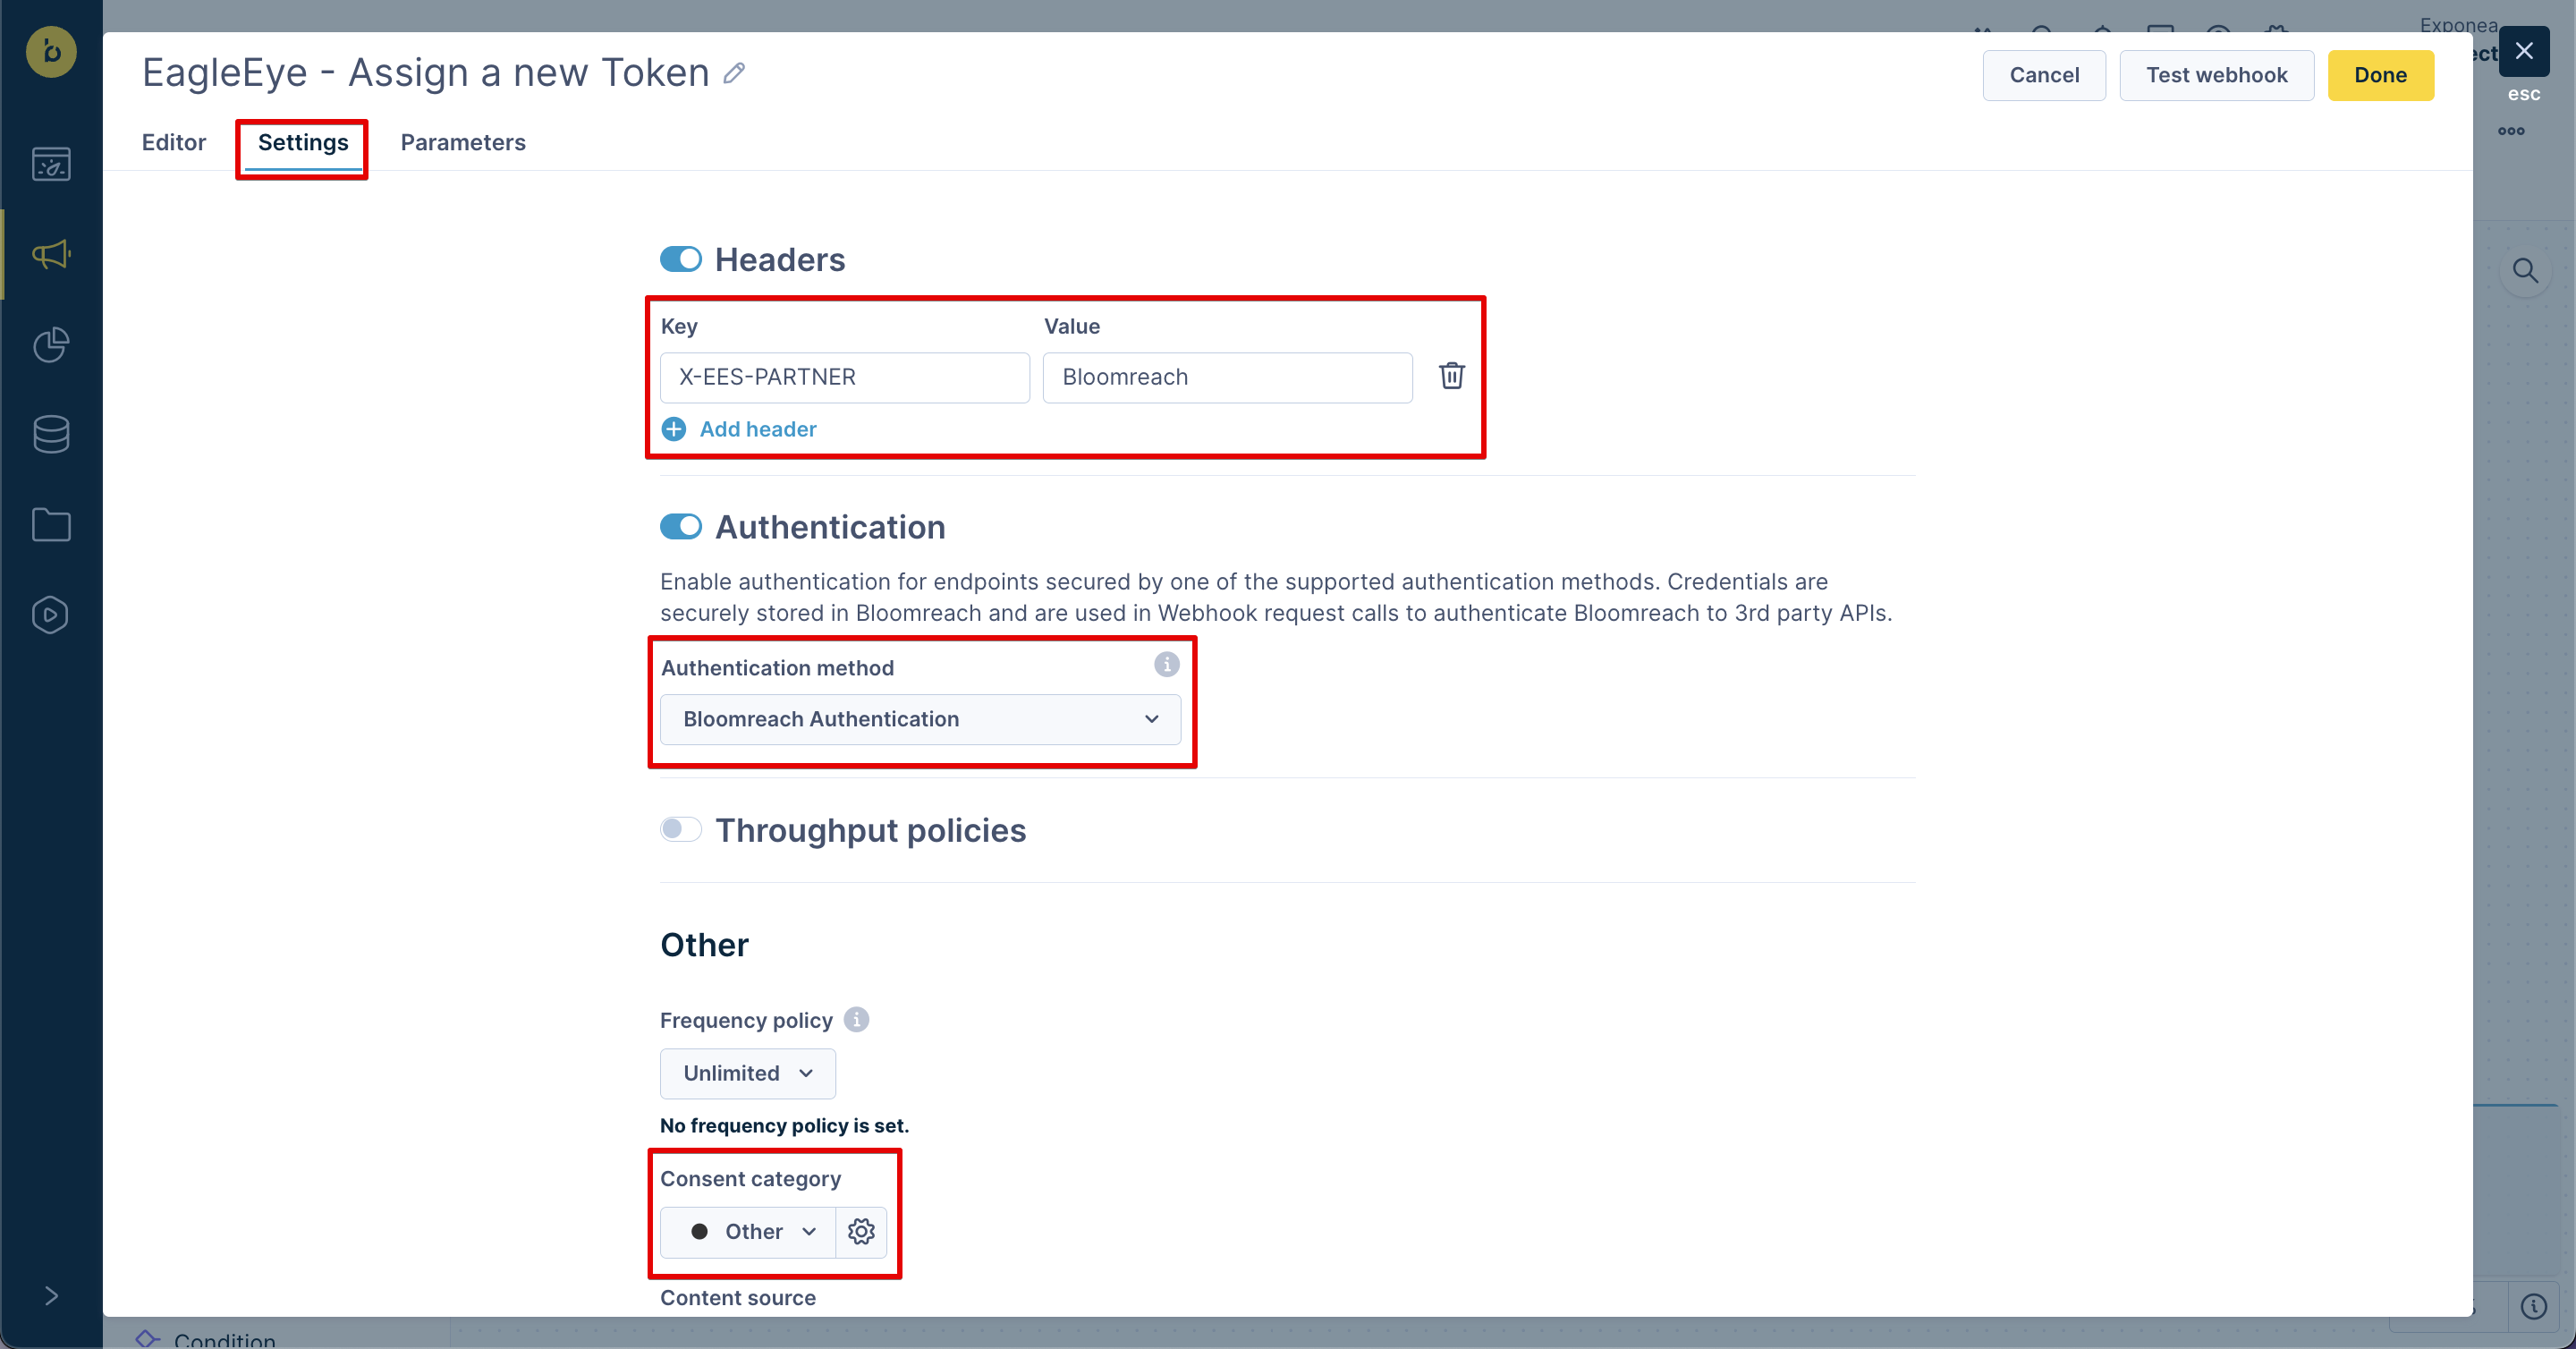
- Double-click on the Webhook (or click on the Edit button) and go to Settings.
- Paste the following into the header:
X-EES-PARTNER:Bloomreach. - Choose Bloomreach Authentication in Authentication and select your consent category.
- Press Done.
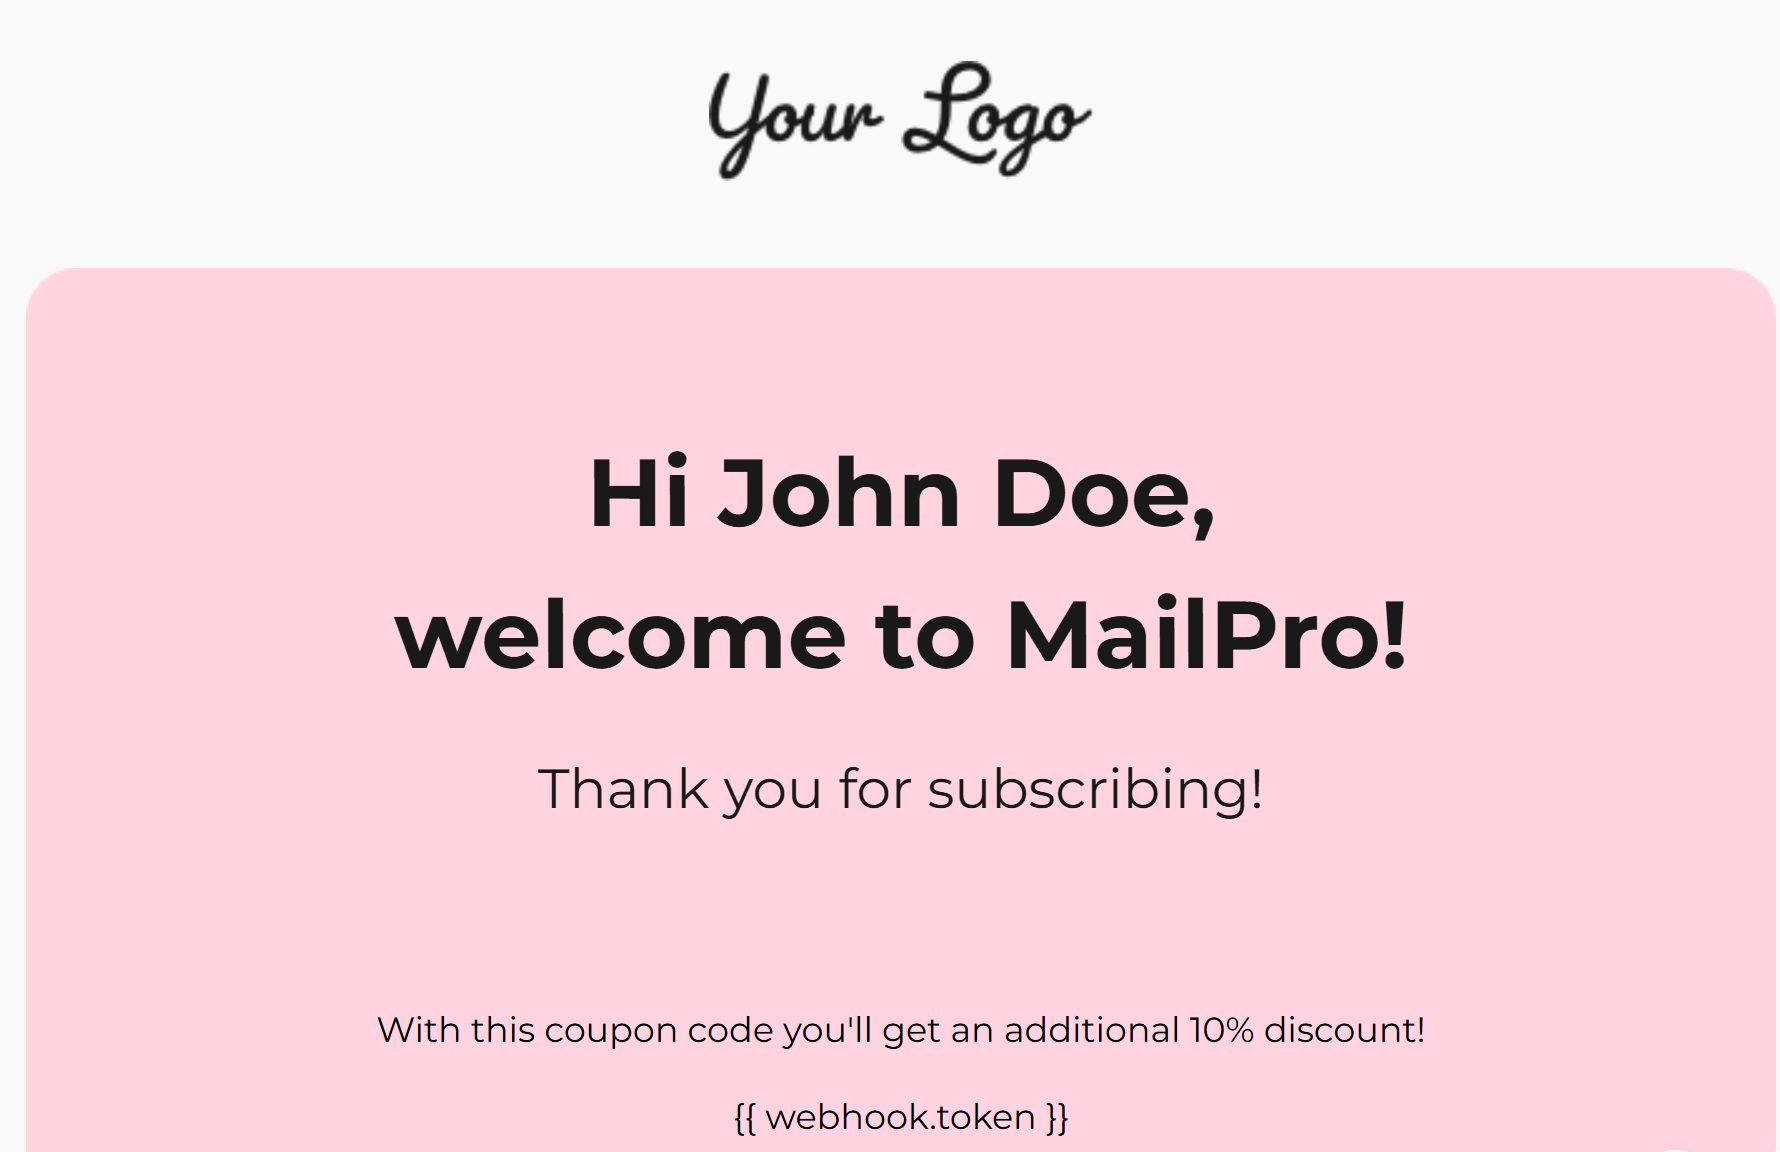
When the preset becomes operational, you can use the returned values in marketing automation. The returned values can be implemented using Jinja tags, as seen here: {{ webhook.token }}.
Transformation function
This function handles webhooks for different topics in different formats. It sets some common payload data at the start and then uses a switch statement based on the incoming topic to add the specific data required for that event.
Depending on the topic, it either generates a customer update or an event. A token identifier, which can be edited, is required.
const EVENT_TYPE = "token";

function handler(payload) {
    const event_list = [];
    const customerIDs = {
        "token": payload.token,
    };

    /**************************************************************/
    /* Customer Update */
    /**************************************************************/
    const transformedUpdateProps = {
        "token": payload.token,
        "token_updated_at": parseDateToTimestampInSeconds(payload.timestamp),
        "campaign_id": payload.campaignId,
    };

    /***************************************************************************/
    const customerUpdate = {
        name: "customers",
        data: {
            customer_ids: customerIDs,
            properties: transformedUpdateProps,
            update_timestamp: parseDateToTimestampInSeconds(payload.timestamp),
        },
    };
    event_list.push(customerUpdate);

    /**************************************************************/
    /* Customer Event */
    /**************************************************************/
    const transformedEventProps = {
        "integration_id": INTEGRATION_ID,
        "integration_timestamp": currentTimestampInSeconds(),
        "token": payload.token,
        "campaign_id": payload.campaignId,
        "campaign_name": payload.campaignName,
        "campaign_offer_id": payload.campaignOfferId,
        "campaign_offer_promo_id": payload.campaignOfferPromoId,
        "event": payload.event,
        "issuing_partner": payload.issuingPartner,
        "issuer_name": payload.issuerName,
        "consumer": payload.consumer,
        "meta": payload.meta,
        "location": payload.location,
        "details": payload.details,
    };

    const customerEvent = {
        name: "customers/events",
        data: {
            event_type: EVENT_TYPE,
            customer_ids: customerIDs,
            properties: transformedEventProps,
            timestamp: parseDateToTimestampInSeconds(payload.timestamp),
        },
    };

    event_list.push(customerEvent);

    /***************************************************************************/

    return event_list;
}

/* Return number/float */
function safeParseFloat(value) {
    const parsedValue = parseFloat(value);
    return isNaN(parsedValue) ? value : parsedValue;
}

/* Mon Jan 01 2024 11:00:00 GMT+0000 -> returns -> 1704106800 */
function currentTimestampInSeconds() {
    return Math.round(Date.now() / 1000);
}

/*  2024-01-11T11:11:11Z -> returns -> 1704106800 */
function parseDateToTimestampInSeconds(dateStr) {
    const date = new Date(dateStr);
    return date.getTime() / 1000;
}
Limitations
EagleEye sends a lot of data with each payload in a rather nested structure. The transformation function only takes selected attributes and flattens the structure for the Engagement events. Therefore, not everything is included by default. You may have different requirements for which data points you want to capture.
Integration of Eagle Eye with Bloomreach—Enabled by Voxwise
We are pleased to announce the integration between Eagle Eye and Bloomreach, made possible through the expertise of Voxwise, the specialist system integrator agency.
This integration enhances the capabilities of Bloomreach, offering seamless connectivity with Eagle Eye to drive better customer engagement and personalized experiences.
Should you require additional key use cases, please do not hesitate to reach out. We would be happy to explore the possibilities with Voxwise to address your specific needs.
Voxwise serves major clients in the UK, Europe, Middle East and further around the world. You can contact them directly via email at [email protected].
For anyone interested in the Eagle Eye / Bloomreach integration and the related use cases, Voxwise offers one hour of Q&A free of charge.
We look forward to supporting your business with this enhanced integration!
Updated 10 months ago
