

Opensend
Integration
Opensend identifies anonymous website traffic by collecting first name, surname, email address, physical postal address, and device data from its identity graph. This enables real-time retargeting and drives higher conversions from first-time and repeat visitors.
The integration connects Opensend to Bloomreach via Omniconnect. Opensend adds a pixel to your website, matches data for US traffic data, and sends retargeting messages to reclaim potential lost revenue.
Prerequisites
- Live Bloomreach account
- Opensend trial account or live account
- To integrate Opensend with Custom webhook, you need:
- Webhook method
- Authorization (if needed)
- Webhook URL
Set up the integration
Setting up Opensend involves 2 steps:
- Install an Opensend Pixel on your website.
- Integrate into Bloomreach.
Set up Omniconnect in Bloomreach
- Go to Data & Assets > Integrations.
- Click + Add a new integration.
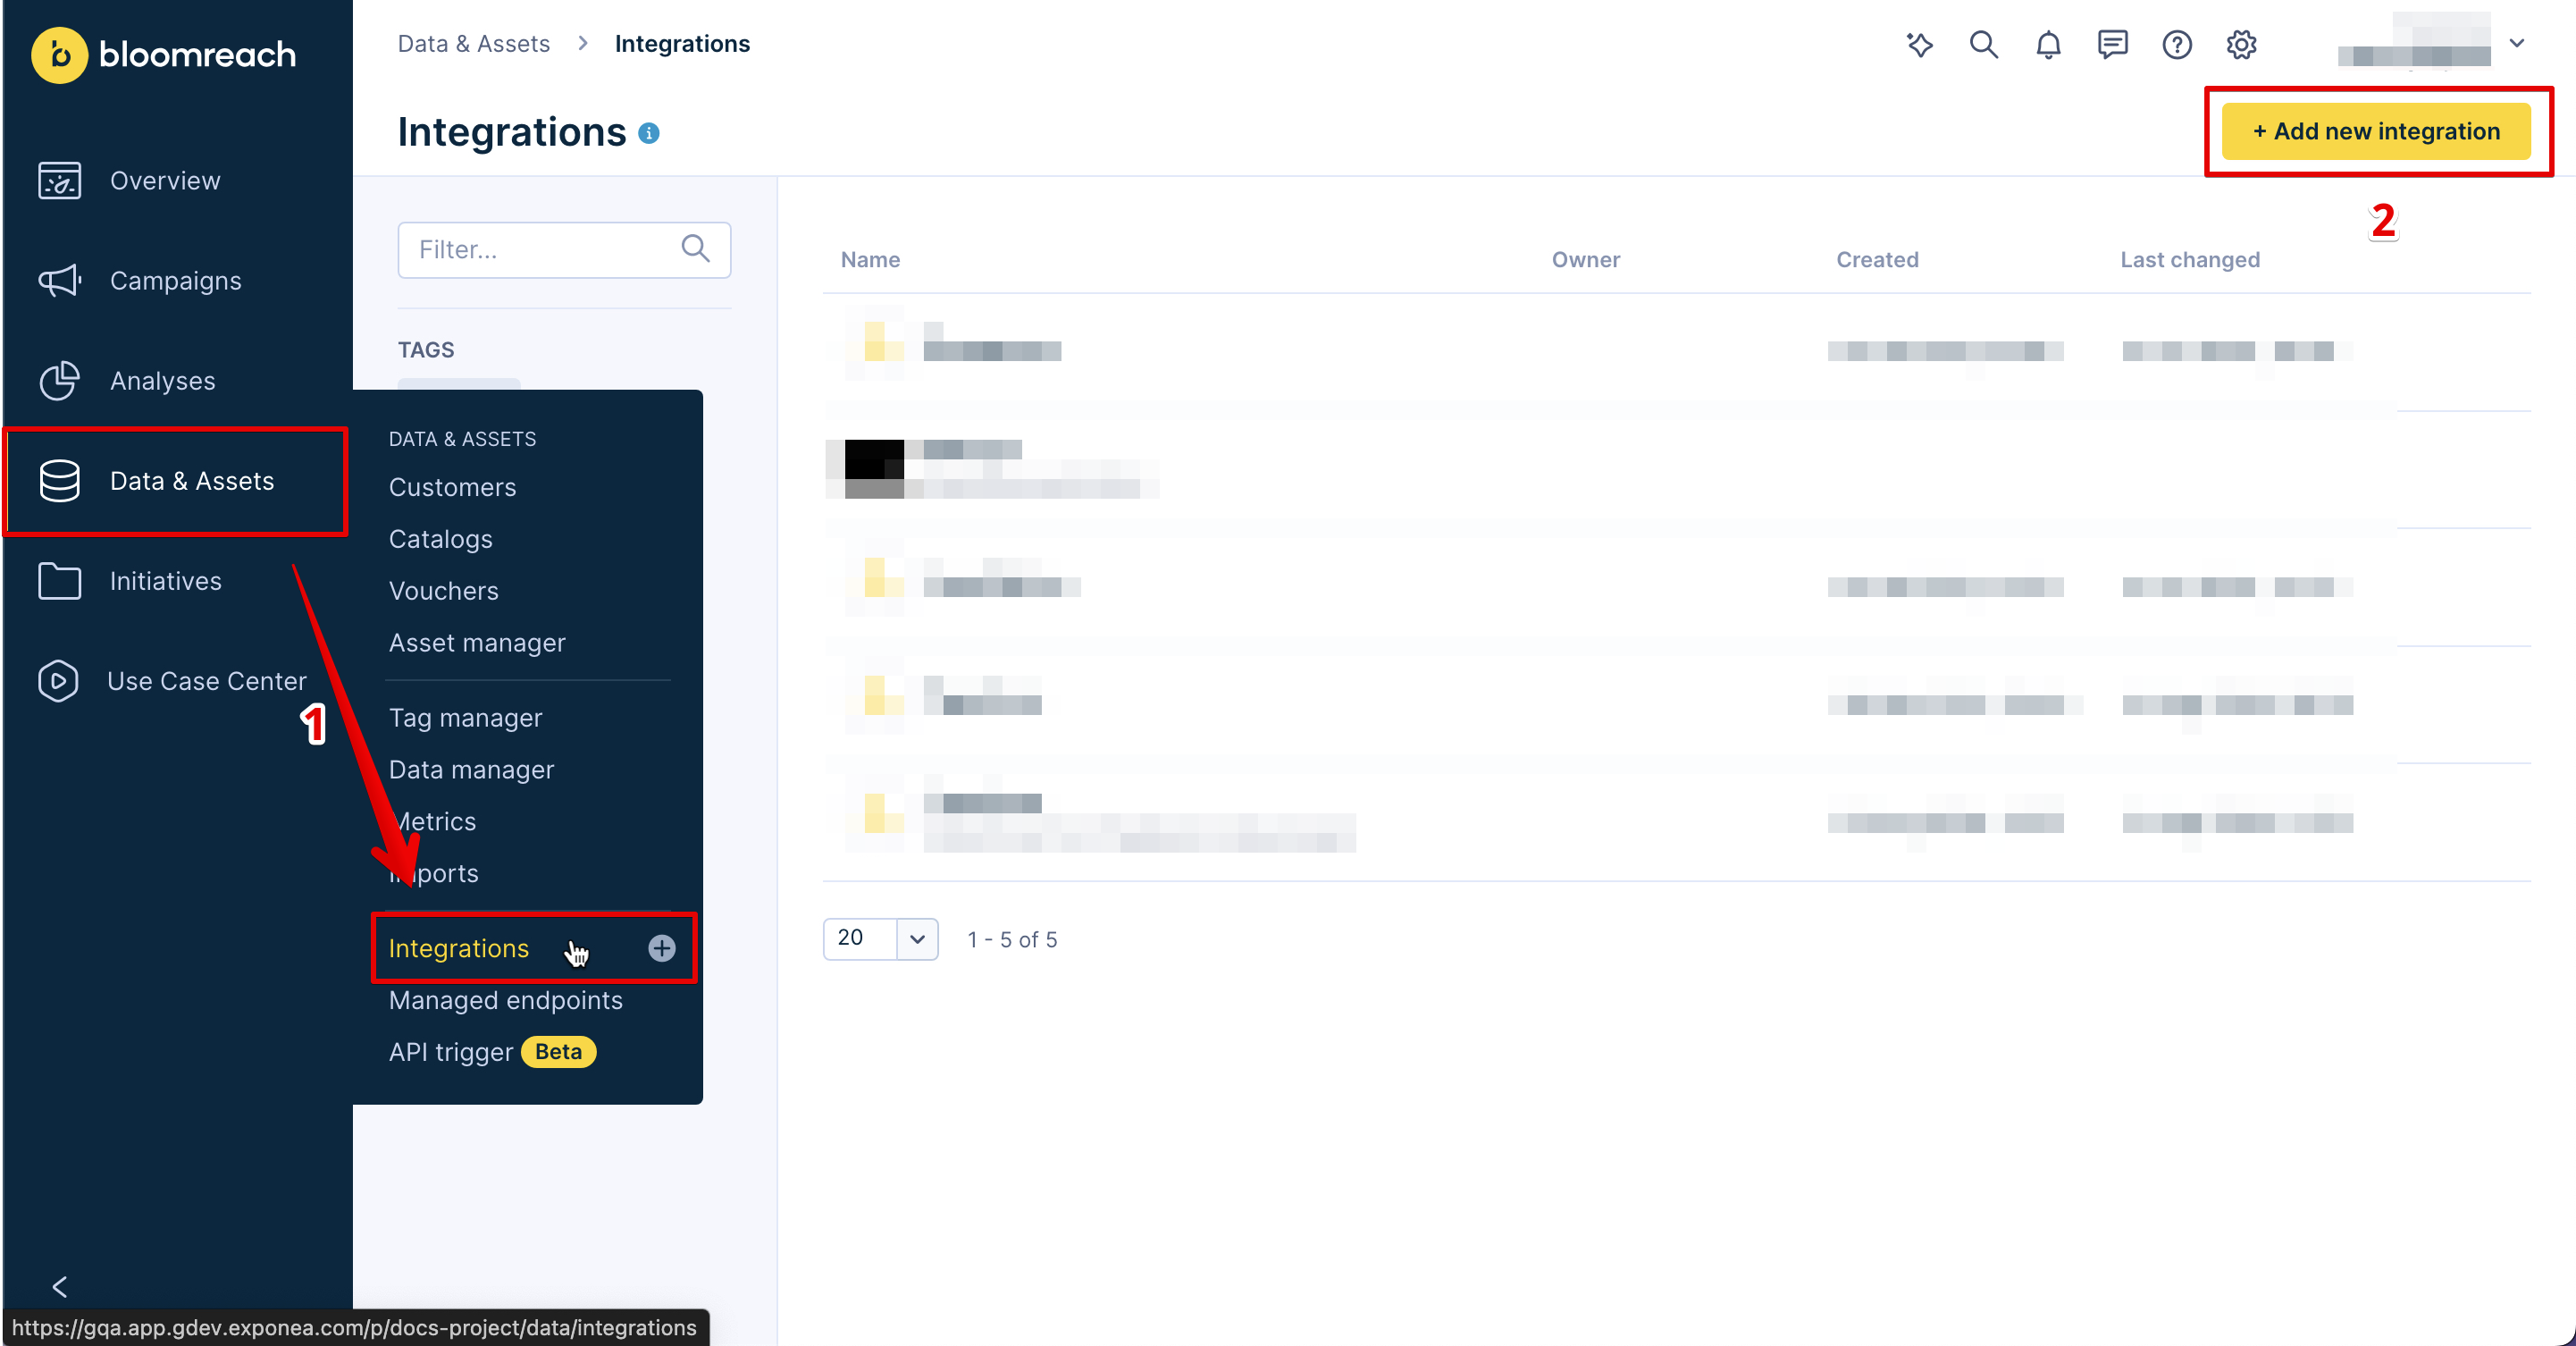
- Search for Omniconnect and click + Add integration.
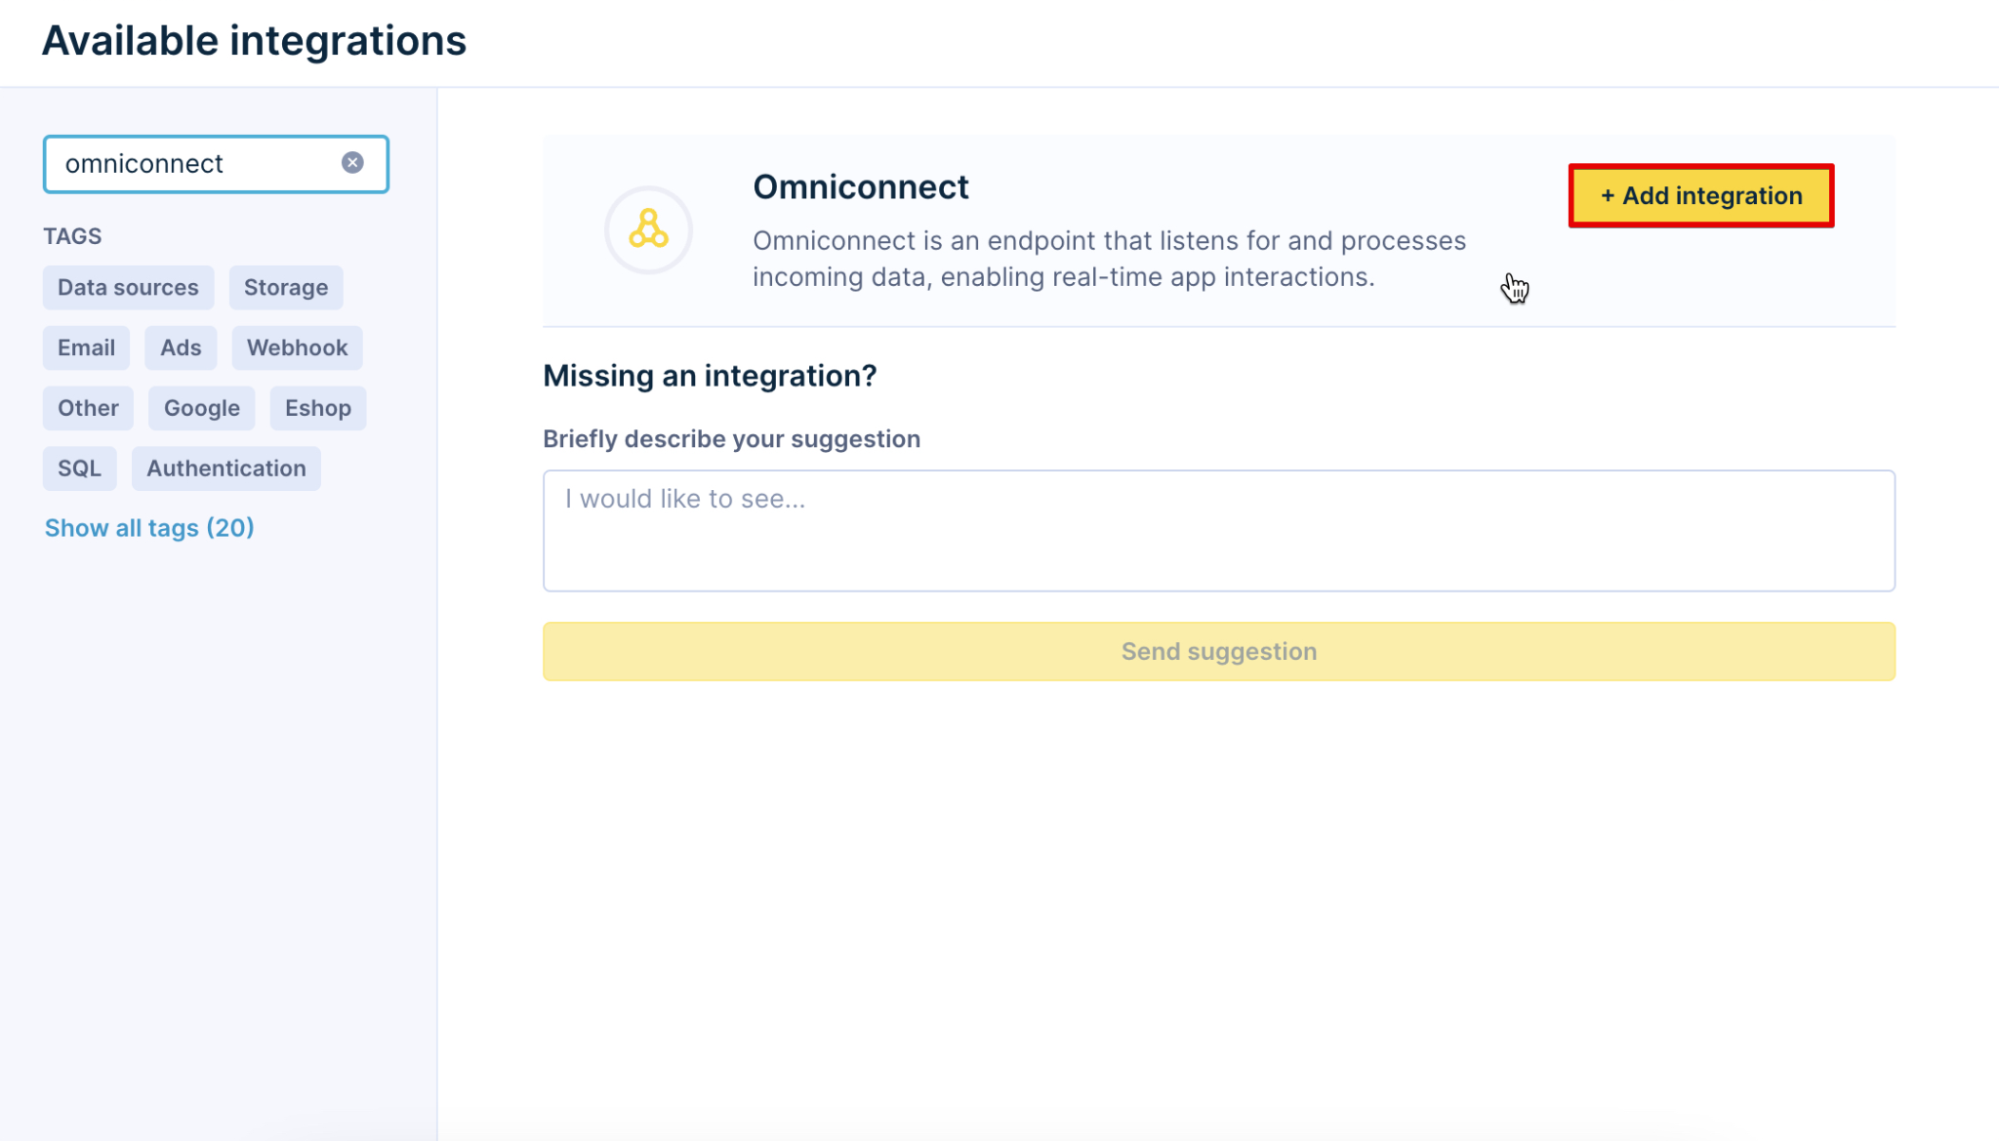
- Name the integration (for example, Opensend) and add a description (for example, Sync data from Opensend to Bloomreach customer profiles).
- Click Save integration.
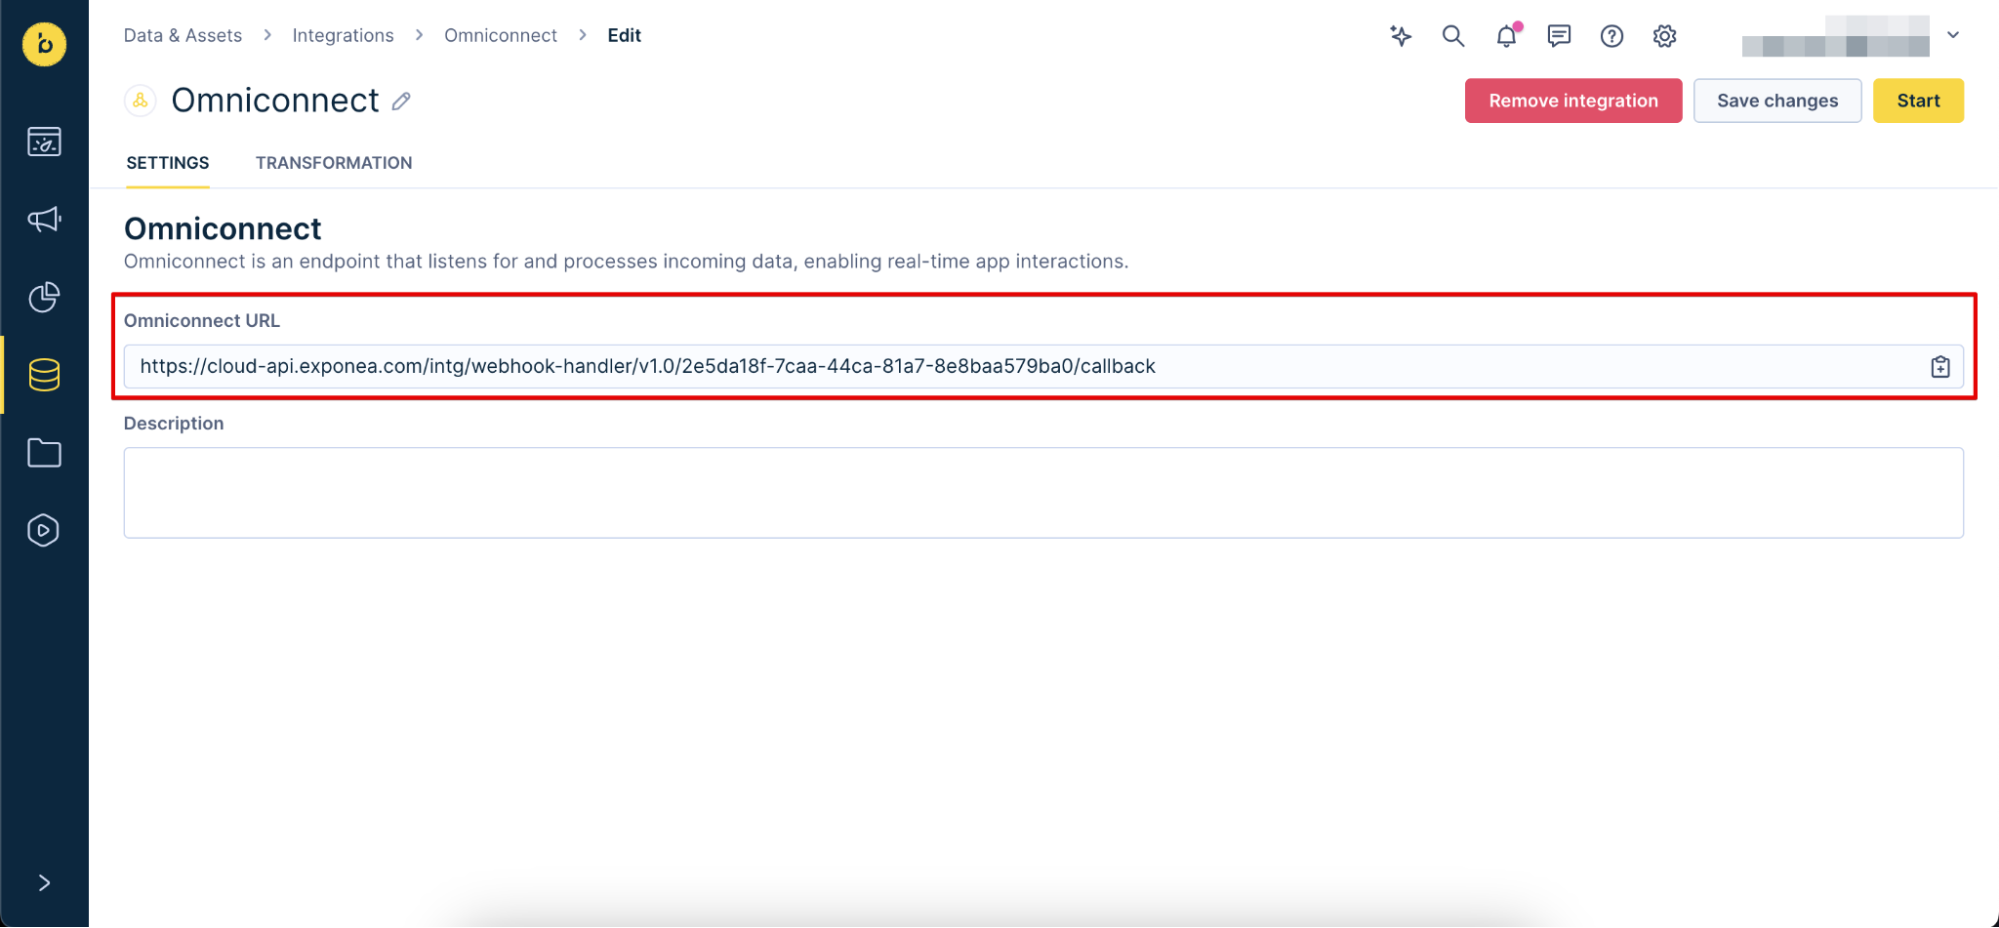
- Copy and save the Omniconnect URL. You’ll need it in the next step.
Set up a custom webhook in Opensend
- Go to your Opensend Dashboard.
- Go to the Integrations > Main connections.
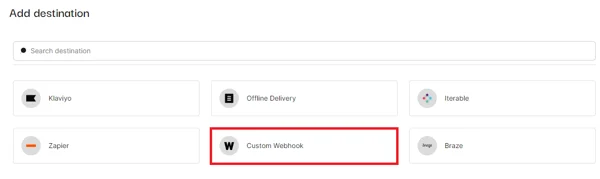
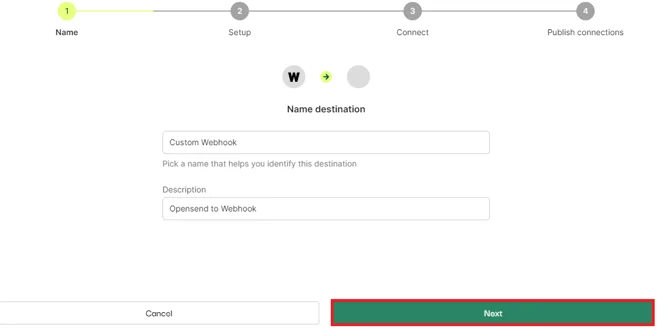
- Click + Add destination.

- Select Custom webhook.
- Add a name and description, then select Next.
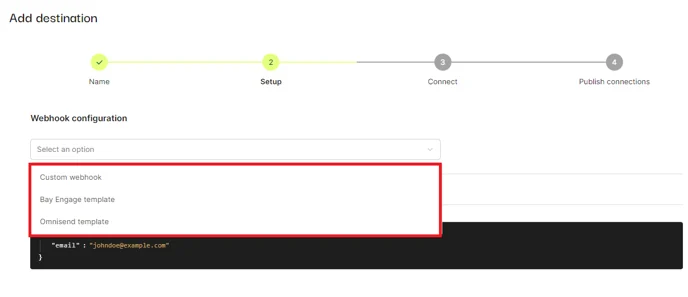
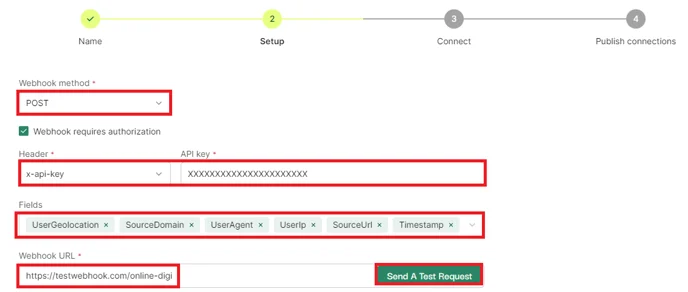
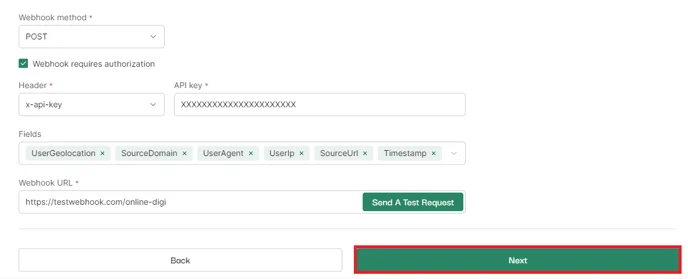
- Select the Custom webhook configuration and set the webhook method to POST.
- Select your authorization method and fill out the required details:
- API Key
- Oauth2
- From the Fields drop-down, select the default and custom fields you want to send to the webhook.
- Paste the Omniconnect URL into the Custom webhook URL field, then select Send a test request.
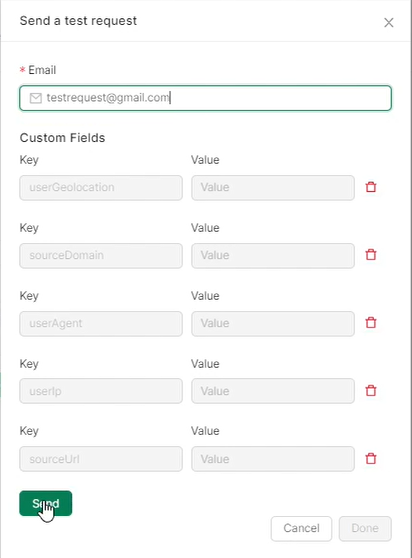
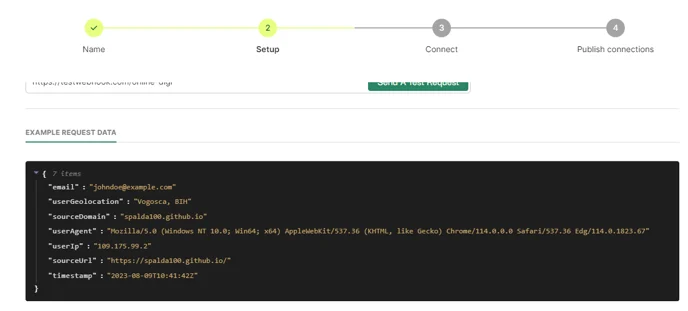
- Enter a test email address in the pop-up and select Send.
- The Headers section shows the test request with the email, custom fields, and authorization details—use this to verify what data Opensend sends and map it accordingly.
- Click Done and then Next.
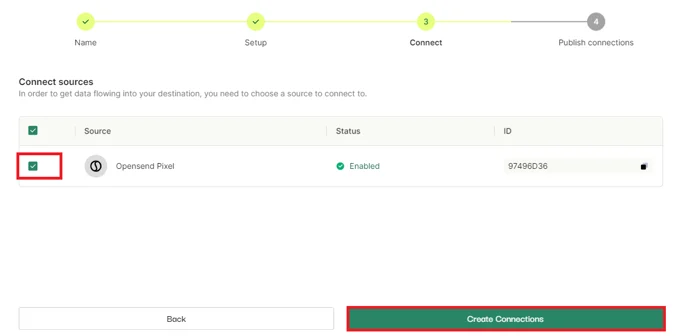
- Select the sources you want to receive data from and select Create connections.
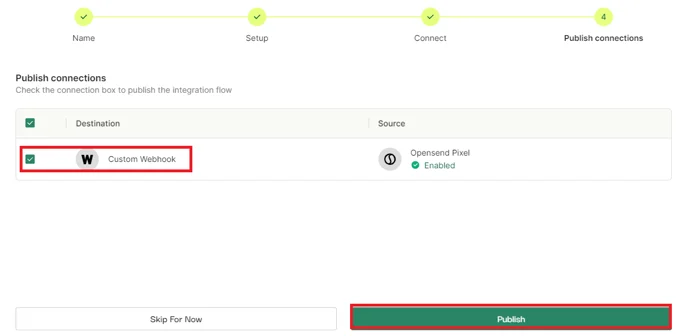
- Select the connections and click Publish.
- Check the Example Request Data format.
Add the transformation function
The transformation function lets you customize the integration logic using JavaScript.
- Go to the Transformation tab in your Bloomreach Omniconnect integration.
- Paste the following function, and click Save:
/**
 * The following code is a sample that can be used as a starter function using Omniconnect, except for the function name and the parameter you can modify the logic with the one that suits you the best.
 *
 * Things to consider before start:
 * - We require the use of `const` and `let` instead of `var` to initialize variables
 * - 3rd party libraries are not supported (on-demand)
 * - console.log() is disallowed
 *
 * ***************************************************************
 * Predefined Constants
 *
 * INTEGRATION_ID: As the name implies it's the identifier for the given webhook handler.
 * COMPANY_ID: Project ID in Engagement Platform
 * INTEGRATION_NAME: Name assigned to the current Webhook Handler integration.
 *
 * **********************************************************************
 * Events
 * The following is an example of the objects the `output` array can contain:
 *
 * CUSTOMER UPDATE
 *
 *	 {
 *	    "name": "customers",
 *	    "command_id": "abc",
 *	    "data": {
 *	      "customer_ids": {
 *	        "registered": "[email protected]"
 *	      },
 *	      "properties": {
 *	        "first_name": "Marian",
 *	      },
 *	      "update_timestamp": 1614941503 // Unix timestamp in seconds
 *	    }
 *	  }
 * CUSTOMER EVENTS
 *	  {
 *	    "name": "customers/events",
 *	    "command_id": "abc",
 *	    "data": {
 *	      "customer_ids": {
 *	        "registered": "[email protected]"
 *	      },
 *	      "event_type": "purchase",
 *	      "timestamp": "1614941503",  // Unix timestamp in seconds
 *	      "properties": {
 *	        "total_price": 1234.50,
 *	      }
 *	    }
 *	  }
 *
 * Do you want to know more? please visit the following link:
 * - How the output is being processed https://documentation.bloomreach.com/engagement/reference/batch-commands-2
 * - Why customer_ids are important? - https://documentation.bloomreach.com/engagement/docs/external-id
 * - https://documentation.bloomreach.com/engagement/reference/add-event-2
 *
 * Output:
 * It should be an array of object(s)
 * [
 *  {}
 * ]
 *
 *
 *
 * Happy coding :)
 */

// HINT: We can set constants in this way
const INTEGRATION_TYPE = "Opensend";

/**
 * Handler is the entry point for the function that enables the transformation of the data sent to our platform.
 * The input field should be a JSON structure `{}` and it's passed using the param `payload`. The name of the parameter can be changed but the number of parameters cannot be modified and should remain as in the current example.
 *
 * @param payload {JSON} JSON structure fetched from the `Input` field
 * @returns Array.<Object> [{}] Array of events
 */
function handler(payload) {
    const eventList = [];

    /**
     * External IDs (in this example customerIDs) are an important part of the event
     * These IDs allow us to link the events with the right customers
     * Read more about external ids: https://documentation.bloomreach.com/engagement/docs/external-id
     **/
    const customerIDs = {
    	"cookie": payload.__exponea_etc__,
        "email_id": payload.email
    };

    /**************************************************************/
    /* Customer Update */
    /**************************************************************/

    // Generate the properties we want to attach to the event
    const transformedUpdateProps = {
        "source":"Opensend",
        "description": "Customer update should contain the following fields: name, command_id, data)",
        "description_2": "'data' field should contain: customer_ids, properties, update_timestamp (UNIX timestamp)",
        "Opensend_Source_URL": payload.sourceUrl,
        "Opensend_GeoLocation": payload.userGeolocation,
        "created_at": parseDateToTimestampInSeconds(payload.timestamp),
    };

    // Customer Update event contains all the fields required to publish a customer update
    const customerUpdate = {
        name: "customers", // see more: https://documentation.bloomreach.com/engagement/reference/add-event-2
        command_id: `${payload.event_id || payload.email}-${payload.event_type || ''}`,
        data: {
            customer_ids: customerIDs, // HINT: Mandatory field
            properties: transformedUpdateProps, // HINT: Mandatory field
            update_timestamp: currentTimestampInSeconds(), // HINT: Mandatory field
        },
    };
    eventList.push(customerUpdate);


    /**************************************************************/
    /* Customer Event */
    /**************************************************************/

    // Generate the properties we want to attach to the event
    //const transformedEventProps = {
    //    "action": payload.customer_event_data.event_type,
    //    "integration_name": "integration",
    //    "description": "Customer event should contain the following fields: name, command_id, data",
    //    "description_2": "'data' field should contain the following fields: event_type, customer_ids (at least one), properties, timestamp (UNIX timestamp)",
    //    "link_to_the_documentation": "https://example.com/",
    //    "integration_id": INTEGRATION_ID, // HINT: INTEGRATION_ID is a built-in constant that can be used across the function
    //    "integration_type": INTEGRATION_TYPE, // Initialized above
    //    "survey_name": payload.customer_event_data.title,
    //    "survey_id": payload.customer_event_data.form_id,
    //    "submitted_at": parseDateToTimestampInSeconds(payload.customer_event_data.submitted_at),
    //};

    // If tags values contain a value in the first position add it in the `first_tag` property
    //if (payload.customer_event_data.tags[0]) {
    //    transformedEventProps["first_tag"] = payload.customer_event_data.tags[0];
    //}

    // Customer Event contains all the fields required to publish a customer event
    //const customerEvent = {
    //    name: "customers/events",
    //    data: {
    //        event_type: payload.customer_event_data.event_type, // HINT: Mandatory field
    //        customer_ids: customerIDs, // HINT: Mandatory field
    //        properties: transformedEventProps, // HINT: Mandatory field
    //        timestamp: currentTimestampInSeconds(), // HINT: Mandatory field
    //    },
    //};
    //eventList.push(customerEvent);

    // eventList should return an array of event [{}]
    return eventList;
}

/**
 * Function that helps us generate the timestamp in the format that is required by Engagement
 *
 * The timestamp can be updated to fit with your needs, the current example is generating the time from the time when the function is executed - Date.now()
 * e.g.
 * Function executed on Mon Jan 01 2024 11:00:00 GMT+0000 -> returns -> 1704106800
 *
 * @returns number Unix timestamp
 */
function currentTimestampInSeconds() {
    return Math.round(Date.now() / 1000);
}

/**
 * Function that helps us generate the timestamp in the format that is required by Engagement from a timestamp passed in the format 2024-01-11T11:11:11Z from the time when the function is executed - Date.now()
 * This function is just for demo purposes of how we can parse date and normalize it to the UNIX Timestamp format
 * e.g.
 * Param in the format 2024-01-11T11:11:11Z -> returns -> 1704106800
 *
 * @returns number Unix timestamp
 */
function parseDateToTimestampInSeconds(dateStr) {
    const date = new Date(dateStr);
    return Math.round(date.getTime() / 1000);
}
For more information, see:
Track the integration
Once you are happy with the transformation part:
- Click Start to start your integration.
- Go to Data & Assets > Customers to track incoming events. Opensend data automatically updates customer profiles.
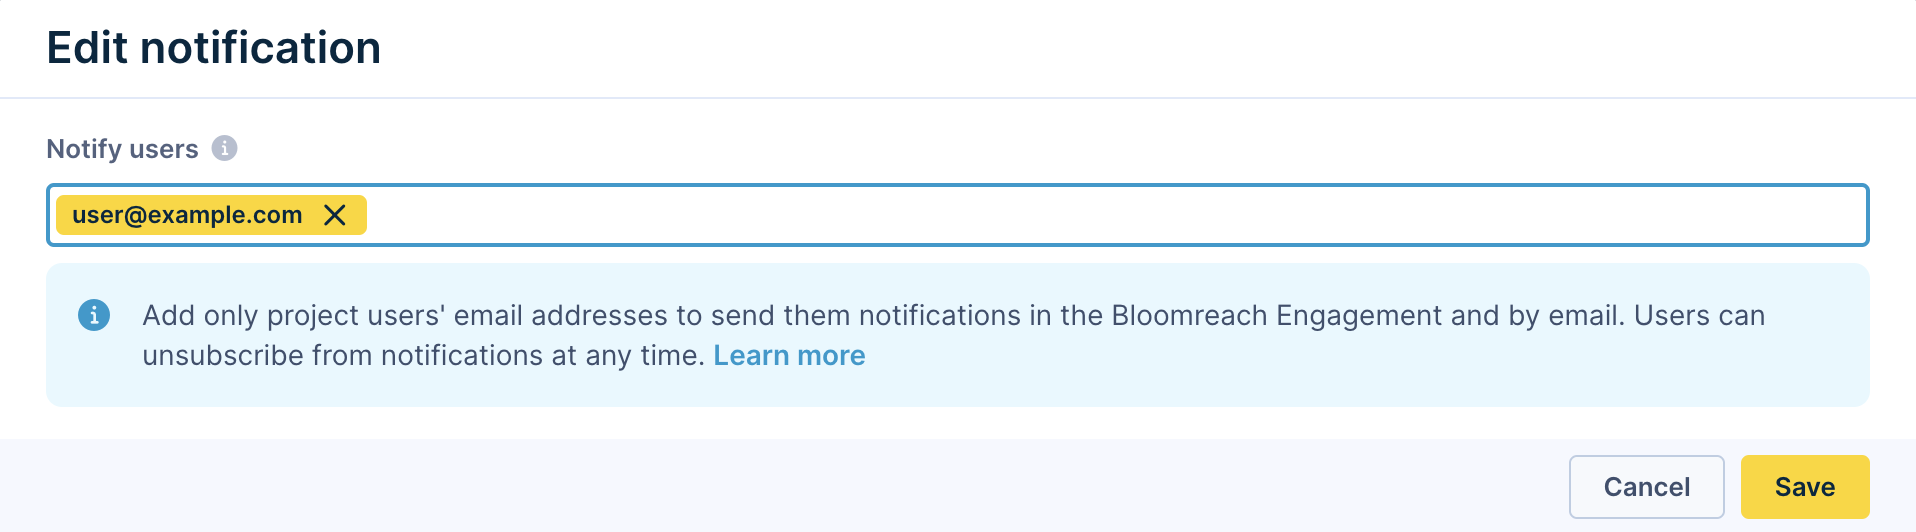
Turn on notifications (optional)
You can set up email and in-app notifications to alert you if the integration encounters any errors.
NoteMake sure email notifications are enabled in your project. Go to User settings > Notification settings and check Get notifications via email.
- Go to your Omniconnect integration.
- Select the three dots next to the Start button, then select Notifications.
- Enter the email addresses of the users you want to notify—for example, your implementation partner or technical team.
- Click Save.
Updated 4 months ago