

Contextual personalization in weblayers
This guide covers weblayer-specific setup steps for Contextual personalization.
For general configuration—variants, value, goal, and contextual features—see Configure contextual personalization.
This is a Premium tier feature powered by Loomi.
Prerequisites
- At least 2 weblayer variants ready to test.
- A goal event defined — weblayers have no automatic interaction tracking, so you must set one. A banner click is a good starting point. For details, see Configure contextual personalization.
Set up contextual personalization for weblayers
Step 1: Select a use case
Choose a use case where personalization plays a relevant role. This guide uses a subscription weblayer with two discount variants as an example. For inspiration, see Contextual personalization use cases.
Step 2: Create weblayer variants
Create at least two variants of your weblayer and configure all relevant settings. For details, see Weblayers.
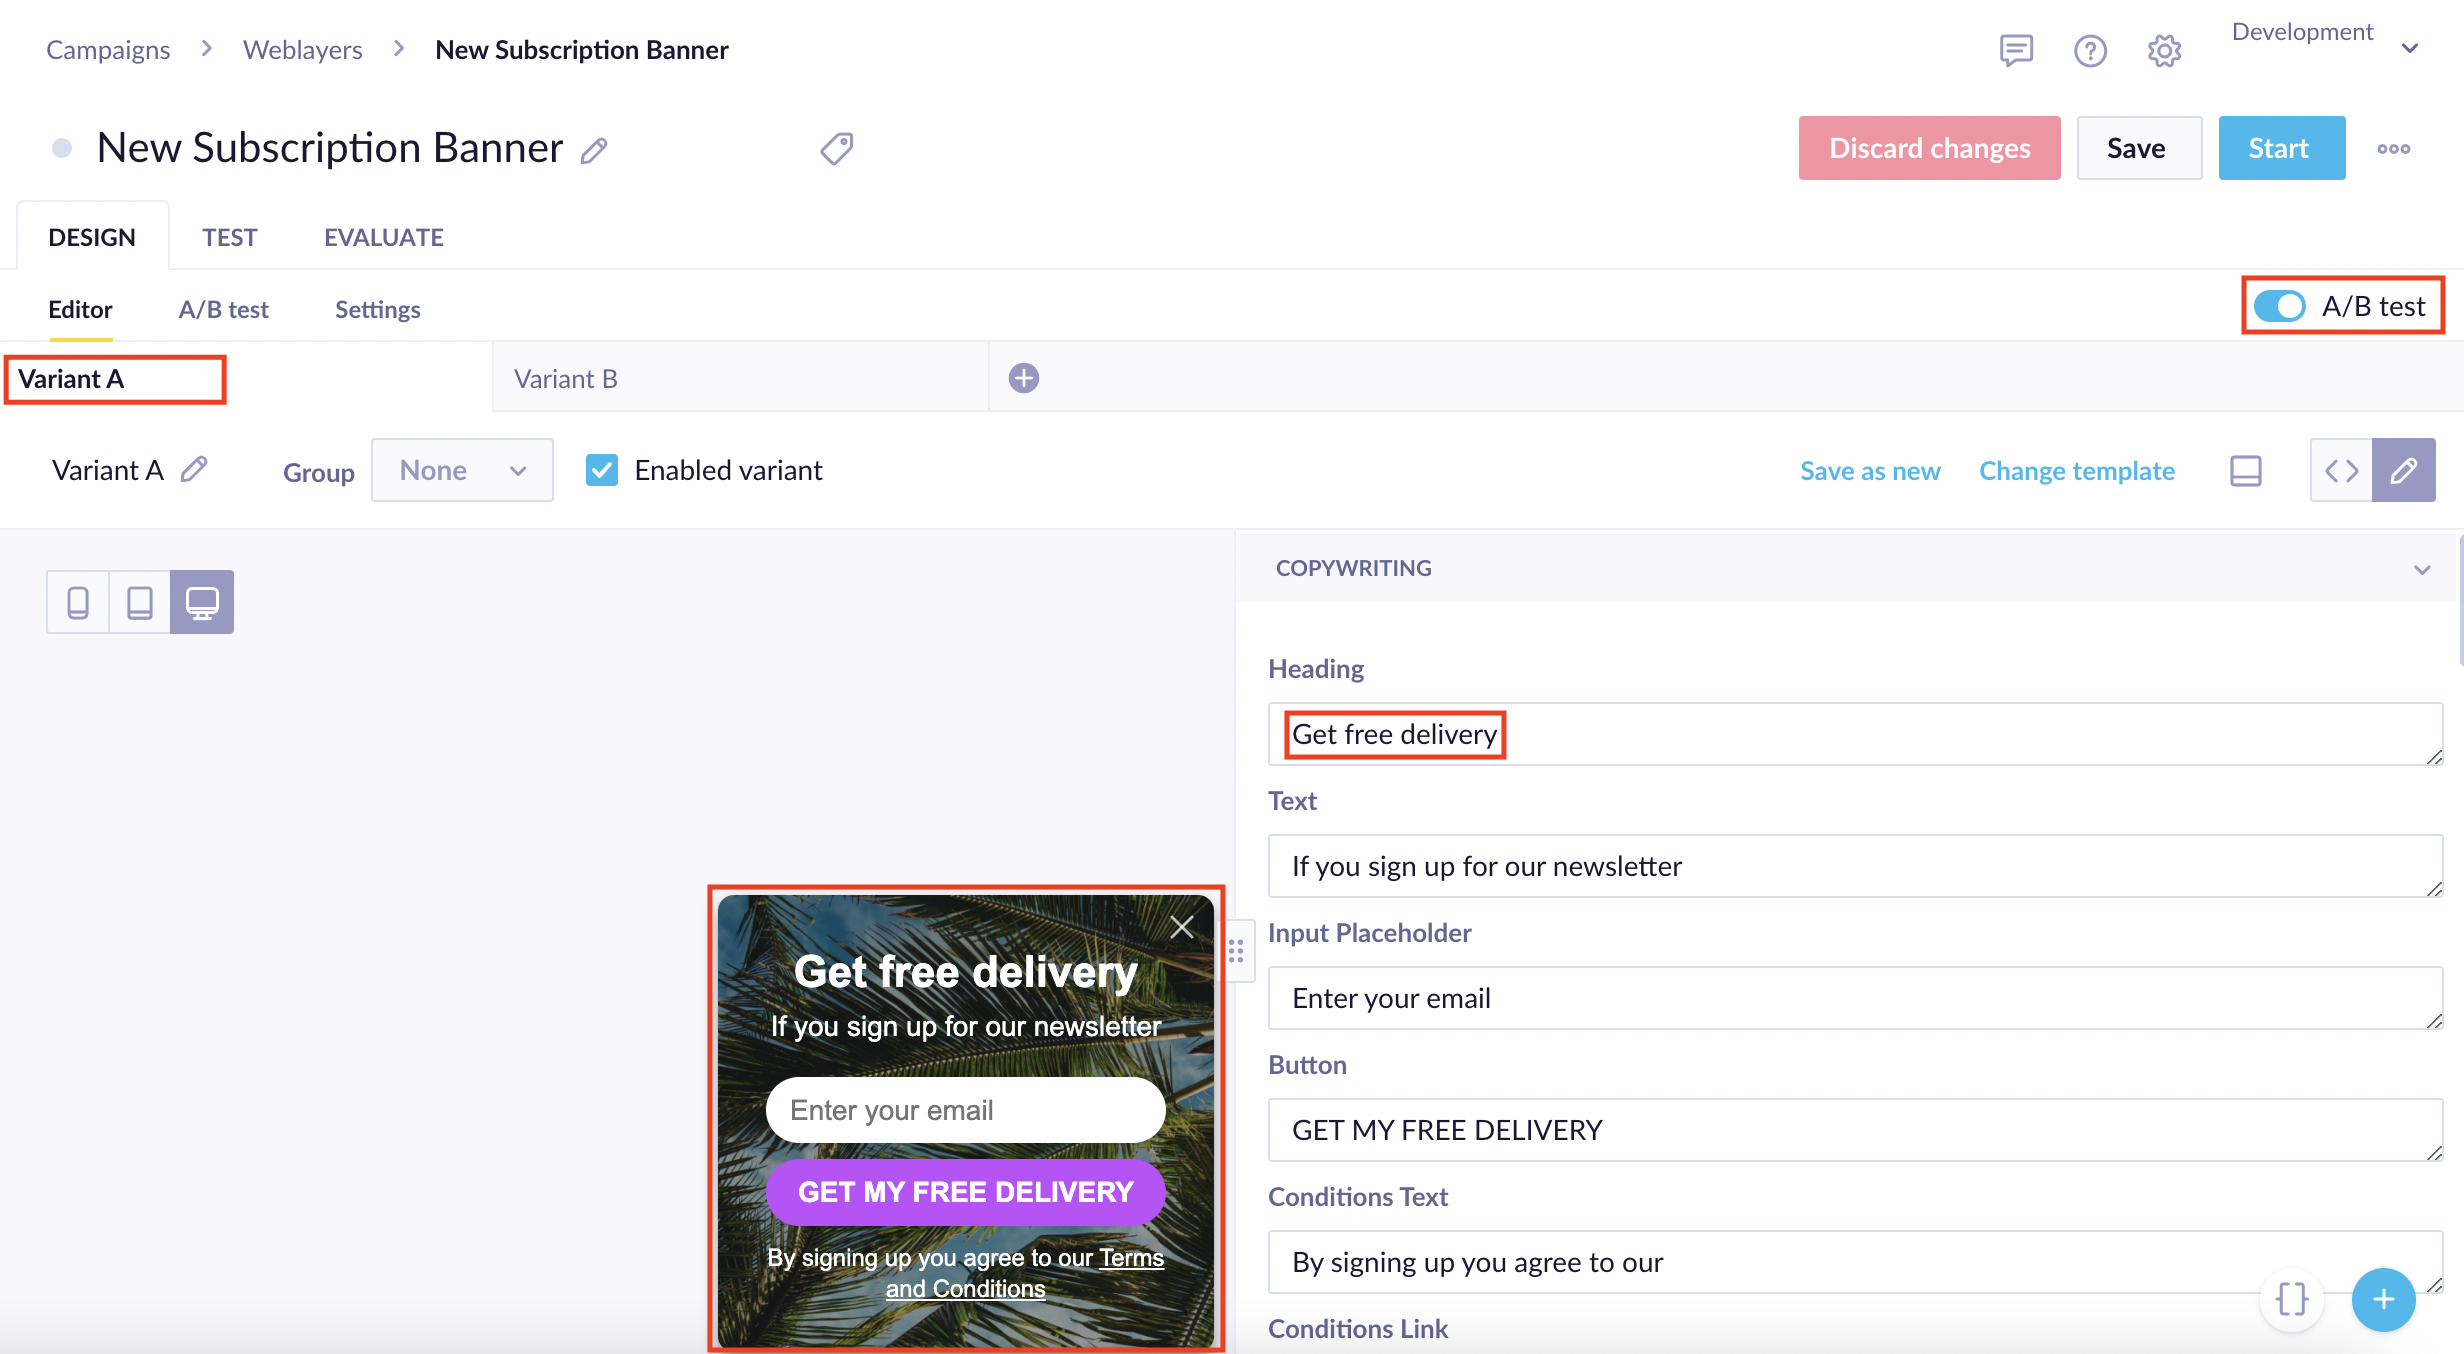
Variant A shows a banner that offers free delivery when subscribing.
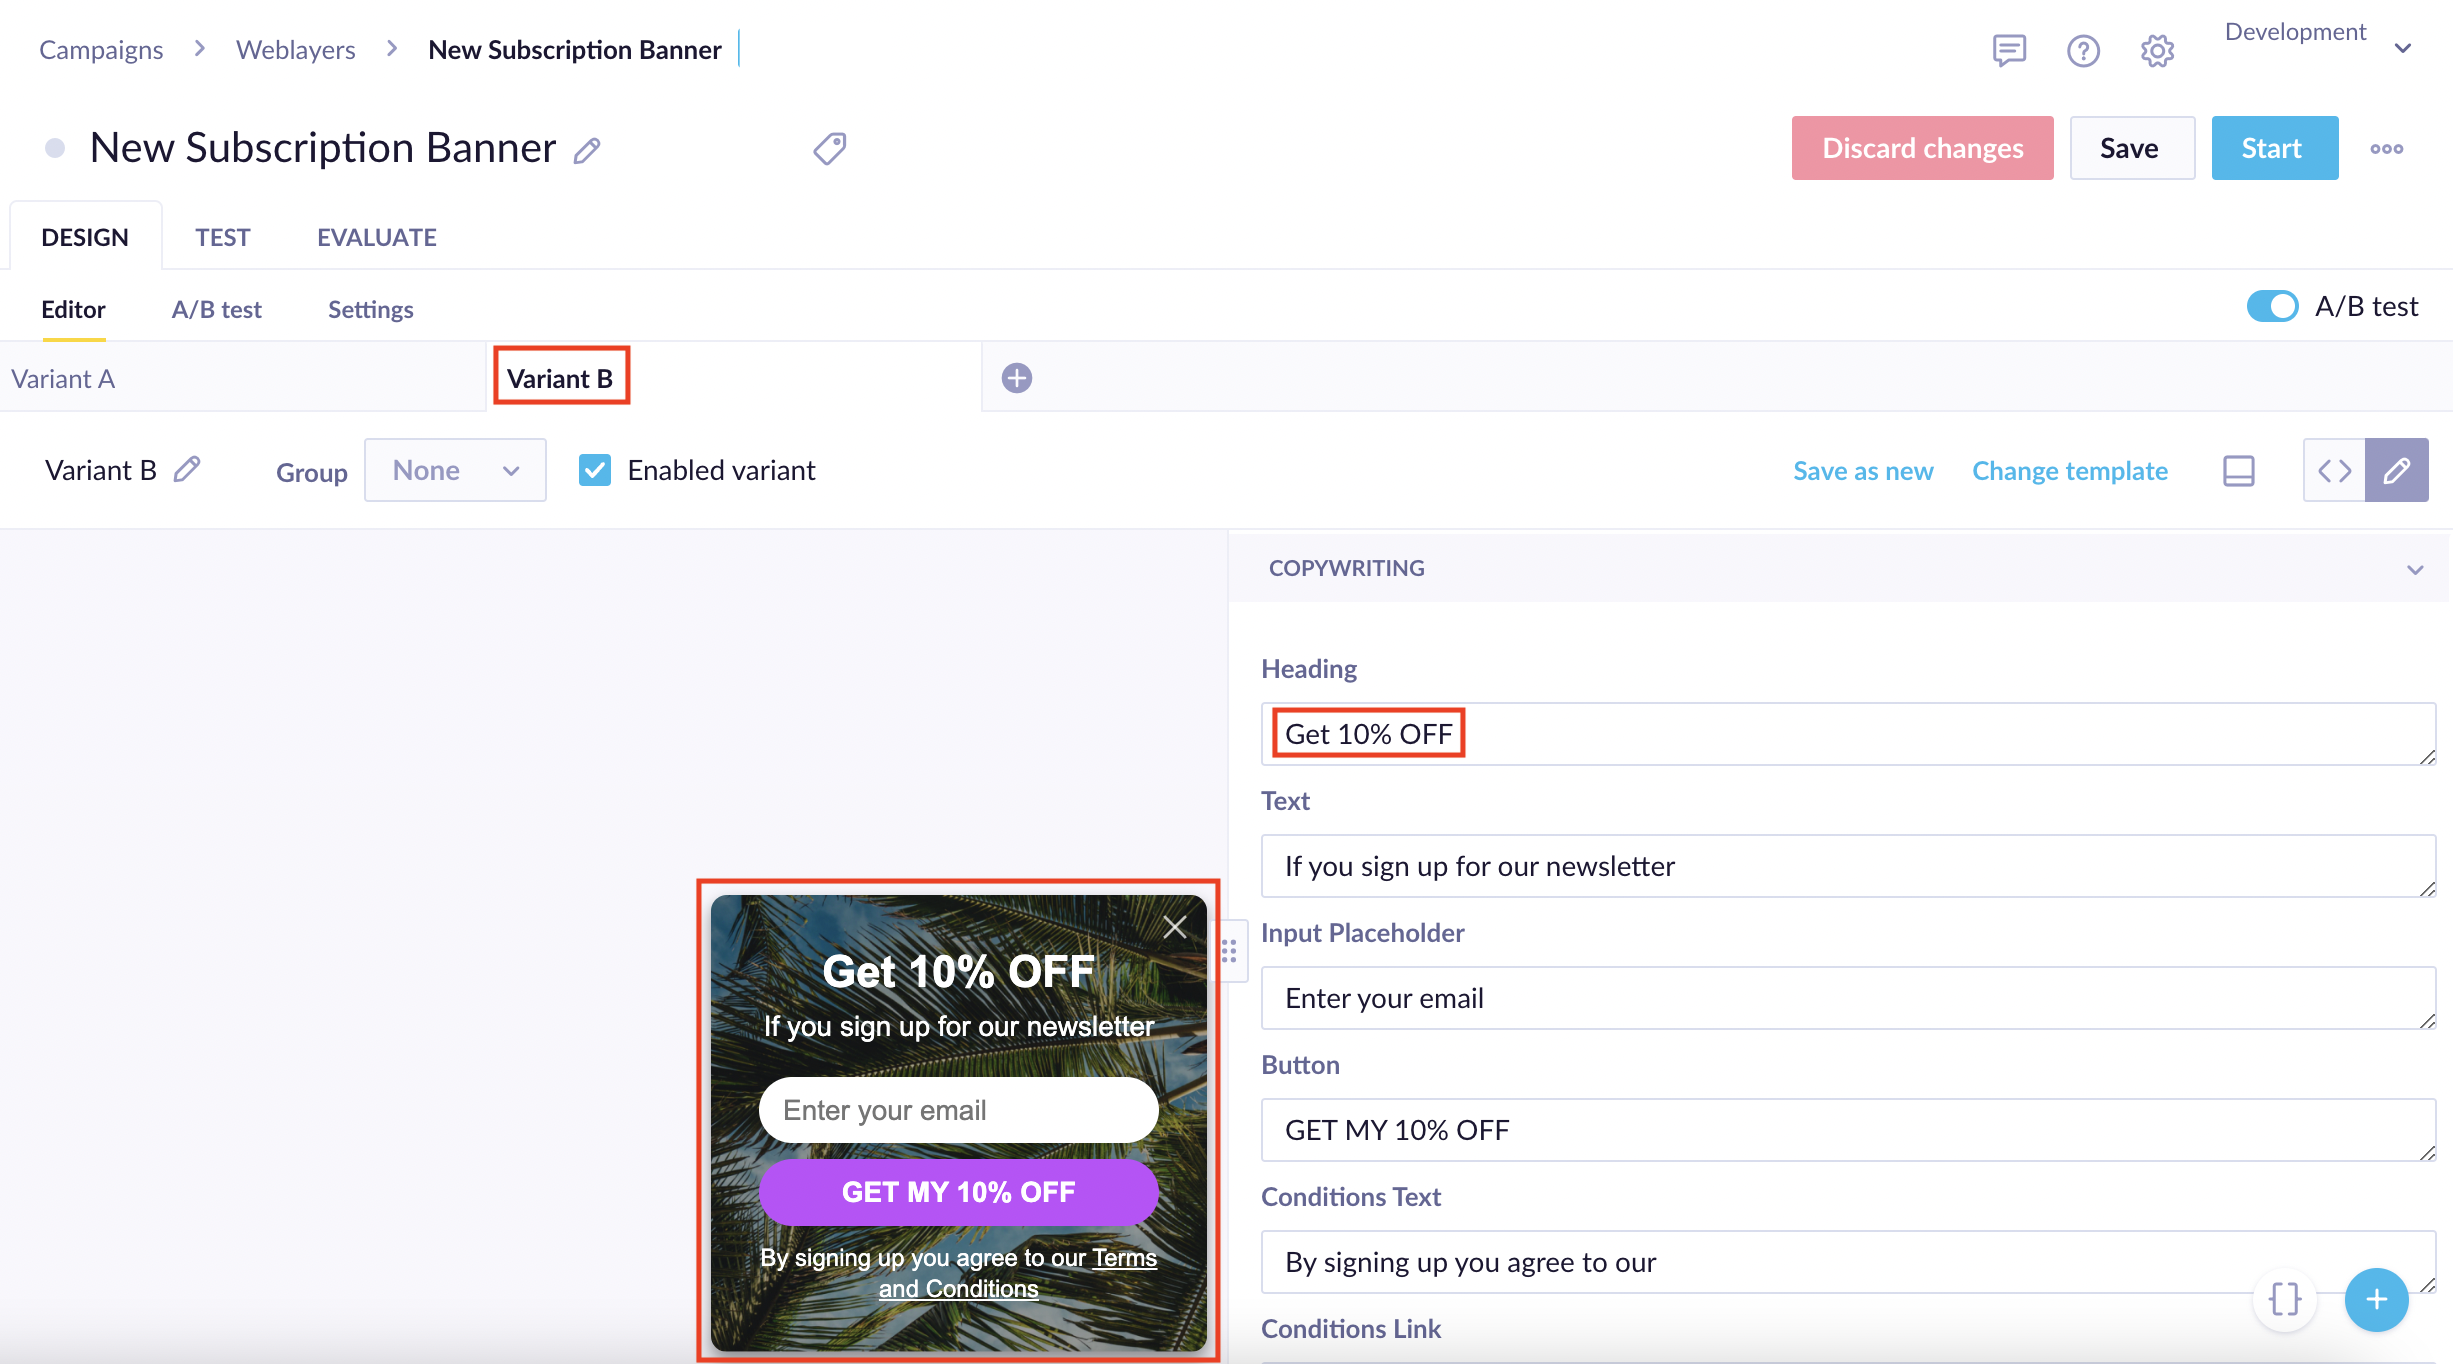
Variant B shows a banner that offers a 10% discount when subscribing.
Step 3: Configure contextual personalization
Go to the A/B test section of your weblayer and select Contextual personalization.
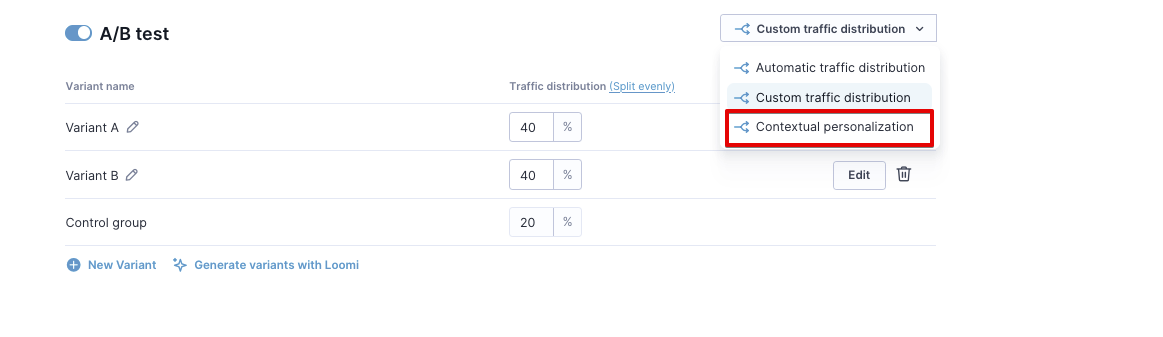
A/B test section with Contextual personalization selected and custom traffic distribution.
Enable the Comparative A/B test toggle and set traffic distribution to 80% contextual personalization and 20% comparative A/B test. For details on evaluating results, see Evaluate contextual personalization.
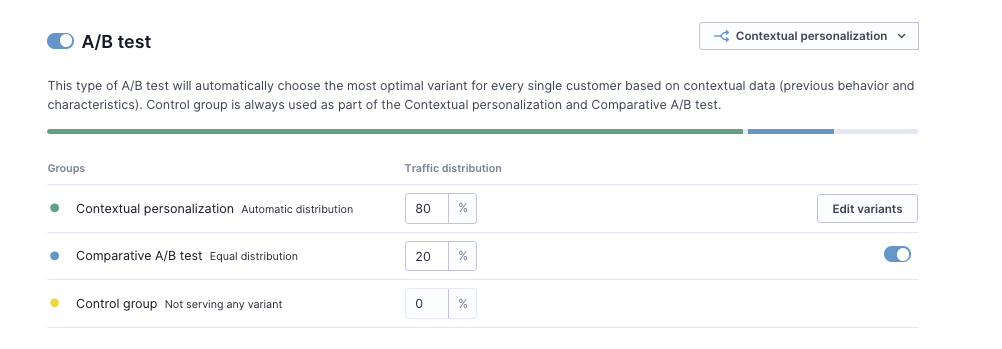
Comparative A/B test enabled showing 80% contextual personalization, 20% comparative A/B test, and 0% control group.
Goal
Set a goal to tell Loomi when a variant succeeds. For this example, set it to a subscription banner click and specify the banner_name — for example, "New Subscription Banner" — or the banner_id found in the URL.
Contextual features
Select Optimized by Loomi AI to let Loomi automatically choose the most relevant customer data for your project. You can also define custom features if needed. For guidance, see Configure contextual personalization.
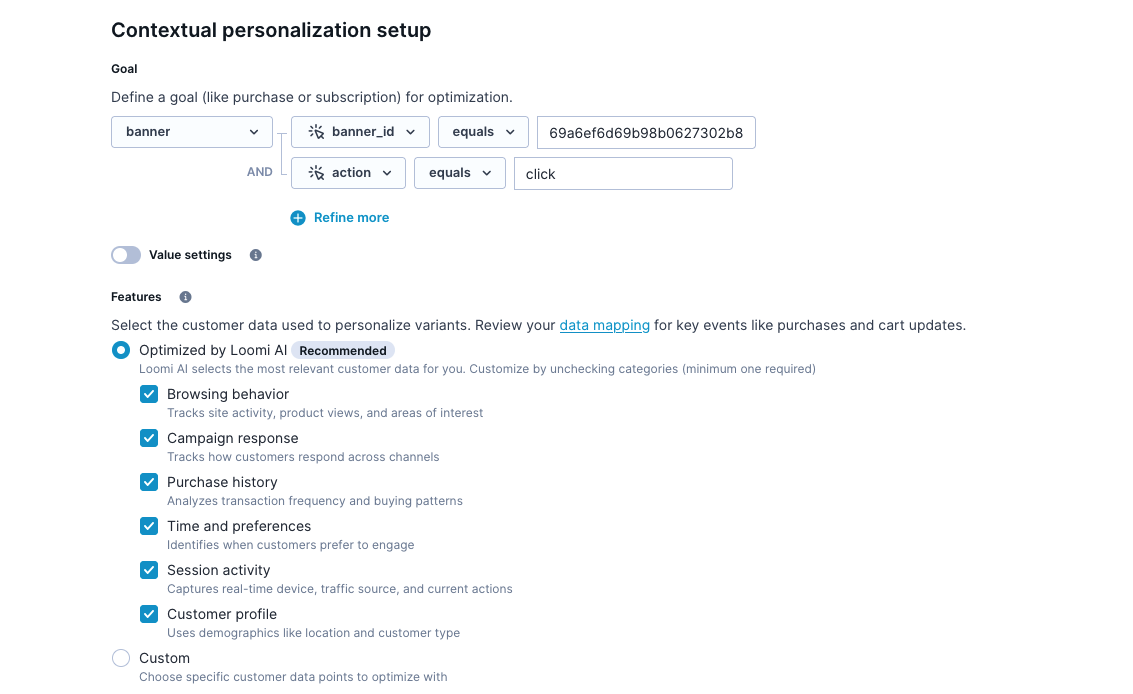
Contextual personalization setup showing goal set to banner click filtered by banner ID, Optimized by Loomi AI selected with six active feature categories, and Value settings toggle.
Value
If your variants have different business values, assign value to each one to guide Loomi. For this example, both variants have equal value, so no changes are needed. For details, see Configure contextual personalization.
Step 4: Configure settings
In the Settings tab, select a consent category. Use the category you normally apply to personalized weblayers. For details, see Consent management.
Contextual personalization can serve different variants to the same visitor across sessions. If you want each visitor to see a variant only once, set the weblayer to show once per visit.
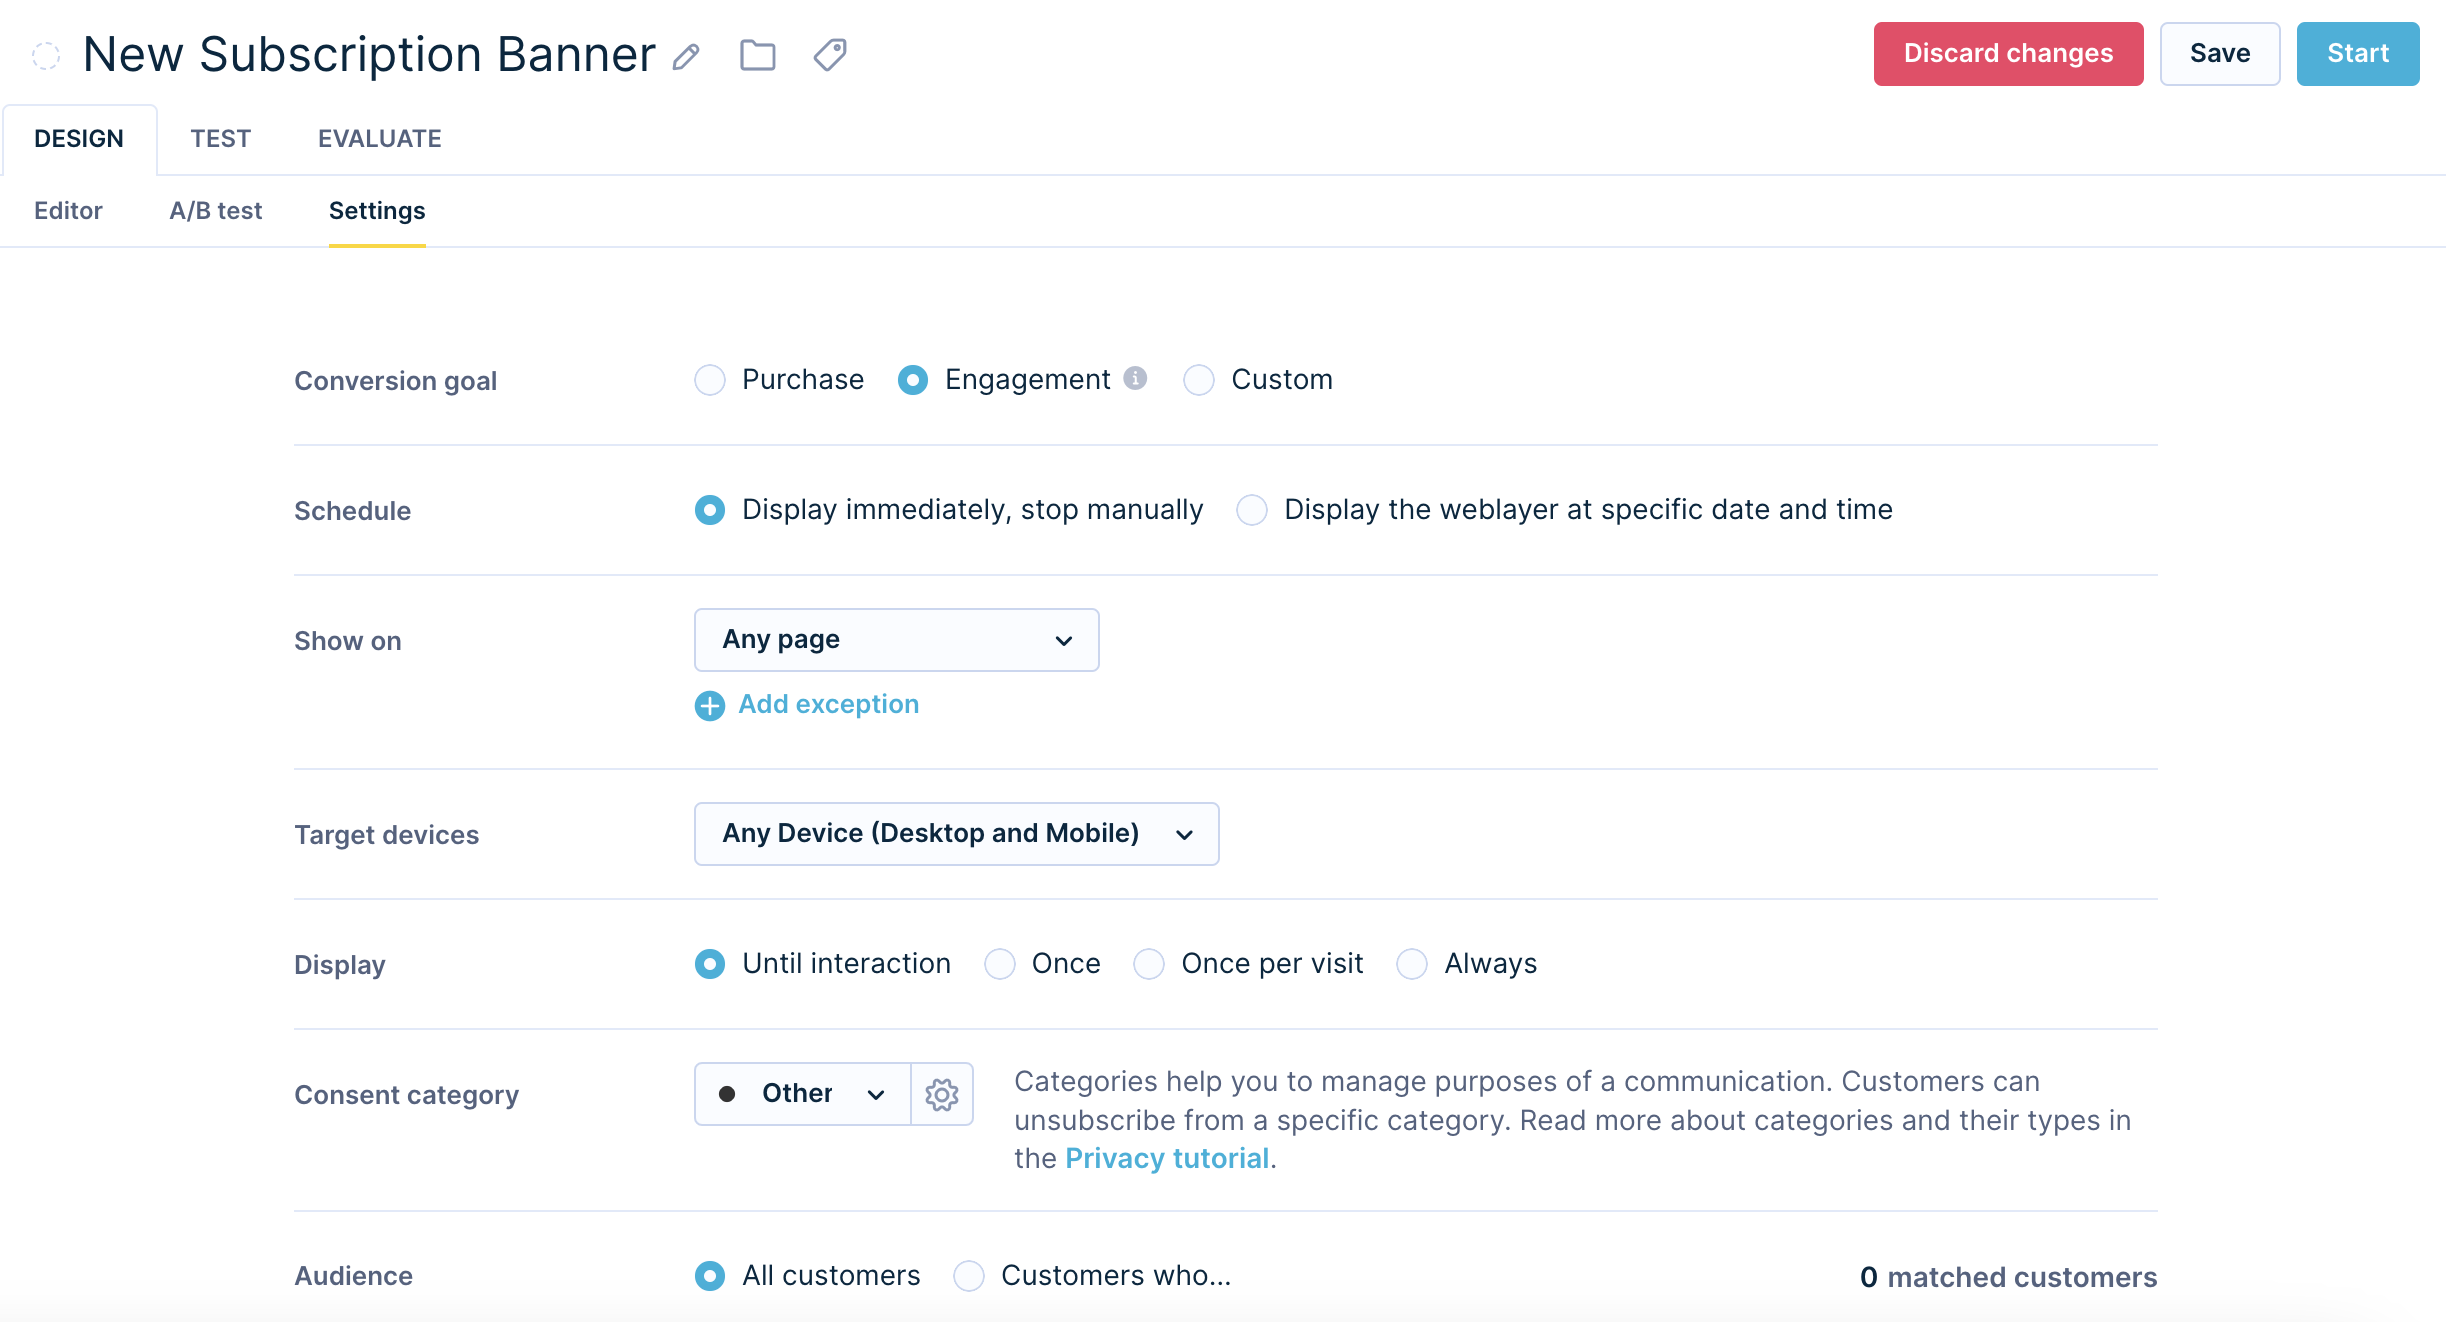
Weblayer settings tab showing conversion goal, schedule, show on, target devices, display frequency set to until interaction, and consent category.
Track goal completion via API
Use the API when the goal event happens outside the current page session — for example, a purchase on a different page.
Store the reward_token from the weblayer's JavaScript object:
data.contextual_personalization.reward_tokenYou can track it in the banner event or create a dedicated event. Note that data.contextual_personalization is only present for variants served by contextual personalization — not for variants served by the comparative A/B test.
Send the reward token using a simple on_event triggered scenario after the goal event fires:
POST https://<api-domain>/webxp/bandits/reward

req: {"reward_token": "<reward-token-string>", "value": 1.0}

resp: <empty> (HTTP 202)
WarningThe maximum delay between serving the weblayer and tracking the goal is 15 minutes. Automatic goal tracking only works for events on the same page session as the weblayer.
Evaluate results
To measure the impact of contextual personalization on your weblayers, see Evaluate contextual personalization.
For guidance on interpreting early results, see Exploration and randomization.
Updated about 2 months ago