

Filtering data
Filters let you narrow down data outputs by customer attributes, event attributes, and time ranges. You'll use them across analyses and campaigns—in reports, metrics, segmentations, and audience definitions.
NoteYou can also filter customers at the project level using the Email list hygiene filter.
Filter types
There are 3 filter types available across all Bloomreach features:
| Filter type | What it does |
|---|---|
| Date filters | Limits results to events within a specific time range. |
| Customer filters | Filters based on customer attributes or event history. |
| Event filters | Filters events based on their attributes. |
For a full reference of the operators available within each filter type, see Filter operators.
Event filters
Event filters let you filter by the attributes of a specific event. Multiple attribute conditions are combined with AND logic—the result must satisfy all conditions defined.
Customer filters vs. event filters
Choosing the wrong filter type is one of the most common mistakes. Here's an example to illustrate the difference.
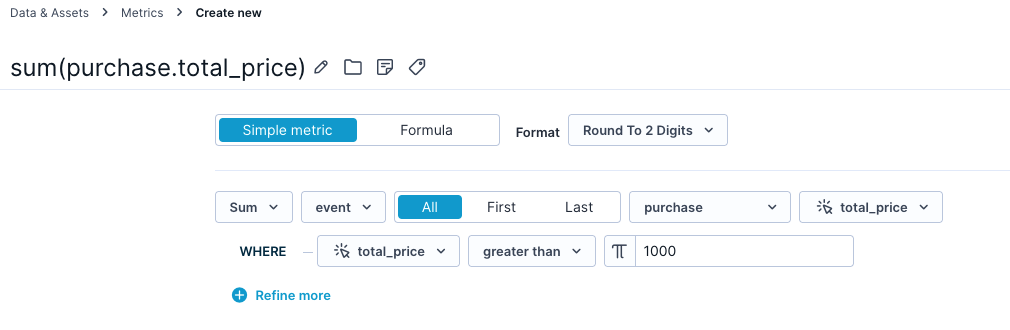
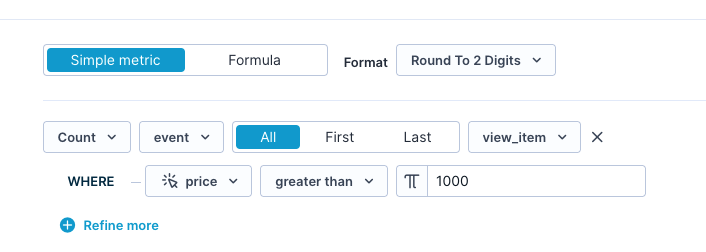
Goal: Count how many times products with a price greater than 100 were viewed.
Correct—an event filter that counts only product views where price > 100
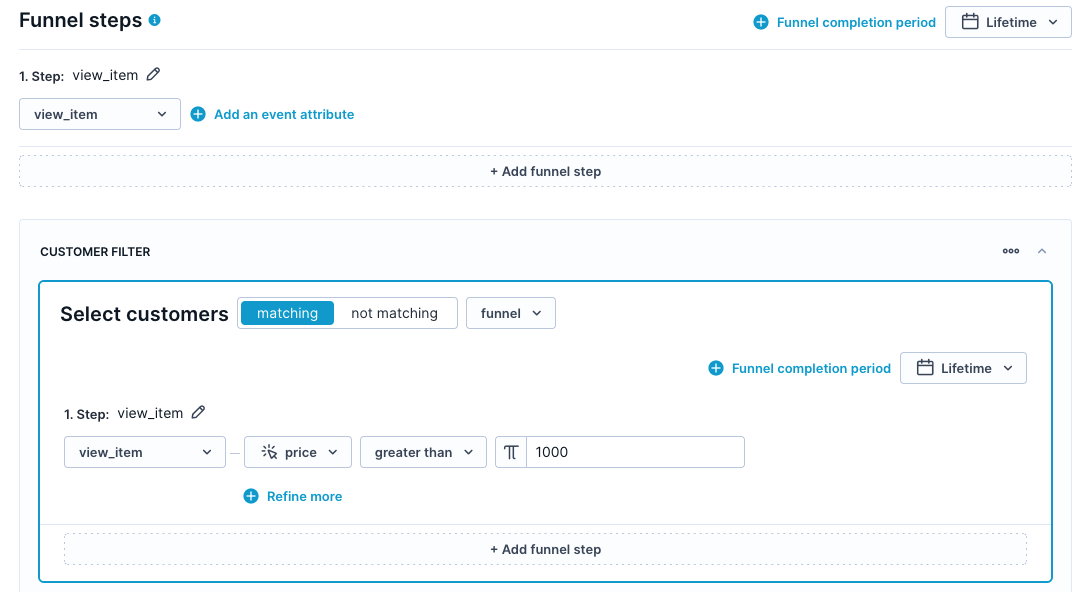
Incorrect—a customer filter counting all product views by customers who ever viewed a product priced > 100
The first approach (event filter) is correct. It counts only the specific product views where the price attribute is greater than 100.
The second approach (customer filter) is incorrect. It counts all product views by any customer who has ever viewed a product priced over 100, regardless of which product was viewed in each event. A customer who viewed a €200 product and a €30 product would have both events counted. A customer who only viewed €40 and €50 products would have none counted.
Negation
There are 2 ways to negate a filter, and they behave differently.
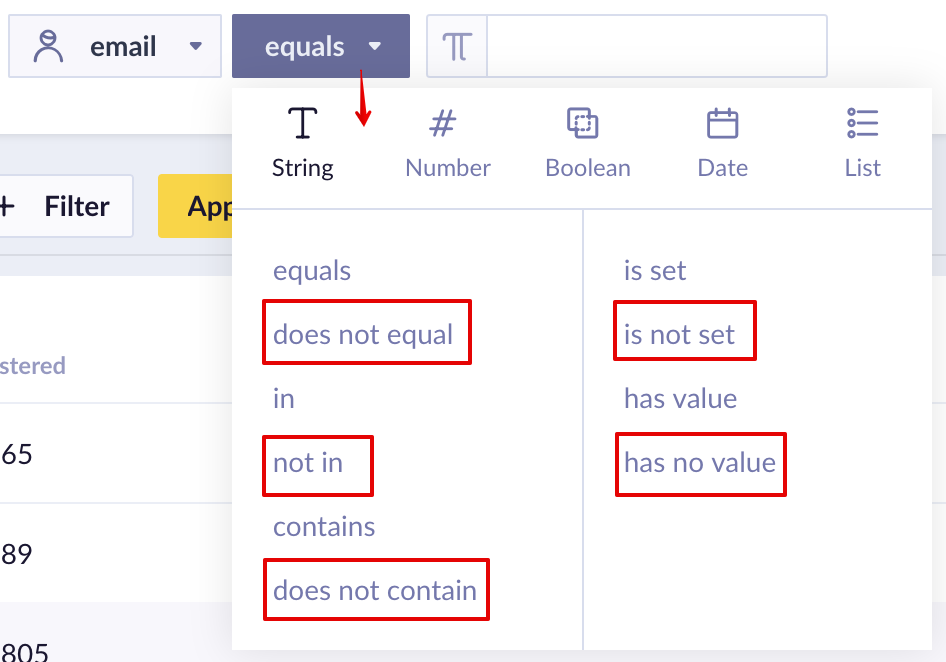
Option 1: Negate within the filter condition
Select a negating operator (for example, does not contain) from the dropdown. This matches only customers who have the attribute set but where the value doesn't meet the condition. Customers without the attribute set at all are excluded.
Result of inline negation — only customers with the attribute set are evaluated.
Option 2: Negate the entire filter
Click the N button on the right side of the filter. This inverts the entire condition and includes customers who don't meet it — including those who have no value set for the attribute at all. This returns a broader result set than option 1.

Whole-filter negation using the N button — includes customers without the attribute.
Filtering logic
Bloomreach filtering is based on De Morgan's laws. When combining conditions with AND and NOT, follow this pattern:
- Goal: Find customers who have marketing consent AND didn't buy
product_123AND did not buyproduct_456. - Use:
A AND (NOT B OR NOT C)
This correctly excludes anyone who bought either product, in line with De Morgan's laws.
Using brackets to group filters
Brackets let you control how AND/OR conditions are evaluated across multiple filters. Without brackets, conditions are evaluated in sequence and may produce unintended results. For example, you can enforce (A OR B OR C) AND D instead of A OR B OR (C AND D).
Group filters using brackets
- Click the first filter you want to group. It highlights with a blue outline.
- Select the remaining filters for the group.
- Click the bracket icon that appears at the top edge of the first selected filter.
- The selected filters group into a single bracketed block.
Modify or remove a group
- Click the grouped block to select it.
- Click the bracket icon with a cross to ungroup.
- Select a different set of filters and regroup as needed.
Filters in reports vs. customers view
If you've used Show customers in a report and the count in the Customers view doesn't match your report cell, this is expected—not a data error.
Show customers only applies report-level customer filters. Metric-level filters—set inside the metric definition—apply when calculating the report table but aren't passed through to the Customers view.
To get consistent counts, use report-level customer filters instead of—or in addition to—metric-level filters when you plan to use Show customers.
Updated 7 days ago