Email domain report
Email domain report allows you to break down your customers into groups according to their mailbox service provider. Its purpose is to identify a problem when there is something wrong with your email campaigns, whether it is low deliverability and open rates, or high bounce and complaint rates. To find out more tips for improving the effectiveness of your email campaigns, visit Email deliverability tips
Email domain report
After following this guide, you will end up with a report providing an overview both in a table and in a chart. The view is customizable. After you make the report there are two possible outcomes.
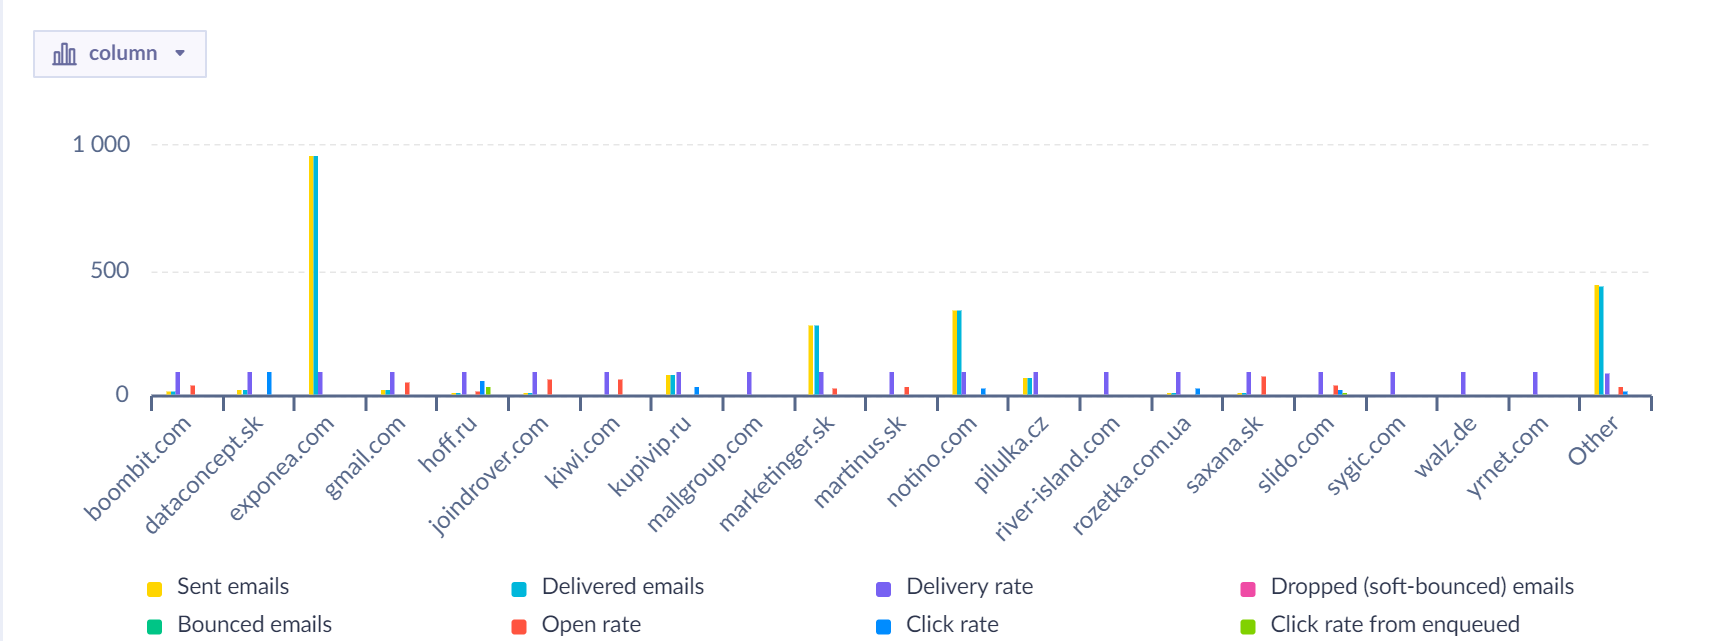
Either all of the metrics are consistent across all MSPs or there are some for which the rates are disproportionately low. If it is the former, the problem with your email campaign doesn't lie with the MSP. However, if it is the latter, you have just identified an MSP that is causing the problem. You need to find out what is different about the particular MSP. For example, in the image below, Microsoft and Google have ⅓ of the Apple and Verizon open rate. This is alarming and should be investigated.

This is how the report will look after successfully completing the guide.
Domain strip scenario
- For the report, you will first need to have a scenario creating a customer attribute with just the stripped domain from a full email address.
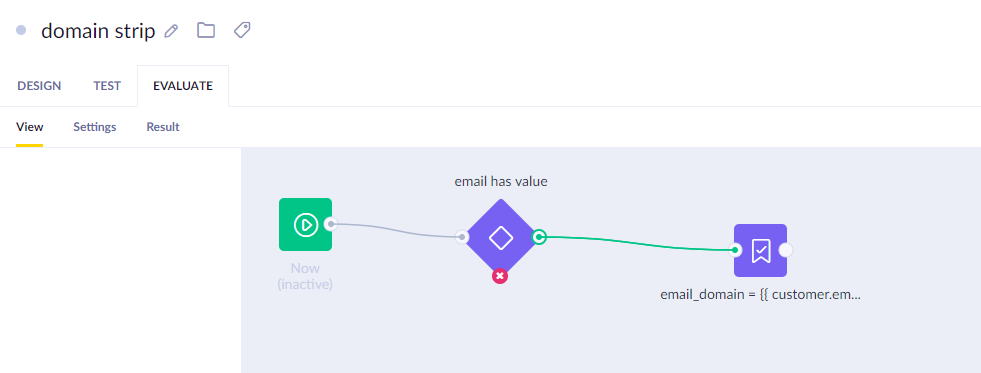
This is what the scenario looks like.
- Select the
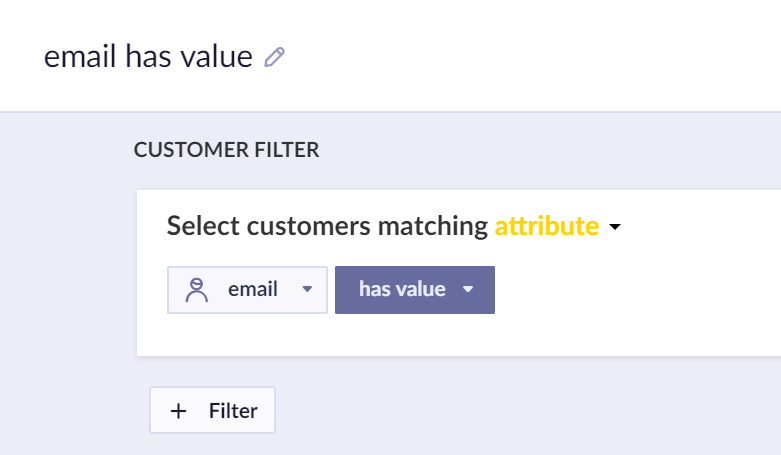
Nowtrigger (green). - Then, add a condition (together with connecting it to the trigger) as shown below.
- Select a Set attribute operator and create an attribute
email_domainby typing it down and clicking on the plus sign.
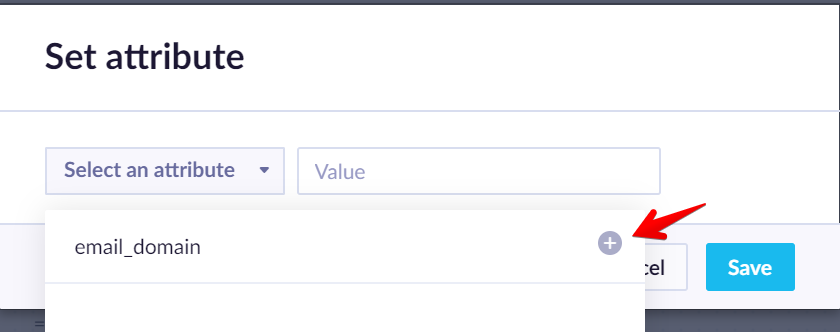
- As a Value, insert the text below. After doing this last step, your scenario is ready to be used.
{{ customer.email.split('@') | last }}
- Start the scenario (top-right corner) and after a while, click Stop, as this is a one-time process.
However, after this initial process, you will have to alter the scenario so it always does the same process with all the new addresses.
Firstly, will need to swap the Now green trigger for a Repeat trigger and set it to repeat daily.

Next, change the condition in the middle of the scenario. In addition to the existing filter, add a new one where the attribute email_domain equals not set, as shown in the picture below.
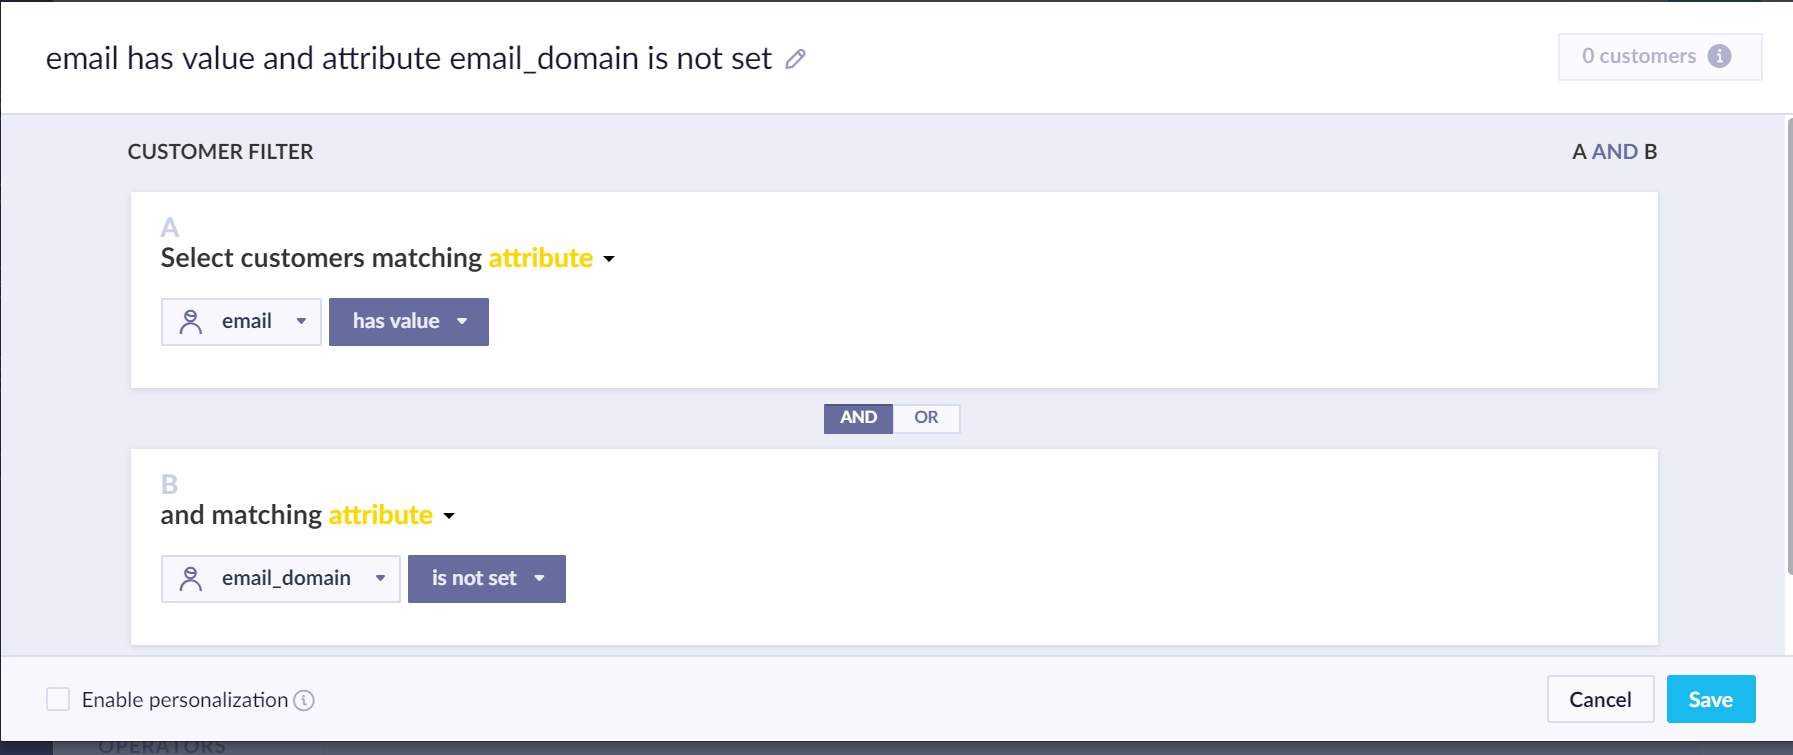
This way, all of the new email addresses will be included and the email domain will be stripped from them on a daily basis.
Email domain report
After you successfully created the email_domain attribute and adjusted it for continual use, you are ready to create the email domain report.
To create the report, copy the conditions outlined in the images. To find out how to work with Reports, visit the linked article.
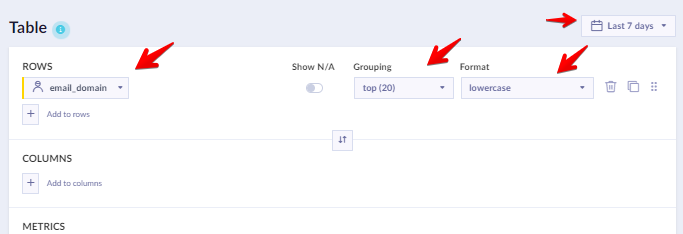
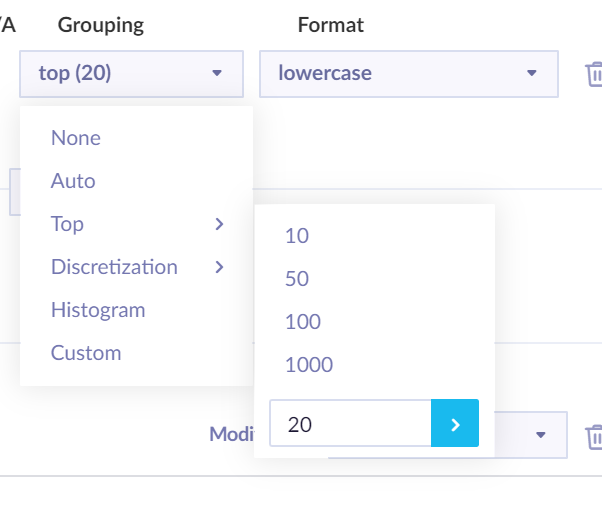
The grouping is set in this way.
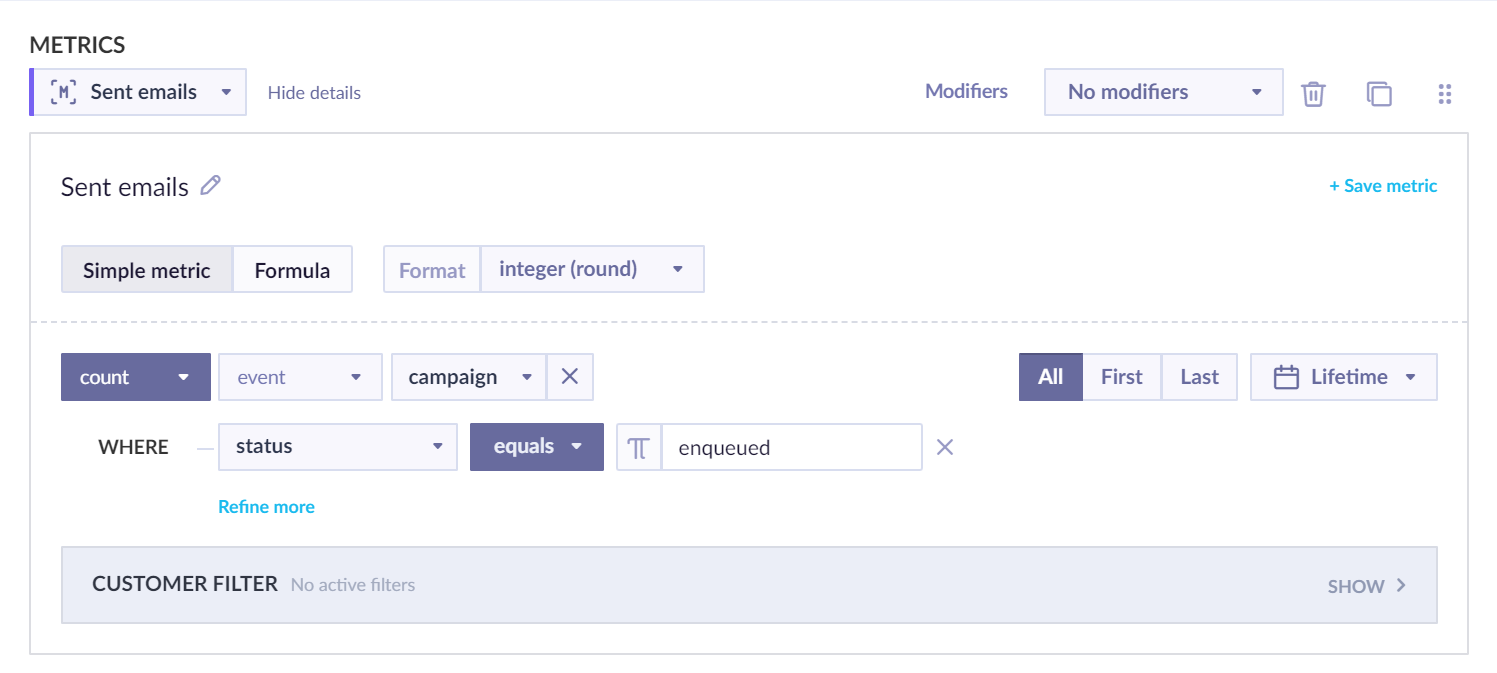
Sent emails
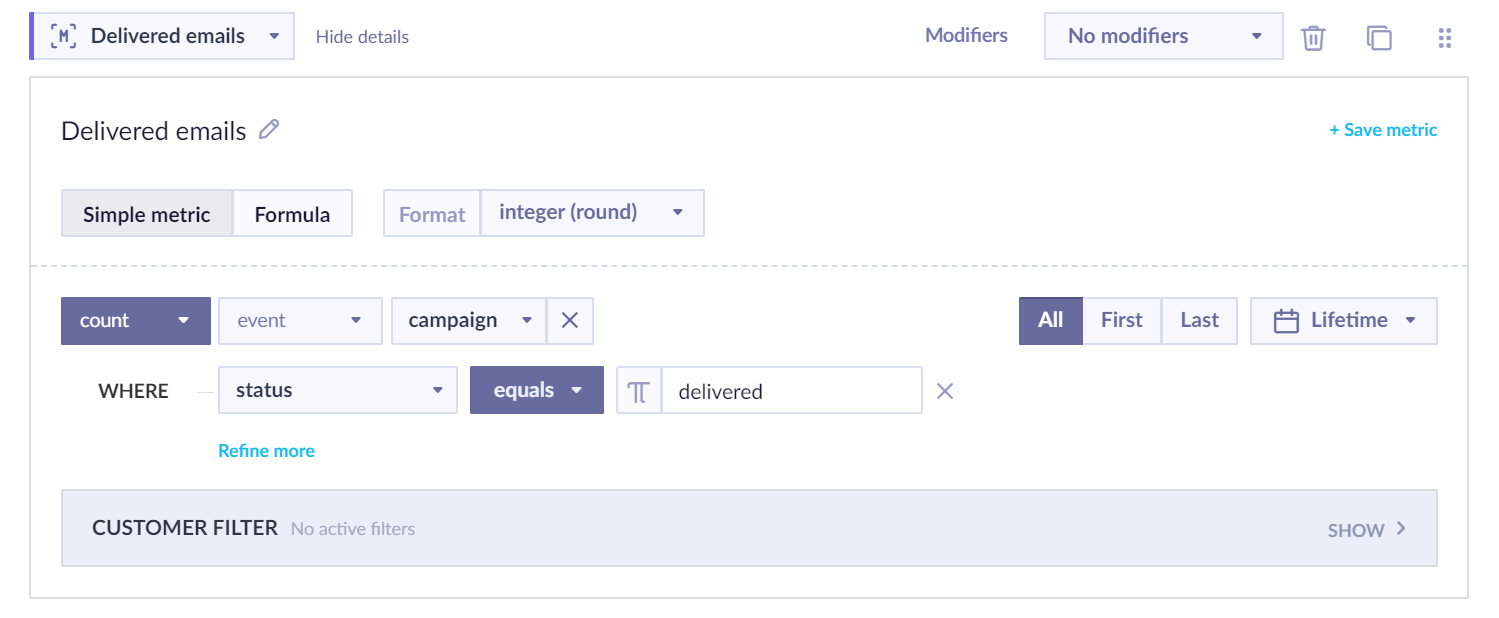
Delivered emails

Delivery rate
Advanced Delivery rate strategies
Read our block about Email marketing analytics about metrics, KPIs, and reports.

Definition of count(customer) for the formula in "Delivery rate"

Definition of count(campaign) for the formula in "Delivery rate"
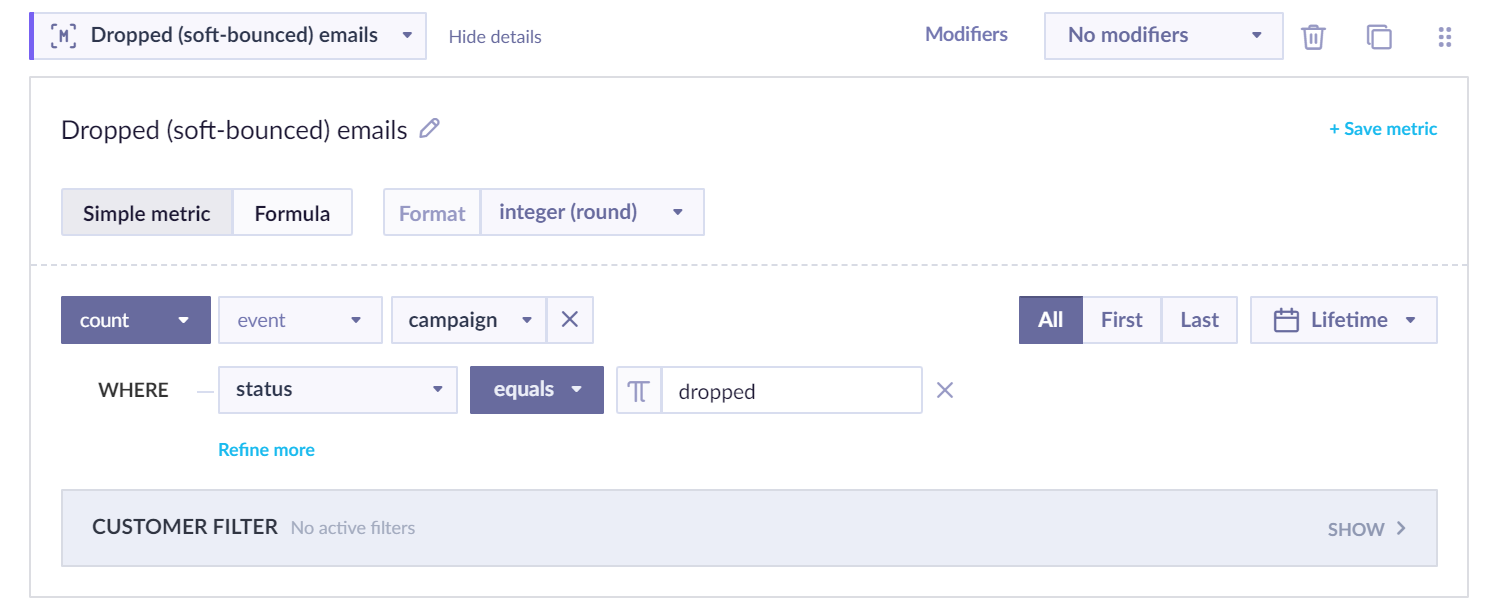
Dropped (soft-bounced) emails
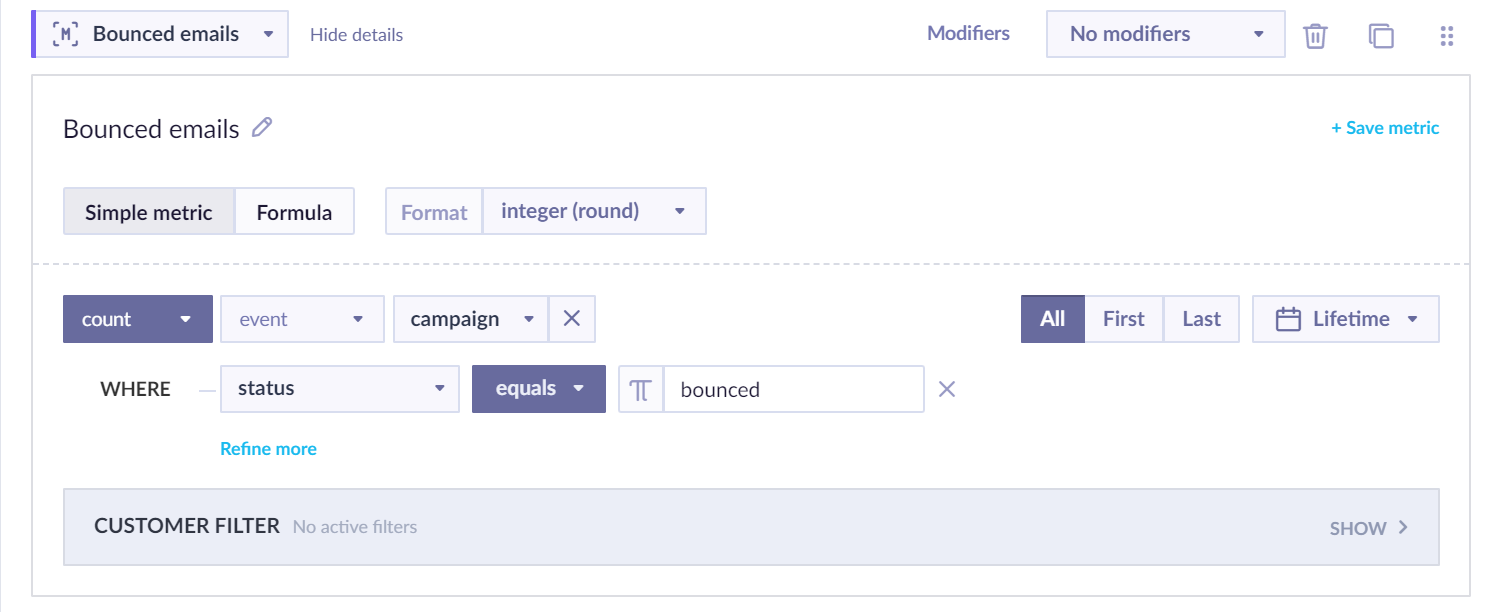
Bounced mails

Open rate

Definition of count(customer) for the formula in "Open rate"

Definition of count(campaign) for the formula in "Open rate"

Click rate

Definition of count(customer) for the formula in "Click rate"

Definition of count(campaign) for the formula in "Click rate"

Click rate from enqueued

Definition of count(customer) for the formula in "Click rate from enqueued"

Definition of count(campaign) for the formula in "Click rate from enqueued"
If you did everything as suggested, you should now have a working report where you can track your campaigns based on the customers' ISPs.
Campaign name report
You can also use the email domain report to build another helpful analysis. To look at the performance of various campaigns in one place, you can create a copy of the email domain report and change "email_domain" in Rows to "campaign_name" from the "campaign" event.
You can also add "action_name" as another row, in case you are sending multiple emails from one scenario - this will help you identify them.

Updated 12 months ago
