View Count Weblayer
People Are Looking At This Product
Showing your visitors how many other people are looking at your products creates peer pressure and also improves their opinion on the products. A view count web layer, or view count banner, can help you turn those visitors into customers. We will show you how you can deploy such banner in Bloomreach Engagement.

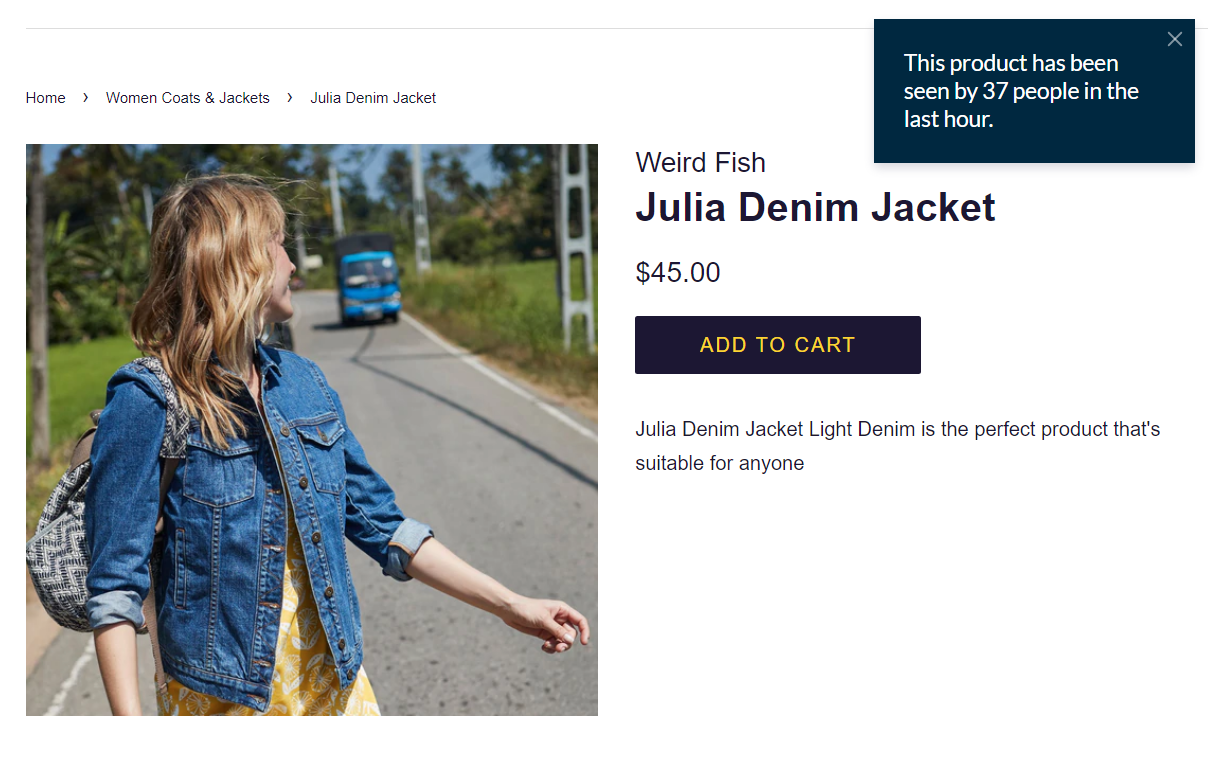
This personalized web layer shows the number of unique visitors who have seen this product in the last 60 minutes.
Overview
This guide will help you understand how to create this use case by yourself through the following sections:
- Requirements for implementation
- Creating a report
- Creating a web layer
- Setting a trigger code in the Tag Manager.
- Launching the web layer
- Evaluation
| Requirements | |
|---|---|
| Bloomreach Engagement skills | Advanced - 90% of this use case can be implemented by a non-technical person following this guide. However, step 3.1 requires knowledge of regular expressions or your data layer. We assume you can navigate and work with basic functions in Bloomreach Engagement. |
| Data and tracking | Tracking of the event view_item |
Knowledge of JavaScript, regular expressions and your data layer is required to implement this use case.
1. Create a report
First, you need to create a Report with the number of customers viewing particular products. This will allow you to show this information in the web layer.
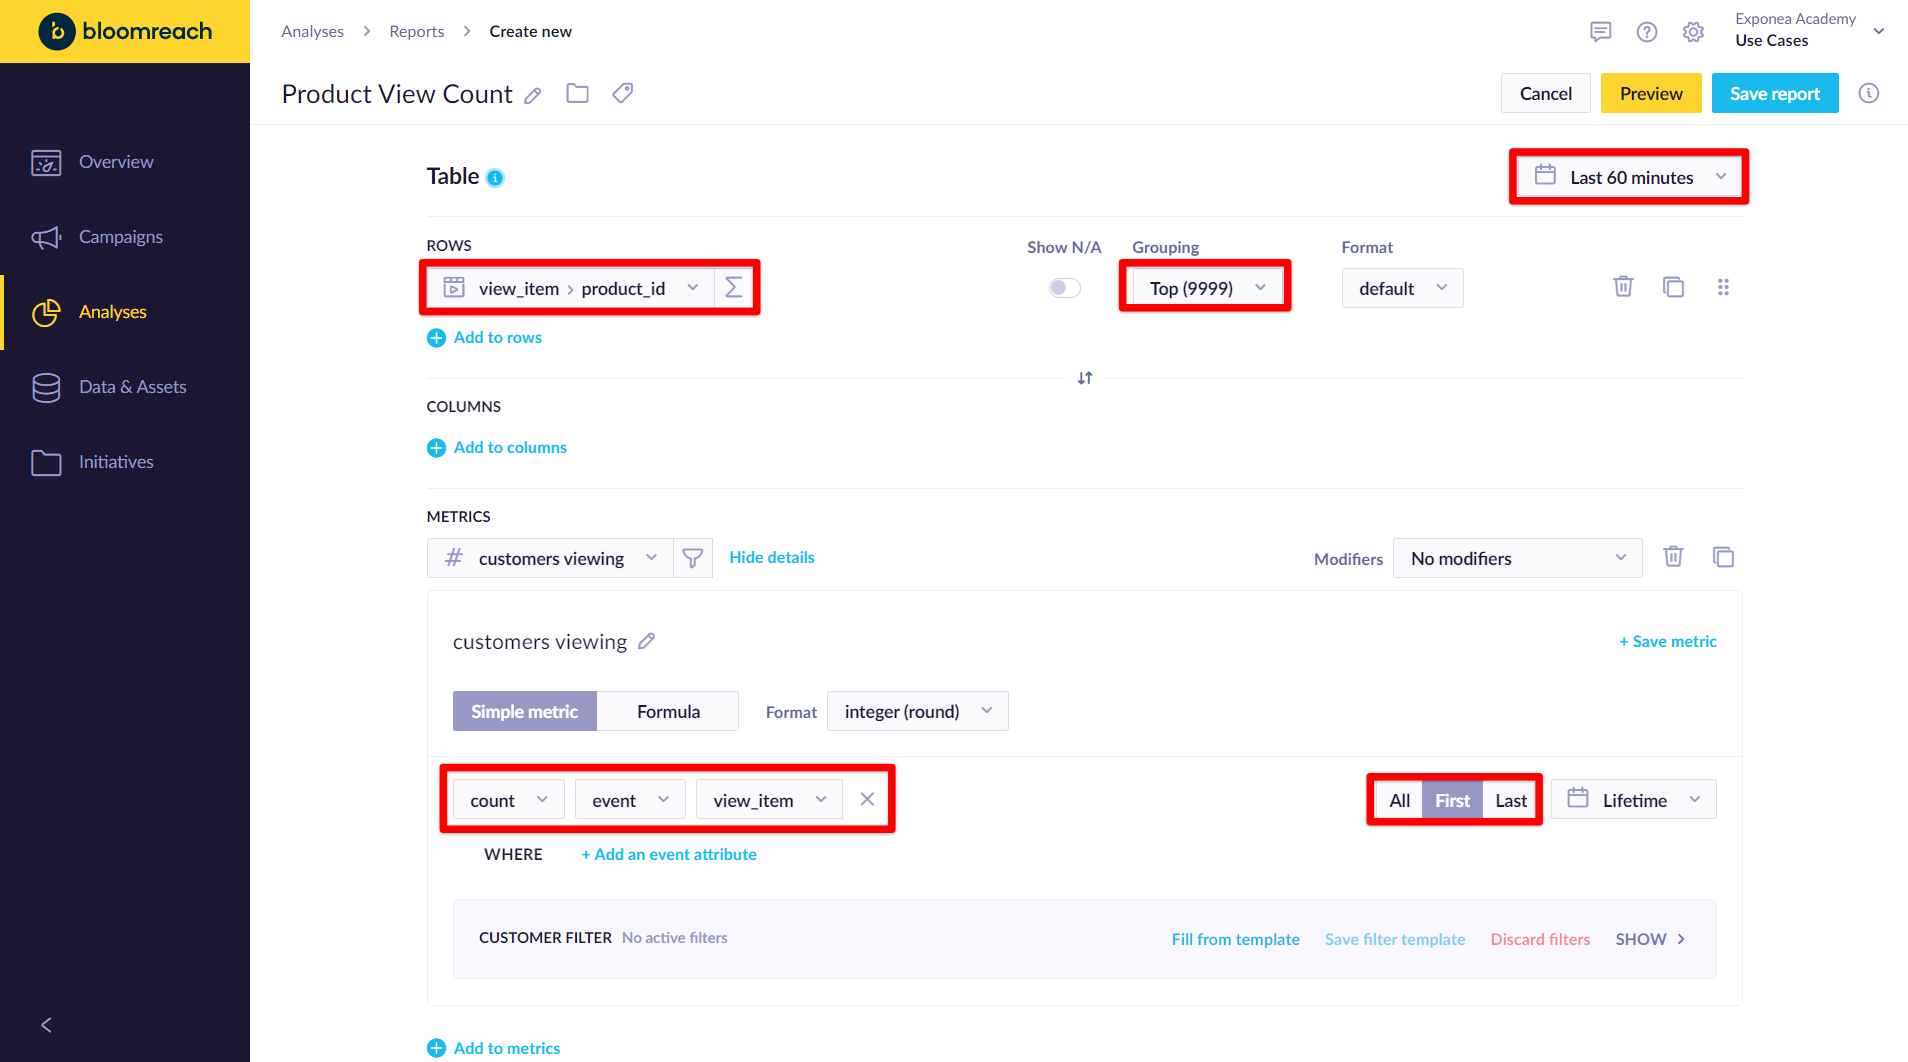
- ROWS: Select event
view_itemand thenproduct_idSet grouping Grouping: top(9999). The grouping ensures the report doesn't get too big, which might slow down the performance. - In METRICS, select "count > event > view_item" and select "first" to count only unique customers viewing each product.
- Select the time filter as needed. In our case, select "custom relative range" and then "last 60 minutes". You can read more about how filters work here.

1.1. Save the report ID
✅ Save the report and make note of the report ID, which you will need later. You can find the ID in the URL:
https://demoapp.exponea.com/p/use-cases/analytics/reports/626db74fa8b379c69cae7e0a/edit
The report ID would be 626db74fa8b379c69cae7e0a. You can read more about using and referring to IDs here.
2. Create a web layer
Now let's create the web layer that will be shown on the top of your product pages.
Create a new Weblayer and choose one of the predefined templates such as "Notification Box" or create your own from scratch. You can customize the design on your chosen template. In this example, we decided to delete accompanying image and change the background color to our Bloomreach dark blue.
2.1. Edit the dynamic text in the web layer
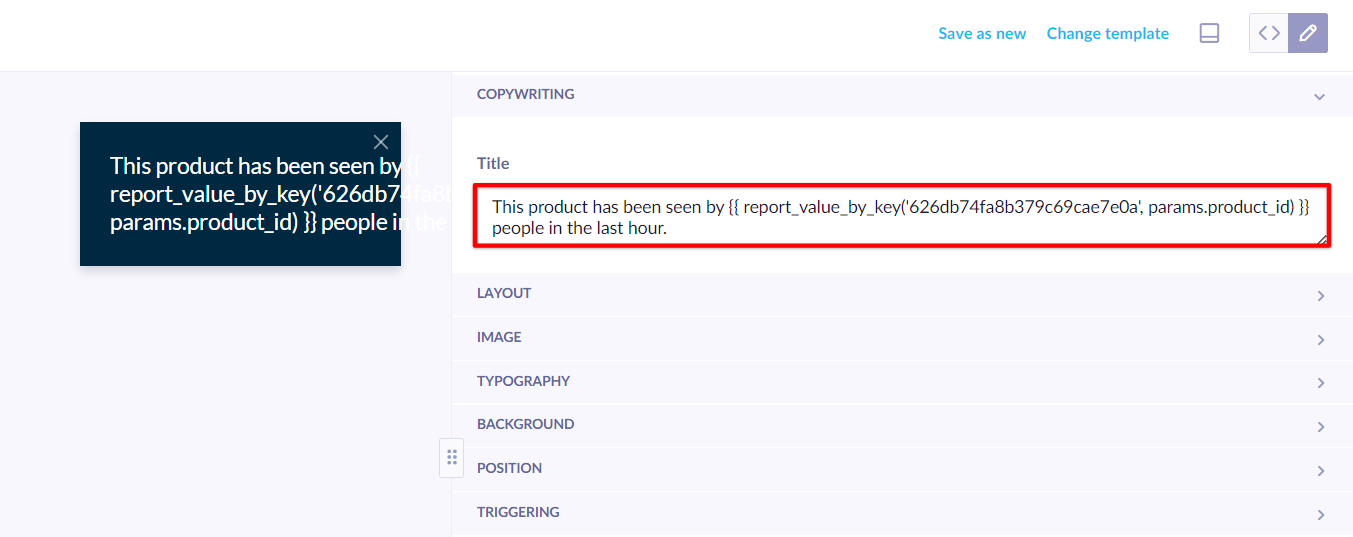
Change the text showcased in the template version to your desired View Count Notification text. For example, you may want it to display "This product has been seen by 73 people in the last hour." We now want to substitute the number 73 with a dynamic (real) number from the created report. This is done through a Jinja code referring to our report:
{{ report_value_by_key('report ID', params.product_id) }}
Replace the report ID with the real ID of the report you created, as explained in the previous section. Hence, the final text would look like this:
This product has been seen by {{ report_value_by_key('626db74fa8b379c69cae7e0a', params.product_id) }} people in the last hour.

2.2. Setting minimum view thresholds
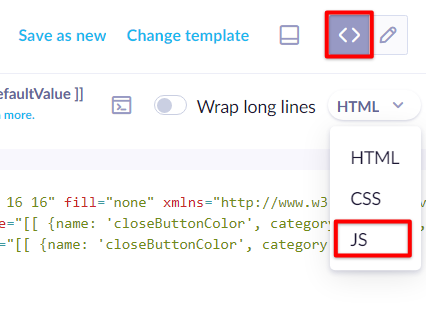
You might not want to display the web layer if a particular product has been viewed by only 1 or 2 people. You can set your own threshold by editing the JS code of the web layer.

Insert the following code snippet before the existing JavaScript code of the web layer:
var viewThreshold = 10 ;
var count = parseInt("{{ report_value_by_key('report ID', params.product_id) or 0 }}");
if (count < viewThreshold) {
    return;
}
Set "viewThreshold" to the minimum of unique visitors needed to show this notification web layer. In this case, we set it to 10. Don't forget to replace the report ID again.
Insert the snippet into all variants
You need to insert this threshold condition into the code of every variant, even the control group. Otherwise, the reached audiences will be different for each variant and your AB test evaluation will be corrupted.
2.3. Save the web layer ID
✅ Save the web layer and make note of its ID, which can be found in the URL in the same way as it was for the report.
3. Set the trigger code
This code will run on the product pages only and will trigger the view count web layer to show. We will use the Tag Manager to set it up.
Create new "Custom JavaScript code" tag in Data & Assets > Tag Manager > New and insert the snippet below.
// insert the code from step 3.1 here
exponea.showBanner("web layer ID", { "product_id": product_id });
- Replace
web layer IDwith your own web layer ID from the previous step. - Assign currently viewed product ID to the
product_idvariable. The next step explains how to do this.
3.1. Getting the product_id
You can get (or "parse") the product_id either from the URL or as a JavaScript variable. Whichever way you choose, paste the code in the first line of the trigger code above.
Product_id from URL
You can use an advanced regular expression to parse product_ID from the product page URL. The expression needs to be adjusted to reflect the structure of your URL.
var m = location.href.match(/https:\/\/www\.yourweb\.com\/products\/[a-z\-]+\/(\d+)/);
var product_id = parseInt(m[1]);
Product_id as a JavaScript variable from the data layer
This needs to be adjusted to reflect your data layer structure. In the example below, we use e-commerce, which is a common layer for the data structure.
Please note that this approach does not work, where there are multiple e-commerce objects in the data layer. An error Uncaught TypeError: Cannot read properties of undefined (reading 'products') will be displayed because the products are not part of the impressions.
var product_id = exponea.gtm.getValue('ecommerce').detail.products[0].id;
Example of the final code
If we decide to parse the product_id from our data layer, this is how the final trigger code would look like:
var product_id = exponea.gtm.getValue('ecommerce').detail.products[0].id;
exponea.showBanner("5989b2dc830434ee5bdb08dd", { "product_id": product_id });
Prerequisite
To use helper functions such as
exponea.gtm.getValue(), which looks through the dataLayer, make sure that Bloomreach Engagement Tracking Toolkit tag is set up and started. You can either copy just the function you need or use the whole tag. To set it up, navigate toData & Assets>Tag Manager>New. Create new “Custom Javascript code”, choose Bloomreach Engagement tracking toolkit from the template, set its priority to 999 and start it.
4. Launch
Start the trigger code in the Tag Manager to launch your view count notification. Do not start the web layer too, as it is already invoked from the trigger code in the tag.
We also strongly recommend testing the web layer first. Go to "Settings" of the tag and use filters to set the desired audience. For example, you can set to show this banner only to yourself by selecting cookie > any item > equals > *paste your cookie*.
Great job!
You have created a view count web layer. Now let's see if it helps to convert more of your visitors into customers.
5. Evaluate
See our guide AB Test Basic Evaluation to learn how to create a basic AB test evaluation report.
Keep in mind that the control group must be subject to the same conditions as the other variants, including the view threshold, as discussed in step 2.2
Updated about 2 years ago
