

Databases and secure connections
This guide explains how to protect personal data transmitted over the internet and imported into Bloomreach by setting up an SSL/TLS connection, an SSH tunnel, or both.
NoteKeeping customer data secure is our priority. You must set up either an SSH tunnel or encrypted SSL/TLS communication — or both.
Prerequisites
Before you begin, open the correct port on your firewall:
- Port 443 for an SSL/TLS connection.
- Port 22 for an SSH connection. You can also use other ports for SSH tunnels.
Supported databases and connection types
Bloomreach supports secure connections for the following databases:
| Database | SSL/TLS | SSH tunnel | Static IPs | Notes |
|---|---|---|---|---|
| Amazon Redshift | Supported | Supported | Supported | |
| Azure SQL, MS SQL | Not supported | Supported | Supported | SSL/TLS unavailable. Use SSH tunnel and/or allowlist Bloomreach's static IPs on your firewall. |
| BigQuery | Supported (enforced) | Not supported | Not supported | BigQuery manages its own TLS. |
| Databricks | Supported (enforced) | Not supported | Supported | Databricks manages its own TLS. |
| MySQL | Supported | Supported | Supported | |
| PostgreSQL | Supported | Supported | Supported | |
| Snowflake | Supported (enforced) | Not supported | Supported | Snowflake manages its own TLS. |
Create a database integration
Every database integration uses the same configuration form. Fill in the following fields:
- Hostname: The public IP or hostname of your database (for example,
28.783.11.22ordb.exponea.com). - Port: The TCP destination port for your database (for example,
1433). - Username: The name of the user with access to your local database (for example,
exponea). For MS Azure SQL, use the formatusername@hostname(for example,[email protected]). - Password: The password for the user with access to your local database.
- Database name: The name of the database you want to access.
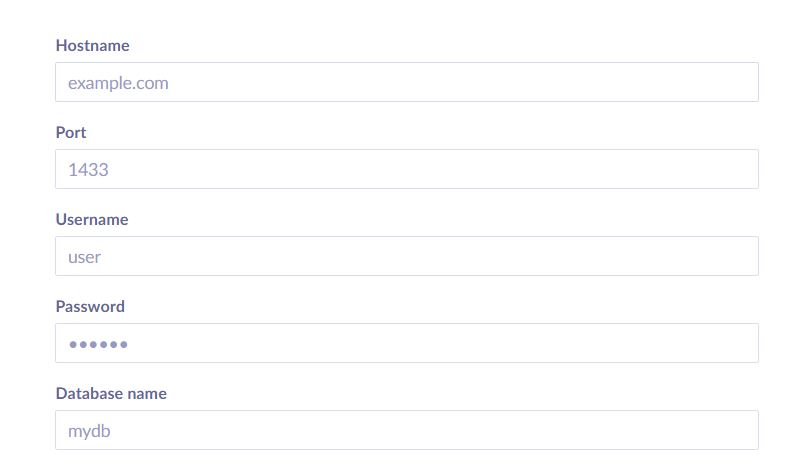
The database integration configuration form.
Configure secure connections
Bloomreach supports SSL/TLS encryption and SSH tunnels to secure communication between your server and the application. Available options depend on the database—some databases manage TLS automatically, while others require you to upload your own certificates.
Enable SSL/TLS encryption
- Click Enable to turn on the SSL/TLS connection.
- Import your SSL/TLS certification authority certificate (load the SSL/TLS CA file).
- Import your SSL/TLS certificate (load the SSL/TLS Cert file).
- Import the private key of your server (load the SSL/TLS Key file).
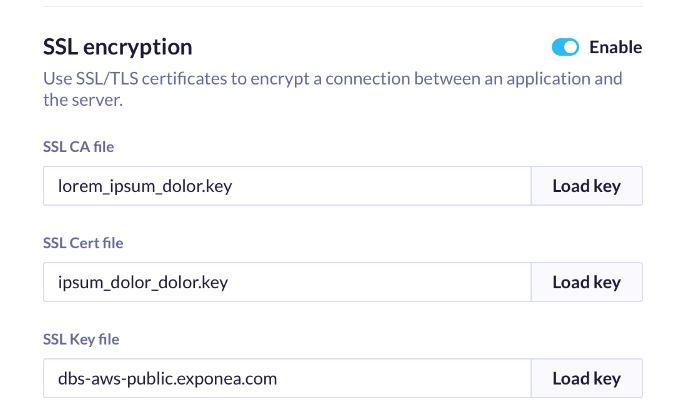
The SSL/TLS configuration panel.
For an example of how to enable SSL/TLS with MySQL, see How to configure SSL/TLS for MySQL on Ubuntu 16.04.
Set up an SSH tunnel
SSH tunnels have their own configuration window. Access it via Project settings > SSH tunnels. Only users with Dev tools permissions can configure SSH tunnels. For details on roles and permissions, see Access management.
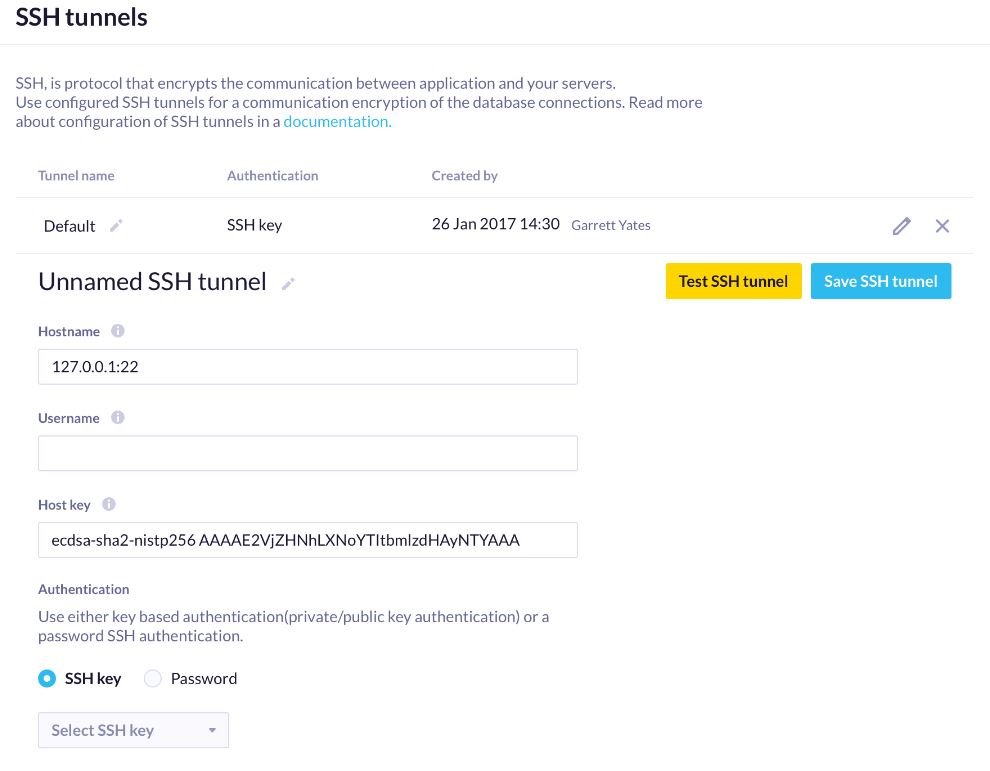
The SSH tunnel configuration window in Project settings.
Fill in the following fields:
- Hostname: The hostname of your SSH server and its port, separated by a colon.
- Username: The username for identifying the SSH user.
- Host key: The fingerprint of your server's public key, used to verify the server's identity. You can find this in the
known_hostsfile on any device that has successfully connected to your server via SSH. For more details, see WinSCP's guide to host keys.
ImportantHost keys verify that you're connecting to the correct remote server. Without them, your connection is vulnerable to attacks such as DNS spoofing.
Find host key
If this is your first time connecting to your SSH server, start by establishing an initial connection:
- Connect to the SSH server:
ssh user_name@server_ip_addressReplace user_name with your username and server_ip_address with your server's IP address. Once connected, type exit to close the session.
If SSH doesn't work due to unsupported key encryption formats, connect using an FTP client such as FileZilla or CyberDuck. Try multiple clients if needed.
- On your local machine, navigate to the
.sshdirectory:
cd ~/.sshOpen the known_hosts file. Each line follows this format:
server_ip_address server_host_keyCopy the host key that matches your server's IP address and paste it into the Host key field.
If the host key isn't in known_hosts, navigate to the .putty directory:
cd ~/.puttyOpen the sshhostkeys file and find the host key in the same format. Copy and paste it into the Host key field.
If the host key still doesn't work, contact your hosting admin or support team. Note that OpenSSH manages SSH connections — the OpenSSH version on your local machine must support the encryption protocol used by the server, otherwise OpenSSH KeyGen won't display the host key in the correct format.
For Authentication, choose one of the following:
- SSH key: Generate a new key pair and import the public key to your SSH server.
- Password: Enter the password for your SSH server.
Use static IP allowlisting
To improve your security posture, allowlist Bloomreach’s outbound IP addresses in your database firewall or network access controls. For supported database integrations, Bloomreach connects from a fixed set of IP addresses, so you can restrict access to connections originating from Bloomreach only.
Find the IP addresses for your instance in Project settings > Security or Workspace settings > Security. For supported integrations and setup instructions, see Outbound IP addresses.
Assign SSH to a database integration
All supported integrations include the option to enable SSH. When you enable SSH integration, select an active SSH tunnel to assign to that database.
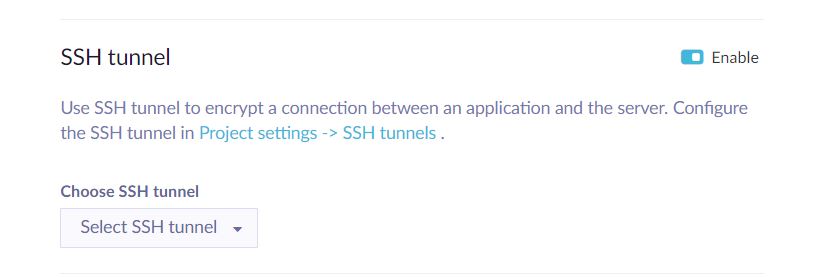
Assigning an active SSH tunnel to a database integration.
Updated 5 days ago