Google Analytics Ad Audiences
Google Ads Analytics
Google Ads Analytics integration was deprecated.
Remarketing campaigns show advertisements to people who visited your online store but are now on other websites. Bloomreach Engagement allows you to create marketing automation scenarios that reach out to these customers and present personalized messages to them.
This guide explains how to create a remarketing scenario that makes a remarketing audience from your website's customer list and uploads their details to Google Ads.
Google Analytics
Google Analytics link is an experimental feature with some limitations to consider. The data imports feature in Google Analytics integration only allows the creation of audiences for customers who visited the website in the last 30 days and have consented to ads and retargeting. Our tests have shown that many clients lose a significant portion of cookies during the matching process. We have contacted Google regarding this issue but couldn't pinpoint the exact root cause.
Until this is resolved, we recommend using the native Google Ads integration for creating Customer Match audiences in Google Ads. It is newer and more reliable, providing some new possibilities, such as targeting the Display network, User ID audiences, integration with DV360, and so on. Google has also recommended using this approach instead of data imports.
There are 2 possible ways of integrating Bloomreach Engagement with Google Ads audiences:
-
Connect your Google Ads account with Bloomreach Engagement and use Google’s Customer Match feature to create custom audiences based on the customer’s email address or mobile ID if you want to retarget your mobile application users. Note: Using this option, you can only target customers through Search, Gmail, and YouTube.
-
Connect your Google Analytics account with Bloomreach Engagement and create a Google Analytics audience based on the Google Analytics cookie. Then import this Google Analytics audience to Google Ads. Note that this is an experimental feature that is still under development. However, it allows you to target customers through the Google Display Network, which is not possible through Google Ads Customer Match integration.
This article will explain how to create a Google Analytics audience and use that for retargeting. To learn how to achieve this through Google Ads Customer Match instead, click here.
Retargeting through Google Analytics
Implementation requirements
- Edit rights for your Google Analytics account.
- Edit rights for your Google Ads account.
- Publish access to the Google Tag Manager container.
- Google Analytics property linked to Google Ads account.
- Your website uses the latest Google Analytics tracking library. The legacy ga.js library isn't supported by Bloomreach Engagement SDK.
Implementation process
Integrate Google Ads and Google Analytics accounts with Bloomreach Engagement project
Go to integrations and connect your Bloomreach Engagement project to your Google Ads account.

Then do the same with your Google Analytics account.
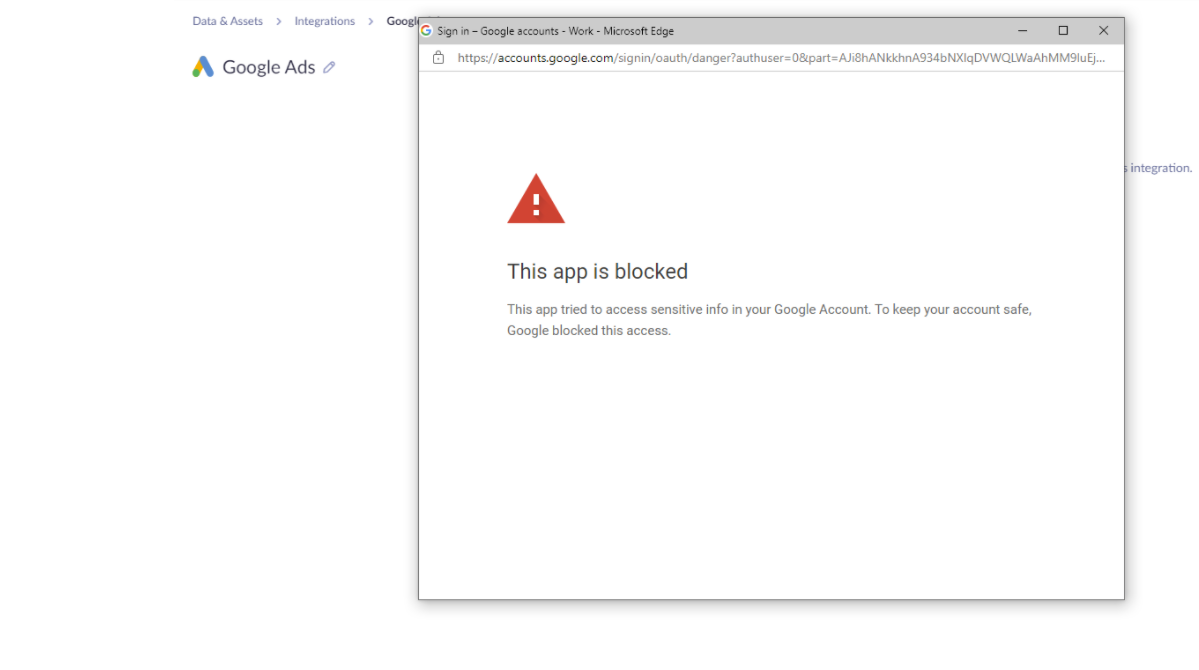
In case you encounter an error "This app is blocked" or similar, contact our Support. Note that Google requires your Bloomreach Engagement instance to get verified by Google prior to integrating since Bloomreach Engagement processes sensitive customer data. Our Support will engage in the verification process once contacted.
Set up and check Google Analytics cookie tracking in Bloomreach Engagement
a. Set up Google Analytics tracking in Web Integration settings and copy the updated snippet into your website (turning on the checkbox in Web integration settings will not start to track GA IDs automatically without updating the snippet on your website).
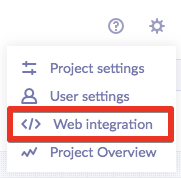
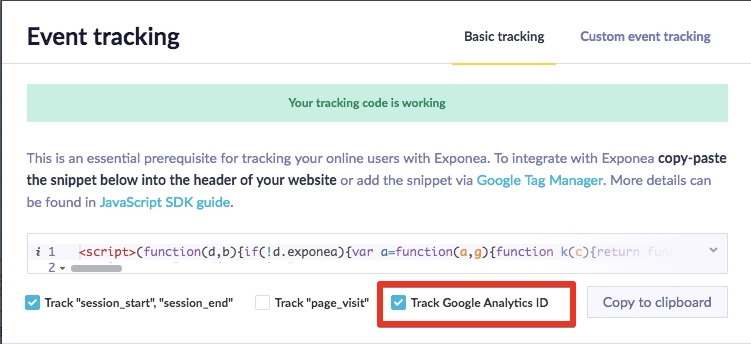
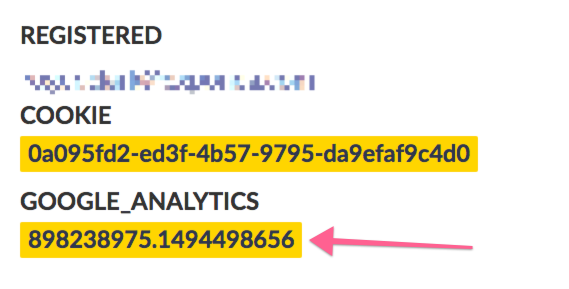
b. Verify that Bloomreach Engagement is tracking Google Analytics Client ID correctly. You can do this by looking at any customer who has visited your website Data & Assets > Customers.
Create 2 custom dimensions in Google Analytics that will be used to store the data needed to create custom audience segments.
a. In Google Analytics property settings, create two new custom dimensions:
-
“Client ID tracked online” dimension, User Scope - this will be used to store information about Client ID for a particular customer in Google Analytics. This is needed because Google Analytics can create audiences based only on User ID or other parameters such as custom dimensions, but not based on a Client ID.
-
“Custom User Dimension: Attribute 1” dimension, User Scope - this will be used to store the name of the audience segment for retargeting.
b. Mark the index numbers of these customer dimensions, you will need that later.
Set up the tracking of Client ID into the newly created Google Analytics custom dimension
a. Ensure that you are storing the Google Analytics Property ID in a Constant Variable for easier management. You can name it GA Property tracking ID.
b. Create a new Custom JavaScript variable in your Google Tag Manager container. Name: Get Client ID for current Tracker
c. Insert the following code that will grab the current client ID:
function() {
  try {
    var trackers = ga.getAll();
    var i, len;
    for (i = 0, len = trackers.length; i < len; i += 1) {
      if (trackers[i].get('trackingId') === {{GA Property tracking ID}}) {
        return trackers[i].get('clientId');
      }
    }
  } catch(e) {}
  return 'false';
}
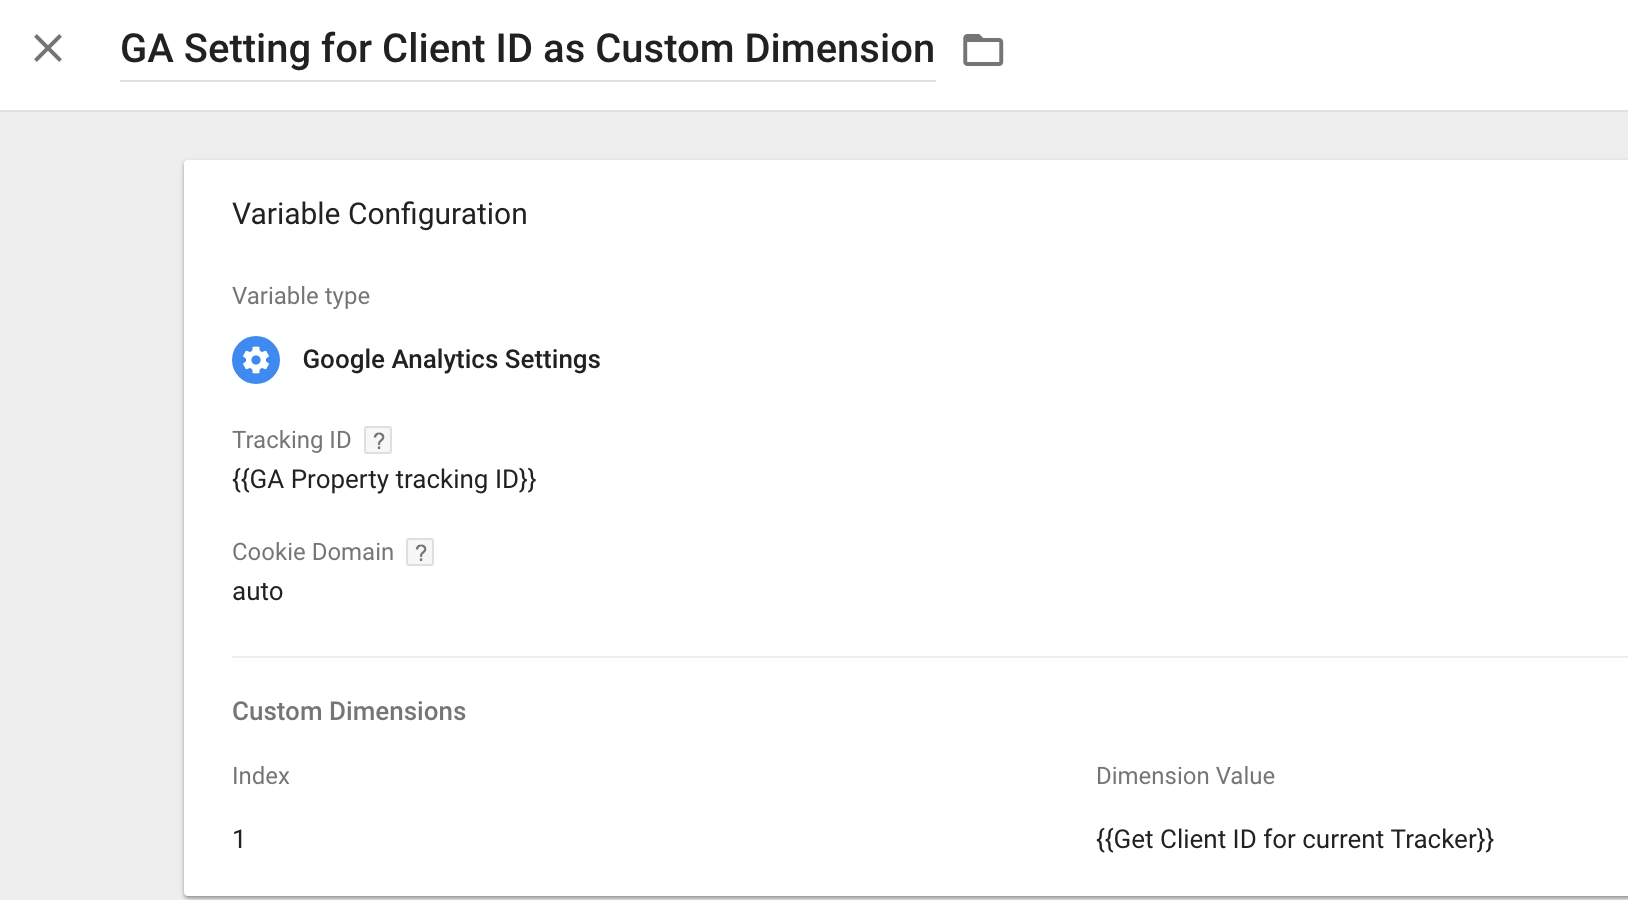
d. Set up a new variable of type Google Analytics Settings, which will store the Client ID into one of the GA custom dimensions. Index of the custom dimension should be the same as you’ve created in STEP 2. Name: GA Setting for Client ID as Custom Dimension
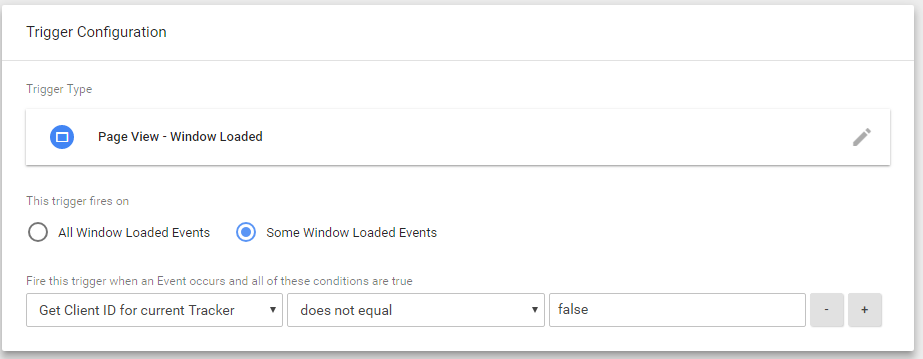
e. Create new trigger “Page view - client ID exists” (type Window Loaded) + settings This trigger fires on “Some Window Loaded Events” and condition “Get Client ID for current Tracker does not equal false”
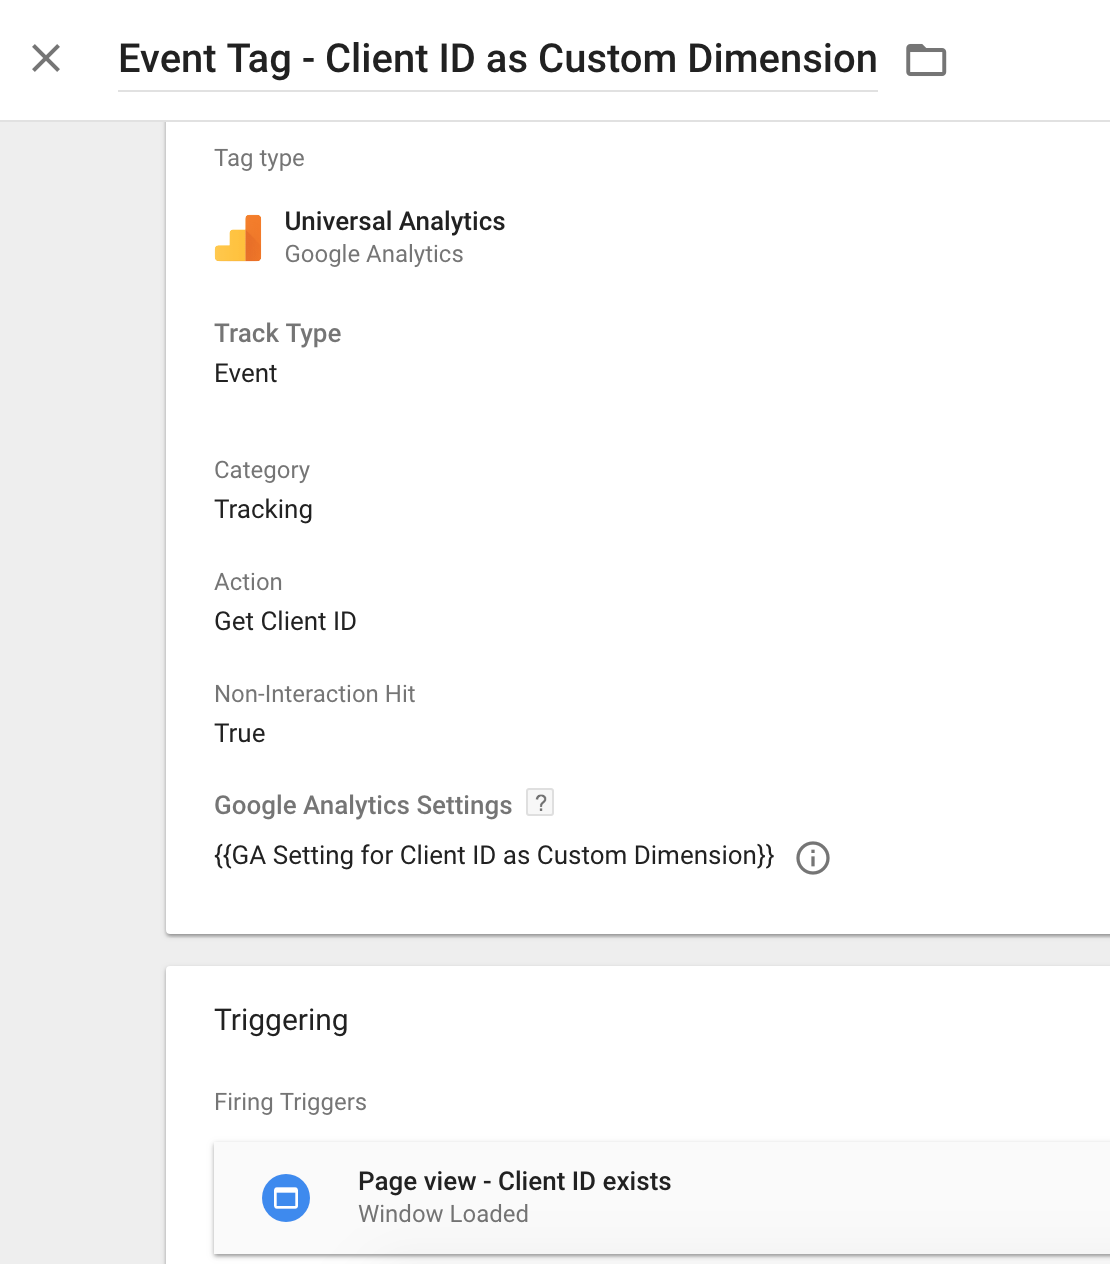
f. Create new tag “Event Tag - Client ID as Custom Dimension” that is triggered by trigger “Page view - client ID exists”
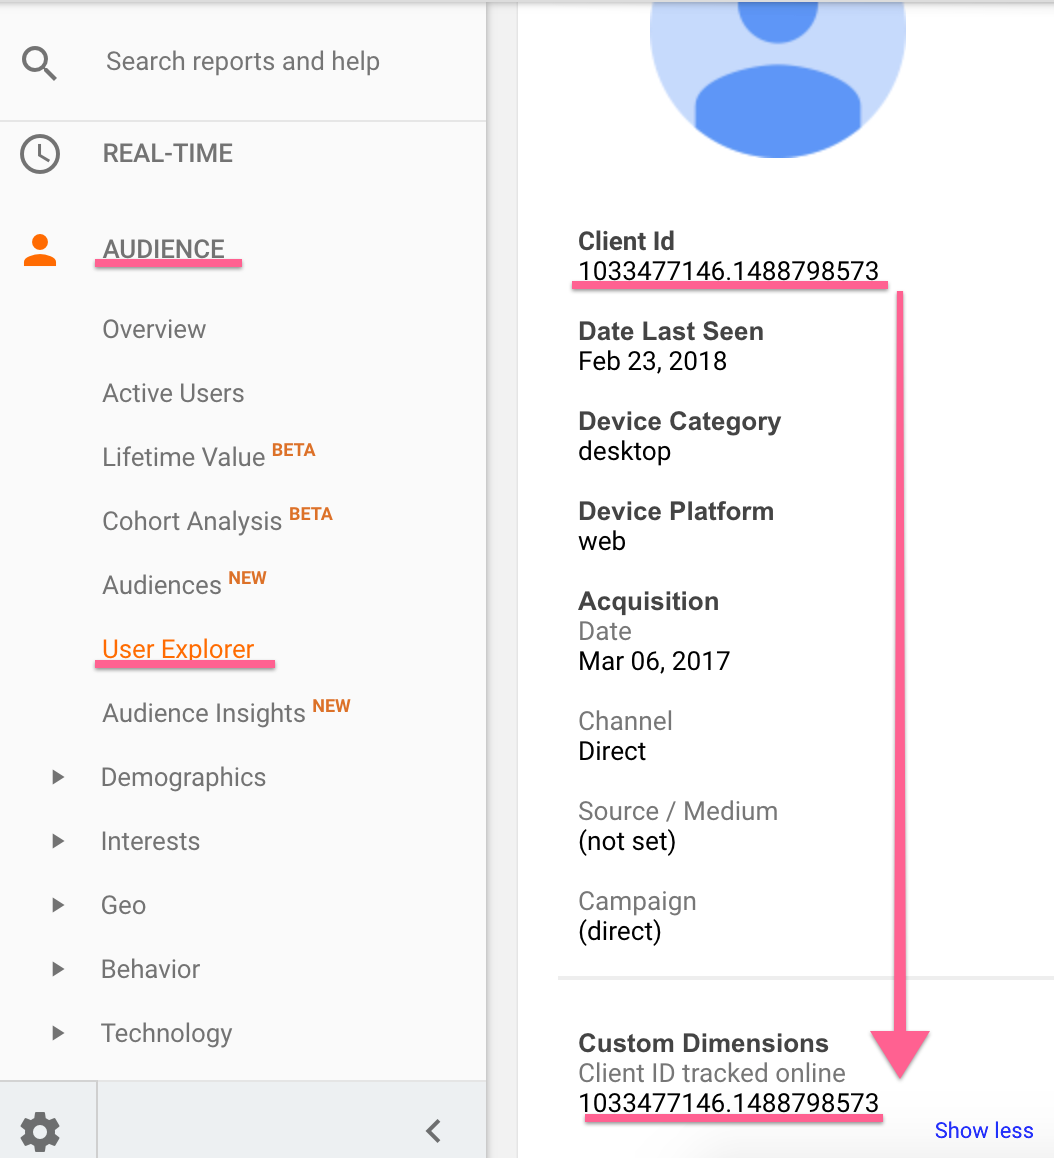
g. Google Tag Manager will now store Google Analytics Client ID into defined custom dimension. We can check if this is working correctly in Google Analytics User Explorer report after a few hours after publishing the GTM container update.
Configure import data set in Google Analytics
In this step, the data structure will be set up in which Bloomreach Engagement will be sending data to Google Analytics.
a. Create new data import in Google Analytics Property Settings > Data Import > New
b. Data Set type: Custom data
c. Name the data set and choose views into which the data will be imported
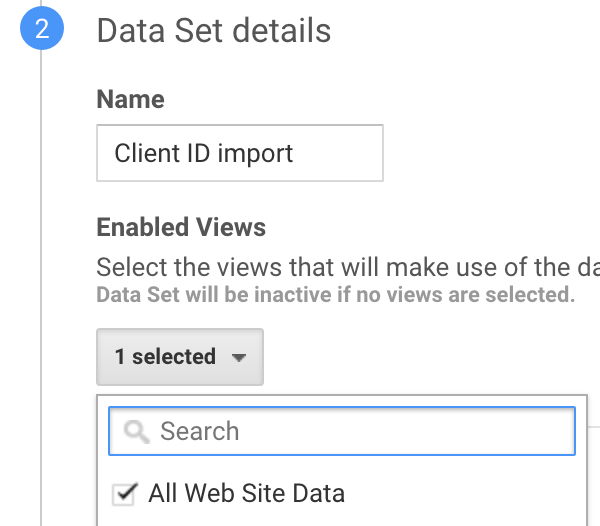
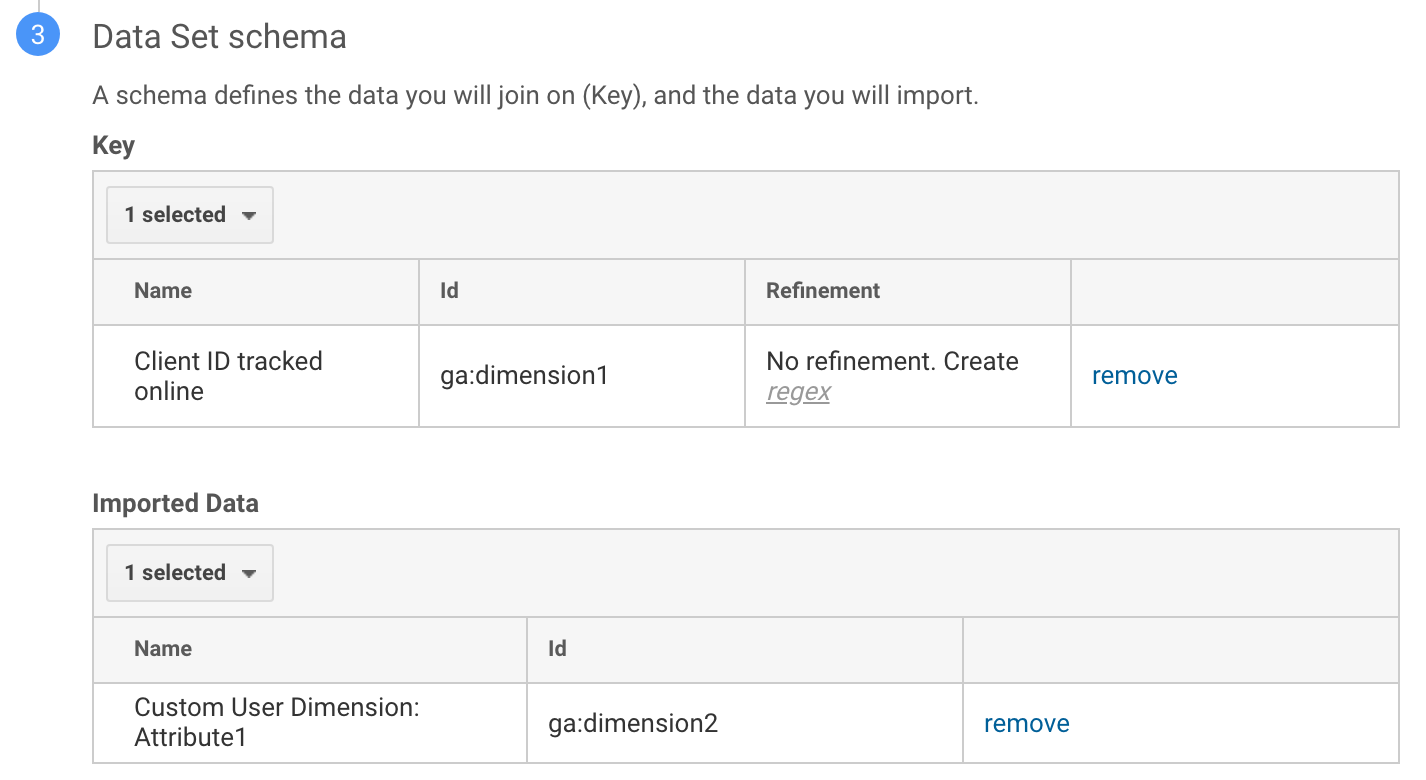
d. Set custom dimension “Client ID tracked online” (index 1 in our case) as Key. Set custom dimension “Custom User Dimension: Attribute 1” (index 2 in our case) as Imported data.
Configure the Retargeting node in Bloomreach Engagement scenario builder
a. Go to Engagement's Scenario Builder and add a new retargeting node.
b. Set up the retargeting node as Google Ads node that will use Google Analytics link.
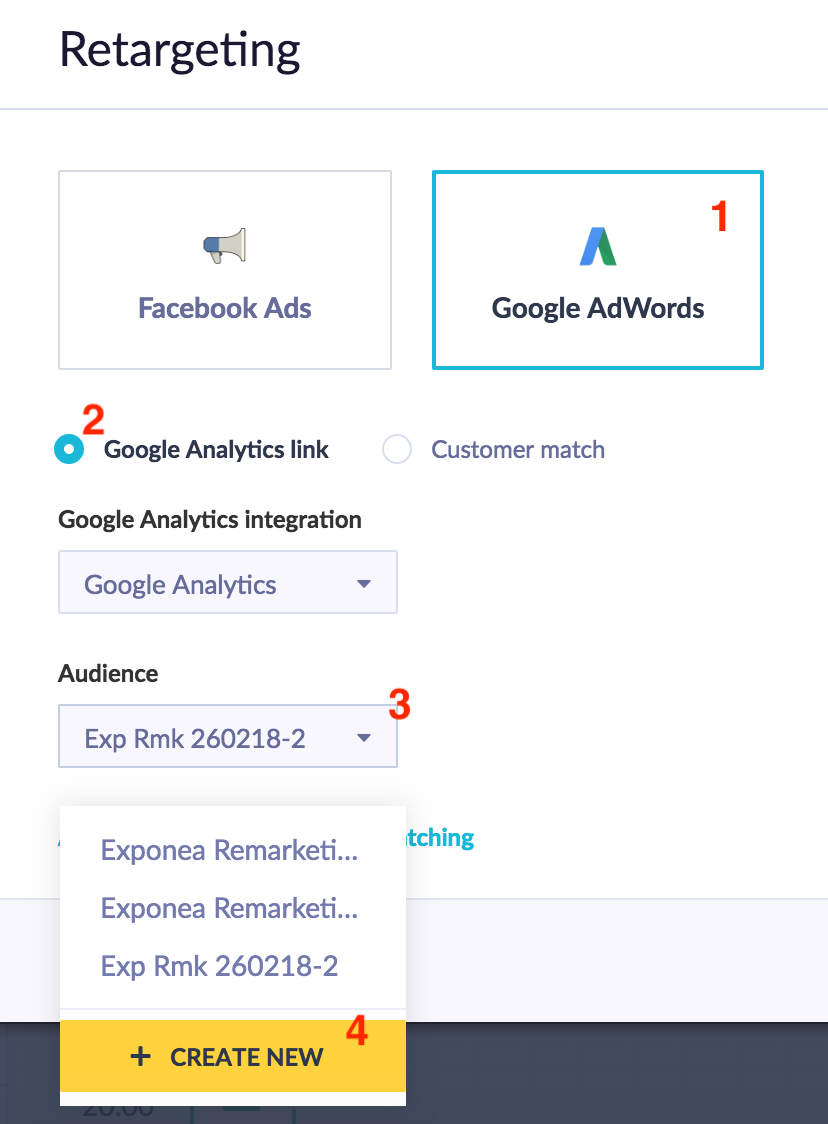
c. In the Audience dropdown box, select **Create new** option to create a new audience.
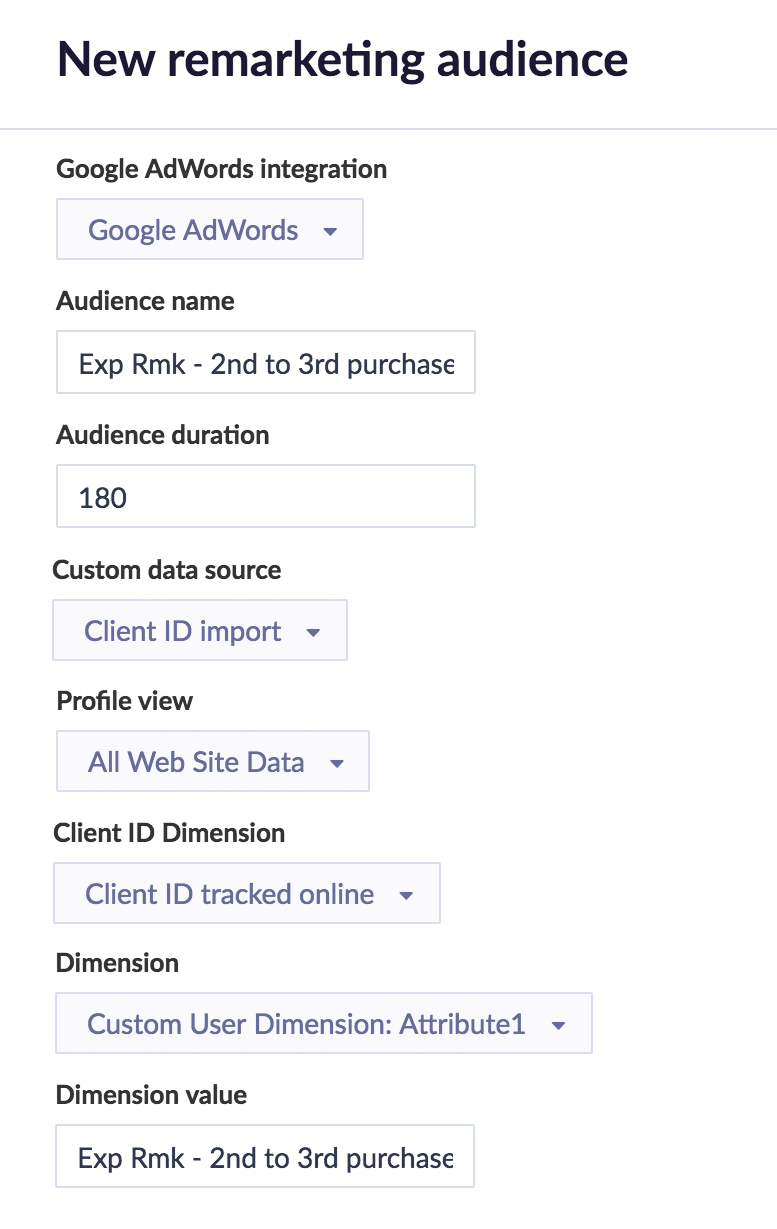
d. Set up the new remarketing audience by filling out the following details:
| Explanation of details |
|---|
| 1. Google Ads integration - select which Google Ads integration you would like to use. Usually, you need only one integration in Bloomreach Engagement. 2. Choose your own Audience name - this is how the audience will end up showing up in Google Analytics and Google Ads. 3. Choose Audience duration - the number of days until customers in the audience will expire. By default, this is set to 180 days (you can change it up to 540 days). 4. Set Custom data source based on the name of the Data Import that you have created in step 4, e.g., “Client ID import”. 5. Profile view - choose the same Google Analytics view that you have configured in step 4. 6. Client ID Dimension - choose the name of the first custom dimension in GA that you have created in step 2, e.g., “Client ID tracked online”. This dimension is used to track Client IDs in GA in separate dimensions, which is needed for the data import to work correctly. 7. Dimension - choose the name of the second custom dimension in GA that you have created in step 2, e.g., “Custom User Dimension: Attribute 1”. This dimension will store the name of your custom audience segment. 8. Dimension value - This is the name of the audience you would like to store in the Custom Segment dimension. |
Create a custom audience in Google Analytics and link this audience to Google Ads Account
a. In Google Analytics Property settings, Audience Definitions, create a new audience by using the conditions as indicated in the screenshot below:
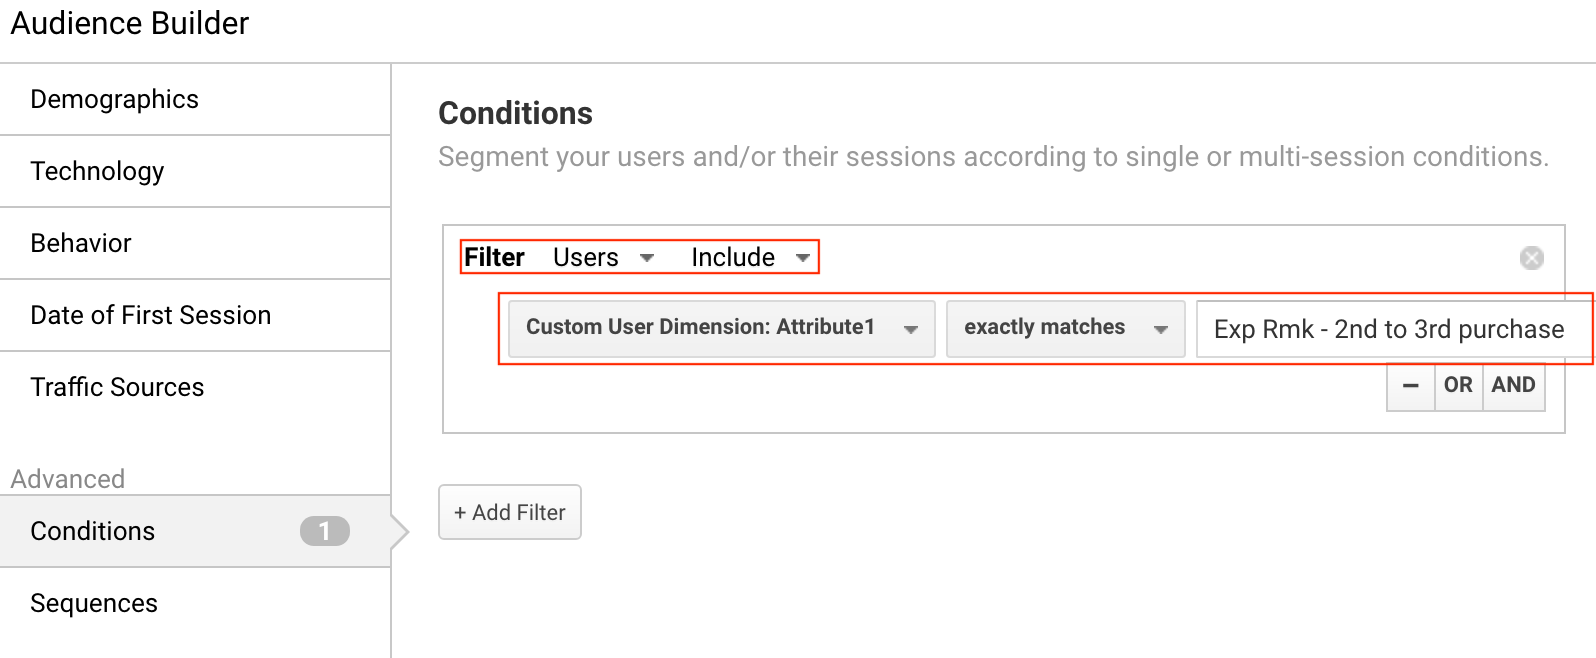
b. Choose the Ads account ID that you would like to use to import this audience into.
Create scenario logic in Bloomreach Engagement and launch the scenario
You can create any simple or advanced scenario logic to be used for triggering the retargeting node. You may find a simple example below, which imports all customers with email addresses into the Google Ads audience.

Remember that sending customers’ private information from Bloomreach Engagement to advertising platforms is not something your customers might expect. Make sure to do this only after considering and implementing all the necessary legal and regulatory requirements.
Wait a few days and monitor the audience size in Google Analytics Property settings (Audiences). Depending on your website traffic, it might take 1-3 weeks to populate your Analytics audience based on Bloomreach Engagement data.
Configure and launch the campaign in Ads to use your custom audience created by Bloomreach Engagement
Related resources
For more detailed information, check our documentation about:
Updated 3 months ago
