

Set up the ResDiary integration
ResDiary is a reservation and table management system for restaurants and hospitality businesses. Integrating ResDiary with Bloomreach lets you bring booking and consent data into your project in real time, build richer customer profiles, and create personalized campaigns that span the full guest journey, from reservation to post-visit follow-up. This guide walks you through how the integration works, what data it syncs, and how to configure the webhook URL in the ResDiary API Portal.
How the integration works
The ResDiary integration syncs the following data with Bloomreach. Booking and consent events are exported in real time.
- Booking events.
- Consent events.
- Customer profiles.
Use cases
The following examples show common ways to use the integration:
- Post-booking upsell emails: Set up automated touchpoints between booking and departure to upsell products, share engaging content, and build brand loyalty.
- Welcome cycle with personalized vouchers: Send new subscribers a personalized voucher as soon as they confirm their email. Add the voucher to the customer profile so it appears across all campaigns until it's redeemed or expires.
- Foodie segmentation: Create granular customer segments based on which restaurant a customer visits or what they order. Use those segments to deliver personalized offers that match individual interests.
- Personalized menu options: Use weblayer banners with zero-party data collection to gather food preferences. Then personalize content with offers relevant to each segment, for example, vegetarians, vegans, or gluten-free diners.
Prerequisites
Your project must have the following customer IDs configured before setting up the integration:
email_id: A hard ID (lowercase, trimmed). The email address is the primary customer identifier.phone_id: A soft ID. Refers to the customer's mobile number, sourced from either a booking event or acustomer_updateevent.
ImportantSome single-tenant and new multi-tenant instances require manual activation of the ResDiary integration by the engineering team. You can request this during a new instance setup or at any time by contacting Live Chat or your Customer Success Manager.
Set up the integration
1. Add the integration
Go to Data & Assets > Integrations and search for ResDiary.
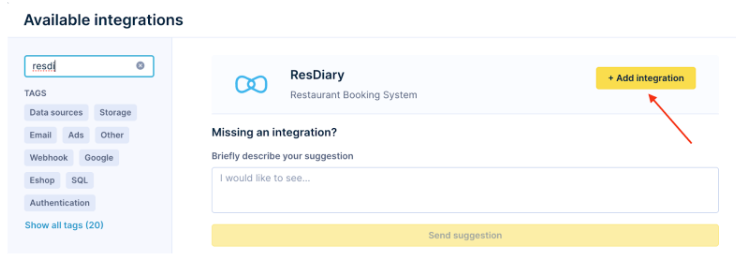
Search for ResDiary in the Integrations page and click + Add integration.
2. Define customer IDs
Define how ResDiary identifiers such as email_id and phone_id map to customer records in your project.
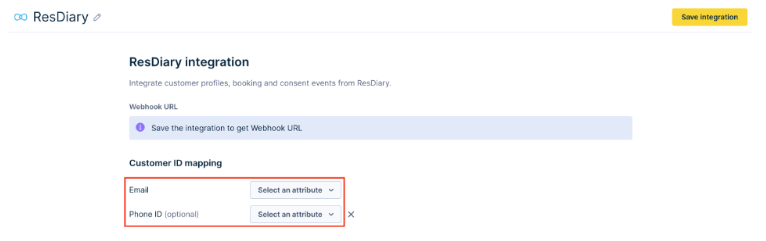
ResDiary integration page showing customer ID mapping fields before saving.
3. Generate the webhook URL
Click Save. Bloomreach generates a unique webhook URL for your integration.
NoteKeep your webhook URL confidential. It's unique to your project and should not be shared with anyone.
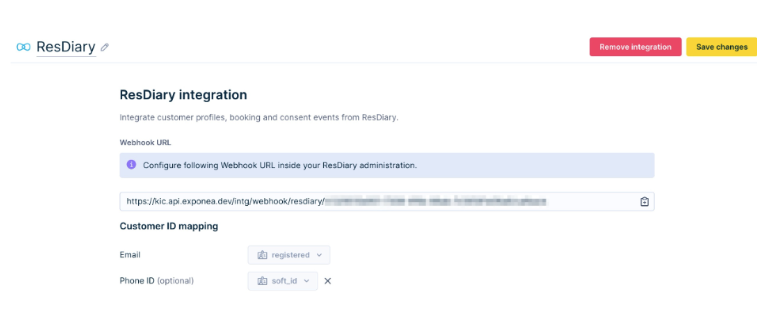
ResDiary integration page showing the generated webhook URL and customer ID mapping.
4. Register the webhook URL
Go to the ResDiary API Portal and register the webhook URL for the restaurants you want to integrate with.
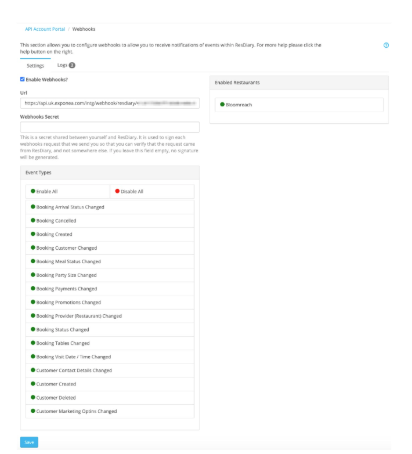
ResDiary API Portal webhook settings showing the Bloomreach URL and event types.
NoteTo log in to the ResDiary API Portal, use your API username and API password. These are different from your standard ResDiary login credentials. If you don't have your API credentials, contact the ResDiary team.
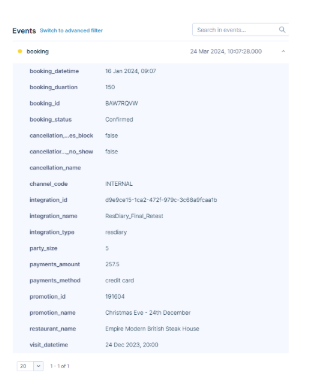
Booking event in the customer profile showing ResDiary data attributes.
Updated 4 months ago