

Omnichannel post-purchase NPS survey


Use case description
After a customer completes a purchase, you want to measure their satisfaction and collect actionable feedback. This use case automatically sends a Net Promoter Score (NPS) survey by email 14 days after purchase (timing is adjustable). If the customer doesn’t respond to the email but visits your website, a banner (weblayer) with the same survey appears.
This omnichannel approach increases response rates, helps you reach customers who ignore email, and provides valuable insights to improve your customer experience.
Key features
- Collects post-purchase feedback via email and website weblayer.
- Reaches non-responders by displaying the survey as a banner on your website.
- Segments customers based on NPS score for targeted follow-up.
- Uses conditional follow-up questions to gather detailed feedback.
- Excludes product returners from receiving the survey.
- Supports both native and third-party surveys for flexibility.
- Tracks and visualizes NPS results in a custom dashboard, separated by channel.
Use case items
- Evaluation dashboard: Visualizes NPS results from both email and weblayer.
- Automated NPS email: Sends the survey to customers with valid email and consent, after a set delay.
- Automated NPS weblayer: Displays the survey as a banner to customers who visit your site but haven’t responded to the email.
- NPS segmentation: Groups customers by their NPS score.
- Conditional survey logic: Shows different follow-up questions based on the NPS score.
How to deploy the use case
Understand the scenario logic
- Customer makes a purchase and enters the NPS flow.
- NPS email is sent after a set delay (default: 14 days) to customers with valid email and consent.
- Exclude customers who returned their product (if return tracking is set up).
- Email contains a 1–10 NPS scale. Clicking a score opens the survey with follow-up questions tailored to that score.
- If no email response: When the customer visits your website within 21 days of purchase, a weblayer banner with the survey appears (shown up to three times).
- All survey responses are tracked for analysis.
Customize your survey
You can use either Bloomreach native surveys or a third-party survey tool.
Use the following tabs in Bloomreach to customize your NPS Survey:
- Design > Form to manage questions.
- Design > Translation for custom texts and post-survey messages.
- Design > CSS and JS for styling and advanced customization.

A. Set up your survey structure
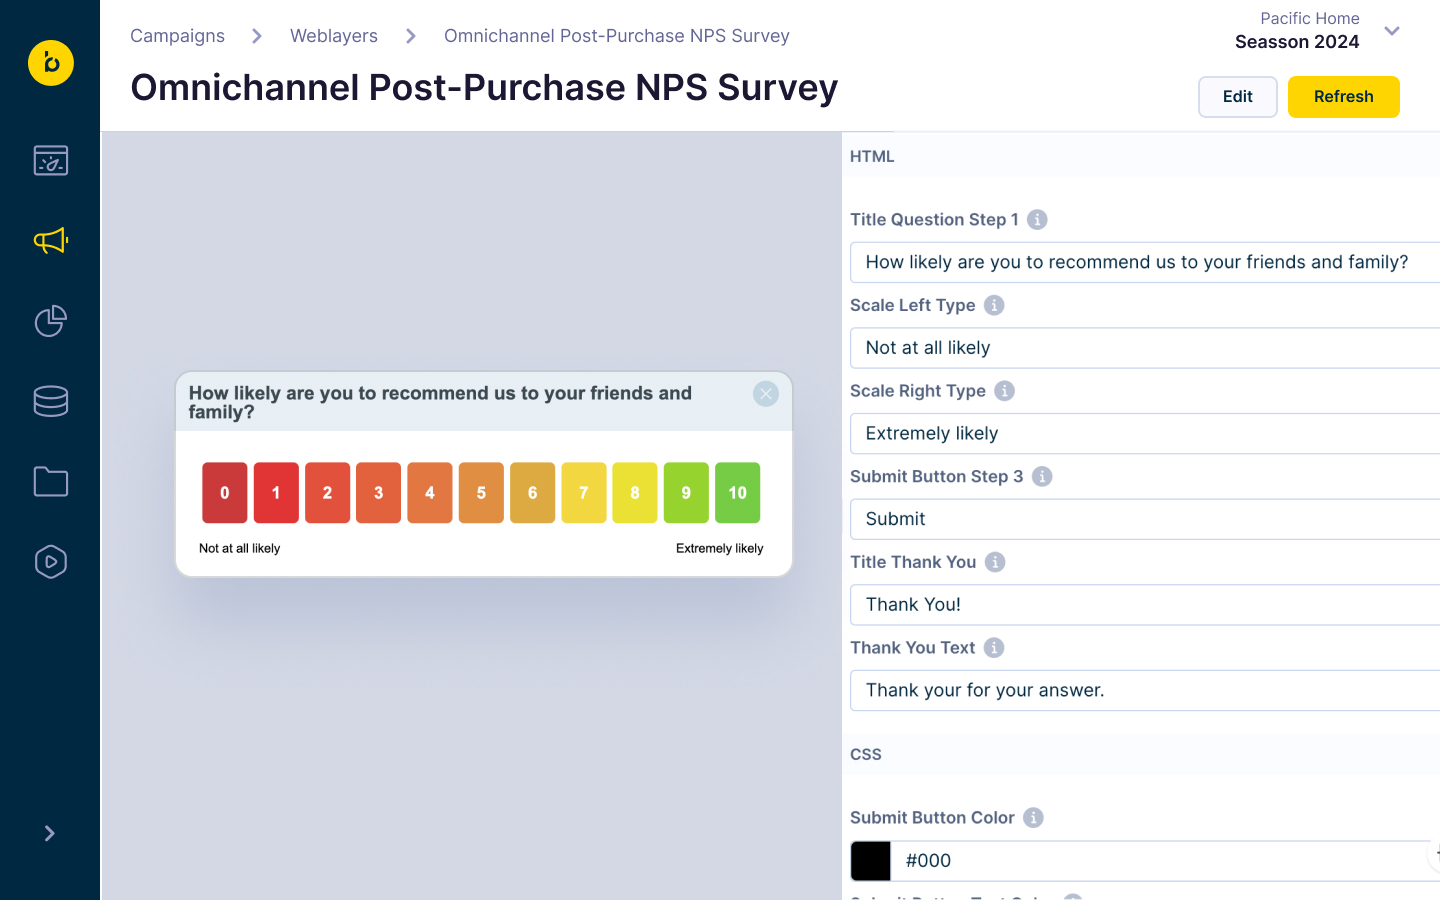
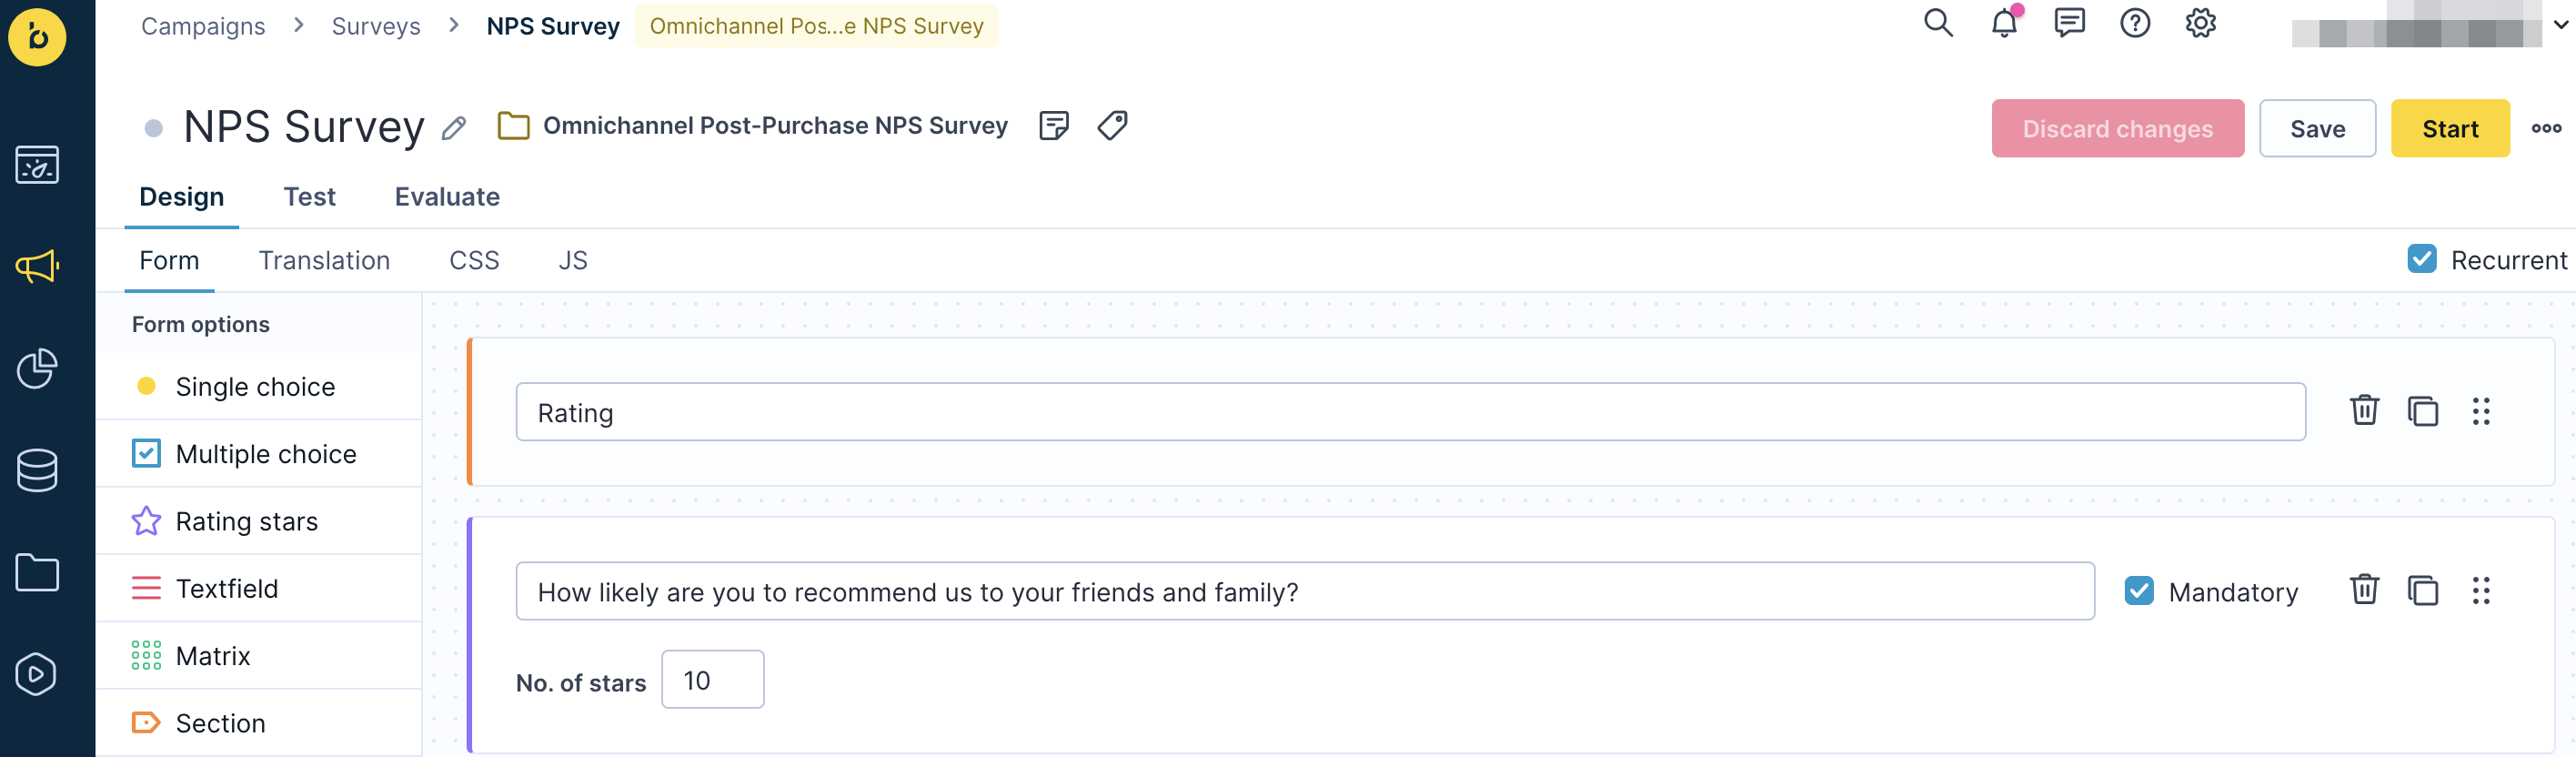
- Add the main NPS question: “How likely are you to recommend us to your friends and family?”
-
Configure conditional follow-up questions:
- Assign follow-ups based on NPS score:
- Score 0–6: Show questions for detractors.
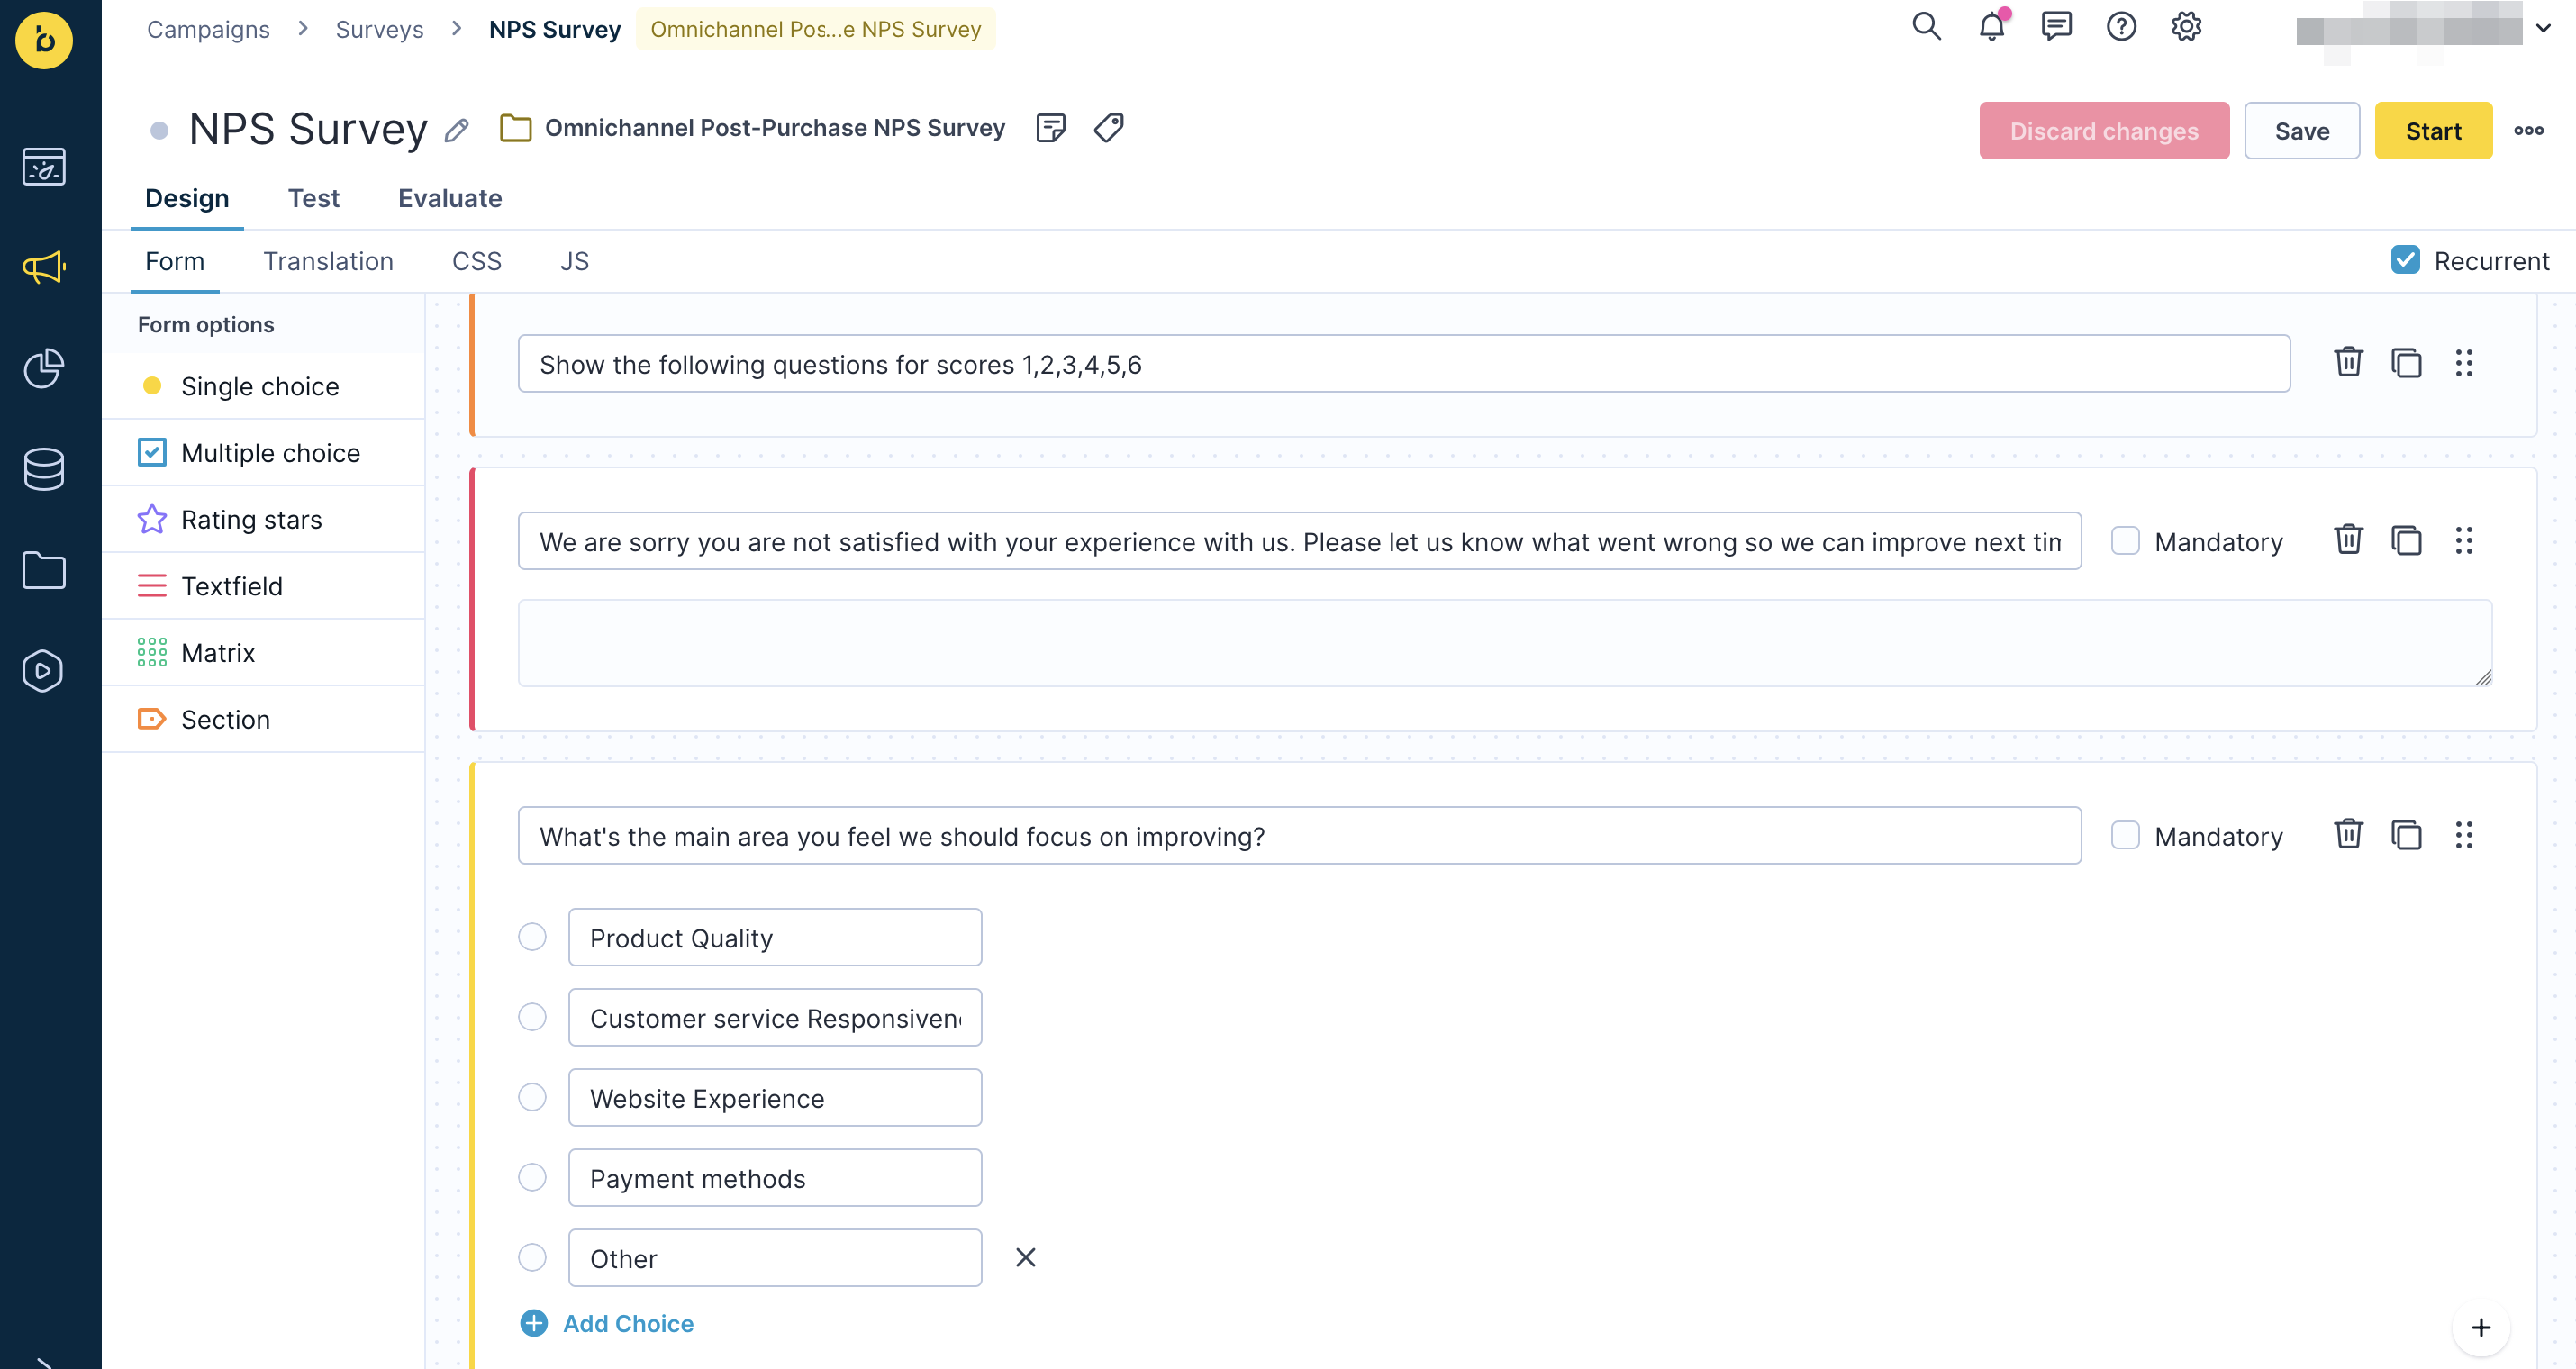
- Score 7–10: Show questions for passives/promoters.
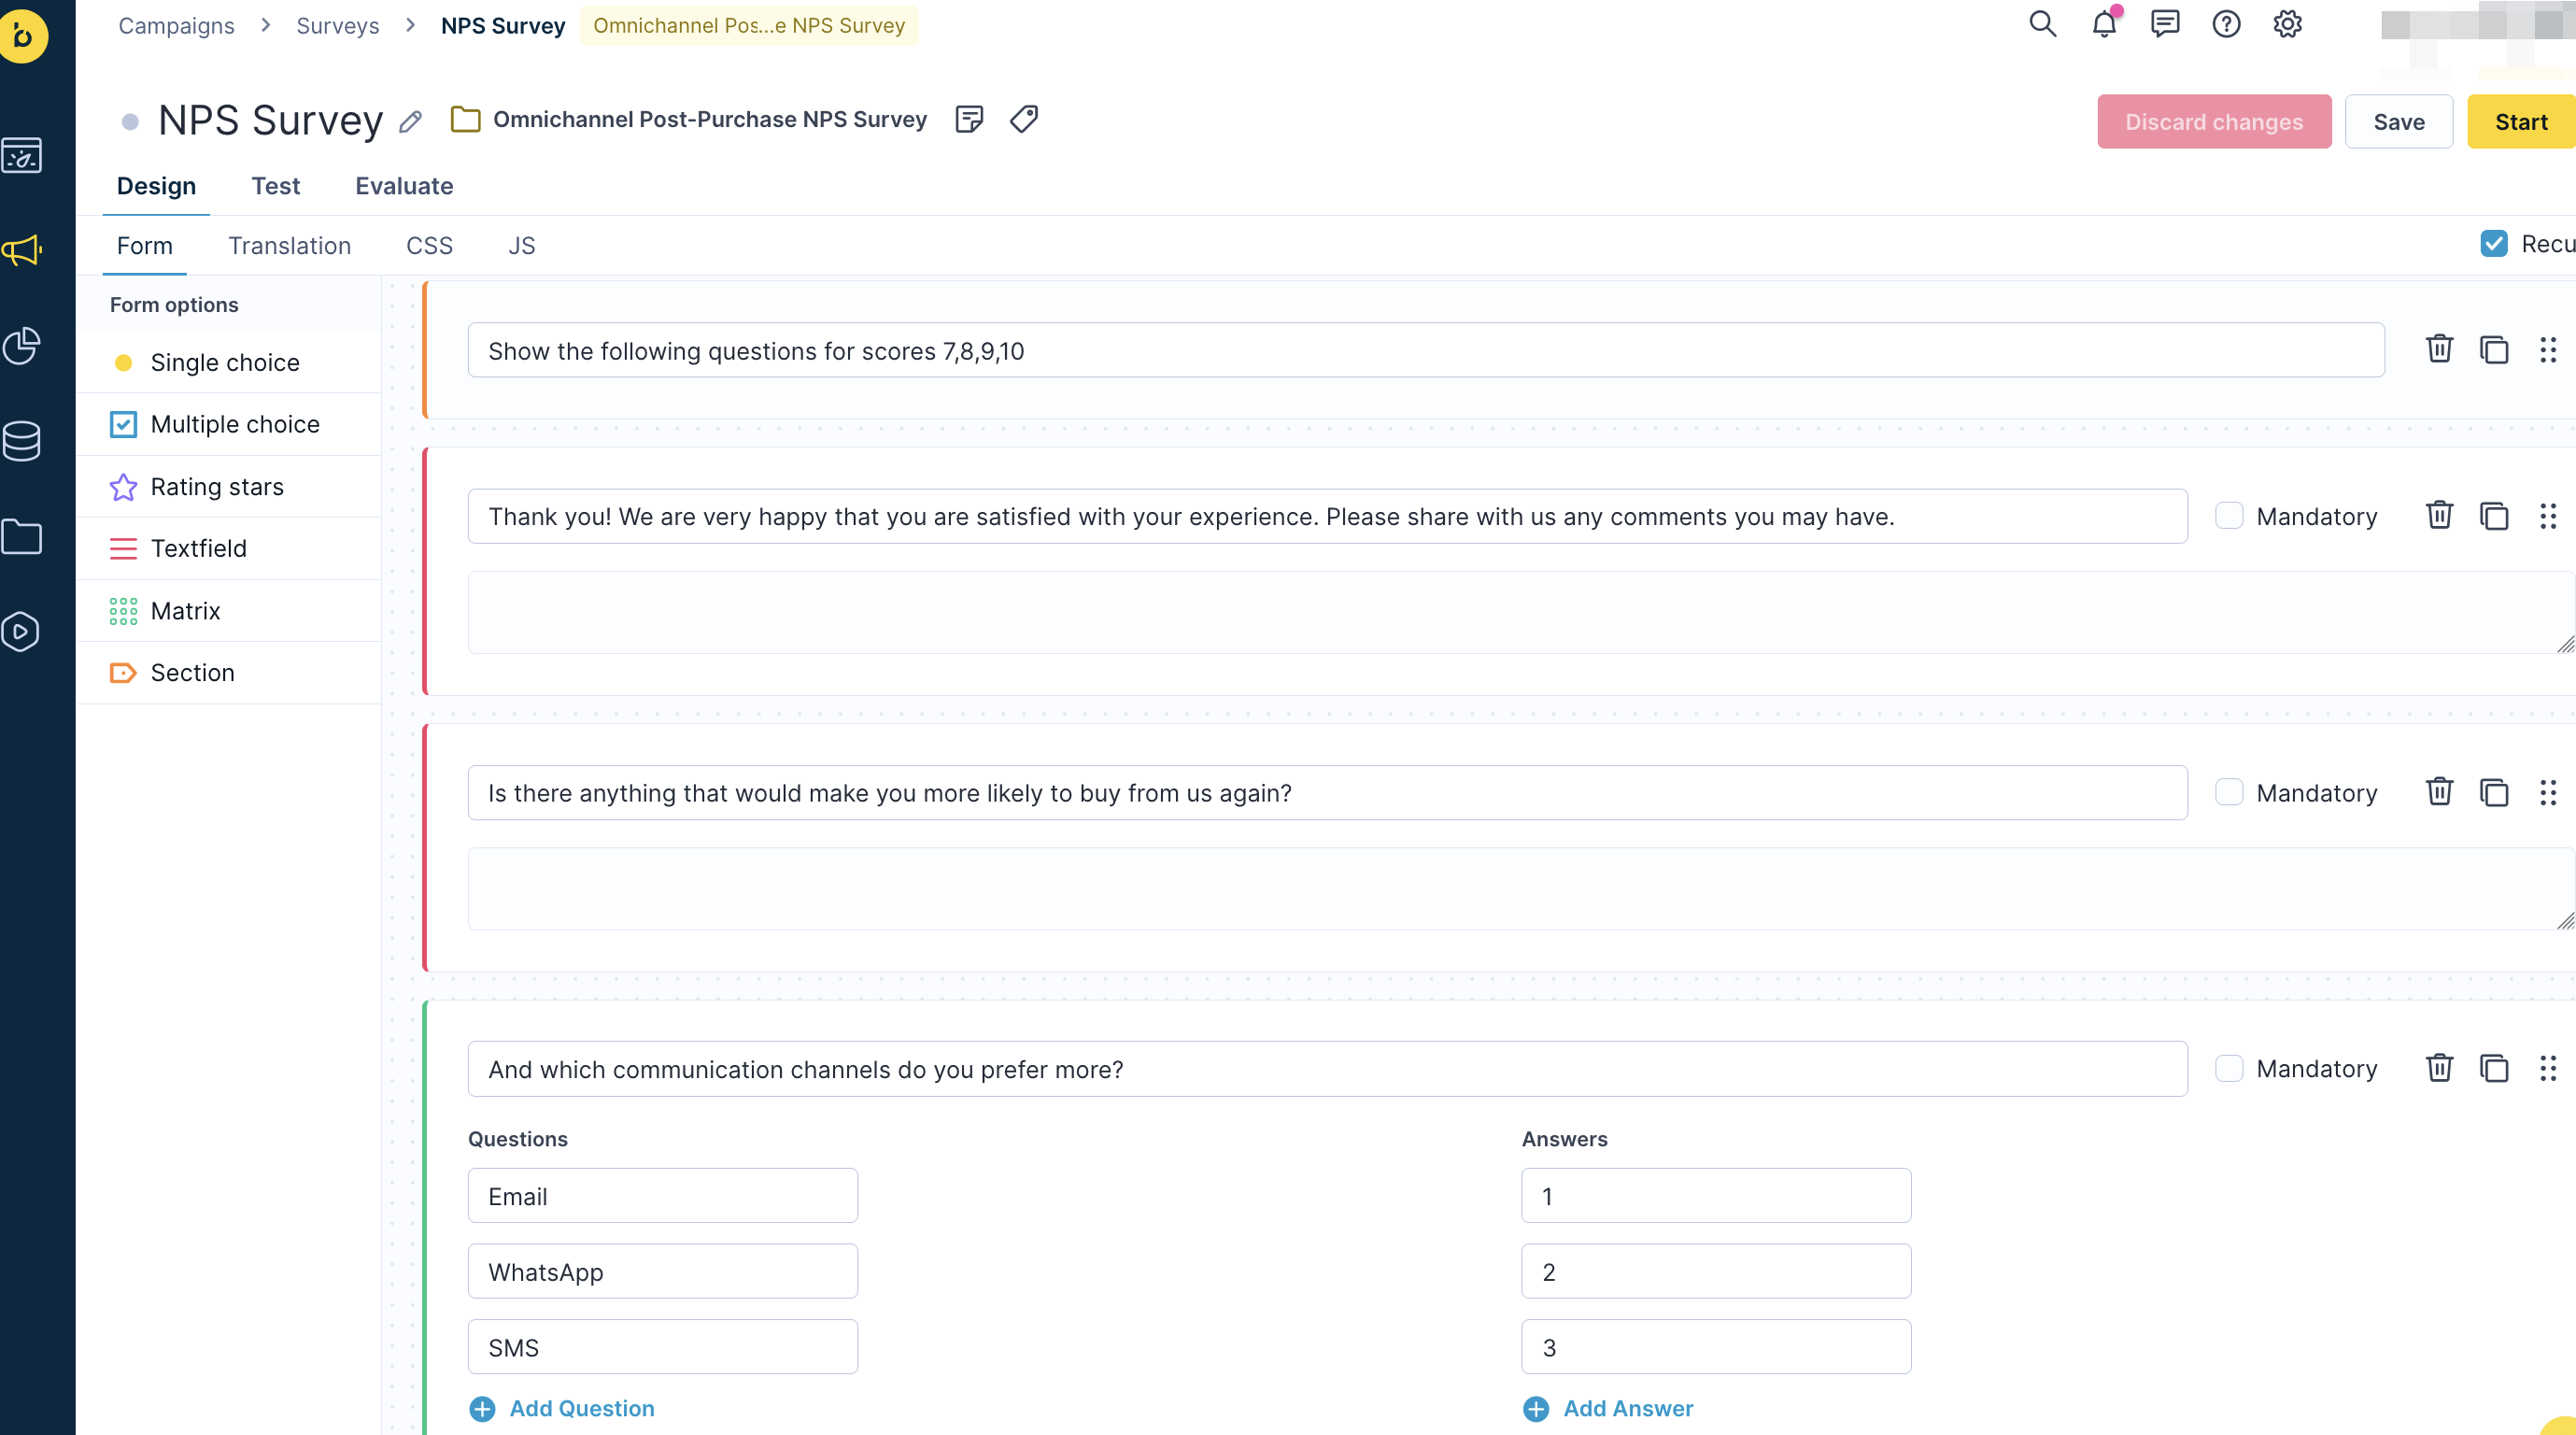
- For each follow-up section, list the NPS scores (numbers) that should trigger its questions. The section heading text itself doesn’t matter—only the numbers you specify.
- You can assign the same score to multiple sections if you want some questions to appear for both high and low scores.
- If you leave a score out of all section headings, customers who select that score will not see any follow-up questions.
- The first section heading and the NPS score question are always shown (unless the score was already selected in the email).
- The "Supplementary Information" section heading is always shown if any additional questions are displayed.
- You can't make follow-up questions (triggered by NPS score) mandatory.
- Assign follow-ups based on NPS score:
-
Edit and organize questions:
- Add, edit, or remove questions as needed.
- Update your dashboard if you change the question structure.
- To see how survey answers are tracked and which question corresponds to which question_id, perform a survey test and review the tracked
surveyevent data on your tester profile.
C. Survey name and technical considerations
-
Do not change the survey name unless necessary. If you must change it, update the survey name in the HTML of the email template as well.
- Click on the scale in your email template to access the HTML editor.
- Replace 'NPS Survey' with the name of your survey, and click Done.
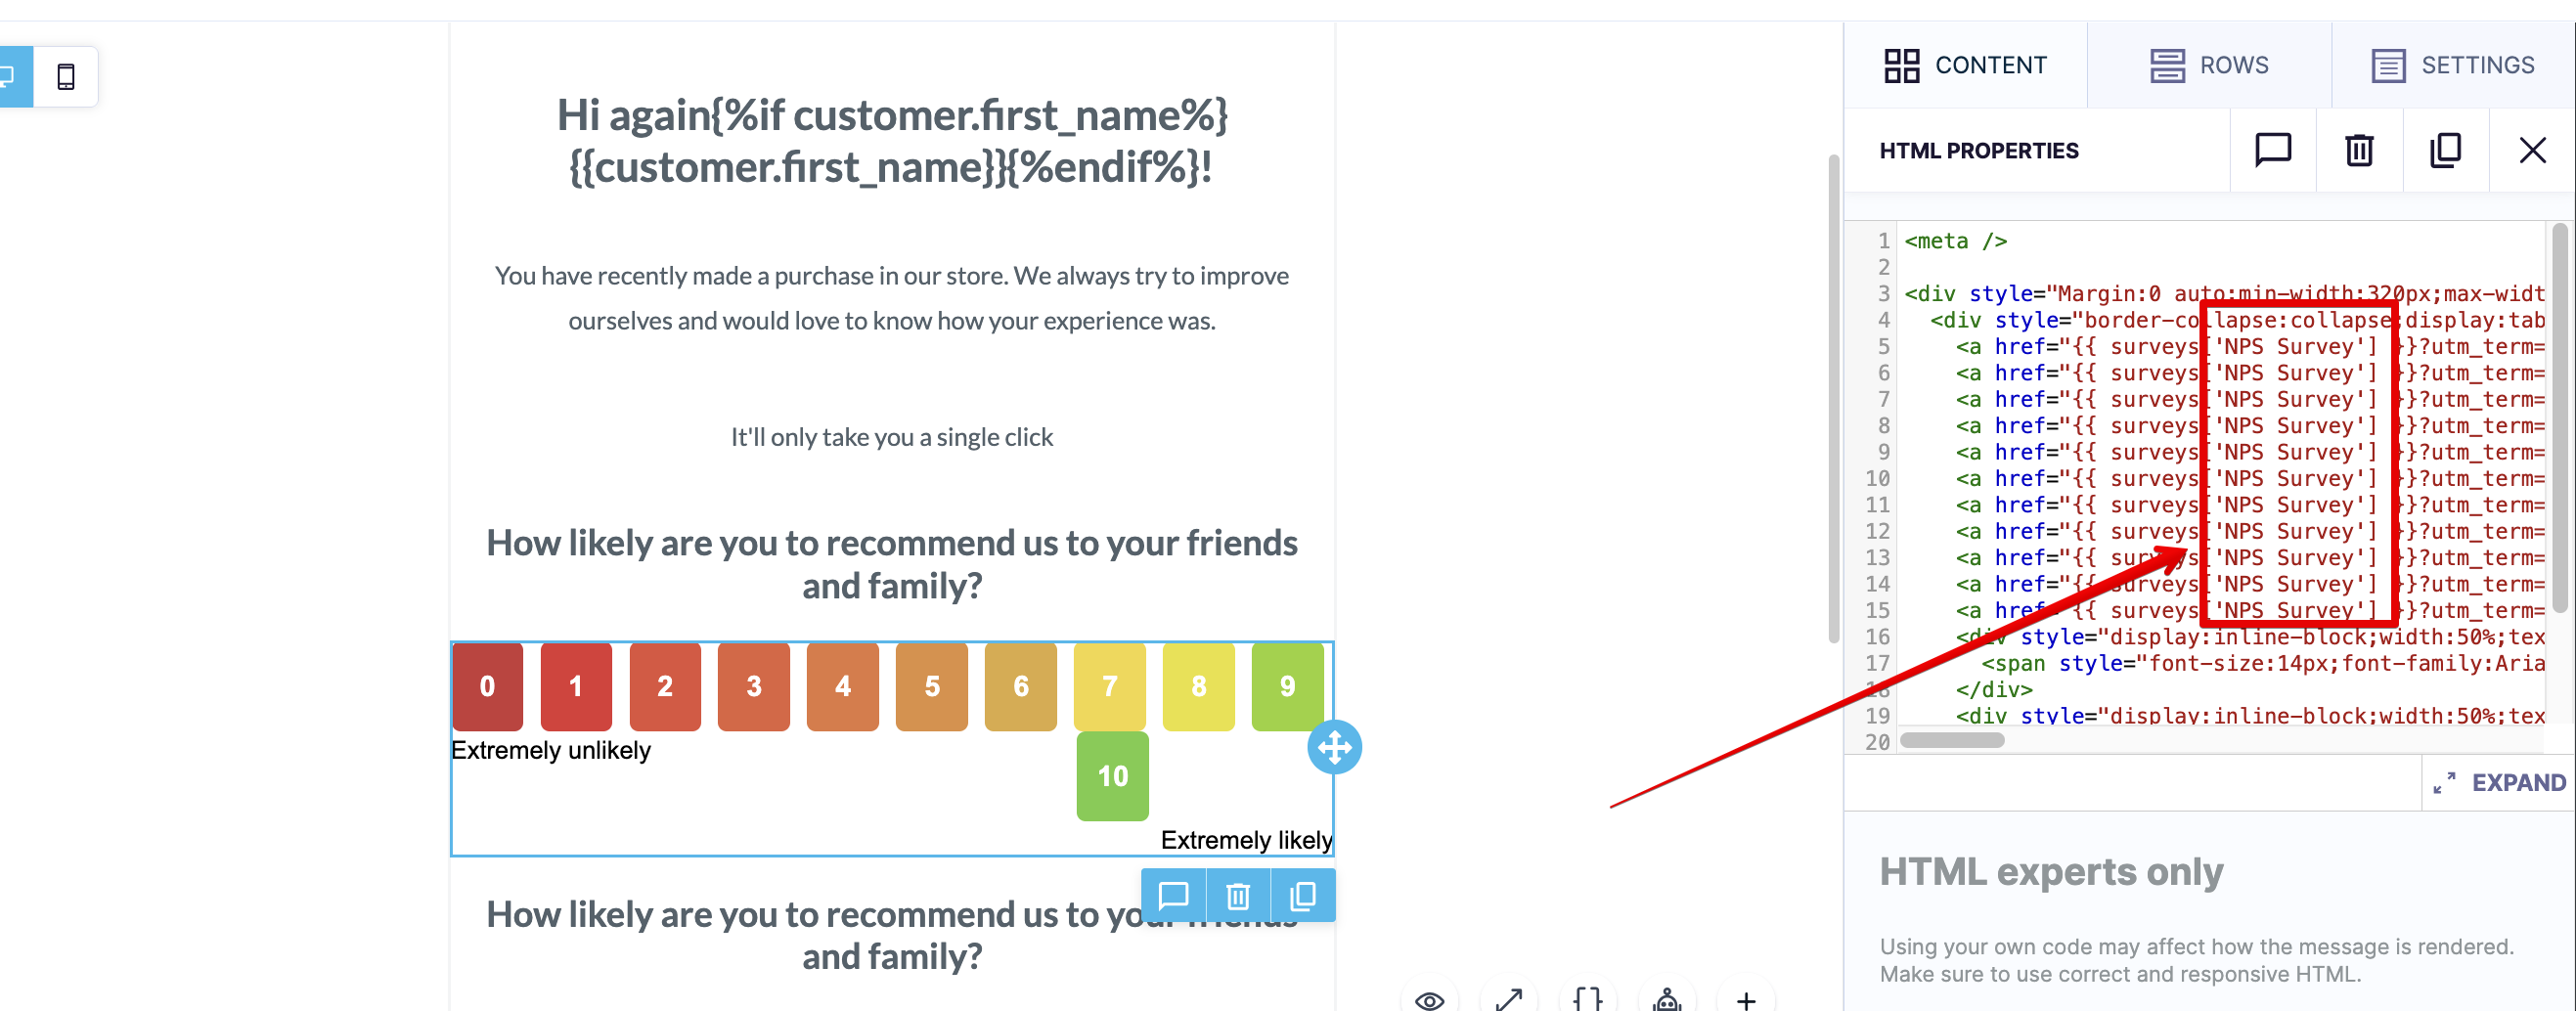
-
Don't modify the UTM parameters tracked within the same HTML block. Changing these will break the use case and disrupt reporting.
D. Link the survey to your NPS email
- Connect the survey to the NPS scale in your email template:
- Each score (1–10) in the email should link to the survey, passing the selected score.
- For third-party surveys:
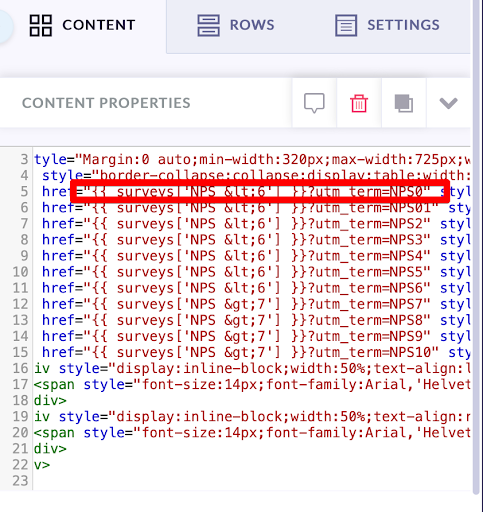
- Access the HTML editor by clicking on the NPS scale, which appears in the bottom right corner of the screen.
- Insert your survey URL within the quotation marks following the first equals sign, as shown in the screenshots below.
- It is crucial to maintain the UTM tracking parameter (for example,
?utm_term=NPS07) for the use case to function properly.
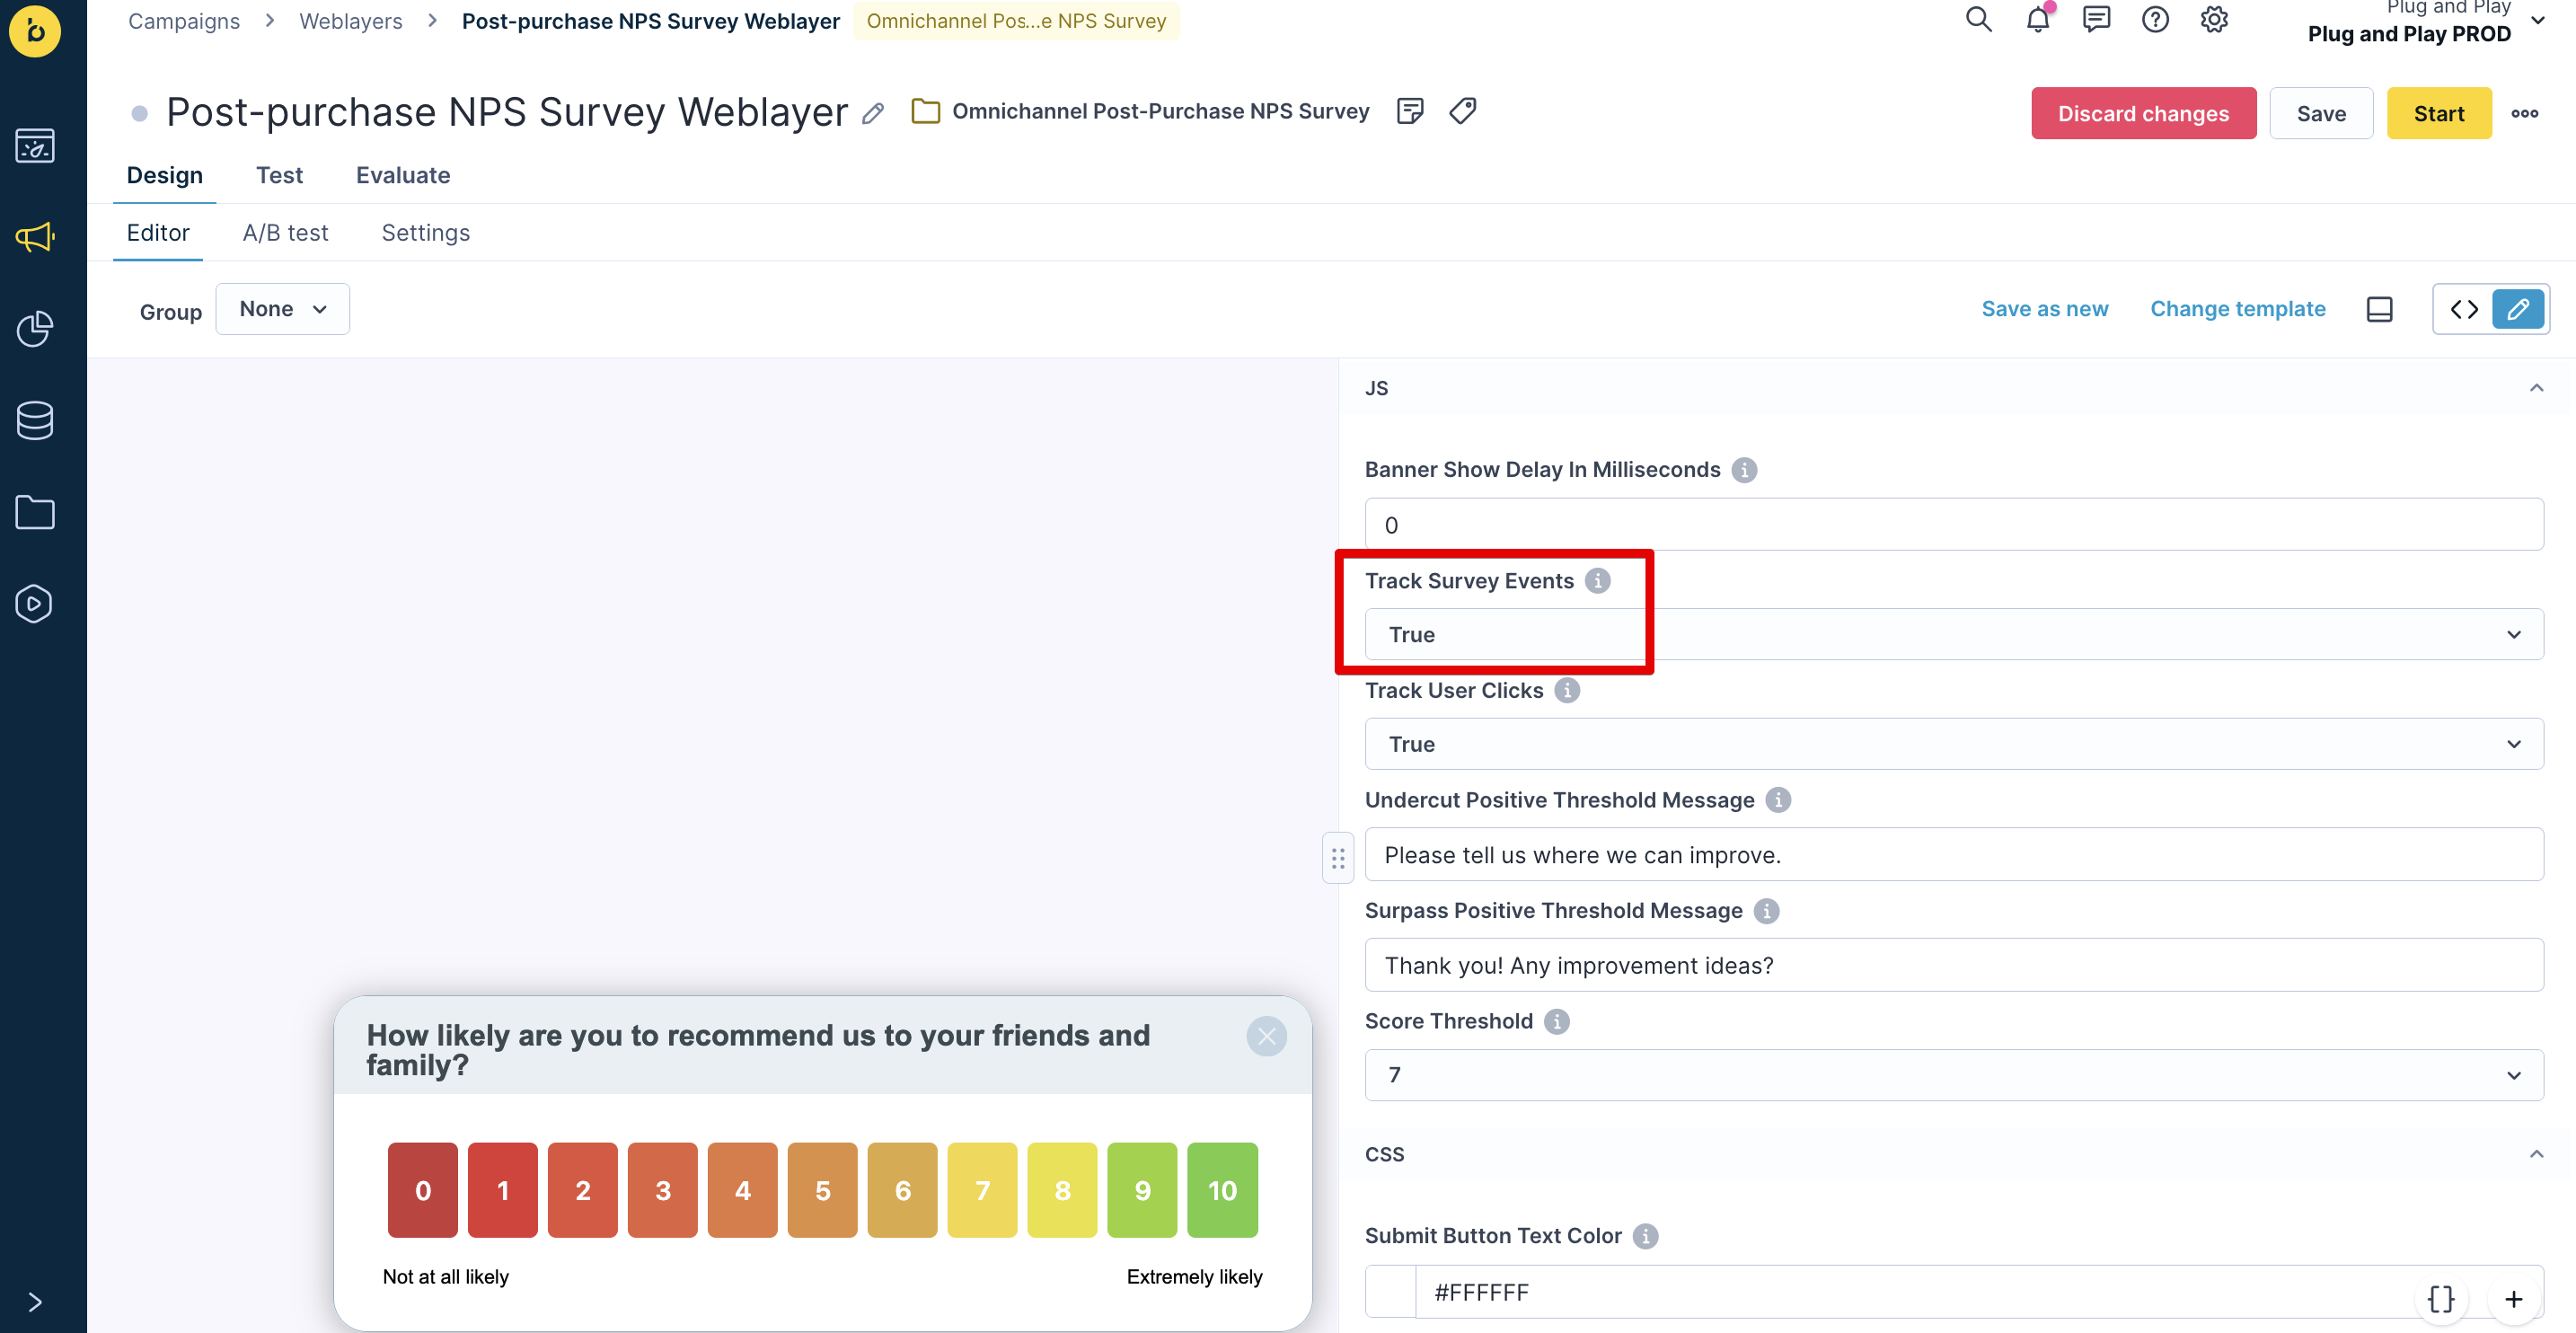
E. Configure weblayer survey (banner)
- Show the NPS survey as a banner to customers who didn’t open the email but visit your website within a set time (default: 21 days).
- Limit banner display to a maximum of three times per customer.
- When the customer clicks the 'submit' button, the system creates a
surveyevent that stores both the NPS score and the customer’s answers. The evaluation dashboard and reports use this event.

- The banner survey is built in JavaScript and isn't linked to the Bloomreach app’s survey module.
- Enable Track Survey Events in banner settings to capture partial responses (an event is tracked after each step, storing partial answers).
F. Test and launch
-
Test the survey:
- Submit test responses and review the tracked
surveyevent data in your tester profile.
- Submit test responses and review the tracked
-
Start the survey:
- Use the Start button in the survey editor before launching the scenario.
Maintenance and best practices
- Do not change the survey name unless you also update all related assets and tracking.
- Update dashboards and reports if you modify survey questions or URLs.
- A/B test** email and banner designs, subject lines, and timing.
- Personalize surveys with Jinja to display purchased items.
- Send follow-up emails or use other channels (SMS, push) for non-responders.
For more details, see:
Updated 3 months ago