Bloomreach Engagement single sign-On
As your internal user base grows, managing access becomes more challenging. Single sign-on (SSO) solves this by letting you manage user access through centralized identity management systems like Azure Active Directory or Okta.
- For unified login setup, see Unified administration SSO.
- SSO now includes authorization capabilities.
- SSO uses identity domains for access control.
How does it work?
SSO is an authentication method for your users. You can set it up as an additional login option or as the only way to access Bloomreach Engagement. SSO works with any Identity Provider that supports SAML 2.0 standards. However, you can still use your Google login information to access your account if you want to.
External users: You can enable SSO for internal users while still allowing external users to access without SSO.
Multi-tenant instances: SSO is available for multi-tenant instances. You manage permissions directly in Bloomreach Engagement. No need to configure them in Azure or Okta.
Before you start
Supported providers
- Bloomreach supports and can advise on Okta and Microsoft Azure Active Directory.
- For other providers (Jumpcloud, OneIdentity, ADFS), you'll need domain expertise to configure them.
Requirements
- Admin role in Bloomreach Engagement.
- Access to your Identity Provider dashboard.
How user access works
- Users must be invited to the project before they can use SSO.
- New users can choose their preferred login method.
- Existing users can switch to SSO for their account.
- One user can have only one SSO enabled per account.
- Users belong to the account where they were invited first.
- If a user has access to multiple accounts and SSO is enabled for only one, SSO works only for that account.
Where to configure SSO
In Bloomreach Engagement, go to Settings > Account settings > Access management > Single sign-on to enable and configure SSO. Once enabled, you can set up Azure Active Directory or Okta to provide authentication for Bloomreach Engagement.
You manage permissions and custom roles directly in Bloomreach Engagement - no need to configure them in Azure or Okta.
Set up Azure Active Directory
Step 1: Create a new application
- In your Azure Active Directory dashboard, go to Manage > Enterprise Applications.
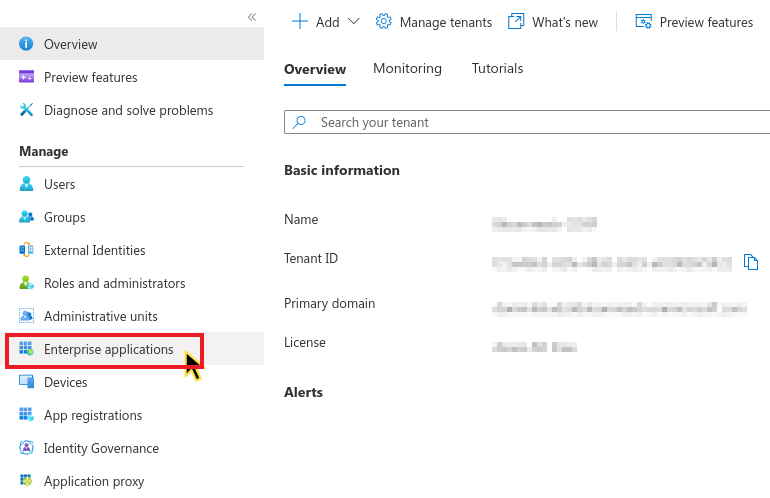
- Click +New application.

- Click Create a new application.

Step 2: Configure the application
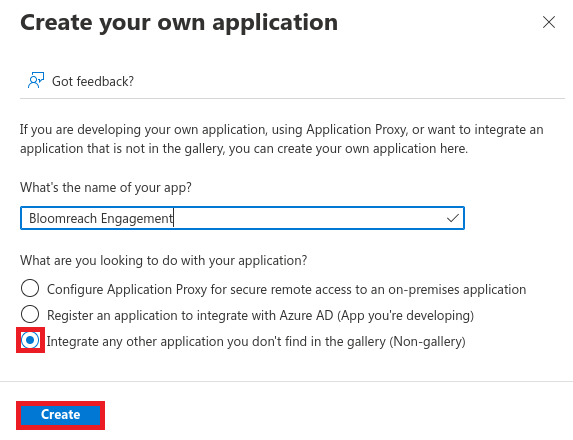
- Name your application (for example, "Bloomreach Engagement").
- Select Integrate any other application.
- Click Create.
Step 3: Enable SAML SSO
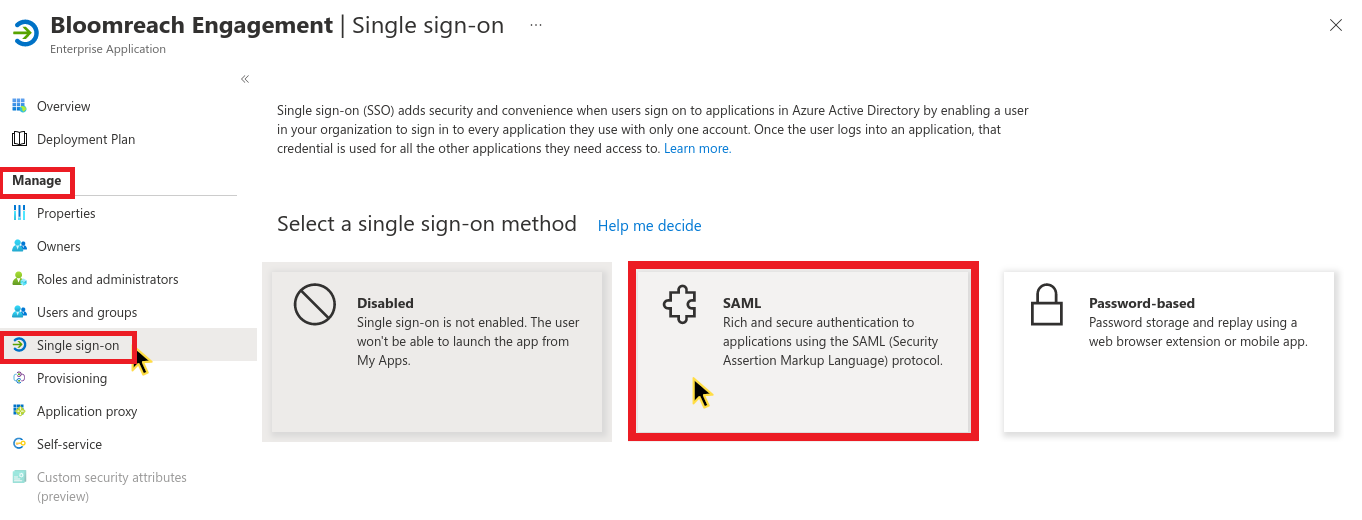
In the left menu, go to Manage > Single sign-on. Select SAML as your SSO method.
Step 4: Download service provider metadata
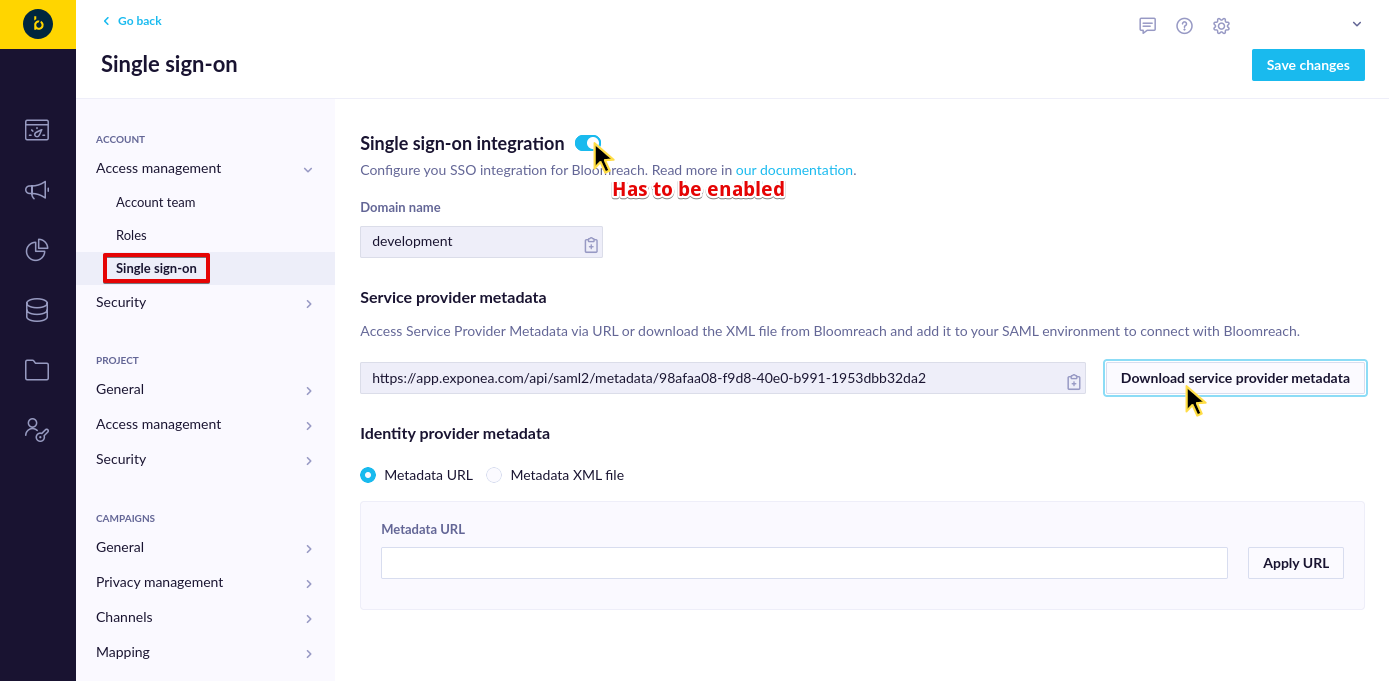
- In Bloomreach Engagement, go to Account Settings > Access management > Single sign-on.
- Enable the integration.
- Download the Service provider metadata file.
- Save it as "service-provider-metadata.xml".
Step 5: Upload metadata to Azure
- In Azure AD, click Upload metadata file.
- Select the XML file you downloaded.
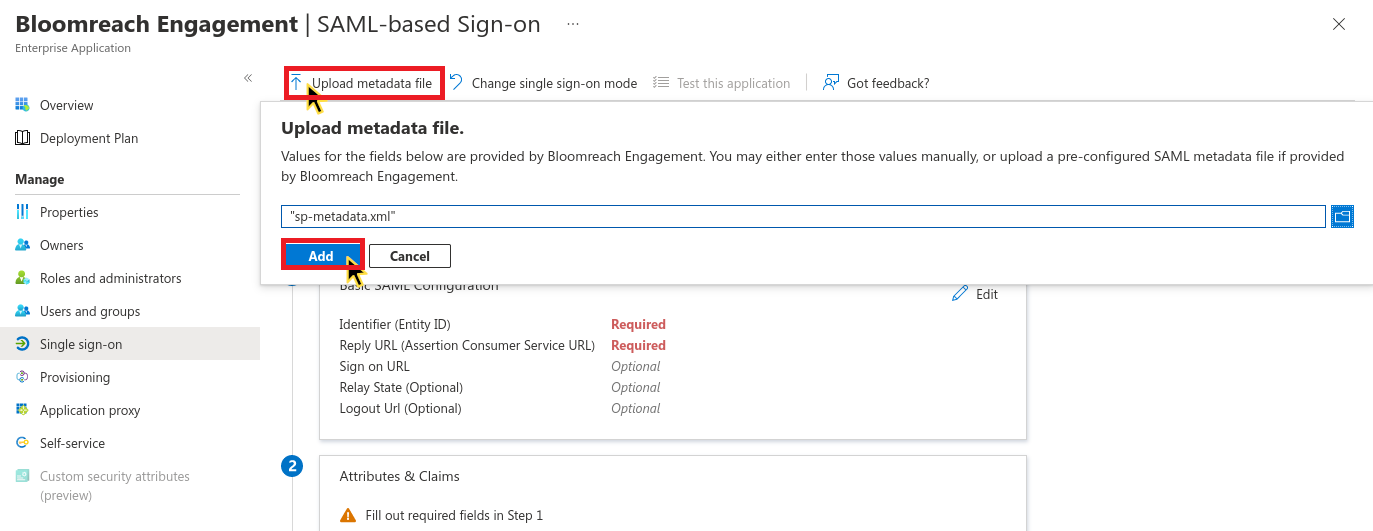
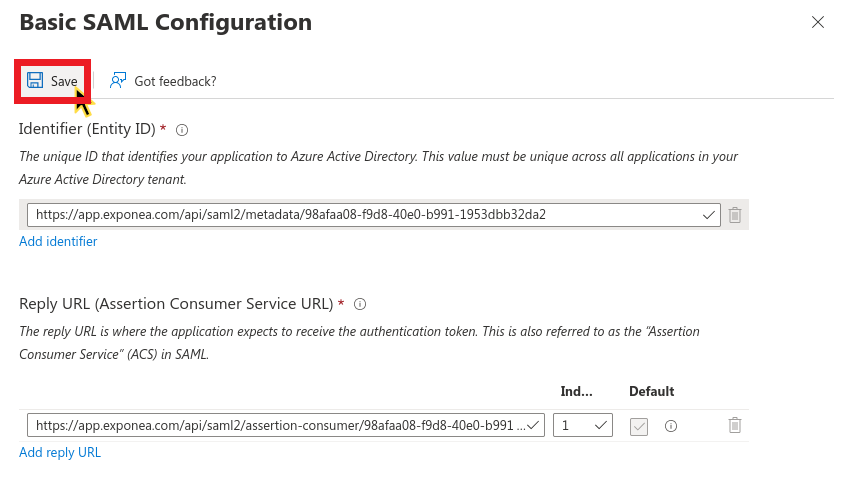
- Review the Basic SAML Configuration in the modal.
- Click Save.
Step 6: Configure claims
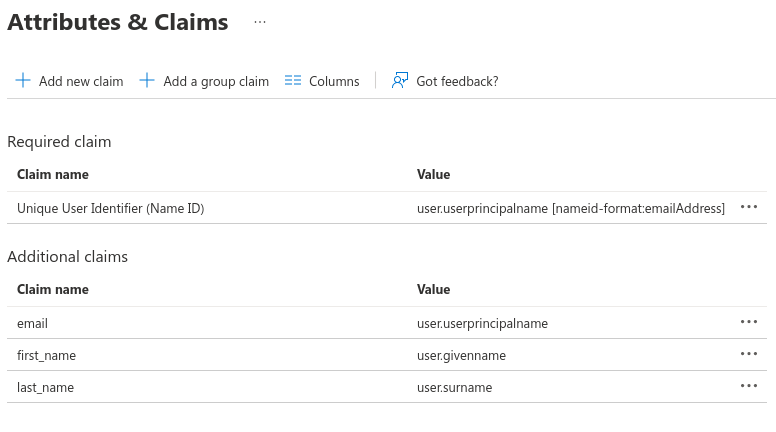
- In Azure Active Directory, go to Attributes & Claims.

- Click Edit.
- Remove all Additional claims (leave Required claim unchanged).
- Add these new claims:
| Name | Source | Source attribute |
|---|---|---|
email | Attribute | user.userprincipalname |
first_name | Attribute | user.givenname |
last_name | Attribute | user.surname |
Note
Make sure email addresses in
user.userprincipalnamecan receive emails. If not, use another unique attribute (likeuser.mail) for both the email claim and the Unique User Identifier (Name ID) claim.Optional: Add a phone claim if you have mobile phone data available (for example,
user.mobilephone).
Your Attributes & Claims should match this format exactly. We recommend removing default values and creating claims from scratch.
Step 7: Complete Bloomreach configuration
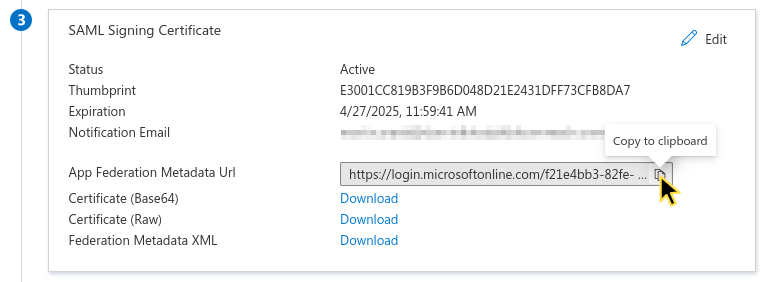
Now we will need to finish the service provider configuration on the Bloomreach Engagement side. You should be back in the opened window with the list of different steps. Go to the third one called SAML Signing Certificate and copy the App Federation Metadata URL to the clipboard as shown below.
After that, switch over to Bloomreach Engagement where you paste the address to the Metadata URL field in the Identity provider metadata section and click on Apply URL. If everything is configured properly, you should see a confirmation that the metadata contains valid SSO URL and that Microsoft Azure Federated SSO Encryption/Signing certificates aren't expired:
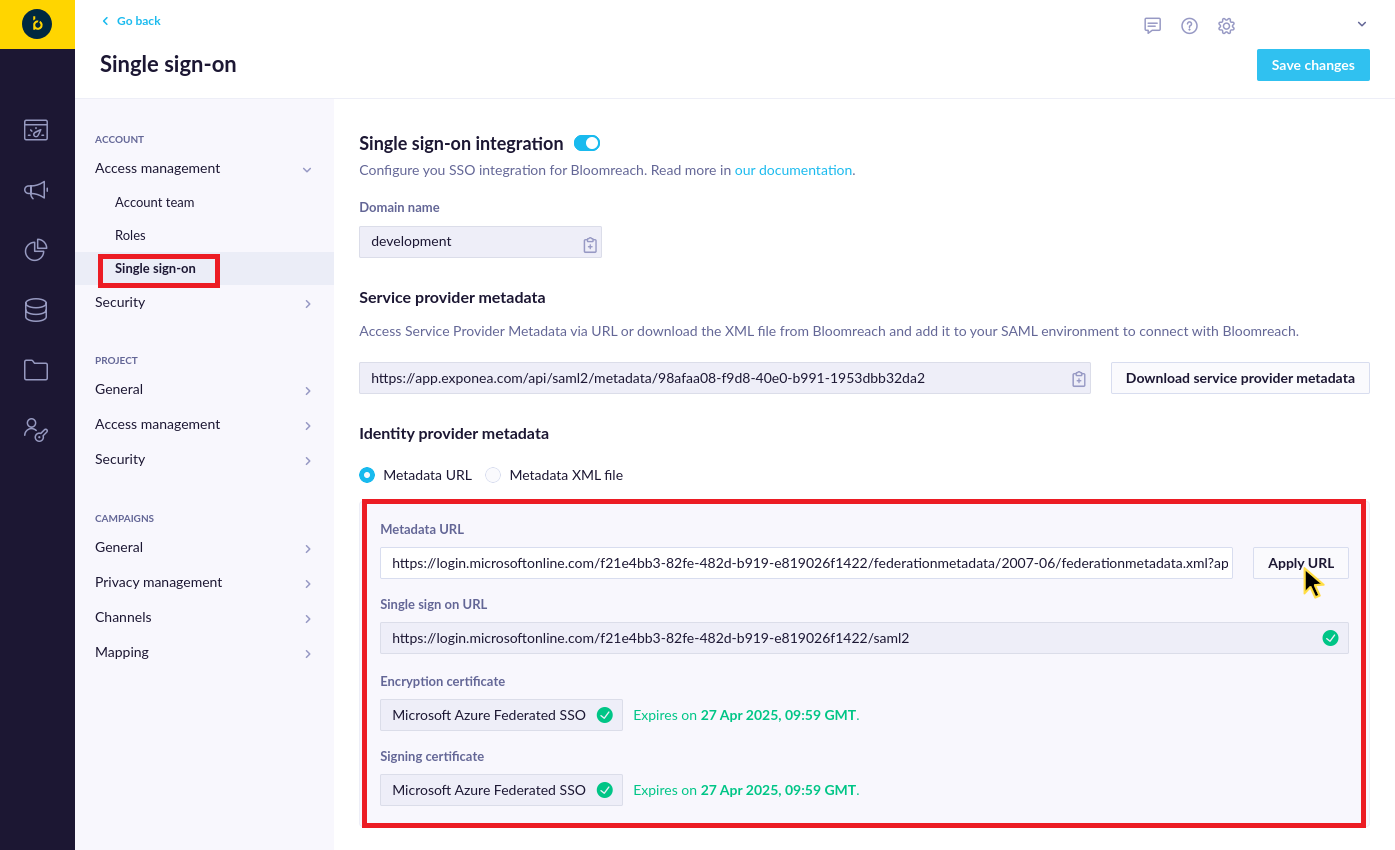
Save it and then navigate to Account Settings > Security > Authentication settings. There you can select Single sign-on as the allowed authentication method. You can also disable other methods if you wish to use the enforced SSO for your users.

Lastly, save all the changes. From now on, all your existing Bloomreach Engagement users, that you assign to the application in Azure Active Directory, will be able to log in to Bloomreach Engagement via Azure AD SSO.
Set up Okta SSO
Step 1: Create app integration
In your Okta administration dashboard, go to Applications and click on Create App Integration.
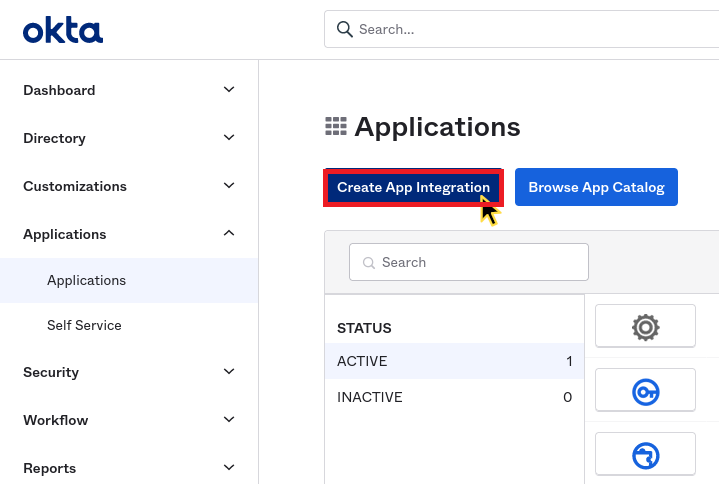
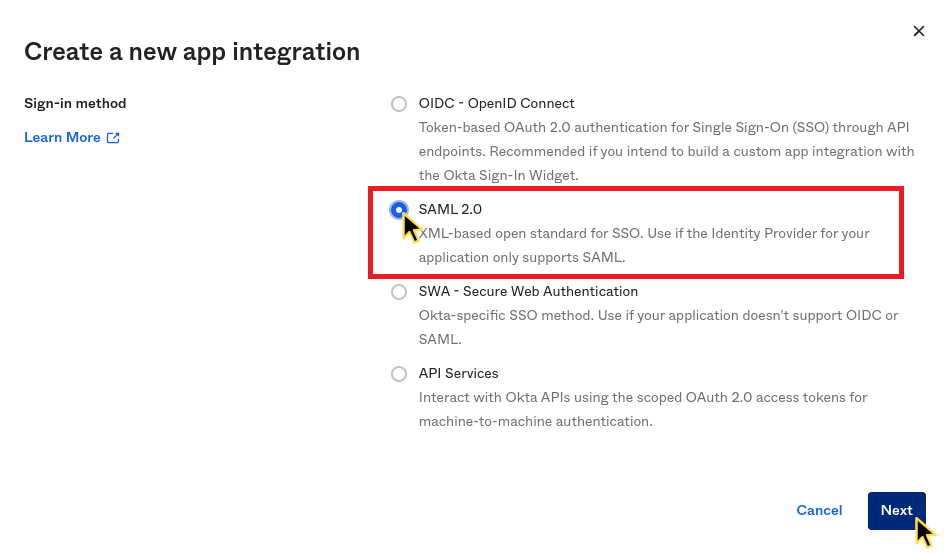
Here, select SAML 2.0, as the Sign-in method in the opened modal window and continue by clicking on the Next button.
Then you can set the name and icon for your new application and continue to the next step.
Step 2: Get service provider information
Now you’ll need to provide Okta with information from Bloomreach Engagement.
Switch over to your Bloomreach Engagement application and navigate to Account Settings > Access management > Single sign-on.
Enable the integration and click on Show configuration in the Service provider metadata section.
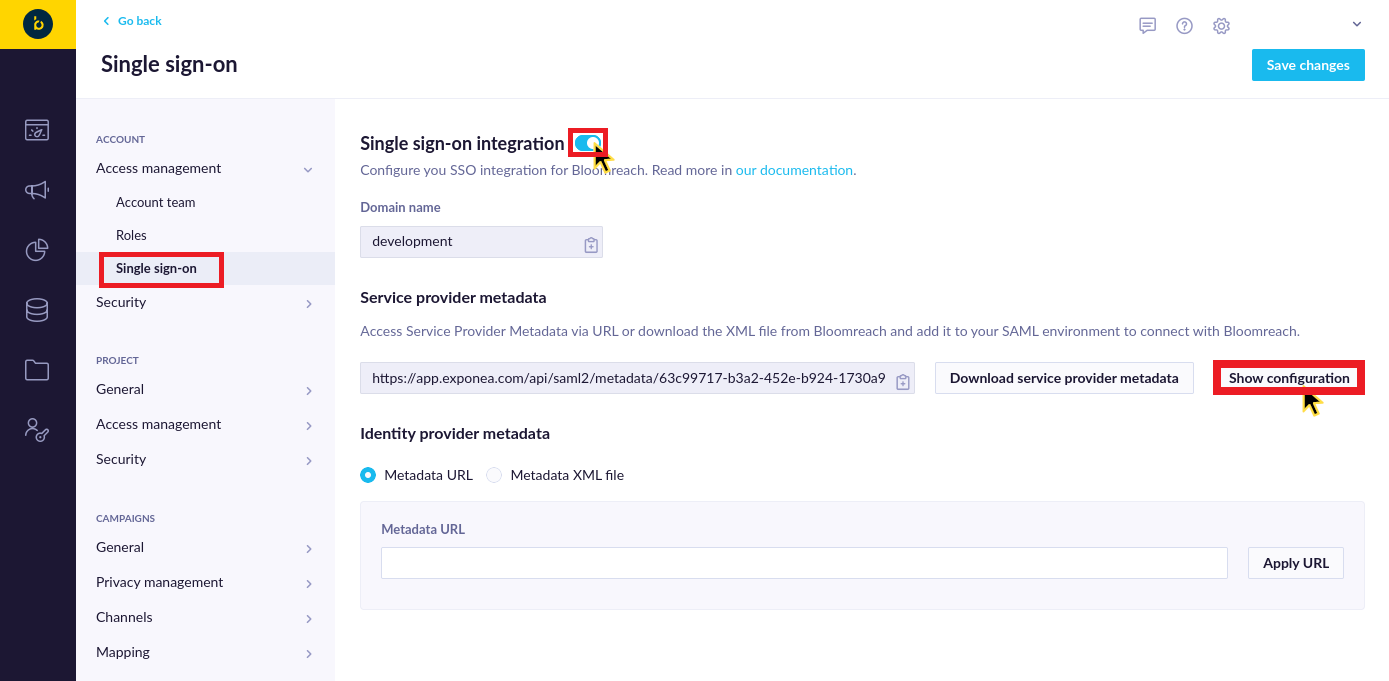
The new window appears. Okta currently doesn't support automatic configuration of the application via the service provider metadata file. You need to copy the required values from the Service Provider Configuration window to Okta.
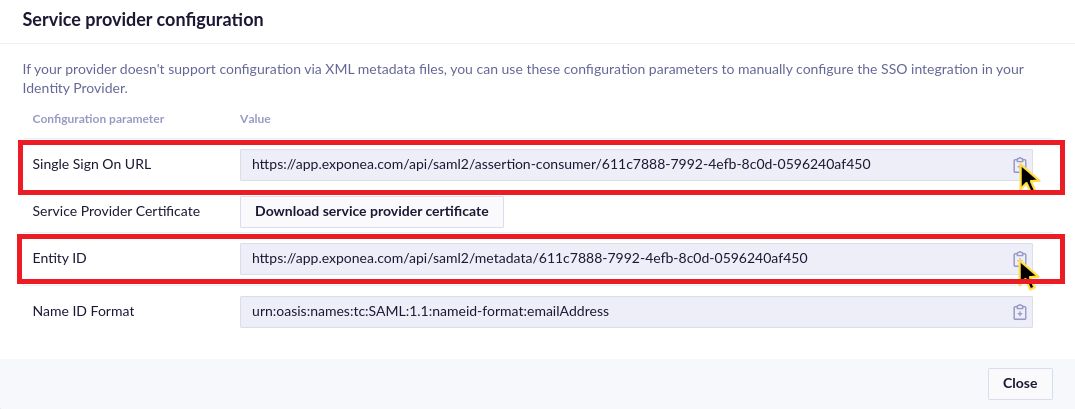
Copy the Single Sign On URL value to the Single sign on URL field in Okta configuration.
Copy the Entity ID value to the Audience URI (SP Entity ID) field in Okta configuration.
That’s all you need from the Service provider configuration window, the rest of the configuration can be set directly in the Okta dashboard.
Step 3: Configure SAML in Okta
Switch back to the Okta dashboard and continue with the second step in the dashboard called 2. Configure SAML.
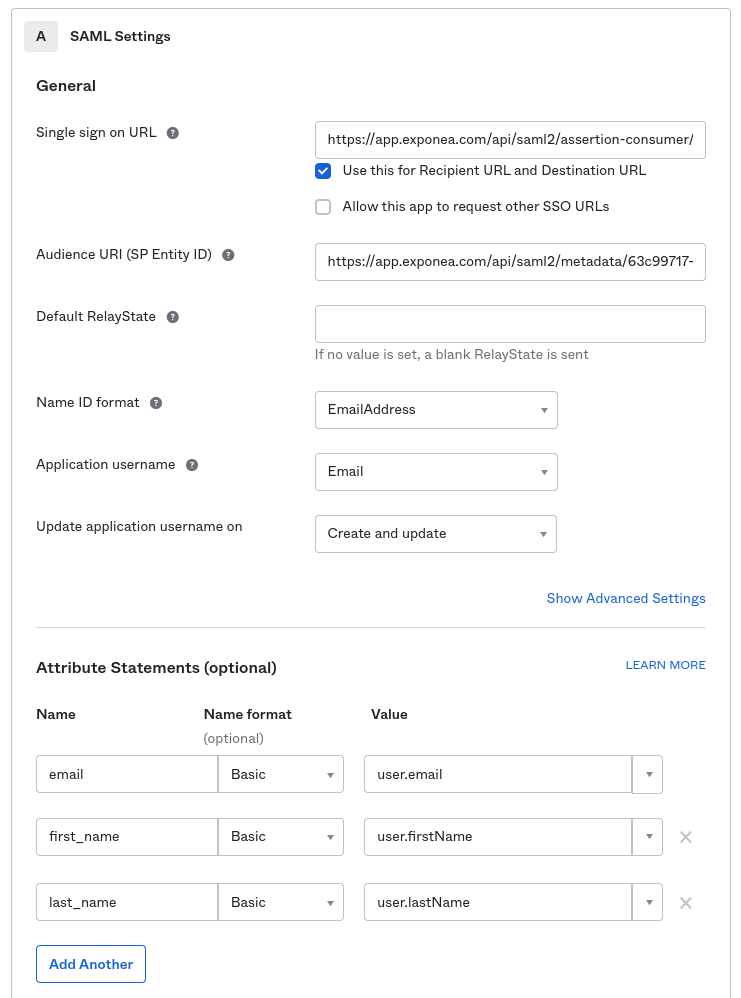
Set the following fields to the given values:
- Name ID format: EmailAddress
- Application username: Email
Add these attribute statements:
| Name | Name format | Value |
|---|---|---|
email | Basic | user.email |
first_name | Basic | user.firstName |
last_name | Basic | user.lastName |
Here is an example of how the configuration should look like:
Optional: Add a phone attribute if you have phone data available (for example, user.primaryPhone).
Click Next to continue to the Feedback step.
Step 4: Get IdP metadata
On the Application settings page in Okta, in the Sign On tab, scroll down to the "SAML Signing Certificates" section. Find the active certificate and click on Actions > View IdP metadata as shown below:
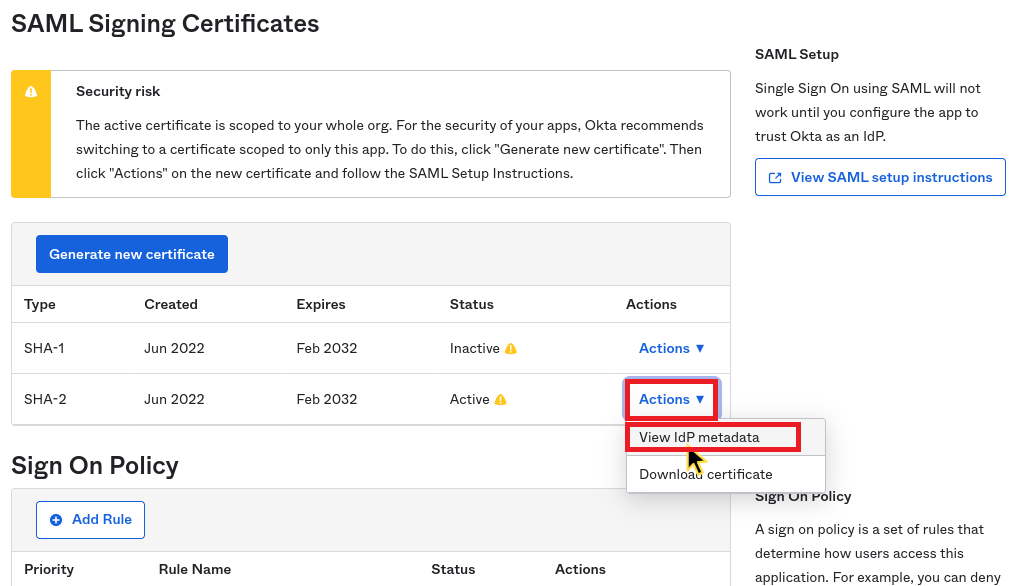
The metadata XML file will be opened in a new tab. Copy the URL to your clipboard.

Step 5: Complete Bloomreach configuration
Switch over to Bloomreach Engagement, paste the address to the Metadata URL field in the "Identity provider metadata" section and click on Apply URL. If everything is configured properly, you should see a confirmation that the metadata contains valid SSO URL and Encryption/Signing certificates that aren't expired:
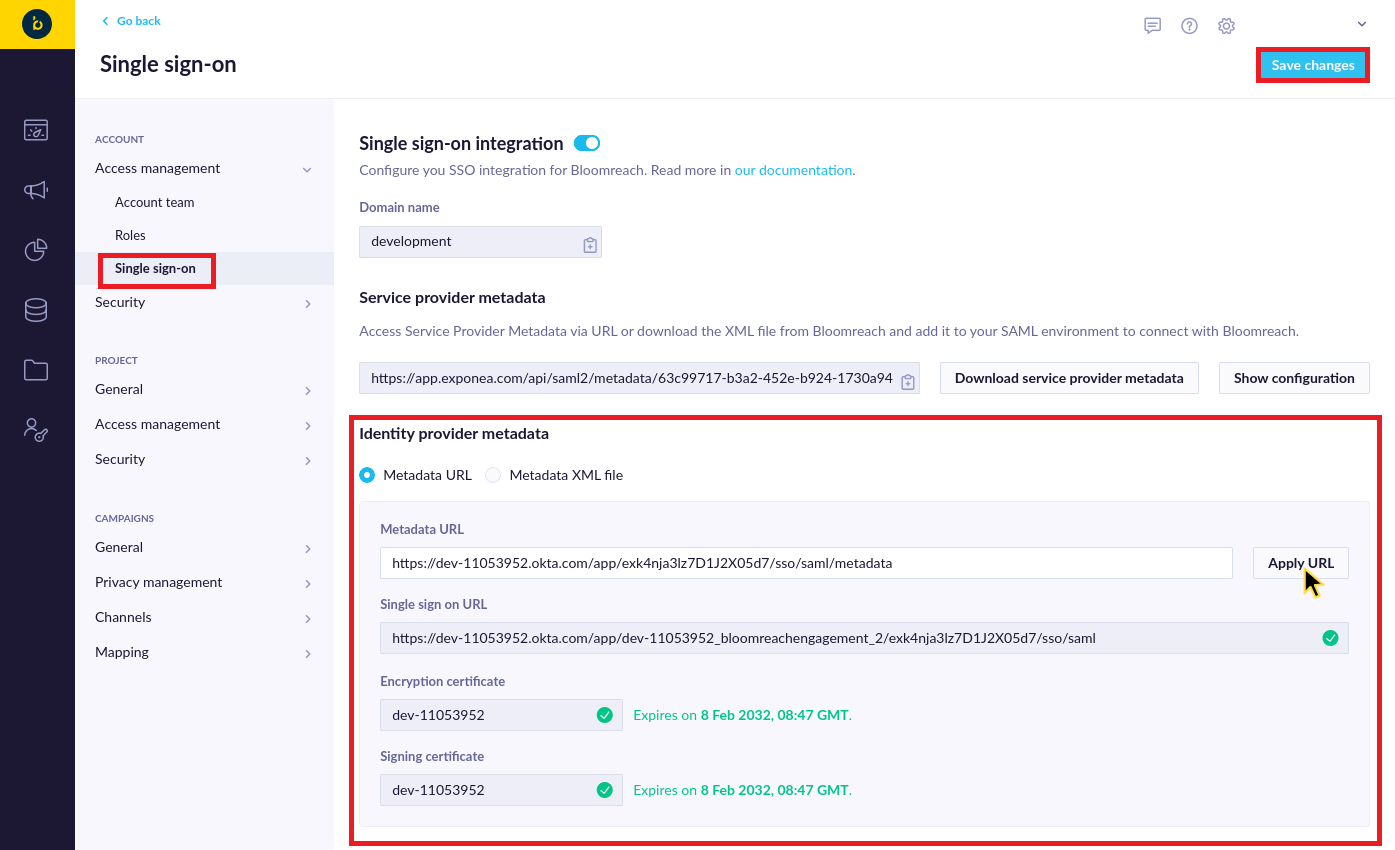
Save it and then navigate to Account Settings > Security > Authentication settings. There you can select Single sign-on as the allowed authentication method. You can also disable other methods if you wish to use the enforced SSO for your users.

You can go ahead and Save the changes. From now on, all your existing Bloomreach Engagement users who are assigned to the application in Okta will be able to log in to Bloomreach Engagement via Okta SSO.
Limitations
- Users with SSO authorization can't be invited, users without SSO authorization have to be invited into the Engagement application.
- SSO authorization assigns user roles during login. Role changes can take up to a minute to process.
- When users choose SSO authentication, Bloomreach 2FA/MFA isn't used.
- You can only enable one SSO provider per account.
- One user can only be managed by one SSO application per instance.
Updated 3 months ago
