

Content sources
This guide introduces what content sources are, how they work, and how to set them up in your project.
Content sources feature brings the power of lookup tables into the channels in the application. It helps you:
- Create a draft of the email in different languages or for different audiences using tools like Google sheets and transfer it into the application in a few clicks.
- Personalize emails for every user based on data from the content source table.
How content sources work
This feature enables you to import data from a Google sheet and use it in Scenarios, Email campaigns, or SMS campaigns. You can use content sources in the following nodes:
- Mobile push
- Browser push
- SMS
- RCS
- Webhook
How to set up content source
- Go to Data & Assets > Data manager > Content sources to connect a new content source. In this section, click on Add content source.
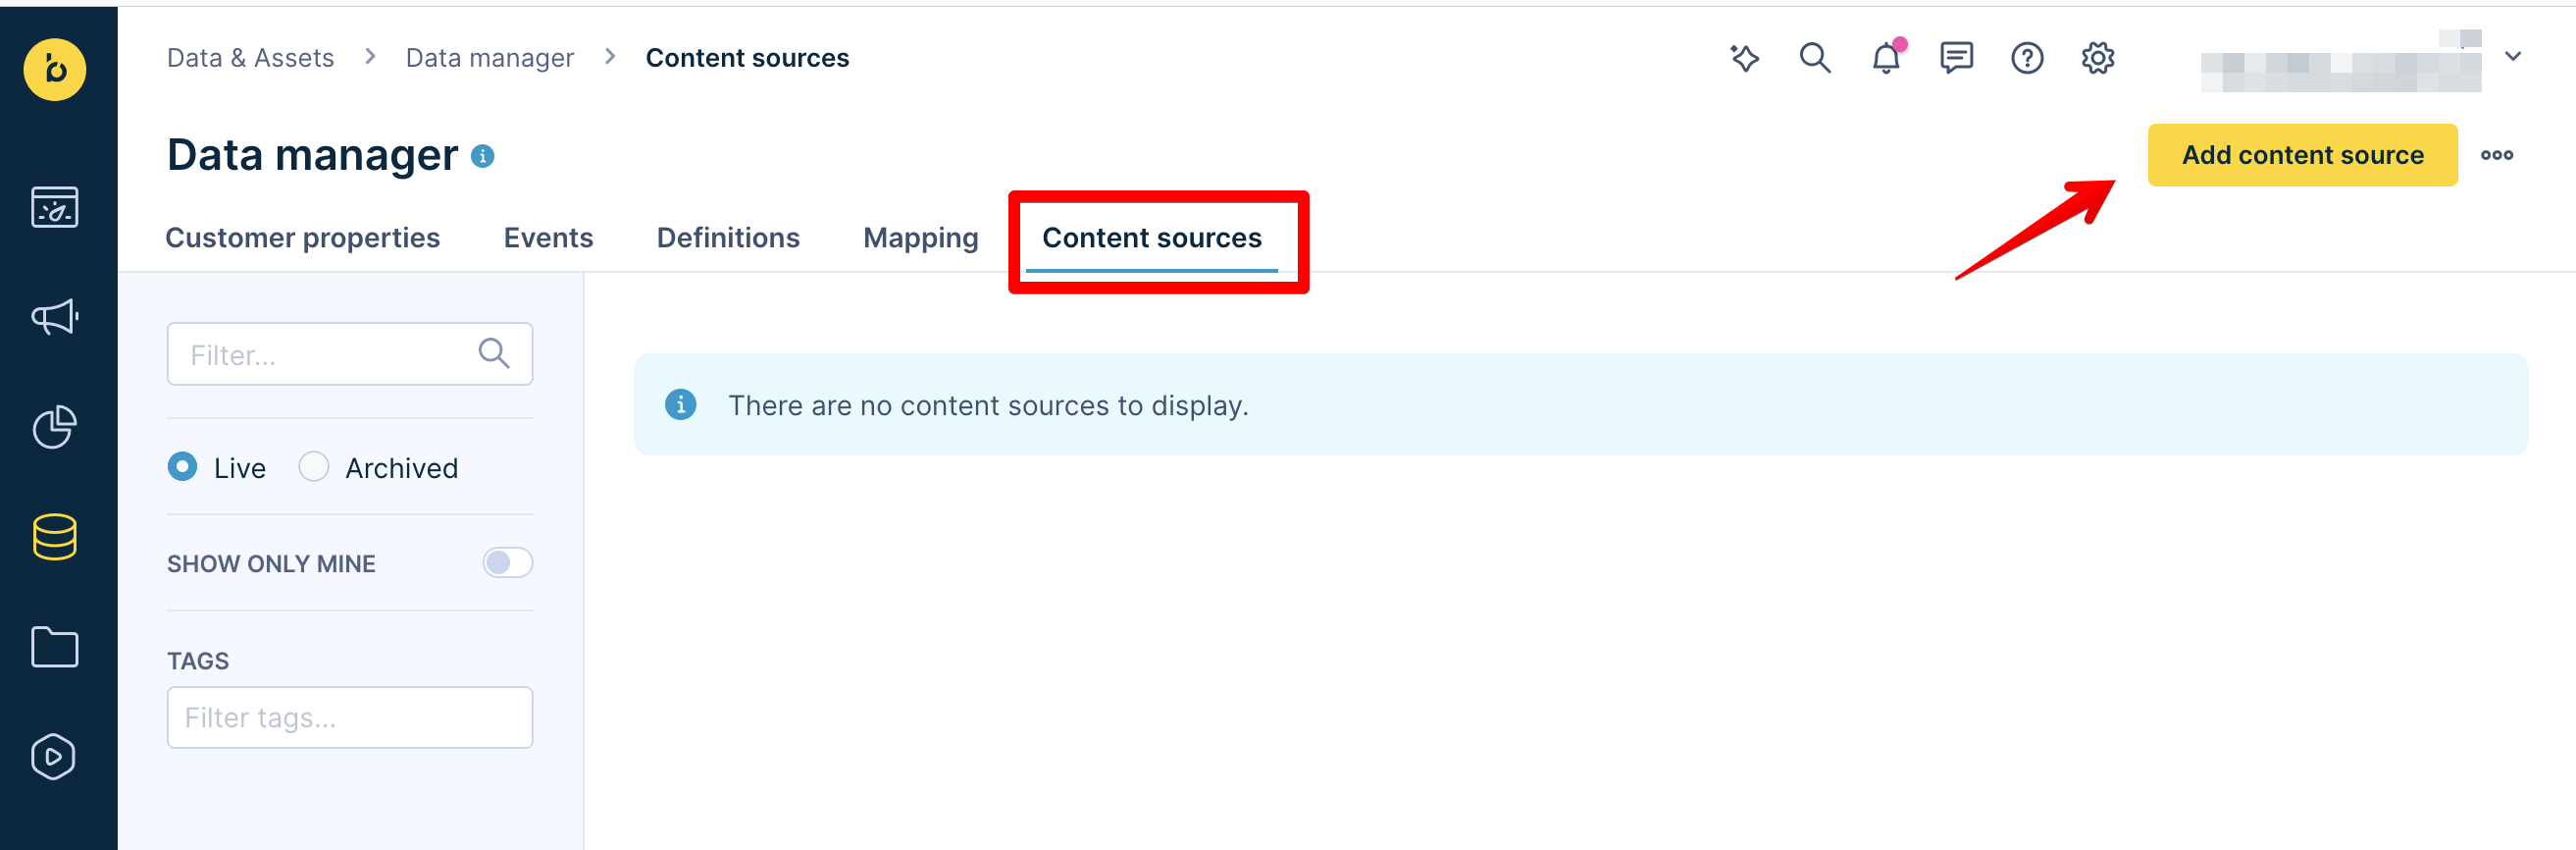
Navigate to manage your content sources
- In the pop-up, click Continue with Google, and sign in with your Google account.
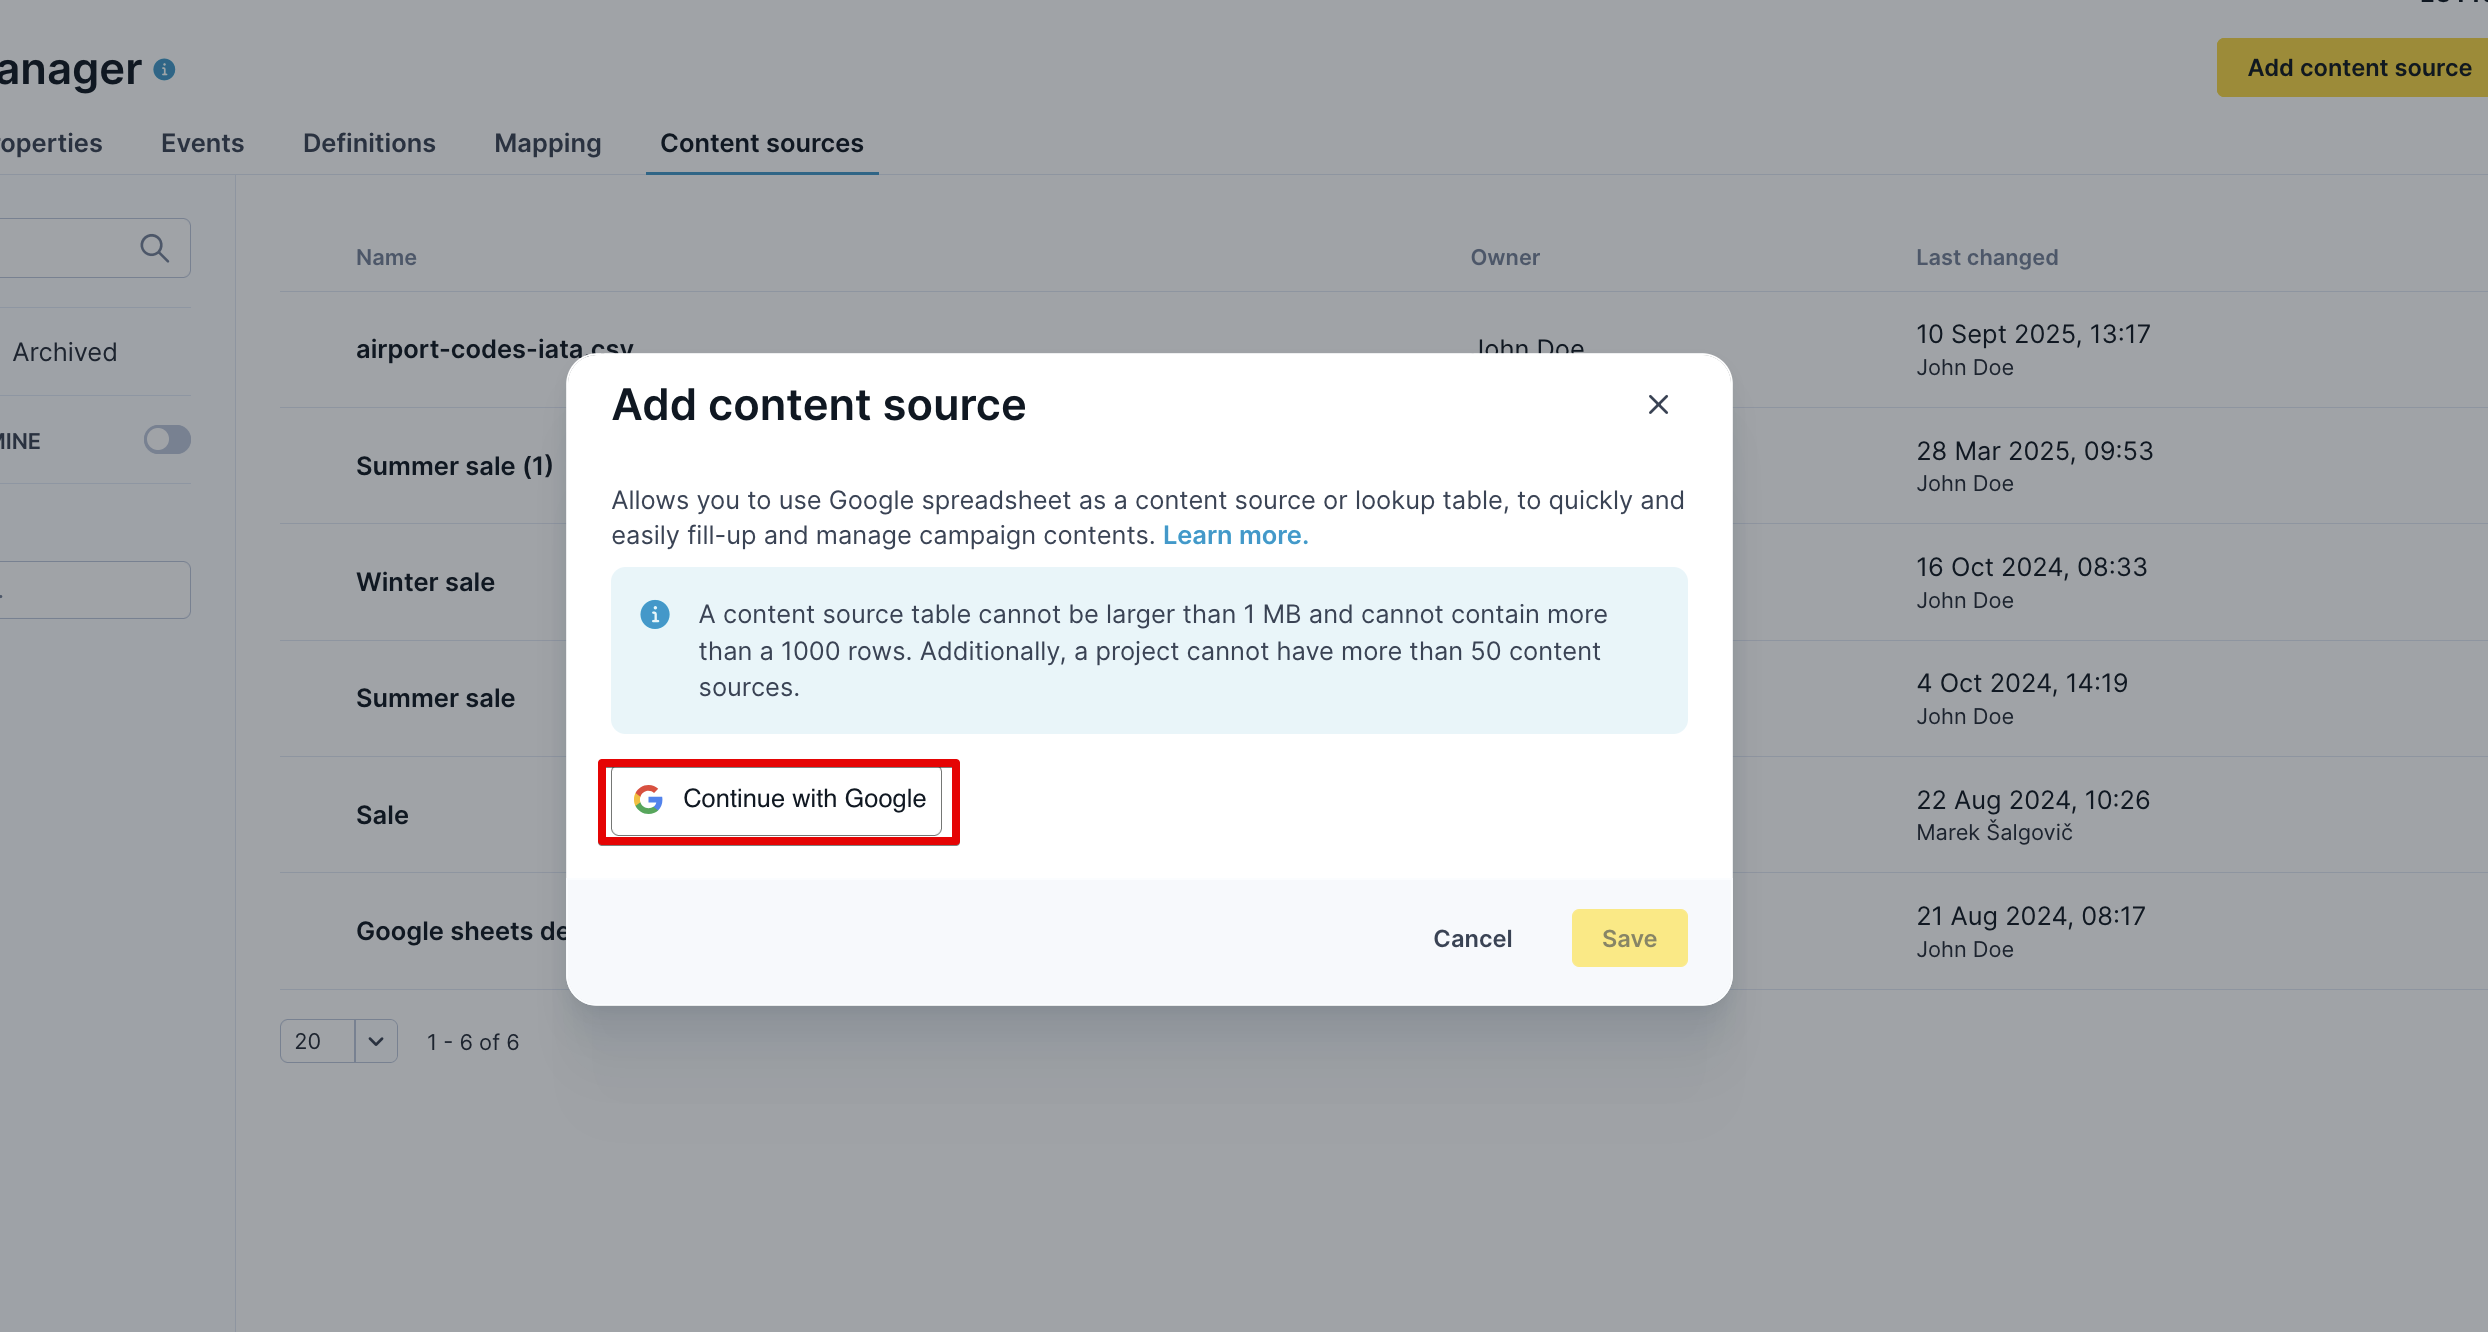
Sign in with your Google account to connect a Google sheet as a content source
- Click Continue to enable Bloomreach access to the Google sheet.
- Choose the Google sheet you want to connect with Bloomreach and click Select. After connecting, the data is stored in the application independently of the Google sheet source.
- Preview the connected Google sheet on the screen. You can also switch between sheets and configure which columns should be shown in the preview.
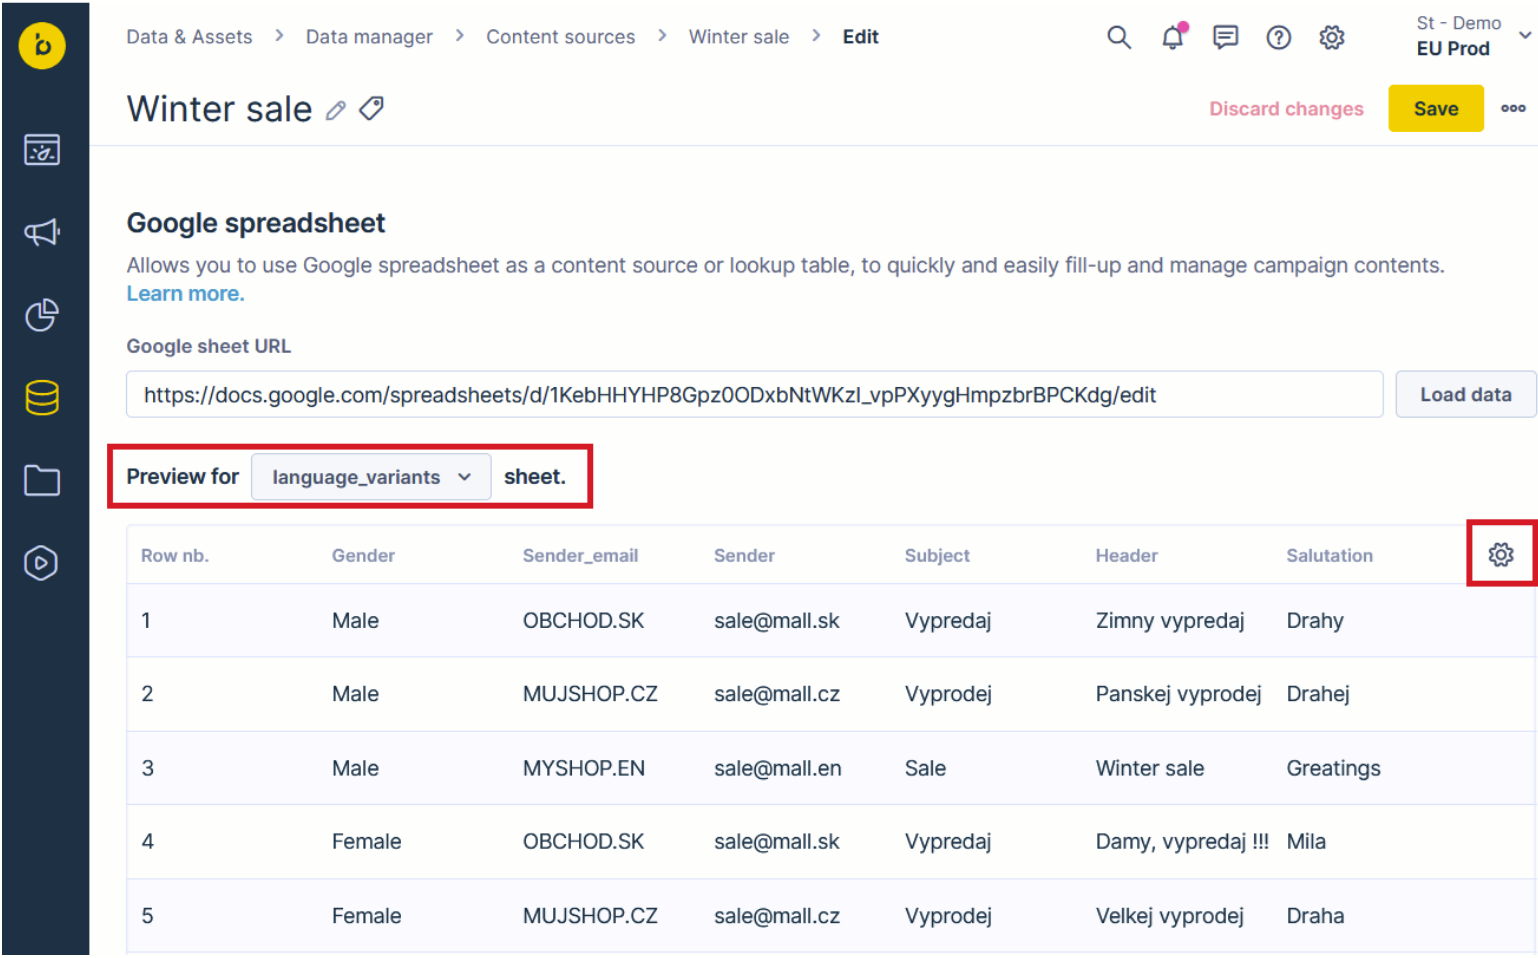
Preview your connected Google sheet
Data visibility and limitations
- All users with access to the Content source section can see data from the Google sheet, even if they don’t have access to the source Google sheet.
- Changes in the source Google sheet aren't automatically reflected in the application. You need to trigger updates manually for every connected Content source
Content source in email campaigns
To use a content source within an Email campaign or an Email node in a Scenario, you need to specify which Google sheet will be used.
Go to Campaigns > Email campaigns > Settings. Click Add content source and follow the same instructions as in How to set up content source section. You can add up to 10 content sources.

Add content source for email campaign
When you configure a content source, you can use it directly in the email editor. You have two options to use the content source as:
- Personalization tags.
- Direct access with Jinja.
Personalization tags
- Go to Campaign > Email campaign > Create new. Add a content block to the visual editor and click Personalization tag
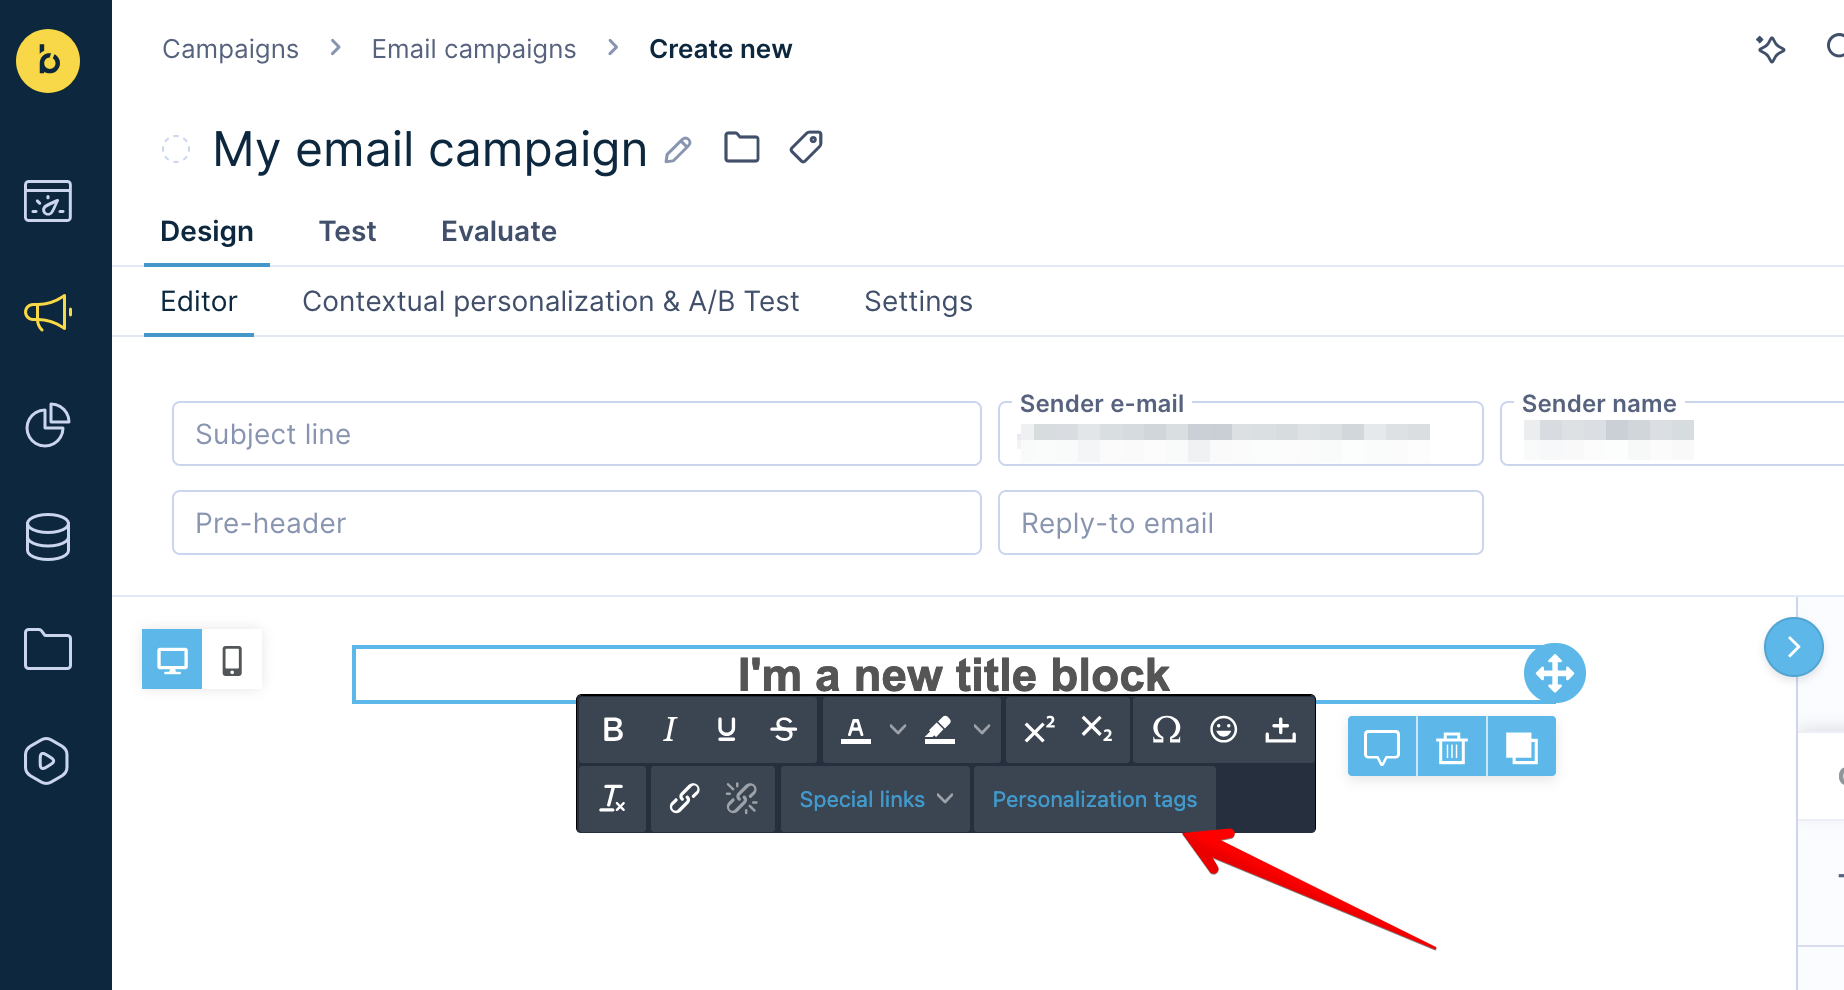
Configure a personalization tag
- A new window will open where you can configure the data to add to the email.
- If you choose the Simple lookup option, you need to select a specific sheet connected with the node. Then, select the column and line from the sheet. The preview will show the actual value of the field.
NoteIn a source Google sheet, the first line is used for the header. Therefore, row 1 in our application corresponds to row 2 in the source Google sheet.
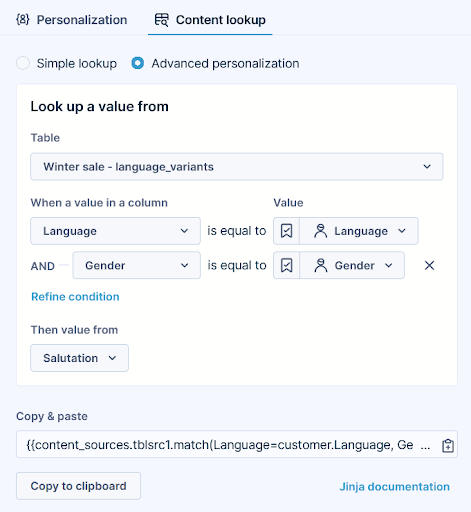
- If you choose Advanced personalization, you can select the row from the content source (Google sheet) based on the condition and then use the values from this line to personalize the message.
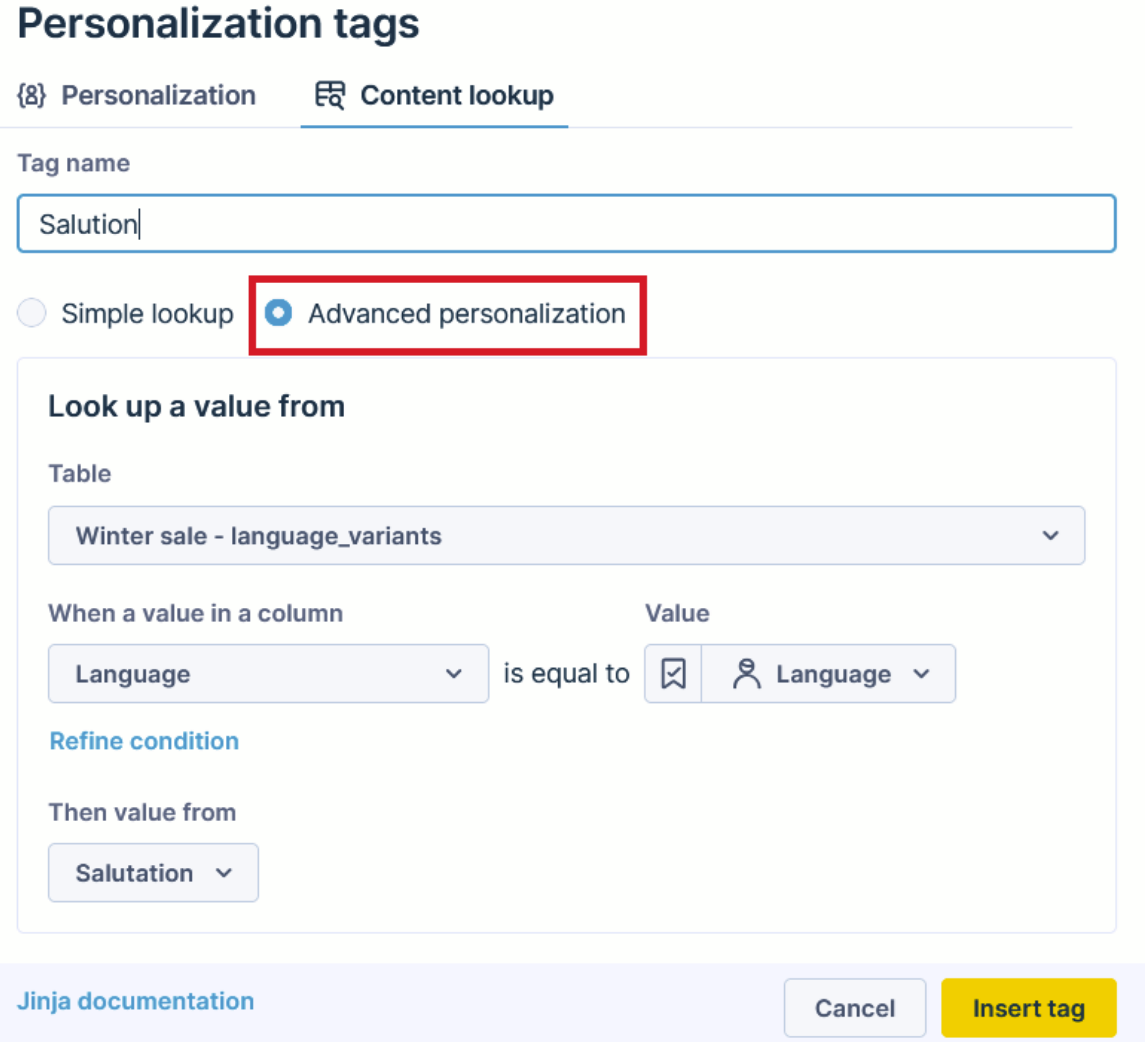
Set conditions in advanced personalization
Use case example of Advanced personalization
To personalize a salutation based on the language and gender of users, you can use the Advanced personalization feature in Bloomreach. Here's how you can set it up:
Assume you have the following table in a Google sheet:
| Language | Gender | Salutation | Header |
|---|---|---|---|
| ES | Male | Estimado | Rebajas de invierno |
| DE | Male | Lieber | Herrenverkauf |
| EN | Male | Greetings | Winter sale |
| ES | Female | Estimada | Chicas, rebajas!!! |
| DE | Female | Liebe | Großer verkauf |
| EN | Female | Hello | Winter sale |
- Customer profile attributes: Ensure your customer profile contains the necessary attributes, such as
languageandgender. - Content source: Use a Google sheet as your content source. Remember, the first line in the Google sheet is used for the header, so row 1 in the application corresponds to row 2 in the source Google sheet.
- Setting conditions: In the email editor, choose Advanced personalization. You can then select the row from the Google sheet based on conditions that match the customer attributes. For example, you can set conditions where the
languageandgenderin the customer profile match the values in the Google sheet. - Refine conditions: You can add more conditions by clicking on Refine condition to further tailor the personalization.
- Choosing the column: Now, when the line is defined, you can choose the column from which you want to obtain a value, in our case, Salutation.
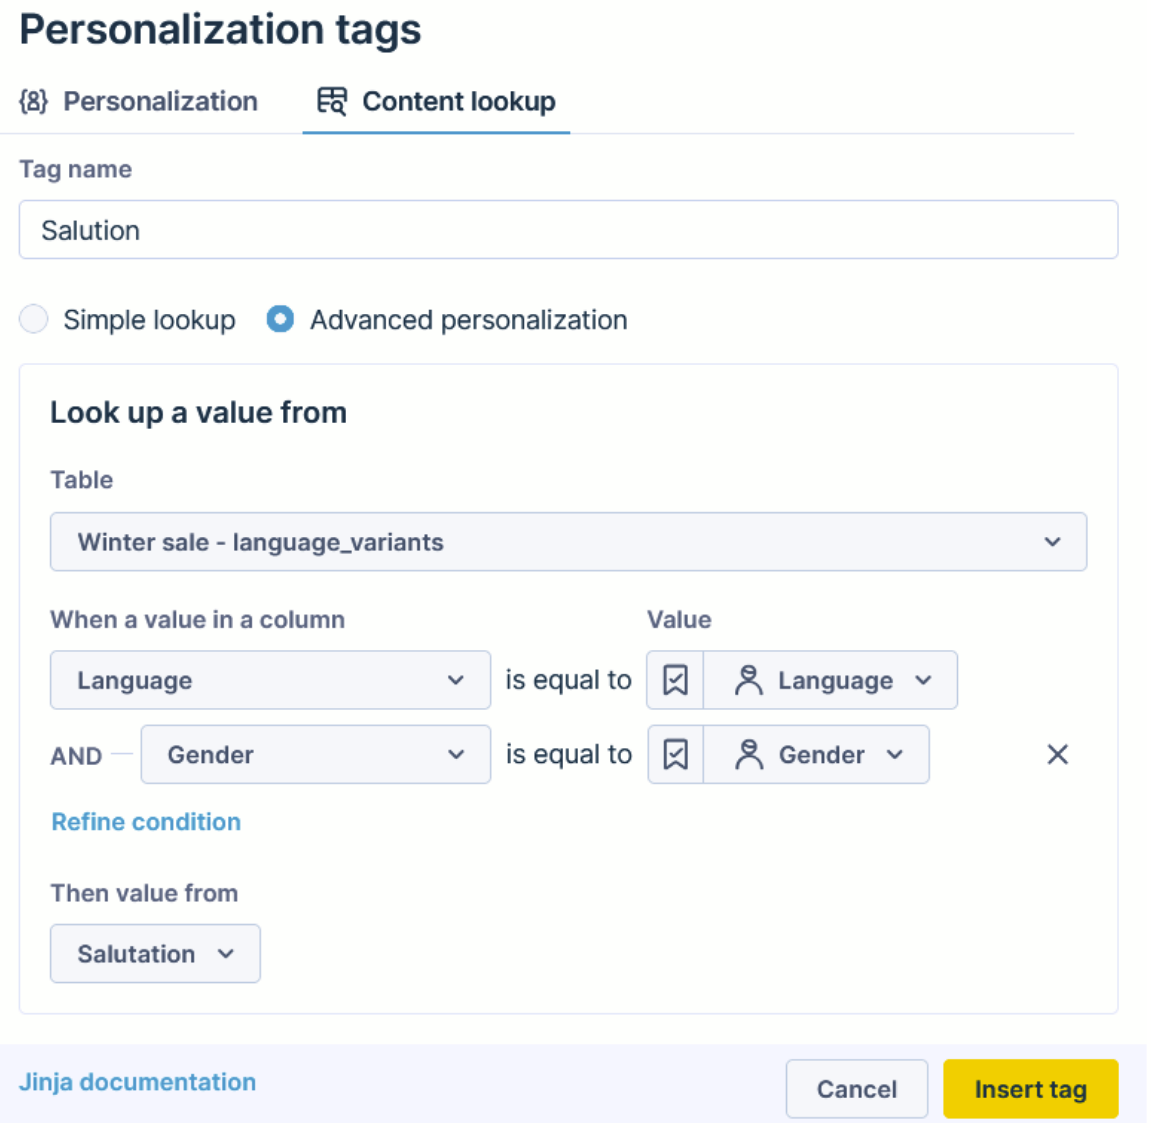
Advanced personalization full setup
Reference by Jinja
To set up and manage content sources using Jinja, follow these steps:
- Go to Campaign > Email campaign > Create new. You can use content sources directly in the HTML editor via Jinja.
- You can find the Jinja helper to create a Jinja expression in the bottom right menu, represented by curly brackets.
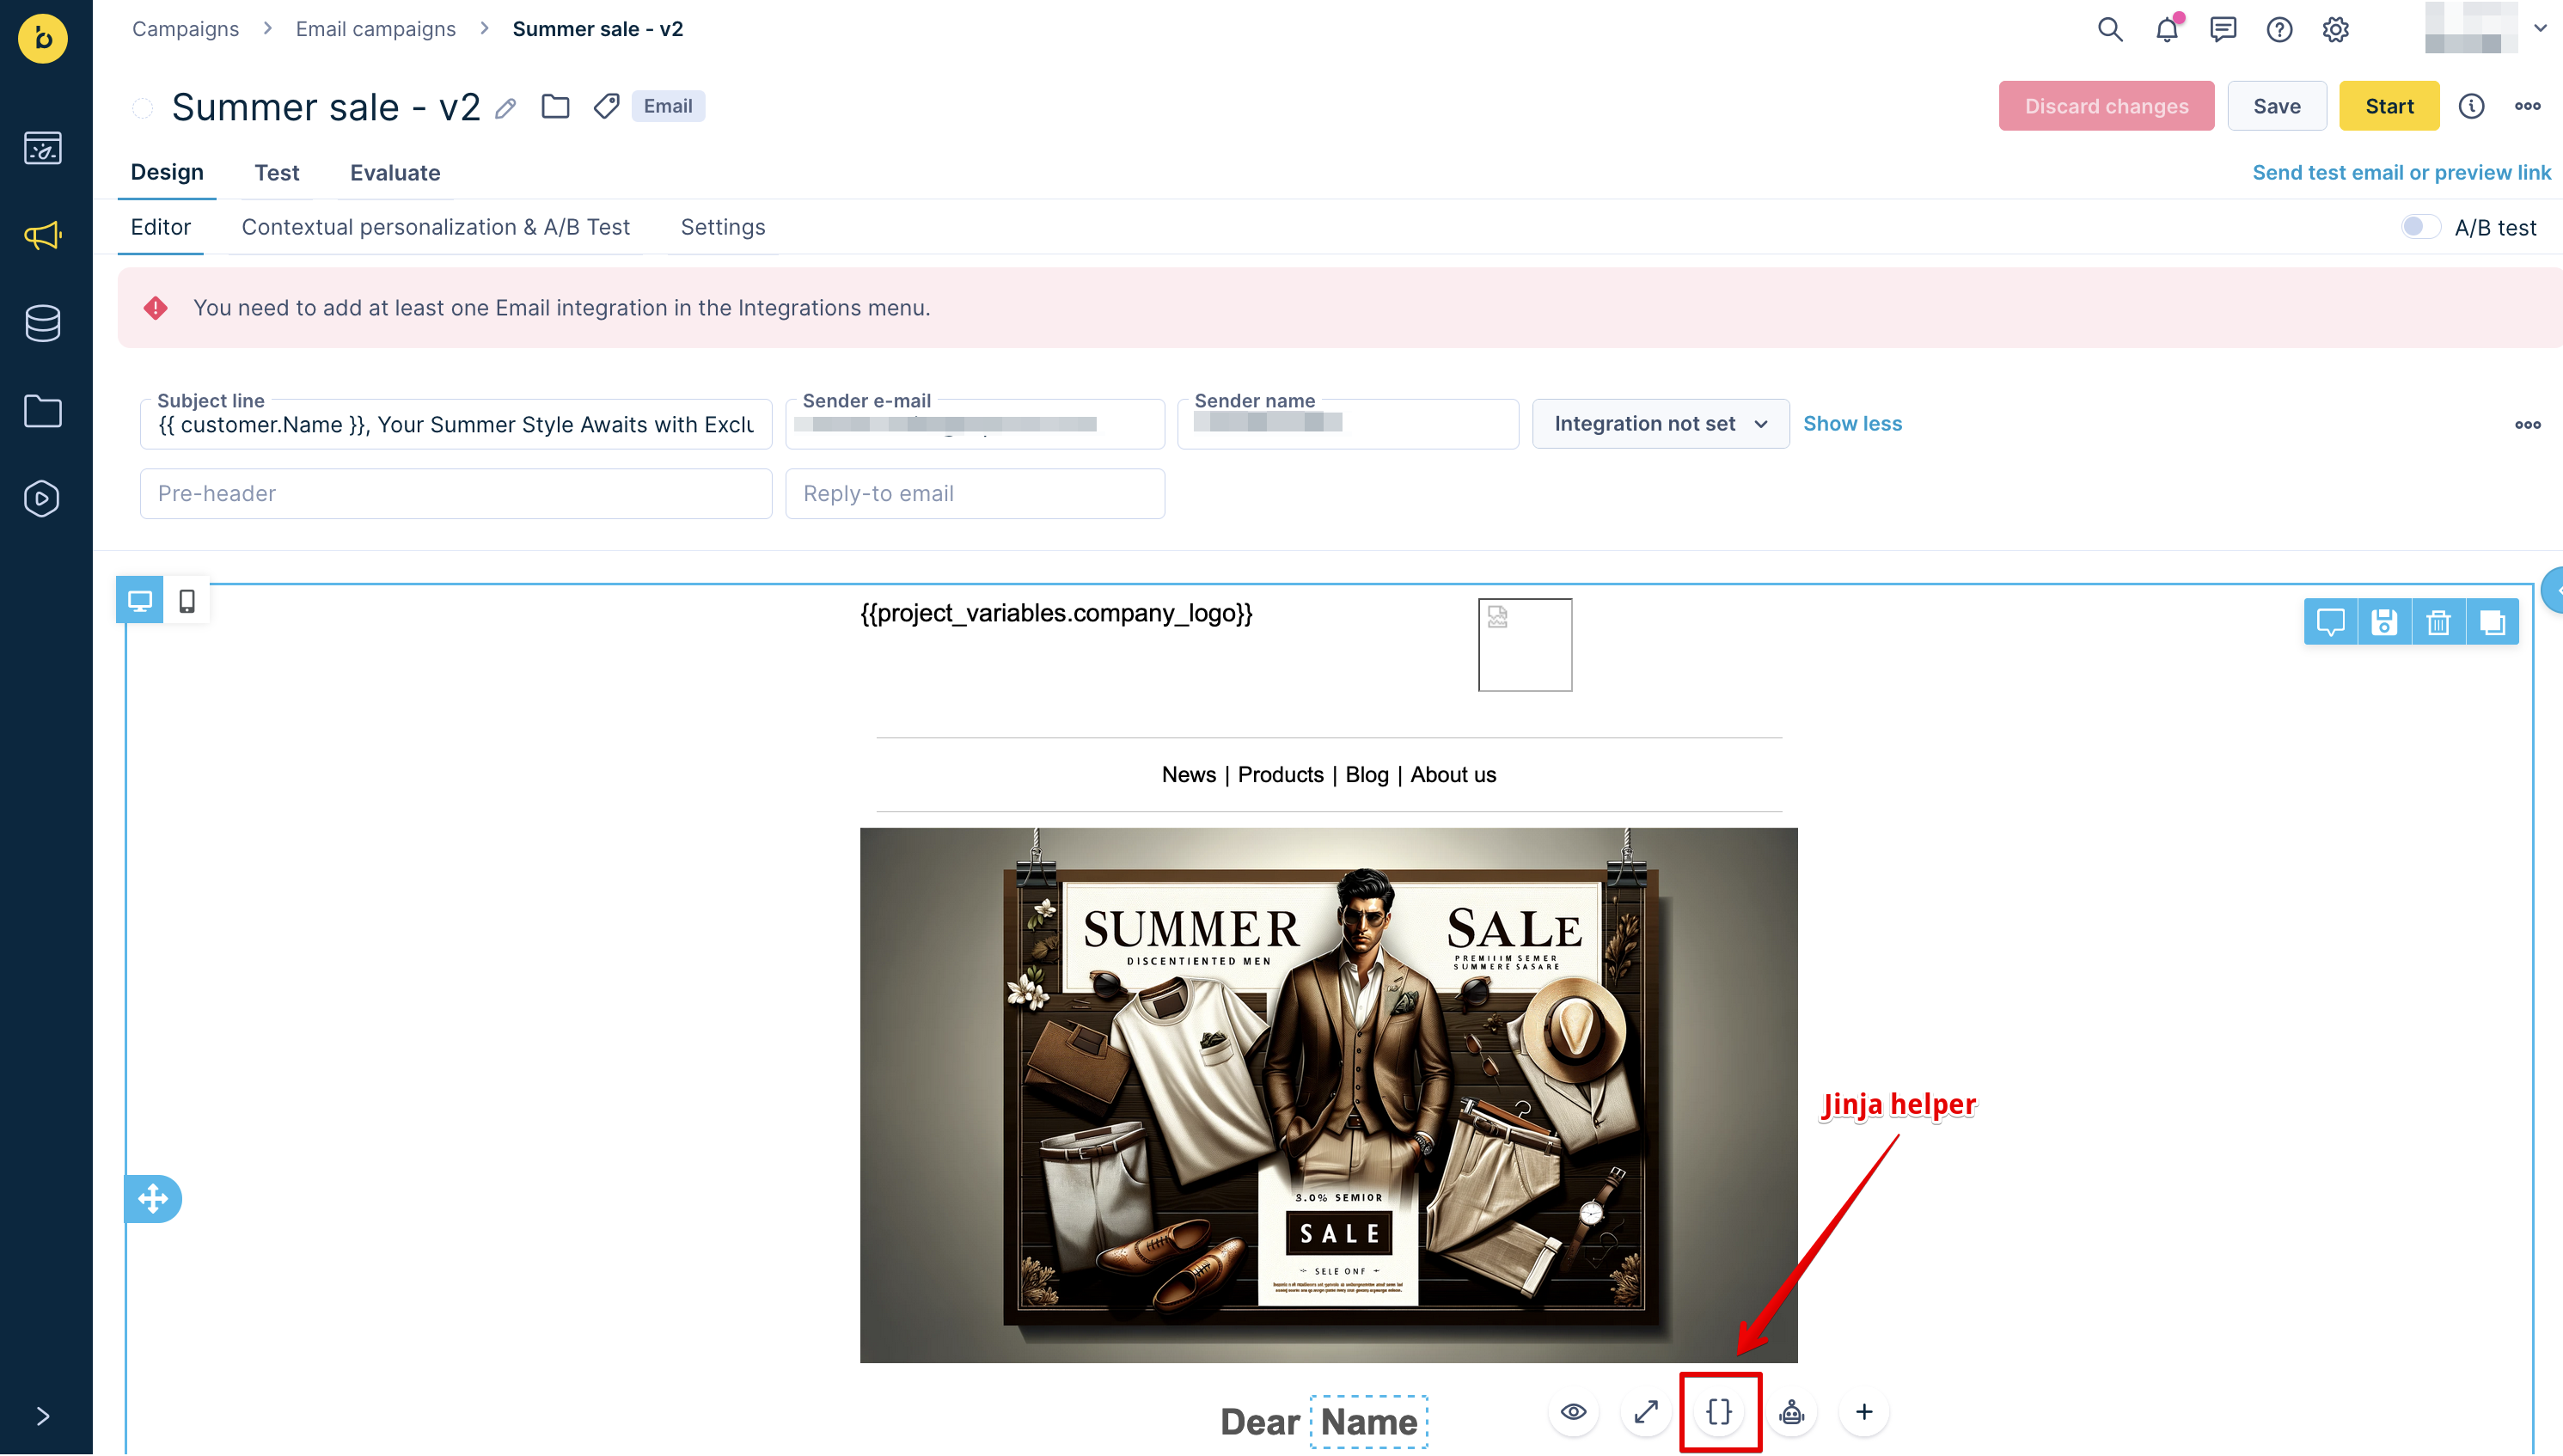
Access the Jinja helper via the curly brackets icon in the bottom right of the HTML editor
- The Google sheet within a Jinja is referenced by an alias that can be found in the Settings.
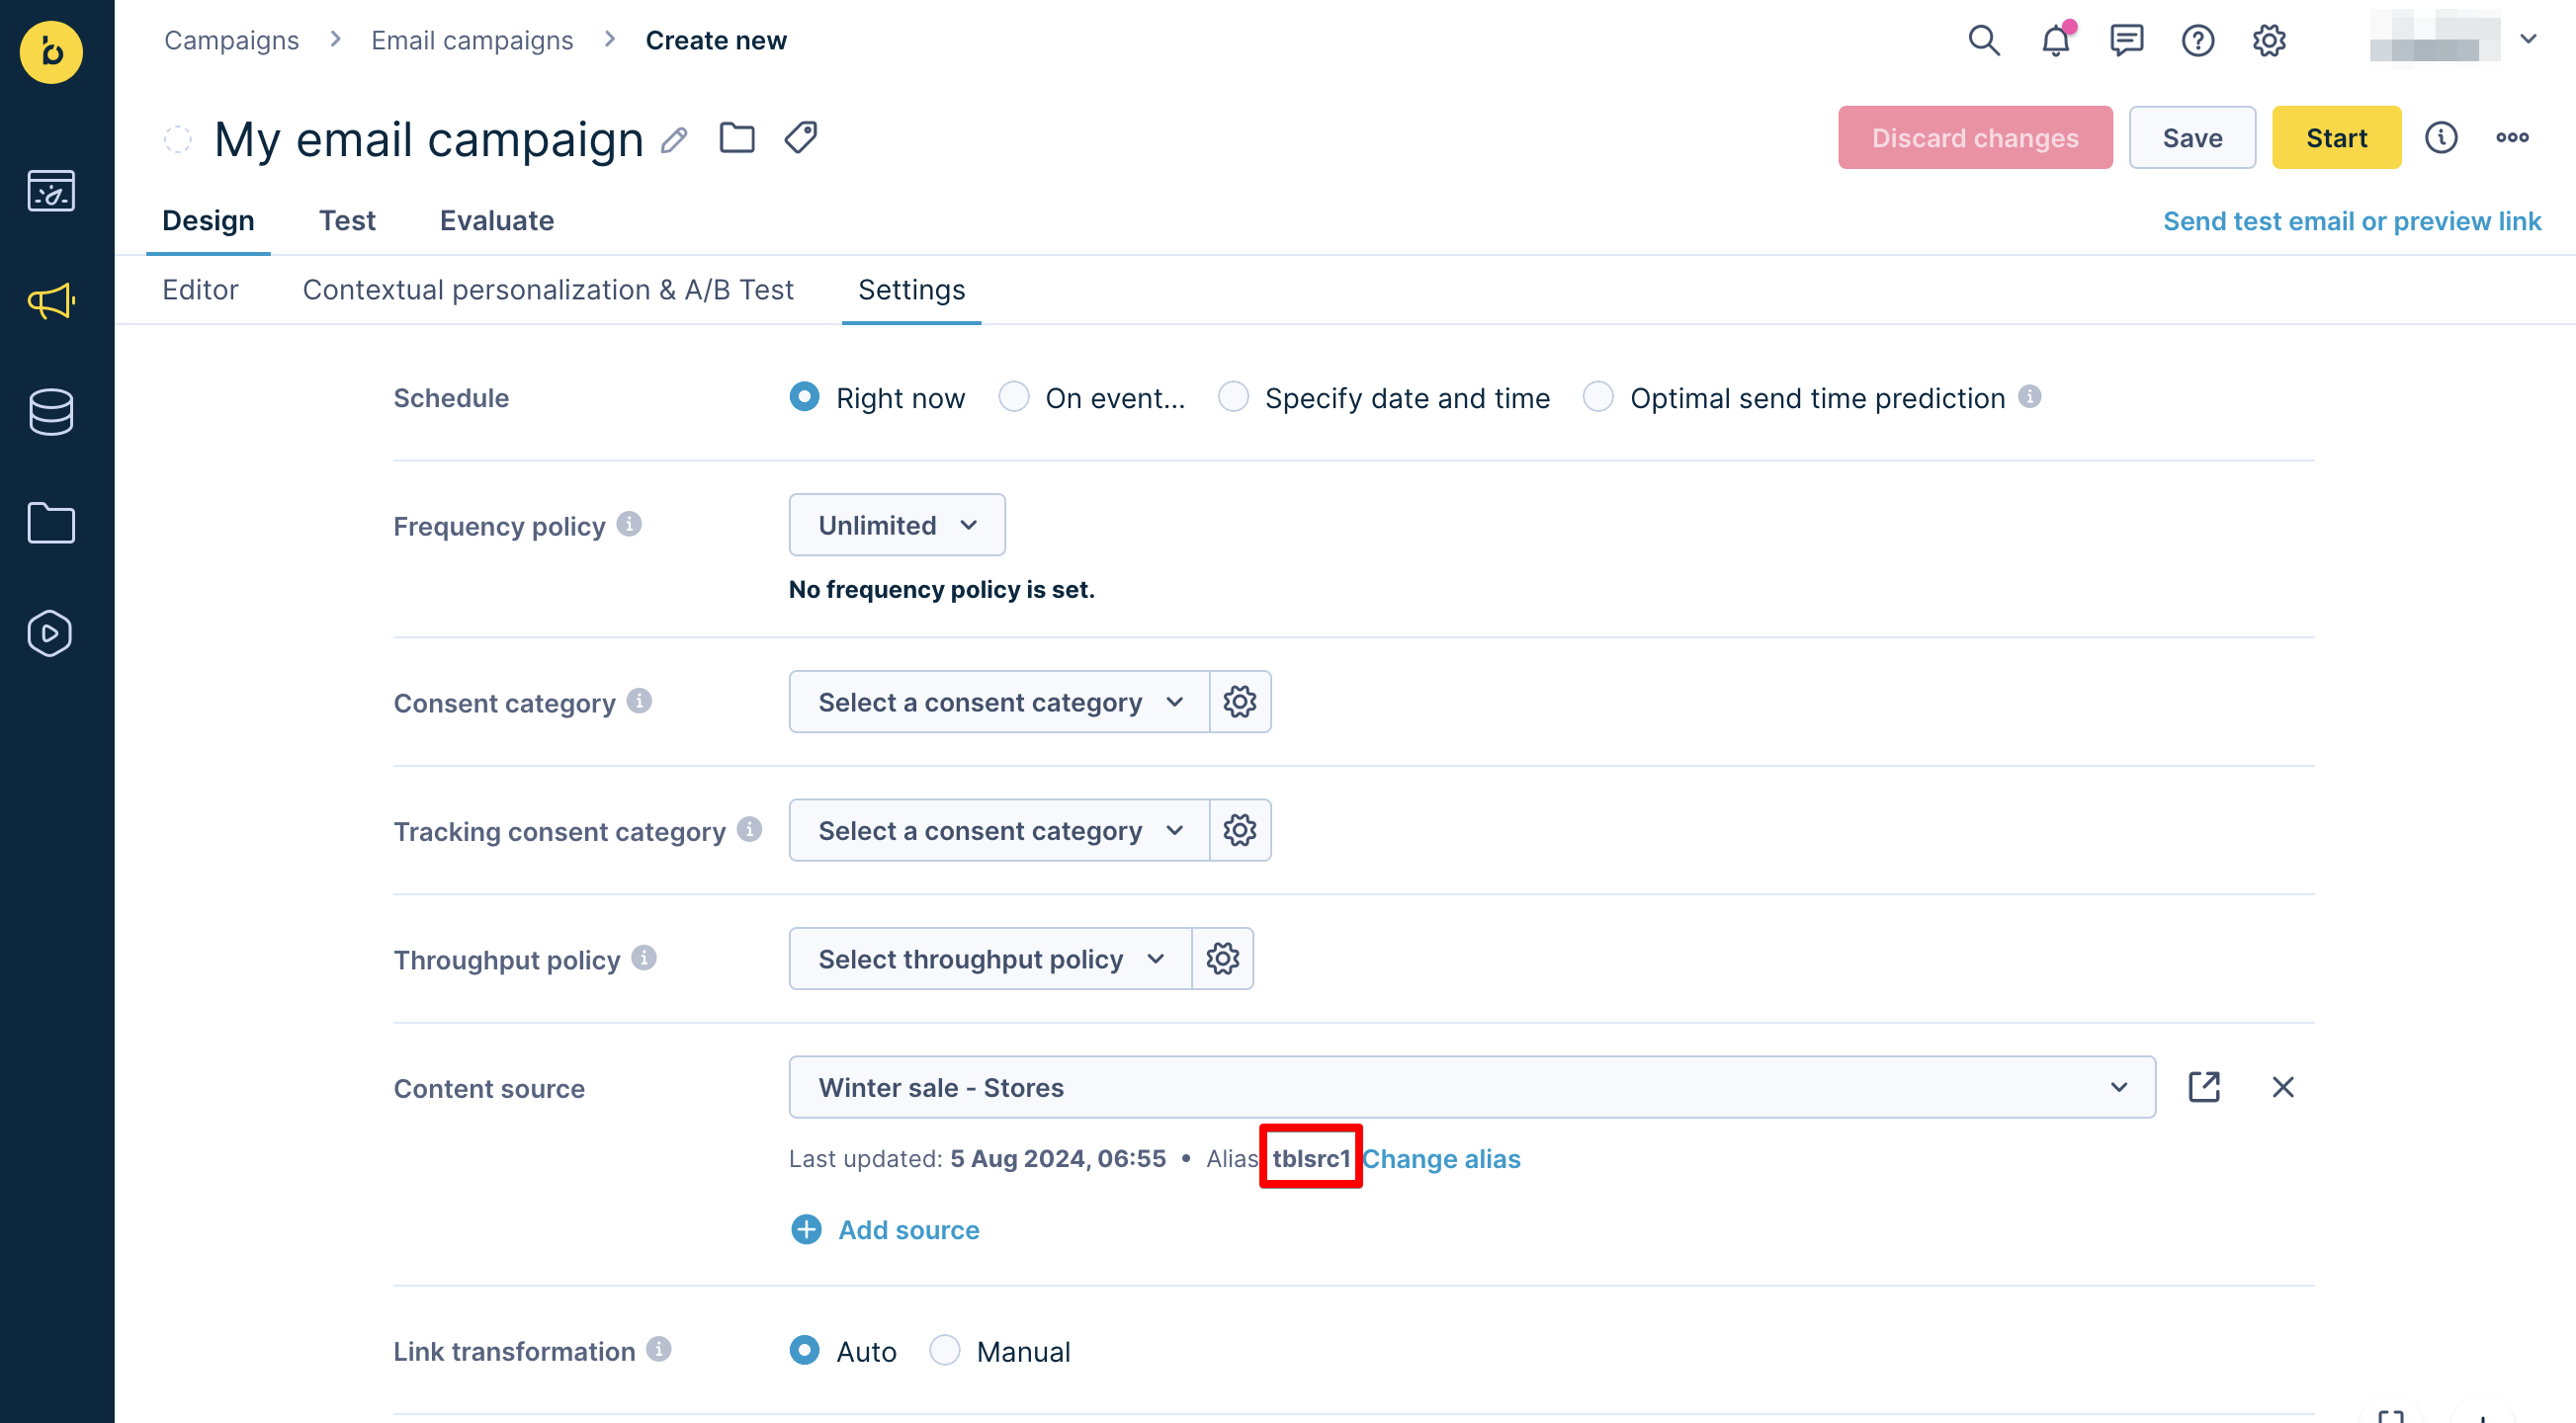
Google sheet reference alias
- Content source can be changed without changing the alias. This means you don't need to update the Jinja expression already in use when you change the content source.
Change content sources without changing the alias
For more details, refer to the HTML Blocks and Email Editors pages. These pages provide comprehensive information on building and personalizing emails using the visual and HTML builders, and how to use Jinja for advanced personalization.
Jinja usage
Here are more options on how to use Jinja commands in Content sources.
You can get results from the content source by using a specific row.
- Example: Get the article title of the 3rd row.
{{ content_sources.articles.find_row(row_number=3, sort_by="title", order="asc").title }}In the command above, defaults for find_row are:
row_number=1sort_by=""(sorted by original order)order="asc"
The results of Jinja commands depend on the column conditions.
- Example: Skip the first 3 and get max 10 rows from the articles where the language equals
'en'and year equals 2024, sorted by the title.
{{ content_sources.articles.match(language='en', year=2024).find_rows(sort_by='title', order='asc', skip=3, limit=10) }}In the command above, defaults for find_row are:
sort_by=""(sorted by original order)order="asc"skip=0limit=None
You can also use a fallback option. If the condition-based lookup returns an empty field, you can use find_row to set a specific value. Here is an example where we check the condition, and if it returns a value, this value is used; otherwise, the value from the defined row is used.
{% if content_sources.tblsrc1.match(Language=customer.Language).find_row().Salutation %}{{content_sources.tblsrc1.match(Language=customer.Language).find_row().Salutation}}{% else %}{{content_sources.tblsrc1.find_row(3).Salutation}}{%endif%}Refer to the Basic Syntax of Jinja article for more details on using Jinja.
Limitations
- Maximum of 50 content sources per project.
- Maximum size of one sheet is 1MB.
- Maximum limit is 1,000 lines per sheet.
- Maximum limit for connected sheets per node is 10.
- When the content source is copied to another project, updates of the sheet need to be triggered in every project.
- Column name must be unique in the sheet and can contain only alphanumeric characters and underscores (_).
NoteYou can include multiple tabs within a single sheet, and each tab can be selected as a separate content source. There is no limit to the number of tabs you can add. The only restriction is the overall sheet file size, which must remain under 1MB. This lets you maximize the number of content sources you use.
For example, if you have a sheet with 6 tabs, each tab containing 200 rows, and the total file size is only 30KB, you could utilize 6 × 50 content sources (one for each data range per tab), allowing up to 300 content sources within a single sheet.
Updated 2 days ago