

Example app for iOS SDK
Build, run, and navigate the example app included with the iOS SDK
The Exponea iOS SDK includes an example application you can use as a reference implementation. You can build and run the app, test Engagement features, and compare the code and behavior of your implementation with the expected behavior and code in the example app.
Prerequisites
You must have the following software installed to be able to build and run the example app:
- Xcode
- CocoaPods
In Xcode, navigate to Xcode > Settings > Locations and make sure Command Line Tools is set to your Xcode version.
Build and run the example app
- Clone the exponea-ios-sdk repository on GitHub:
git clone https://github.com/exponea/exponea-ios-sdk.git - Run the following CocoaPods command:
pod install - Open the
ExponeaSDK.xcworkspacefile to open the project in Xcode. - In the Project navigator in Xcode, select the
ExponeaSDKproject. - Navigate to the
Exampleapplication target's settings. On the General tab, find theFrameworks, Libraries, and Embedded Contentsection and verify thatExponeaSDK.frameworkis listed. - Navigate to Product > Scheme and select
Example. - Select Product > Build (Cmd + B).
- Select Product > Run (Cmd + R) to run the example app in the simulator.
To enable push notifications in the example app, you must also Configure Apple Push Notification Service for iOS SDK in the Engagement web app.
Navigate the example app
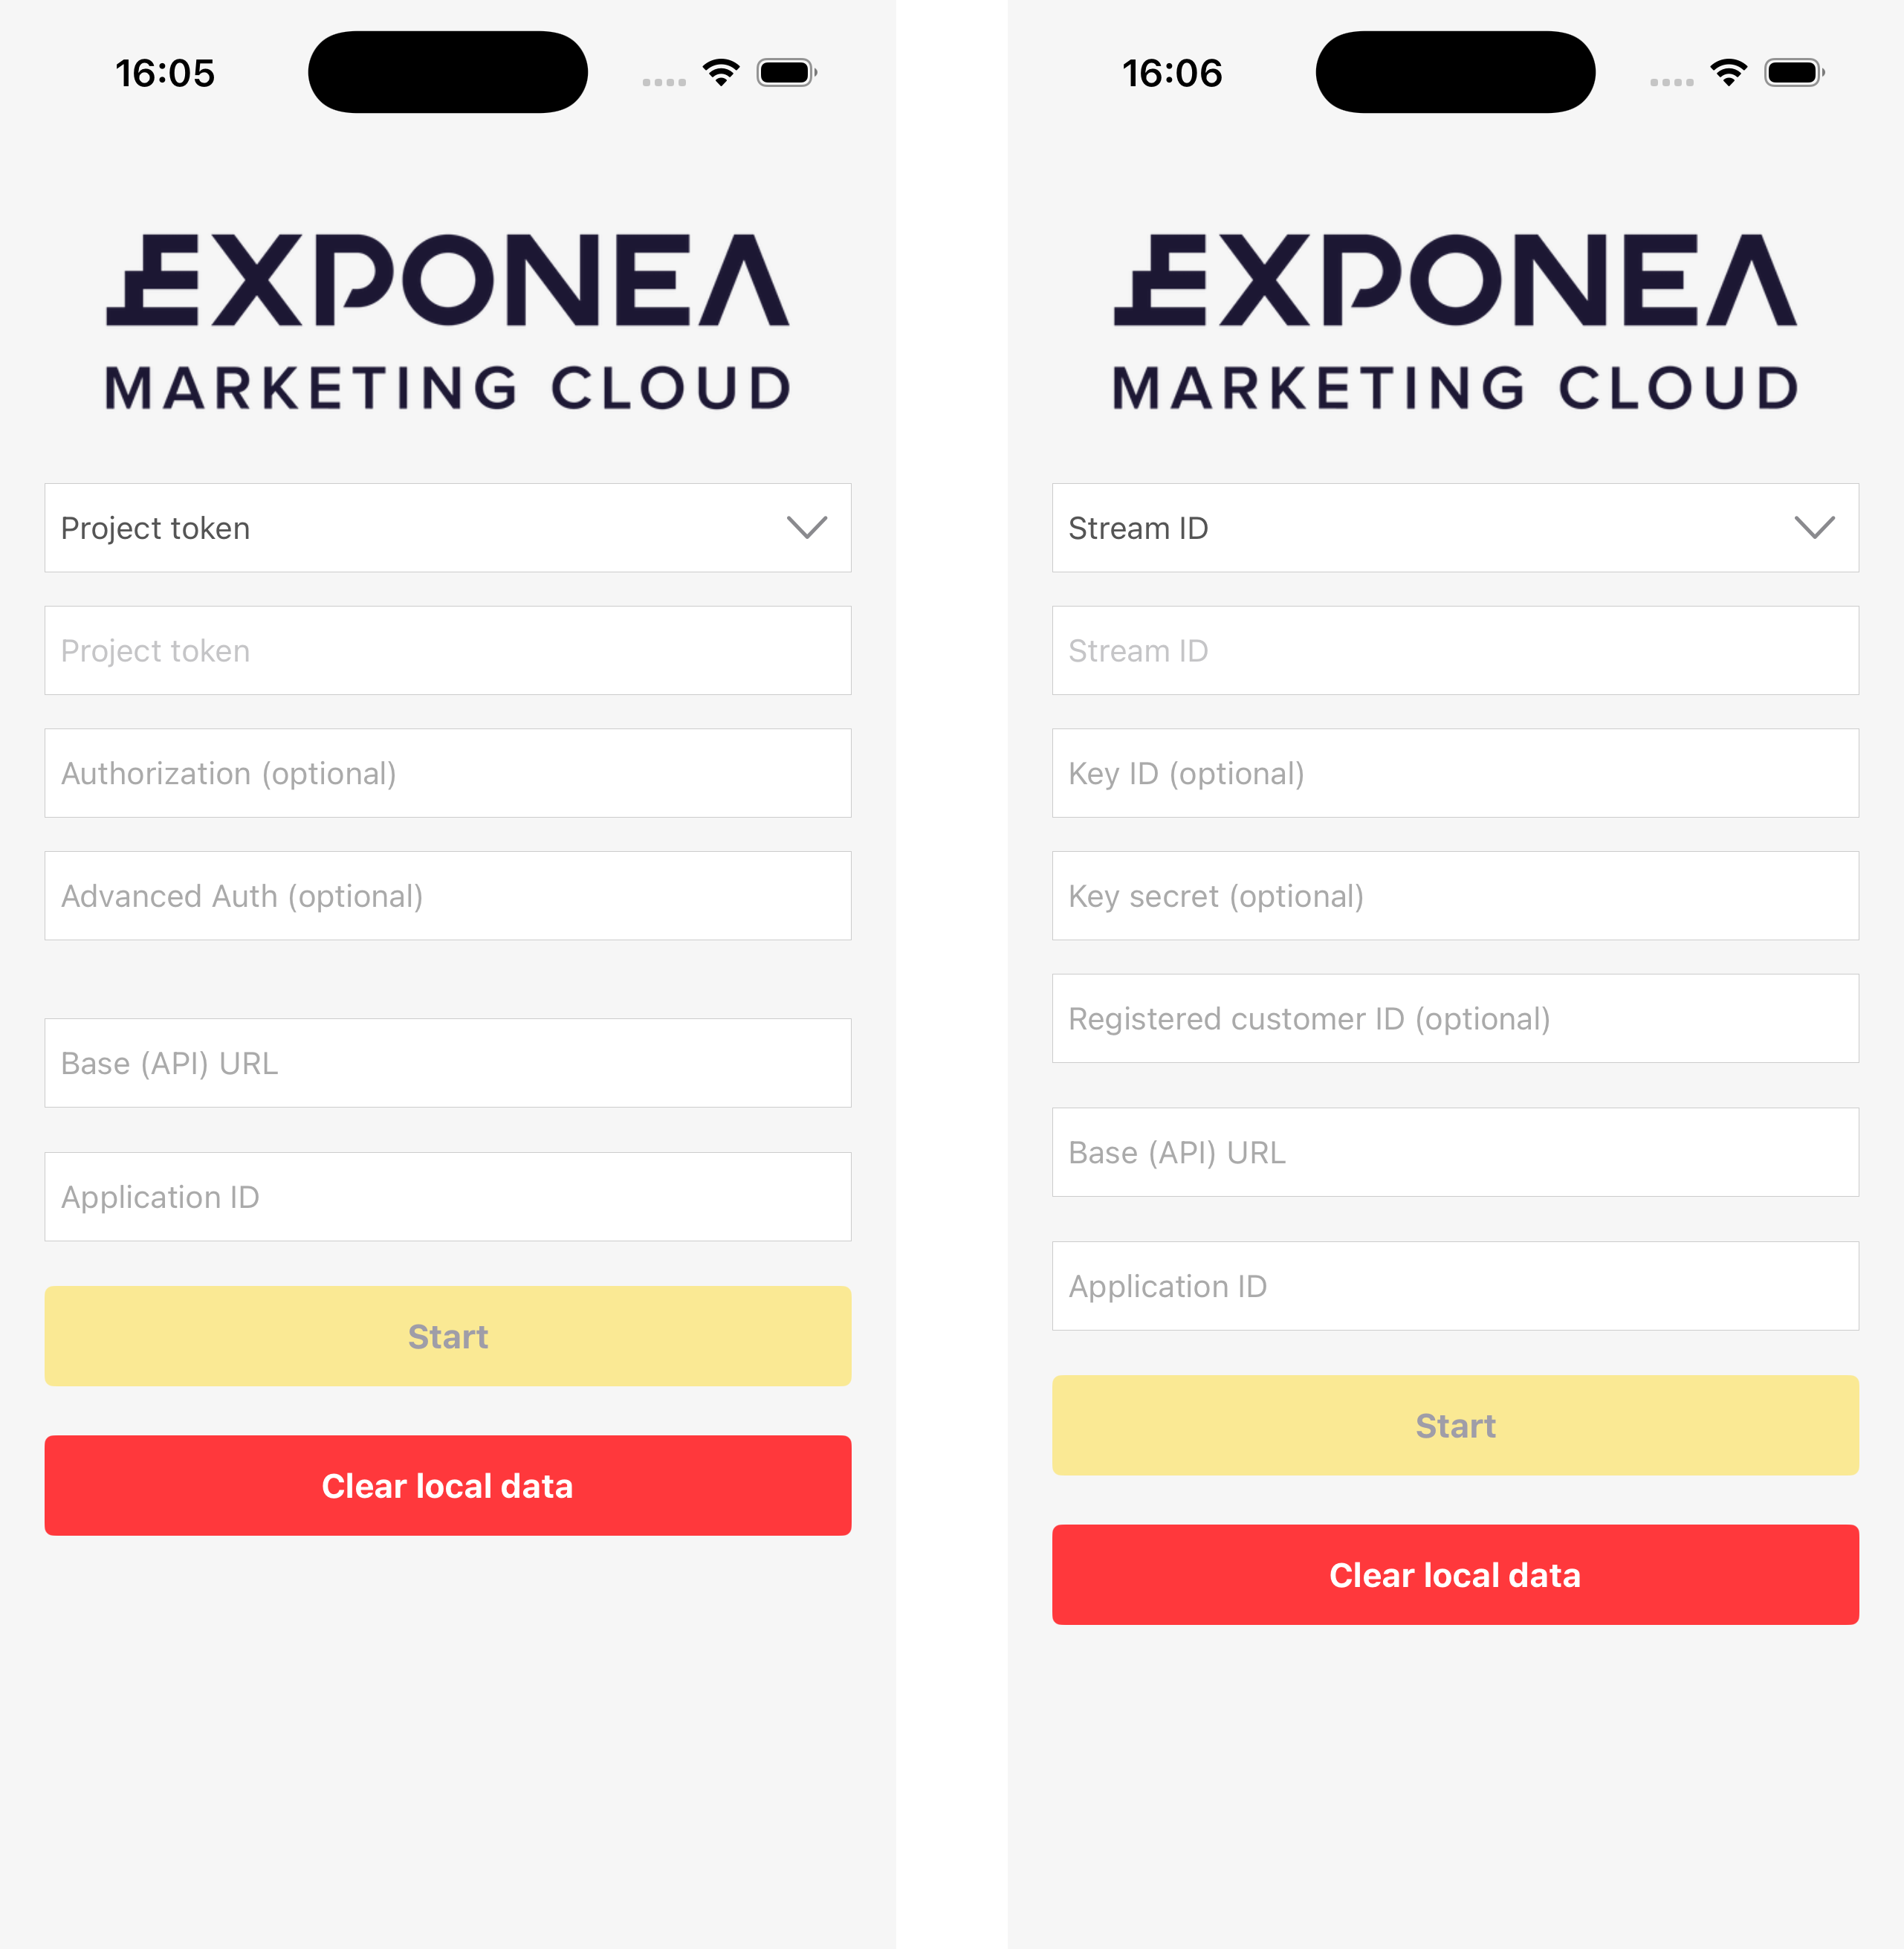
When you run the app in the simulator, you'll see the Authentication view. The screen fields change depending on the selected integration type. Here's how to set it up:
- Select your integration type from the dropdown: Stream ID or Project token.
- For Stream ID:
- Enter your
Stream ID. - Optional: Enter
Key IDandKey secretto enable local JWT token generation for testing. Both must be provided together. Refer to SDK auth token authorization for details. - Optional: Enter a
Registered customer IDto identify the customer at startup. WhenKey IDandKey secretare provided, the registered customer ID is required.
- Enter your
- For Project token:
- Enter your
Project token. - Optional: Enter the
Authorization(API key). - Optional: Enter the
Advanced Authkey to enable customer token authorization.
- Enter your
- Enter the
Base (API) URL(API base URL for the Bloomreach platform). - Optional: Enter an
Application IDif your Engagement project supports multiple mobile apps. If you leave this blank, the SDK uses the default valuedefault-application. Learn more about Configuration for iOS SDK. - Click Start to initialize the SDK.
The Clear local data button invokes Exponea.shared.clearLocalCustomerData(appGroup:) to delete all locally stored data without initializing the SDK.
When using Project token, make sure to prefix your API key with
Token, for example:
Token 0b7uuqicb0fwuv1tqz7ubesxzj3kc3dje3lqyqhzd94pgwnypdiwxz45zqkhjmbf.
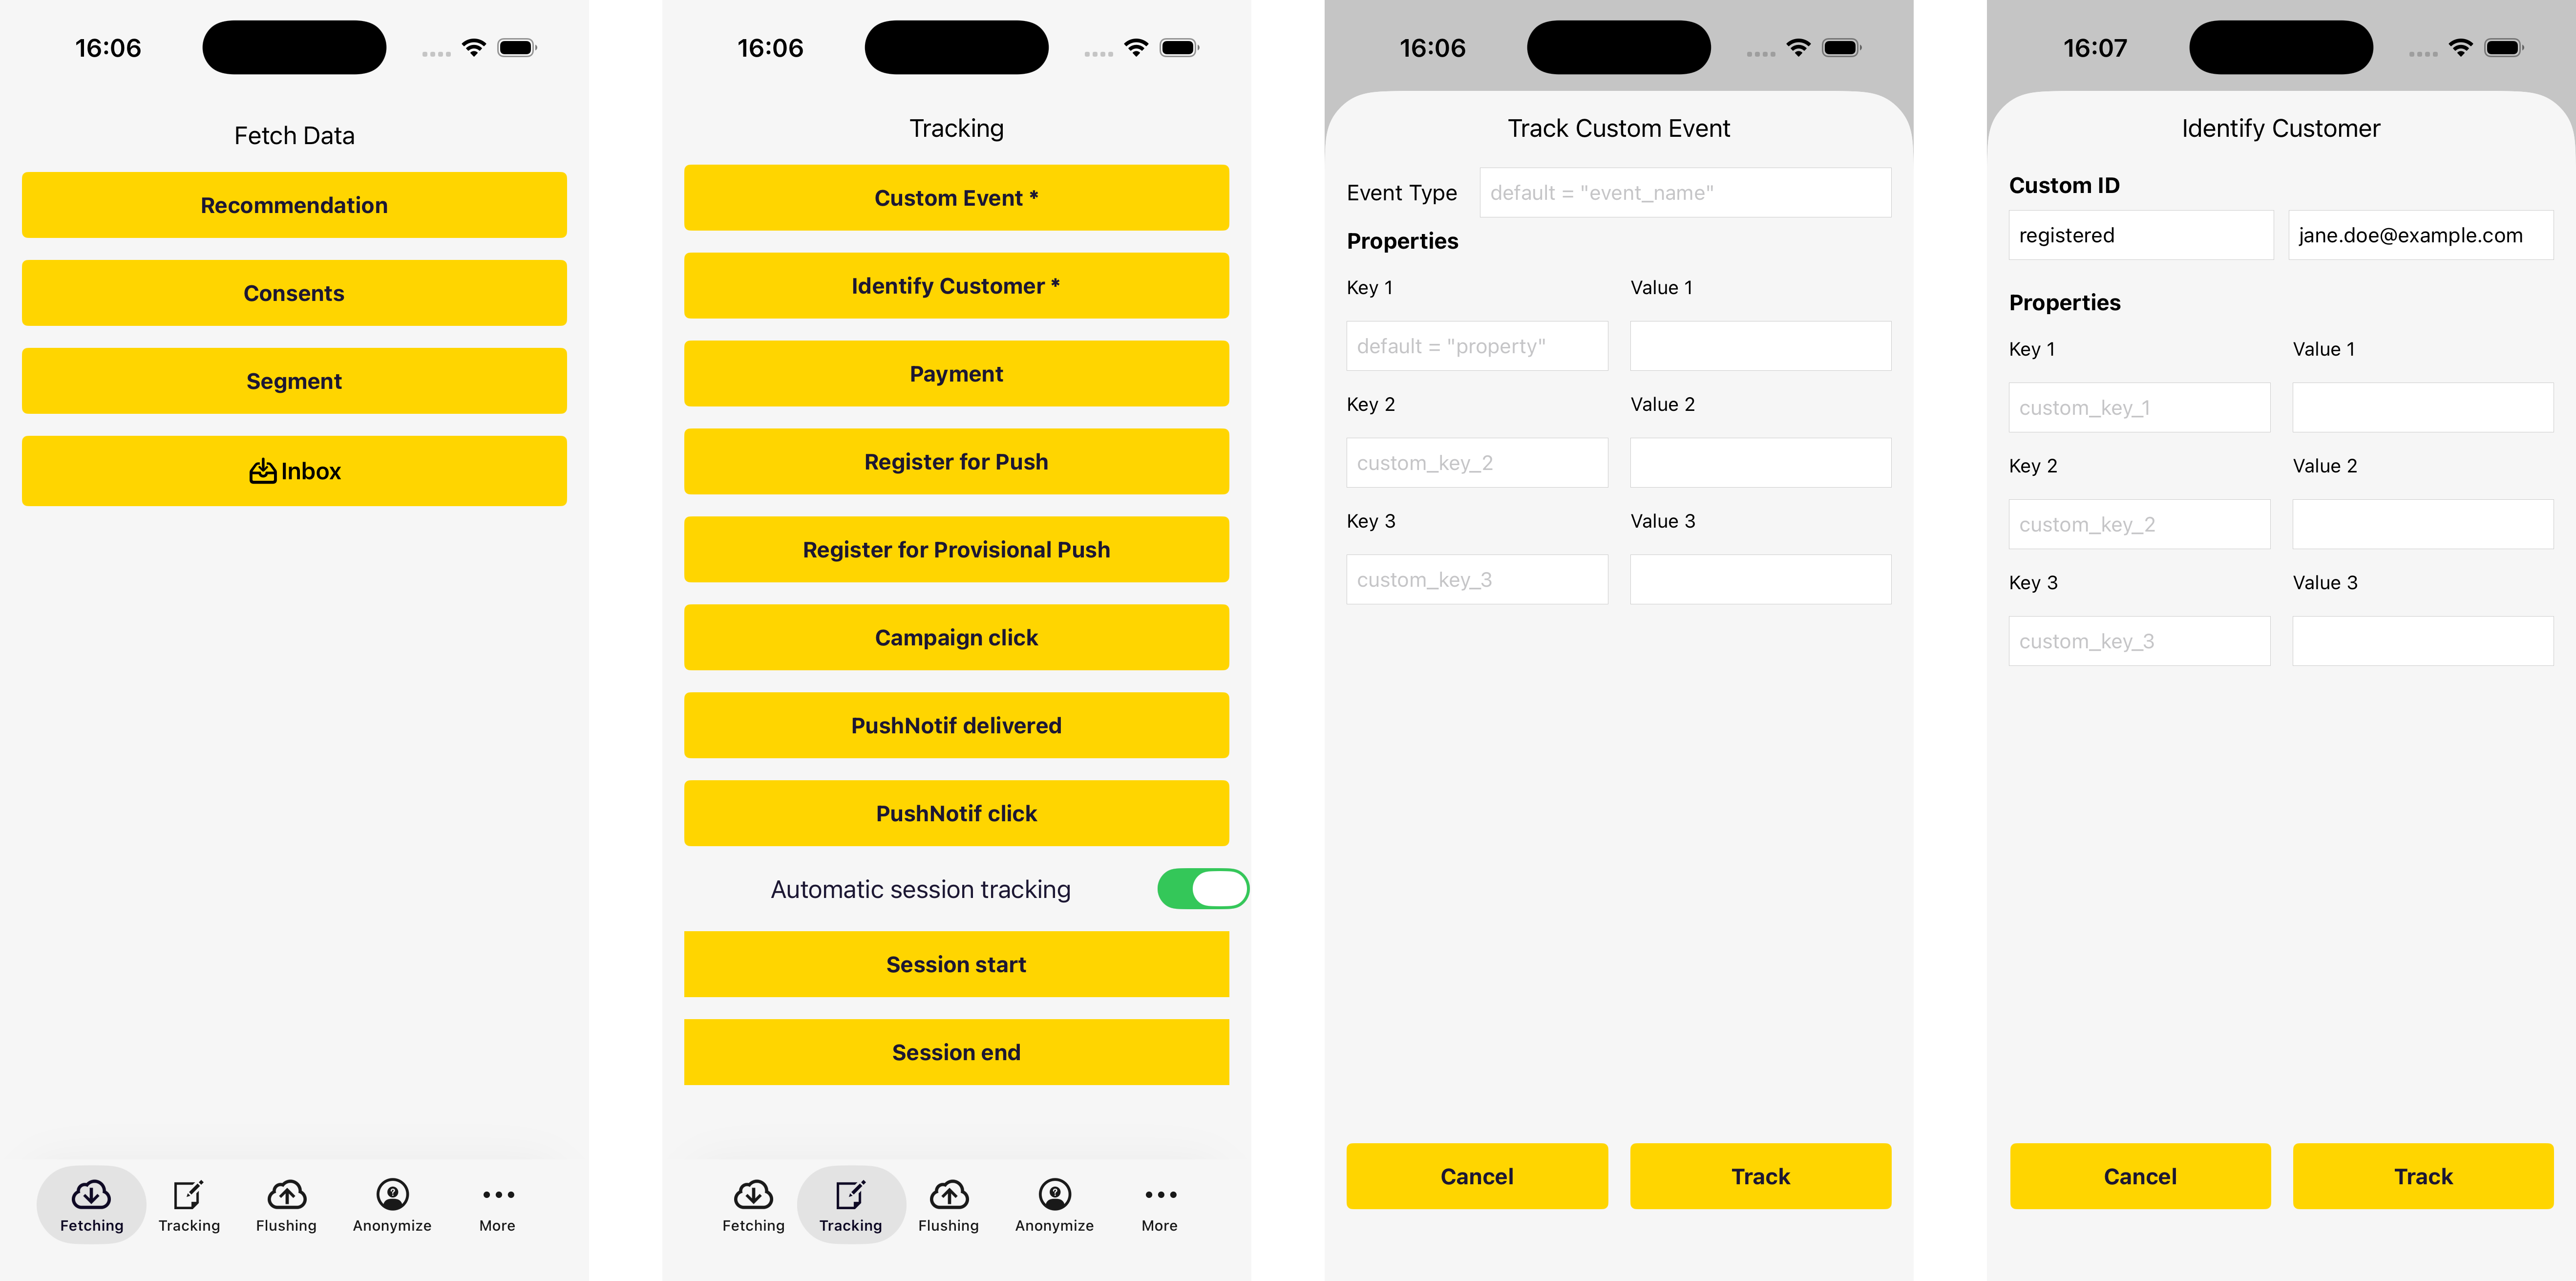
The app provides several views, accessible using the bottom navigation, to test the different SDK features:
-
The Fetching view enables you to fetch recommendations, consents, and segments, as well as open the app inbox.
-
The Tracking view enables you to test tracking of different events and properties. The
Custom EventandIdentify Customerbuttons lead to their separate views to enter test data.TrackingViewController.swift
TrackEventViewController.swift
IdentifyCustomerViewController.swift -
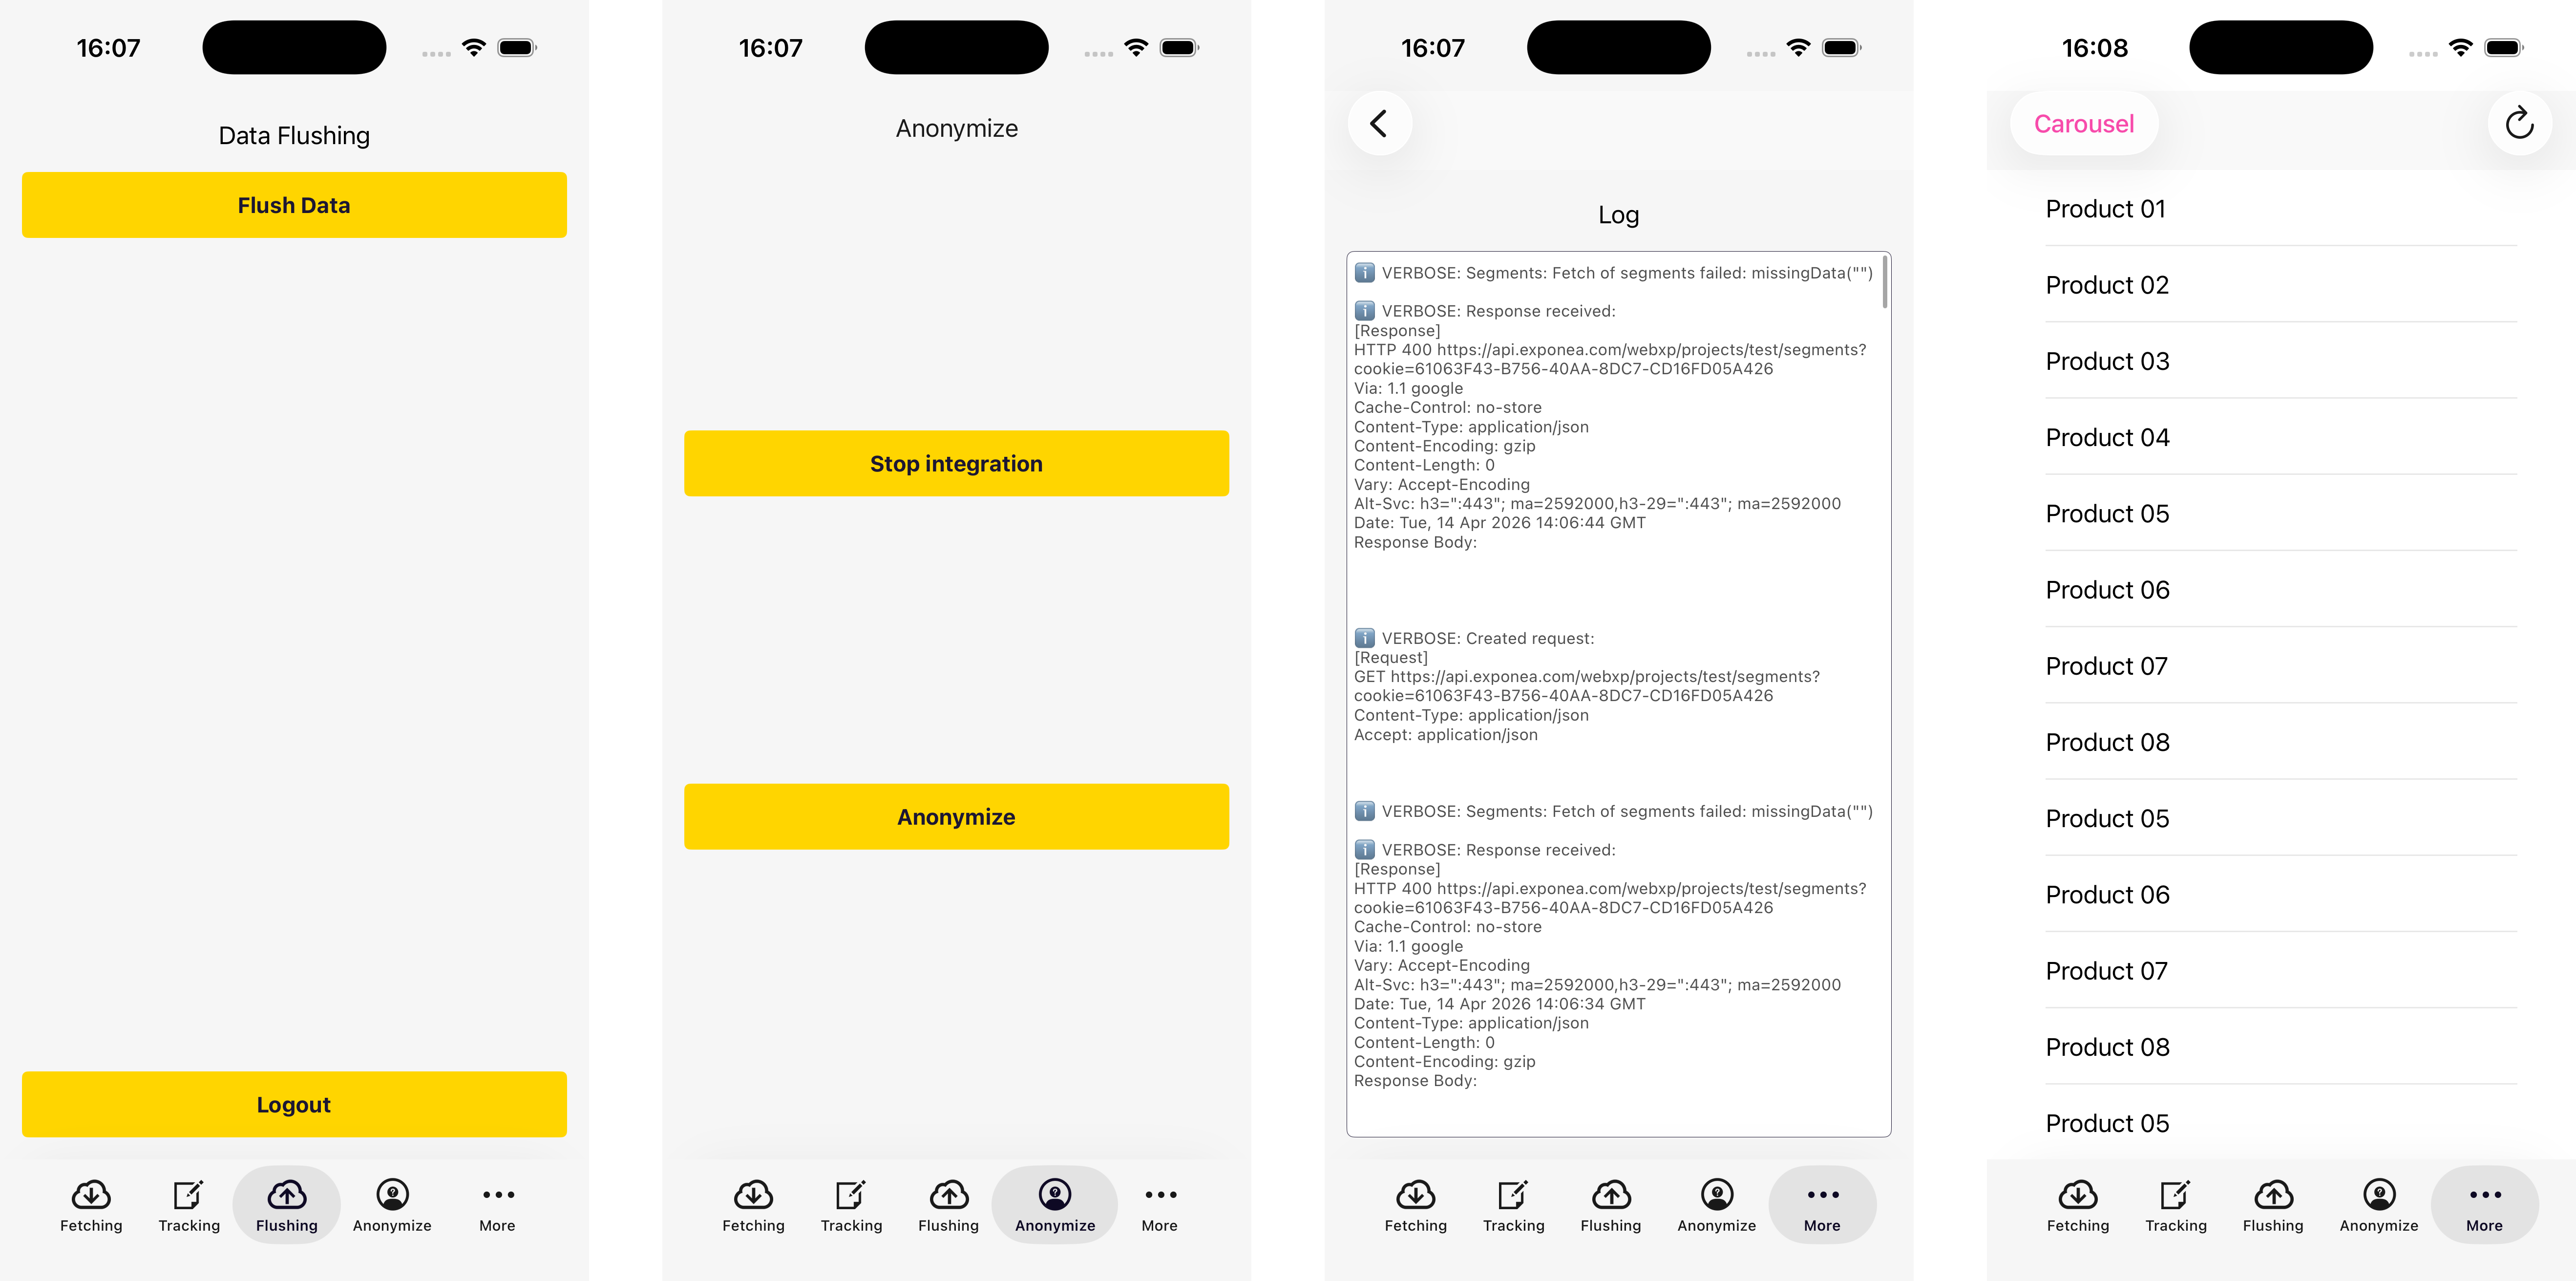
The Flushing view lets you trigger a manual data flush and log out.
-
The Anonymize view lets you anonymize the current user and stop the SDK integration.
-
The In-app Content Blocks view displays in-app content blocks. Use placeholder IDs
example_top,ph_x_example_iOS,example_list,example_carousel, andexample_carousel_iosin your in-app content block settings.InAppContentBlocksViewController.swift
InAppContentBlockCarouselViewController.swift -
The Logging view displays log messages from the SDK.
Try out the different features in the app, then find the customer profile in the Engagement web app (under Data & Assets > Customers) to see the properties and events tracked by the SDK.
If you enter a Registered customer ID on the authentication screen (Stream ID mode), the customer is identified from startup and can be found in the Engagement web app by their registered ID.
If you left the Registered customer ID field blank, or are using Project token mode, the customer is tracked anonymously using a cookie soft ID. You can look up the cookie value in the logs and find the corresponding profile in the Engagement web app.
If you use Identify Customer in the app to set the registered hard ID (use an email address as value), the customer is identified and can be found in the Engagement web app by their email address.
Refer to Customer identification for more information on soft IDs and hard IDs.
Troubleshooting
If you encounter any issues building the example app, the following may help:
- Remove the
Podsfolder and thePodfile.lockfile from the project folder and rerun thepod installcommand. - In Xcode, select
Product>Clean Build Folder(Cmd + Shift + K), thenProduct>Build(Cmd + B).
Updated 3 months ago