Webhook Authentication
When you send campaigns through 3rd party platforms using webhooks, you can select which authentication method to use.
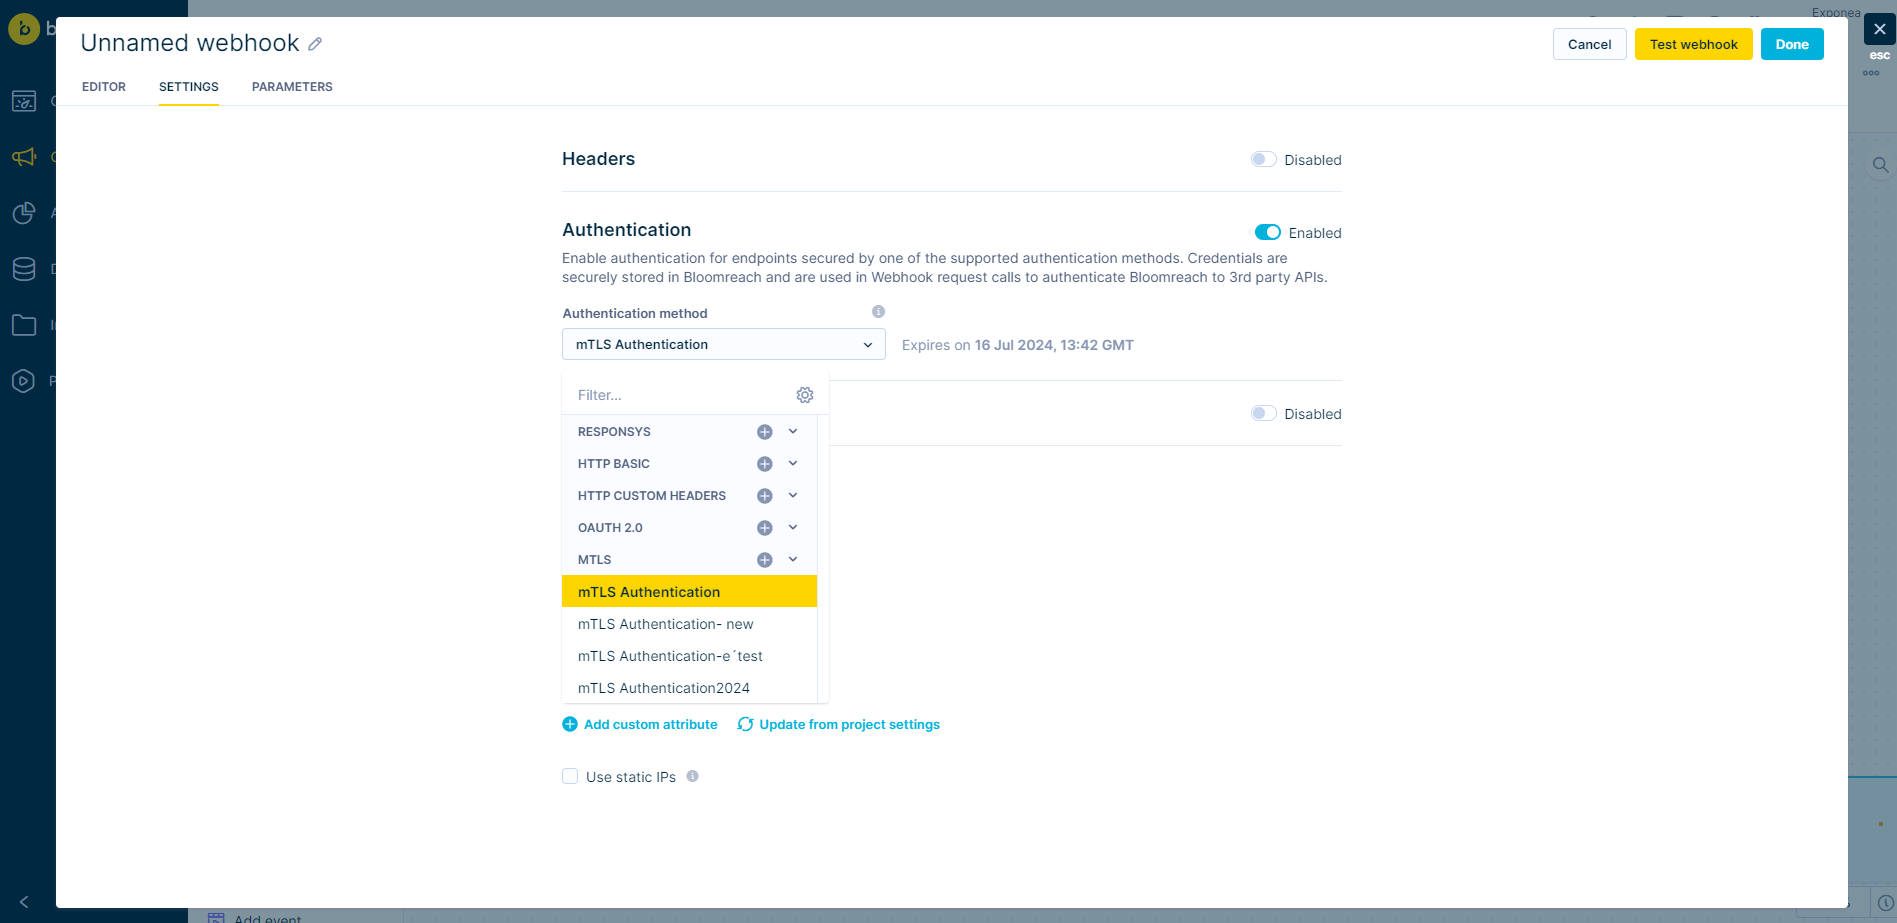
You can find available authentication methods in the Data and Assets > Integrations > +Add new integration by selecting the tag Authentication.
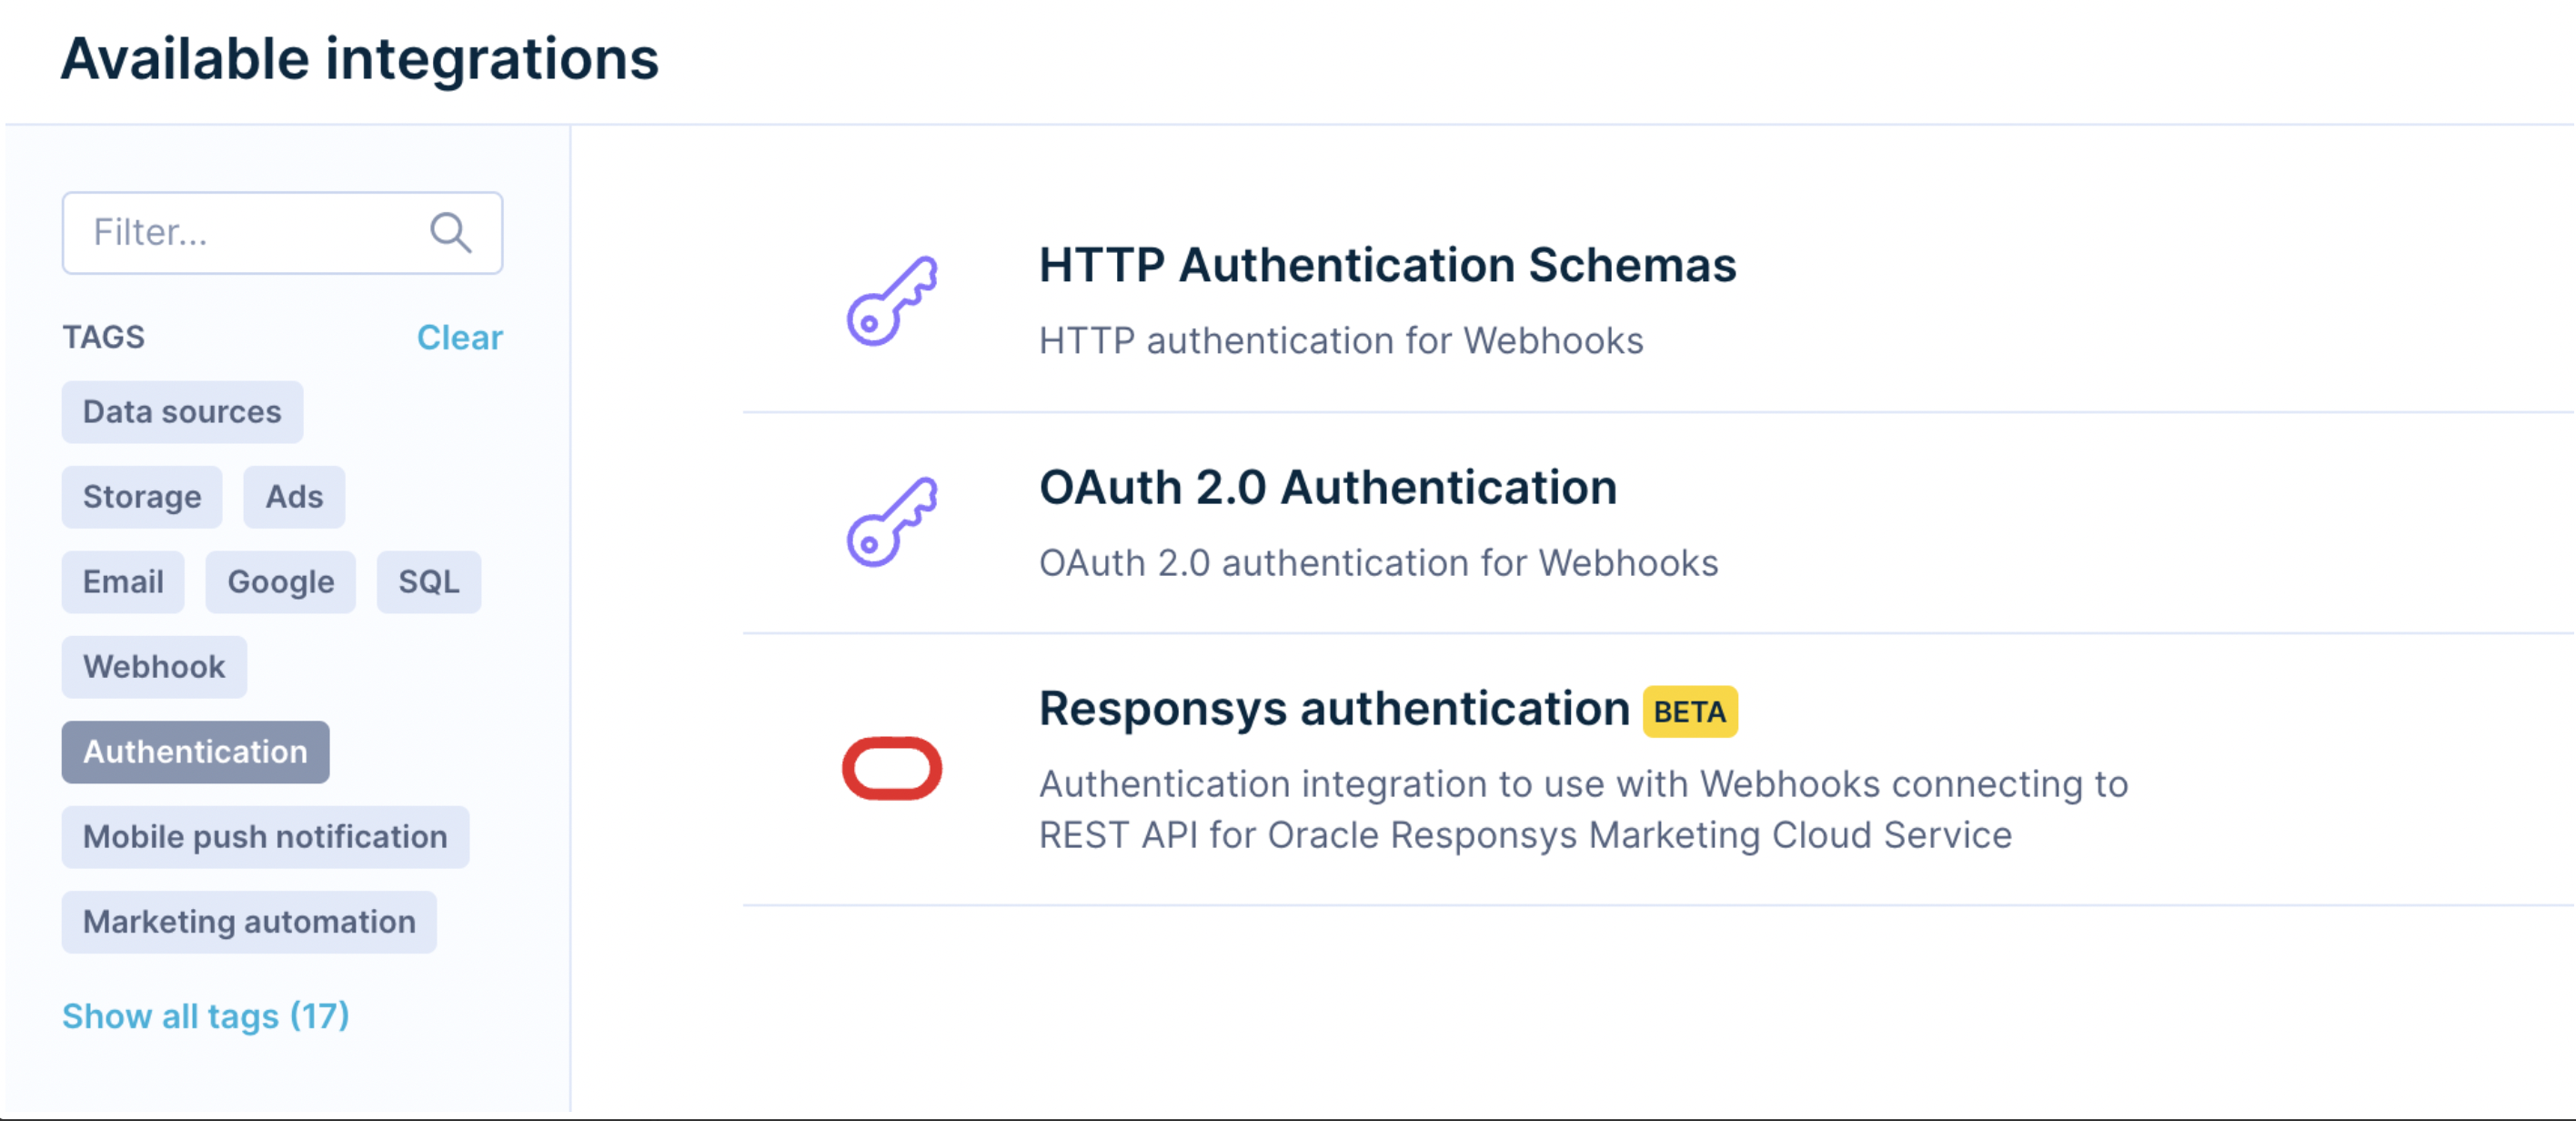
HTTP authentication schemas
Use HTTP Authentication Schemas when API requires credentials in HTTP headers. You can read more on HTTP authentication on MDN web docs:HTTP authentication.

Endpoint
Enter the endpoint prefix that will be enforced for webhooks using this authentication. For security reasons, Bloomreach Engagement will enforce sending credentials only to defined endpoints and paths under it. For example, if the endpoint prefix is https://secure.example.com/api/v1, then the webhook may use the endpoint https://secure.example.com/api/v1/send_sms but not https://secure.example.com/api/v2/send_sms, because the latter one doesn't have a compatible path.
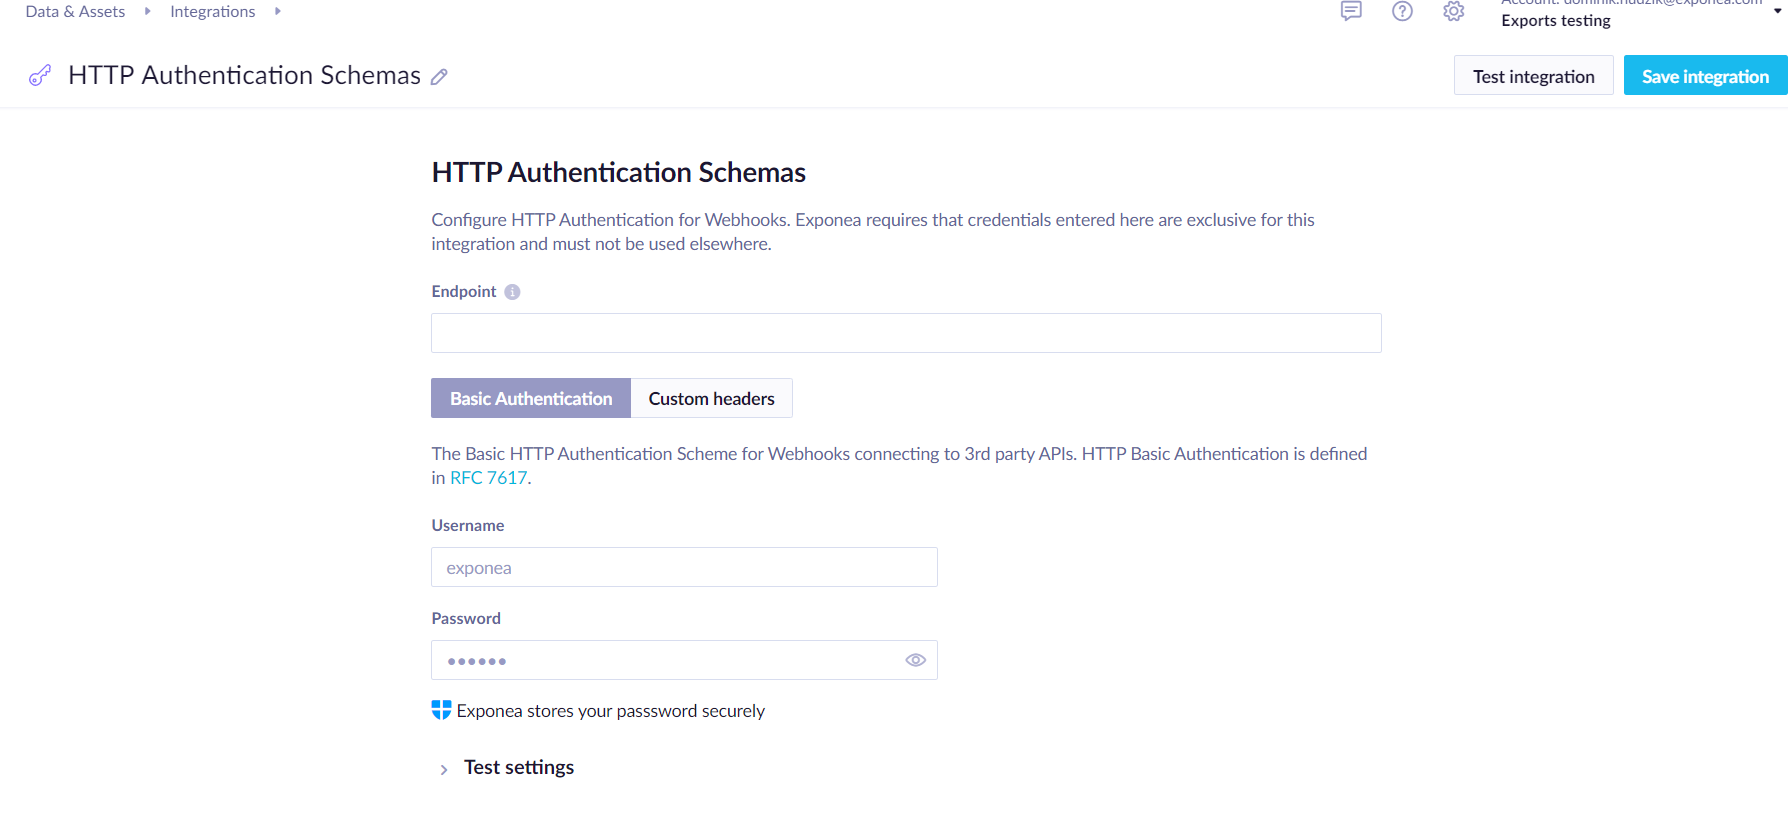
Basic authentication
The Basic HTTP Authentication Scheme for Webhooks connecting to 3rd party APIs. HTTP Basic Authentication is defined in RFC 7617.
You are required to enter theUsername and Password. These are securely stored in Bloomreach Engagement and will not be displayed to anyone after saving.
Custom headers
Define custom headers for other types of HTTP Authentication Schemas, for example, the Bearer token authentication (RFC 6750), Proxy-Authorization header (RFC 7235).
You are required to enter headers in theKey-Value pairs. Pairs marked as _secret_ are securely stored in Bloomreach Engagement and won't be displayed to anyone after saving. _Public_ headers will be visible to users with access to Integrations.
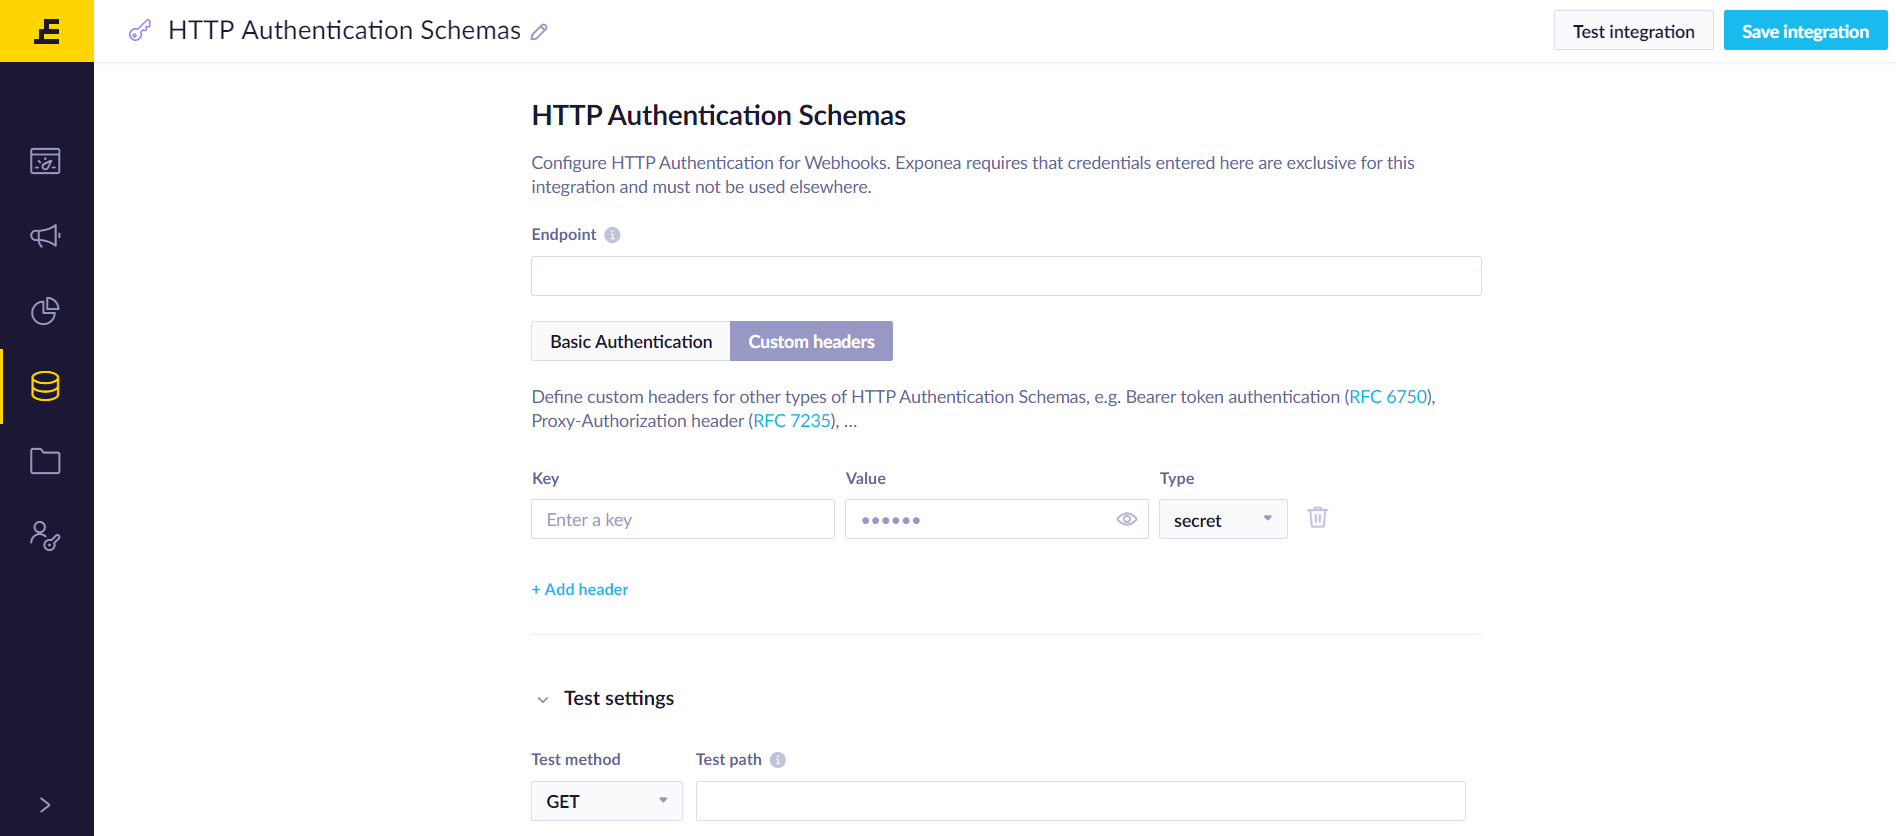
Test settings
Optionally, you can test entered credentials by providing a method and path for HTTP requests. The test endpoint must accept an empty request body, validate the credentials, and must respond with HTTP 200 Success for the test to succeed.
Users can select which authentication method to use in Webhooks and Webhook presets.
This enables separate responsibilities: the developer sets up the authentication integration and creates a Webhook preset, then marketing users can use the preset without entering the credentials.
OAuth 2.0 authentication
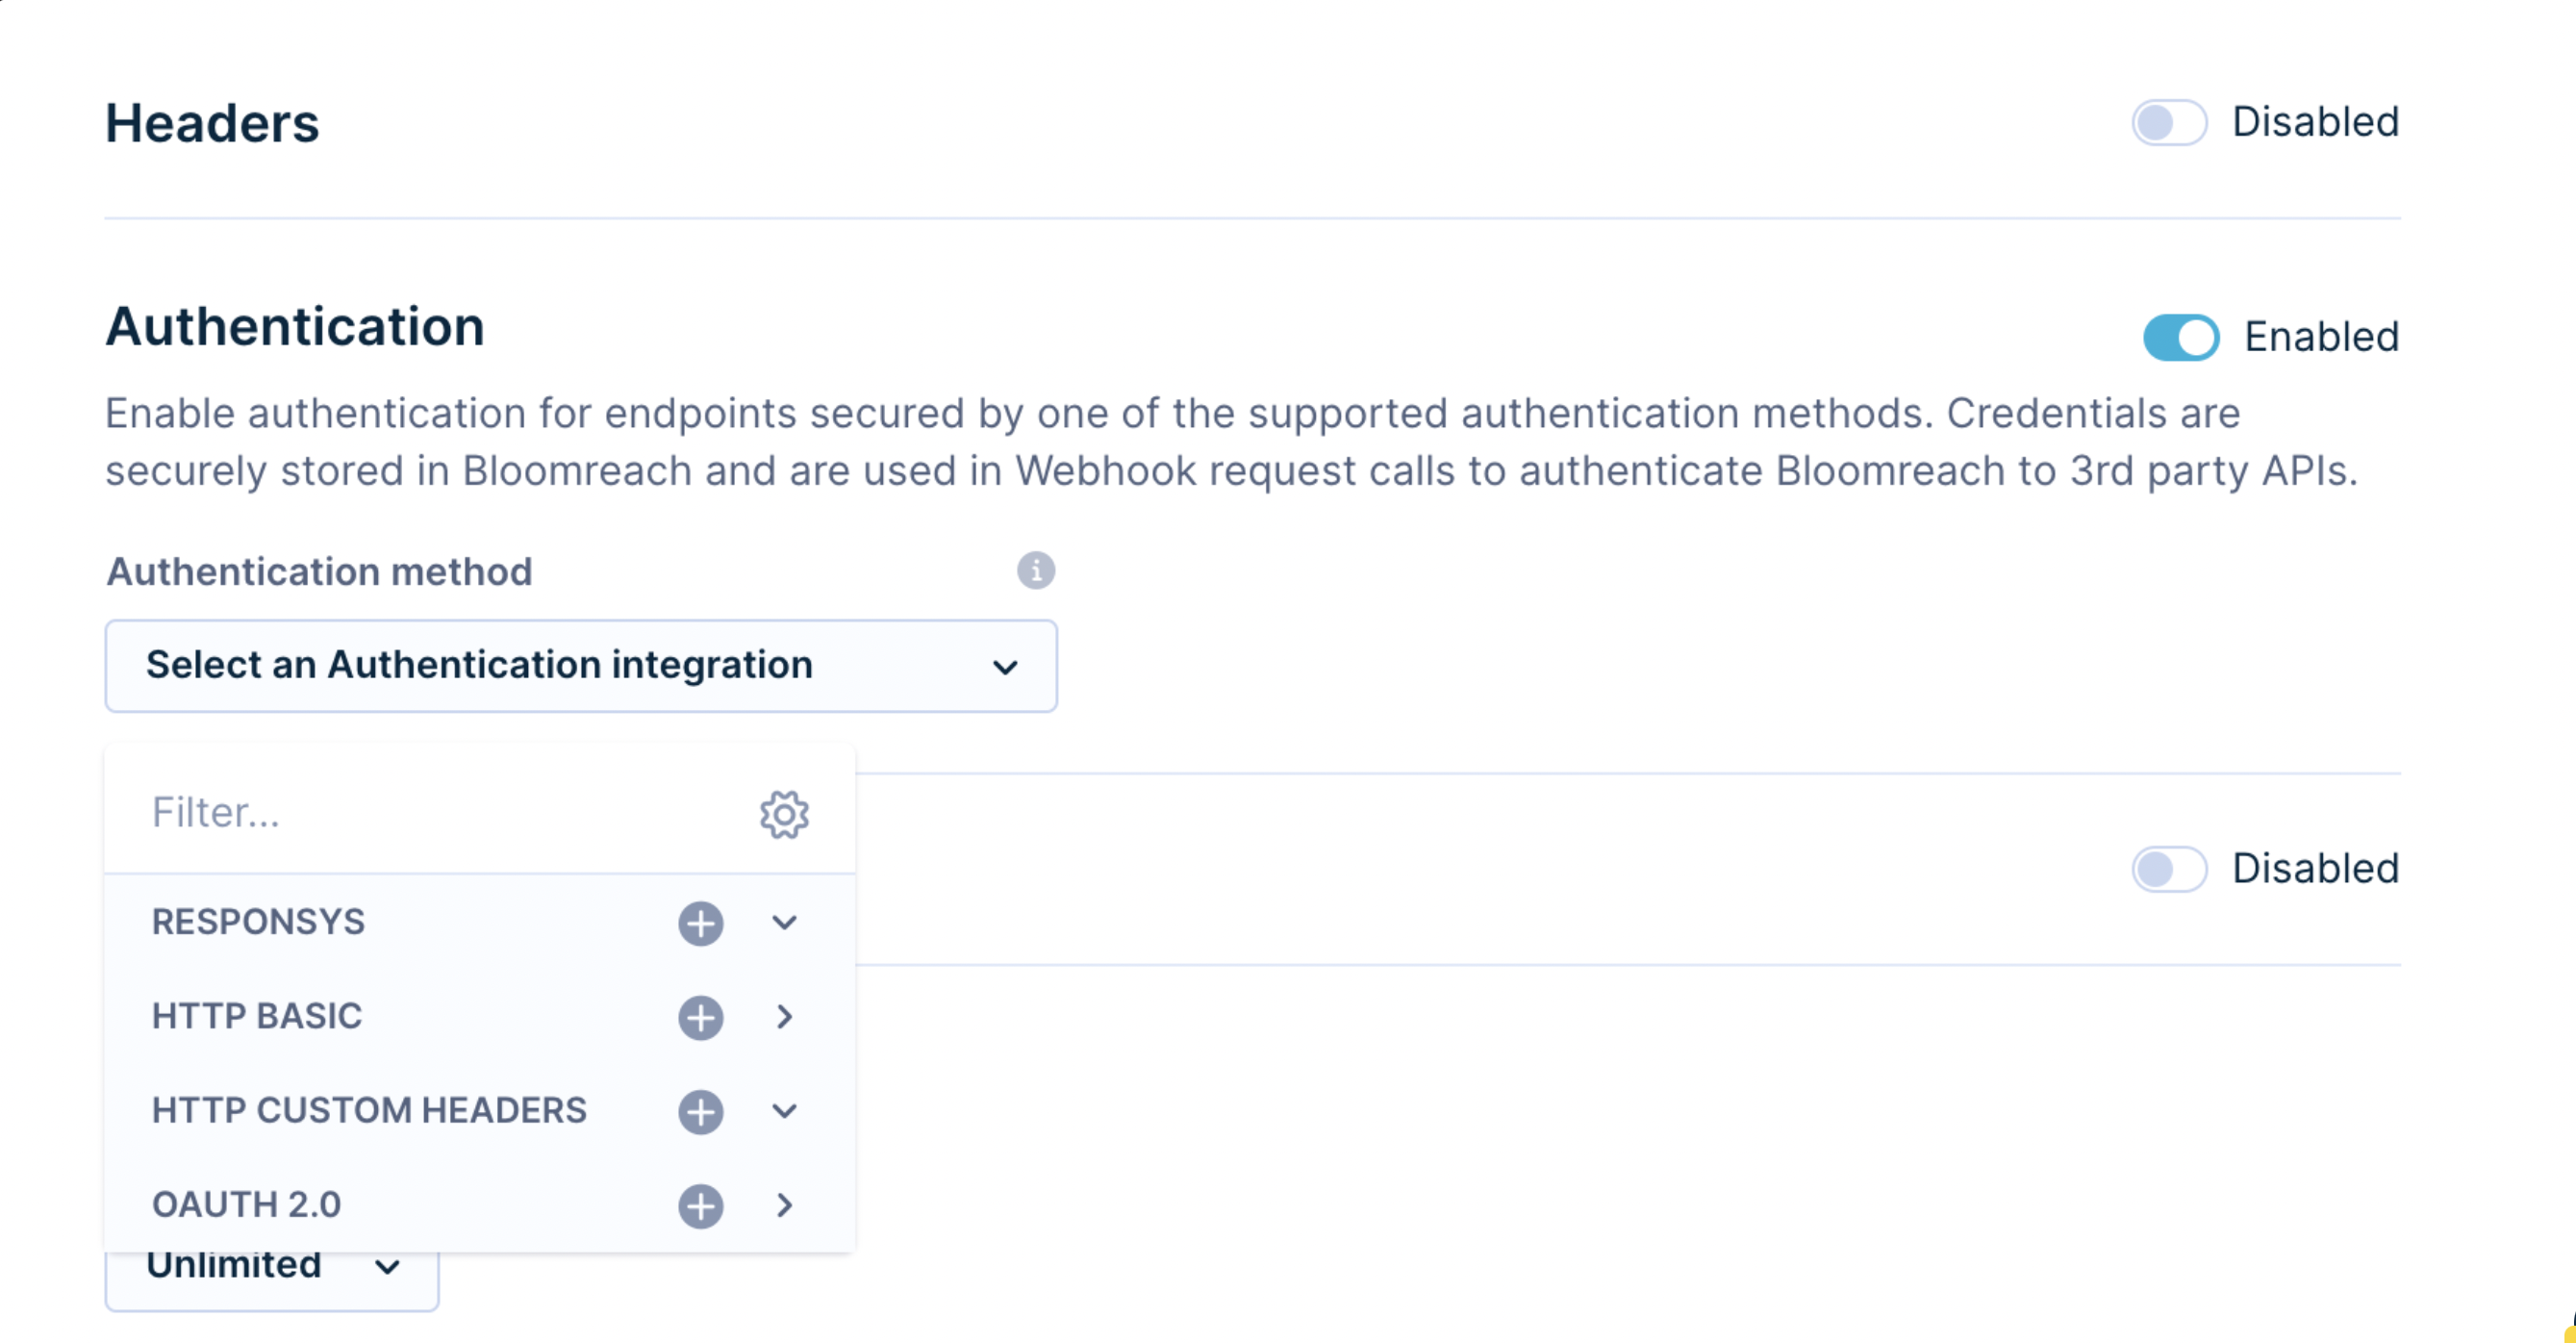
Use OAuth 2.0 authentication when the platform you want to connect to via a webhook uses the OAuth API authentication method. This feature allows you to connect to 3rd party platforms, such as:
- Microsoft Azure
- CommerceTools
- Criteo Marketing
- Salesforce Marketing Cloud,
- Listrak
- and many more.
Supported flows of OAuth 2.0 authentication
This authentication supports platforms that use the OAuth 2.0 flow grant_type=client_credentials (known as the two-legged OAuth flow). Other flows, like grant_type=authorization_code (known as the three-legged OAuth flow), are currently not supported.
Defining which flow is used by each platform is very easy. Go to the API documentation of the third party you want to connect to and look for the Authentication chapter. There, you can see which authentication method is used (for example, OAuth) and what flow is used (for example, grant_type=client_credentials).
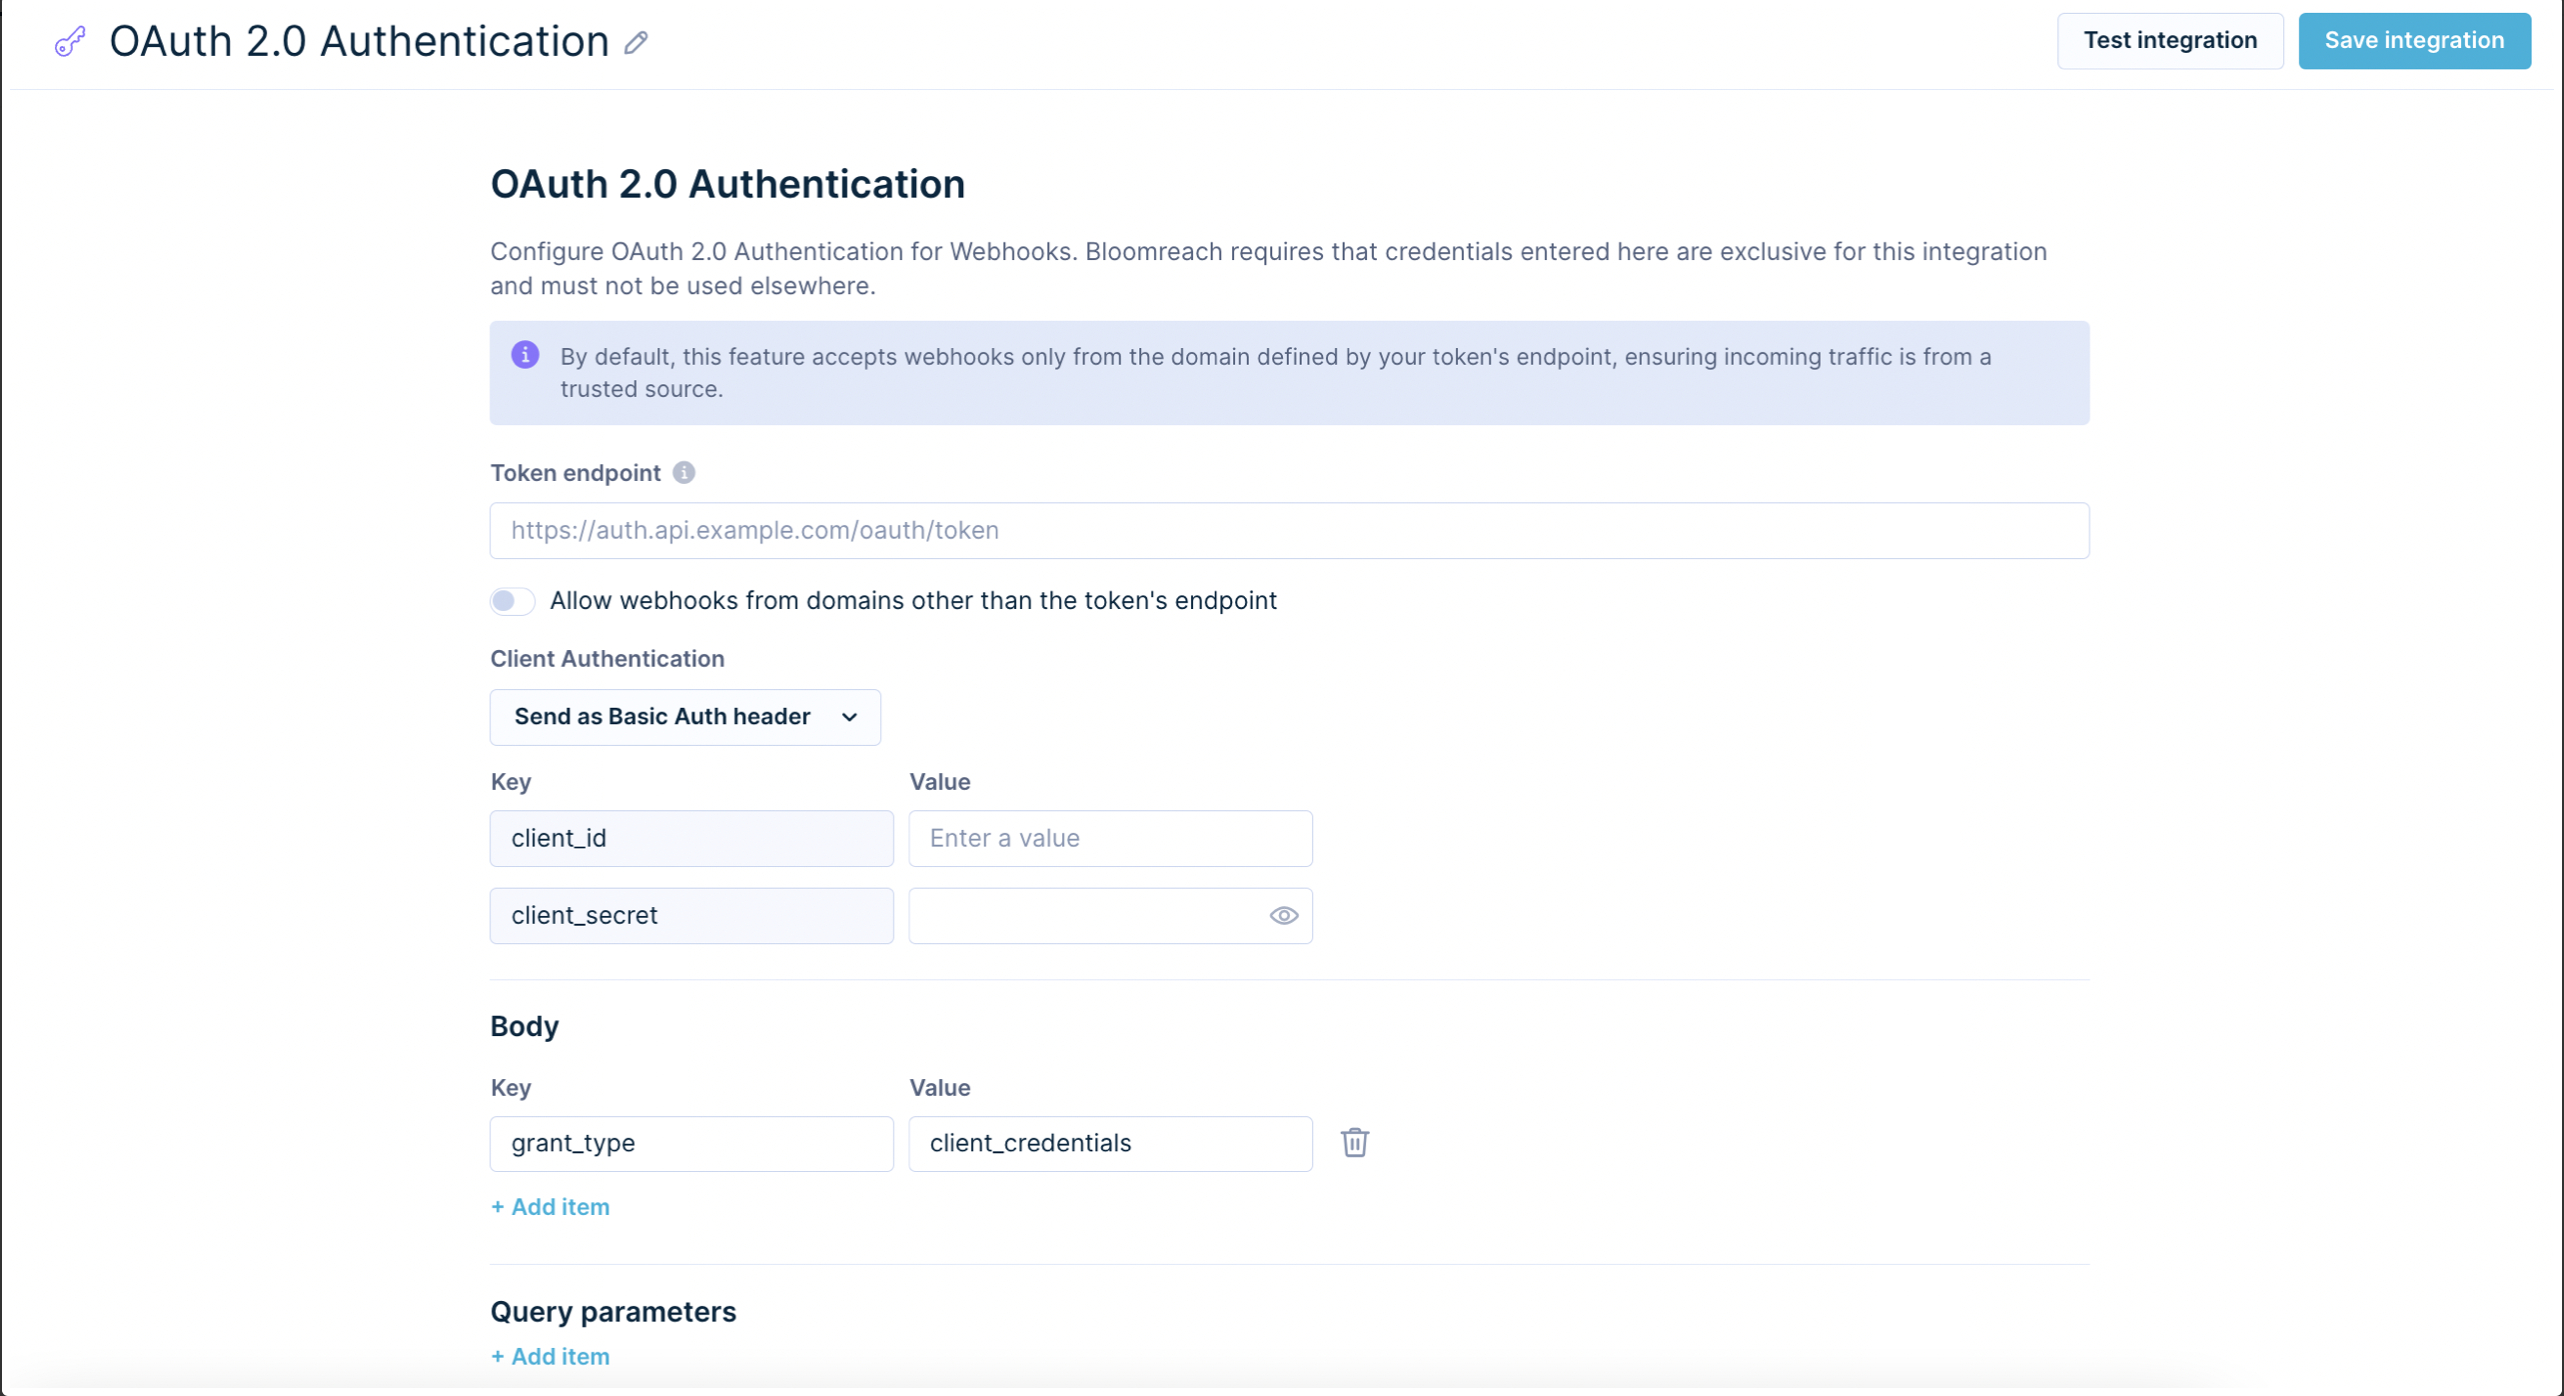
OAuth 2.0 authentication configuration
To create a successful configuration of the OAuth 2.0 Authentication, you need to provide the following:
- Token endpoint - a URL responsible for the generation of an Access Token, which will be used in your webhooks. To find it, go to the API documentation of the 3rd party you want to connect with and search for the Authentication chapter. There you will find the Token endpoint, which usually has this structure:
https://api.example.com/oauth2/token. The token request must include"token_type": "Bearer"as a required parameter. - Client ID, Client Secret - this pair of credentials is unique and should not be shared publicly with anyone, as it allows accessing your private data. To generate these credentials, follow a process described in the 3rd party API documentation. Once you have them, provide them next to the client_id and client_secret fields.
For security reasons, we validate if the Token Endpoint and endpoints used in webhooks use the exact same URL
Example
You want to send data to a 3rd party via webhook, which uses the following endpointhttps://api.example.com/list/customers. As this platform uses the OAuth 2.0 authentication method, you create the OAuth 2.0 Authentication inside Bloomreach.
- In case the token endpoint contains the same base URL as the webhook, for example,
https://api.example.com, the validation will be successfully passed.- In case the token endpoint contains a different base URL as the webhook, for example,
https://auth.example.com, the validation will fail.
To allow the OAuth 2.0 authentication method to send data via webhooks using different base URLs in their endpoints, you have to enable the toggle below the Token endpoint called Allow webhooks from domains other than the token's endpoint and list all base URLs used for webhooks. In the example above, it would be https://api.example.com.
As every platform can have a different API specification, we allow sending the Client Authentication (token created using client_id and client_secret) in webhooks as:
- Auth Header
- Body
- Query Parameter
to cover all possible cases.
Additionally, as different platforms can request additional parameters like the scope to define which permissions should be granted for a token, it is possible to define additional fields, which can be sent in the Body or as a Query Parameter of a token endpoint.
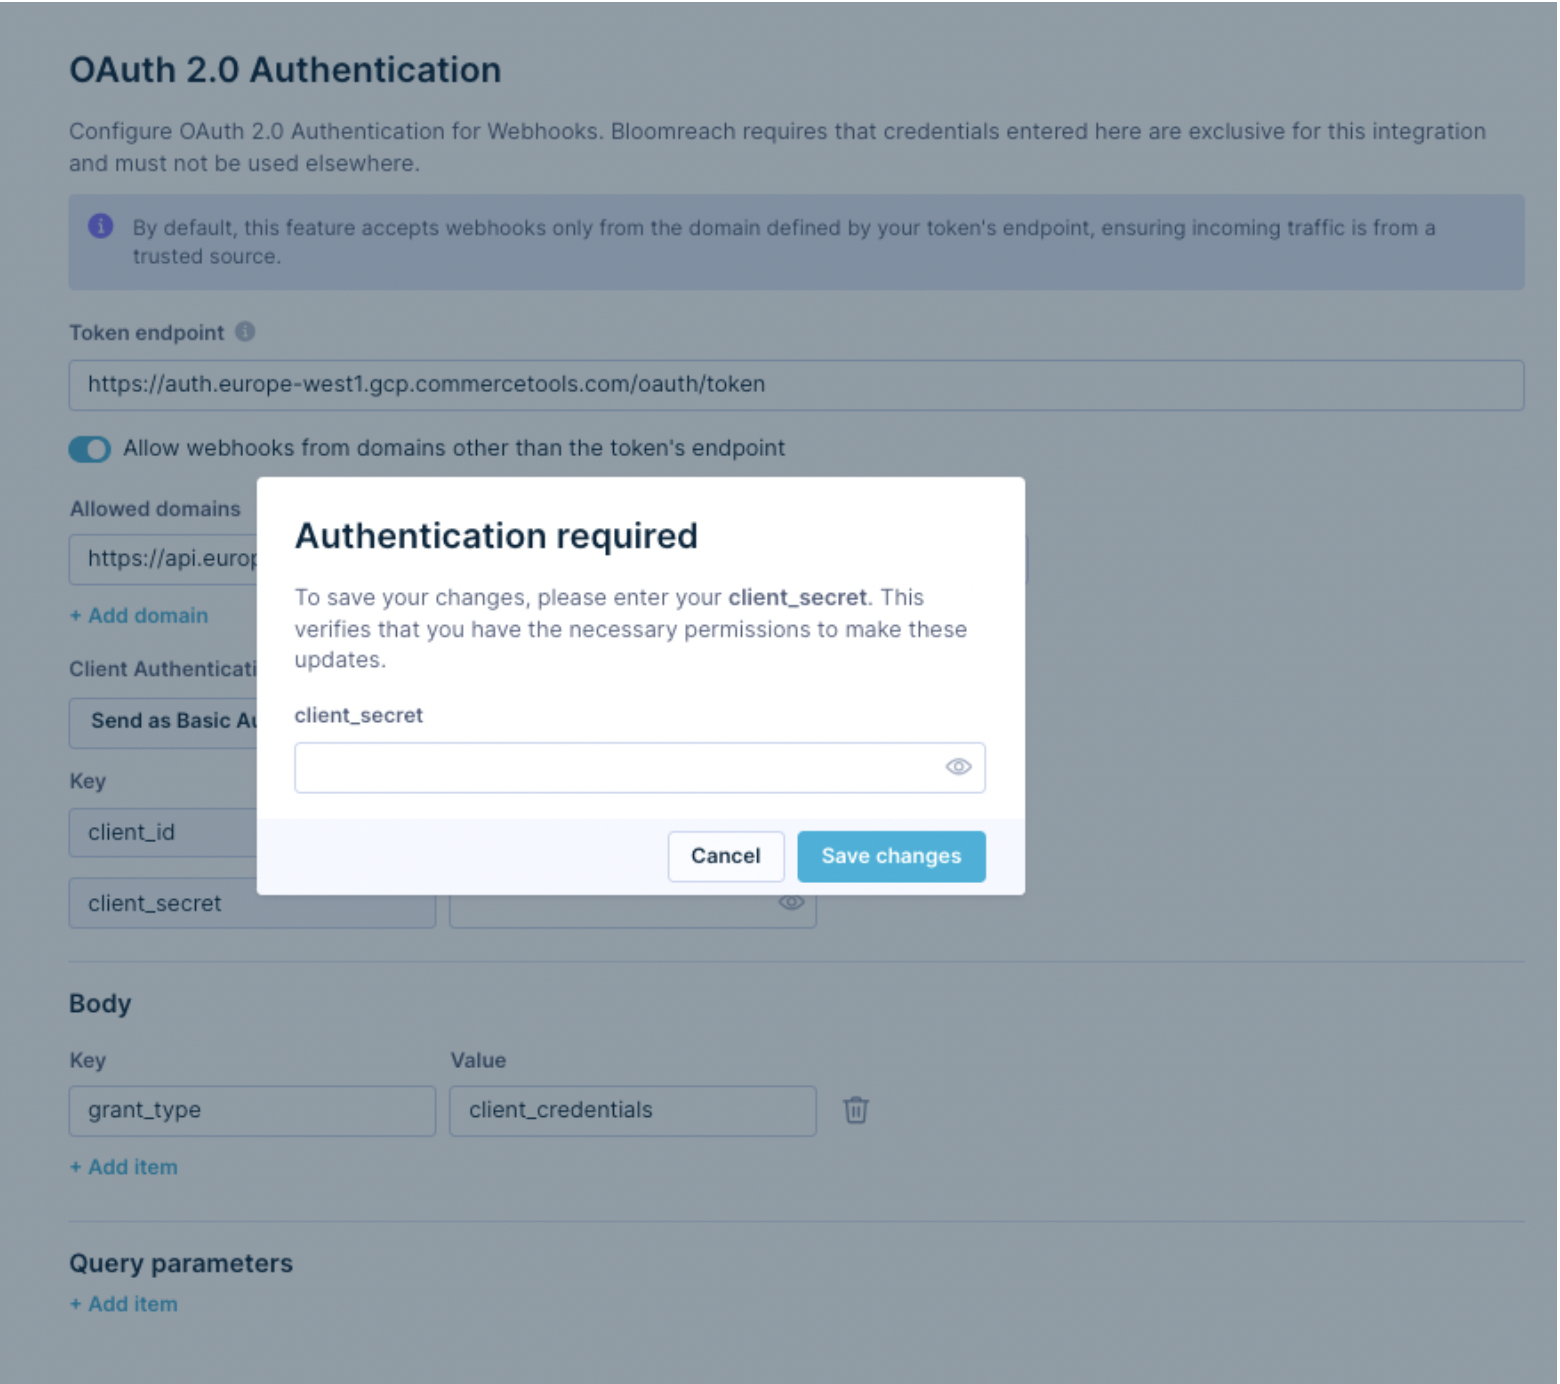
For security reasons, once you want to update (the Token endpoint or Allowed domains) the saved OAuth 2.0 Authentication, it is mandatory to re-enter.
Once your OAuth 2.0 authentication is successfully saved, you can use it for webhooks to send data to platforms such as Microsoft Azure, CommerceTools, Criteo Marketing, Salesforce Marketing Cloud, Listrak, and many more.
Responsys authentication
This feature is currently available in the Alpha version.
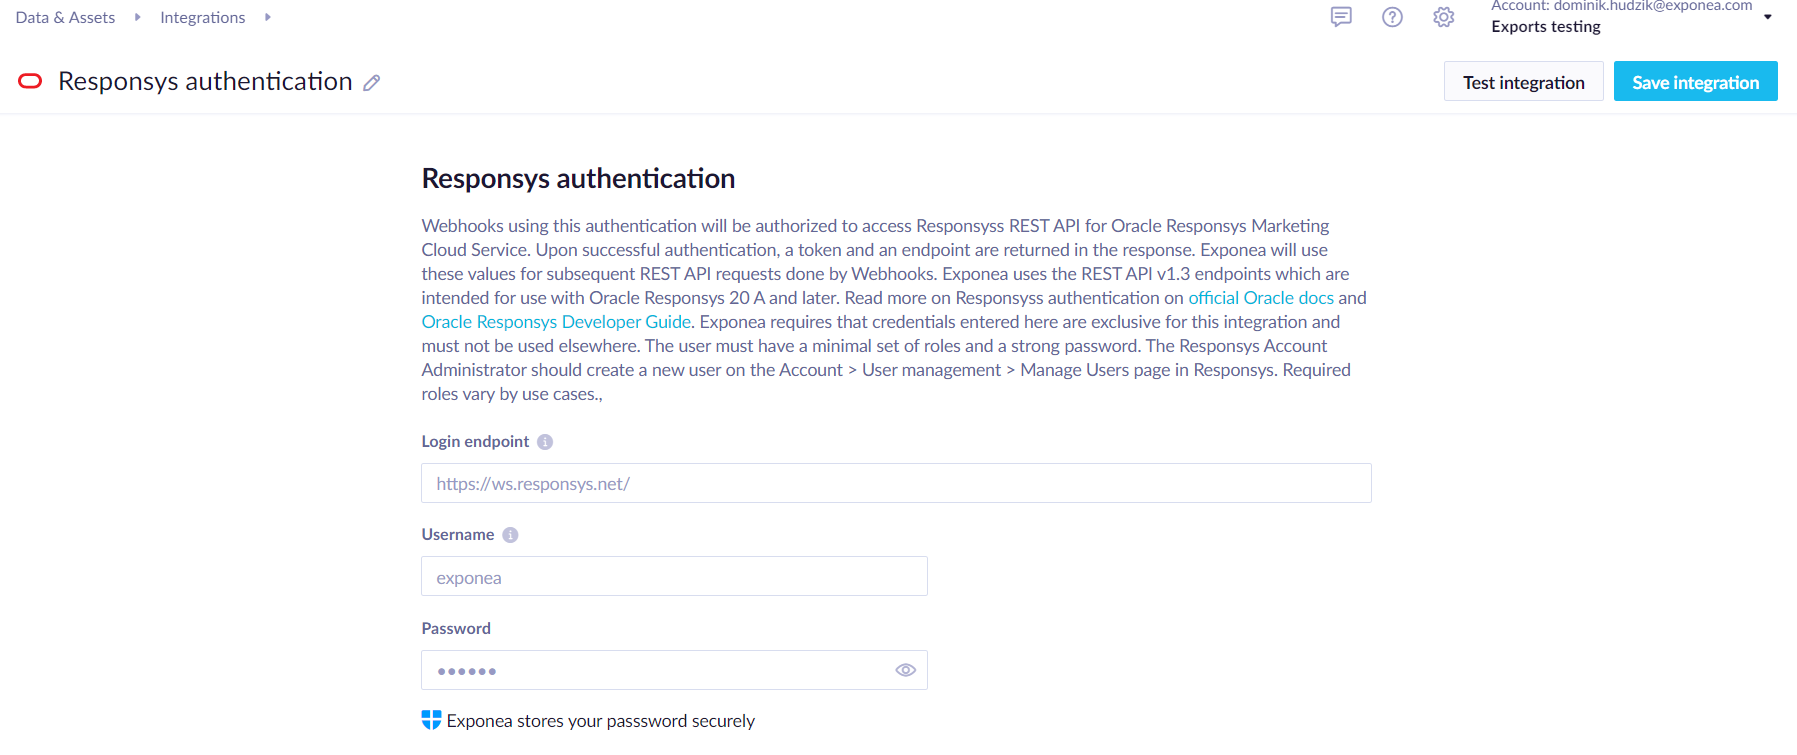
If you are using Oracle Responsys Marketing Cloud Service, you use Responsys authentication to connect to Responsys REST API. Webhooks using this authentication will be authorized to access Responsys's REST API and upon successful authentication, a token and an endpoint are returned to be used by Bloomreach Engagement.
Bloomreach Engagement uses the REST API v1.3 endpoints which are intended for use with Oracle Responsys 20 A and later. Read more on Responsys's authentication on official Oracle docs and Oracle Responsys Developer Guide.
To set up the integration, you need to fill out the following fields:
Login endpoint(for example,https://ws.responsys.net/, Obtain the Oracle Responsys REST API endpoint that corresponds to the Oracle Responsys pod for your account)Username(The username of a user created in Responsys's account management)Password(We recommend using only strong passwords)
Bloomreach Engagement requires that credentials entered here are exclusive for this integration and must not be used elsewhere.
The user must have a minimal set of roles and a strong password. The Responsys Account Administrator should create a new user on the Account > User management > Manage Users page in the Oracle Responsys Marketing Cloud web portal.
mTLS authentication
Mutual Transport Layer Security (mTLS) authentication (or, client certificate authentication) is a security protocol enhancing the authentication process in a networked environment. It's based on Transport Layer Security (TLS), a protocol for secure online communication.
mTLS authentication offers robust security by verifying the identities of both clients and servers during communication. Its two-way authentication and encryption capabilities make it a powerful tool for safeguarding sensitive data, preventing unauthorized access, and ensuring the integrity of networked interactions desired by financial and banking institutions.
When linking Bloomreach to external platforms via Webhooks, you can now choose mTLS for added security.
Set up mTLS authentication
Step 1: Create a new mTLS Integration
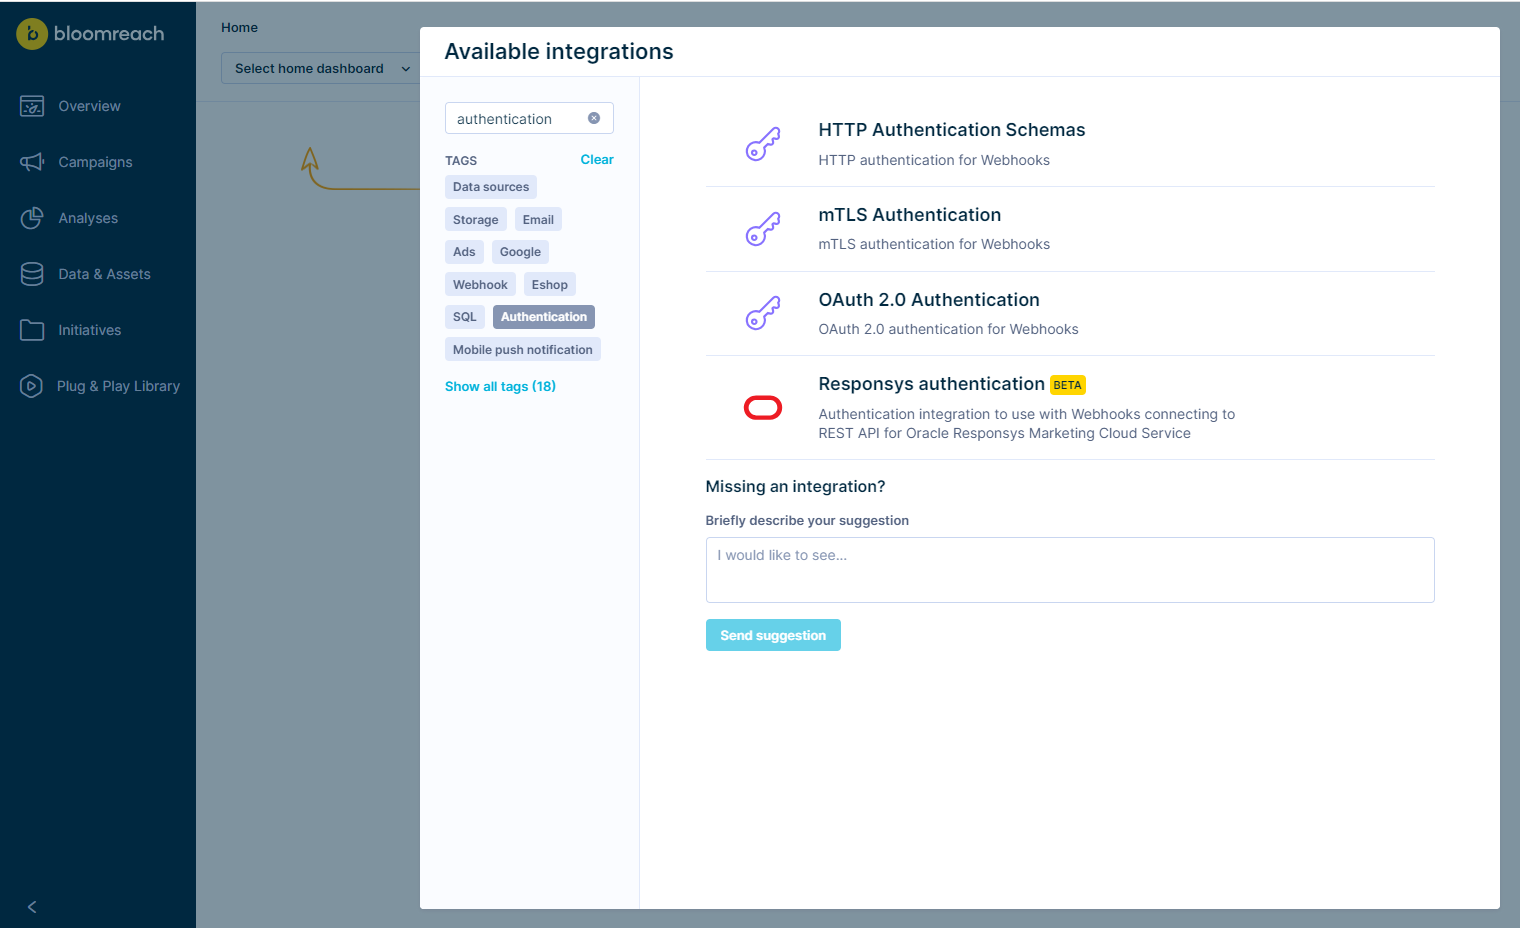
You can find the new mTLS authentication method in Data and Assets > Integrations > +Add new integration by selecting the tag Authentication.
Step 2: Provide the Client Certificate and Private Key to be used by Bloomreach
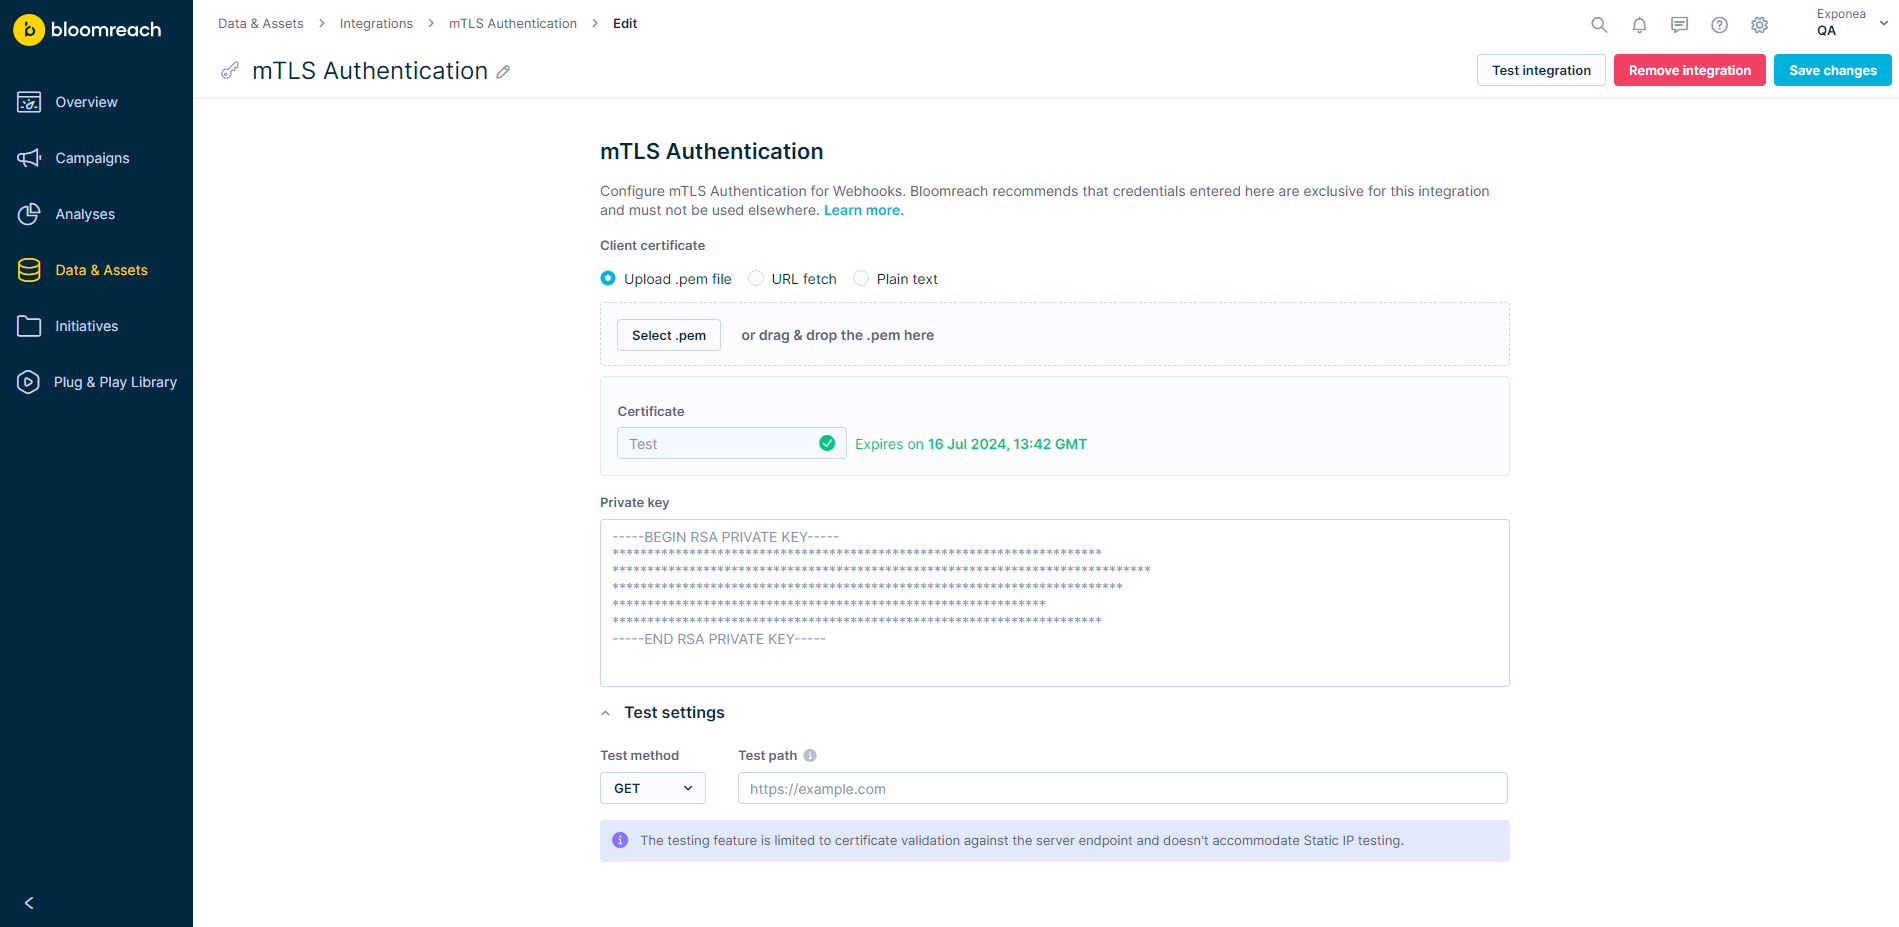
You may use one of the following methods to upload the client certificate:
- Upload a pem file
- Provide a URL that hosts the pem file
- Paste the contents of the certificate
Important
- Only PEM file format is supported.
- No password protection support.
- We don't support self-signed certificates (signed by custom/non-public CA). Uploading this kind of certificate will result with connection error.
- If editing an existing mTLS integration, you will not be able to view the previously uploaded certificate and key file for security reasons. Both the certificate as well as the private key file will need to be provided again when making any changes.
- Server certificate must be signed by trusted CA authority (we are using Mozilla CA bundle).
Step 3 (Optional): Test against a mock Endpoint
This step can assist with validating that the certificate and private key were successfully accepted by the server endpoint.
In order to test, fill in the details within the 'Test Settings' section and click the 'Test Integration' button in the top right corner.
Note
Unlike when using mTLS authentication within Webhooks, this test feature doesn't support Static IPs. Ensure that the testing endpoint isn't configured to only accept requests from a specific set of IPs.
Step 4: Set up the Webhook to use the above-created mTLS authentication
Within the Webhooks Settings tab, you should see available mTLS integrations under the ‘Authentication’ section.
Only mTLS integrations for which the certificate hasn't yet expired will be visible in the list for selection.
Updated about 1 month ago
