Azure Storage for Exports
Export your Bloomreach Engagement data to Azure Storage, one of the most widely used cloud storage solutions.
This integration supports both Azure Blob Storage and Azure Data Lake Gen2 storage accounts. Data Lake Gen2 is a layer built on top of Blob Storage with additional big data analytics features. Refer to Azure documentation for more details on the Data Lake Gen2 type of storage accounts.
When to use Azure Storage for exports
You need to combine your Bloomreach data with information from other sources (ecommerce platforms, inventory systems, ad costs) and analyze everything in one centralized location.
Need to import data instead?
This integration exports data only. To import data from Azure Storage, use the separate Azure Storage integration for Imports.
Prerequisites
Before you start, make sure you have:
- Azure Storage account
- Container in your storage account
- Authentication method: Shared Access Token (SAS) or OAuth2
Choose your authentication method
You can authenticate using:
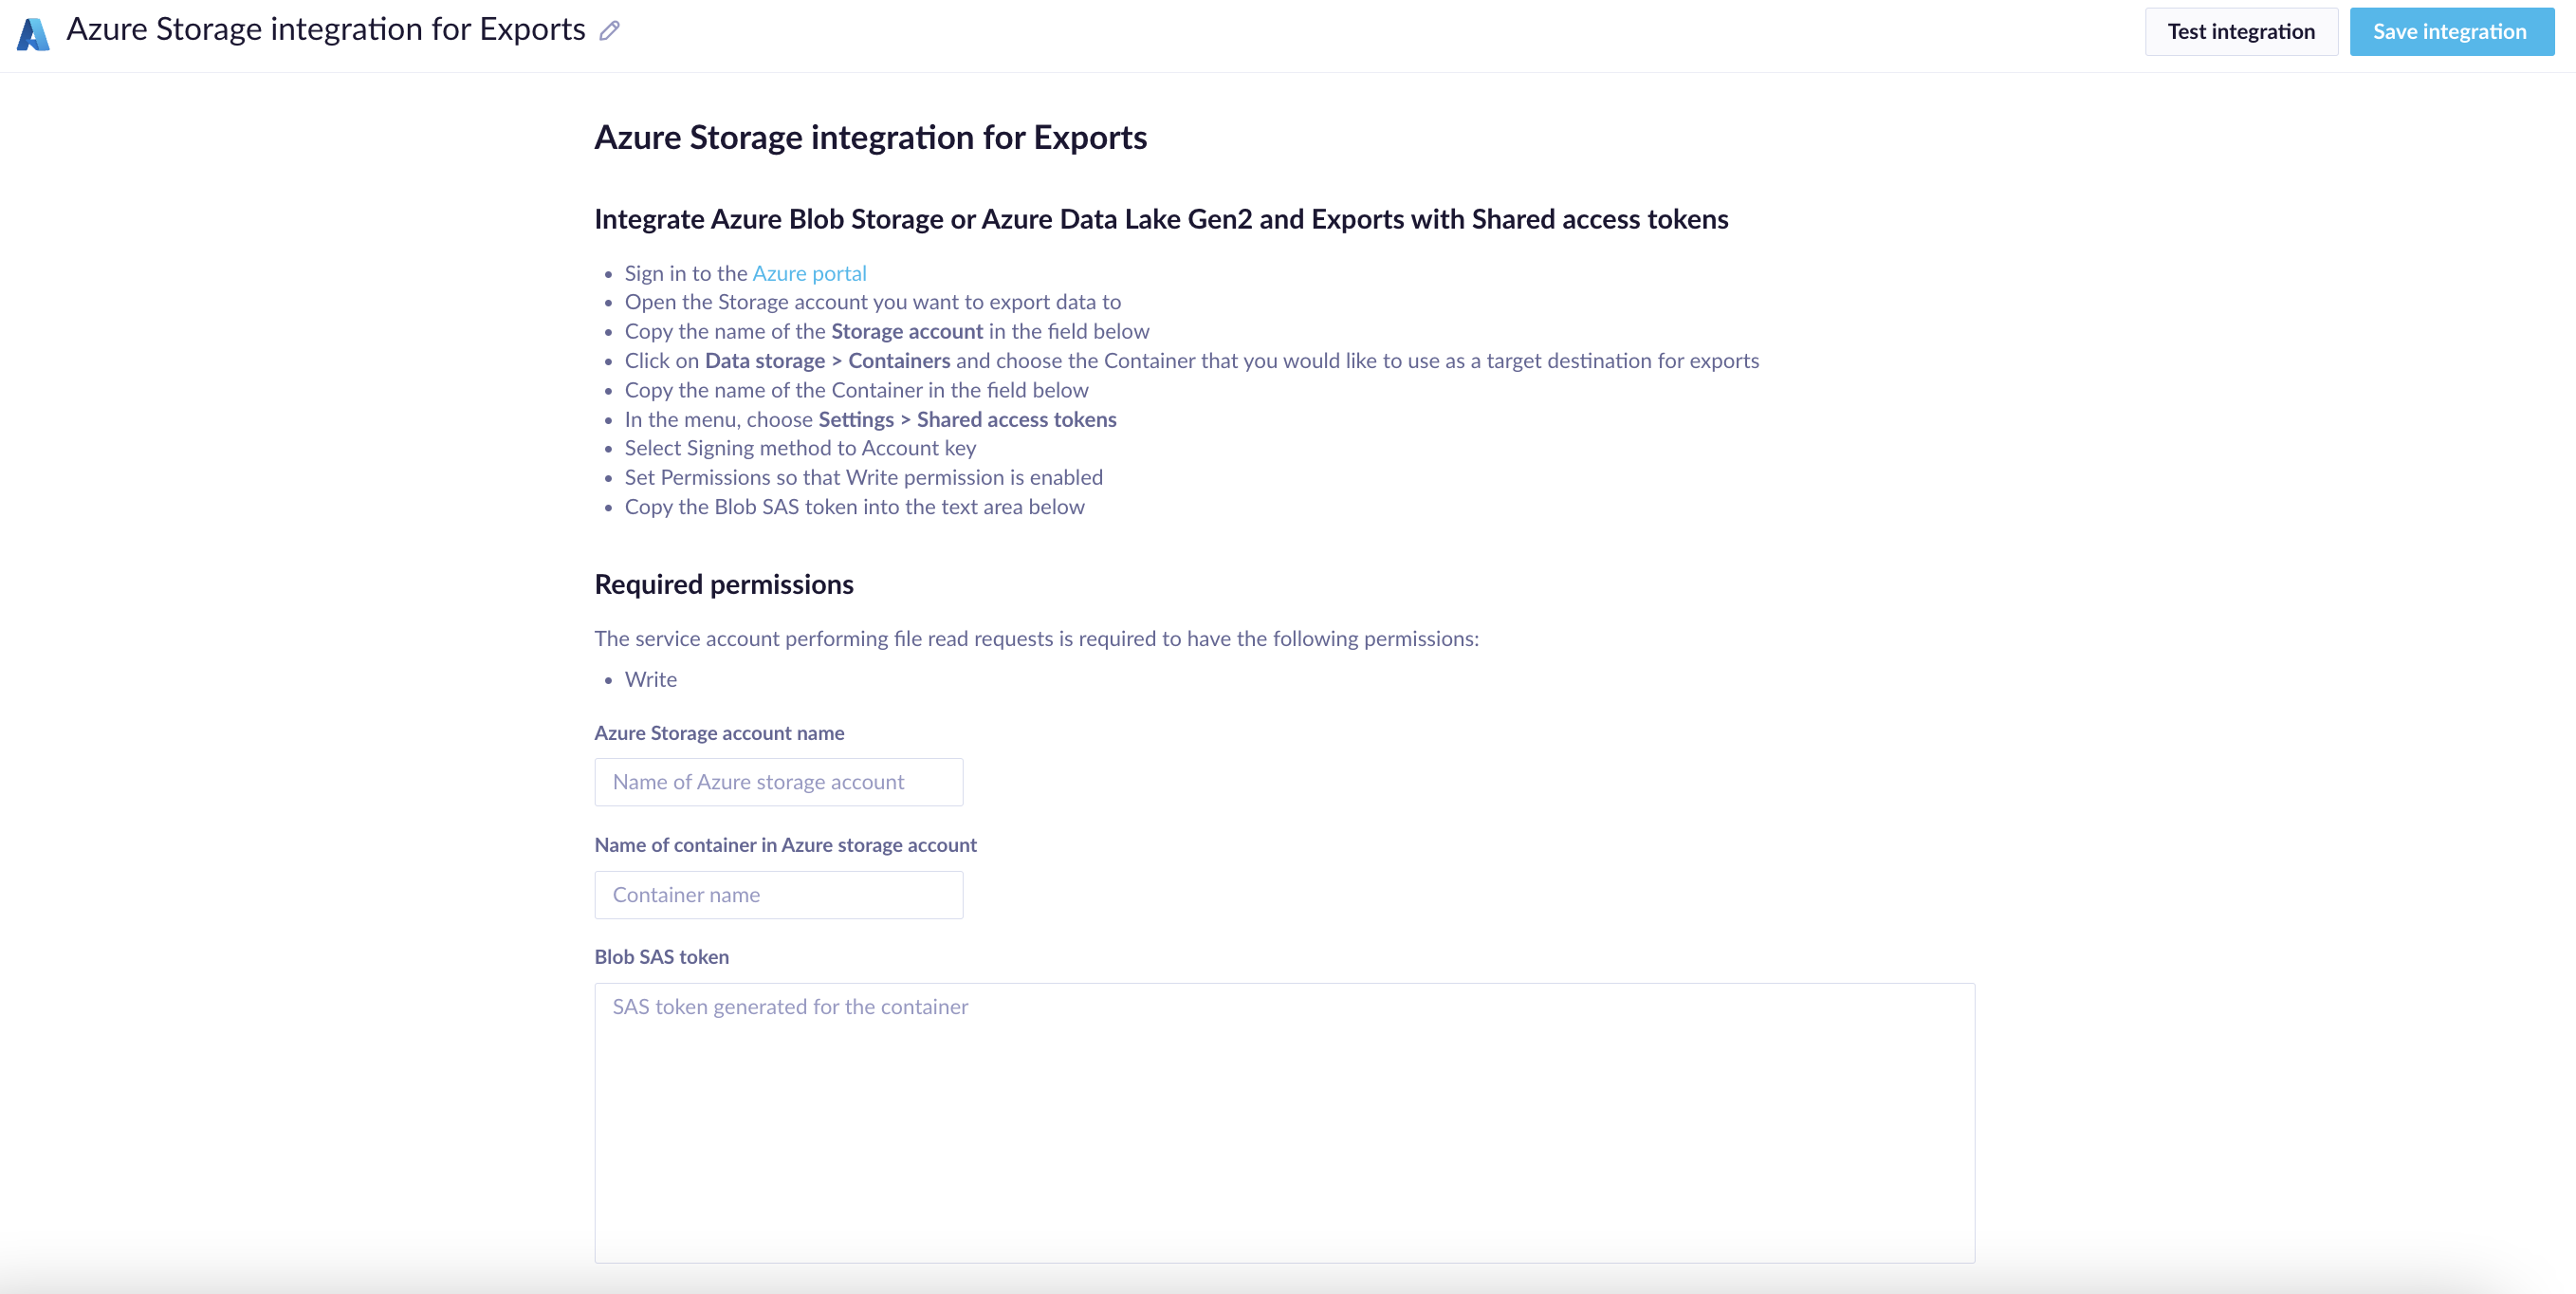
- Shared Access Token (SAS): Enter Blob Shared Access Secret Token.
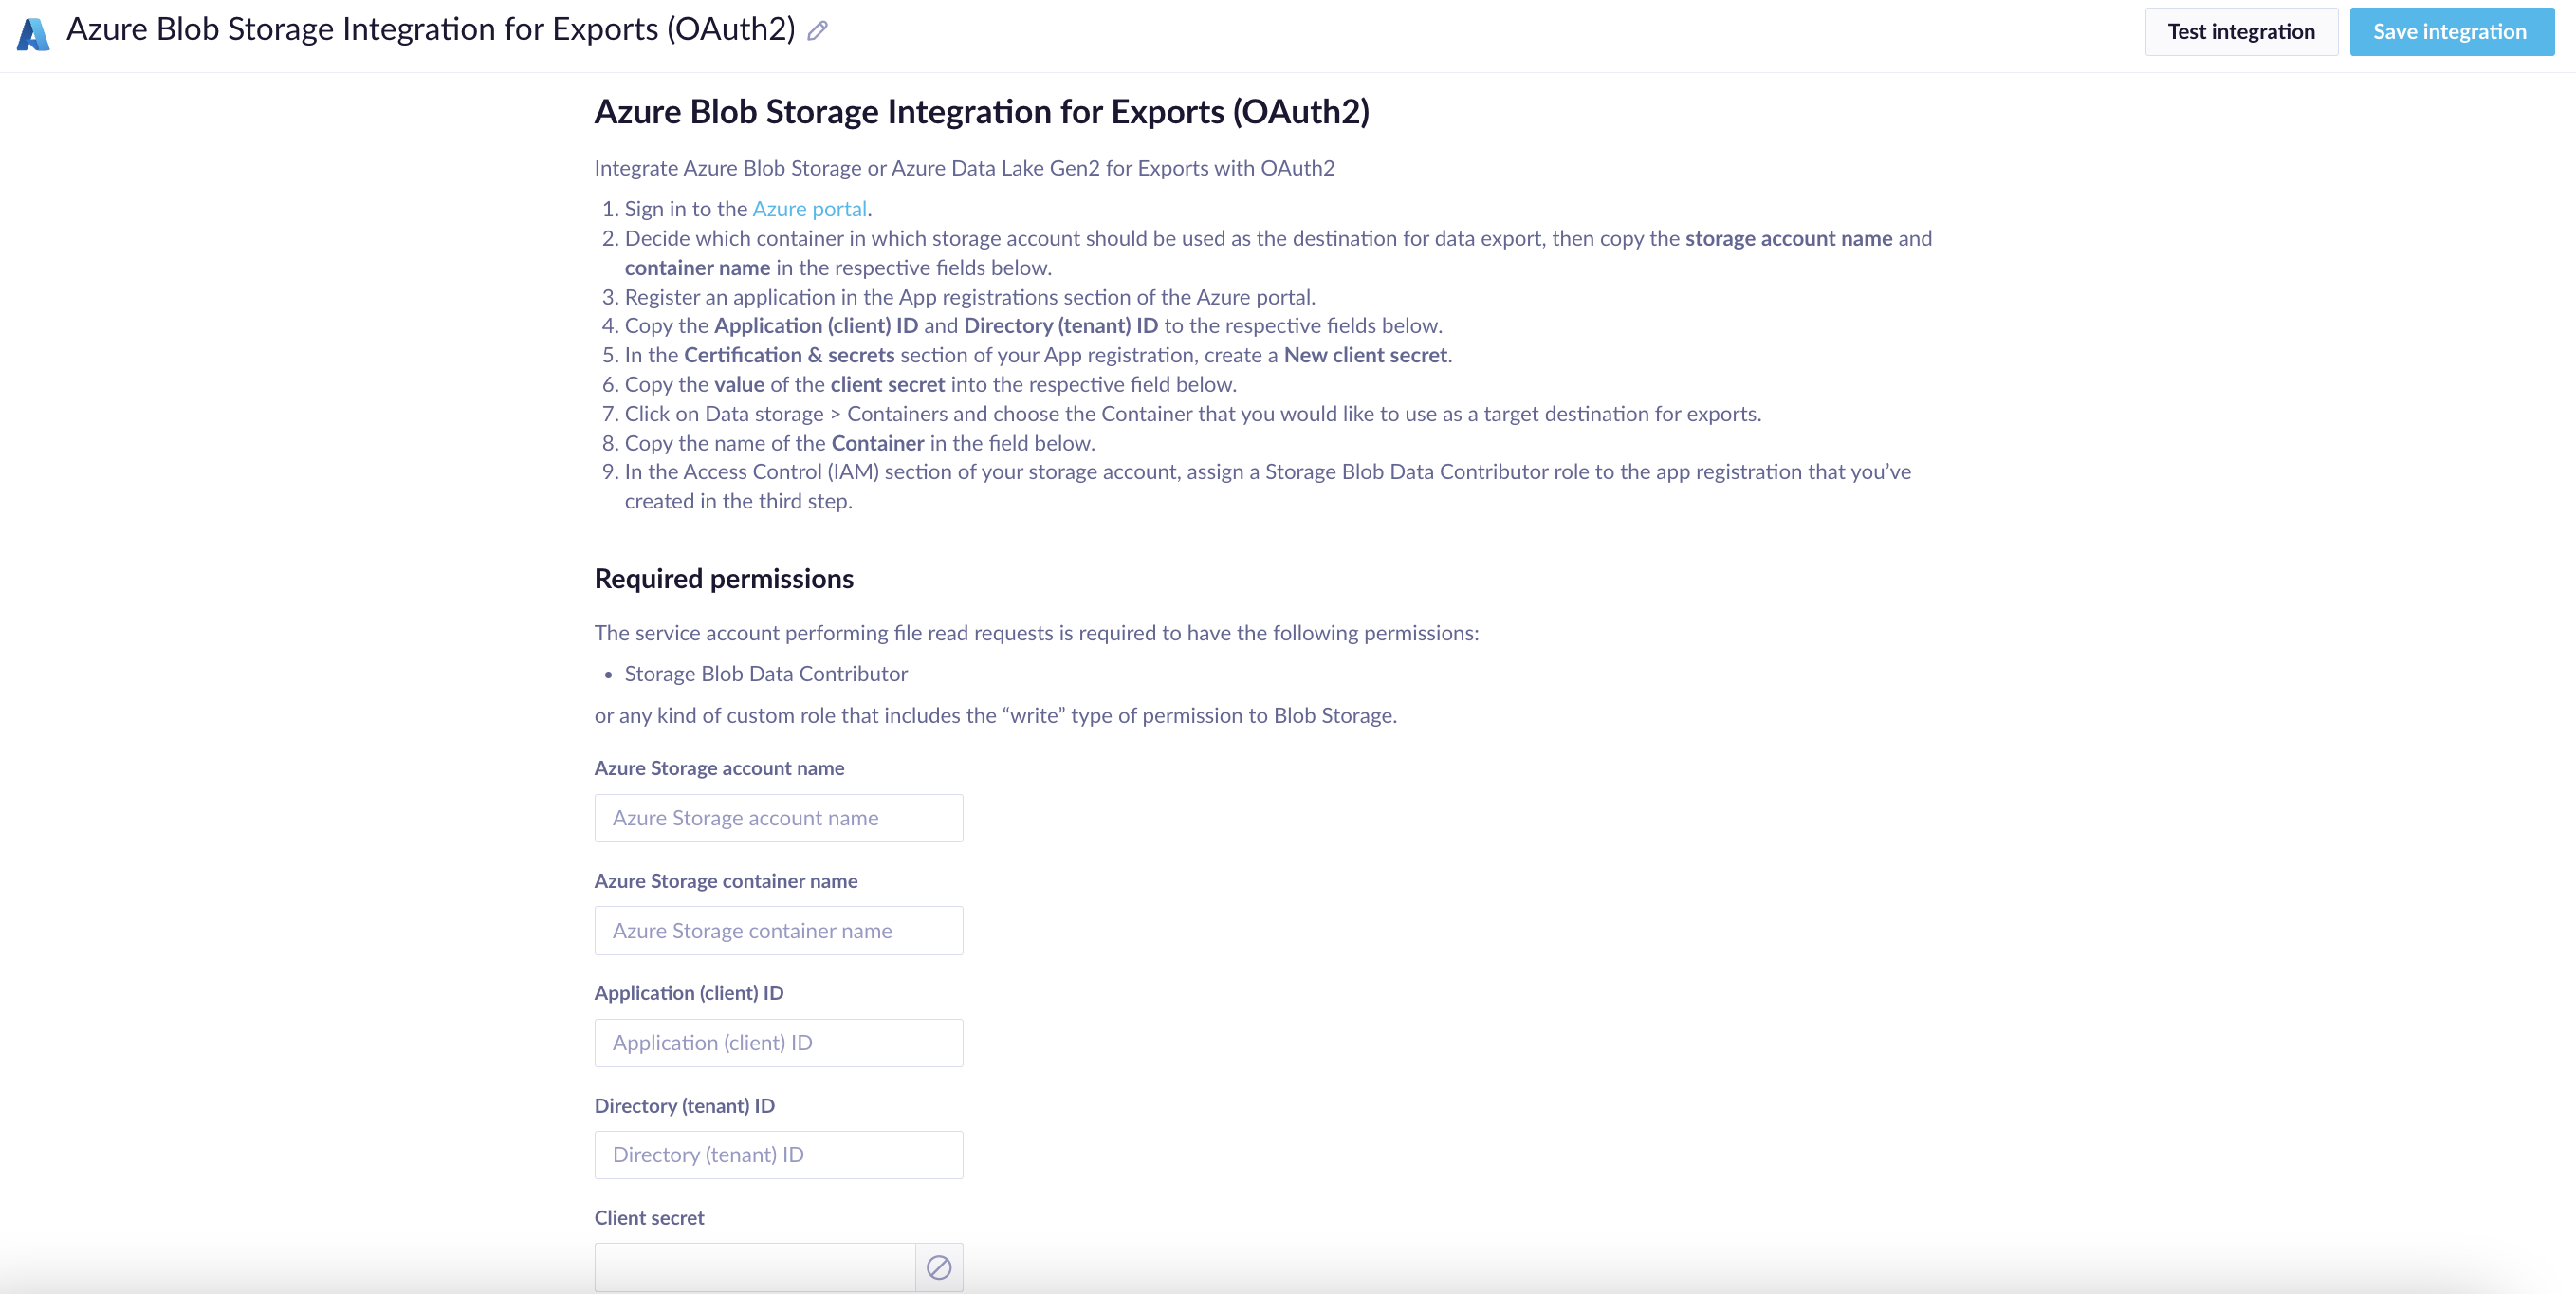
- OAuth2: Enter:
- Application (client) ID
- Directory (tenant) ID
- Client secret
Set up with Shared Access Token
Step 1: Prepare your storage details
- Sign in to Azure Portal.
- Open your storage account and copy the account name.
- Go to Data storage > Containers and select your target container.
- Copy the container name.
Step 2: Generate access token
- In your storage account menu, go to Settings > Shared access tokens.
- Set Signing method to Account key.
- Enable Write permission.
- Copy the Blob SAS token.
Required permissions
The service account performing file read requests is required to have the ‘Write’ permission.
Step 3: Complete integration setup
- In Bloomreach Engagement, go to Data & Assets > Integrations > Add new integration.
- Enter your storage account name, container name, and SAS token.

Important
SAS tokens have expiration dates. Your exports will fail when the token expires, so set calendar reminders to renew it.
Set up with OAuth2
Step 1: Prepare your storage details
- Sign in to Azure Portal.
- Choose your storage account and container for exports.
- Copy the storage account name and container name.
Step 2: Register your app
- Go to App registrations and register a new application.
- Copy the Application (client) ID and Directory (tenant) ID.
- In Certificates & Secrets, create a new client secret.
- Copy the client secret value.
Step 3: Set permissions
In your storage account's Access Control (IAM), assign Storage Blob Data Contributor role to your app registration.
Step 4: Complete integration setup
- In Bloomreach Engagement, go to Data & Assets > Integrations > Add new integration.
- Enter all your authentication details.

Required permission
The service account performing file read requests is required to have the following permissions:
- Storage Blob Data Contributor,
or any kind of custom role that includes the “write” type of permission to Blob Storage.
Start exporting
Once your integration is set up, you can specify exactly where Bloomreach Engagement exports your files. This works just like our SFTP or Google Cloud Storage integrations.
You can learn more about Exports and available features in our Data Exports documentation.
Export limits
Azure supports exports up to 48.8GB of data.
Updated 7 months ago
