

Gocertify
The gocertify integration with Bloomreach Engagement helps you to target and convert high-value customer groups (such as students, key workers, or specific age ranges) by offering personalized discounts. These targeted offers can help increase conversion rates.
This is a native integration that will work with any customer using Bloomreach.
In this guide, we provide you with the following:
- how to set up the integration
- how the integration works and how the data will appear in Bloomreach Engagement
- how to create an example segmentation
Set up the integration
Specific prerequisites must be met before setting up the integration. Their list is provided below. It is also good to know that the supported data are events.
Prerequisites
You need the Bloomreach Engagement project, a gocertify account, and a contact to your Customer Success Manager at gocertify.
Setup process
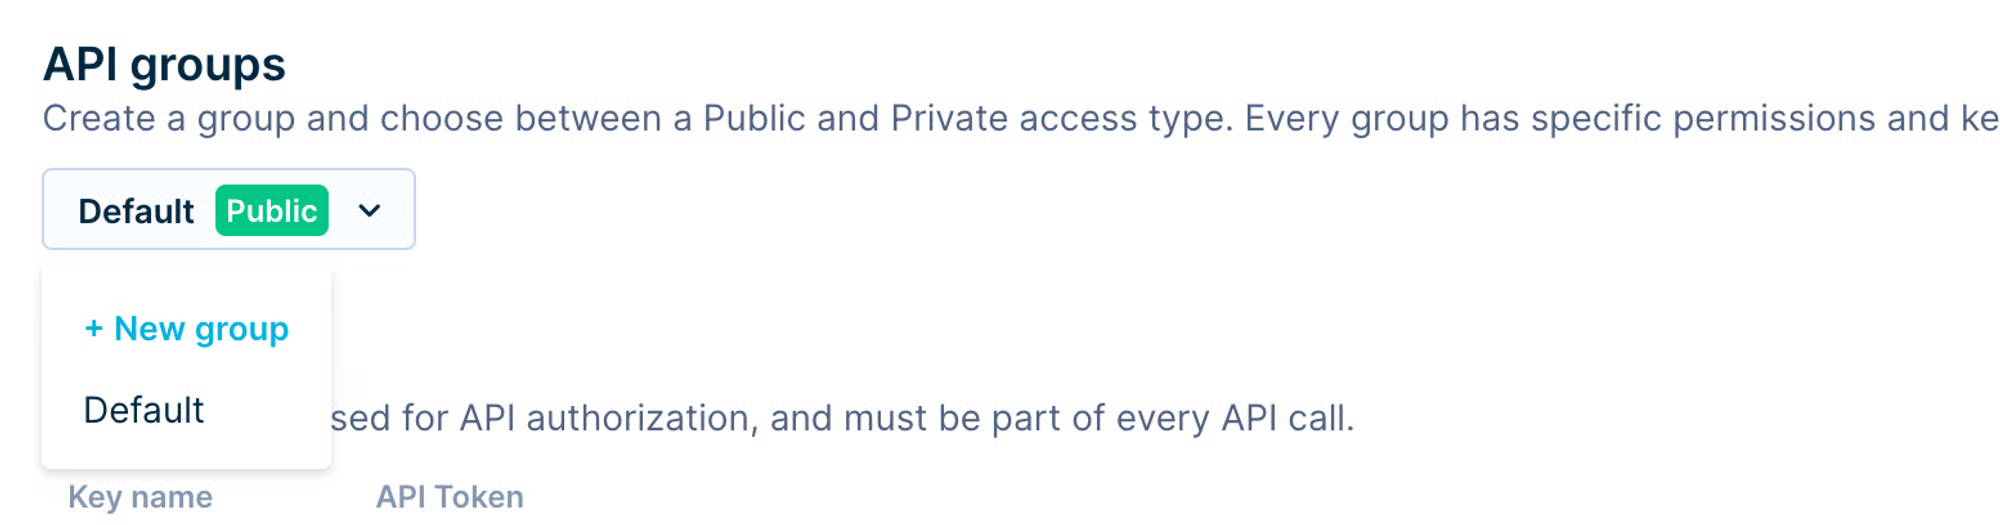
Step 1: Create a new API group
In your Bloomreach Engagement project, click in the top right corner on Settings > Project settings > Access management > API. In the “API groups” section, open the dropdown selector and choose “+ New group.”
In the popup, choose “Private access” and name the group “gocertify” and click on “Create group”.
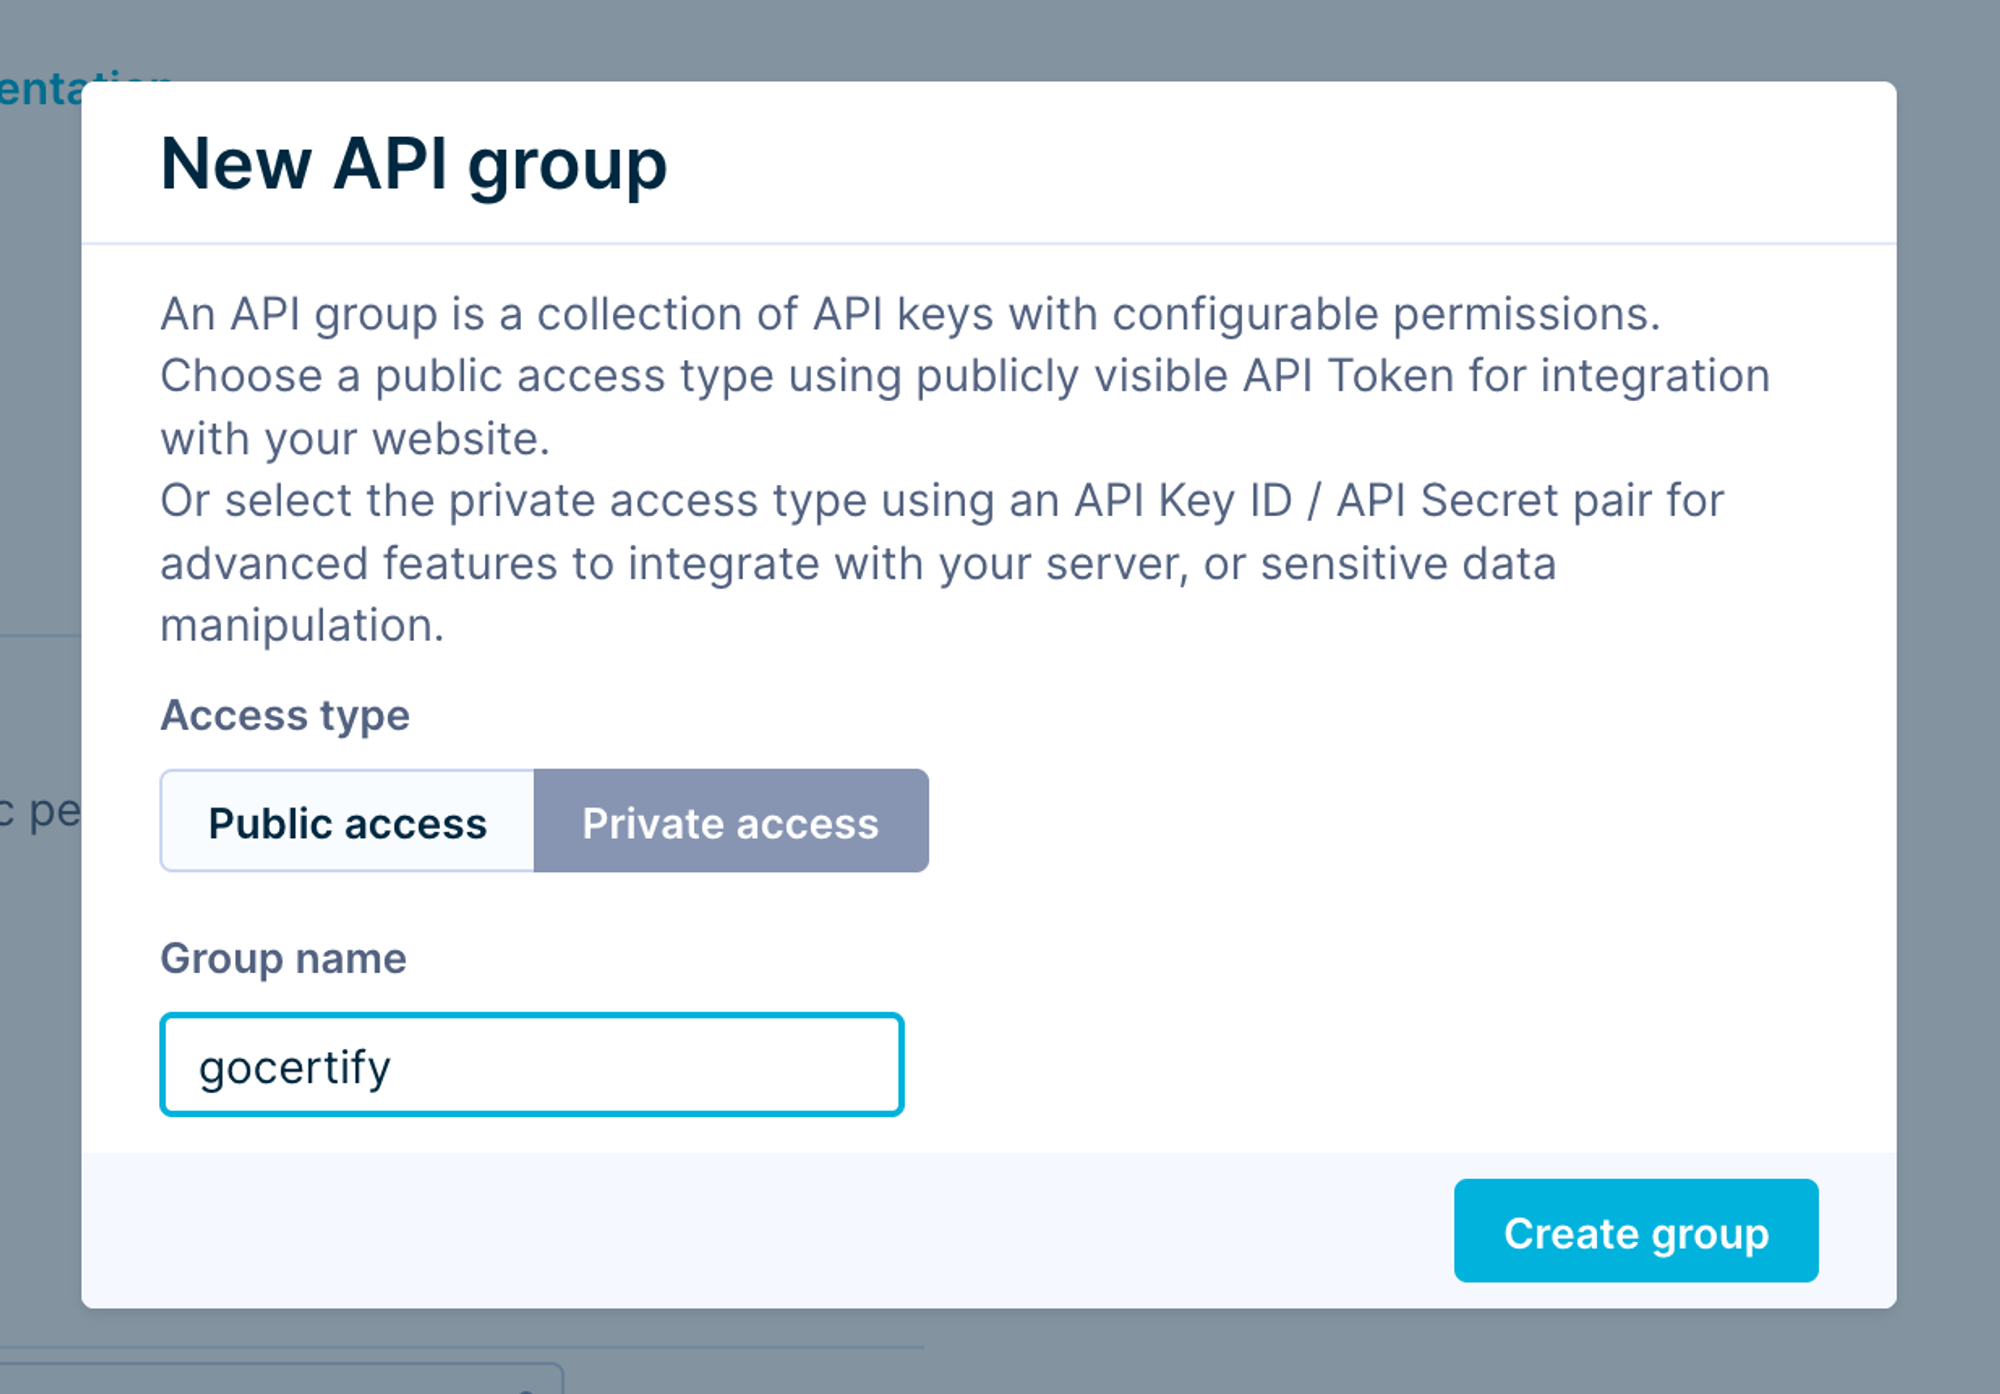
You will get a Secret key. Copy it and save it in a safe place, you will need it later.
Step 2: Set up the API group permissions
Scroll to the “Group permissions” section and click the Events tab. Enable the “Set” checkbox next to “New events.”
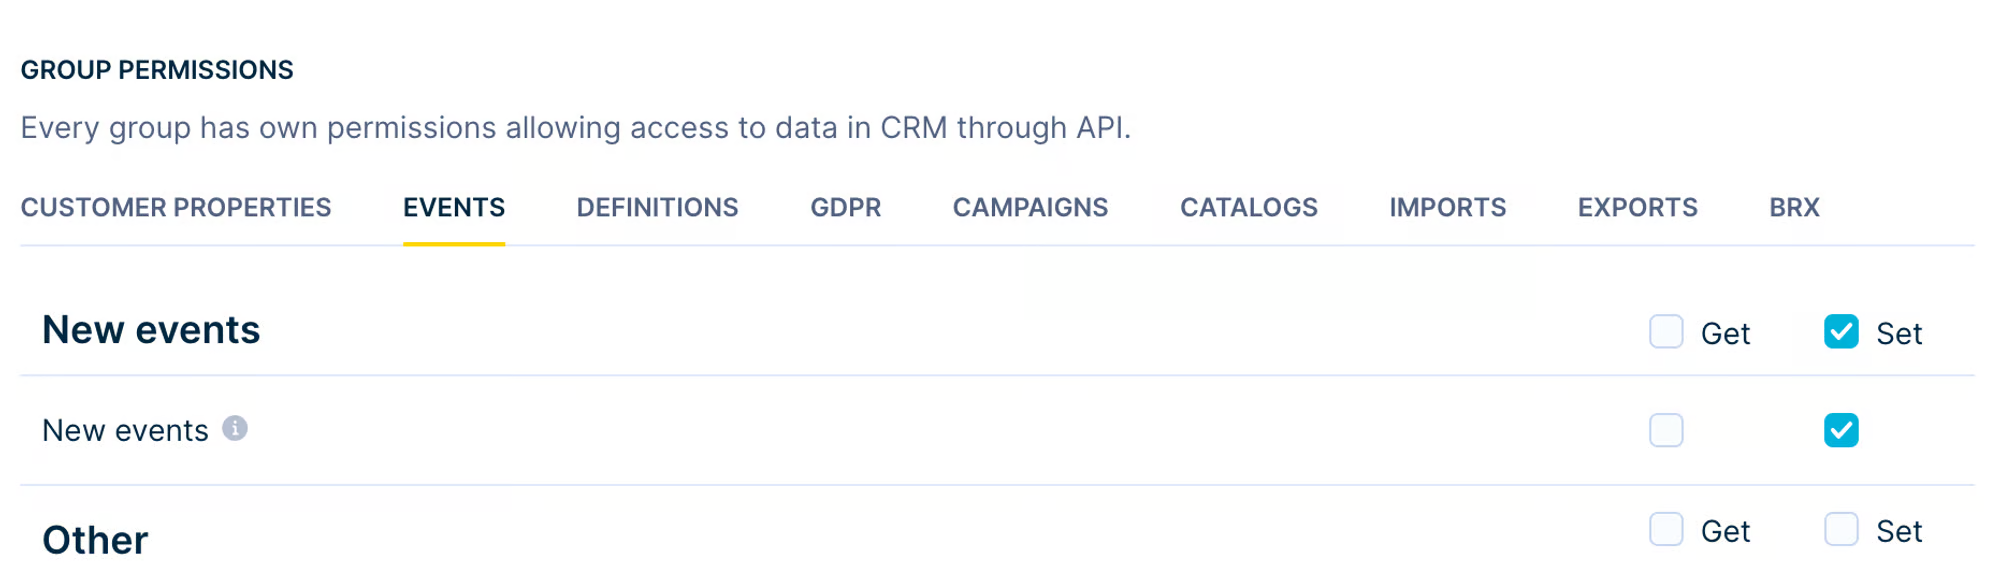
This means you will allow gocertify to only create new events. No other access will be given.
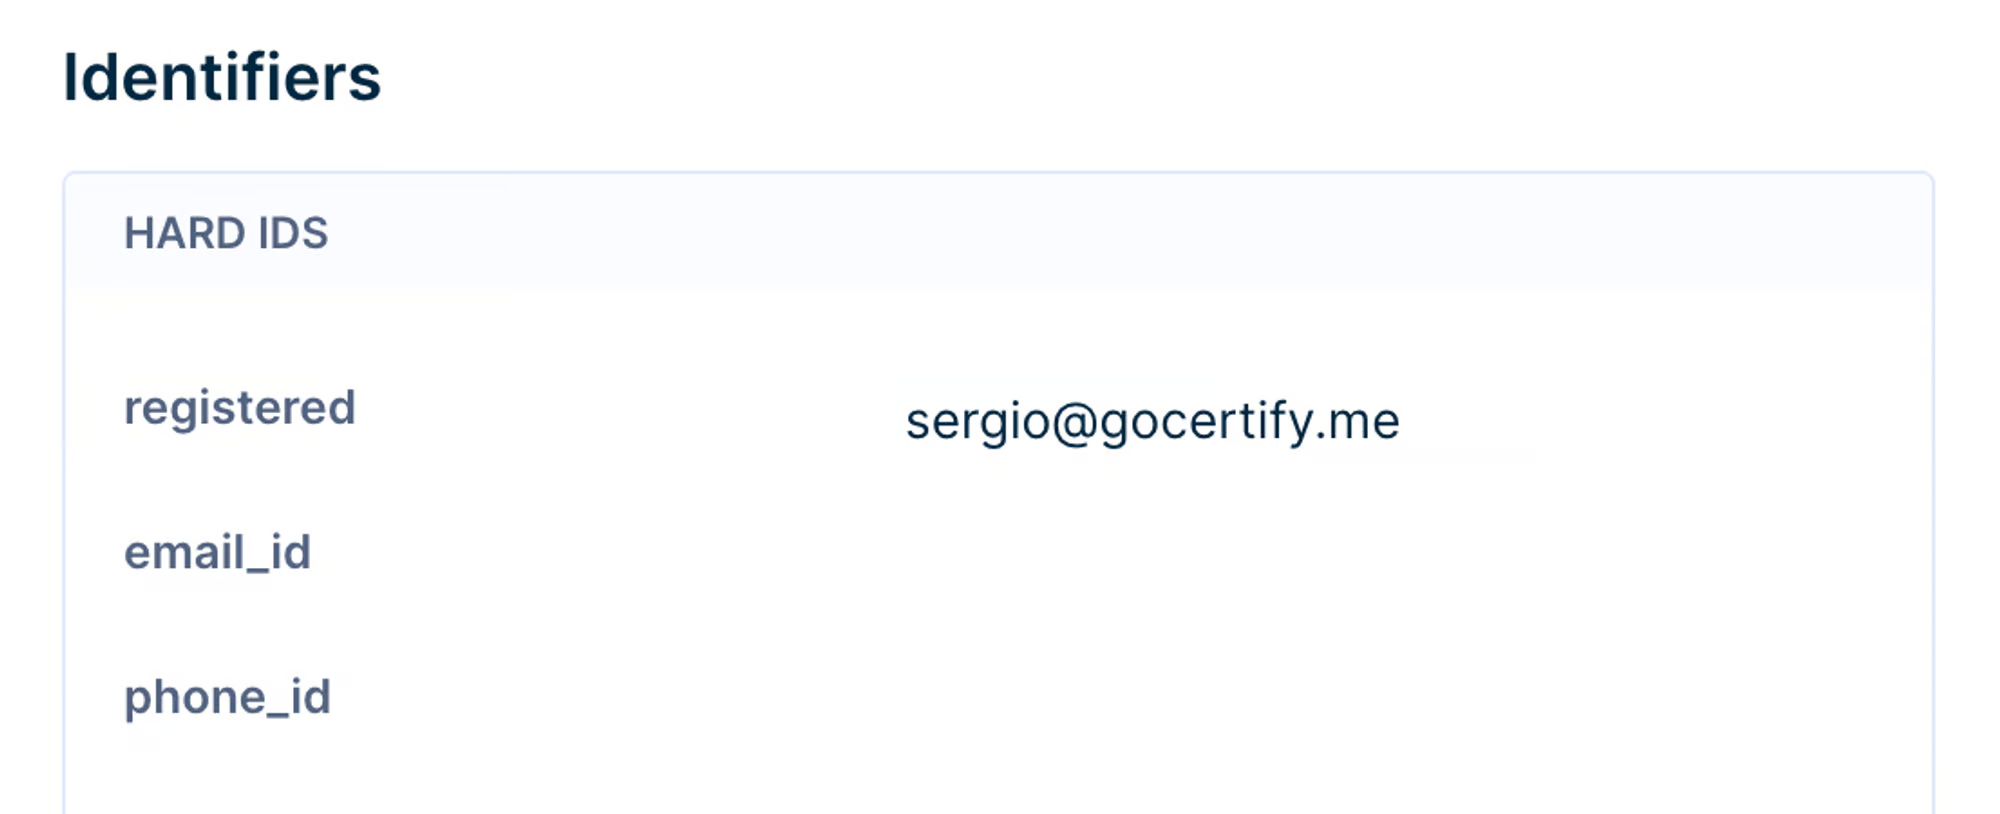
Step 3: Find your hard ID in Bloomreach Engagement
Visit any customer profile in your instance, and look at the field name where their email is. It’s typically “registered” or email_id. See the example below. In this case, your hard ID is “registered”:
Step 4: Share credentials with gocertify CSM
Go to onetimesecret.com and paste the credentials in the format below. Even if it’s not required, we encourage you to add a random “Passphrase.” It will generate a secret link that expires within seven days and is visible only once. Once done, share this link with your Customer Success Manager at gocertify.
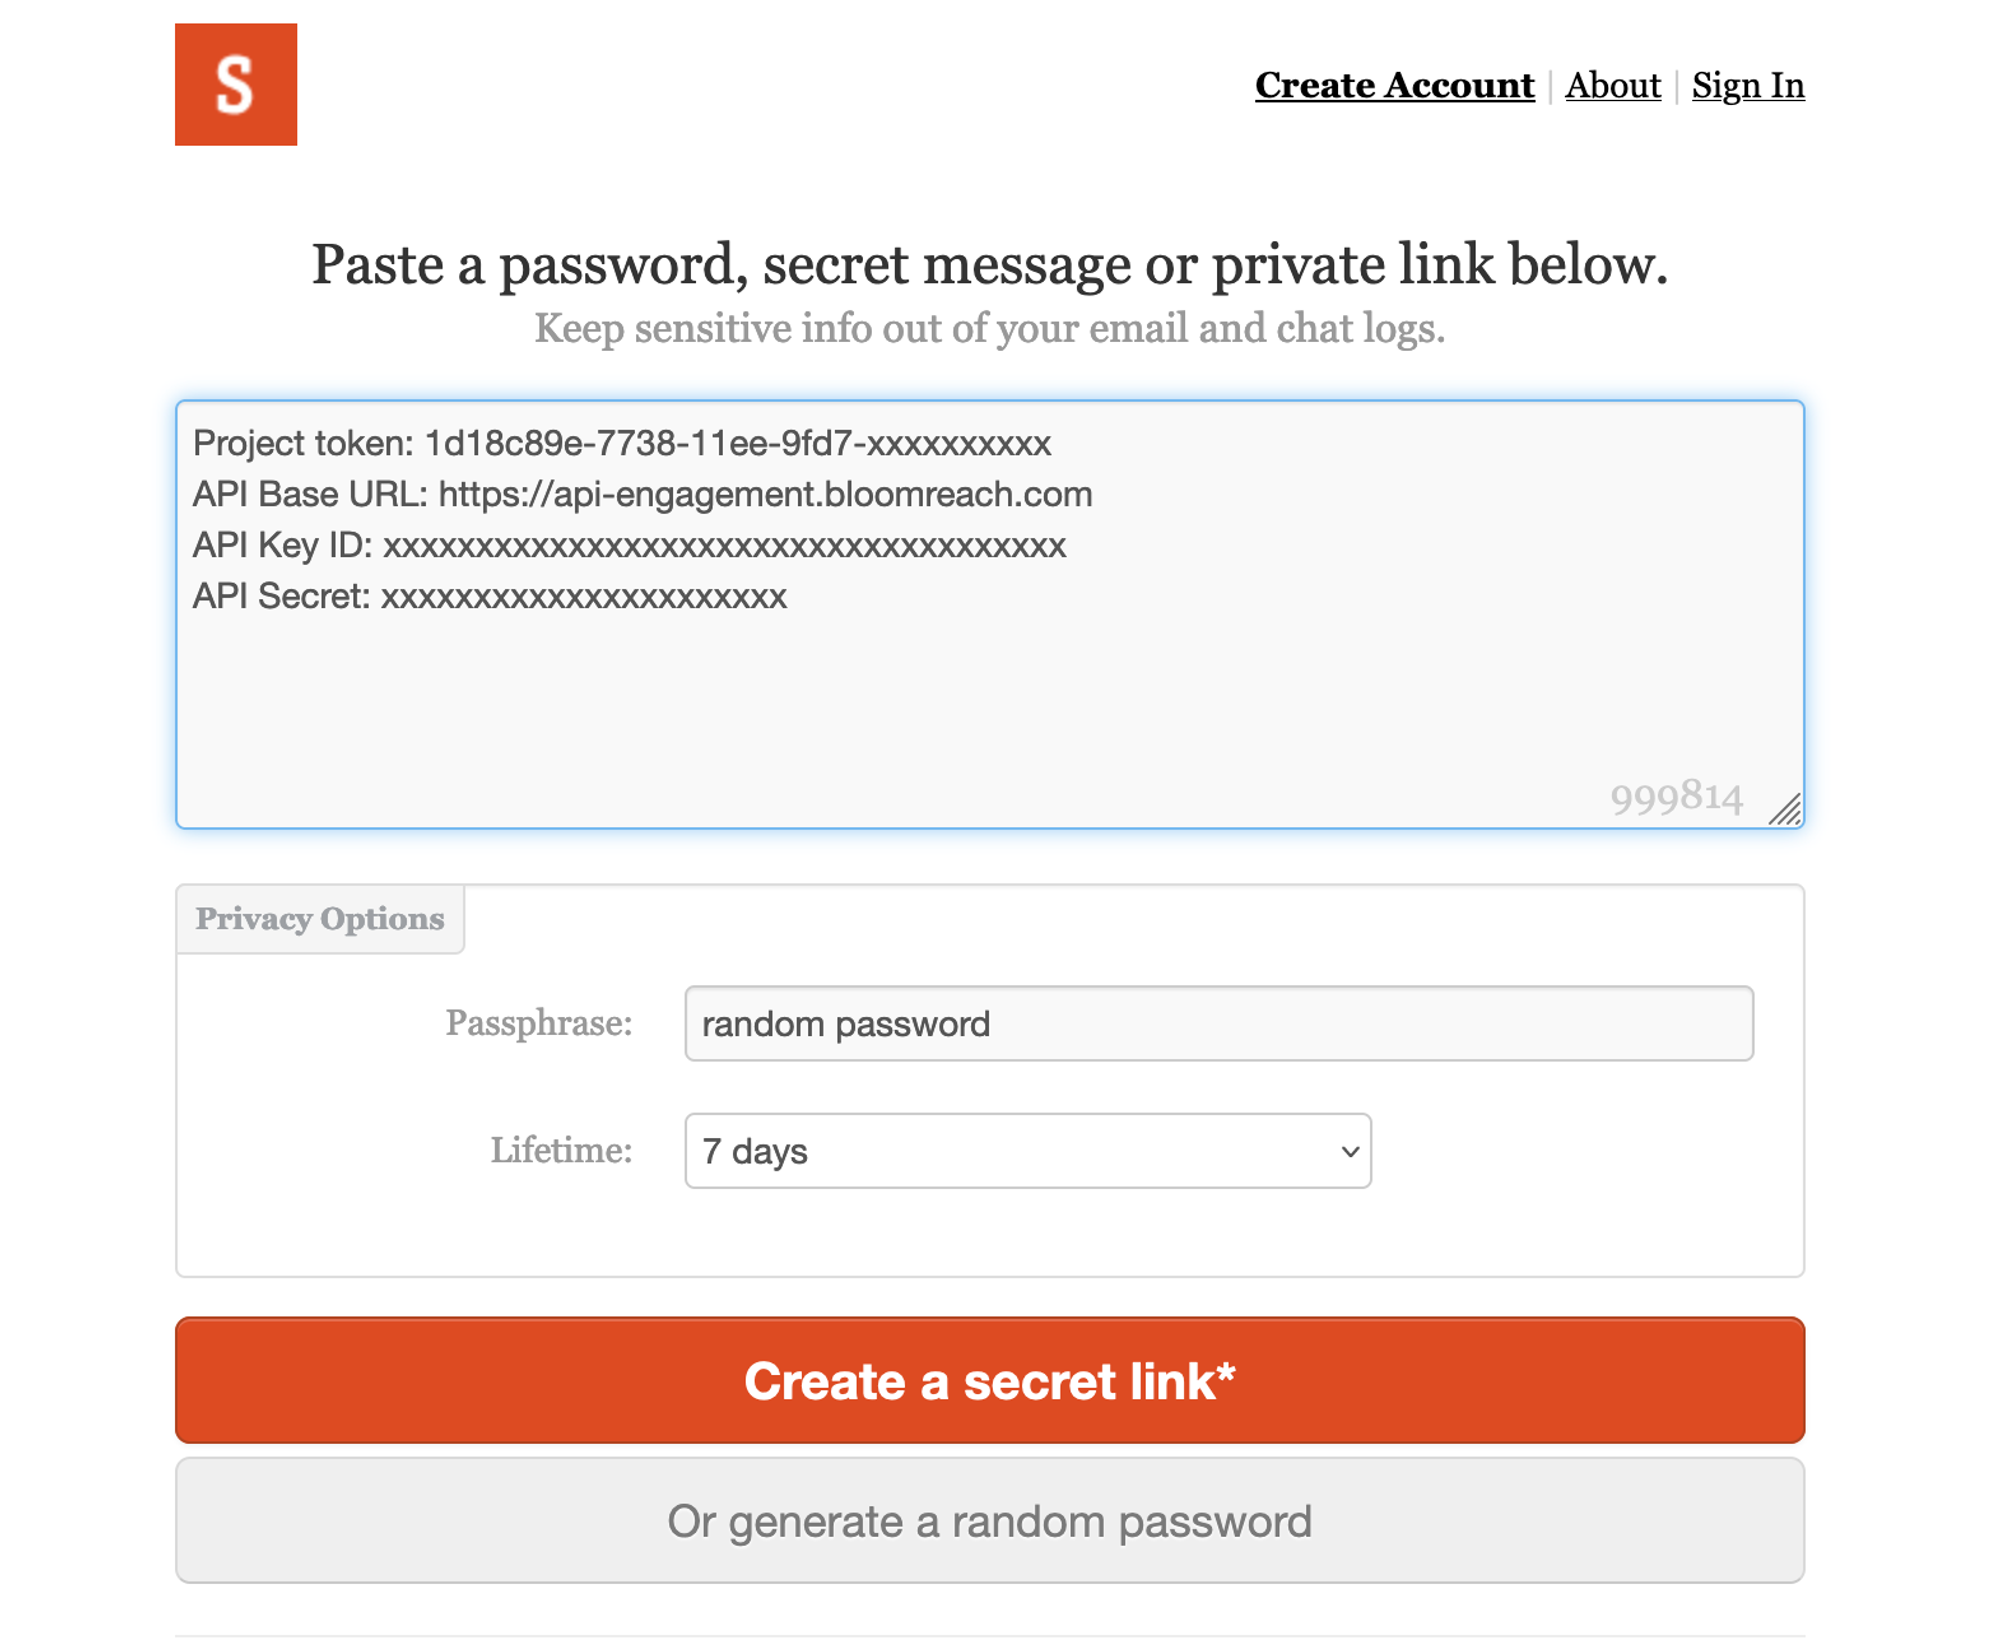
The “API Secret” is the previous “Secret key” that you saved in a safe place.
Project token: xxxxxxx-xxxxxx-xxxxxx-xxxxxxxxxx
API Base URL: xxxxxxxxxxxxxxxxxxxx.bloomreach.com
API Key ID: xxxxxxxxxxxxxxxxxxxxxxxxxxxxxxxxxxxxx
API Secret: xxxxxxxxxxxxxxxxxxxxxx
Hard ID: registered
Use this as a placeholder at onetimesecret.com
Your Project token, API Base URL, and API Key ID you will find at Settings > Project settings > Access management > API.
API Secret is the Secret key from Step 1, and Hard ID is your hard ID from Step 3.
How the integration works
Once the user submits their email or mobile number, gocertify will send this data to the customer’s Bloomreach account as a custom event named ”gocertify.” Bloomreach will create a new customer (if the email/phone number is new) or use an existing customer (if the email/phone number is already in your platform).
Receiving this custom event in your Bloomreach Engagement project means the user has given explicit consent for marketing.
After the screen, when the user successfully verifies as a target group (student, healthcare, senior, etc.), a second custom event named “gocertify” as well will be triggered, including the details of the verification.
With this data, you can generate segments based on these events.
How the data appears in Bloomreach Engagement
You will encounter two events, one for the “consent intent” and another after they verify as a group and claim an offer.
ImportantIt's your responsibility to subscribe the customer to your marketing campaigns
Format of the event for consent-intent
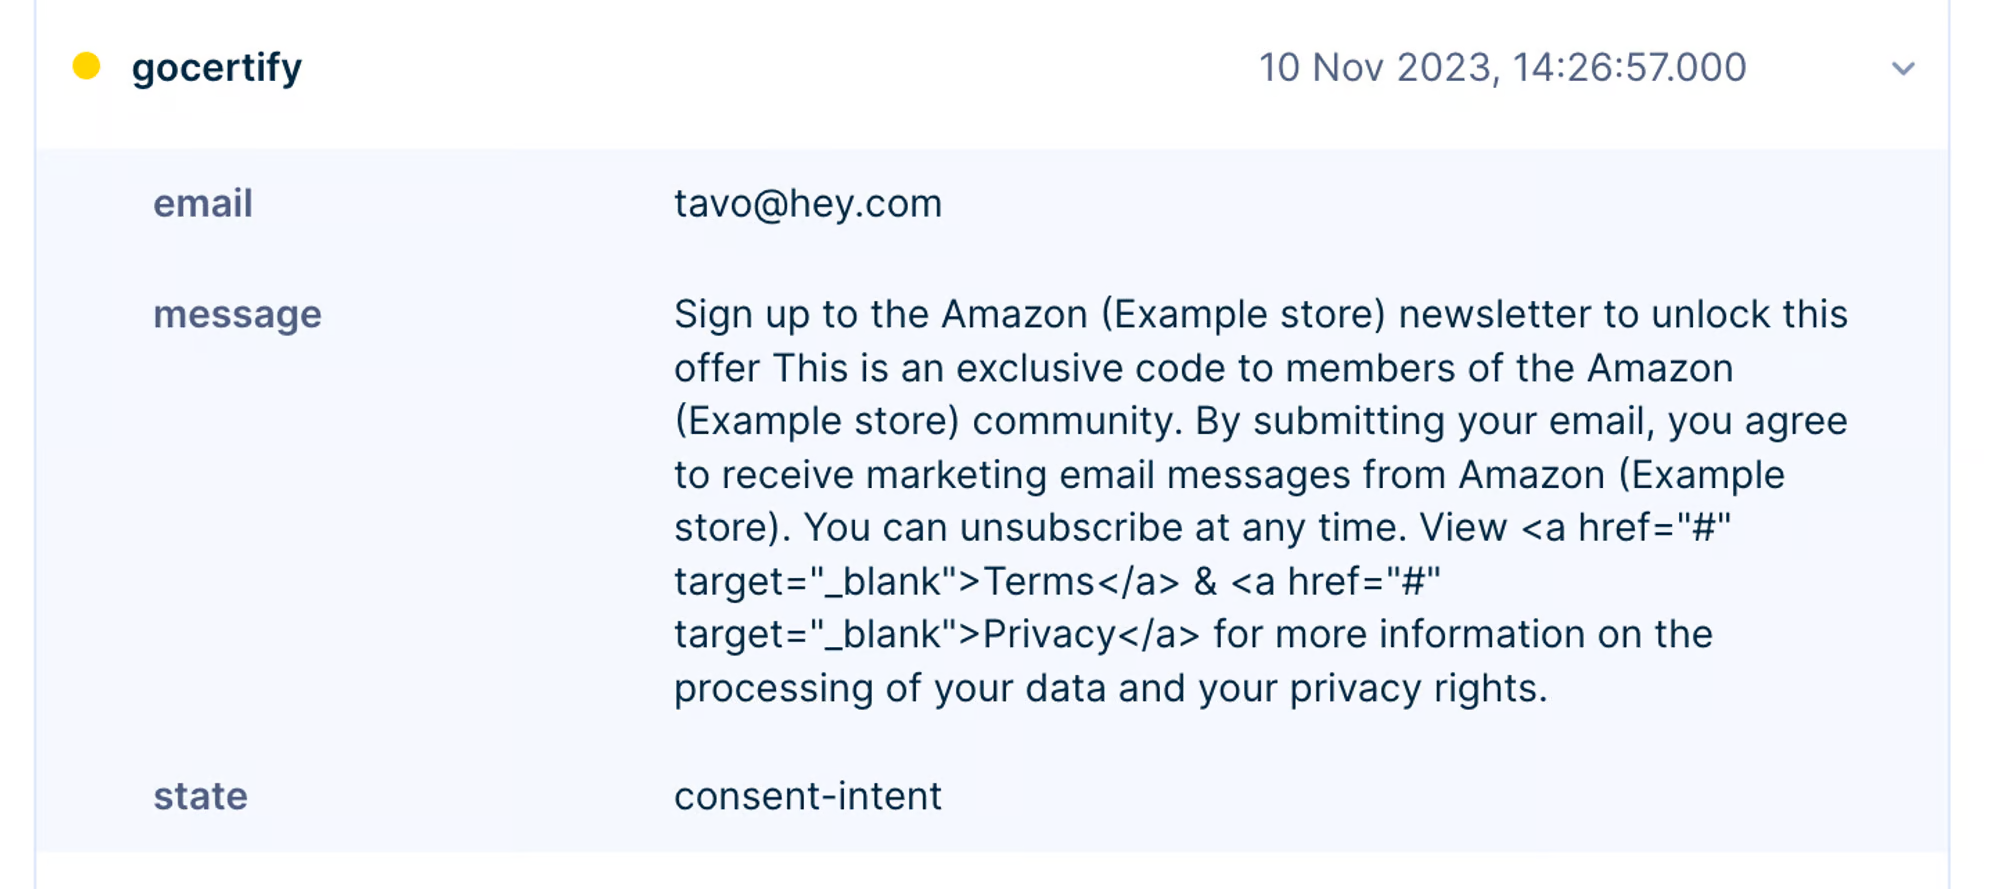
The “state” key will be equal to “consent-intent”. The “message” field will include all the text the customers saw when sharing their email/phone number with you.
Format of the event after the customers verify
After they verify, the event will differ depending on the type of offer they claim.
With verification-based offers
With verification-based offers, for example, students/key workers.
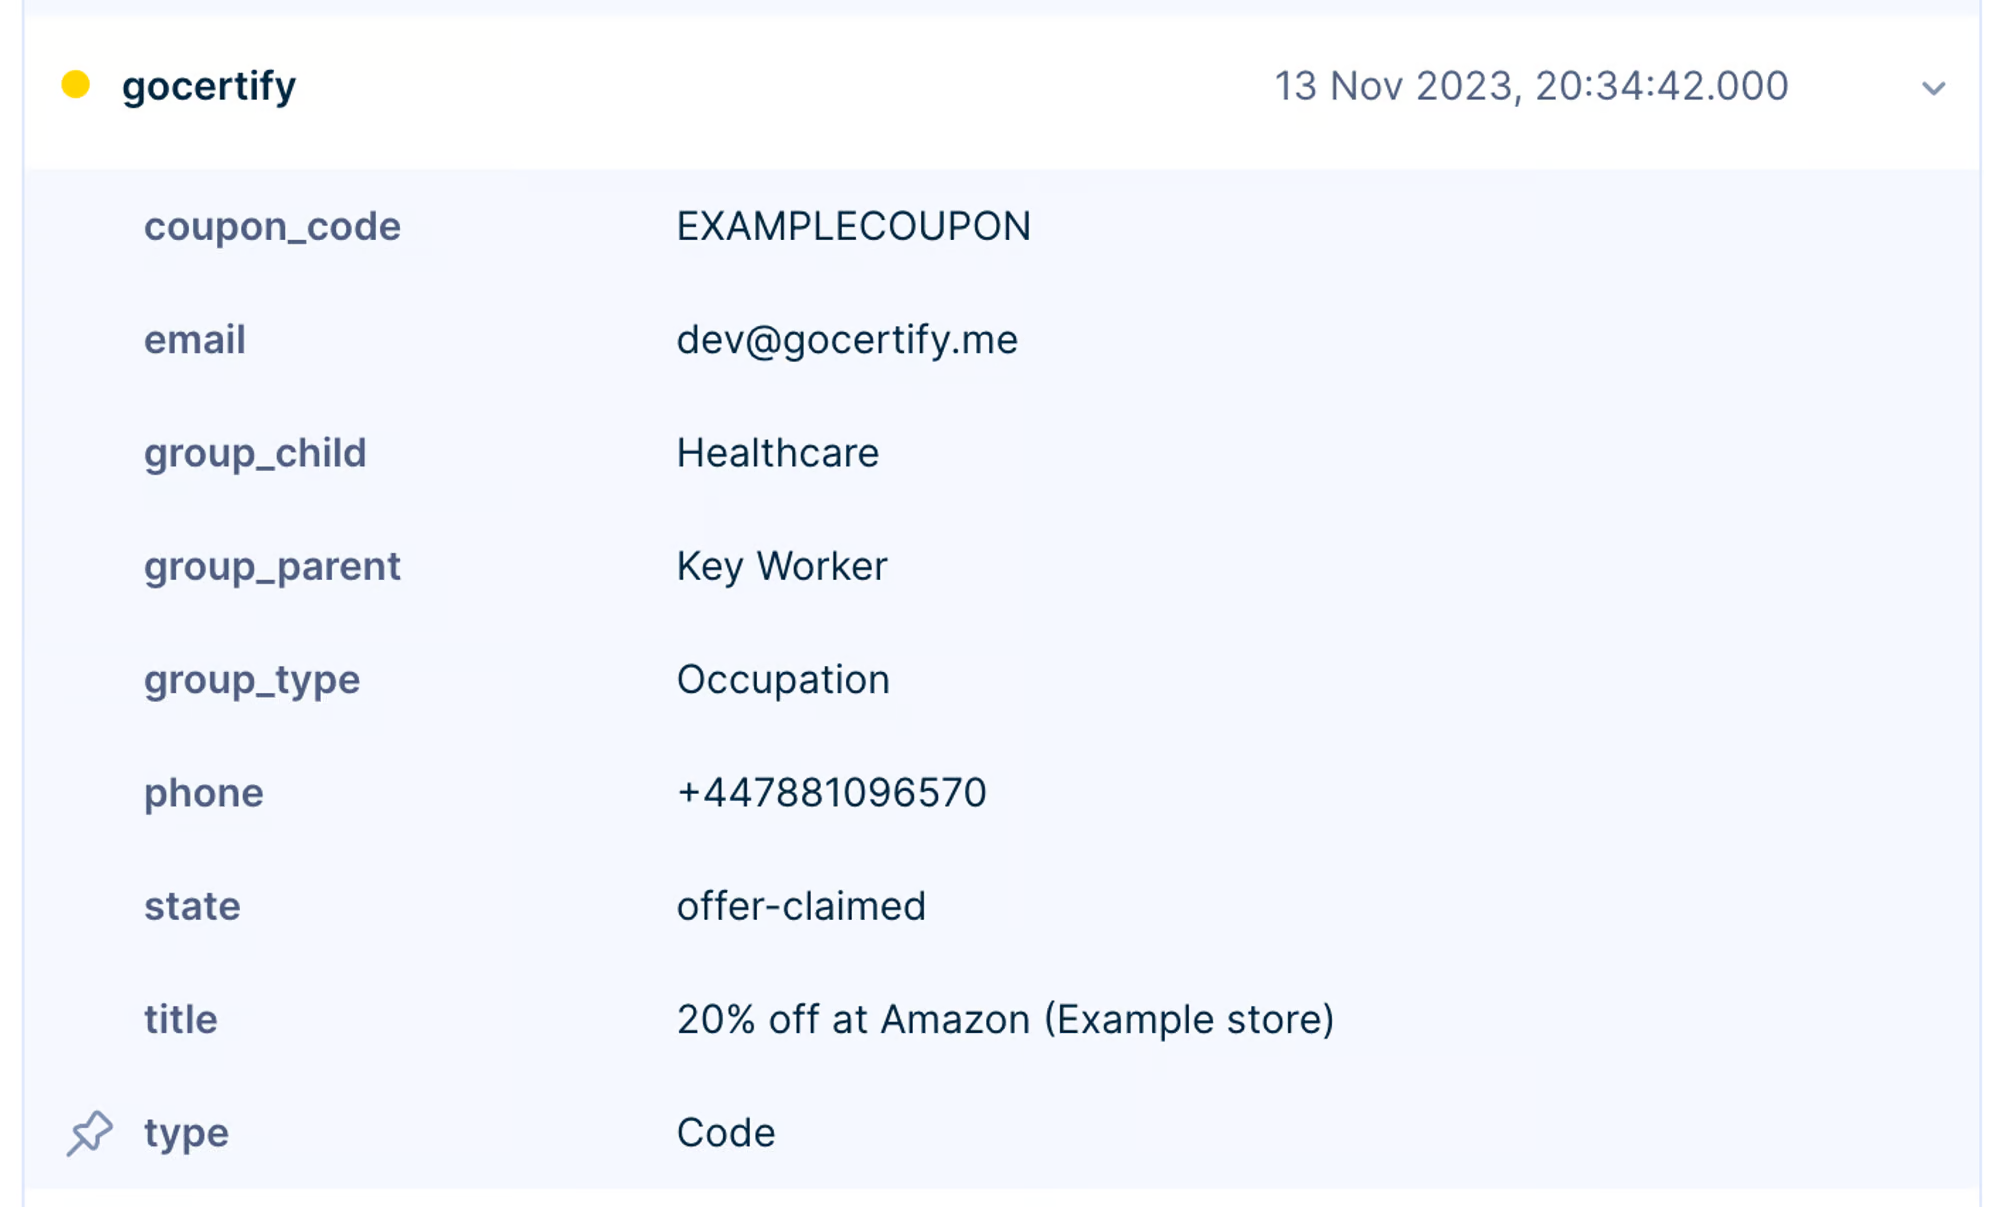
Please note that the content of the message could evolve to give more context to our customers.
With standard non-verification offers
This event will differ slightly for external offers that don’t require verification (often included in the OfferHub), as it won’t include the “group_xxx” keys.
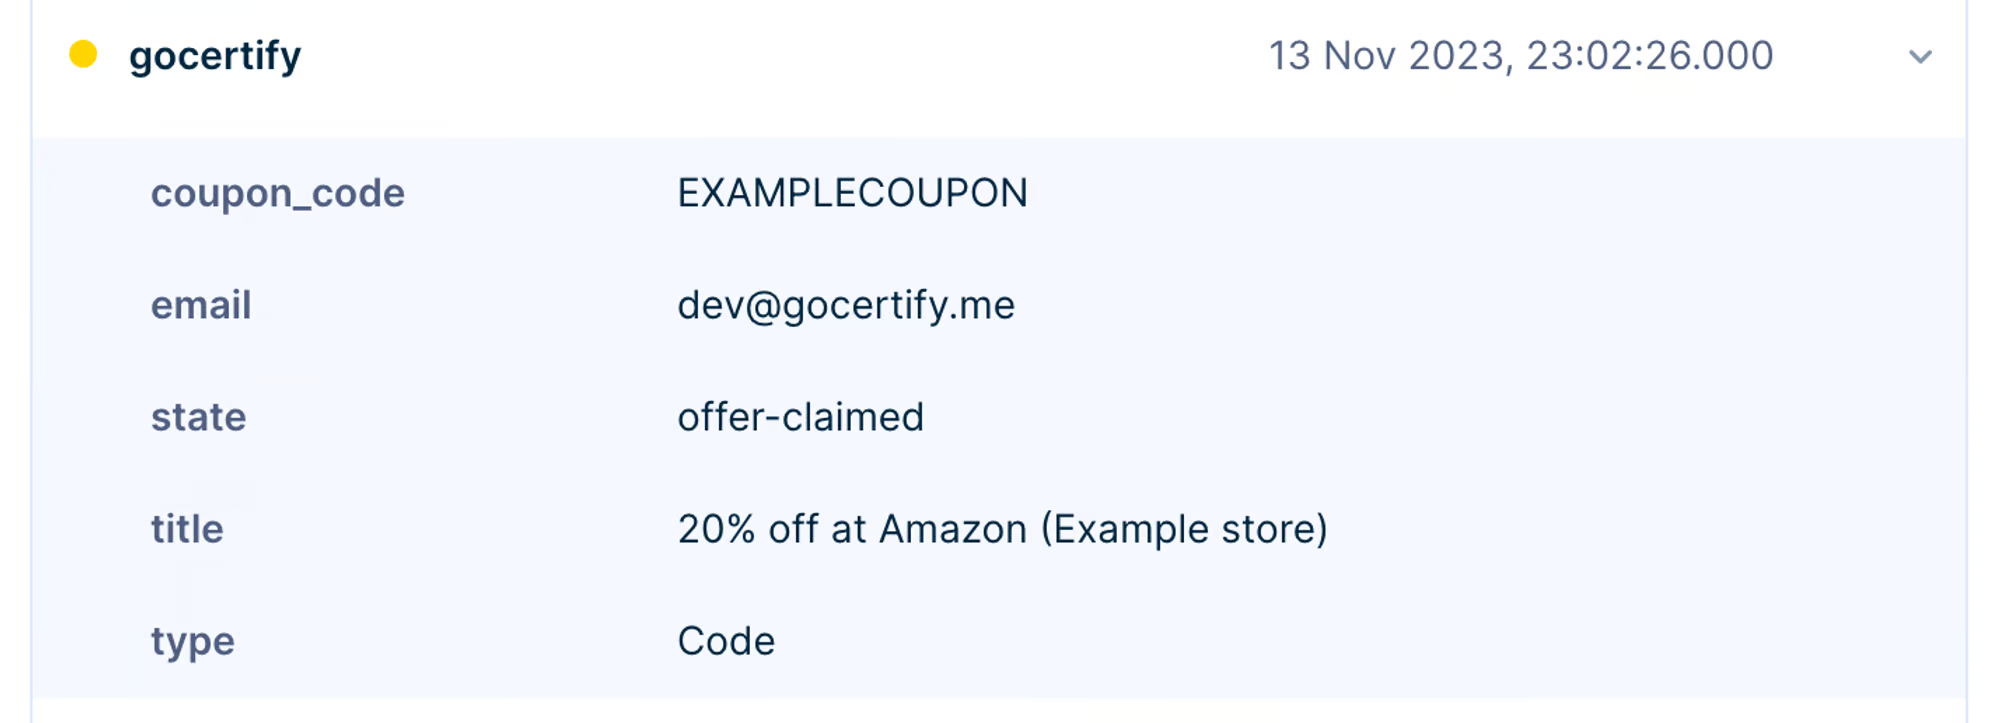
Please note that the content of the message could evolve to give more context to our customers.
Set up segmentations
You can then build segmentations based on the custom events gocertify sent to your Bloomreach Engagement project by going to “Customers” and creating filters.
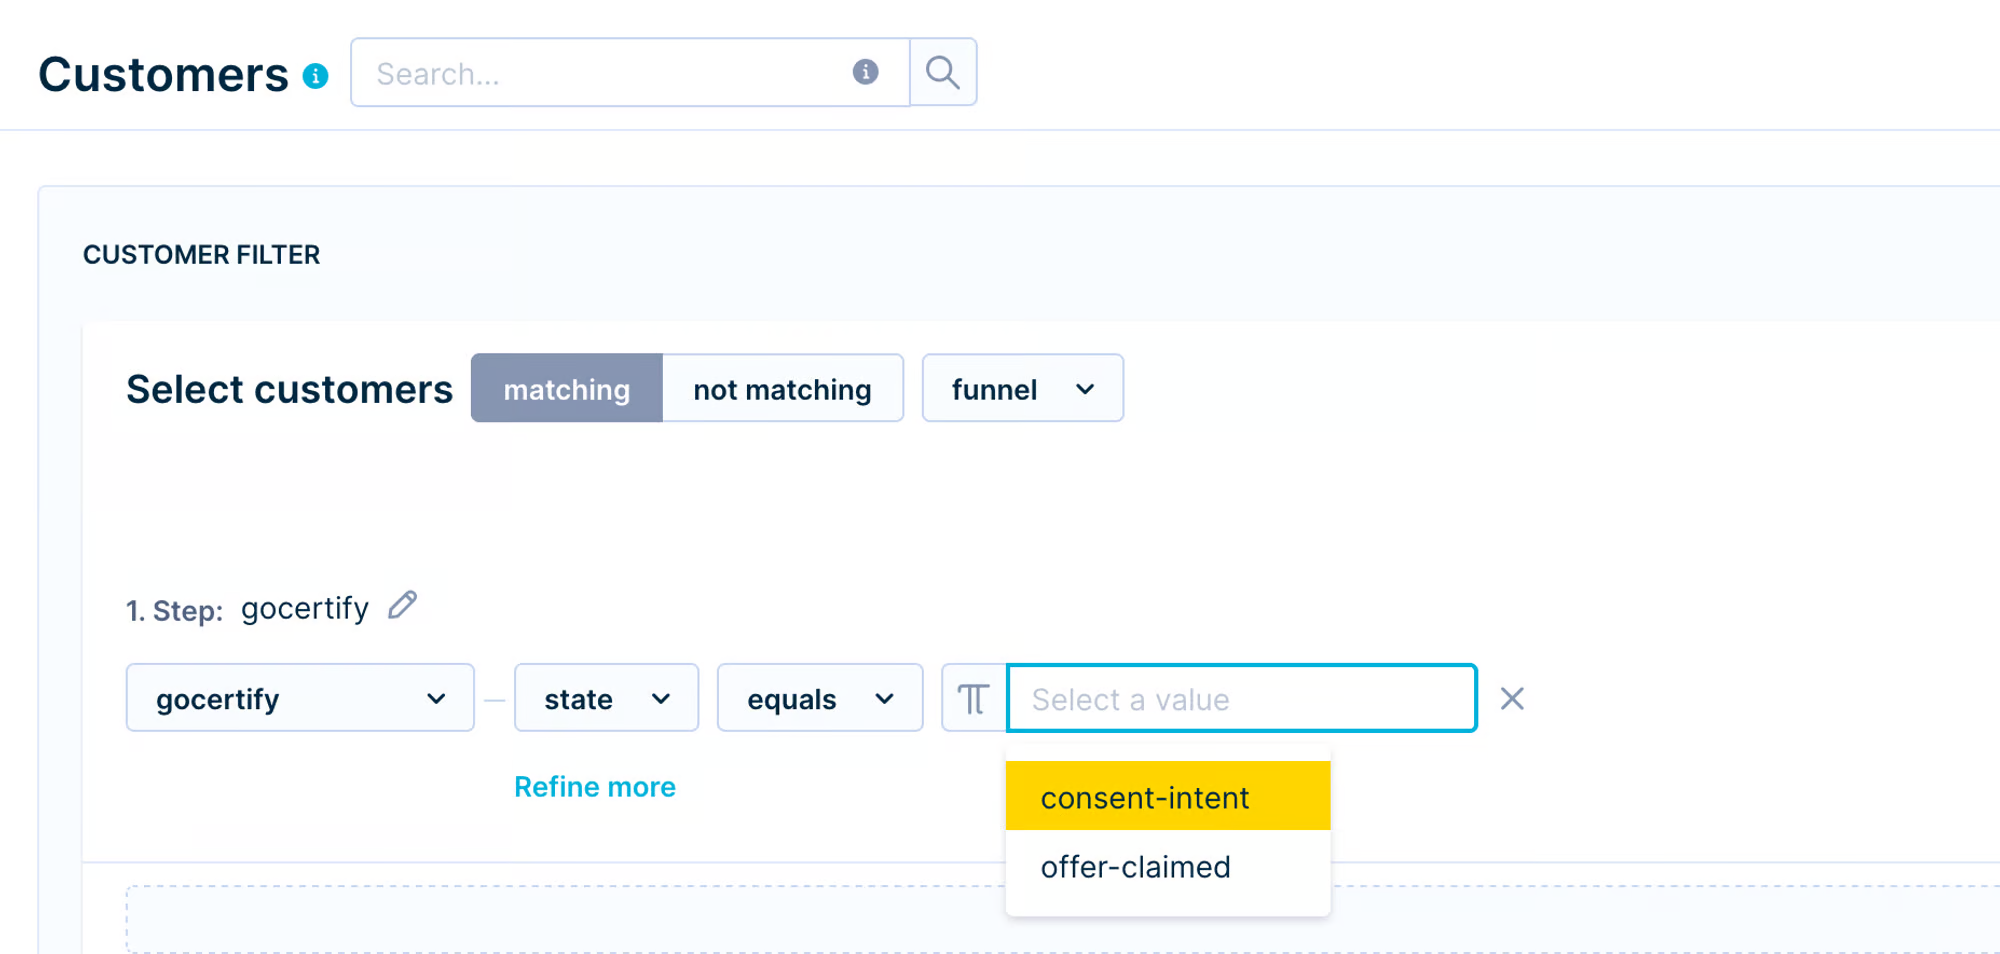
An example filter
You can use the “state” attribute to filter all the Customers who have given you consent for marketing, those who are verified as a group, or those who claimed an offer.
When the filter is ready, you will see the option to save this filter for later in the top right corner of that filter.
You can then run various automations in Bloomreach Engagement based on these filters.
Updated 4 months ago