Omniconnect setup
This guide shows you how to set up an Omniconnect integration to connect third-party platforms with Bloomreach Engagement using webhooks.
Before you start
Make sure you have:
- A Bloomreach Engagement project with integration access.
- Basic knowledge of JavaScript.
Choose your platform
Pick the third-party platform you want to connect with Bloomreach Engagement. Your platform must support webhooks for this to work.
Note
Different platforms use different names for webhooks. Your platform might call them API Notifications, Web Service Requests, or something else.
This guide uses Typeform as an example. You can follow the same steps with other platforms and adjust as needed.
Watch this short demo on how to integrate Typeform with Bloomreach Engagement.
Create the integration
- In Bloomreach Engagement, go to Data & Assets > Integrations.
- Click + Add new integration.
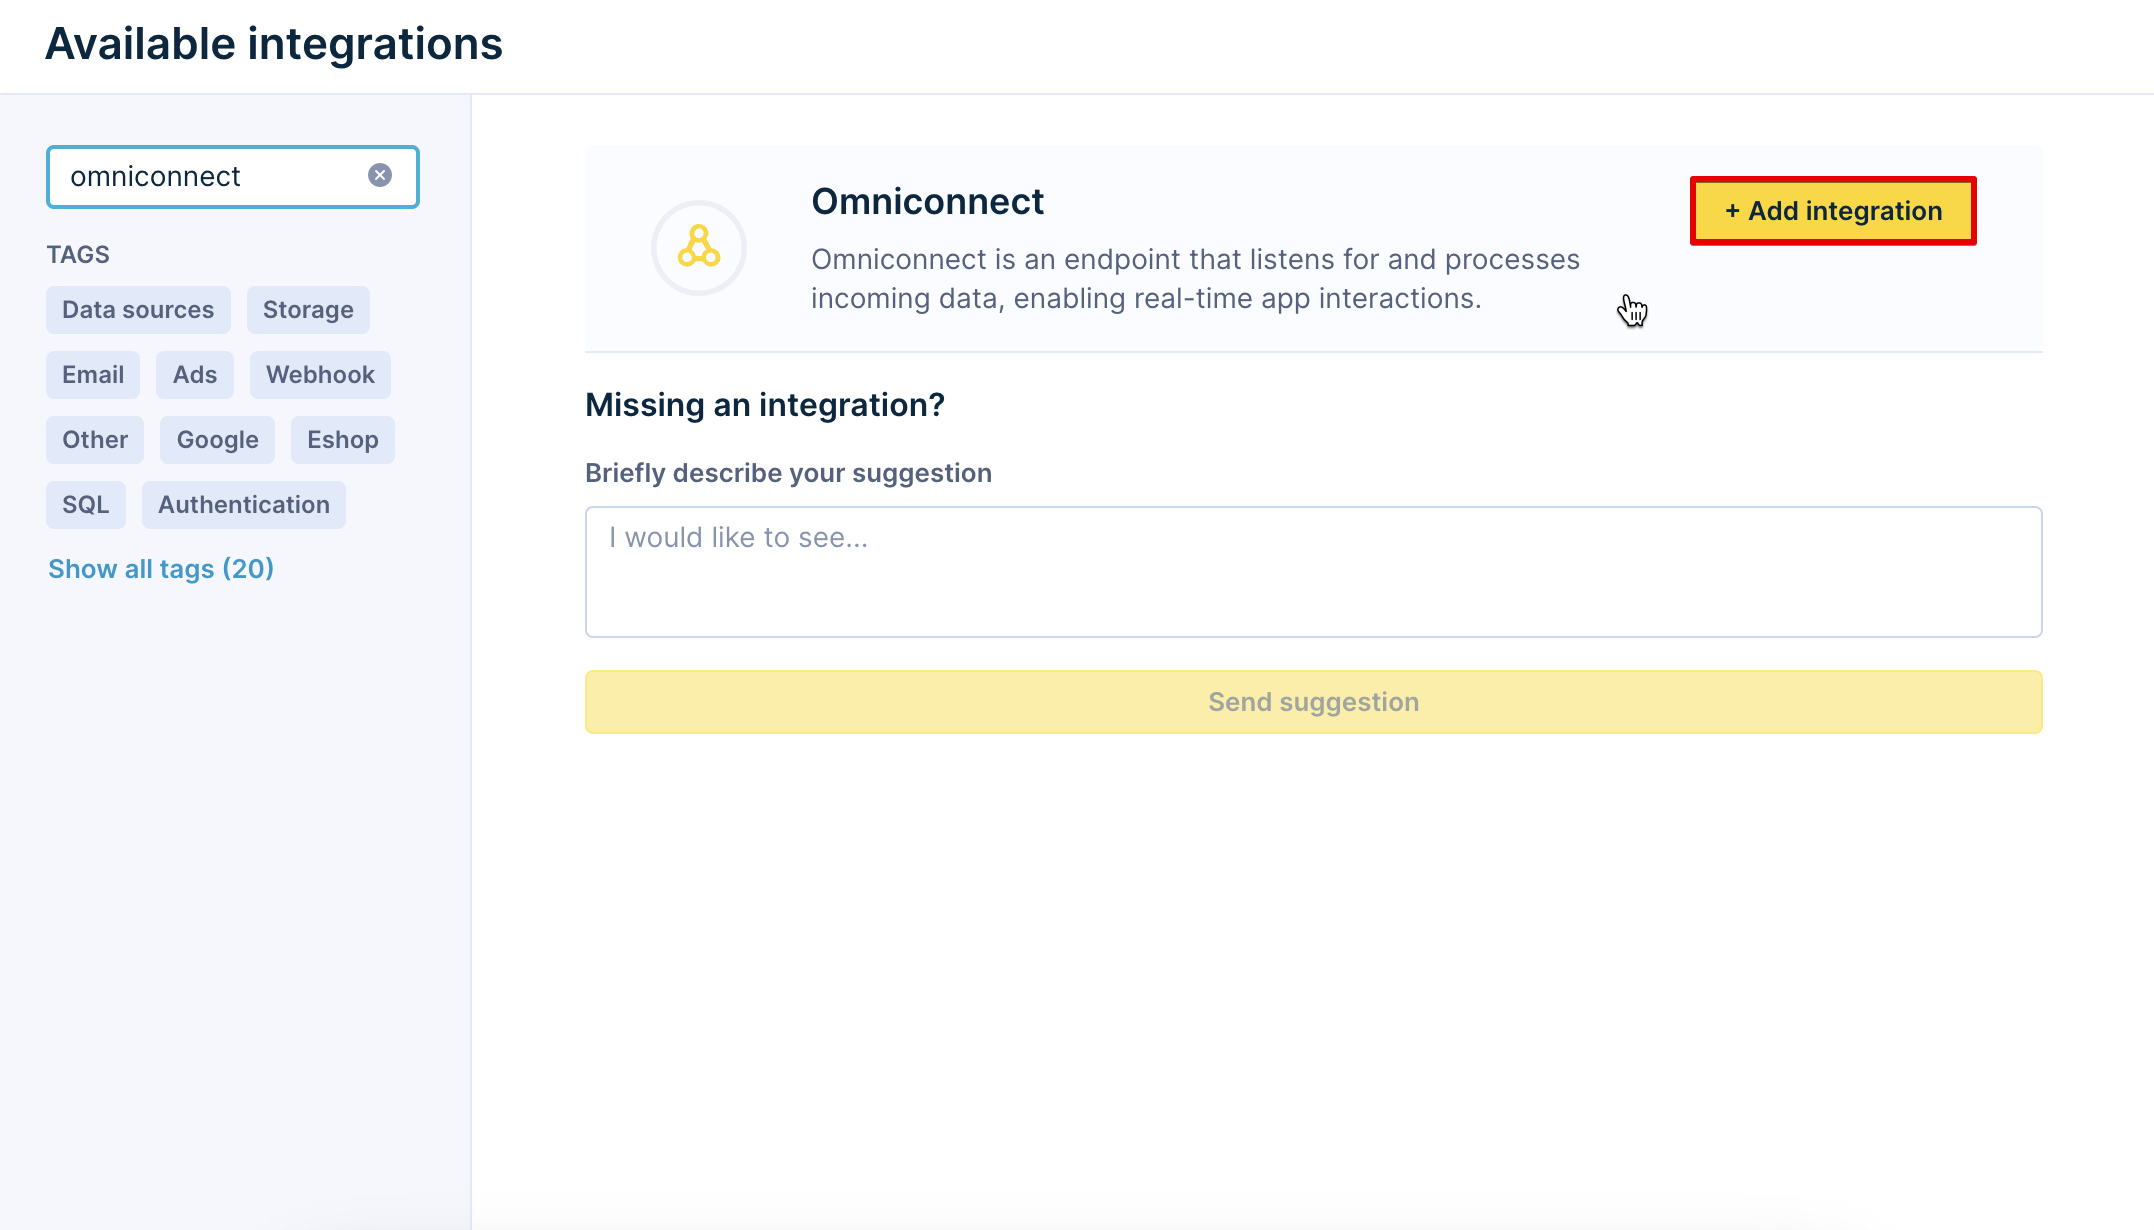
- Search for Omniconnect.
- Click + Add integration.

- Give your integration a name and click Save integration.
Protect your API key group
Don't delete or rotate the API key group that Omniconnect creates. This key group processes all Omniconnect events. If you delete or rotate it, events will fail and you'll see 401 errors.
Connect your platform
- Copy the Omniconnect URL from Bloomreach Engagement.
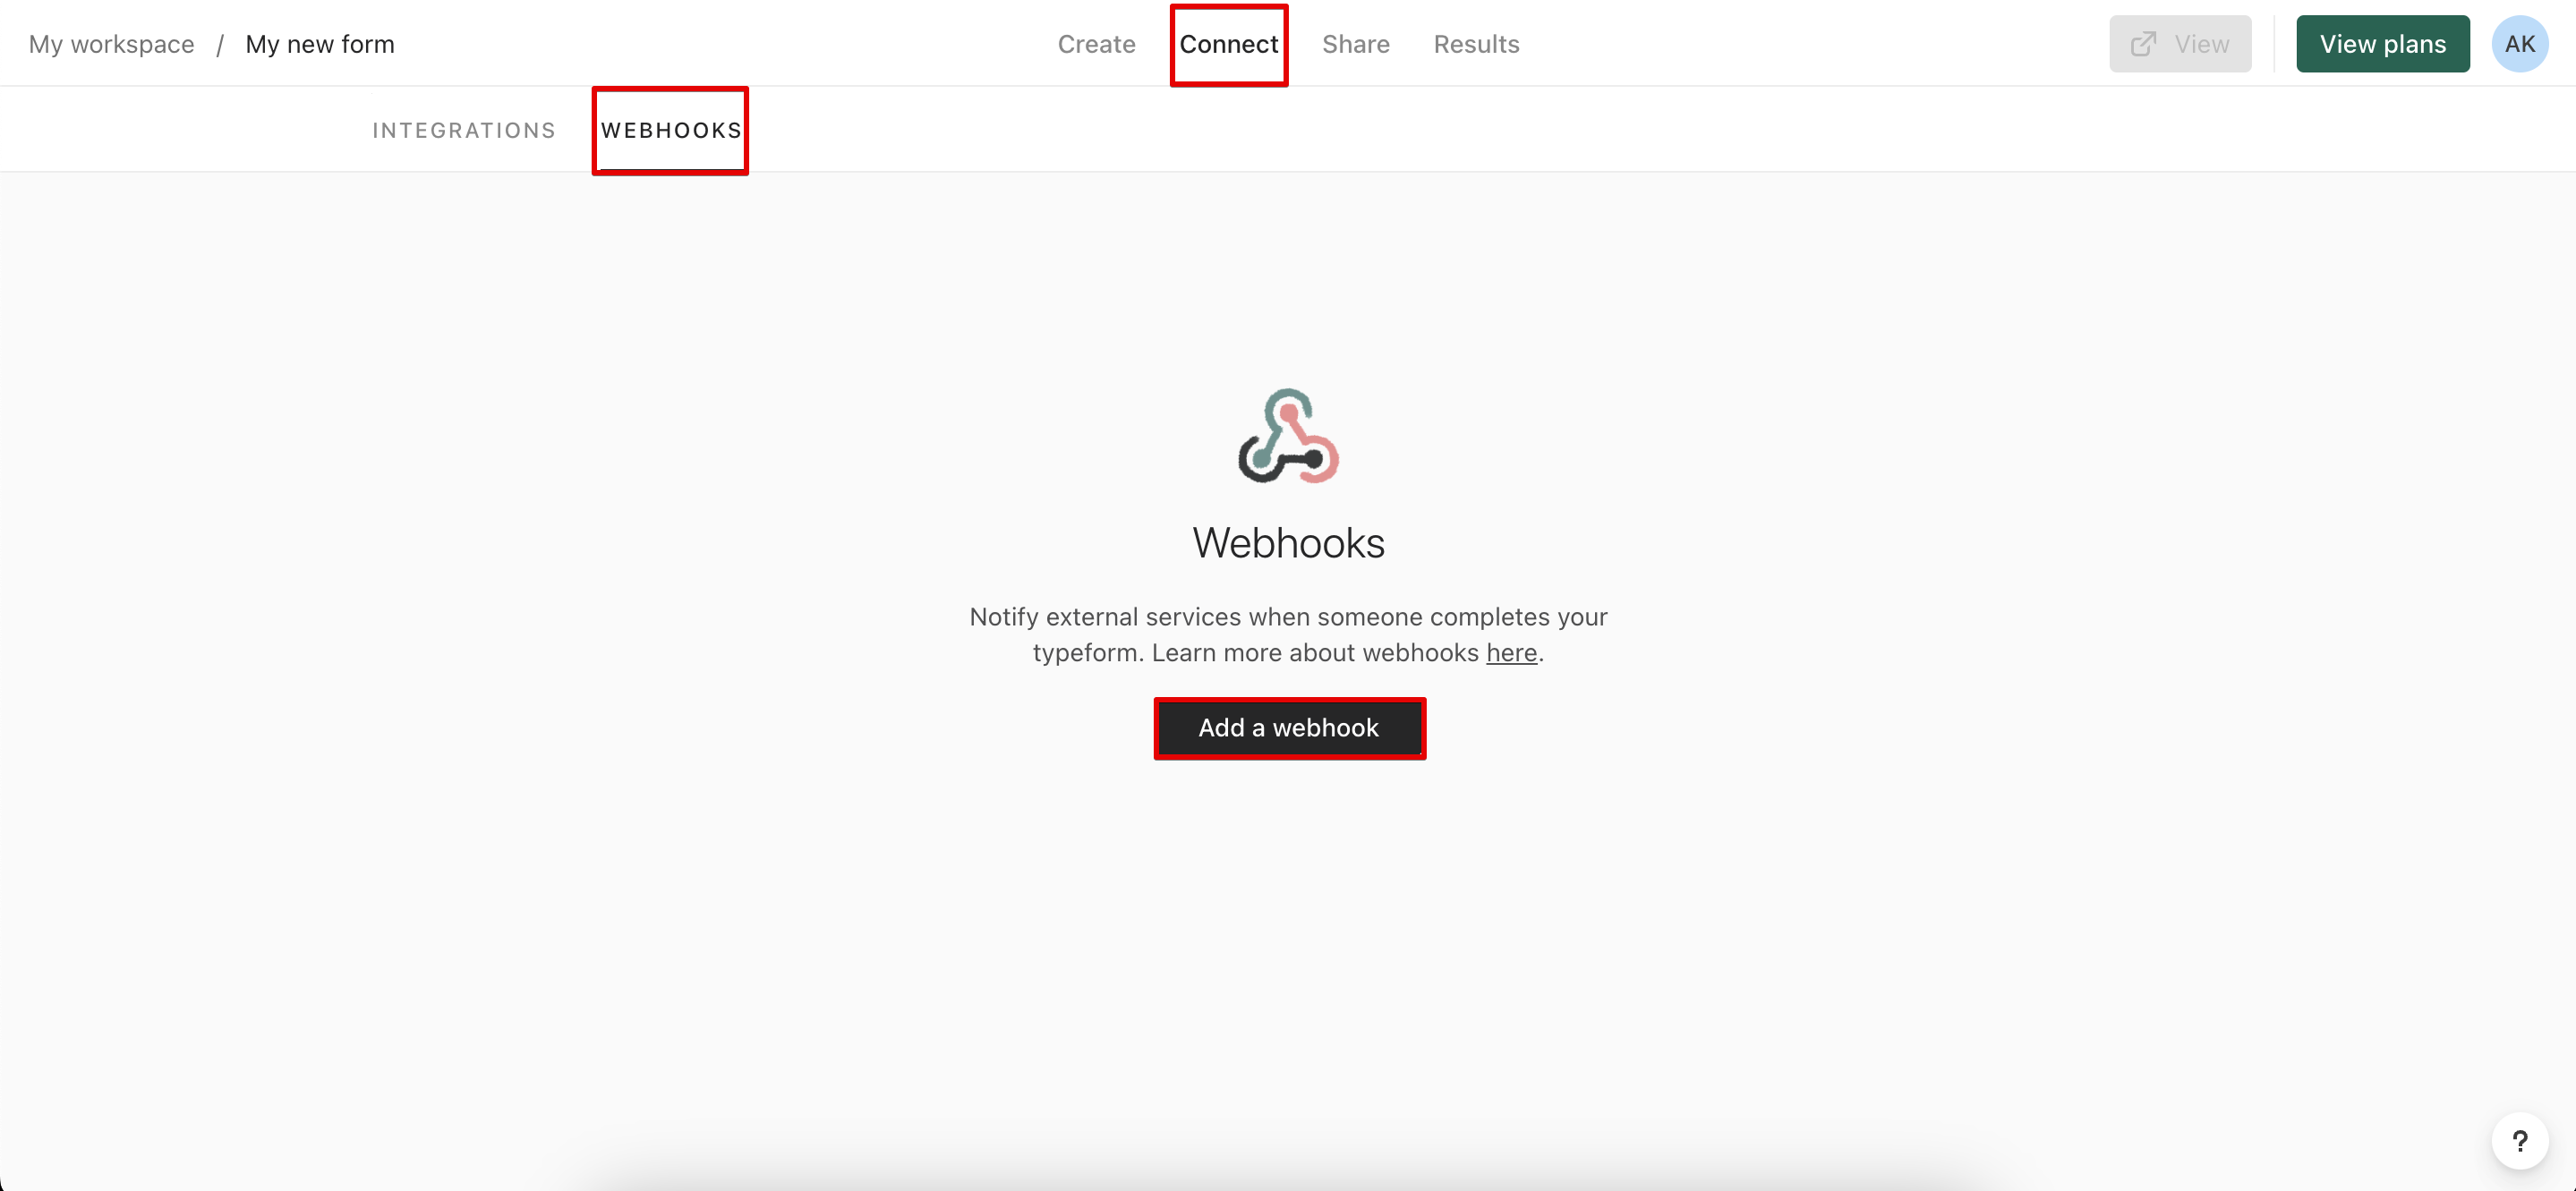
- Go to your third-party platform's webhook settings. For Typeform: Workspace > Connect > Webhooks > Add a webhook.

- Paste the Omniconnect URL into the webhook field.
- Add a description that explains what this integration does.
Set up the transformation function
The transformation function converts incoming webhook data into a format that works with Bloomreach Engagement.
View incoming data
- In Bloomreach Engagement, go to your Omniconnect integration.
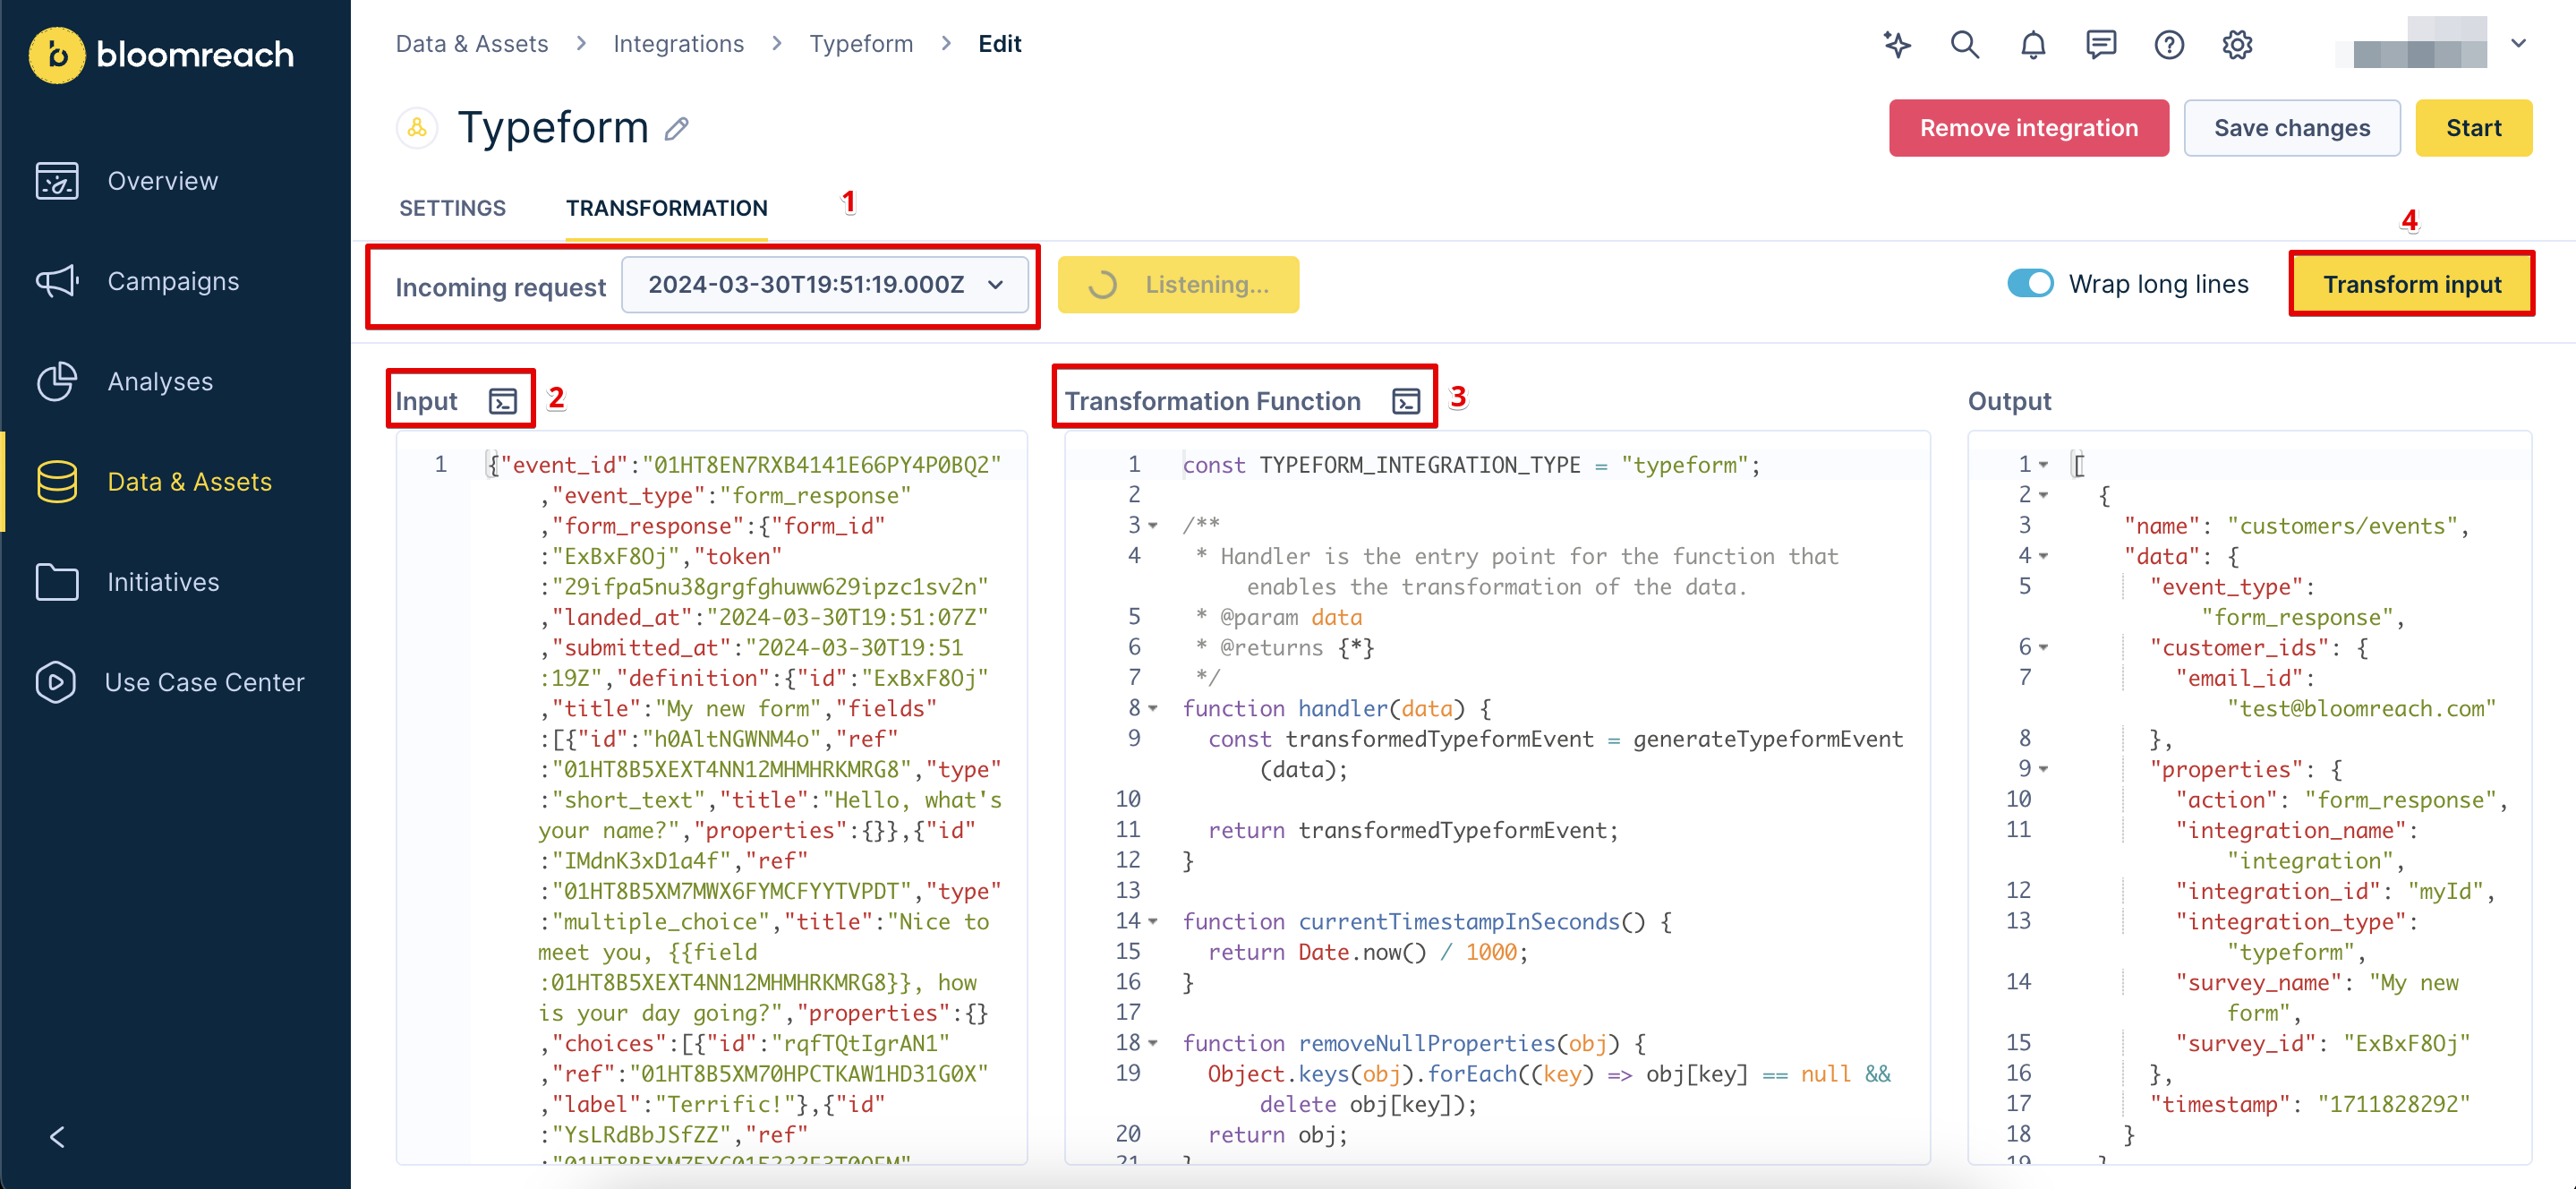
- Click Transformation.
- Open the Incoming request dropdown and select the most recent request.
- Check the Input tab to see the raw data from your platform.
Write your transformation function
The transformation function varies from integration to integration and allows for a high-level personalization of the integration using JavaScript.
- Write JavaScript code to transform the incoming data.
- Click Transform input to test your function.
- Check the Output tab to see the transformed data.

Your transformation function varies based on your platform and needs. For Typeform examples, see the Use Cases article.
Requirements for successful requests
- Payload format: JSON (for example, {})
- Content type: application/json
- Method: POST
- Payload size: 500 KiB or less recommended. Payloads of 1 MB or larger may cause issues or timeouts.
Response codes
Omniconnect returns these HTTP codes:
| HTTP Code | Explanation | What to do |
|---|---|---|
| 200 - OK | Request received and sent to Omniconnect. | No action needed. |
| 401 Unauthorized | API key group is missing, rotated, or lacks permissions. | Recreate the integration and don't modify the API key group. Contact Support. |
| 404 Not Found | Invalid integration ID or incorrect URL. | Check your URL and try again. Contact support if it persists. |
| 405 Method not allowed | Only POST is supported. | Use POST method. (GET coming in future releases.) |
| 500 Internal Server Error | Something went wrong during processing. | Contact Support with a sample request and headers. |
| 504 Gateway Timeout | Request took too long to process. | Check your payload size (should be under 500 KiB). Contact Support with a sample request. |
Test and launch
- Click Save changes after you finish your transformation function.
- Click Start to launch the integration.
- Go to Data & Assets > Customers to see events from your platform. Customer profiles update automatically.
Set up notifications (recommended)
Get email alerts when your integration has issues.
Turn on email notifications first
Make sure your email notifications settings are turned on, otherwise this feature will not work. To turn them on, go to
User settings > Notification settings > Get notifications via email.
Add notification recipients
-
Go to your Omniconnect integration.
-
Click the three dots next to the Start button.
-
Click Notifications.

-
Enter email addresses for people who should get alerts. We recommend adding your implementation partner, internal teams, or technical teams.
-
Click on Save.

Troubleshoot issues
Events aren't appearing in customer profiles
Check if the API key group was deleted or rotated. If so, recreate the integration using the steps in "Protect your API key group" above.
Errors after platform changes
If your third-party platform changes its webhook payload format, your transformation function may break. The Bloomreach support team can check the Audit Log to see what changed.
Need help?
Contact Bloomreach Support with:
- Sample requests and headers.
- Error codes you're seeing.
- Description of the issue.
Updated 4 months ago
