Two-step Verification
Two-step verification is a simple and more secure way to protect your accounts. It combines a password (something that you know) with a second factor (something that you own), so it is less vulnerable to attacks.
The most common verification techniques are:
- Text messages with a PIN code on your mobile phone
- The Authenticator app generates an authentication code
Bloomreach Engagement currently offers 2-step verification with a Text message and Authenticator app.
Configuration
To enable 2-step verification for your Bloomreach Engagement accounts, go to Settings > User Settings and select Security.
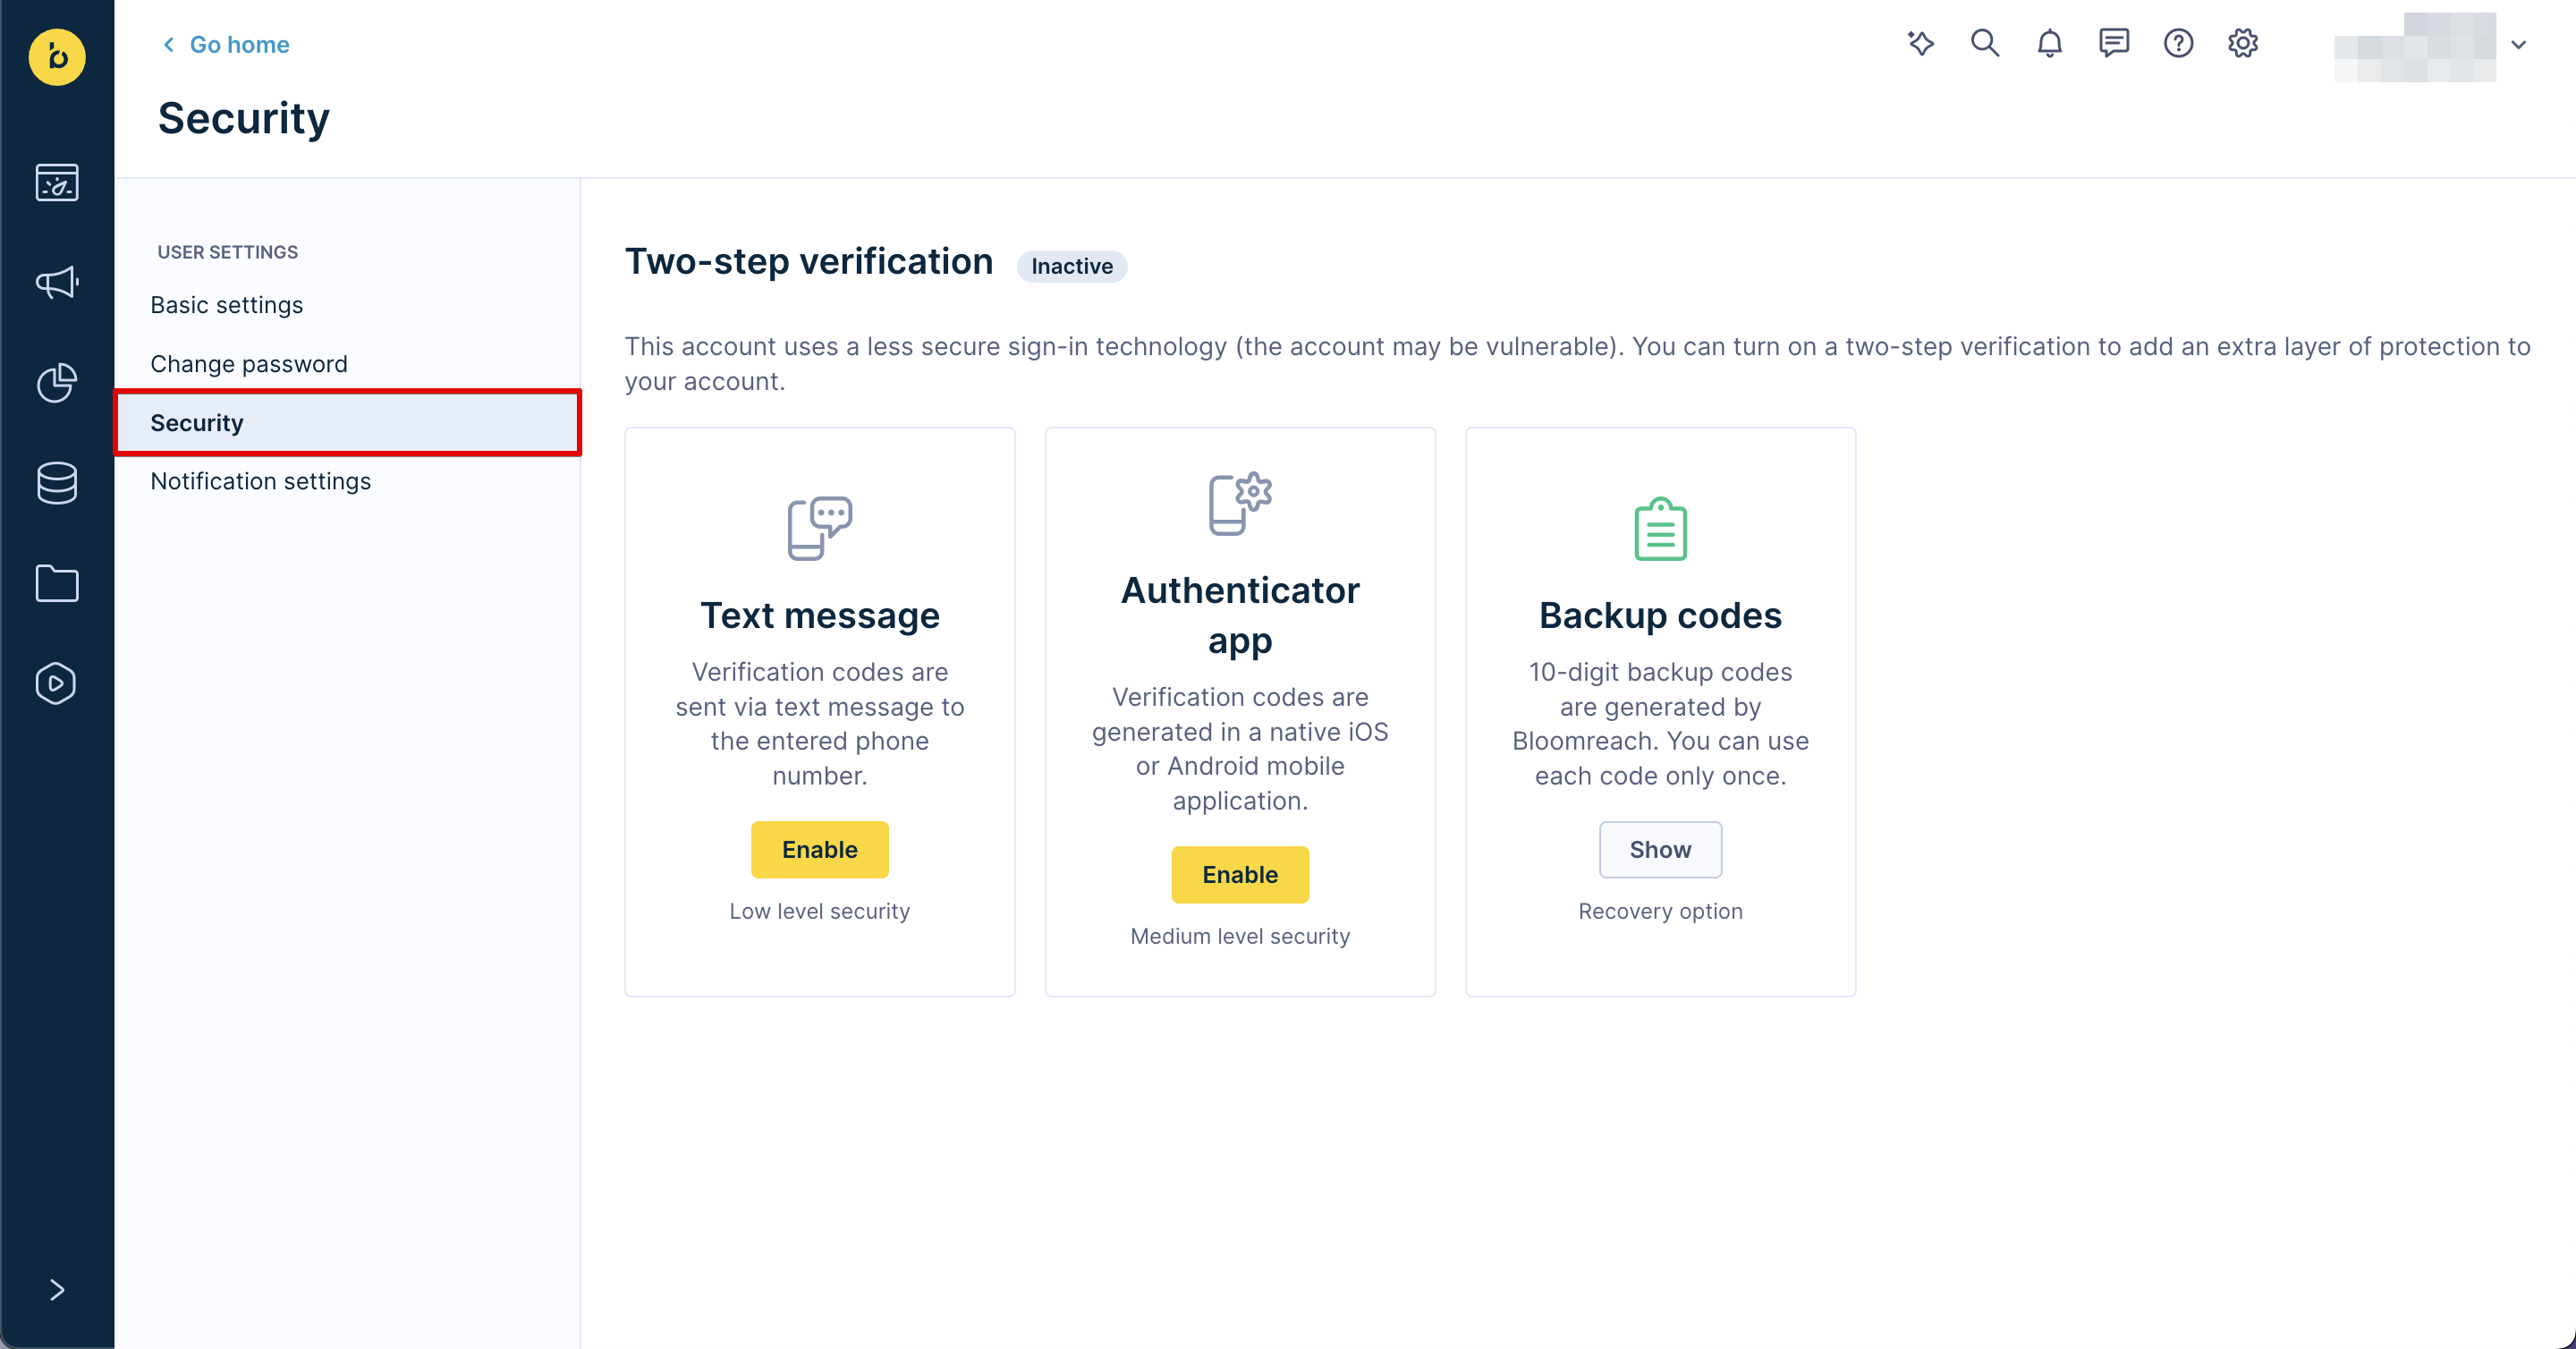
Configuration window
Once the 2-step verification is enabled, you will be asked to verify yourself with the chosen method every time you log in. You will also be asked to provide a new token/code from the authenticator app after 30 days or every time your IP is changed.
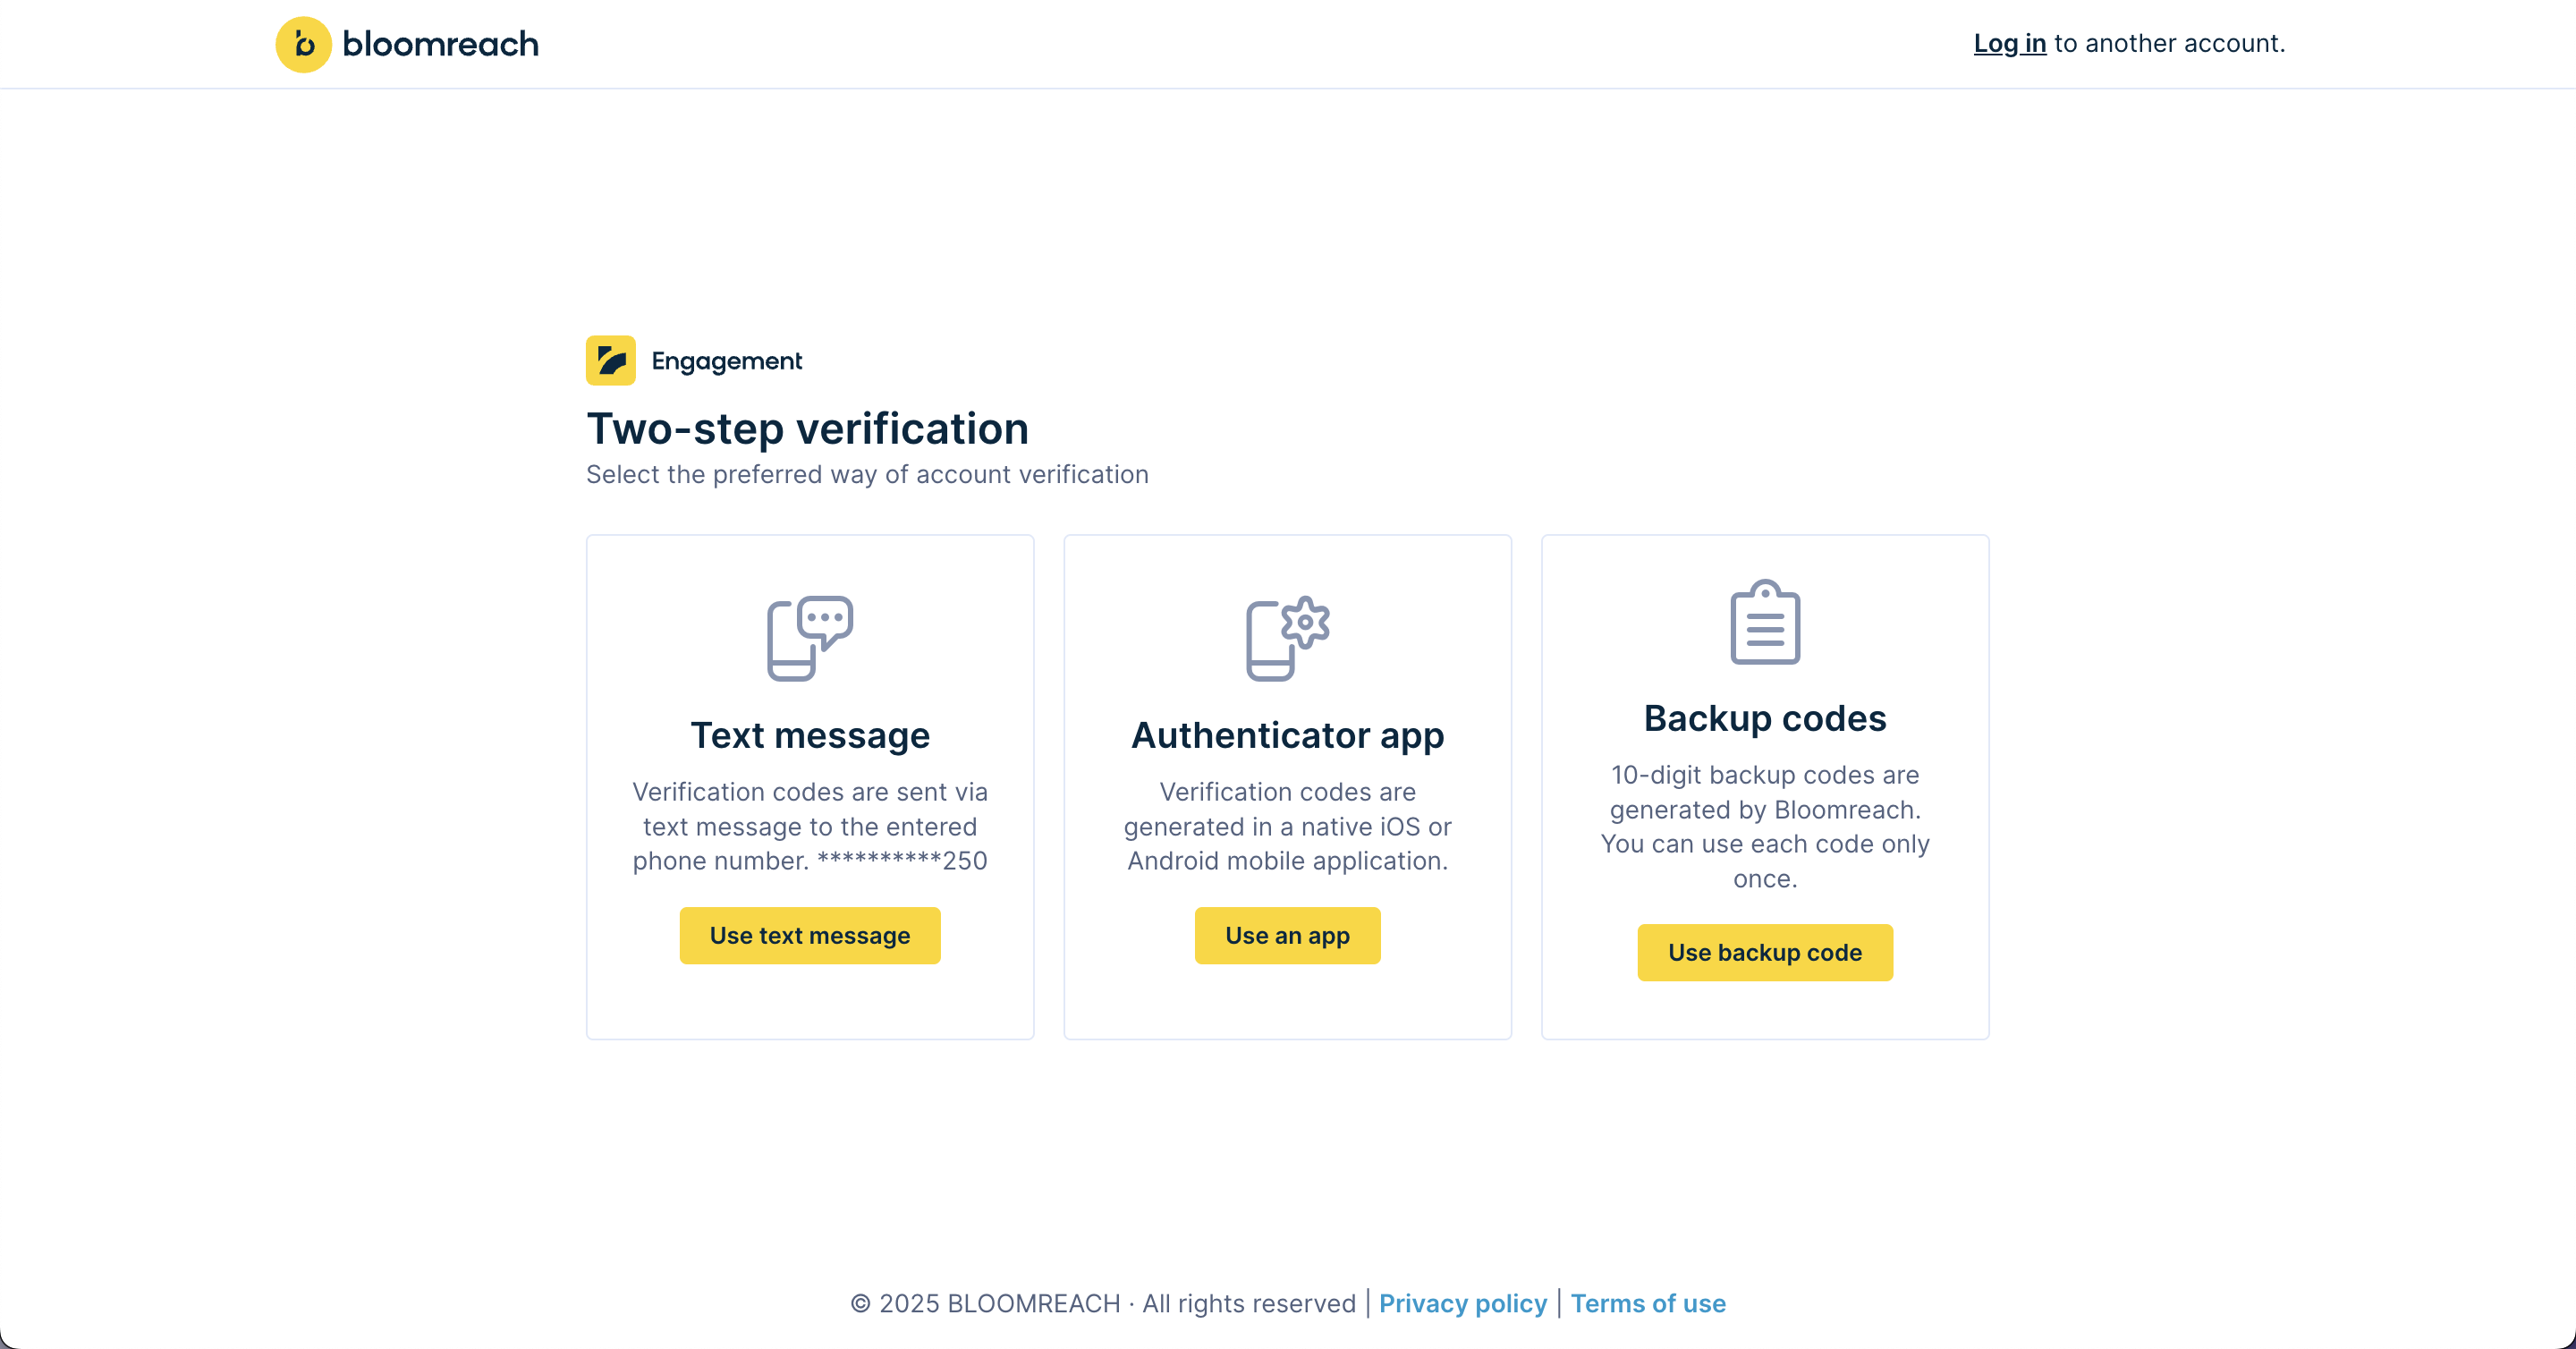
Login page - two-step verification
Text message
- Under User settings, go to the Security tab.
- Enable the Text message option.
- Enter your phone number and click Get code. Once you receive the code, type it into the text area below.
- Click confirm.
Authenticator app
Install an authenticator app on your mobile device. You can use any authenticator mobile app, but we recommend installing Google Authenticator:
Open the authenticator and scan the QR code to obtain a 6-digit code which you need to input in Bloomreach Engagement. Then, click Confirm.
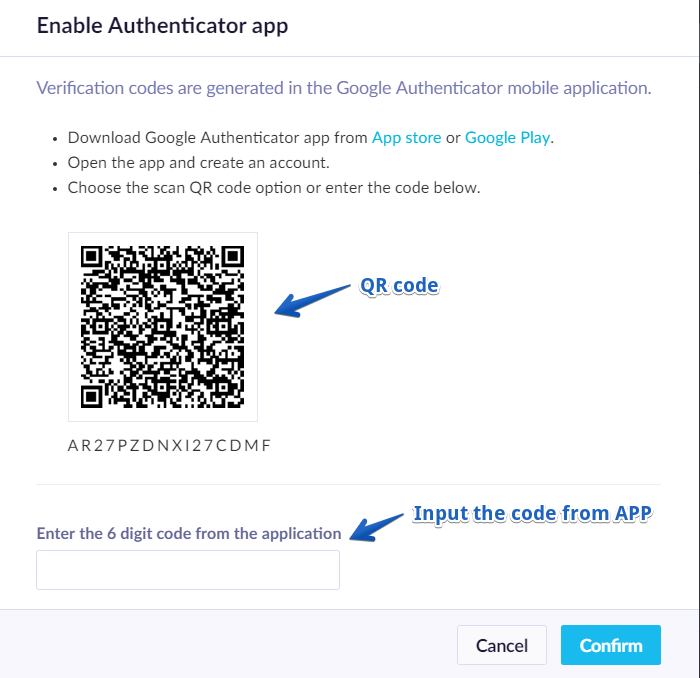
Configuration of Authenticator APP
Backup codes
Backup codes are useful if you don't have access to your mobile. When you enable this option, you will obtain 10 codes that you can use to log in. You can use every code only once.
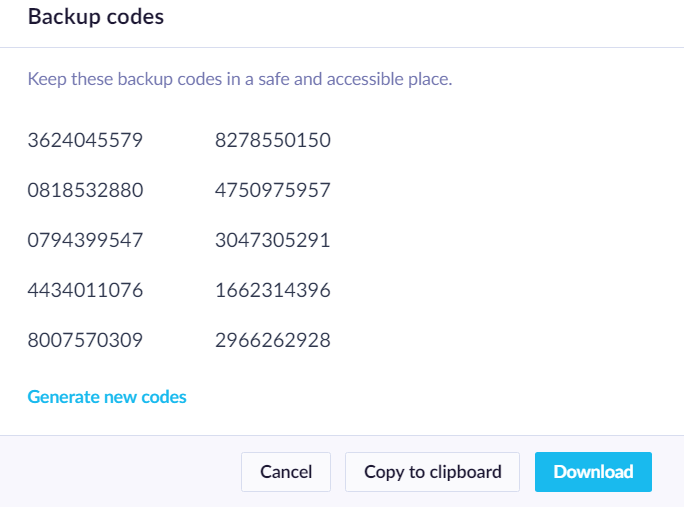
Example backup codes
Note
Backup codes are not a part of the two-step verification. Use backup codes only as a recovery option if you lose access to your devices.
Troubleshooting and recommendations
Occasionally, you might encounter problems with your Google Authenticator app. We have put together a few solutions that solve the most common problems.
Sync your Google Authenticator time
Time syncing incorrectly is one of the reasons why your Google Authenticator codes might have stopped working and/or are displaying an error. To resolve this issue, follow these steps:
- Open the Google Authenticator app.
- Go to the Menu.
- Select Settings.
- Click on Time Correction for Codes.
- Click Sync Now.
This will automatically correct the time.
Sync your phone's time
Whether you are using Android or iOS, you will need to navigate to the settings, look for Date & Time, and toggle both automatic time and timezone on.
Use backup codes
As described above, it is always good to generate and store your backup codes securely. This is useful not only for times when your app might not be working properly but also for rare cases when you might lose or damage your device.
Two-step verification enforcement
You can enforce the usage of two-step verification. Under Project or Account settings, go to Security > Two-step verification. You can decide who needs to use it and who is required to log in again as verification. It can be applied per account or project.
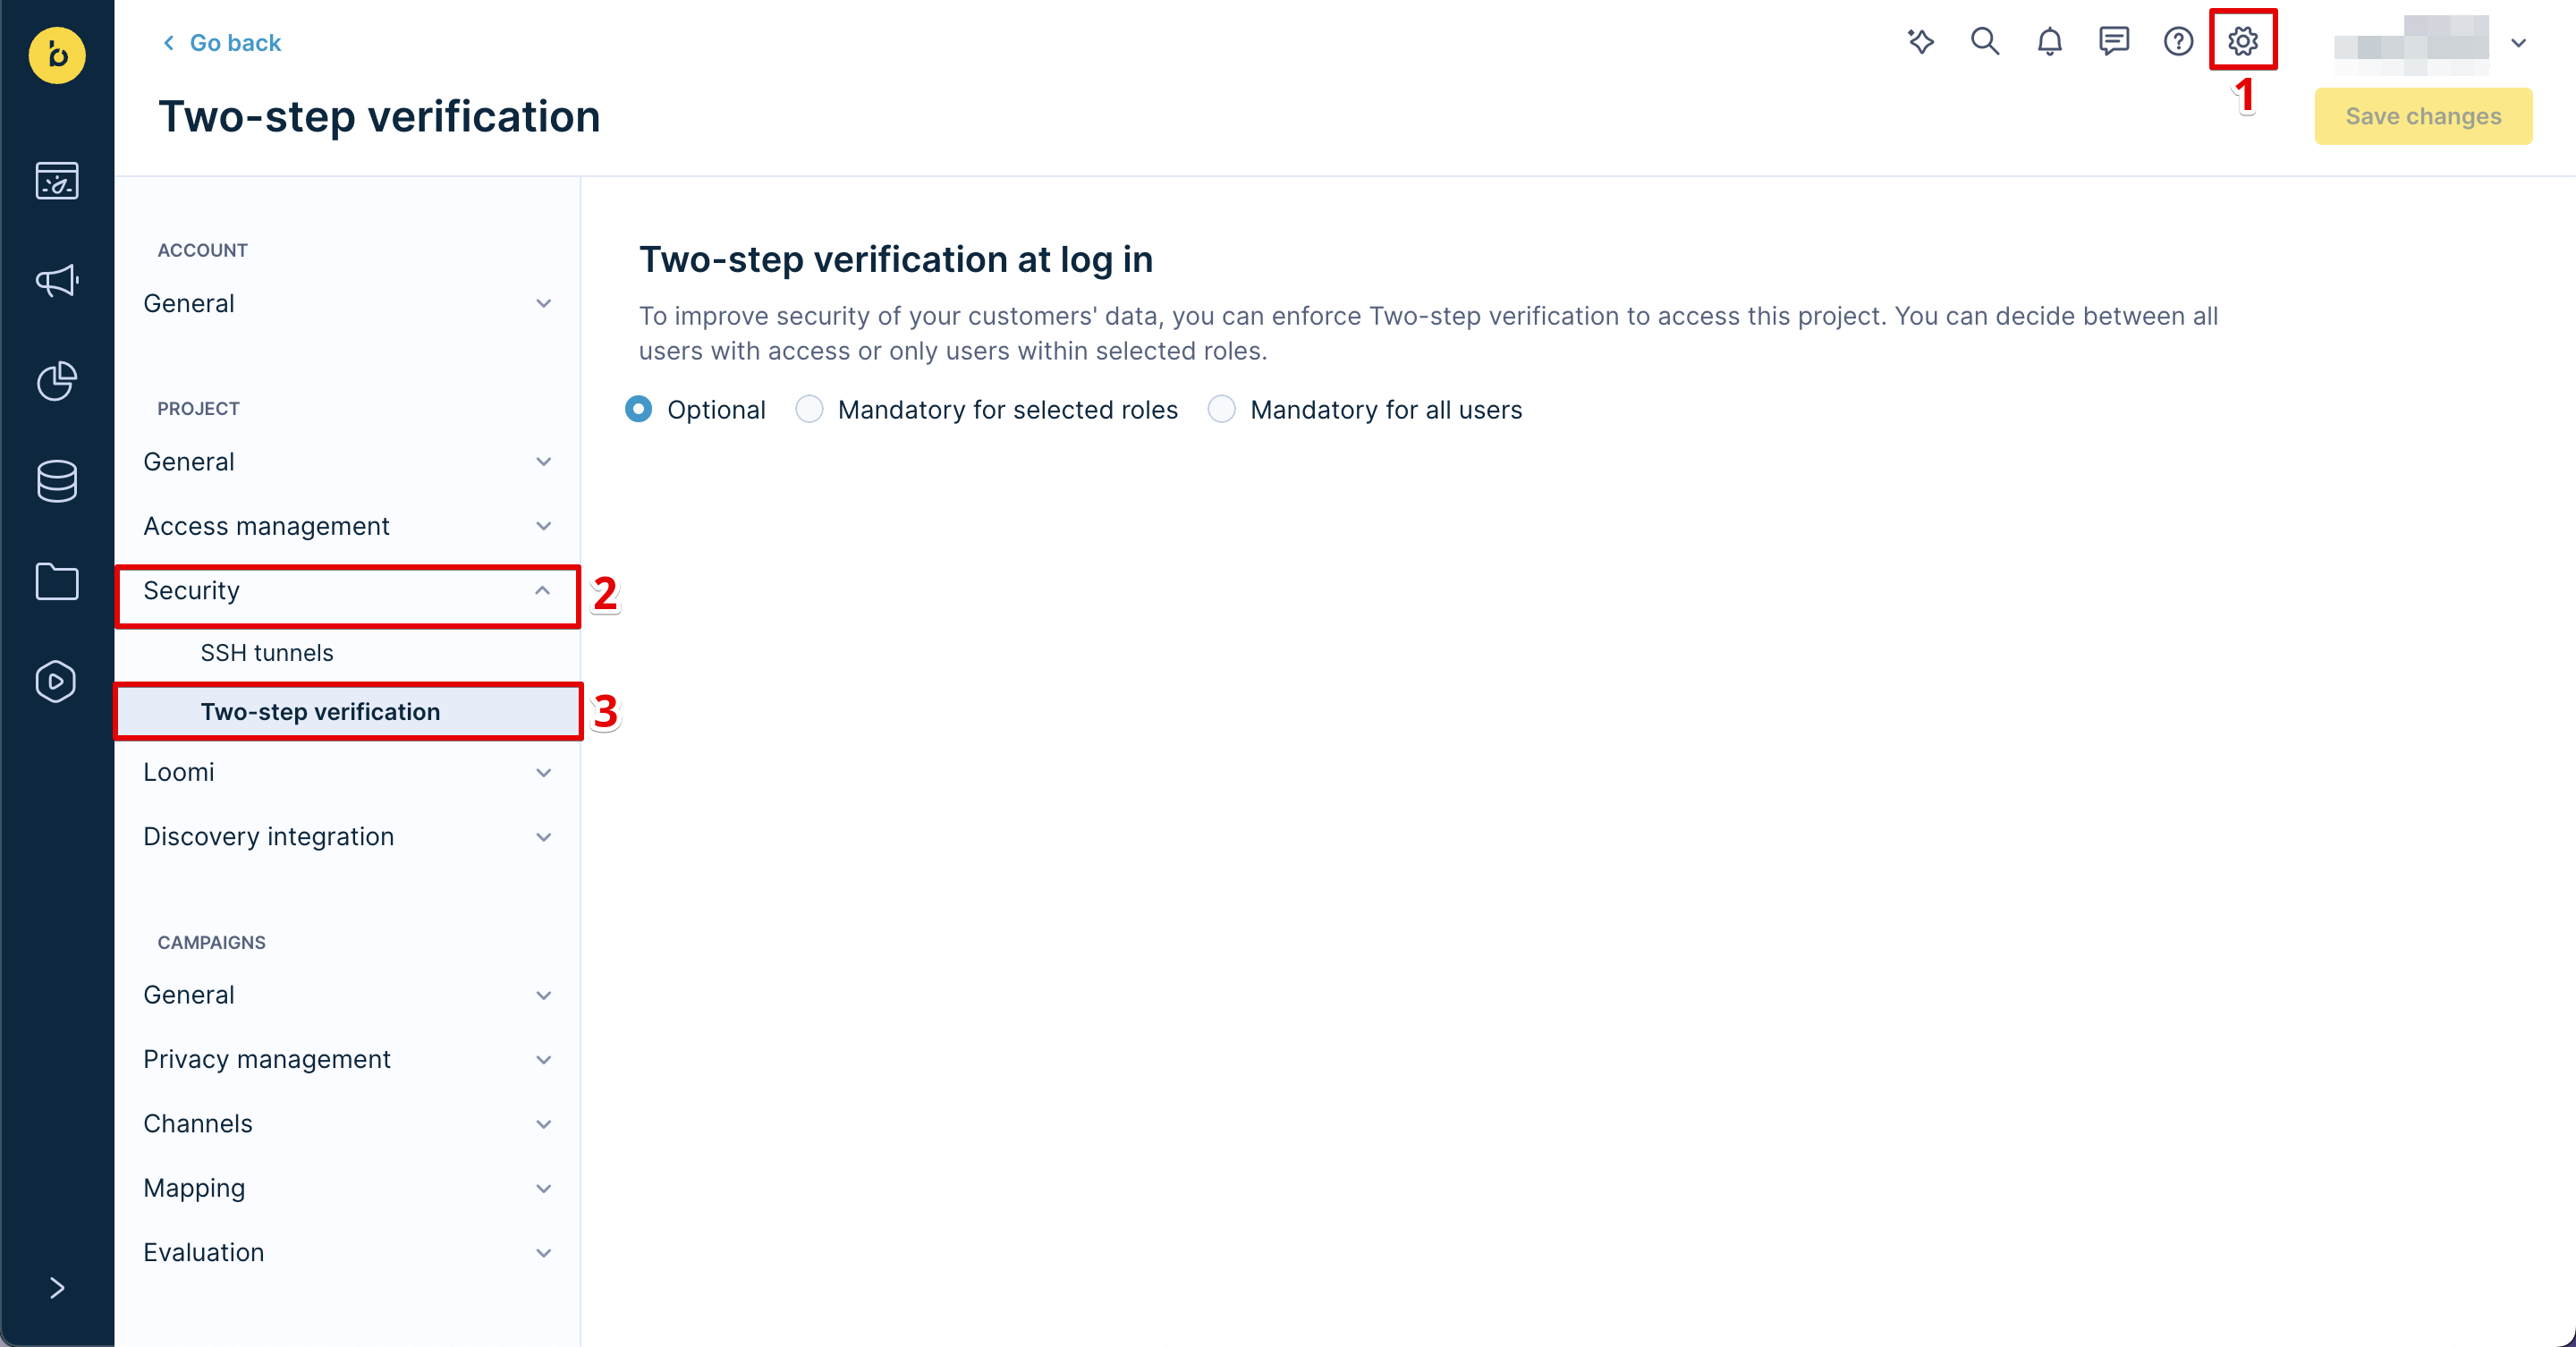
You can apply the enforcement on both the project and account levels. The settings allow you to choose one out of 3 options available:
- Optional: This is the same as it was before. It is up to you if you want to use two-step verification.
- Mandatory for all users: If this option is selected, every user with access to the account/project will be required to use two-step verification.
It is recommended that users also download backup codes when they are setting up two-step verification. This option is available on the same settings page.
Settings can be changed only by the project admin.
Two-step verification reset
When you change your contact number or lose/misplace your device, the two-factor authentication (2FA) needs to be reset to access the platform. Follow the steps to request a 2FA reset:
- Submit a 2FA reset request to support yourself or through your colleague using official support contact channels.
- In both cases, support verifies the authenticity of the request. Support sends an email to the email address used with the user account that needs 2FA to confirm the request.
- Reply to the support email and confirm that the 2FA request is valid.
- Upon receiving the confirmation, support proceeds with a 2FA reset for that account.
- After the reset is complete, you can choose and set up an alternative 2FA method and log in to the platform.
Updated 7 months ago
