

Twilio SendGrid
Send transactional and marketing emails through Twilio SendGrid directly from Bloomreach.
Set up your Twilio SendGrid account
Use your own Twilio SendGrid account—no need to migrate it under Bloomreach's parent account.
If you don't have a SendGrid account, contact your CSM to create one.
NoteEven with an existing SendGrid account, we recommend setting up a separate account for Bloomreach. Shared accounts send status updates for all emails, which can affect privacy and performance.
Configure your SendGrid account
Before connecting, make sure your SendGrid account has the following in place.
Required API key scopes
Your API key needs these scopes:
- Mail send
- Webhooks
- IP pools read (only if you use IP pools)
IP pools (optional)
IP pools are groups of dedicated IP addresses that improve deliverability by separating different types of email traffic.
If you plan to use IP pools:
- IP pools must be configured and enabled in your SendGrid account.
- Sending must be enabled from the IPs on your account.
- If using subusers, create IP pools at the subuser level.
If you don't use IP pools, leave the IP pool name field empty when connecting the integration.
What you'll need
- API Key ID: Your unique 69-character API key to authenticate access to your SendGrid account.
- IP pool name (optional): An existing IP pool to use for sending. Leave empty if you don't use IP pools.
Authenticate your domain in Twilio SendGrid
Authenticate your domain to improve deliverability and build trust with email providers.
- In Twilio SendGrid, go to Settings > Sender Authentication.
- Click Authenticate Your Domain > Get Started.
- Follow the steps in your account.
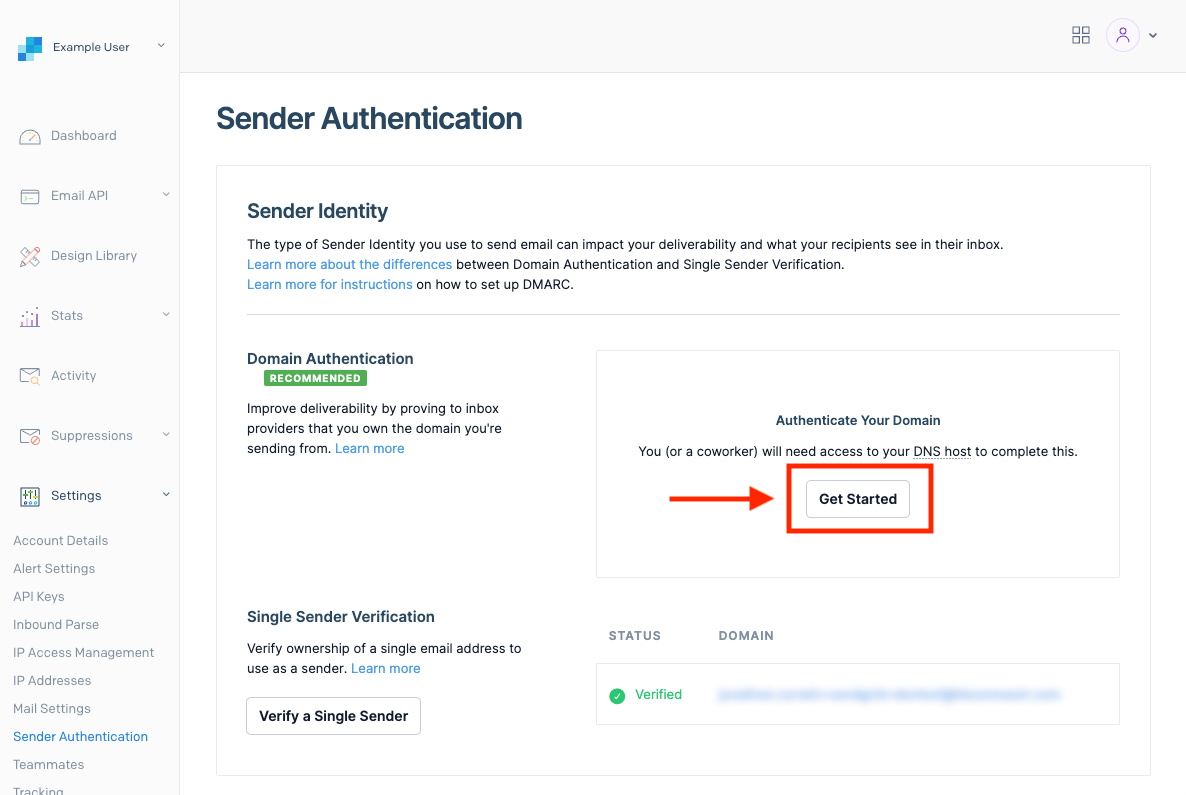
You need access to your DNS host. Contact your technical team if you need help.
NoteDomain verification usually takes less than an hour but can take longer.
Create an API key
- In Twilio SendGrid, go to Settings > API Keys.
- Click Create API Key.
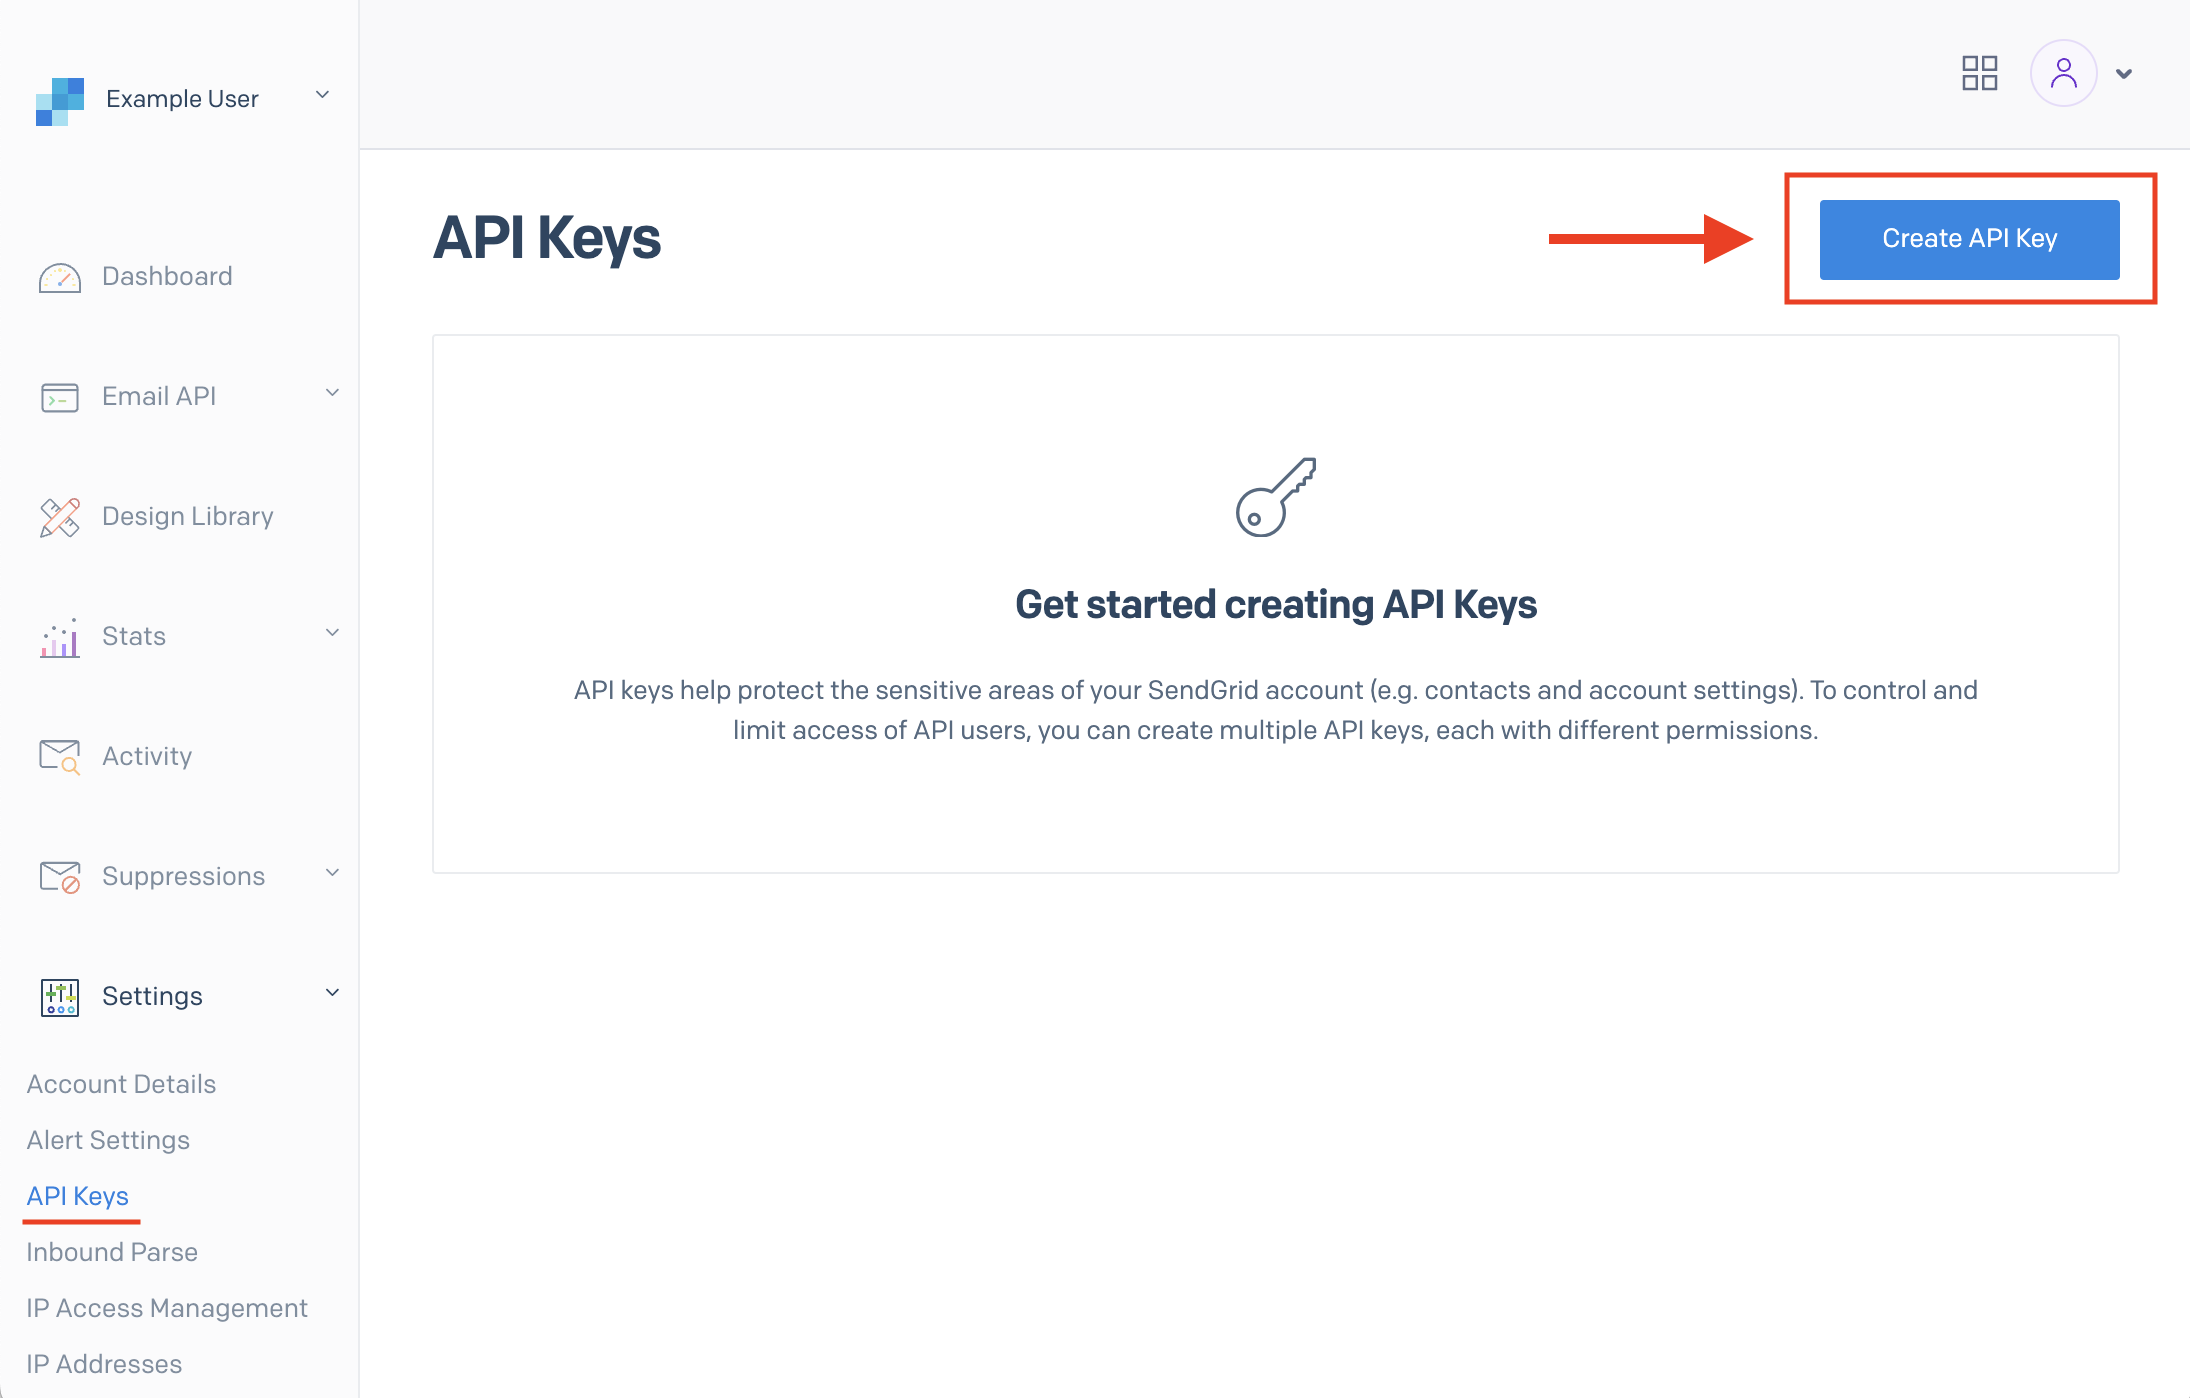
- Name your key—include "Bloomreach" so it's easy to identify and avoid accidental deletion.
- Set permissions to Full Access, or enable at minimum: mail send, webhooks, and IP pools read (if using IP pools).
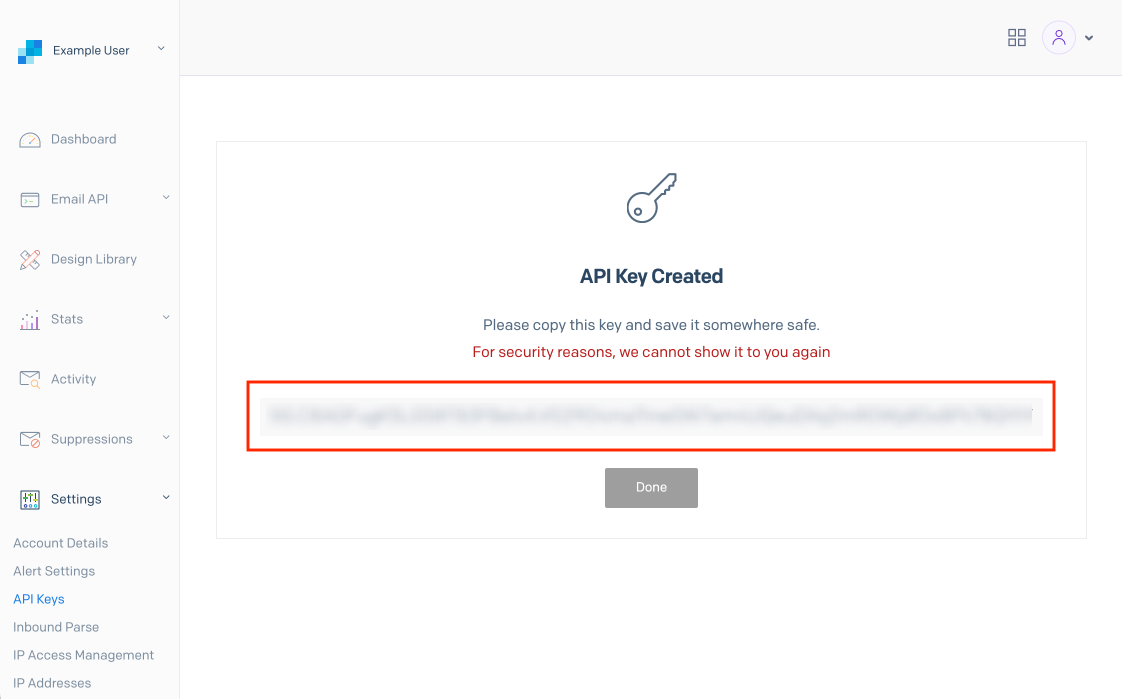
- Click Create & View.
WarningCopy your API key immediately—it's only shown once. Store it somewhere safe as it can't be retrieved or restored.
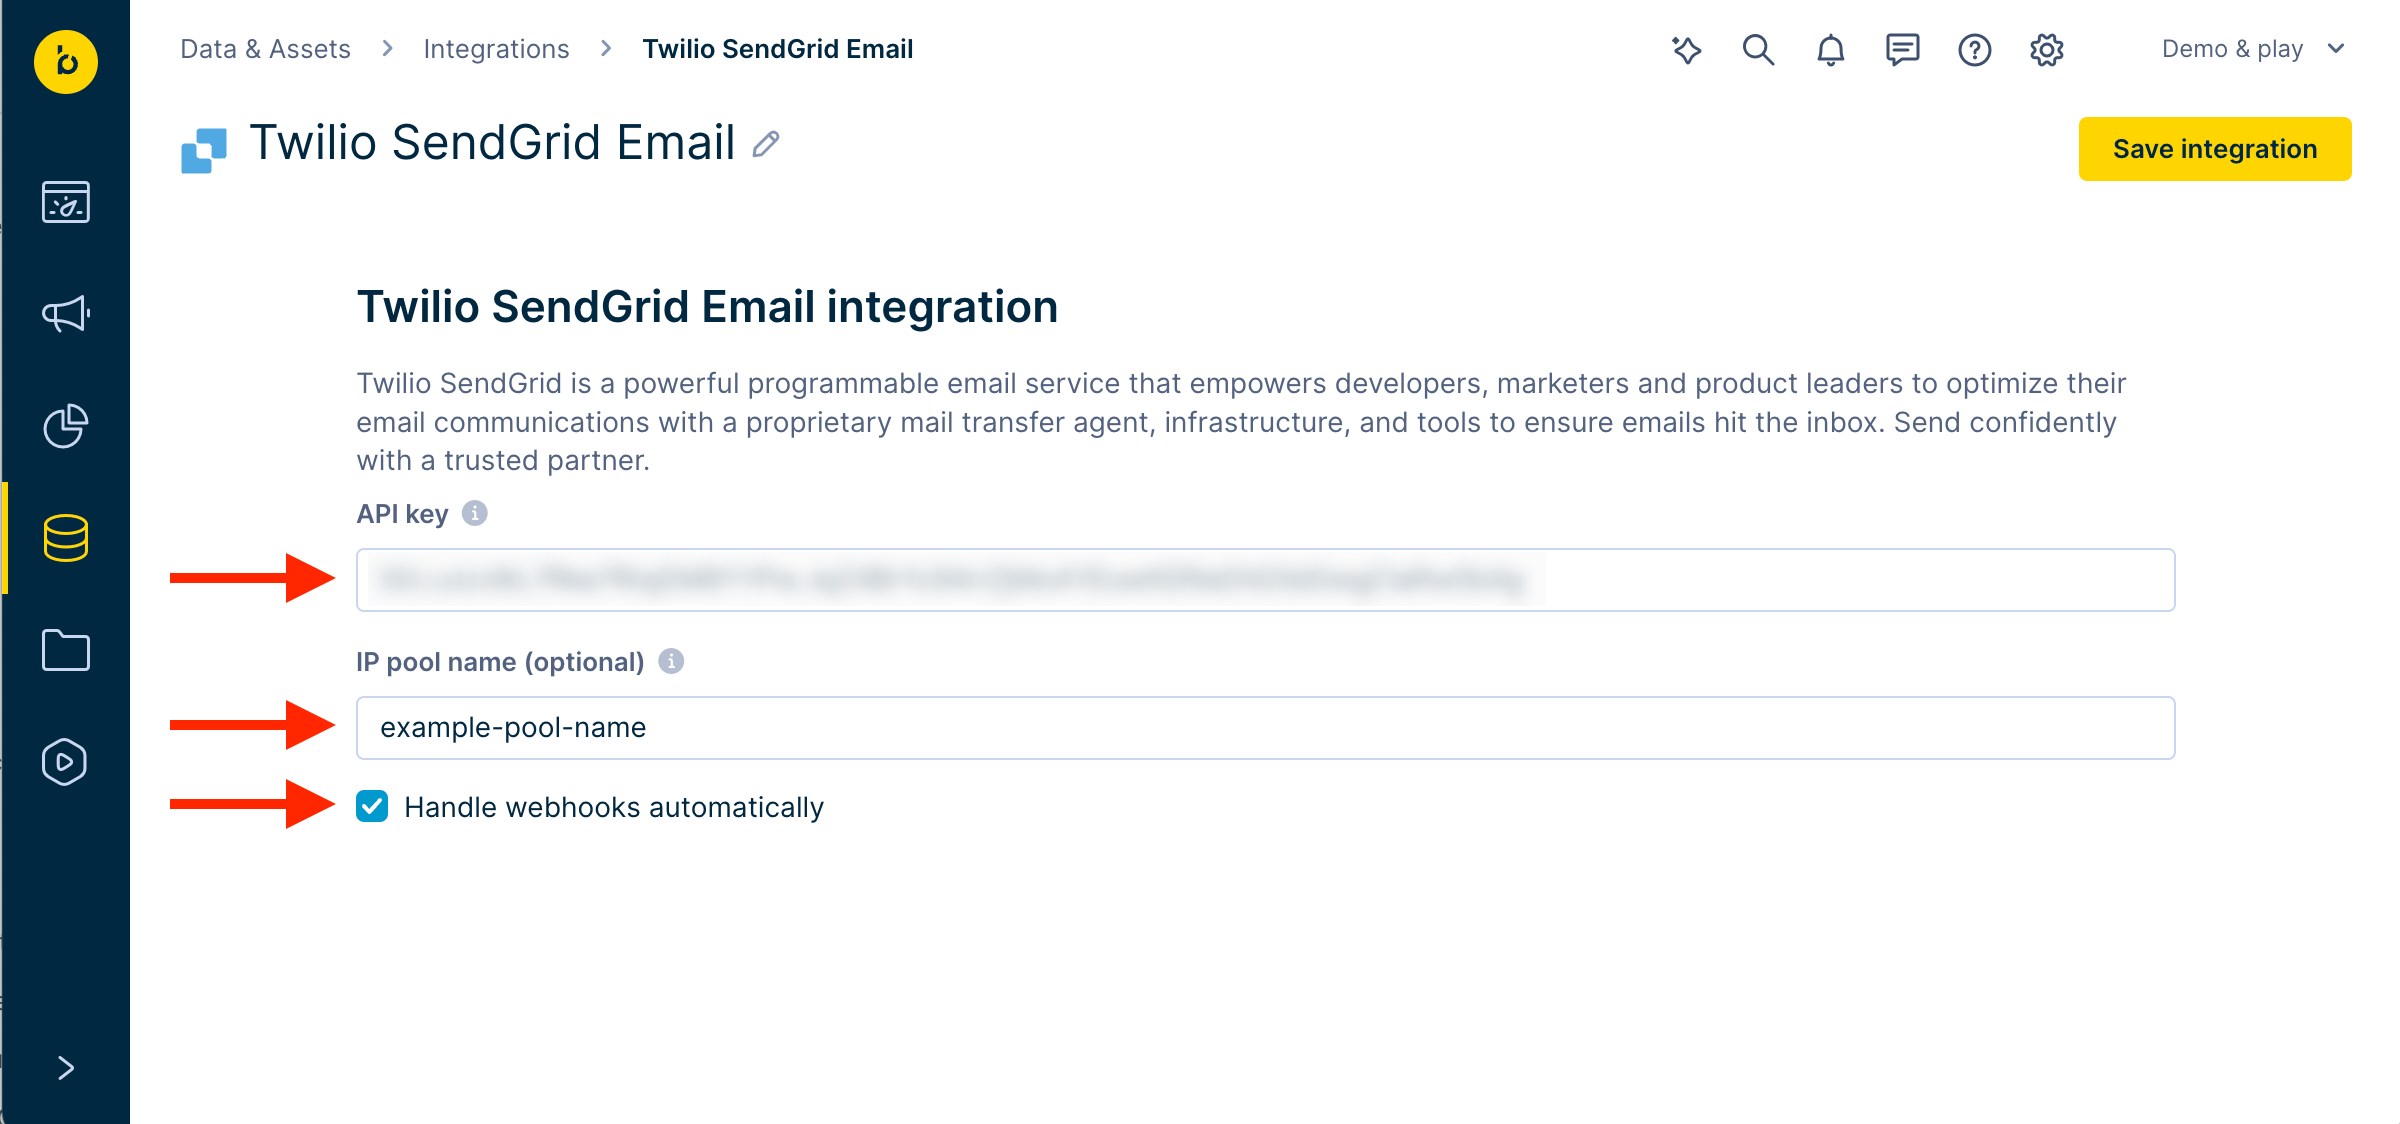
Connect the integration
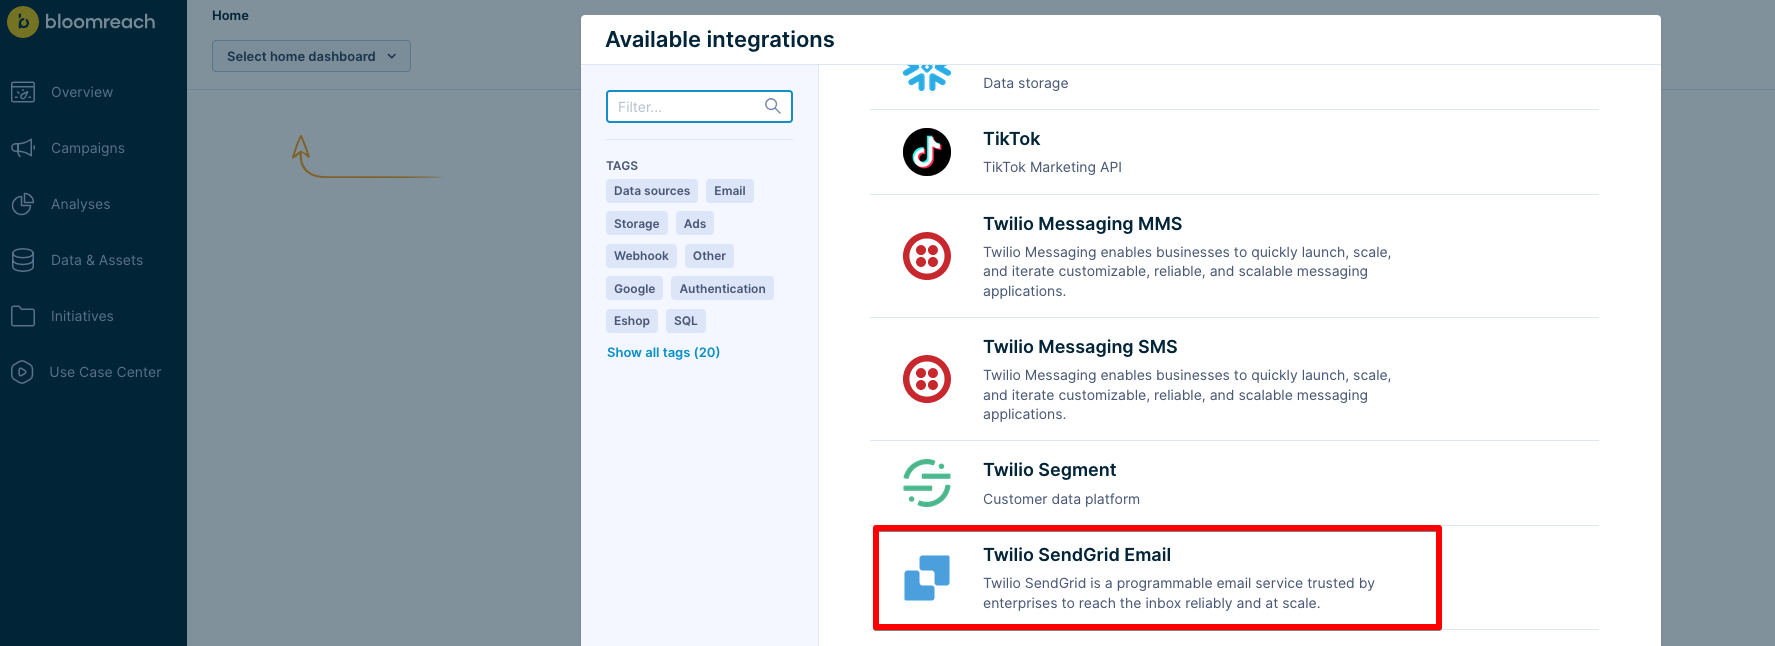
- In your Bloomreach project, go to Data & Assets > Integrations > and click + Add new integration.
- Search for Twilio SendGrid, then click + Add integration.
- Paste the API key you copied from SendGrid.
- Add your IP pool name if you're using one. Leave this empty if you don't use IP pools.
- Select Handle webhooks automatically.
- Click Save integration.
If you get a 403 Forbidden error, your API key is missing the required scopes. In SendGrid, go to Settings > API Keys, verify the key has mail send, webhooks, and IP pools read permissions, then try again. If using subusers, create the API key at the subuser level and confirm the subuser has IP pools configured. If the issue persists, contact SendGrid support—this is usually a SendGrid account configuration issue, not a Bloomreach integration issue.
ImportantThe same API key can be used across multiple integrations and projects, but sharing keys creates a risk: deleting one integration removes the webhook and disables tracking for all integrations using that key. Use separate API keys per integration.
Set up webhooks (optional)
If you didn't enable automatic webhook handling during setup:
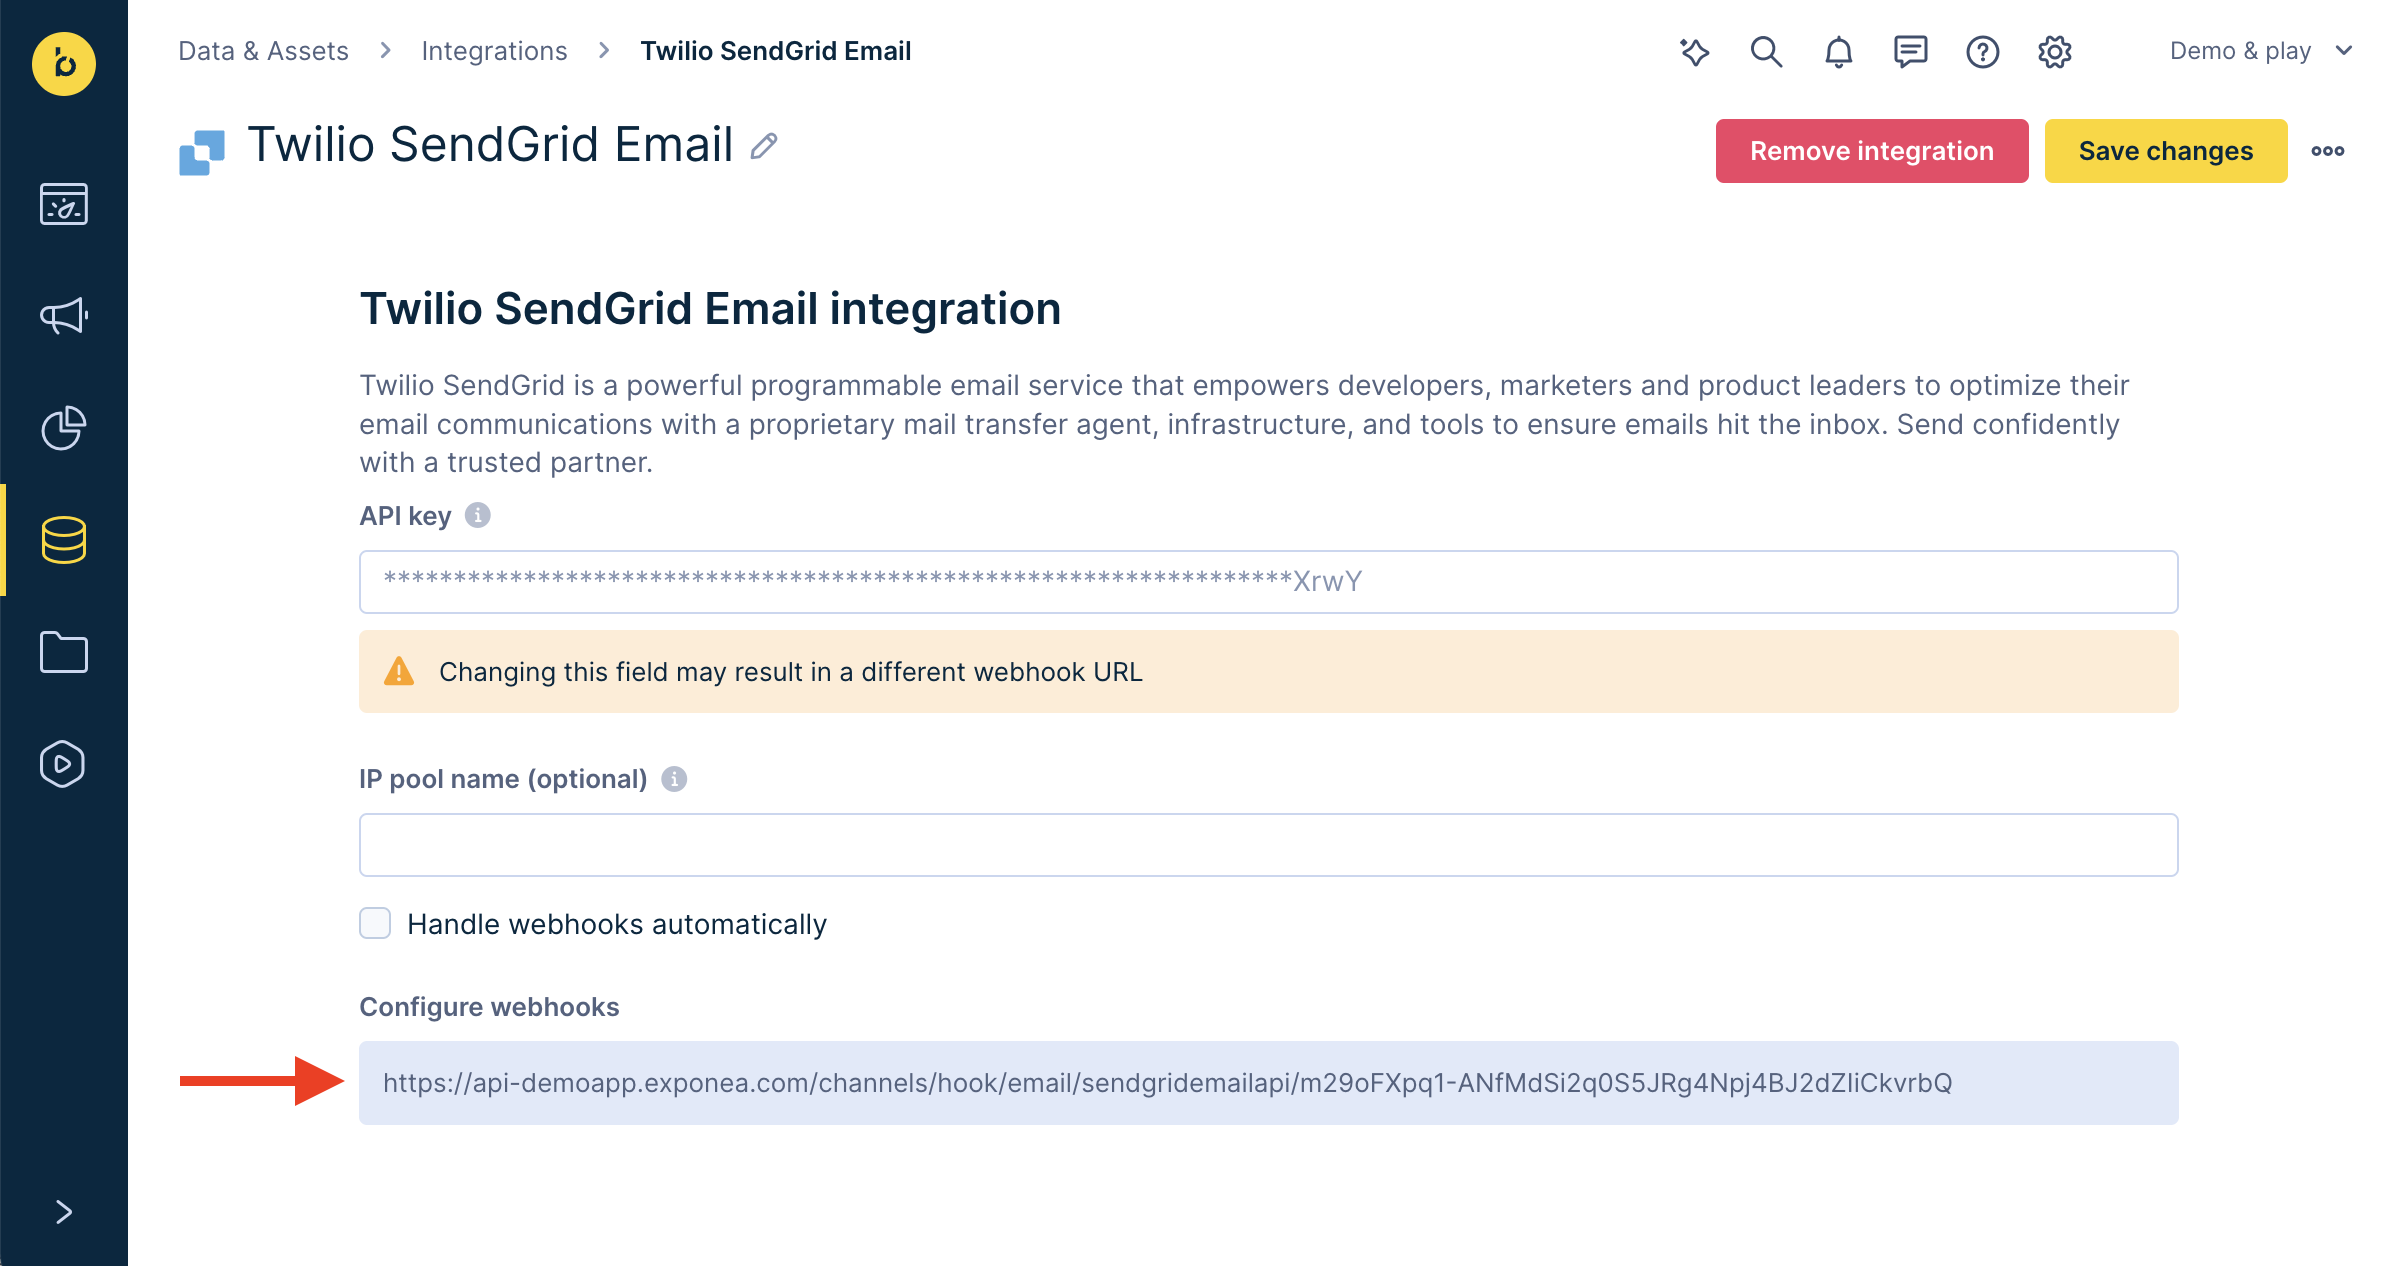
- In your integration settings, copy the tracking webhook URL.
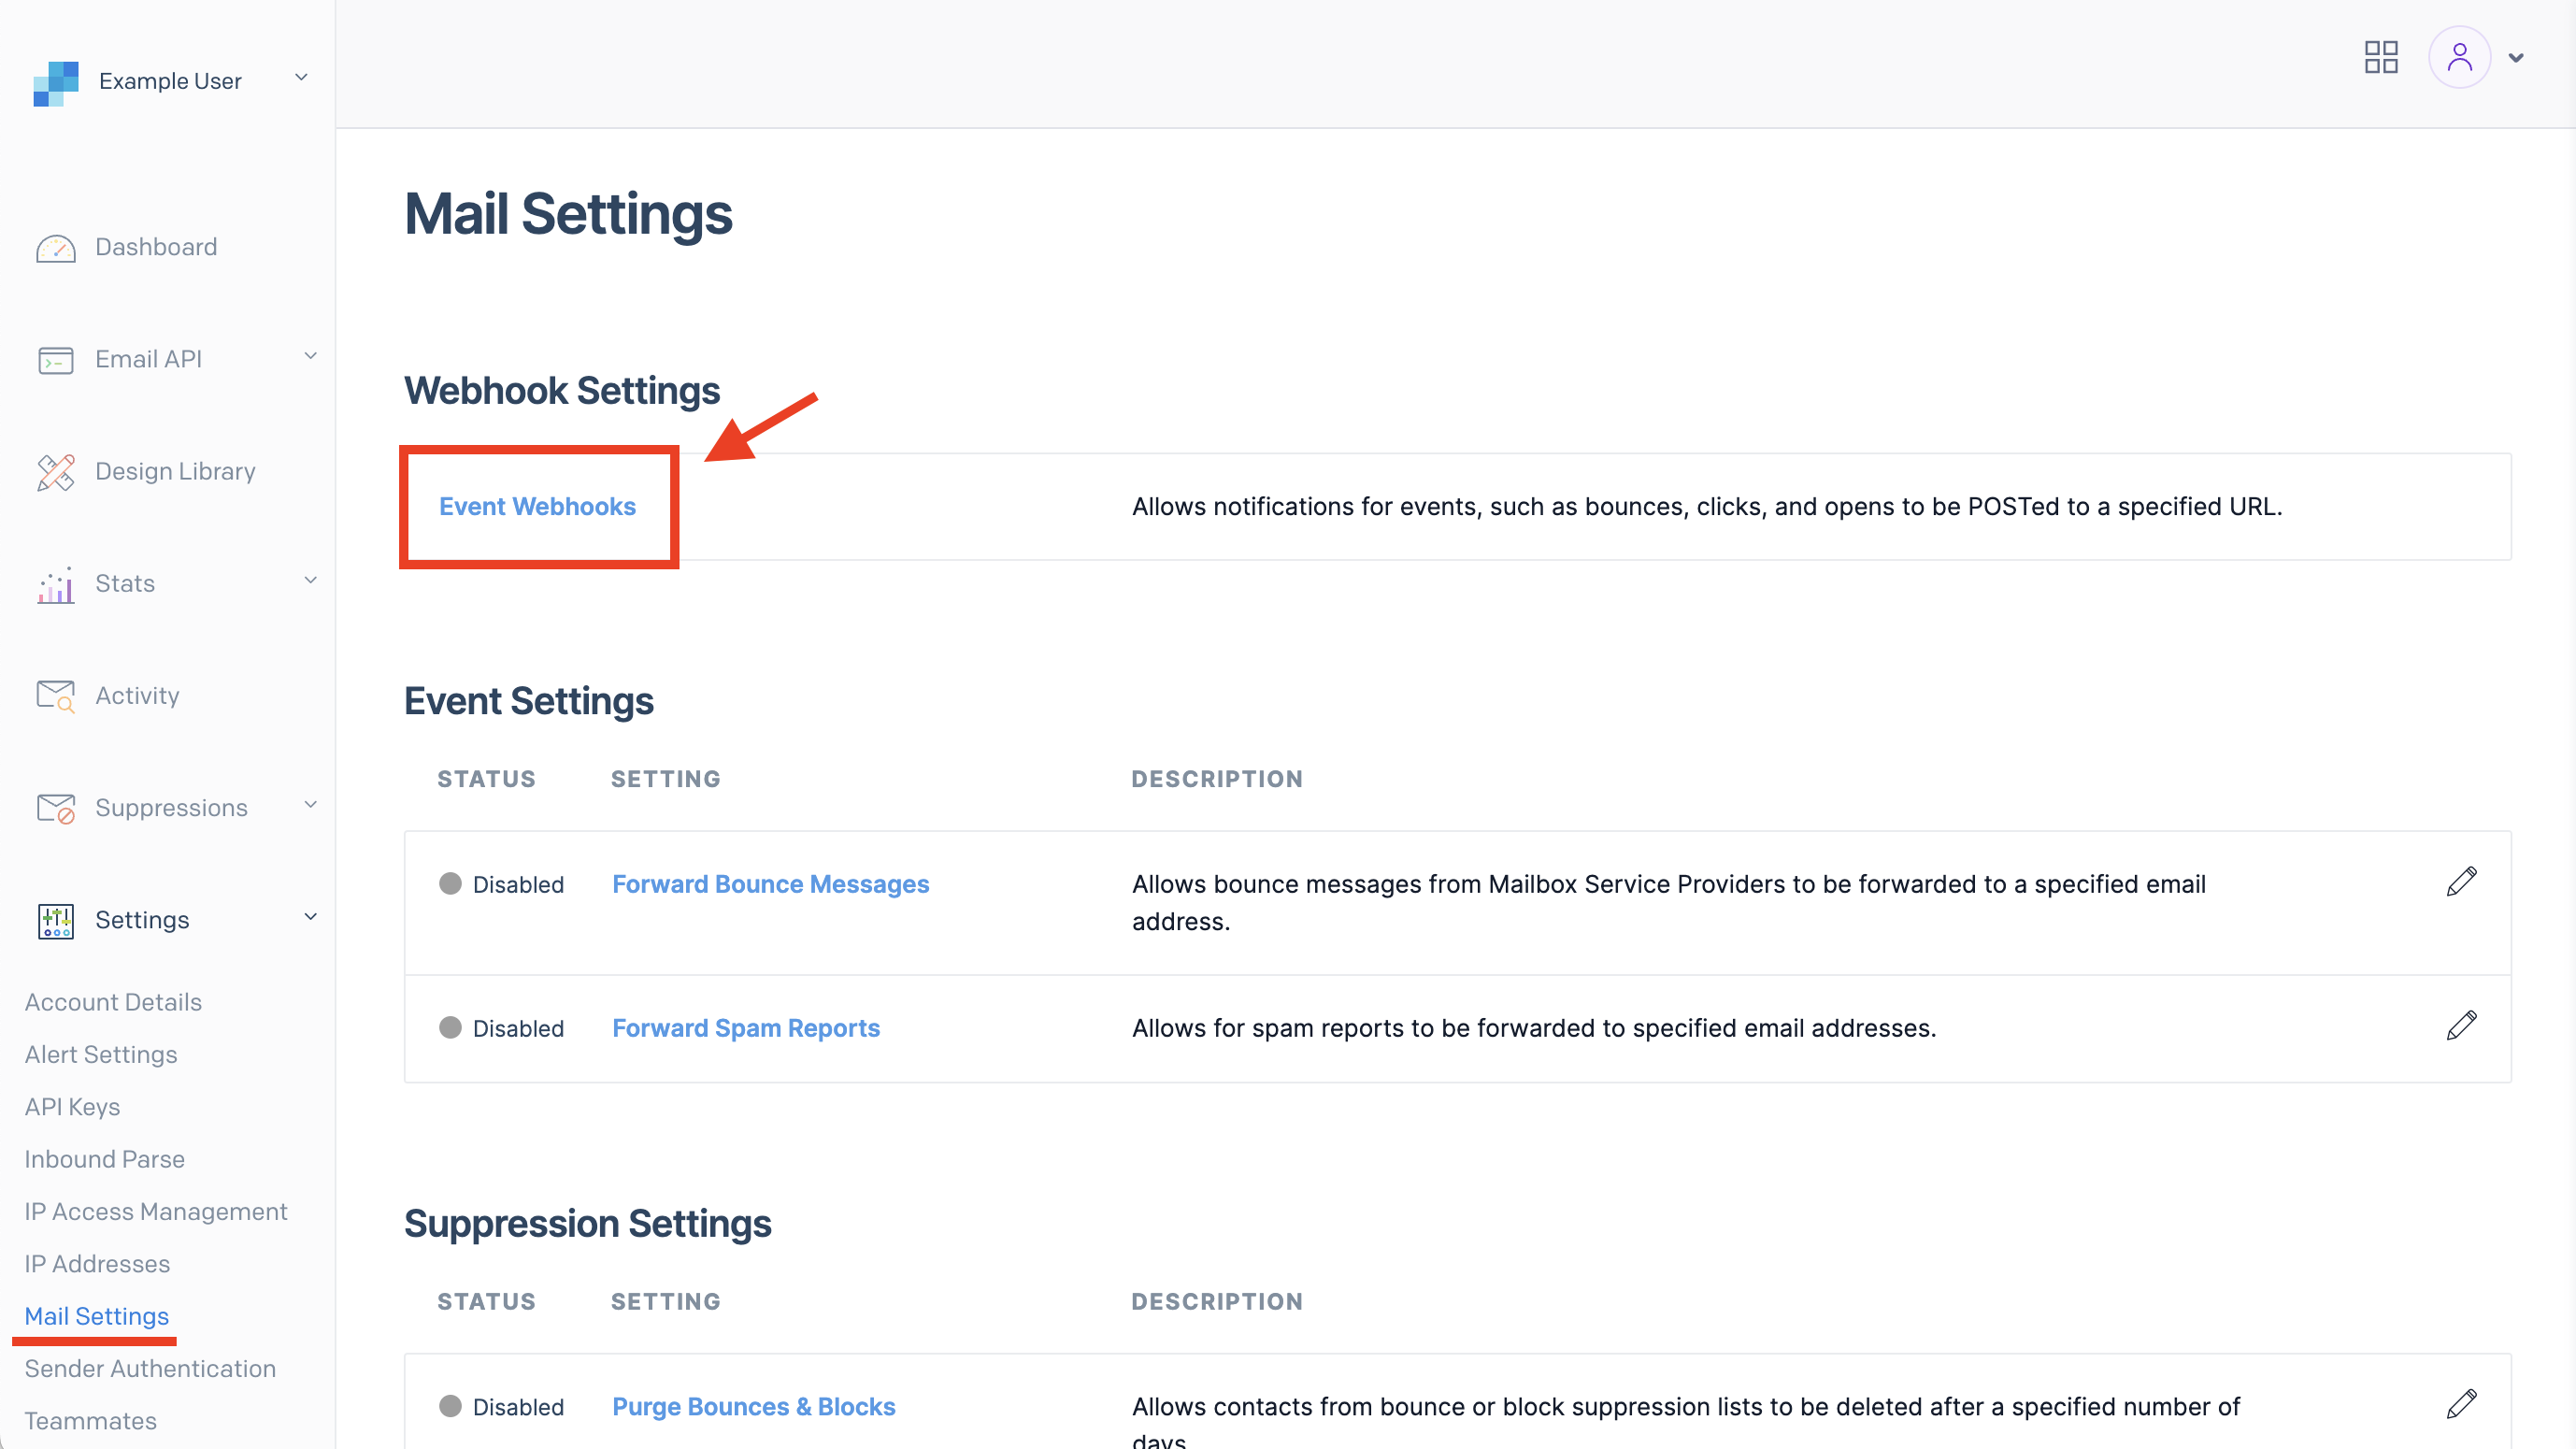
- In Twilio SendGrid, go to Settings > Mail Settings > Event Webhooks.
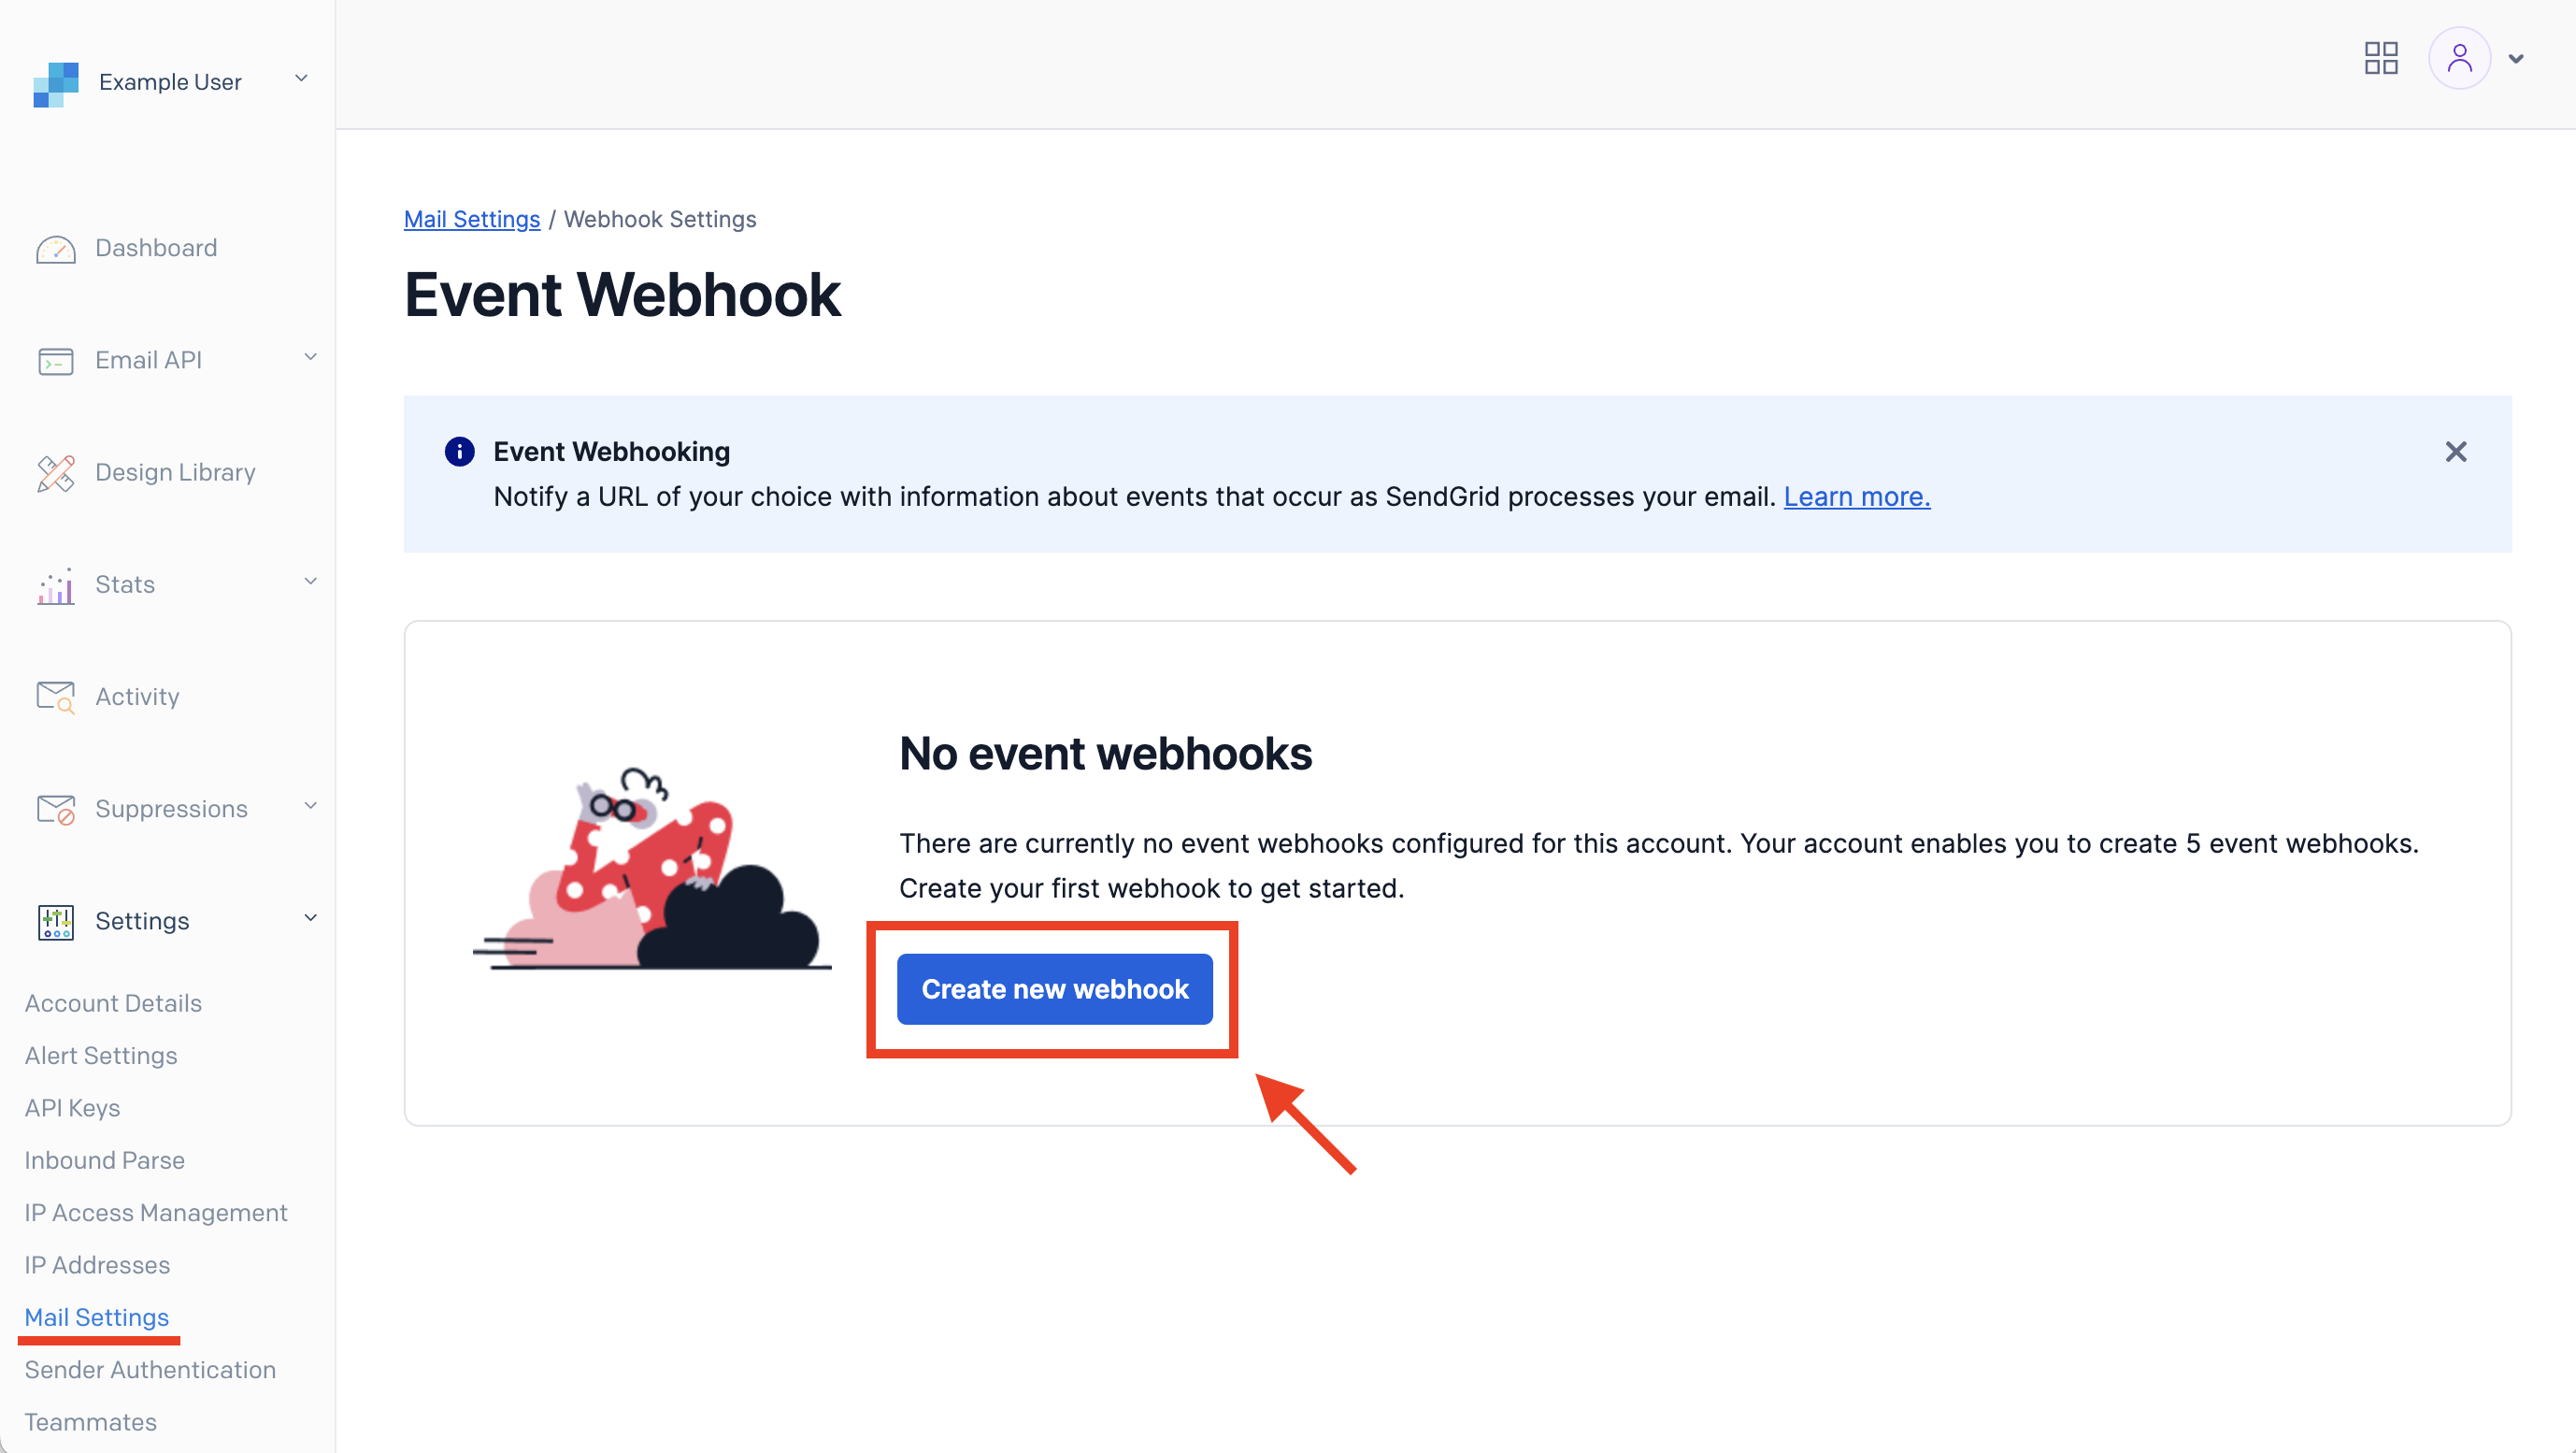
- Click Create new webhook.
- Paste the URL into all required fields.
For details on webhook setup, see Webhooks.
Related resources
- Default email settings: Set this integration as your default email provider.
- Working with emails: Send and manage emails in Bloomreach.
Updated 2 months ago