

Contextual personalization in email campaigns
This guide shows you how to set up contextual personalization for email campaigns. Loomi AI analyzes each customer's context and serves the most relevant email variant to drive conversions.
For general information on email campaigns, see Email campaigns. For a full overview of contextual personalization and its configuration, see Contextual personalization and Configure contextual personalization.
This is a Premium tier feature powered by Loomi.
Prerequisites
- At least 2 email variants ready to test.
- A Bloomreach account with the contextual personalization feature enabled.
Set up contextual personalization for email campaigns
Step 1: Select a use case
Choose a use case where personalization plays a relevant role. This guide uses a Black Friday newsletter with two subject line variants as an example. For inspiration, see Contextual personalization use cases.
Step 2: Create email variants
Create at least two email variants and configure all relevant settings. For details, see Email campaigns.
You can personalize subject lines or email content with customer attributes — for example, adding the customer's first name using Jinja.
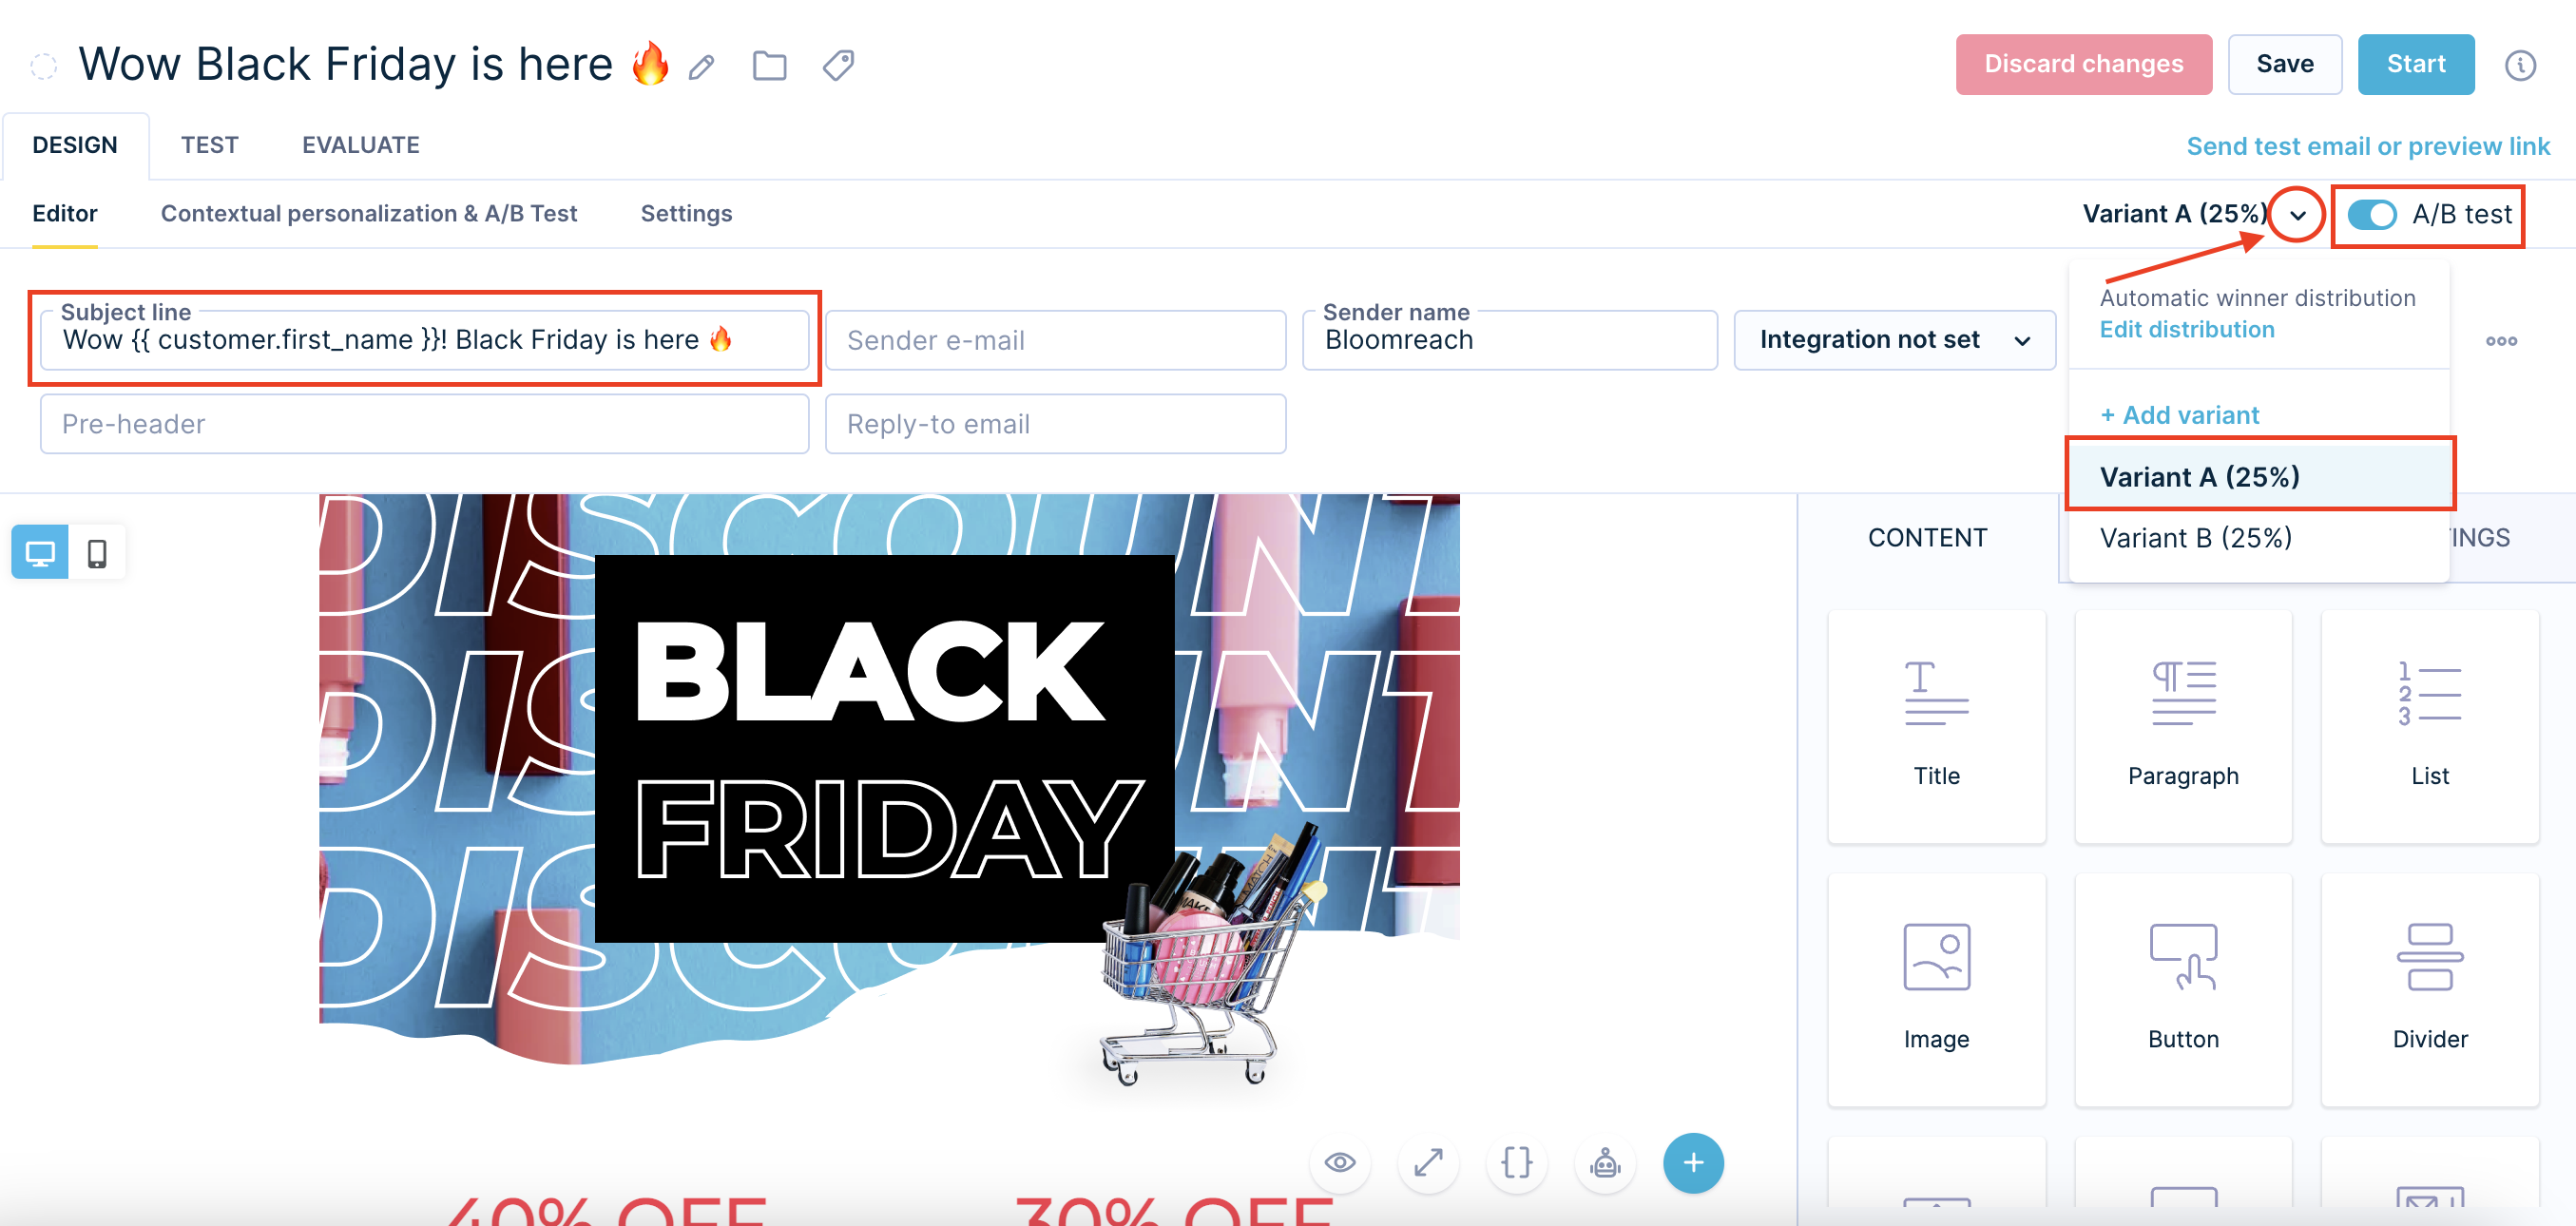
Variant A
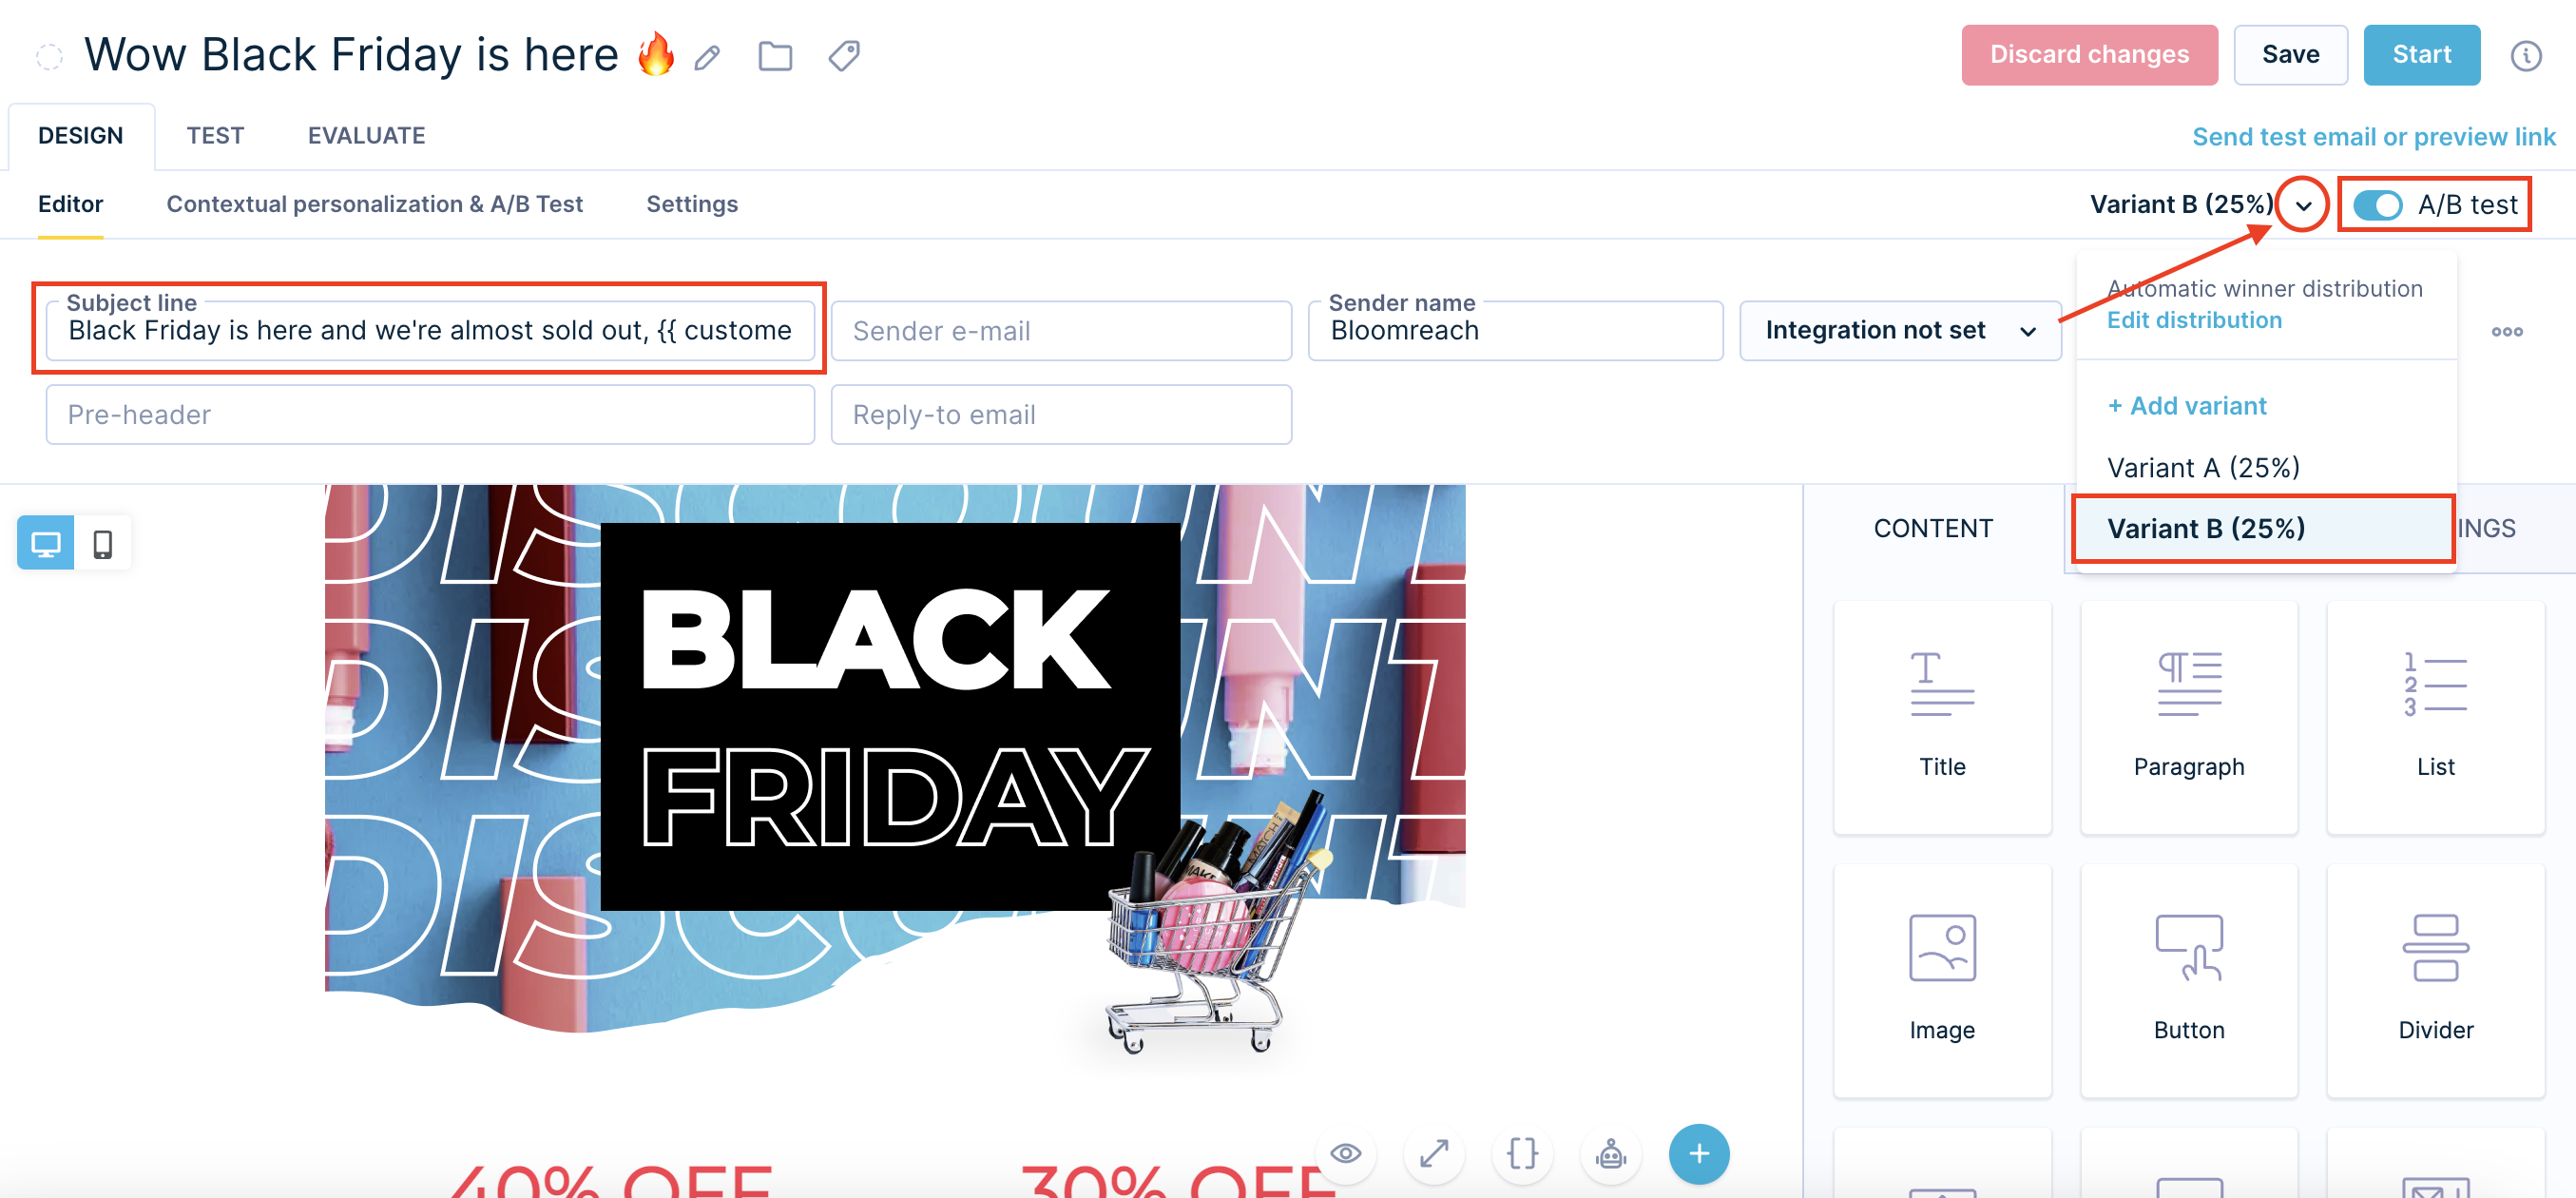
Variant B
Step 3: Configure contextual personalization
Go to the Contextual personalization & A/B test section of your campaign.
Enable the Comparative A/B test toggle and set traffic distribution to 80% contextual personalization and 20% comparative A/B test. This lets you measure the uplift of contextual personalization against individual variants once your campaign is running.
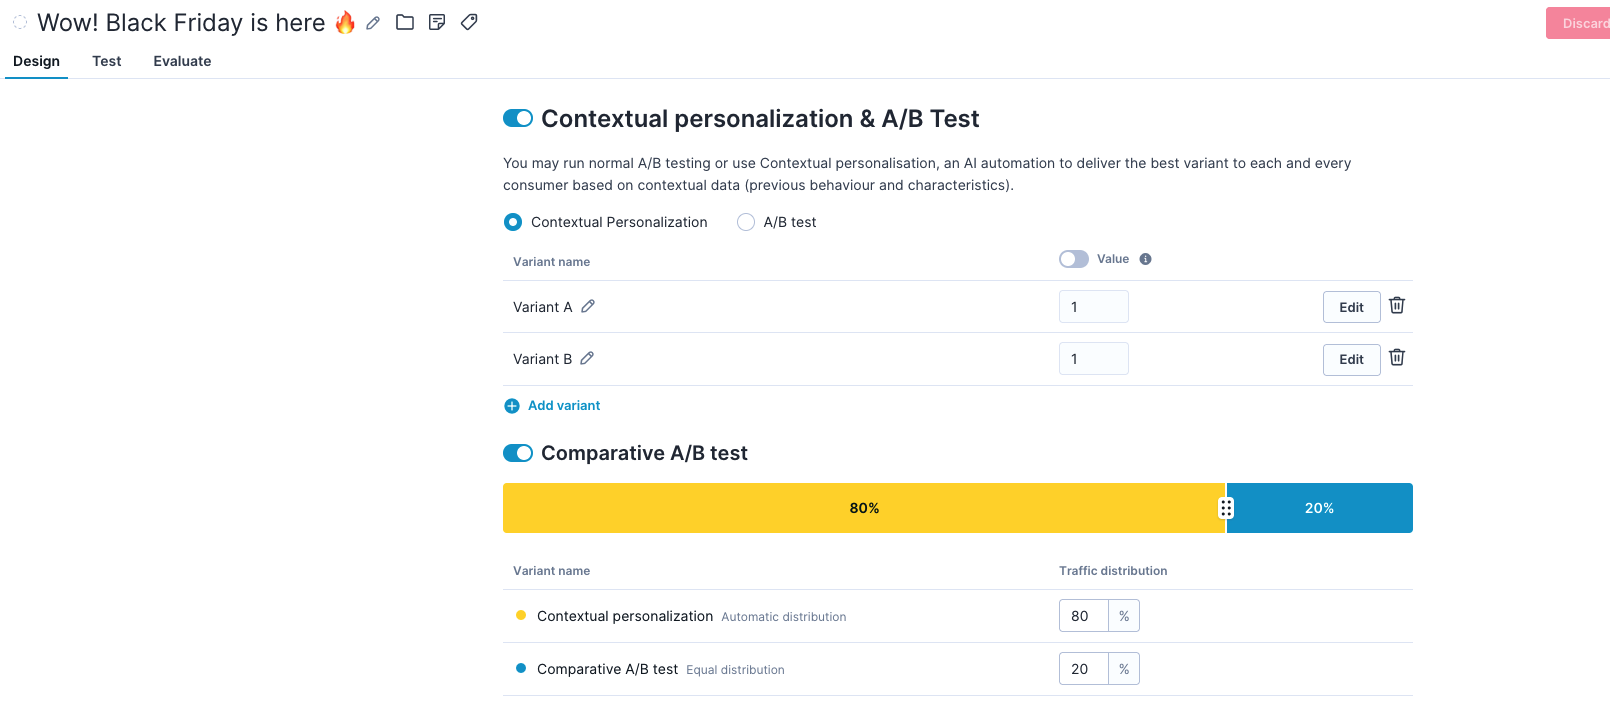
Value
If your variants have different business values, assign value to each one to guide Loomi.
For this example, both subject line variants have equal business value, so no changes are needed. If your variants have different business values — for example, one offers a 10% discount and one doesn't — assign higher value to the variant that's worth more to your business long-term. Loomi uses the ratio between values, not the absolute numbers — 2:1 works the same as 50:25.
For details, see Configure contextual personalization.
Goal
For email campaigns, Loomi automatically tracks opens and clicks. You can optionally define an additional goal to optimize for a downstream business outcome — for example, a purchase. For this example, the goal is set to click to drive recipients back to your website.

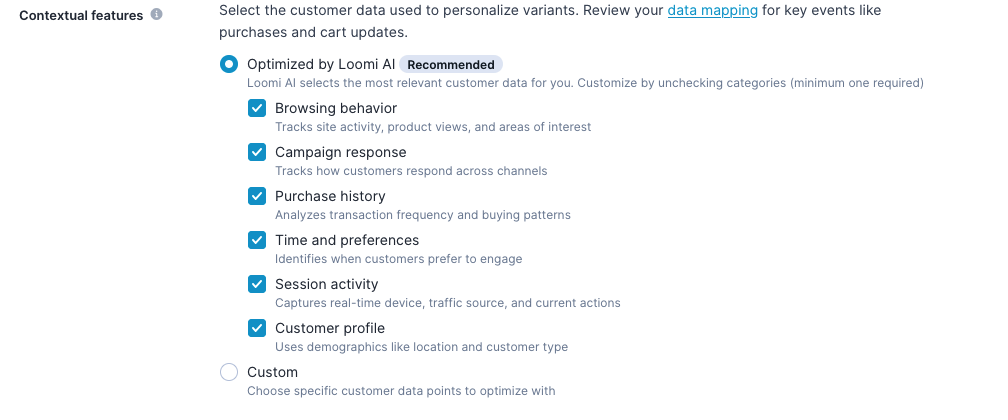
Contextual features
Select Optimized by Loomi AI to let Loomi automatically choose the most relevant customer data. You can also define custom features — such as device, country, RFM segment, or most-visited product category. For guidance, see Configure contextual personalization.
Campaign type
Select the campaign type that matches your send strategy:
- Automatic campaign: Use for on-event triggered campaigns that run continuously over weeks or months. Loomi learns continuously over time — no distribution window is needed.
- One-off campaign: Use for newsletter blasts. Set Distribute within to 12 hours to give Loomi enough time to learn from early interactions and improve delivery for later recipients.

If your campaign must send quickly, a shorter window still works — but expect less optimization.
For guidance on timing configuration, see Timing considerations in the configure article.
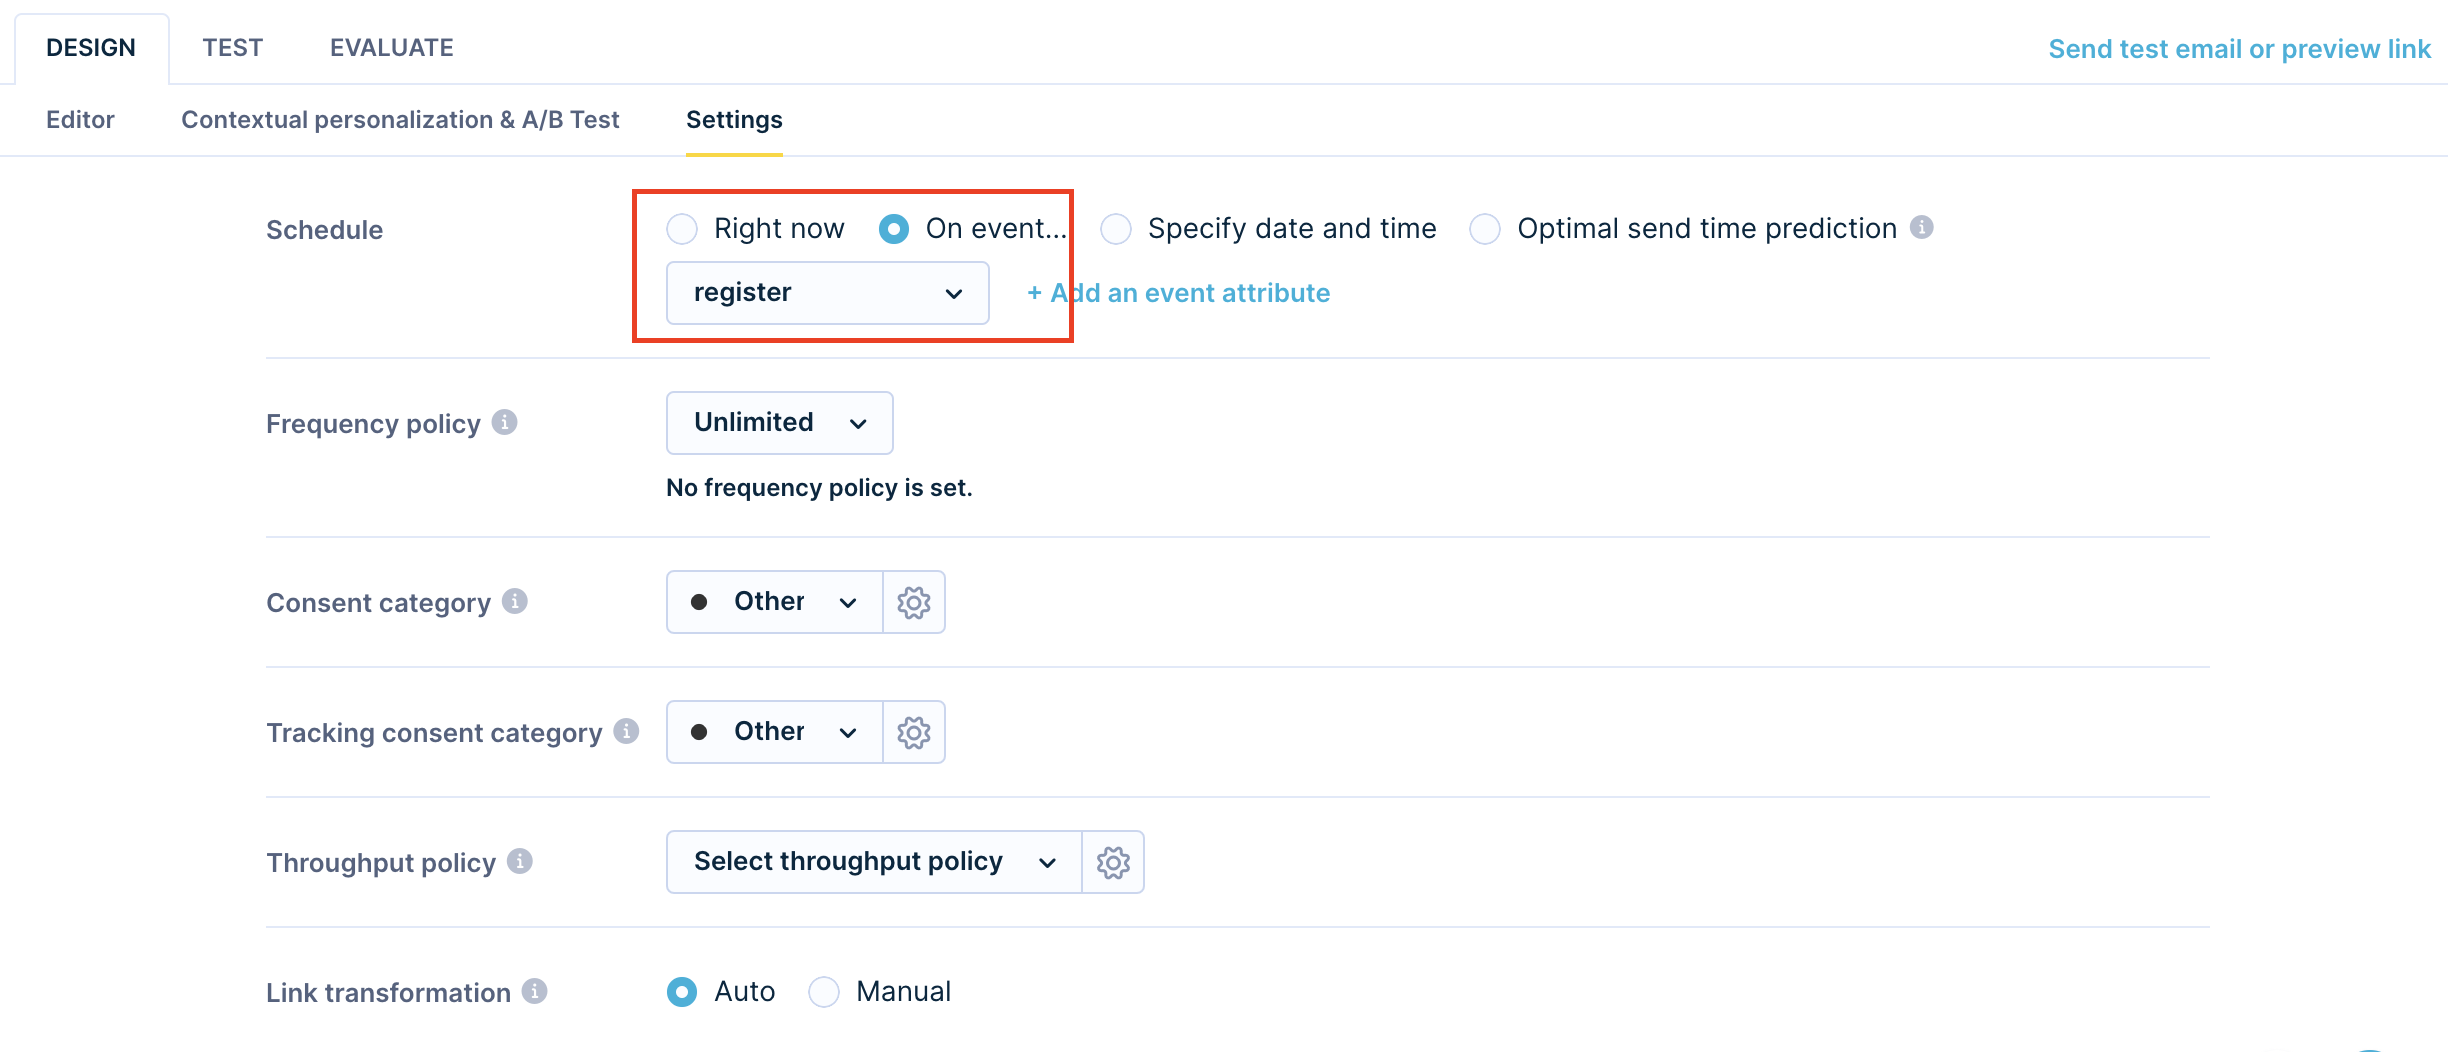
Step 4: Configure settings
In the Settings tab, select a consent category and configure the schedule. Because this example campaign is triggered after the customer subscribes to your newsletter, set Schedule to On event and select register as the trigger event. For details, see Consent management.
Evaluate results
To measure the impact of contextual personalization on your email campaigns, see Evaluate contextual personalization.
Updated about 2 months ago