

Configure Contextual personalization
This guide walks you through configuring Contextual personalization. You'll add variants, define a business goal, and set up contextual features.
This is a Premium tier feature powered by Loomi.
Prerequisites
- A Bloomreach account with the Contextual personalization feature enabled.
- At least two variants of a weblayer, scenario node, or email campaign ready to test.
- Familiar with how variants, value, and goal work together.
Configure Contextual personalization
Add variants and assign value
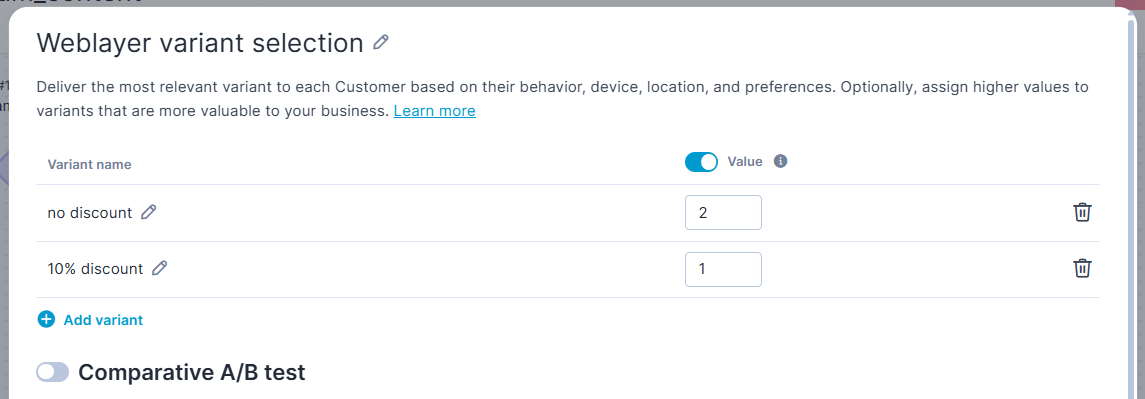
Add at least two variants. By default, all variants have a value of 1 — meaning Loomi treats them equally. Enable the Value toggle to assign different values and tell Loomi which variants matter most to your business.
Example: You're running a subscription banner with two variants — one offers a 10% discount, and one doesn't. Subscribers without discounts are more valuable long-term. Set Variant A (no discount) to 2 and Variant B (discount) to 1. Loomi learns to favor Variant A — but only for customers where it's likely to convert.
When assigning value, keep in mind:
- Loomi uses the ratio between values, not the absolute numbers. Setting 2 and 1 has the same effect as 20 and 10.
- If a customer triggers multiple goal events within the attribution window — for example, clicking a link and then completing a purchase — the values are summed together.
- When evaluating results, factor in value ratios. A variant with a lower conversion rate but a higher value can outperform a variant that converts more often but is worth less to your business.
Attribution window
Loomi attributes goal events within a fixed window that starts when the channel action activates — for example, when an email delivers, an SMS sends, a push notification delivers, or a banner serves. The window doesn't start when Loomi makes its variant decision.
The attribution window length depends on the campaign type:
- Automatic (continuous, scenario-based) campaigns: 24 hours.
- Batch or one-off campaigns: 2 hours.
- Weblayers: 1 hour.
Any goal event that happens within this window counts toward the campaign's outcome, whether it's an open, a click, a purchase, or a custom goal you've defined. If a customer clicks and then purchases within the same window, both events add to that variant's value.
Enable comparative A/B test
Enable the Comparative A/B test toggle to run a control group alongside Contextual personalization. Set traffic distribution to 80% Contextual personalization and 20% comparative A/B test. This gives Loomi enough data to learn quickly while keeping a meaningful control group for evaluation.
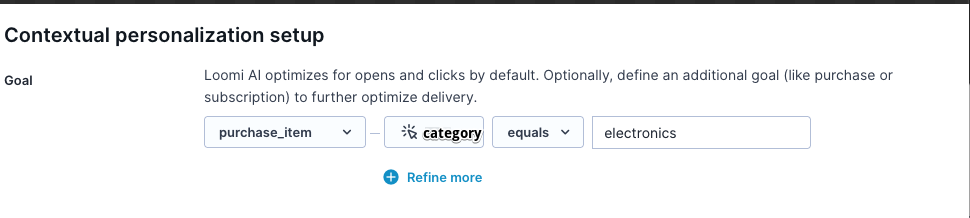
Set a goal
Your goal tells Loomi which customer action signals that a variant worked. When a customer completes the goal, Loomi registers it as a success for the variant that was served.
Goal tracking works differently depending on the channel:
- Email and scenario channels: Loomi automatically tracks opens and clicks. You don't need to configure anything to get started. Optionally, define an additional goal — for example, a
purchase— to give Loomi a stronger business signal. - Weblayers: There's no automatic tracking, so you must define a goal. A banner click is a good starting point, as it's easy to track and signals customer interest.
To add a goal, click Add goal and define:
- Event type: The customer action to track, for example,
purchase_item,add_to_cart, orlevel_up. - Filter (optional): Conditions to match specific event variations, for example, only purchases where
category = 'electronics'.
Examples by industry:
- Ecommerce and retail:
add_to_cart,use_a_discount_code, orpurchase_item. - Gaming:
level_up,make_an_in_app_purchase, orinvite_a_friend. - Banking and finance:
starting_a_loan_applicationoropening_a_new_account.
TipIf your goal is a purchase but you don't have enough purchase events yet, use an intermediate goal like
add_to_cartor a product page view to help Loomi learn faster.
For more goal setup examples, see Contextual personalization use cases
Configure contextual features
Contextual features are the customer data points Loomi uses to decide which variant to serve. During setup, choose one of two options:
1. Optimized by Loomi (recommended)
Loomi automatically selects the most relevant data for your project based on the projects data mapping and standard system events. This option is pre-selected by default. All six feature categories are active, but you can uncheck any you don't want to use — at least one must remain active:
- Browsing behavior: Site activity, product views, and areas of interest.
- Campaign response: How customers respond across channels.
- Purchase history: Transaction frequency and buying patterns.
- Time and preferences: When customers prefer to engage.
- Session activity: Device, traffic source, and current actions.
- Customer profile: Demographics such as location and customer properties from data mapping.
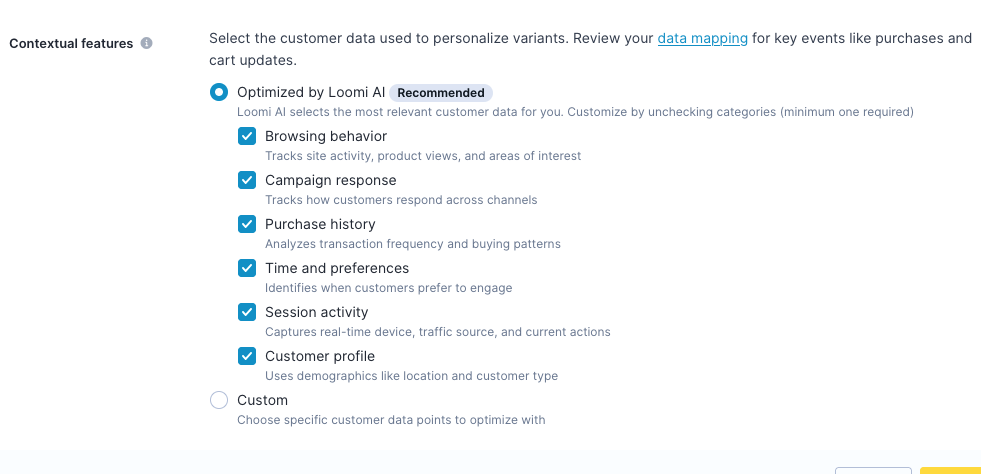
2. Custom
Choose specific data points manually — such as your own properties, aggregates, expressions, segmentations, or predictions. Keep these guidelines in mind:
- Keep features dense. Group customers into a small number of meaningful categories. For example, instead of exact hours of the day, use three groups: morning, afternoon, and evening. Avoid unique values like product titles — too many distinct values make it harder for the model to spot patterns.
- Use fewer, more relevant features. More features mean more contexts, which means the model takes longer to learn. Use your business knowledge to select features that genuinely influence customer behavior.
- Size your audience accordingly. Use this formula to estimate the audience size needed for statistically significant results:
100 × number of contexts × number of variants ÷ estimated conversion rate = required audience size. For example: 100 × 20 contexts × 2 variants ÷ 0.2 conversion rate = 20,000 customers.
Timing considerations
Use fixed delays or fixed send times in your scenario — for example, "wait 1 hour" or "send in the morning." Avoid optimal send time and dynamic wait times calculated via Jinja or similar templating. Dynamic timing prevents Loomi from reliably identifying when the attribution window starts, which affects the accuracy of its learning.
This restriction applies to wait nodes or Send time optimization placed between the Contextual personalization node and the channel action. Adding a wait node or Send time optimization before the Contextual personalization node doesn't affect attribution, since Loomi still measures the window from the actual channel action.
One-off send distribution
For one-off campaigns, Loomi distributes sends across the time window you set in Distribute within (12 hours by default). The audience splits randomly across 13 fixed segments within that window, regardless of audience size or window length.
A shorter Distribute within window compresses these segments closer together, leaving less time for goal events to come in between batches — making the test behave more like a standard A/B test.
Once your configuration is complete, see Evaluate contextual personalization to measure your results.
Next steps
Continue with the setup guide for your channel:
- Contextual personalization for weblayers
- Contextual personalization for email campaigns
- Contextual personalization for scenarios
Updated 3 days ago