

Edit, refine, and launch in Campaign Agent
After Campaign Agent generates your campaign, you can refine it before launch. You can edit conversationally, adjust individual nodes directly on the Canvas, or use both approaches together.
Conversational editing
Conversational editing happens in the left-hand panel where you interact with Campaign Agent in natural language. Describe what you want to change, and Campaign Agent interprets your request, identifies the relevant nodes, and updates the campaign automatically.
As Campaign Agent applies changes, it displays each step transparently:
- Editing campaign.
- Adjusting the audience.
- Finding your ideal audience.
- Updating content or timing.
All changes reflect in real time on the Canvas so you can see how your campaign evolves. Campaign Agent confirms what was changed, helping you stay in control while iterating.
What you can do conversationally
- Add or remove steps in the flow.
- Refine audience or exit conditions.
- Adjust wait times or message tone.
- Request explanations (for example, "Why did you add this wait time?").
Manual editing
Manual editing happens directly on the Canvas. Click any node — Audience, Wait, Split, or Content — to open its configuration panel and adjust specific parameters. Use this approach for precise edits without changing the campaign structure.
For a detailed breakdown of each node's contents, see Understand the Campaign Agent structure.
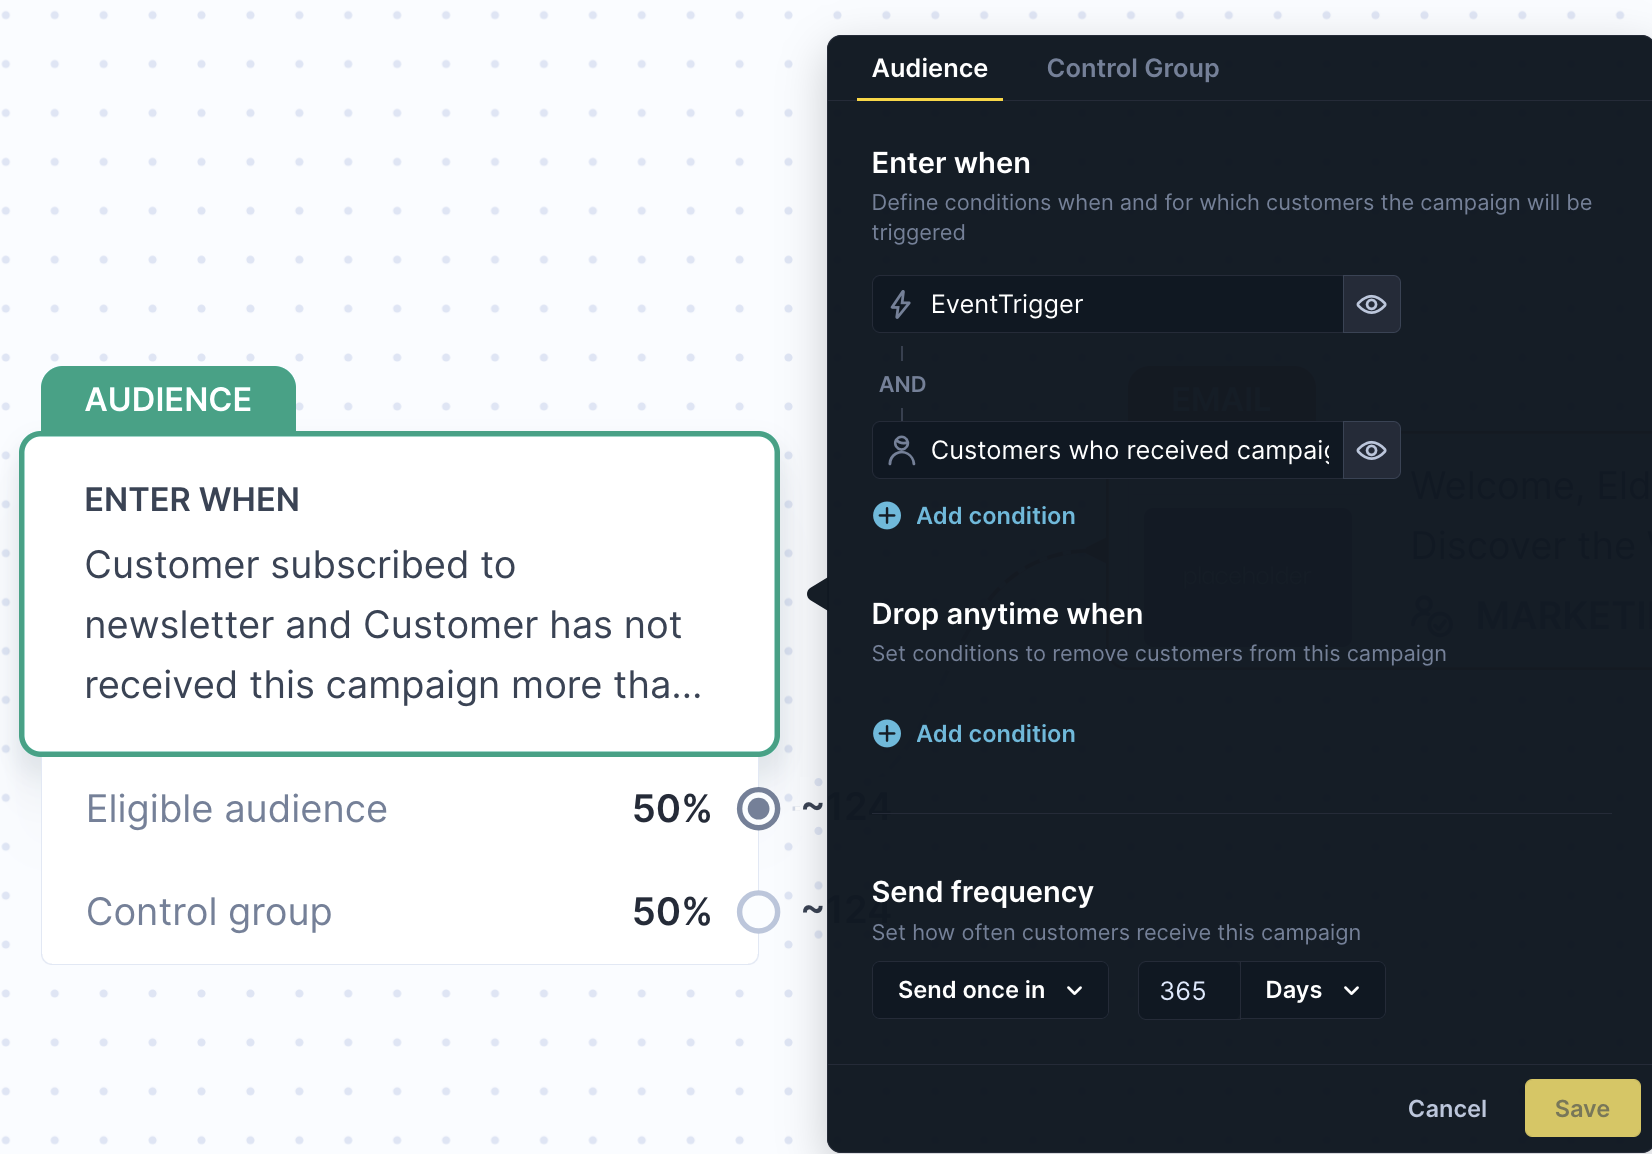
Audience node
Modify:
- Enter when conditions (trigger events and audience conditions defining who enters the campaign).
- Drop anytime when conditions (conditions that remove customers from the campaign).
- Send frequency (how often customers can enter within a time period).
- Control group (reserve a portion of your audience for testing).
Changes save automatically when you click Save.
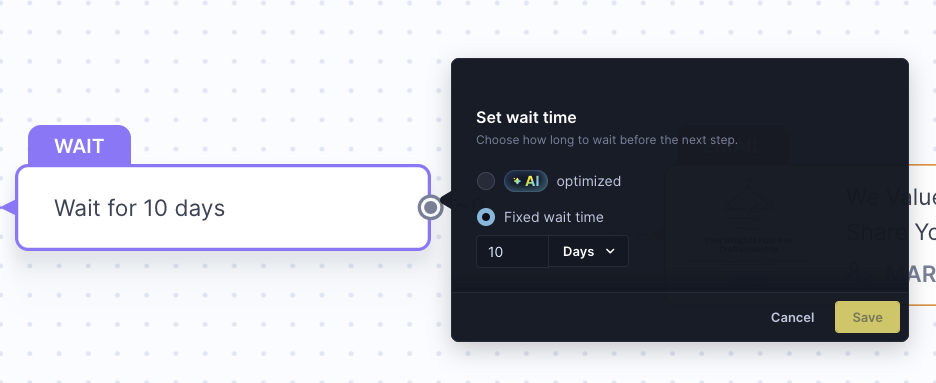
Wait node
Adjust:
- Specific wait time (for example, 12 hours, 2 days).
- Switch between fixed and AI-optimized timing.
AI-optimized delays are automatically enabled for supported use cases (Abandoned Cart and Browse Abandonment) during campaign brief approval. Once generated, you can disable AI optimization but can't newly enable it from the Canvas.
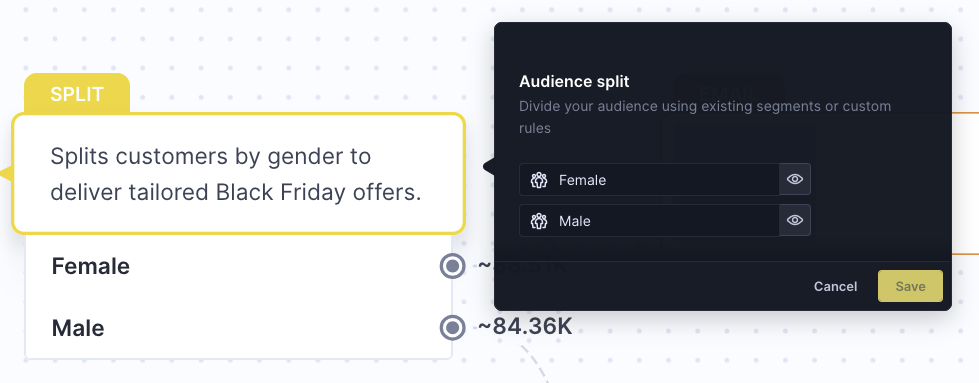
Split node
Modify:
- Split conditions (for example, gender, purchase history, loyalty tier).
- Rename or describe branches.
Segments created in Campaign Agent are exclusive to Campaign Agent and aren't accessible in your Bloomreach project. Each split generates new segments from scratch.
Email node
Adjust:
- Message content and personalization preview.
- Text or subject line edits.

For a complete overview of what content elements can be edited conversationally or manually, see Campaign Agent limitations.
For detailed content editing guidance, see Work with content in Campaign Agent.
What you can't do manually
Manual editing doesn't support structural or architectural changes. You can't manually:
- Add or remove nodes.
- Reorder flow steps.
- Add branching logic.
Request these changes through conversational editing instead.
When to use which approach
Conversational editing is the recommended approach for most changes. Use manual editing only for small, precise adjustments once the campaign structure is set.
Use conversational editing when:
- You want to change campaign logic or structure (for example, add a new step, modify the sequence, replace conditions).
- You want to refine tone, targeting, or content strategy ("Make the follow-up email sound more urgent" or "Add an extra step for inactive users").
- You're unsure about the best setup and want Campaign Agent to recommend improvements.
- You want to iterate quickly through multiple ideas before locking in details.
Use manual editing when:
- You need to tweak specific parameters (for example, change a delay from 1 day to 3 days, adjust an audience filter).
- You want to fine-tune details Campaign Agent already set up (for example, message subject line or control group percentage).
- You're confident about the structure and only need small, precise adjustments.
If you're not sure which method to use, start conversationally — Campaign Agent can rebuild logic safely. Once the structure feels right, switch to manual adjustments for fine-tuning.
Best practices for iteration
- Review before saving: Double-check filters and timing changes before confirming.
- Save incrementally: Apply and confirm each change before moving on to the next.
- Test after editing: Use preview mode to verify results across customer segments.
- Use conversational editing for complexity: When changes affect multiple nodes or the overall logic, describe them conversationally to ensure campaign integrity.
Launch and monitor your campaign
Once you've finished reviewing and refining your campaign, you're ready to launch.
Publish your campaign
Click Start campaign at the top-left corner of your Canvas to publish.
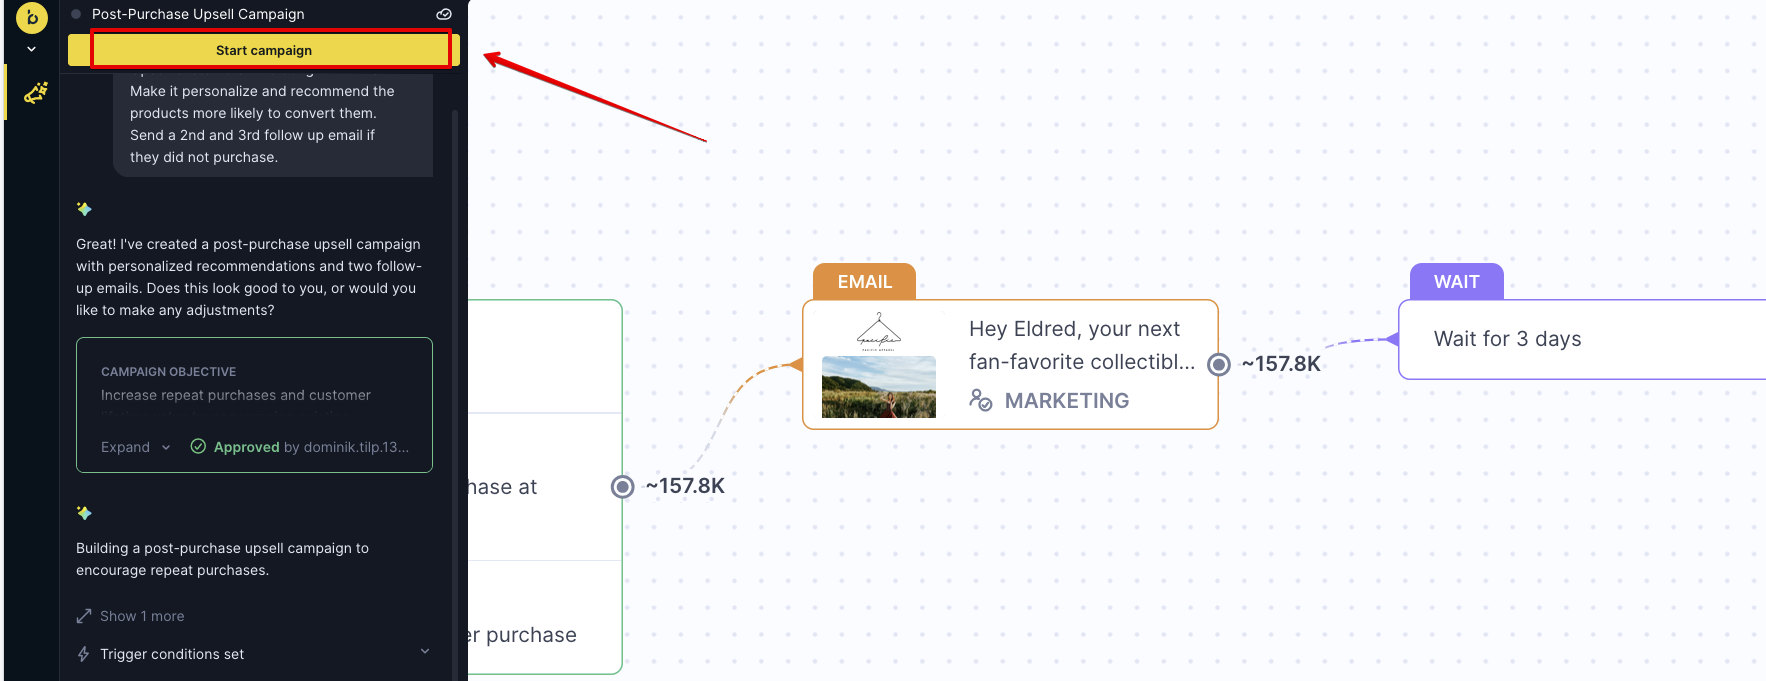
After publishing, you'll be redirected to the Evaluation dashboard where you can monitor performance in real time.
Evaluation dashboard
The Evaluation view shows how your campaign performs across key metrics:
- Attributed revenue.
- Purchases and buyers.
- Conversion rate.
- Email performance breakdown (sent, opened, clicked, purchased).
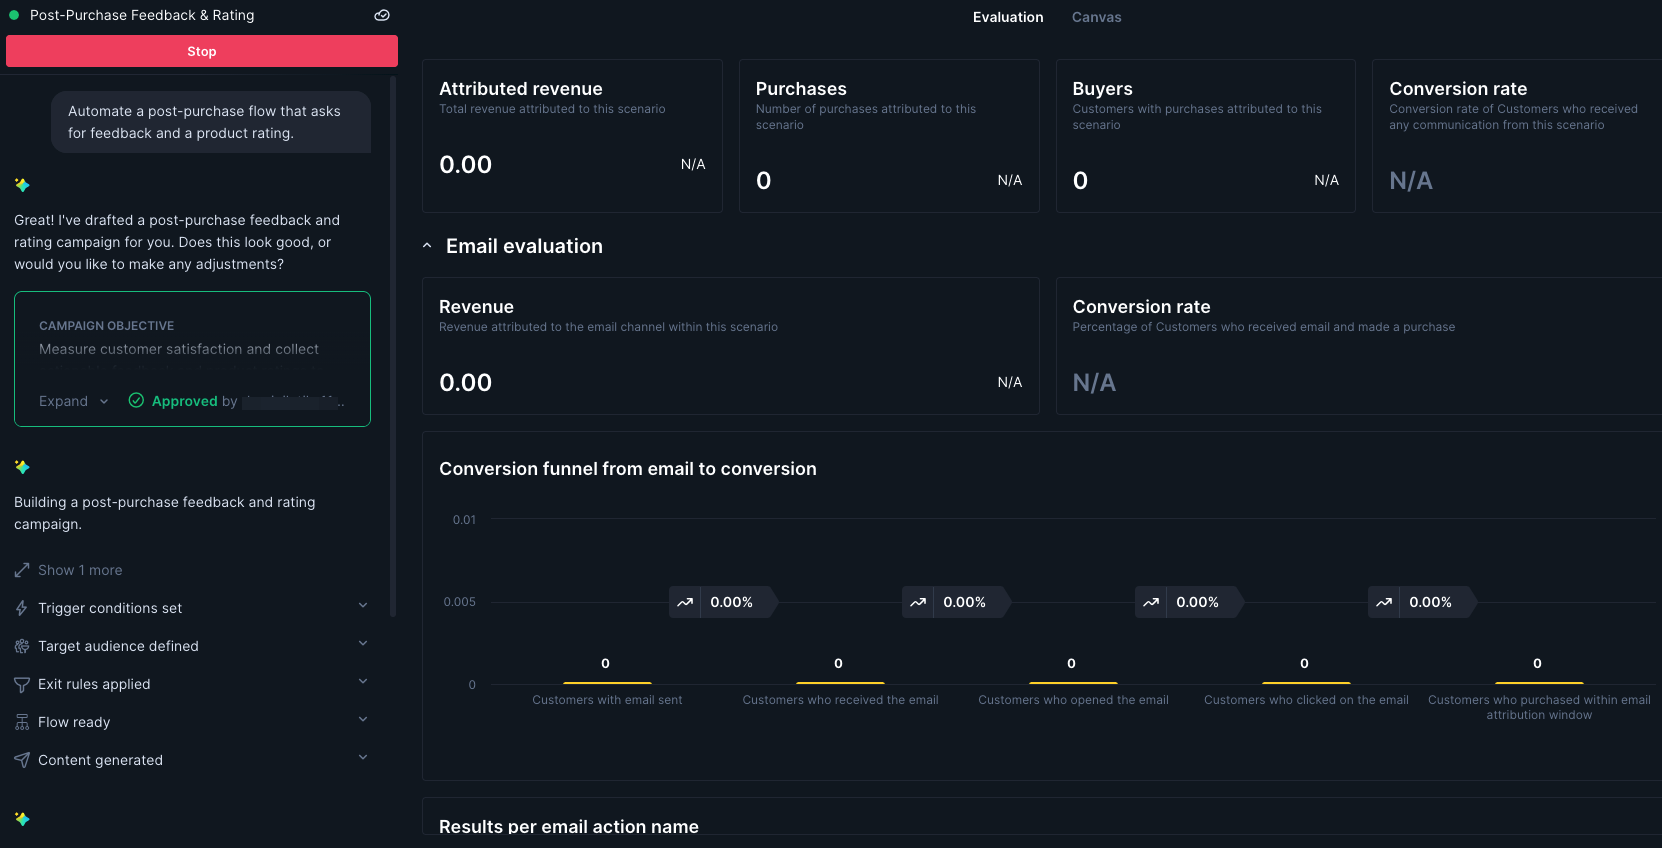
You can also review conversion funnel charts and results per email action, helping you measure impact and identify optimization opportunities.
Make changes after launch
You can continue adjusting your campaign after it goes live. Switch between the Canvas and Evaluation tabs to review or modify campaign settings.
Changes don't take effect automatically. To apply modifications, republish your campaign by clicking Start campaign again.
For major edits (for example, structural changes), stop the campaign, make your adjustments, then publish again.
Monitor the Evaluation dashboard after launch to track performance and identify where to improve.
Updated 13 days ago