

LINE onboarding
To send LINE messages, connect a LINE Official Account to your project, configure your settings, and add at least one sender.
Prerequisites
Ensure you have the following before you begin:
- A LINE Official Account. If you don't have one yet, create it at the LINE for Business portal.
- The Mobile Messaging package enabled on your account—contact your account manager if it isn't.
- A Sinch Mobile Messaging integration configured for LINE. To set one up, go to Data and Assets > Integrations, click + Add new integration, and select Sinch Mobile Messaging.
- LINE integration must be enabled on the Sinch Build Dashboard, which will be supported by the Bloomreach team. For more information, see Sinch official documentation.
ImportantBloomreach's integration with LINE and Sinch is provided "as is" and is subject to the respective terms, conditions, and platform limitations of those third parties. Bloomreach makes no warranties regarding the continuous availability or functionality of third-party services, and any use of LINE or Sinch is governed by your respective agreements with those providers. All third-party trademarks are the property of their respective owners.
Configure project settings
After connecting LINE, configure it in your project settings:
- Go to Settings > Project settings > Channels > Mobile Messaging.
- Select LINE.
- Set the default sender, see Set up senders.
- To configure two-way messaging and auto responses, see Configure two-way messaging below.
Set up senders
A sender in LINE corresponds to a LINE Official Account. You can add multiple senders if you operate in more than one country or manage separate brands.
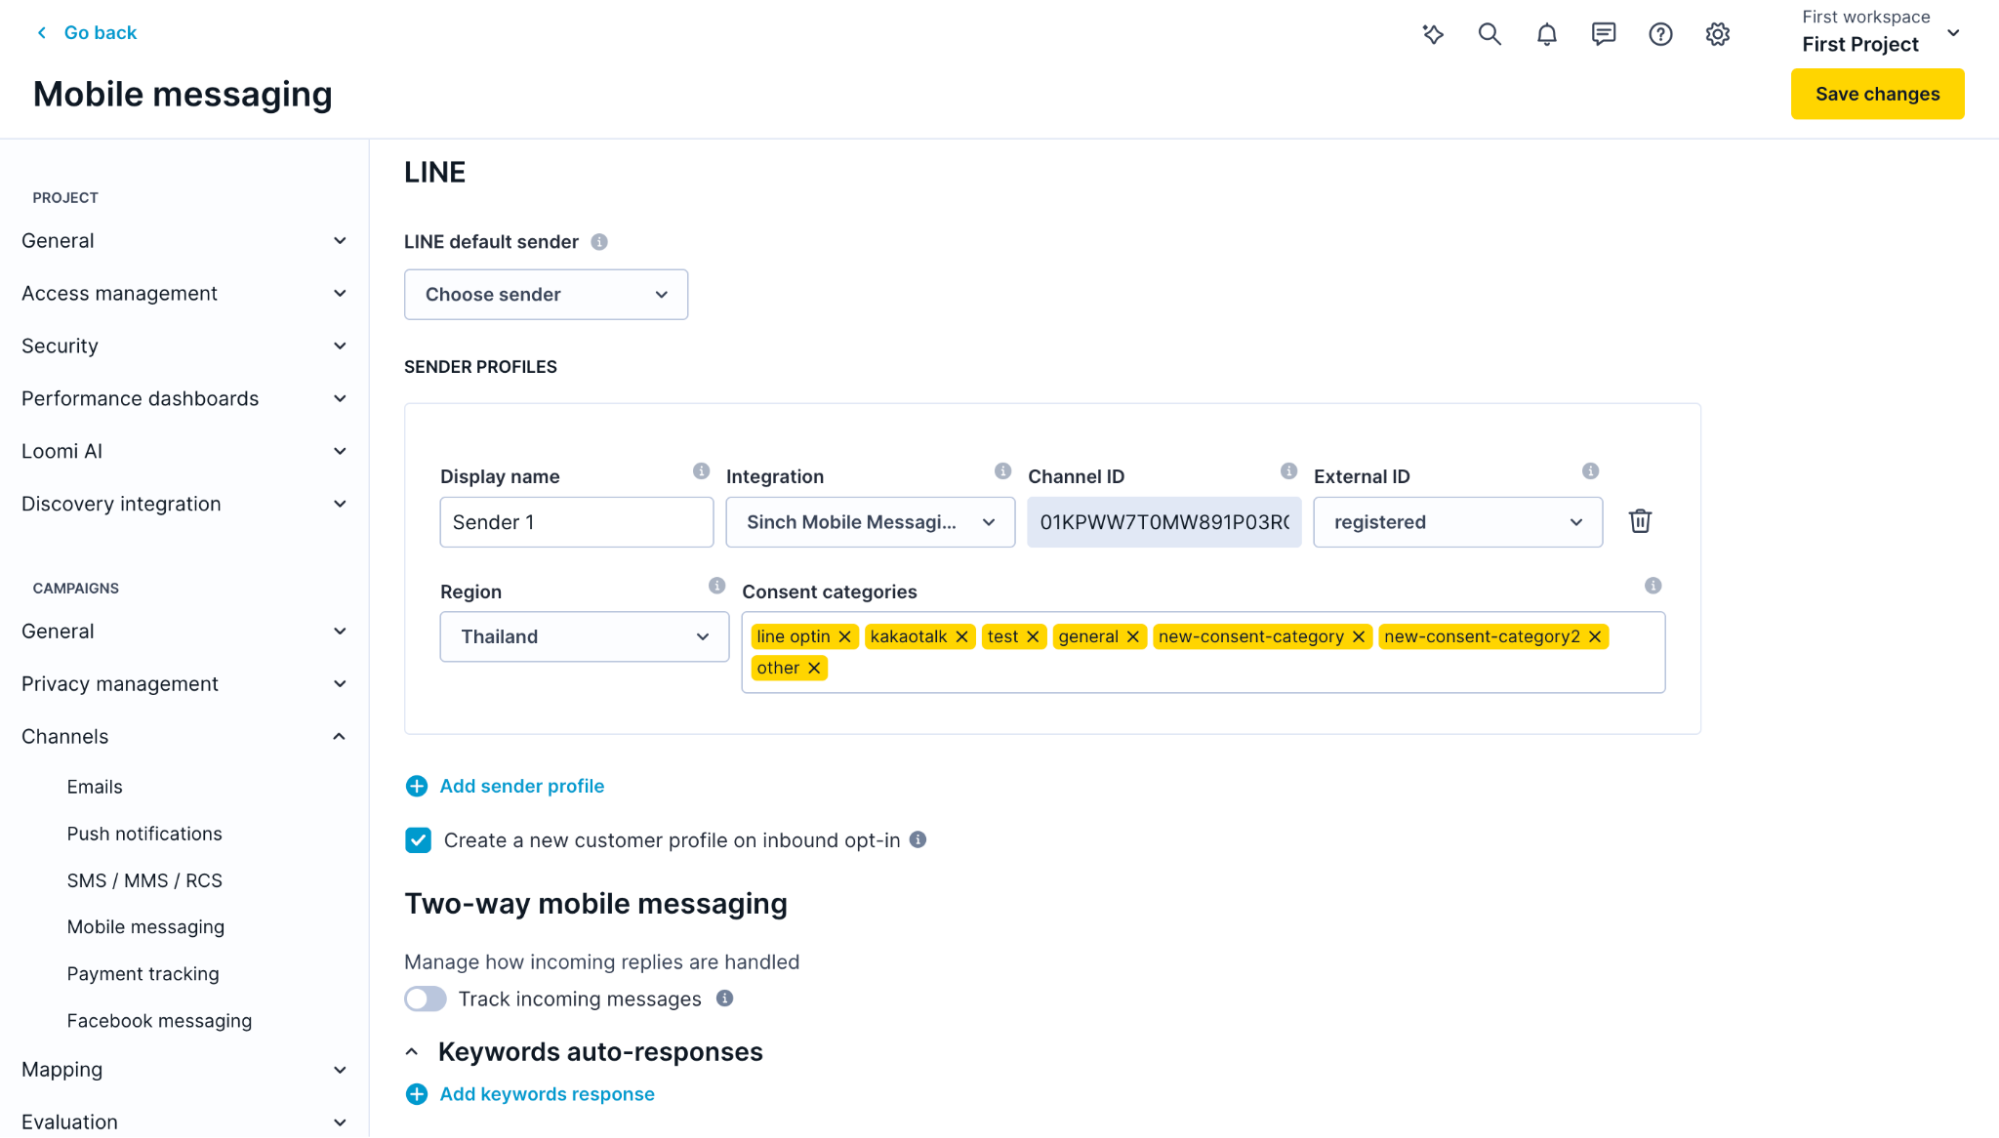
- In Settings > Project settings > Channels > Mobile Messaging, click + Add sender profile.
- Enter a display name — a label to identify this sender internally. This information won’t be displayed to users in LINE.
- Select the integration — the Sinch integration that delivers messages for this sender.
- The channel ID fills automatically for Sinch integrations. You can also find it in your Sinch Dashboard (Conversation API > Apps).
- Select the external ID — the customer property used to store the LINE ID and match incoming messages to existing customers.
ImportantAvoid changing the external ID once the scenario is in use. If you change it, the same customer can be associated with multiple profiles and receive duplicate messages. You might need to run a profiles cleanup before changing the external ID.
- Select the region — region of the LINE channel. This information is used for billing purposes and should match the region of your LINE Official Account.
- Select the consent categories required to send LINE messages. When a customer opts in, consent is granted for all of them. Similarly, when opt-out is processed, these consents are automatically revoked.
- Optional: Enable Create a new customer profile on inbound opt-in to automatically create a customer profile for new incoming contacts - that is when a new user Adds your Official Account as a Friend. Existing customers are updated.
Configure two-way messaging
In Settings > Project settings > Channels > Mobile Messaging, select LINE to manage how incoming replies are handled.
Enable Track incoming message to treat incoming LINE messages as events in customer profiles. For more information, see Two-way messaging.
You can also set up keyword auto-responses.
ImportantFor the Grant consent consent action, LINE doesn’t support mapping new subscriber IDs. This means that Bloomreach uses the mapping from the corresponding sender to determine which external ID to use when creating a new profile. If no corresponding sender is found, the incoming message is discarded and no action is taken.
What's next
Updated 9 days ago