

Cart consolidation banner


Use case description
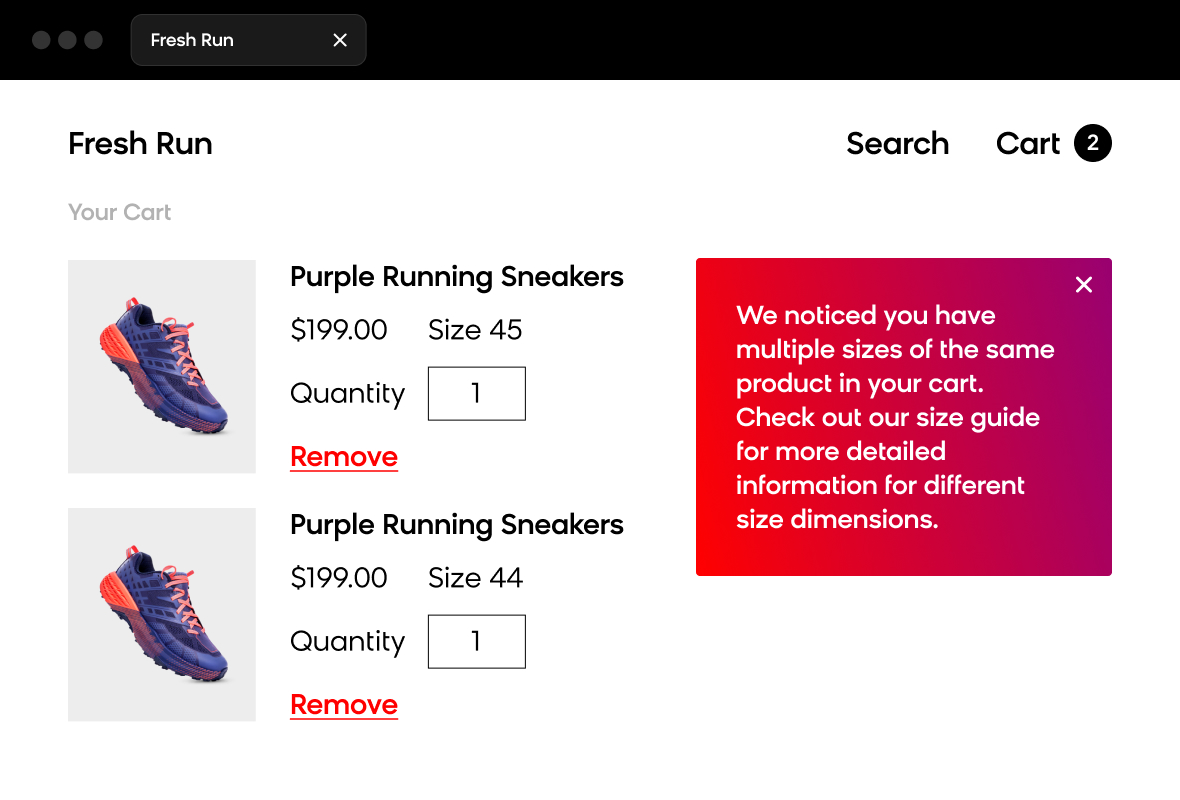
Reduce return rates and help shoppers find the right size with a real-time checkout banner that appears when customers add multiple sizes of the same product to their cart. This use case displays a dynamic banner that highlights duplicate items, leads shoppers to your sizing guide, and prevents accidental multi-size orders. By guiding customers to the right size before purchase, you can decrease return rates and improve customer satisfaction.
Key features
- Real-time cart detection: Automatically identifies when customers add multiple sizes of the same product.
- Checkout-optimized display: Appears at the critical moment when customers review their purchase.
- Sizing guide integration: Directs customers to your existing sizing resources.
Use case items
With this use case, you’ll get an:
- Cart consolidation banner: weblayer that appears on the checkout page when customers have multiple sizes of the same product in their cart.
- Evaluation dashboard: A comprehensive dashboard provides insights into user behavior, campaign performance, and overall engagement metrics. The dashboard allows you to evaluate the effectiveness of your marketing strategies and make data-driven decisions.
How to deploy the use case
After downloading the use case, follow these steps.
Meet the requirements
Check if the data in your project meets the requirements. The Use Case Center lists requirements for each use case during the deployment process.
Understand the use case logic
The Cart consolidation banner uses a tag-based trigger system to detect and respond to customer behavior in real time:
- The checkout tag monitors your checkout page for the checkout event.
- When a customer reaches checkout, the tag evaluates products in their cart.
- If the tag detects multiple sizes of the same product (matching product IDs), it triggers the banner.
- The banner displays with your customized messaging and sizing guide link.
- Customers can click through to your sizing guide to confirm their size before completing purchase.
Checkout tag setup
The checkout tag detects when customers add multiple sizes of the same product and triggers the banner display.
- Open your checkout page in a web browser.
- Right-click anywhere on the page and select Inspect.
- Navigate to the Console tab.
- Type
dataLayerand press Enter to view your site's data structure. - Locate the checkout event and product ID fields in the
dataLayeroutput. - Copy the dynamic values you identified.
- In Bloomreach, open the Checkout tag.
- Paste your
checkout event(rows 1-2) andproduct ID(rows 8-9) values into the event section: - Make sure the tag references the
banner IDof the Cart consolidation banner (row 29). This connects the trigger logic to the banner display.

- To configure display page, go to the Settings tab in Checkout tag and select Page containing URL in the Fire on field.
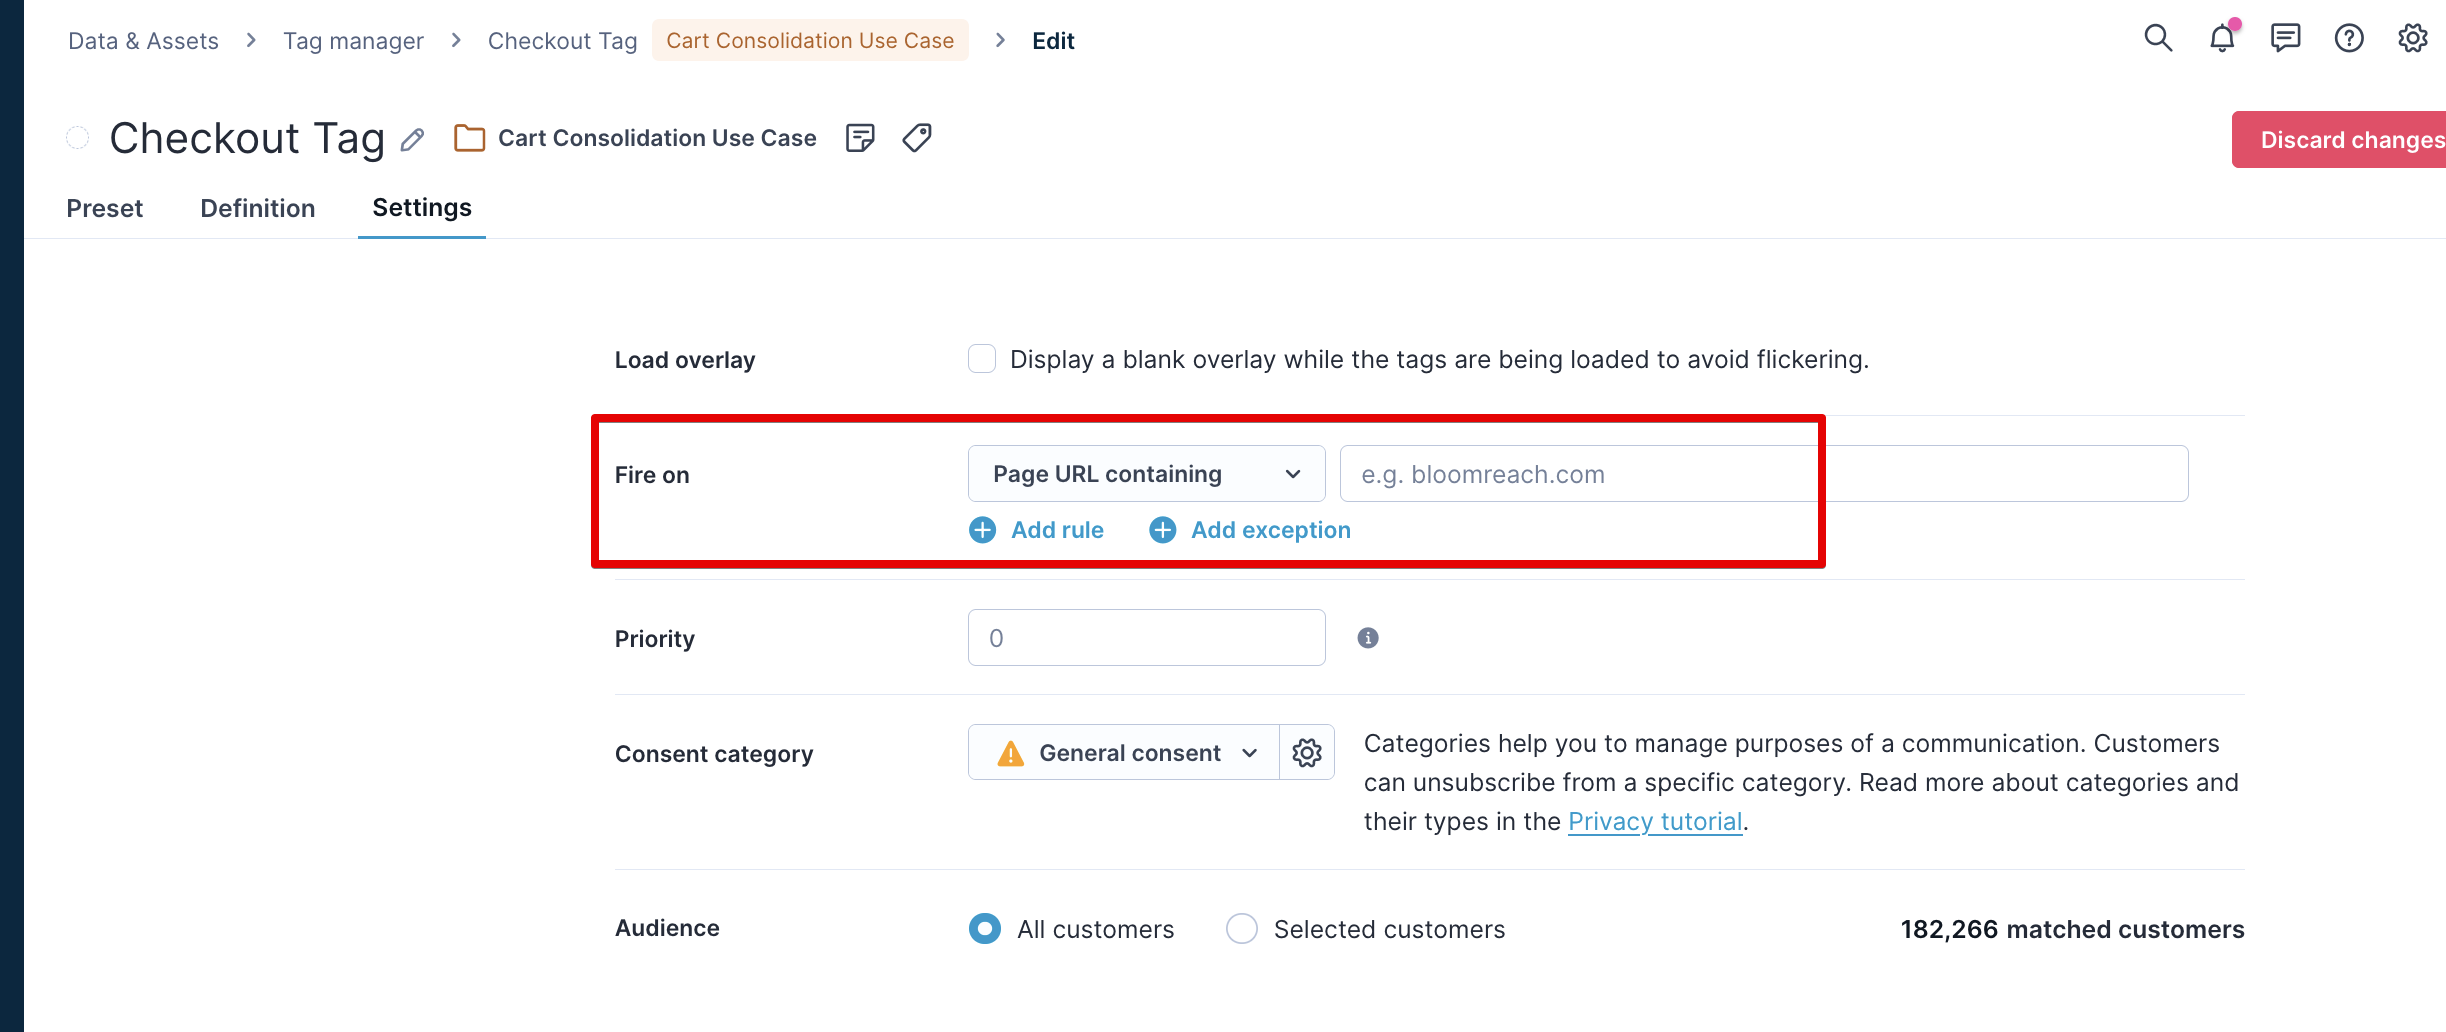
- Enter the URL pattern for your checkout page (for example,
yoursite.com/checkoutoryoursite.com/cart/review). This ensures the tag only fires on your checkout page.
NoteThe banner settings aren't relevant for this use case since the banner runs on the tag. Set all audience and display settings on the checkout tag instead. The banner itself should remain configured but not started independently.
Customize design and messaging
Customize the banner visuals and copy to reflect your brand identity and messaging style.
- Open the Cart consolidation banner in the Use Case Center.
- Navigate to the Design - Editor tab.
- Update the banner text to match your brand voice.
- Add the URL link to your sizing guide page.
- Adjust colors, fonts, and layout to align with your brand guidelines.
Test the banner
Test the use case before launching it to your full customer base. Testing helps you catch issues and verify the banner displays correctly.
Set up your test:
- Launch the Checkout tag in Tag Manager (don't start the banner separately, as it's triggered by the tag).
- In Tag Manager Settings, go to Audience and select Customers who....
- Filter to include only test users (for example, by filtering by cookie or email domain).
- In the Fire on field, confirm the page matches your checkout URL.
Run your test:
- Add multiple sizes of the same product to your cart.
- Go to your checkout page.
- Verify the banner displays correctly with your customized messaging.
- Click the sizing guide link to confirm it leads to the correct page.
- Test on different devices and browsers to ensure consistent display.
Troubleshooting tips:
- If the banner doesn't appear, verify the product identifiers match your
dataLayerstructure. - If the banner appears on the wrong pages, double-check your URL pattern in the Fire on field.
- If styling looks incorrect, review your design customizations in the Editor tab.
Launch the banner
Once you're satisfied with testing results, launch the banner to your customers.
- Open the Cart Consolidation Banner settings.
- Configure your desired settings in the Settings tab.
- Click Save (don't click Start on the banner itself, since it's triggered via the Checkout tag).
- Open the Checkout tag.
- Remove any test audience filters from the Audience settings.
- Verify all settings are configured correctly.
- Click Start to launch the tag.
The banner will now display automatically whenever customers add multiple sizes of the same product to their cart.
Other resources
Learn how to enhance and optimize the banner performance with different tips and tricks from Bloomreach experts.
Updated 3 months ago