
Working with content in Affinity
After you generate your journey, Affinity creates one or more content nodes containing your email messages. This guide walks you through understanding, viewing, and editing the content Affinity generates—helping you verify that emails align with your journey goals and brand guidelines.
Content node overview
Affinity generates email content tailored to your journey goals. Each Content node includes subject lines, message copy, personalization, and consent validation—all created automatically from your journey brief.
Each content node contains:
- Email subject line and message body
- Personalization logic based on customer data
- Product recommendations (when applicable)
- Consent validation (automatically added to ensure messages are sent only to customers with valid marketing consent)
Open content node
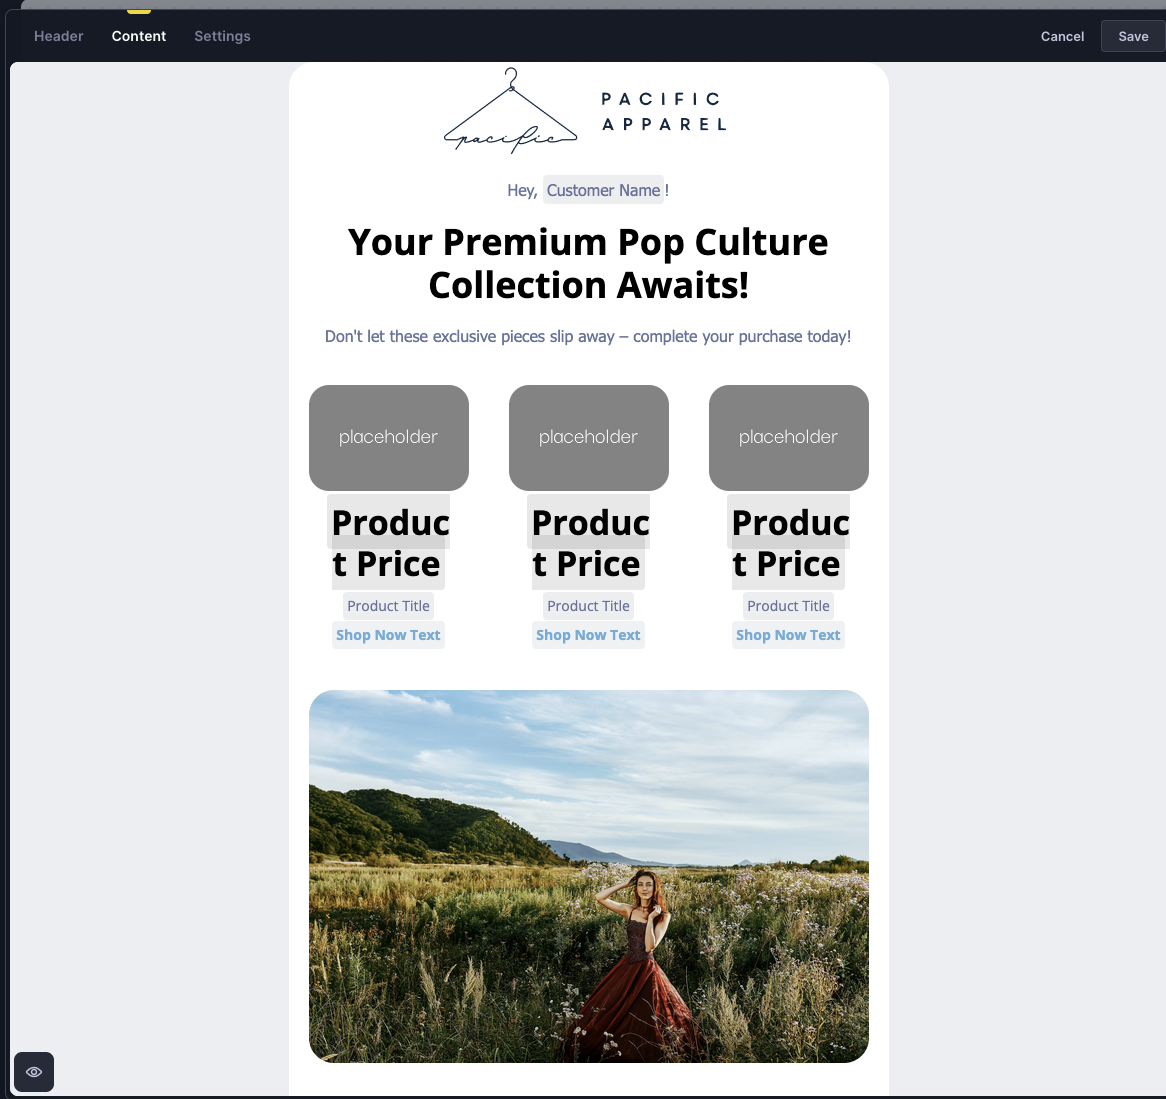
Double-click an Email node on the Canvas to open the content editor. The visual editor displays by default, showing your email design and layout.
Dynamic or personalized content appears as placeholders with descriptions of the underlying logic rather than actual customer values. To see how content looks for specific customers, use the preview mode.
Personalization
Affinity generates personalized content tailored to individual customers. Understanding how personalization works helps you verify that emails deliver the right message to the right audience.
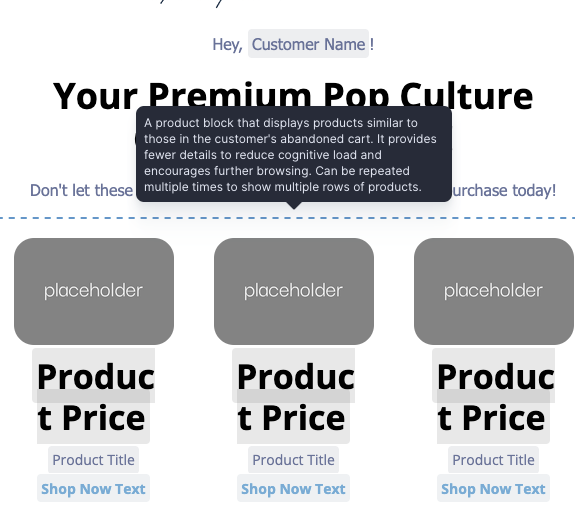
Product blocks
Product blocks display items based on customer behavior—such as abandoned cart products, browsing history, or AI-powered recommendations. These appear as placeholders because the specific products vary for each customer.
Hover over any product block to see how Affinity selects products (for example, "Products from abandoned cart" or "Recommended based on purchase history").
Within each placeholder, you can see:
- Which product attributes display (name, price, image).
- Static text that accompanies products.
- Which product data drives images.
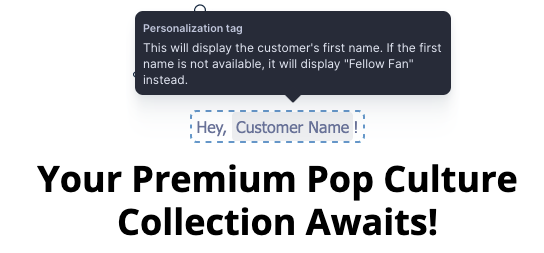
Personalization tags
Text content includes personalization tags that insert customer-specific information—names, loyalty points, or product details.
Hover over any personalization tag to see what customer data it retrieves and any conditional logic it contains. Some tags include conditions that change sentence content based on customer attributes.
Preview and test
Preview how personalization resolves for actual customers and send test emails to verify that content displays correctly in email clients.
Click the eye icon in the bottom-left corner to access preview and testing options.
Preview
The Preview tab shows how your email looks for a specific customer, with all personalization and dynamic content resolved.
- Select a customer's name.
- Toggle Fully resolved content only to o show only customers who meet all personalization requirements for this email.
- Review the email in the visual editor.
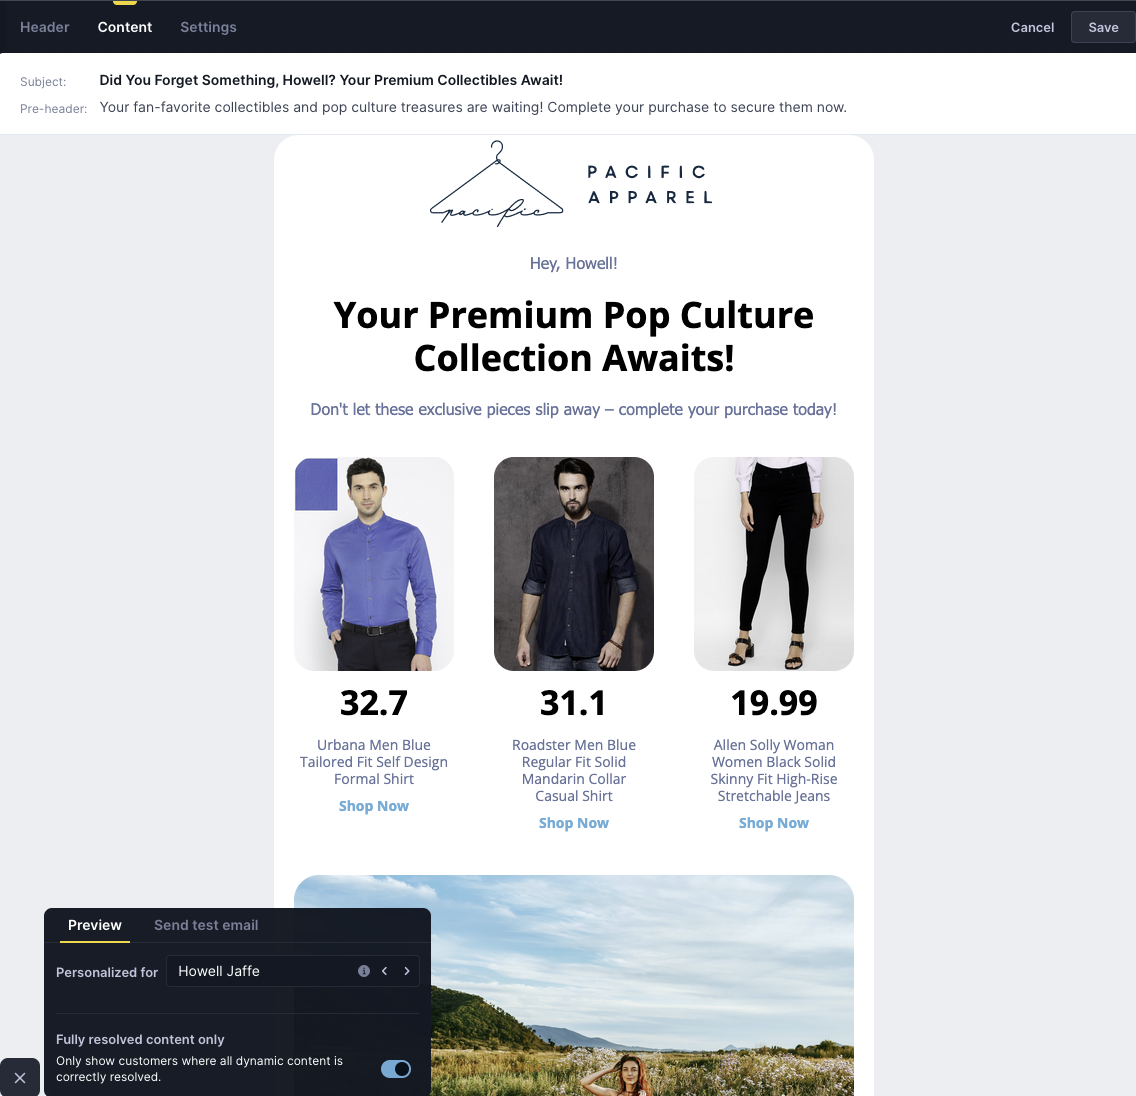
Preview different customers to verify that personalization works correctly across your audience—especially customers with minimal data or different segment attributes.
Test emails
The Send test email tab lets you check how content appears in actual email clients.
- Click the Send test email tab.
- Select which customer's personalized version to send.
- Enter up to 20 email addresses (comma-separated).
- Toggle Fully resolved content only to send only when all dynamic content resolves correctly.
- Click Send test email.

The Send test email tab lets you check how content appears in actual email clients. Select which customer's personalized version to send, enter up to 20 email addresses (comma-separated), and toggle Fully resolved content only to send only when all dynamic content resolves correctly.
Edit content
You can modify content conversationally (through natural language) or manually (directly in the visual editor). For comprehensive guidance on editing strategies, structural changes, and when to use each approach, see Editing, refining, and launching.
To understand what Content node elements can be edited conversationally, manually, or not at all, see Content editing capabilities.
Conversational editing
Select a content block in the editor, then describe your desired changes in the conversation panel. Affinity updates the content or personalization logic based on your instructions.
Example requests:
- "Mention the customer's loyalty points in the opening paragraph"
- "Make the tone more urgent"
- "Add a sense of scarcity to the call-to-action"
Manual editing
Click content blocks directly in the visual editor to make precise adjustments:
- Add, remove, or reorder blocks.
- Rewrite text.
- Update images.
- Adjust email send and reply-to addresses.
Brand consistency
Brand assets
Affinity can learn to reuse your brand assets—email templates, product displays, and visual styles—adapting them across different journeys without inventing new designs.
To set up brand assets, contact your Bloomreach Customer Success Manager.
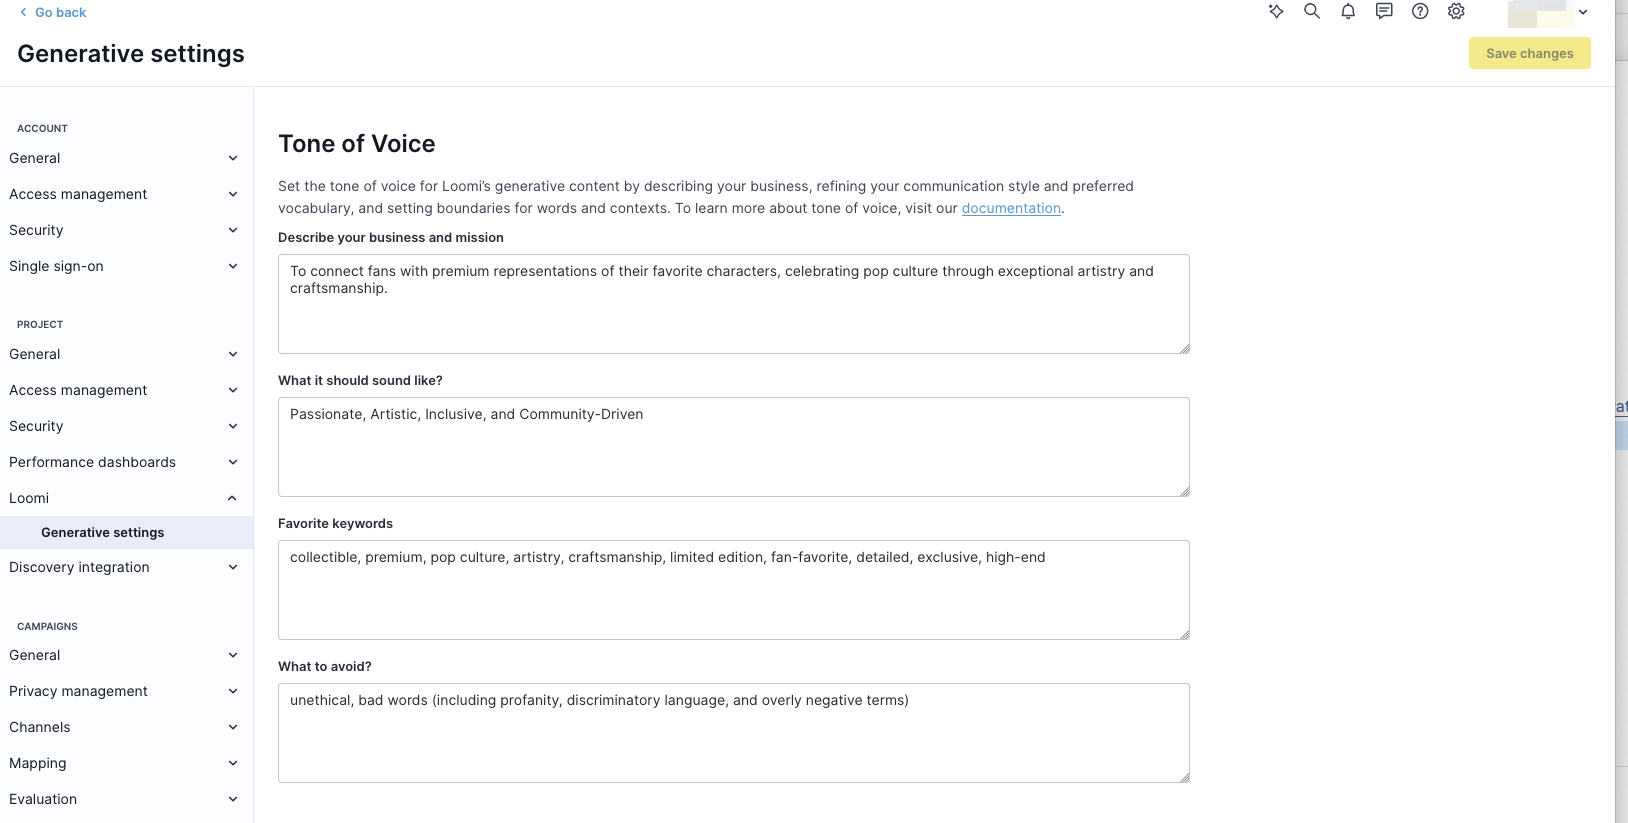
Brand tone
Set your brand's tone of voice in Bloomreach Engagement Project Settings:
- Navigate to Project Settings.
- Define your preferred tone and style.
- List phrases to use or avoid.
- Add brand-specific language preferences.
Affinity applies these guidelines automatically when generating content, ensuring consistency across all journeys.
Email settings
Email settings—including email integration and identity transfer for clicks—are inherited from your Engagement project settings. You can't adjust these per individual Affinity email.
To change email settings, update the default values in the Engagement project settings. Changes apply to all new Affinity journeys.
Best practices
Test before launch
Before launching your journey:
- Preview emails across different customer segments.
- Check customers with minimal data to verify proper handling of missing information.
- Verify product recommendations align with your journey goals.
- Review all conditional logic variations.
Personalize subject lines
Include relevant customer information to drive higher open rates:
- Mention the most expensive viewed product in the subject line.
- Include the customer's loyalty points balance in the subject line.
- Reference the first product shown in the email in the subject line.
Personalize hero
Capture attention with personalized hero content:
- Show the most expensive last-viewed product in the hero image.
- Display the first recommended product in the hero image.
- Feature products from the customer's favorite brand in the hero section.
Monitor and iterate
- Test multiple subject line strategies and compare open rates.
- Experiment with hero personalization to improve click-through rates.
- Track performance in the Evaluation dashboard.
- Refine based on journey data.
Updated about 2 months ago