

Unified SSO for Okta
Data hub rolloutEngagement customers are being upgraded to unified login in several phases. Your registered support contacts will be notified when the login experience is upgraded for your organization. If your account hasn't been upgraded yet, the pre-existing Administration documentation still applies.
Unified single sign-on (SSO) authentication for Okta enables your team to access Bloomreach using their existing company credentials (linked with Okta).
This guide walks you through configuring Okta as your identity provider using SAML 2.0 authentication.
Prerequisites
Before configuring SSO for Okta, ensure you have:
- Admin role in Bloomreach.
- Admin access to Okta identity provider.
- Active SSO feature on your account (contact your Customer Success Manager for activation).
- User email addresses that to receive verification emails.
Configure Okta SSO
To enable Okta as your identity provider for Bloomreach authentication, you need to set up a SAML 2.0 app integration in your Okta dashboard. You’ll be switching between Okta and Bloomreach to complete the setup:
- Okta: Create the integration app (Step 1).
- Bloomreach: Enable SSO in Bloomreach (Step 2).
- Okta: Configure the SAML settings and get metadata URL (Step 3-4).
- Bloomreach: Complete the configuration (Step 5).
NoteEach step in the procedure represents consecutive action on the previous step and assumes its completion.
Step 1: Create application integration
Access your Okta administration dashboard and follow these steps:
- Go to Applications.
- Click Create App Integration.
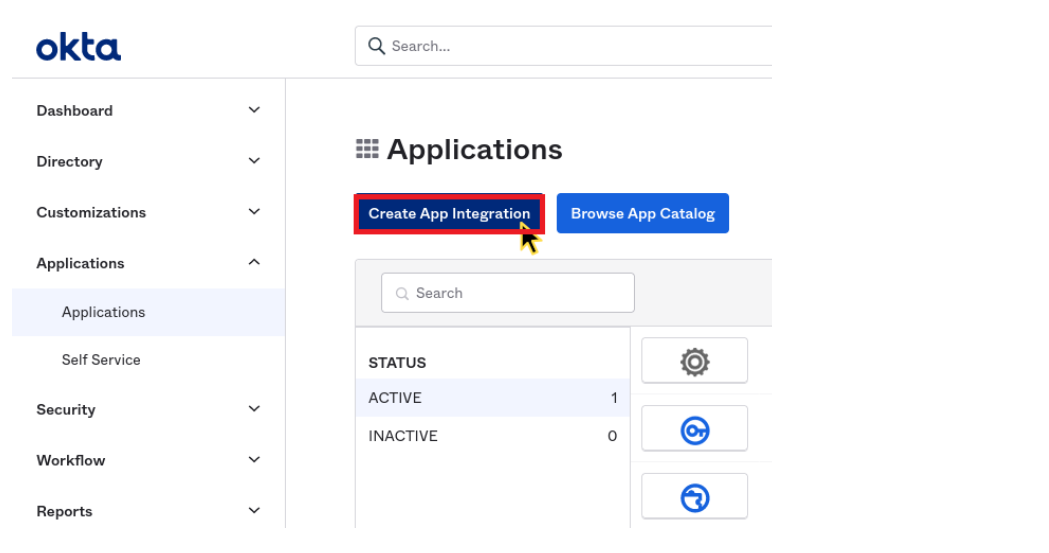
Create new app integration in Okta.
- Select SAML 2.0 as the sign-in method.
- Click Next.
- Set the application name and icon.
- Click Next.
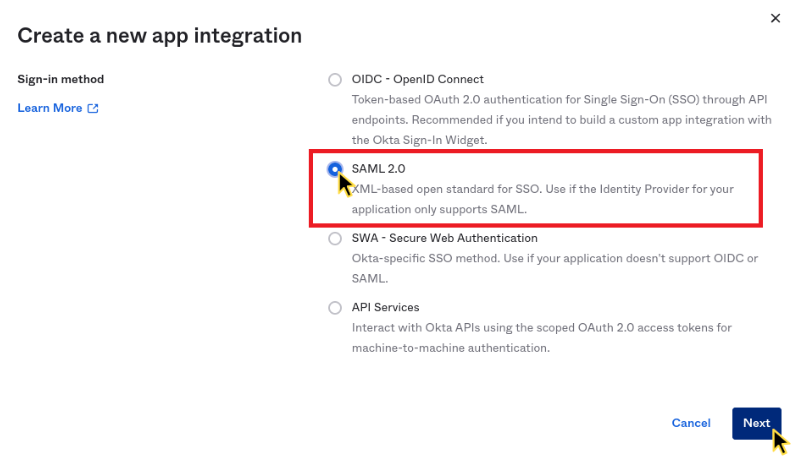
Select SAML 2.0 as a sign in method.
Step 2: Enable SSO and get configuration data
Switch to Bloomreach to enable the SSO and get the required configuration values:
- Go to Administration > Settings > Single sing-on > Preferences.
- Enable the Single sign-on integration toggle.
- Click Show configuration in the Service provider metadata section.
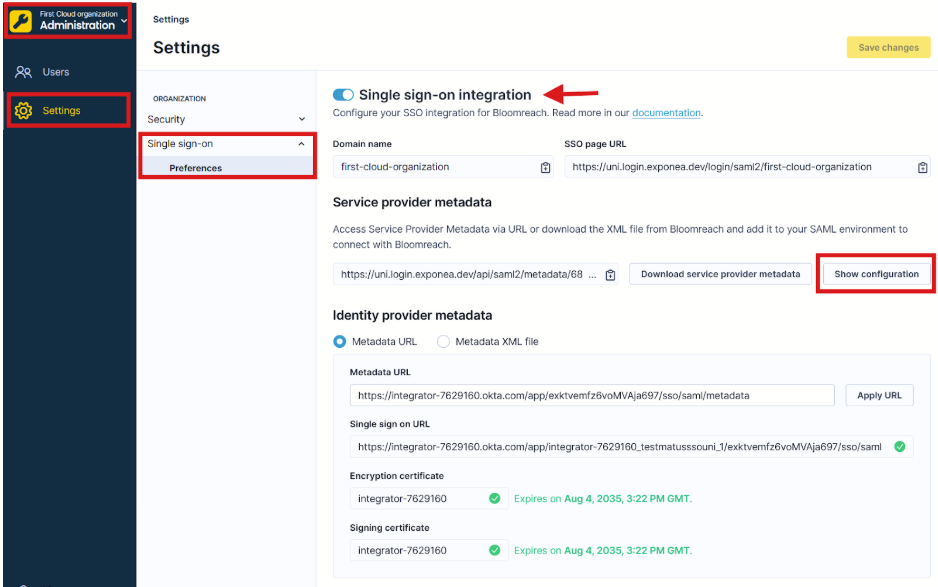
Enable SSO and get configuration data in Bloomreach.
The Service Provider Configuration window displays the values you need. Keep this window open as you'll need the Single Sign-On URL and Entity ID values from it in the next step when you return to Okta.
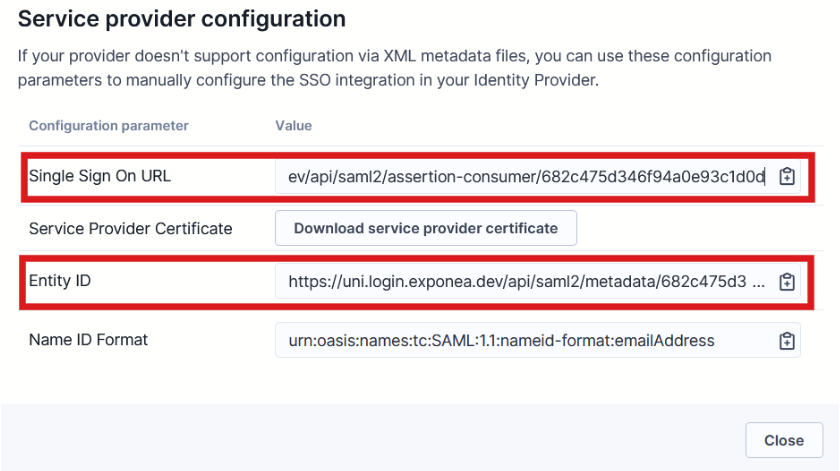
Okta SSO values needed for Bloomreach integration.
Step 3: Configure SAML settings
Return to Okta and configure the SAML settings:
- Copy the single sign-on URL from Bloomreach Administration section.
- Paste it into the single sign-on URL field in Okta.
- Copy the Entity ID from Bloomreach Administration section.
- Paste it into the Audience URI (SP Entity ID) field in Okta.
Configure these additional settings in Okta:
| Setting | Value |
|---|---|
| Name ID format | EmailAddress |
| Application username |
In the Attribute Statements section, add three attributes:
| Name | Name format | Value |
|---|---|---|
email | Basic | user.email |
first_name | Basic | user.firstName |
last_name | Basic | user.lastName |
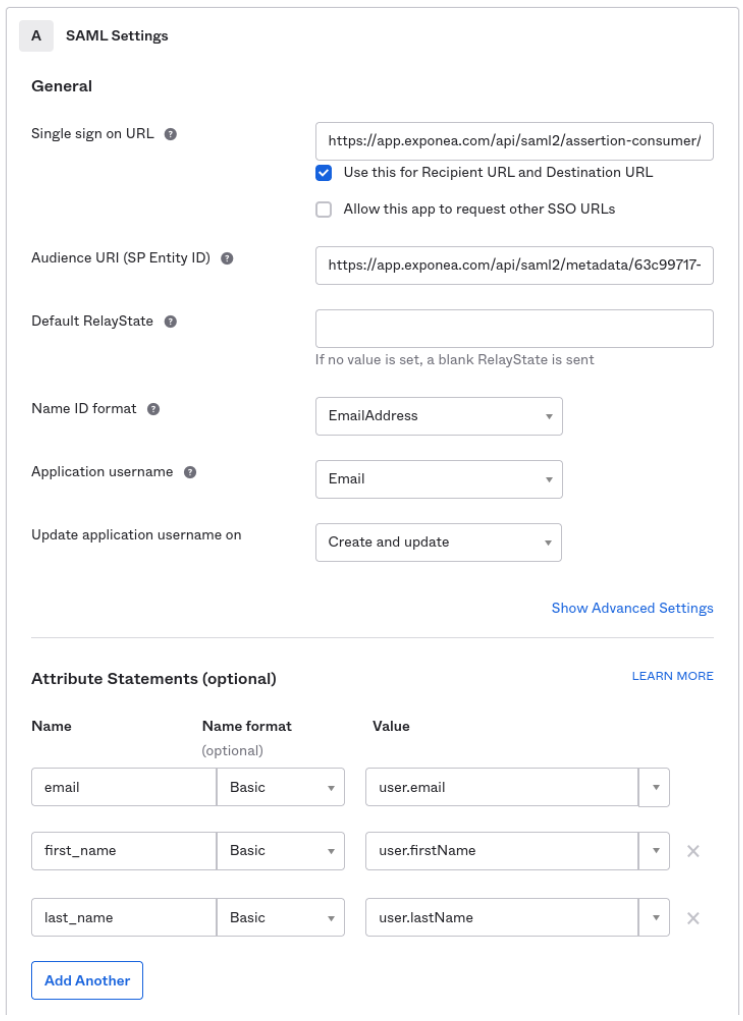
SAML settings in Okta.
NoteAdd a phone attribute (optional) if you have phone data available (for example, using
user.primaryPhoneattribute).
Click Next. Okta displays a feedback form asking how you'll use this integration. You can provide feedback or skip this step. It doesn't affect your configuration.
Step 4: Get metadata URL
Get the metadata URL from Okta:
- On the Application settings page, go to the Sign On tab.
- Scroll to SAML Signing Certificates.
- Find the active certificate.
- Click Actions > View IdP metadata.
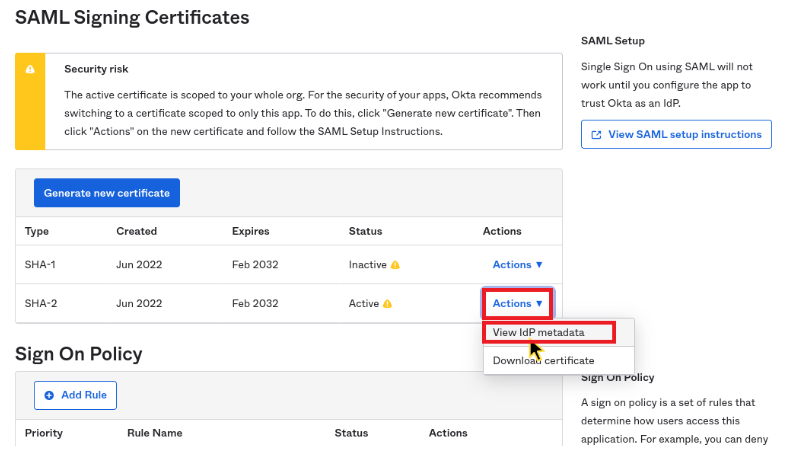
Get metadata URL from Okta.
- Copy the URL from your browser's address bar to the clipboard.
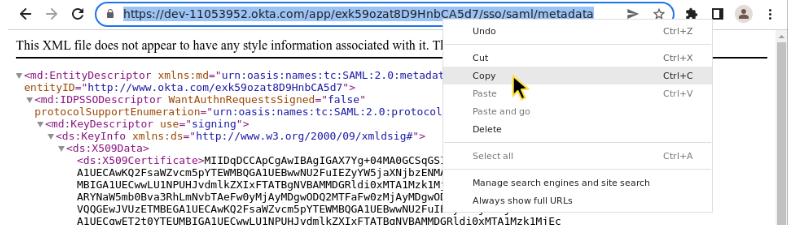
Copy the URL.
Step 5: Complete the configuration
Finish the configuration in Bloomreach:
- Go to Administration > Settings > Preferences.
- Paste the URL into the Metadata URL field under Identity provider metadata.
- Click Apply URL.
Verify that the metadata contains a valid SSO URL and that the encryption/signing certificates haven't expired.
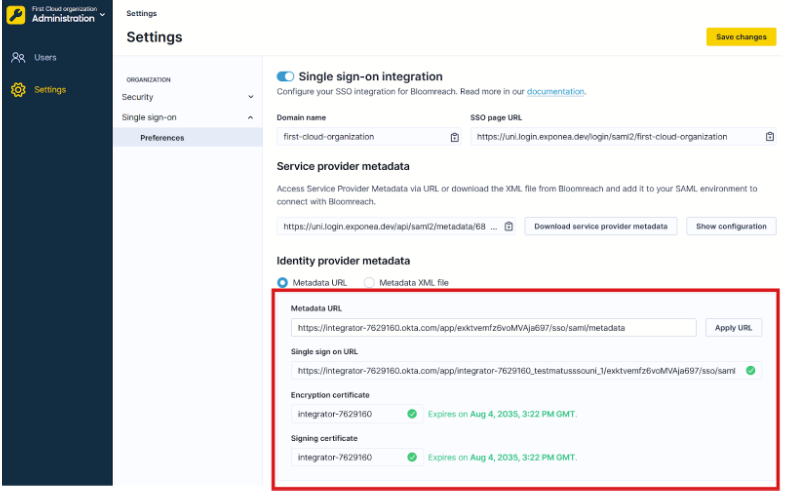
Paste the metadata URL to Bloomreach settings.
- Click Save changes.
- Navigate to Administration > Settings > Security > Authentication settings.
- Enable single sign-on as an allowed authentication method.
- Optional: To require all users to use SSO (and prevent email/password login), disable Email and Social authentication methods. Ensure the SSO is working before enforcing this step.
- Click Save changes.
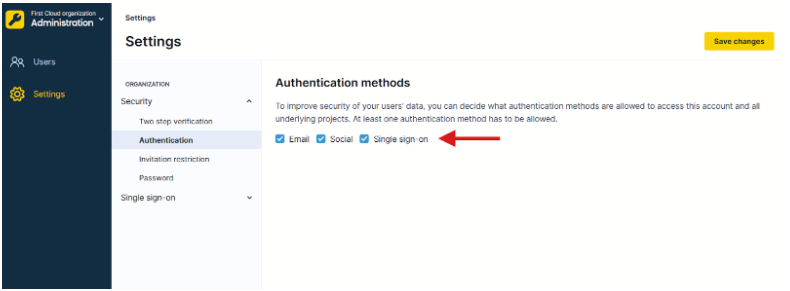
Enable SSO login method.
All users you assign to the application in Okta can now log in to the Bloomreach application and access their subscribed Bloomreach products using Okta SSO.
Next steps
- Assign users to the application in Okta.
- Assign user roles via SSO (see Unified SSO authorization for Okta).
- Test the SSO login with a test user.
- Communicate the change to your team.