

Unified user management: Common tasks
Data hub rolloutEngagement customers are being upgraded to unified login in several phases. Your registered support contacts will be notified when the login experience is upgraded for your organization. If your account hasn't been upgraded yet, the pre-existing Administration documentation still applies.
This guide walks you through common user management tasks in the unified administration interface. Before you begin, familiarize yourself with the organizational structure in Unified user management overview.
How to add a new user
Go to Administration > Users > Add users and follow the dialog instructions. Select the application to which you want to add the user.
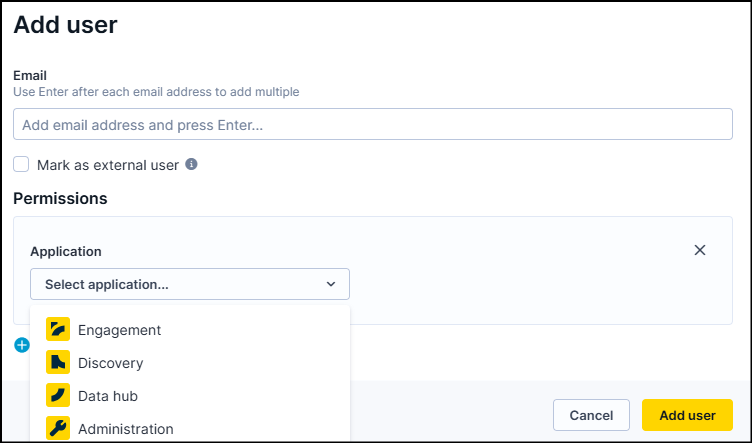
For each user in any application, you need to provide:
- Email address
- Application (Marketing, Search, Data hub, or Administration)
- Scope
- Workspace/project for Marketing and Data hub
- Organization/account/environment for Search
- Roles
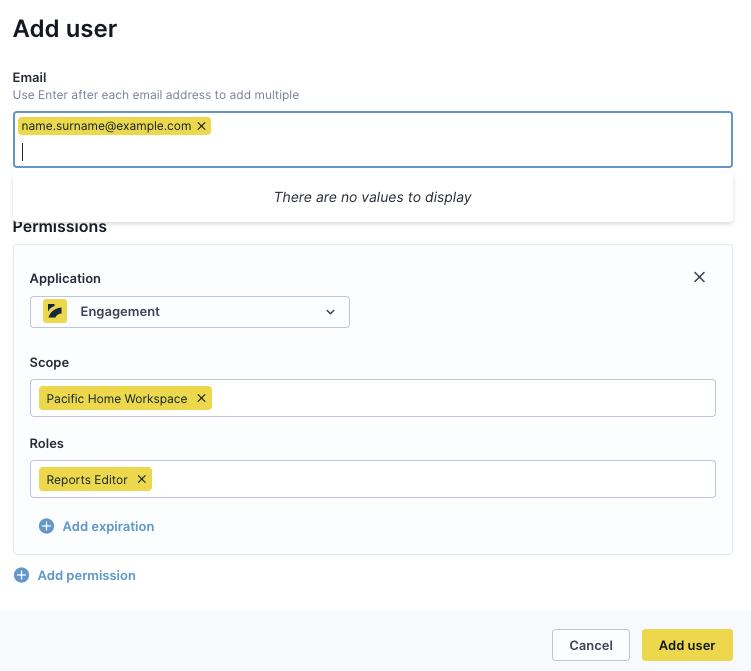
Marketing
-
Enter the user email and select Marketing as the application.
-
Define the scope by selecting either the entire workspace or specific projects.
NoteIf you select the entire workspace, the assigned permissions will apply to all projects within. You can't assign different permissions at the workspace and project levels for the same user.
-
Select the user roles. The available roles are automatically filtered based on your selected scope (workspaces and projects).
-
You can also set an expiration date for temporary user access.
-
Review the details and click Add user.
Search
-
Enter the user email and select Search as the application.
-
Define the scope by selecting the entire workspace/account, specific sites/environments, or a combination of both.
-
Select the user roles. The available roles are automatically filtered based on your selected scope (workspaces and sites/environments).
-
Review the details and click Add user.
NoteSearch doesn't support expiration dates for users.
Data hub
-
Enter the user email and select Data hub as the application.
-
Define the scope by selecting the entire workspace, specific catalogs, or a combination of both.
-
Select the user roles. The available roles are automatically filtered based on your selected scope (workspaces and catalogs).
-
Optionally, set an expiration date for temporary user access.
-
Review the details and click Add user.
Administration
-
Enter the user email and select Administration as the application.
-
Select the user roles. The available roles are automatically filtered based on your organization's permissions.
-
Review the details and click Add user.
User management operations
Go to Administration > Users to view all users based on your assigned permissions. From this screen, you can view, filter, and perform operations on users.
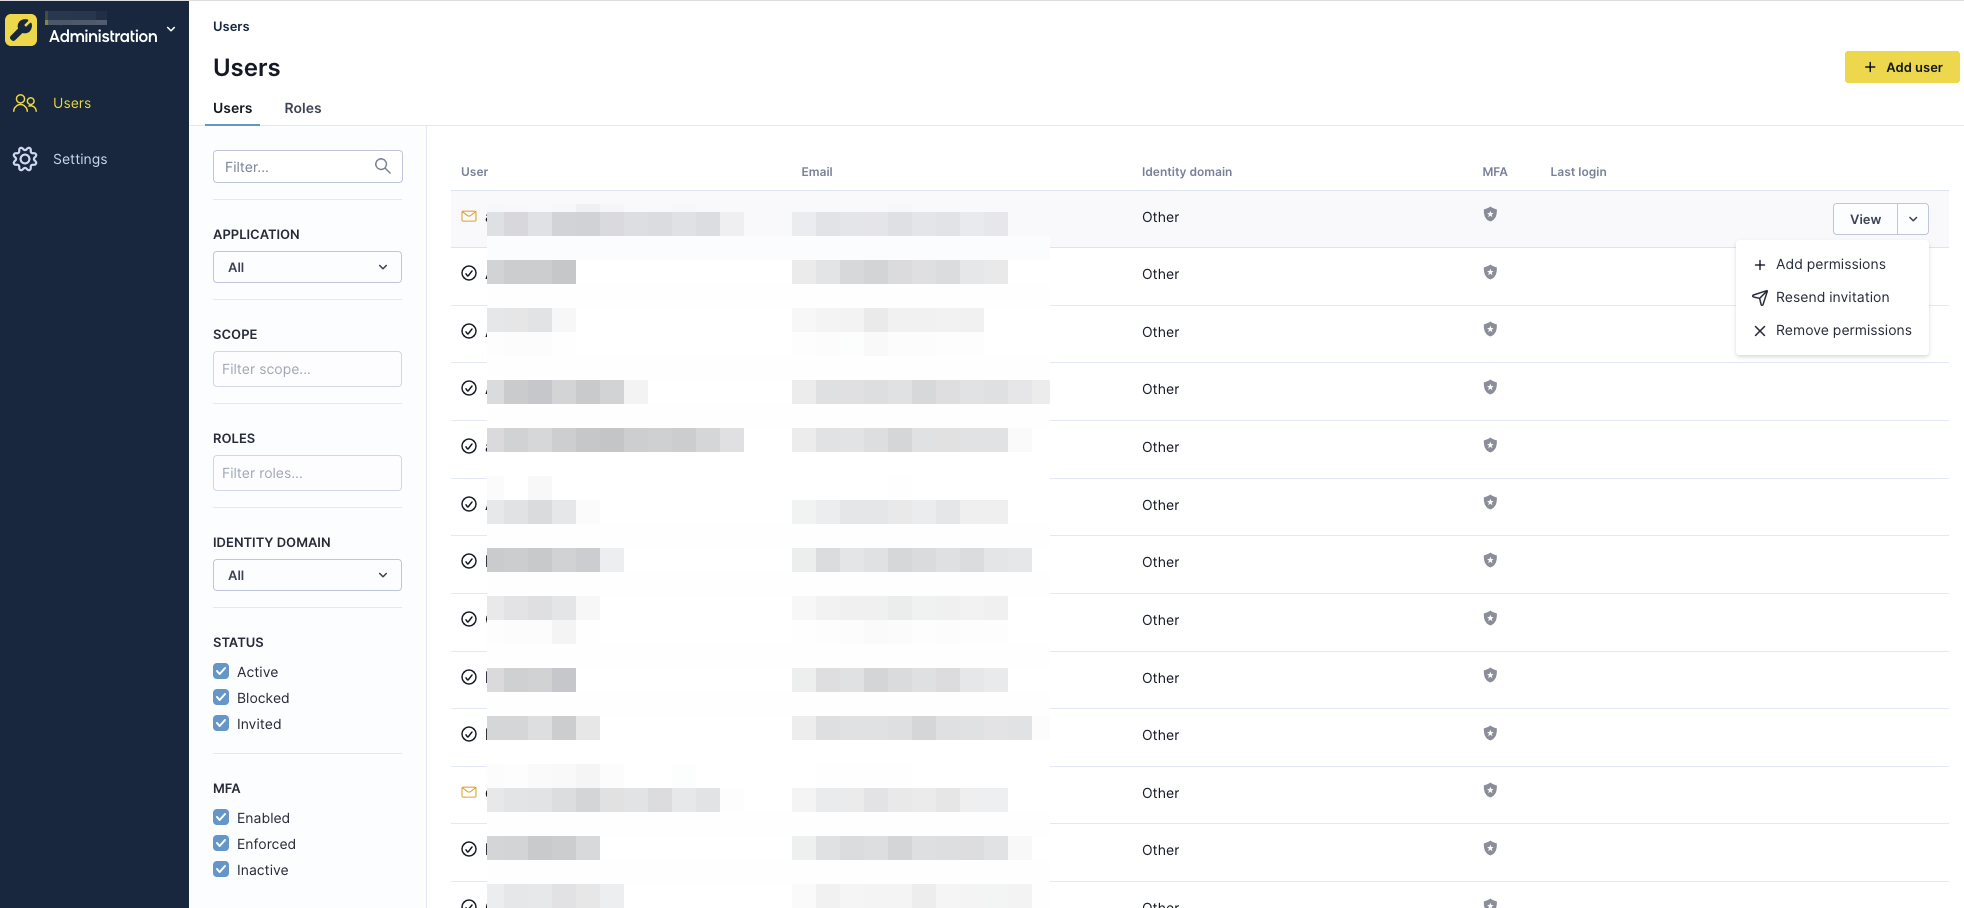
Available operations
Block and unblock user
Immediately blocks or unblocks user access to the organization.
Terminate user session
Ends the active user session and forces immediate logout.
Enforce password reset
Requires the user to set a new password at next login.
Mark as external user
Exempts the user from organization-level security measures such as SSO authentication, allowing independent login. This action can't be undone.
Add permission
Grants additional permissions to an existing user, similar to the "Add user" process.
Resend invitation
Sends a new invitation and expires any previous pending invitations.
Remove permissions
Removes all permissions for the user in the current scope without deleting the user from the organization.
Delete user
Permanently removes the user and revokes all access to Bloomreach services. Available only for organization administrators.
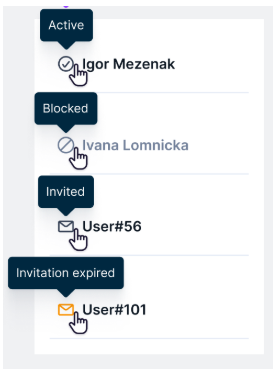
User status indicators
Users display status icons indicating their current state:
- Active: User has accepted the invitation and can log in.
- Blocked: User can't access the organization.
- Invited: User has a pending invitation.
- Invitation expired: User's invitation has expired and needs to be resent.
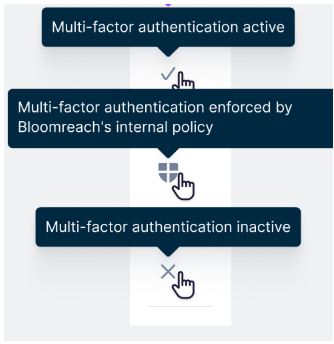
MFA status indicators
Multi-factor authentication status displays three states:
- MFA enabled: User has MFA configured.
- MFA enforced: MFA is required by policy.
- MFA inactive: User doesn't have MFA enabled.
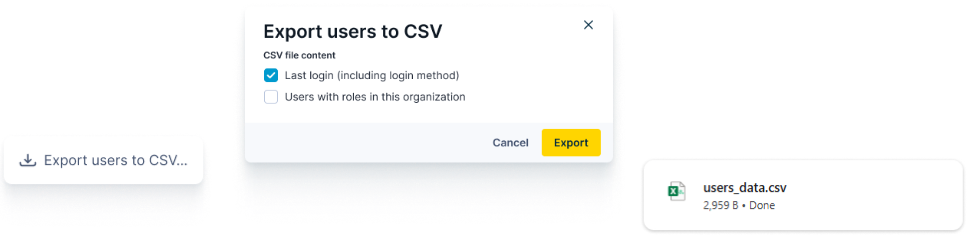
How to export users
Export user lists for compliance, auditing, or reporting purposes.
- Go to Administration > Users.
- Click the three dots in the top right corner.
- Select Export.
- Follow the dialog to export the user list in CSV format.
How to set a custom role
Unified user management supports custom roles for both Marketing and Data hub. For detailed information, see Custom role documentation.
NoteThe functionality is the same for both products, but navigation differs slightly. You need Cloud Organization Admin role to manage custom roles.
Creating a custom role
- Go to Organization > Administration > Users > Roles.
- Click +Create custom role in the top right corner.
- Select +Add inherited role to base your custom role on an existing role.
- Customize permissions as needed.
- Save your custom role.
Updated 3 days ago