

Create legacy catalogs
This guide explains how to set up and manage legacy catalogs with non-Data hub integrations and Data hub enabled workspaces still using the legacy catalogs workflow.
When to use legacy catalogs
Legacy catalogs are relevant if you have one of these:
-
Non-Data hub integrations: Your workspace isn't Data hub enabled. Follow the standard creation workflow.
-
Data hub enabled workspace using legacy catalogs workflow: Your workspace has been upgraded to Data hub, but your workflows still use legacy catalogs. Contact your Bloomreach representative to enable the legacy catalog module for your workspace so you can continue working with catalogs as before while you plan your transition to Data hub catalogs. You then see a legacy toggle in the Catalogs interface.
Prerequisites
Before you begin, ensure you have the appropriate permissions.
Steps to create legacy catalog
The following steps illustrate the standard legacy catalogs creation workflow:
1. Create a new catalog
- To start a catalog import, go to Data & Assets > Imports > + New import > + New Catalog.
- This redirects you to the Catalogs page. Click + New catalog. For Data hub enabled workspaces, toggle ON the legacy mode.
- Name the catalog.
2. Choose a data source
Select the source your catalog data is coming from. All standard import sources are supported. For details, see Data sources.
After selecting your source, click Preview data to confirm the format looks correct. If the preview looks off, check that the right delimiter and encoding are selected. Click Next.
Preview data to check format
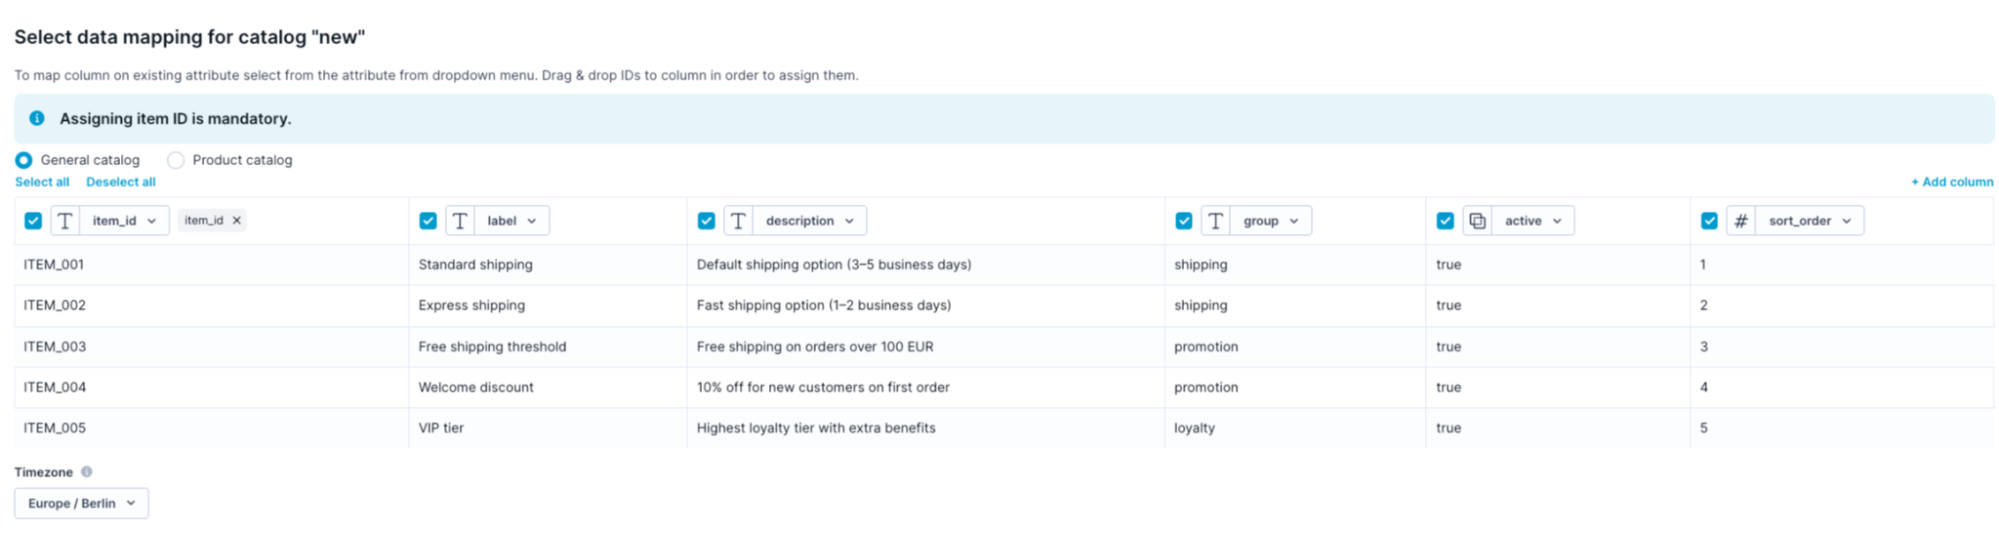
3. Map your data
Select catalog type
The platform supports two catalog types. Choose Product catalog at the top of the mapping screen if you're importing a product catalog. This displays additional tags to assign to your columns.
Assign required IDs
At least one ID tag must be assigned:
-
General catalogs: Only item_id is available and mandatory.
-
Product catalogs: Two IDs are available — item_id and product_id. A single product (product_id) can have multiple variants, each with its own item_id. For example, "iPhone X Case" with product_id "123" can have separate item_id values for black, white, and green variants.
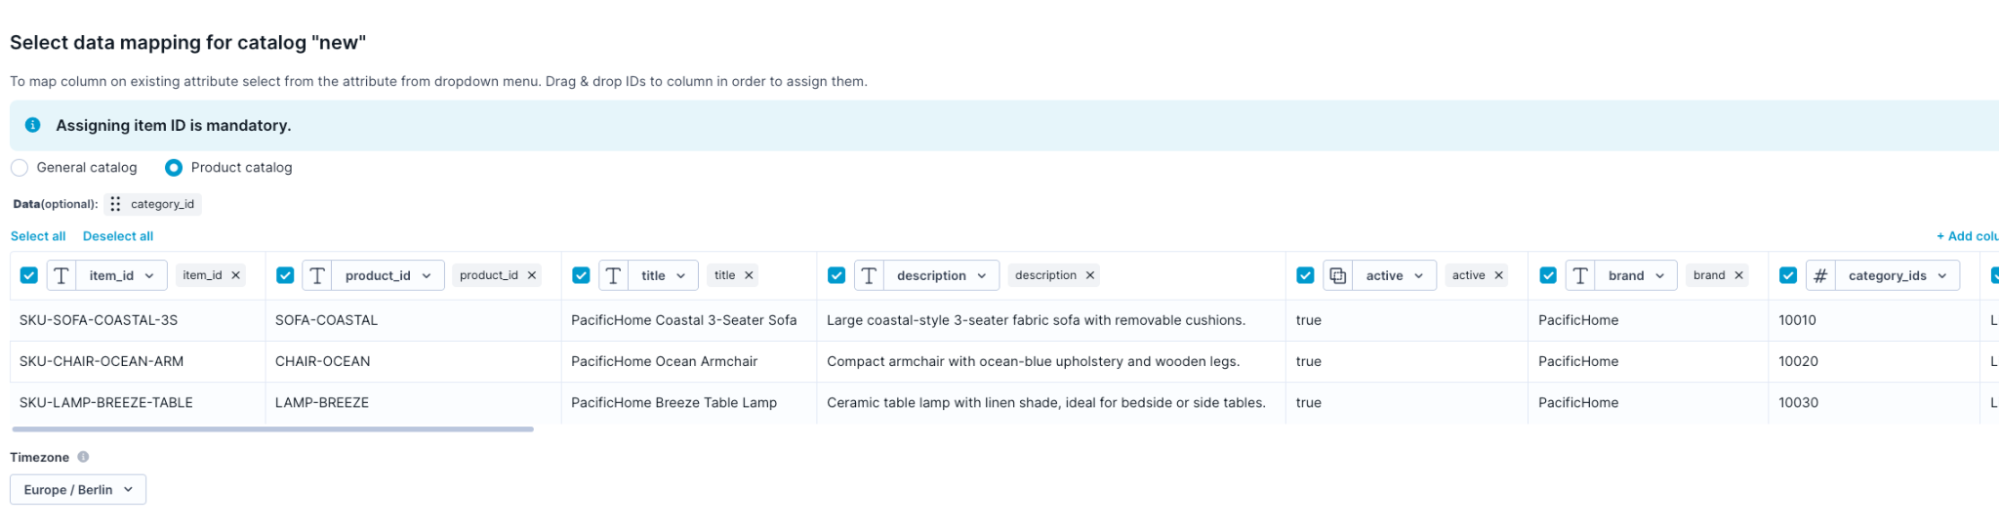
Map data and set data types
Set data types
Set the correct data type for each column — text, number, date, and more. Data types affect how the platform filters and displays values. Each data type is explained in the Data manager article.
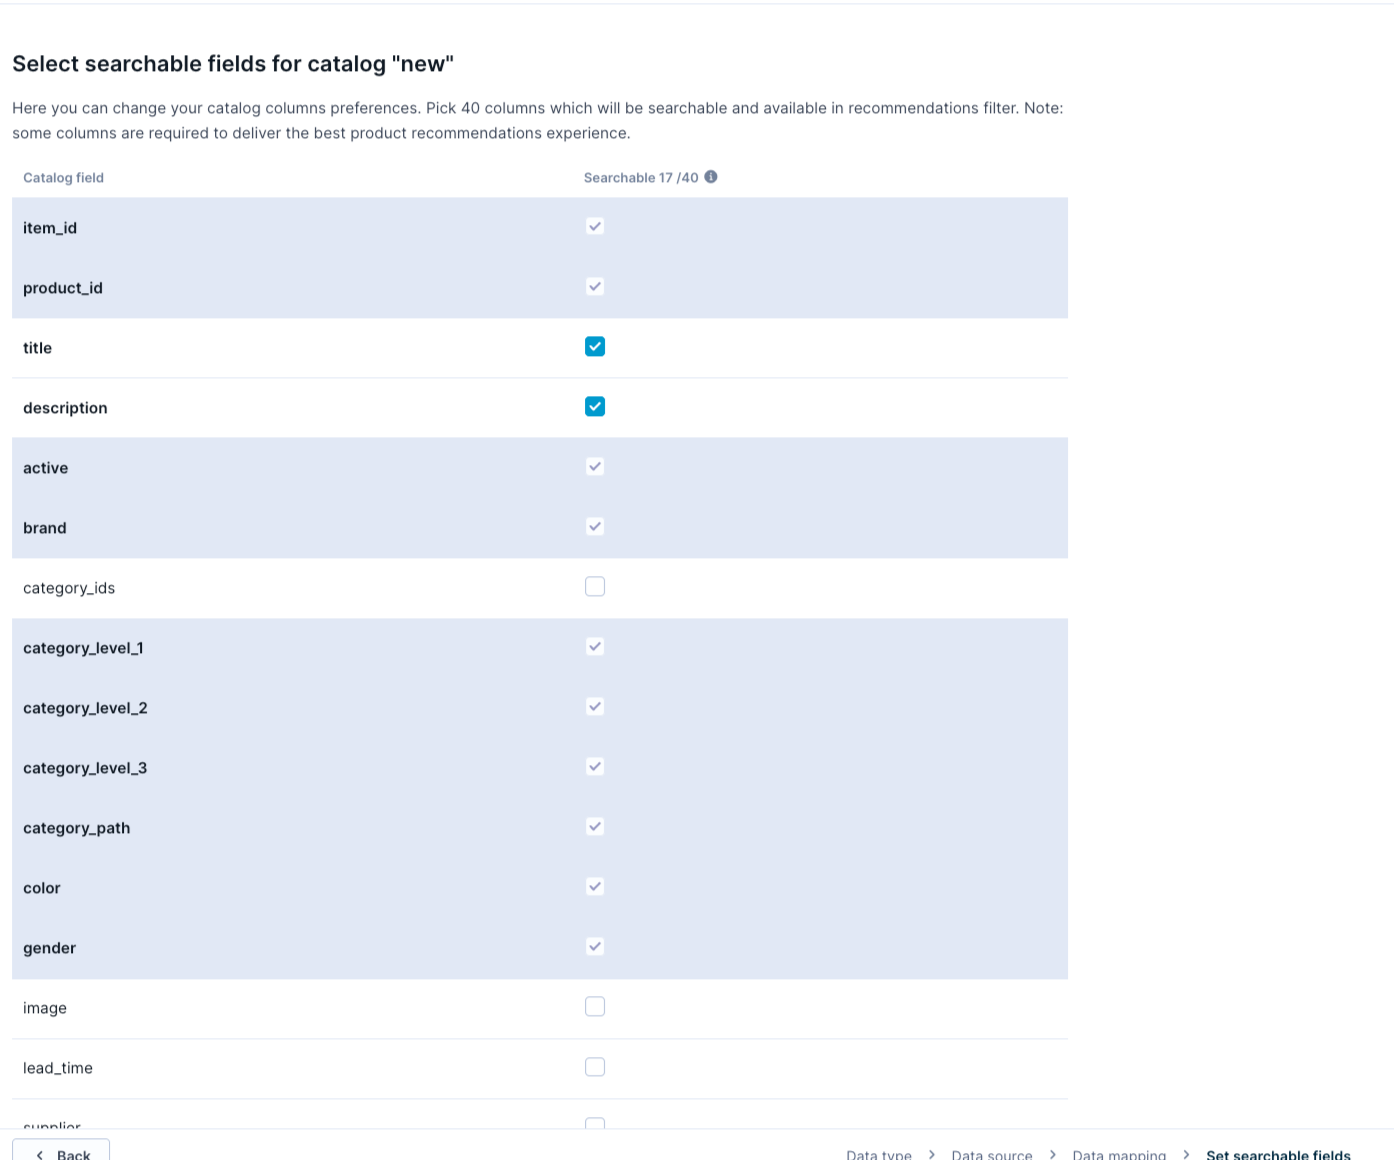
4. Set searchable fields
If you're importing a catalog for the first time, select which fields are searchable. Searchable fields are indexed in the platform's search and are the basis for recommendations. For example, to make product recommendations based on brand, the brand column must be set as searchable.
Set searchable fields
Searchable field limits:
- Searchable fields can only be defined on first import. To add more searchable columns later, reimport the data to a new catalog.
- A maximum of 40 columns can be set as searchable.
- List and JSON fields cannot be set as searchable.
5. Schedule a repeated import (optional)
If you're importing from a dynamic source — Database, URL, or Bloomreach — you can schedule repeated imports. For details, see Schedule a repeated import.
6. Run the import
Complete the wizard steps to start the import. Check the status in the import list by clicking Refresh. Large files take more time to process.
You can monitor progress using the two-stage progress bar. Data is available only after both the import and processing stages are complete. For details, see Track import progress.
Updated 4 months ago