

Experiments editor
The experiments editor is an inline visual editor that loads directly on your website when you create or edit an experiment. It lets you select and modify any element on the page without writing code. This guide walks you through every part of the editor and explains how to apply, manage, and save your modifications.
Editor interface
When the editor loads, you'll see a toolbar with the following controls:
| Control | Description |
|---|---|
| Browsing mode | Switch to browsing mode to navigate to another page on the website. |
| Close the editor | Close the editor and return to Bloomreach without saving. |
| Experiment variants | Create and switch between experiment variants. Compare variant performance through A/B testing. |
| List of modifications | Expand the full list of modifications you've made. Click a modification to return to its editing menu. Delete a modification to revert that element to its original state. |
| Mobile preview | Preview your experiment on a mobile screen size. |
| Modification selection | Shows the currently selected elements on the page when clicking the page or a modified element. |
| Modifications list | The menu that appears when you click an element on the page. See Modify elements for details. |
| Number of selected elements | Shows how many elements are currently selected. Hold Shift and click to select multiple elements. |
| Preview | Generate a shareable link to your modified website. The link is valid for 24 hours and doesn't launch the experiment. |
| Save | Exit the visual editor with or without saving your changes. This doesn't launch the experiment. To launch it, exit the editor and click Start in Bloomreach. |
| Selector | CSS selector of the current modification or the currently selected element on the page. |
| Top-level modification selection | Shows the currently selected head or body of the page when clicking an area modified by the selected modification. |
| Top-level selector | Insert scripts directly into the head or body of the page rather than into specific elements. |
| Undo / Redo | Undo or redo changes to the experiment. |
Manage variants
Variants let you compare different versions of the same element—text, images, structure, or functionality—against a control group.
Use the variant selector in the editor to create, duplicate, rename, and delete variants.
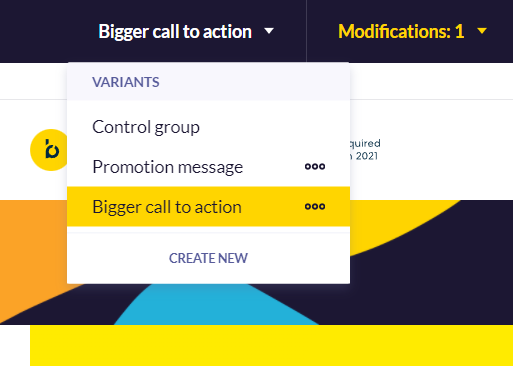
The variant selector with multiple variants and the control group.
NoteEvery experiment includes a Control group variant by default. This represents your website without any changes. The control group can't be edited or deleted.
Work with modifications
View and manage the modification list
Click List of modifications to see all the changes you've made to the page. Each entry shows the modified element and the change applied.
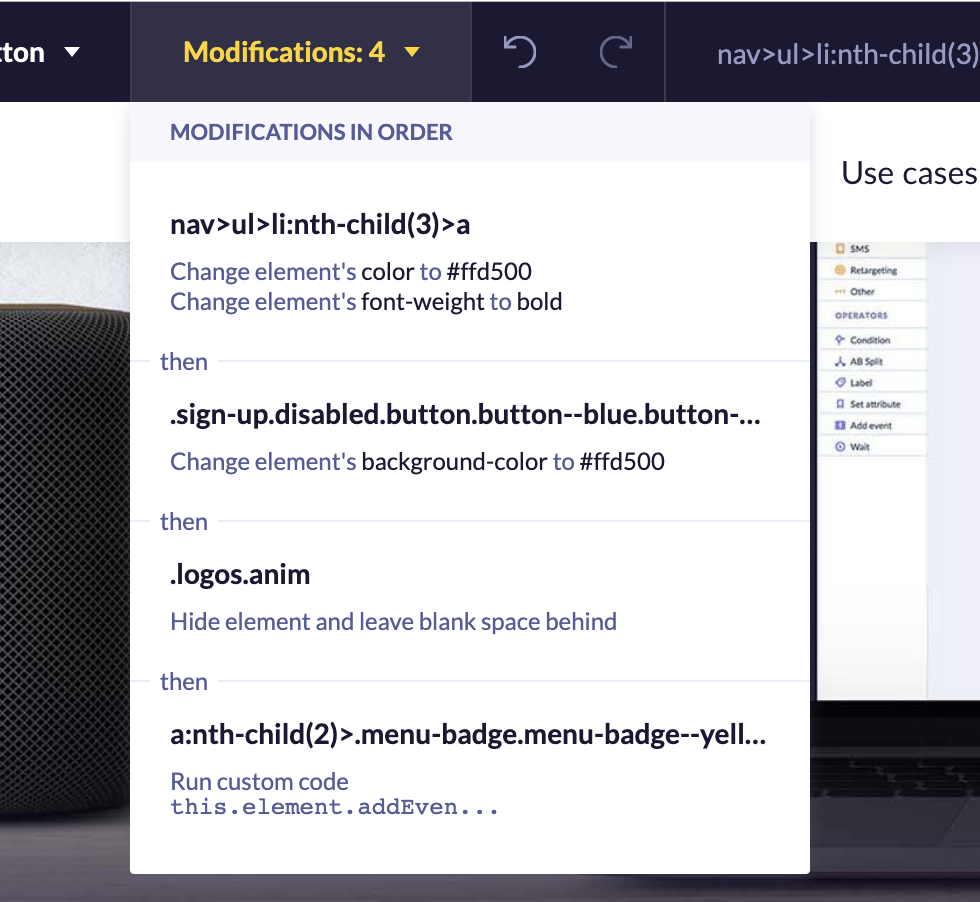
The modification list showing applied changes and their target elements.
Hover over a modification to highlight the edited element on the page. Click a modification to reopen its editing menu and make further adjustments.
Personalized modifications
When a modification contains Jinja, it's marked as personalized in the modification list. Personalized modifications load more slowly than non-personalized ones—and this also affects any modifications applied after them in the list.
Where possible, place all non-personalized modifications before personalized ones to keep load times as fast as possible.
Use selectors
A selector is a CSS selector that identifies the element you're currently modifying or have selected on the page.
The selector field showing an auto-generated CSS selector for a selected element.
When you hover over or click an element, the editor automatically generates a unique selector for it. Hold Shift and click to select multiple elements. The editor then generates a selector that matches all of them.
After selectinYou can edit the auto-generated selector by clicking the pencil icon in the toolbar. For example, if you want to apply a change to all images on the page rather than just one, select one image and rewrite the selector to match more elements. You can also write a fully custom CSS selector if you're comfortable with CSS.
Unique selectors
The editor always tries to generate a unique CSS selector based on the elements on the current page. Because it doesn't have visibility into other pages on your website, the selector might unintentionally match elements on other pages too.
To avoid unintended matches, either set up page filters for the experiment, or use unique IDs for the elements you want to modify. See Experiments for developers for details.
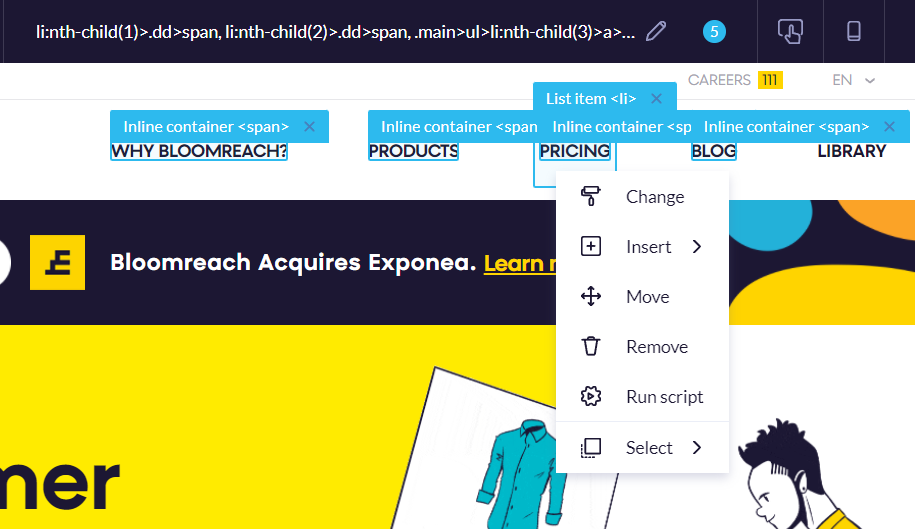
Modify elements
Click any element on the page to open the modification menu. From here, you can change, insert, move, or remove the element.
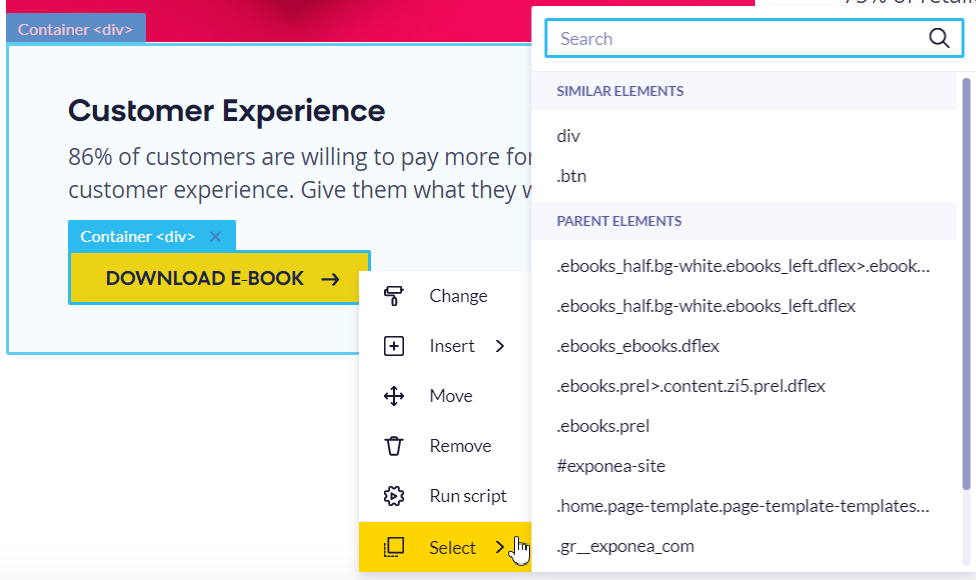
Select parent, child, or similar element
Before modifying an element, you can adjust your selection to a parent or child element. Selecting a parent moves one level up in the page structure. Each element can have multiple children, and selecting one moves down within the structure.
Modification types
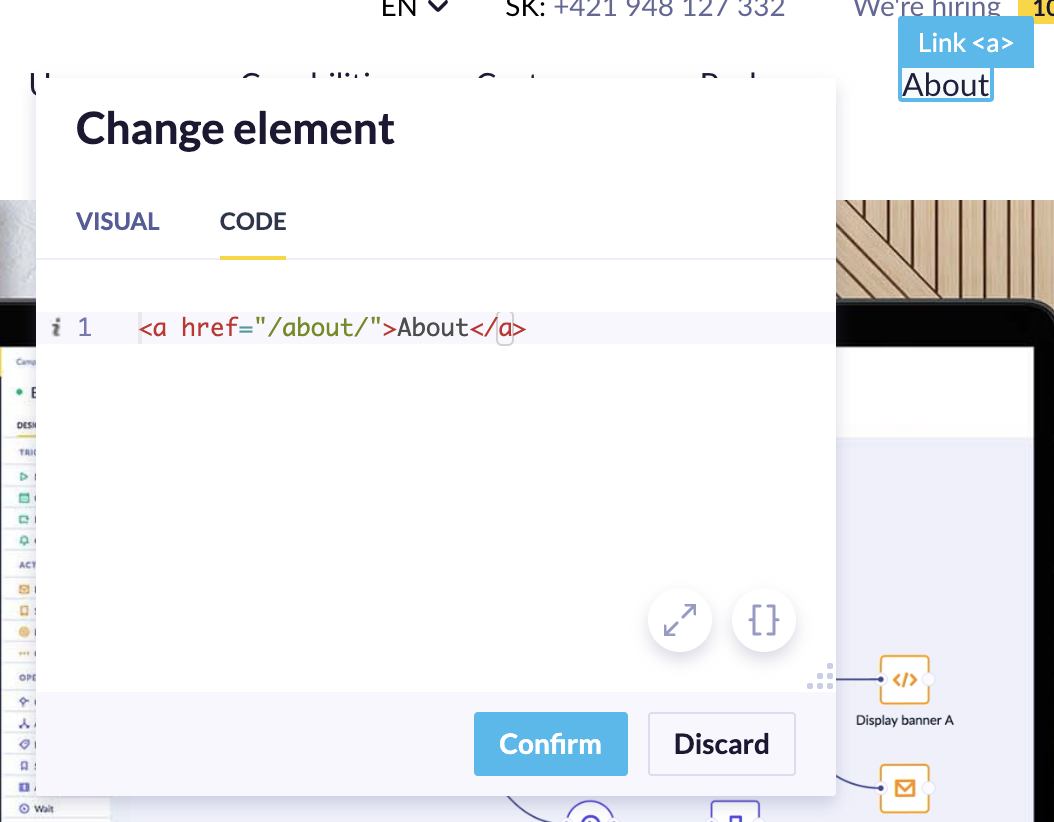
Change
Use Change to modify an element visually. You can adjust dimensions, colors, fonts, and spacing. Enter colors manually using hex or RGB format, or use the color picker. Font sizes require a number and a unit — for example, 43px or 12em.

The Change panel with visual editing controls.
You can also use Change to replace an image or update a link's URL. Select the image or link first, then apply the change.
For advanced edits, switch to the Code tab to modify the HTML of the selected element directly. You can use Jinja here to personalize content for the user.
Jinja syntaxExperiment modifications are Jinja templates. Be careful when editing element code — minified CSS and HTML can sometimes be interpreted as Jinja.
The Code tab performs a basic replacement of the element's text or HTML. Don't use it to modify large sections of the page. Instead, select the most specific child element possible and apply HTML modifications deep in the document tree. See Experiments for developers for details.
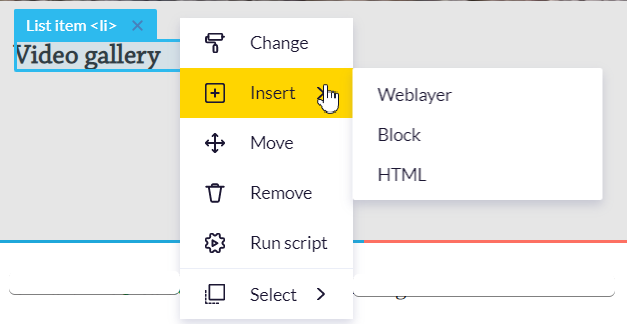
Insert
Use Insert to add content to the page from your Asset Manager. You can insert a weblayer, an HTML block, or custom HTML.
The Insert panel with weblayer, HTML block, and custom HTML options.
- Weblayer: Display any weblayer from your project on the page. Weblayers are HTML/CSS/JavaScript campaigns shown to a specified audience on specified pages.
- Block: Insert any existing HTML Block from your project. HTML blocks in the old form of
[[ paramName ]]cformat can be adjusted using parameters. - HTML: Write your own custom HTML and use Jinja to personalize it.
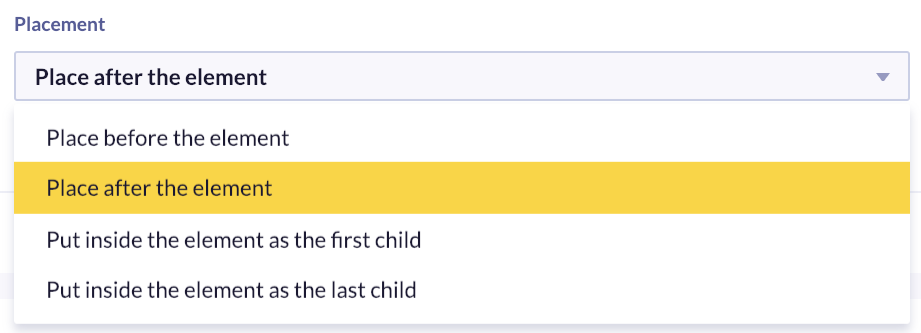
Move
Use Move to reposition an element on the page. First, choose where to place the element relative to an anchor point.
The Move panel with placement options relative to an anchor point.
- Before: Places the element immediately before the anchor. The element sits outside the anchor and doesn't inherit its styles.
- After: Places the element immediately after the anchor. The element sits outside the anchor and doesn't inherit its styles.
- First child: Places the element inside the anchor as the first item. The element inherits the anchor's styles.
- Last child: Places the element inside the anchor as the last item. The element inherits the anchor's styles.
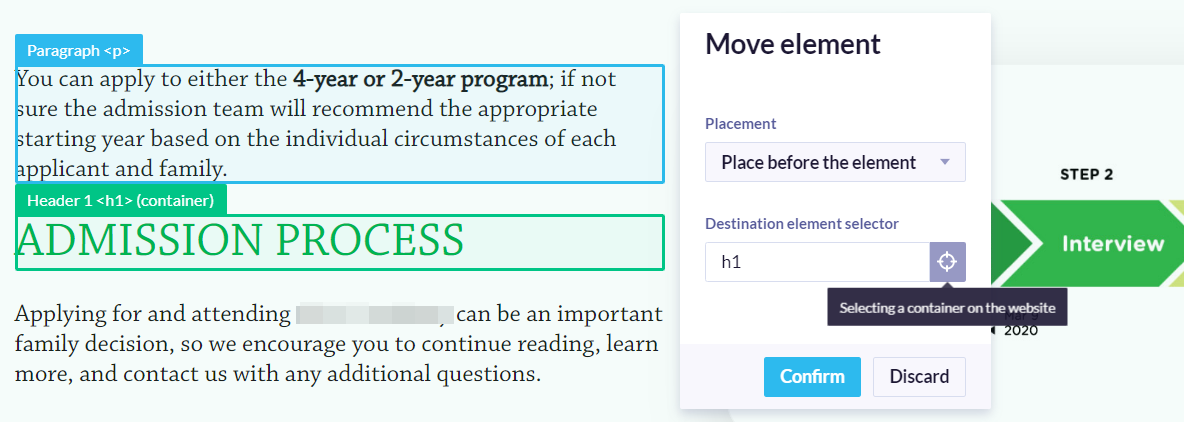
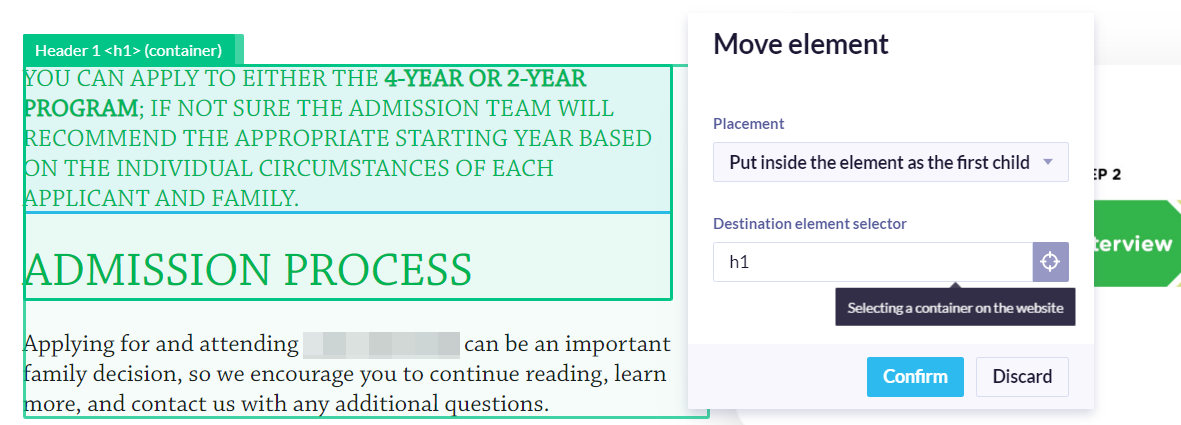
In non-programming vocabulary, the first-child matches the first element of a series of tags. Last-child works the same as first-child, but it selects the last element in the list.
After selecting a placement option, click the target button and select the element you want to use as the anchor point.
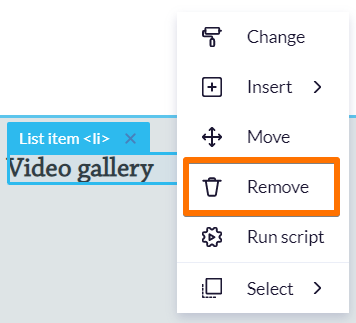
Remove
Use Remove to delete the selected element from the page. After clicking Remove, choose whether to leave blank space where the element was or collapse the space entirely.
The Remove confirmation with the option to preserve or collapse blank space.
Save your work
Confirm your changes by clicking the Save button in the top menu. You return to the Bloomreach app where you can edit additional settings of the experiment and set up A/B testing.
ImportantFor security reasons, you can't save an experiment directly from the editor. Don't close the browser tab when you click Save—wait until you're redirected back to Bloomreach and the page fully loads. You should see the confirmation message: "Success! Your experiment was saved."
Updated 3 days ago