

Get started with Campaign Agent (Affinity)
Follow these steps to write your first Campaign Agent prompt, review the generated brief, and launch your campaign.
Prerequisites
To complete this walkthrough, you need:
- Access to Campaign Agent in your Bloomreach platform.
- Basic understanding of email campaign concepts (target audience, timing, messaging).
- Familiarity with your customer data and typical campaign goals.
Welcome screen
When you open Campaign Agent, you land on a welcome screen. Start typing straight away, or take a moment to check your configuration and explore recommended use cases first.

Configuration status
Three status indicators sit below the input field:
- Tone of voice: Shows whether a custom tone is configured or a default tone will be used. Select the link to open tone of voice settings and adjust how Campaign Agent writes email content.
- Data mapping: Shows whether data mapping is active so Campaign Agent can interpret events, attributes, and catalog data. If anything needs attention, follow the link to the Data mapping page and review the setup before building more advanced campaigns.
- Design: Shows whether an email design is set. When configured, Campaign Agent builds on your existing templates and blocks instead of generic ones. Select the link to review what Campaign Agent will use.
These indicators don't block you from continuing — they're a quick way to confirm Campaign Agent is working with the right configuration.
Recommended use cases
At the bottom of the screen, a row of recommended use cases provides common starting points:
- Select a tile to pre-configure the initial brief around that pattern. Campaign Agent will ask follow-up questions to adapt it to your brand and goals.
- Use More use-cases to browse the full library available for your project.
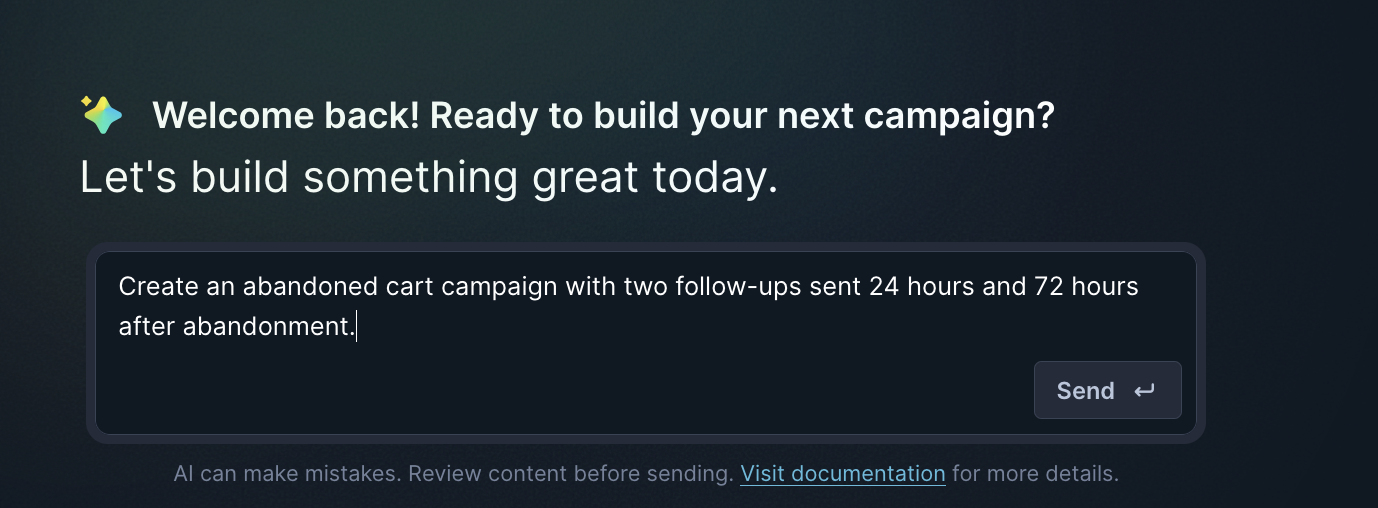
1. Write your prompt
- Click the text field in the conversation area.
- Describe your campaign goal in everyday language. If you have a clear goal in mind, be specific. If you're not sure where to start, ask Campaign Agent what campaign would best achieve your goal.
Example prompt:
"Create an abandoned cart campaign with two follow-ups sent 24 hours and 72 hours after abandonment."
- Press Enter or click the send button.
- Wait while Campaign Agent processes your request and generates a campaign brief.
The clearer and more specific your prompt, the better Campaign Agent's initial campaign brief will be. Learn more about writing effective prompts in Campaign Agent.
2. Review the campaign brief
Campaign Agent presents a campaign brief showing how it interpreted your request:
- Campaign objective: What the campaign aims to achieve and expected outcomes.
- Target audience: Who enters the campaign and when, and the conditions that remove customers once they no longer qualify.
- Key message: Example subject lines and messaging themes demonstrating the content approach.
- Additional context: Campaign timing recommendations and overall strategy.
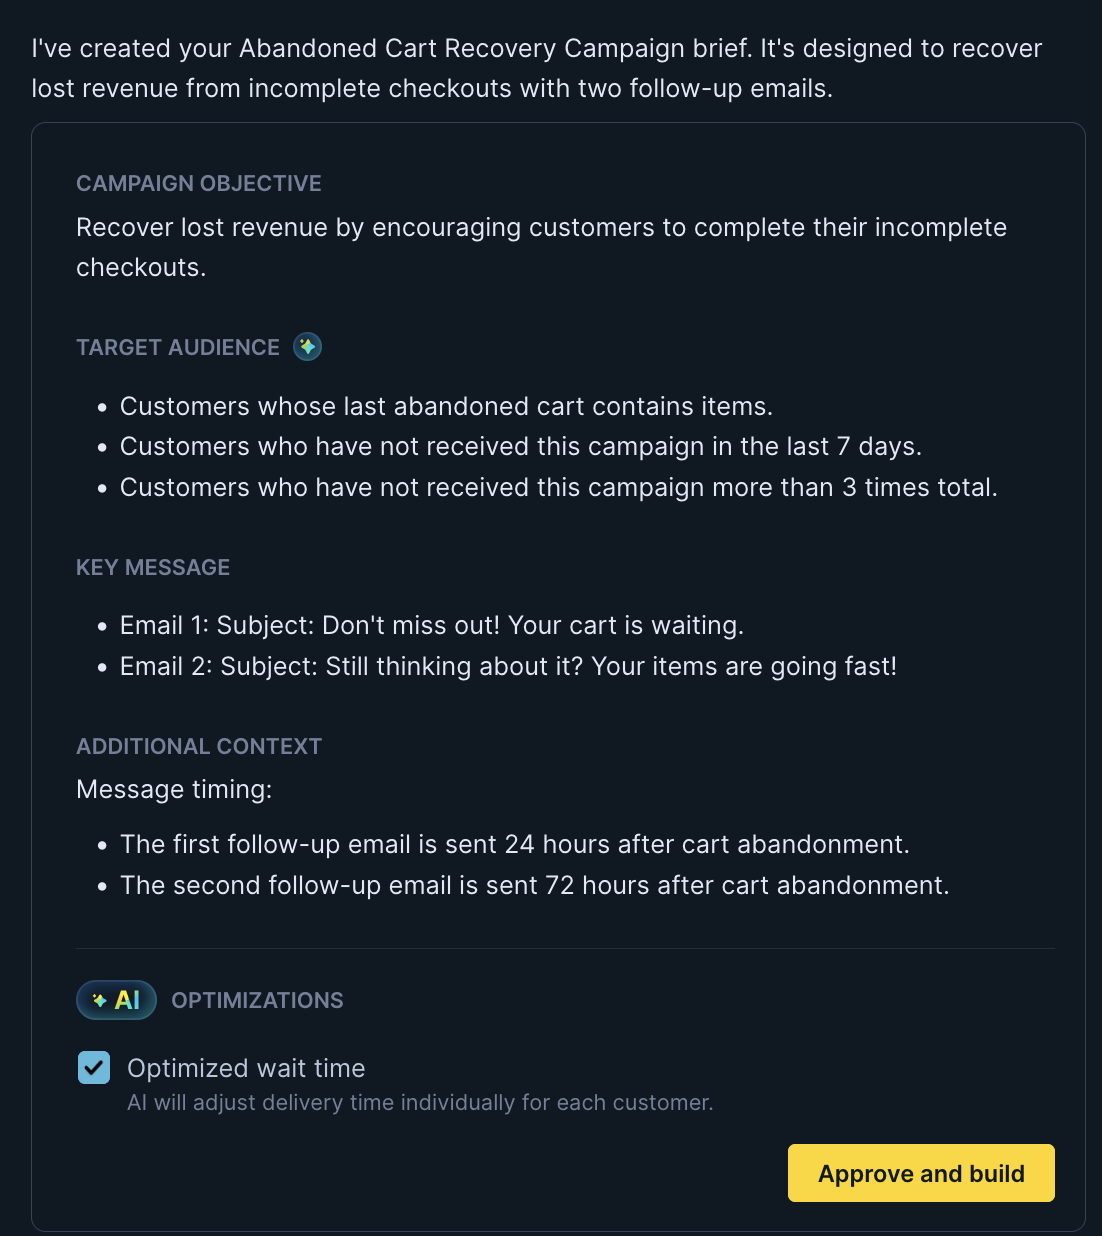
If the campaign brief doesn't match your needs, use the conversation window to request specific changes.
Example refinement request:
"Change the first follow-up timing to 12 hours instead of 24 hours."
Continue refining until the brief aligns with your objectives. Learn more about reviewing the Campaign Agent brief.
3. Approve and generate campaign
- When you're satisfied with the campaign brief, click Approve and build at the bottom of the brief.
- Campaign Agent automatically generates a campaign with all components. Campaign generation speed depends on complexity. To get notified when the Campaign Agent finishes its task, allow browser push notifications.
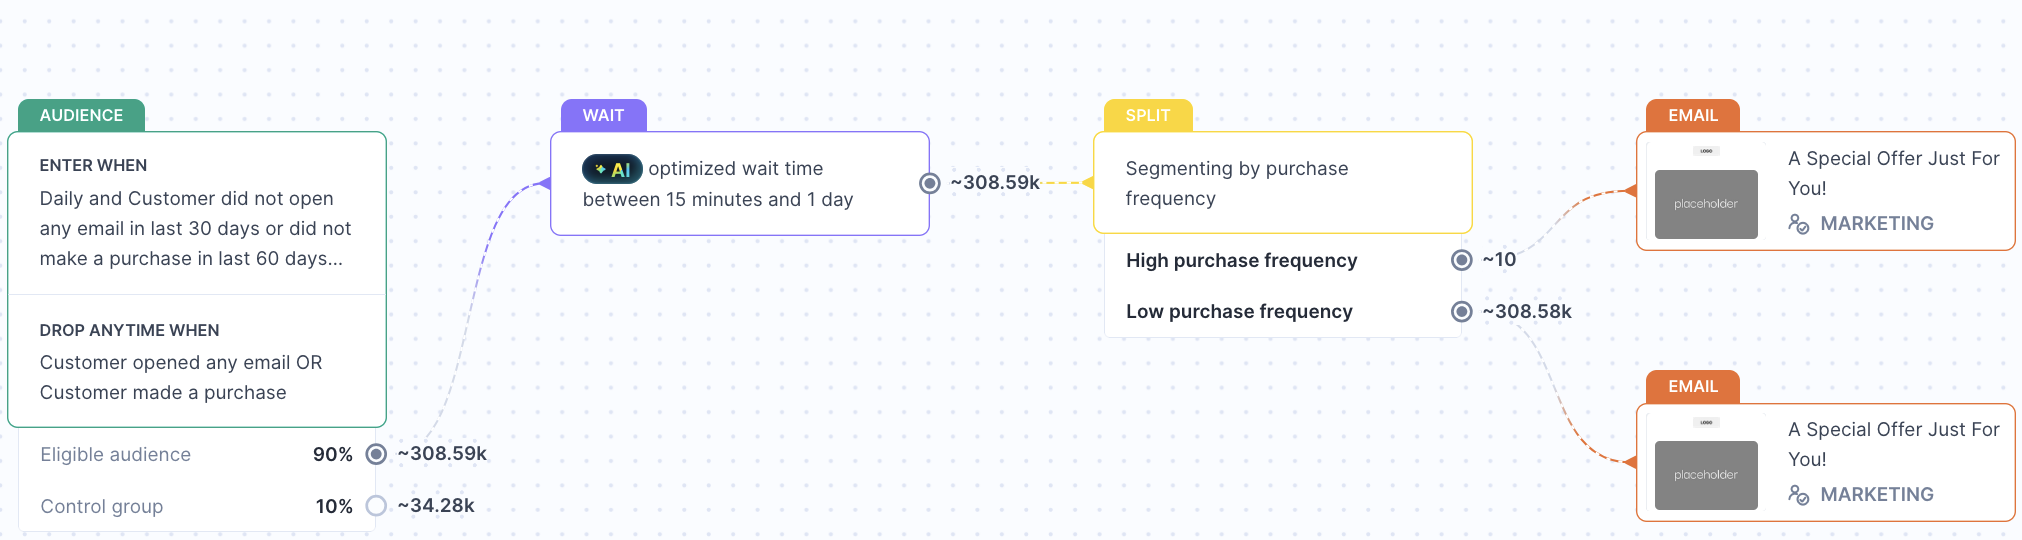
- The Canvas appears on the right, showing your complete campaign flow.
The generated campaign includes all elements needed to run:
- Audience nodes: Define who enters and exits the campaign.
- Wait nodes: Control timing between touchpoints.
- Split nodes: Segment audiences for personalized paths (when applicable).
- Email nodes: Contain email messages and personalization.
Each node represents a specific campaign component you can review and adjust. Learn more about campaign generation and elements.
4. Edit and refine
Review your generated campaign and make adjustments using two approaches:
Conversational editing: Use the chat window to request structural changes like adding campaign steps, modifying flow logic, or adjusting content strategy. Campaign Agent will rebuild the campaign with your requested changes.
Manual editing: Click individual nodes to adjust specific properties like audience filters, timing delays, control group percentages, and entry limits. Changes save immediately when you click Save.
For structural changes (adding steps, reordering flow), use conversational editing. For fine-tuning specific properties, use manual editing.
Learn more about how to edit, refine, and launch in Campaign Agent, including when to use each approach and best practices for iteration.
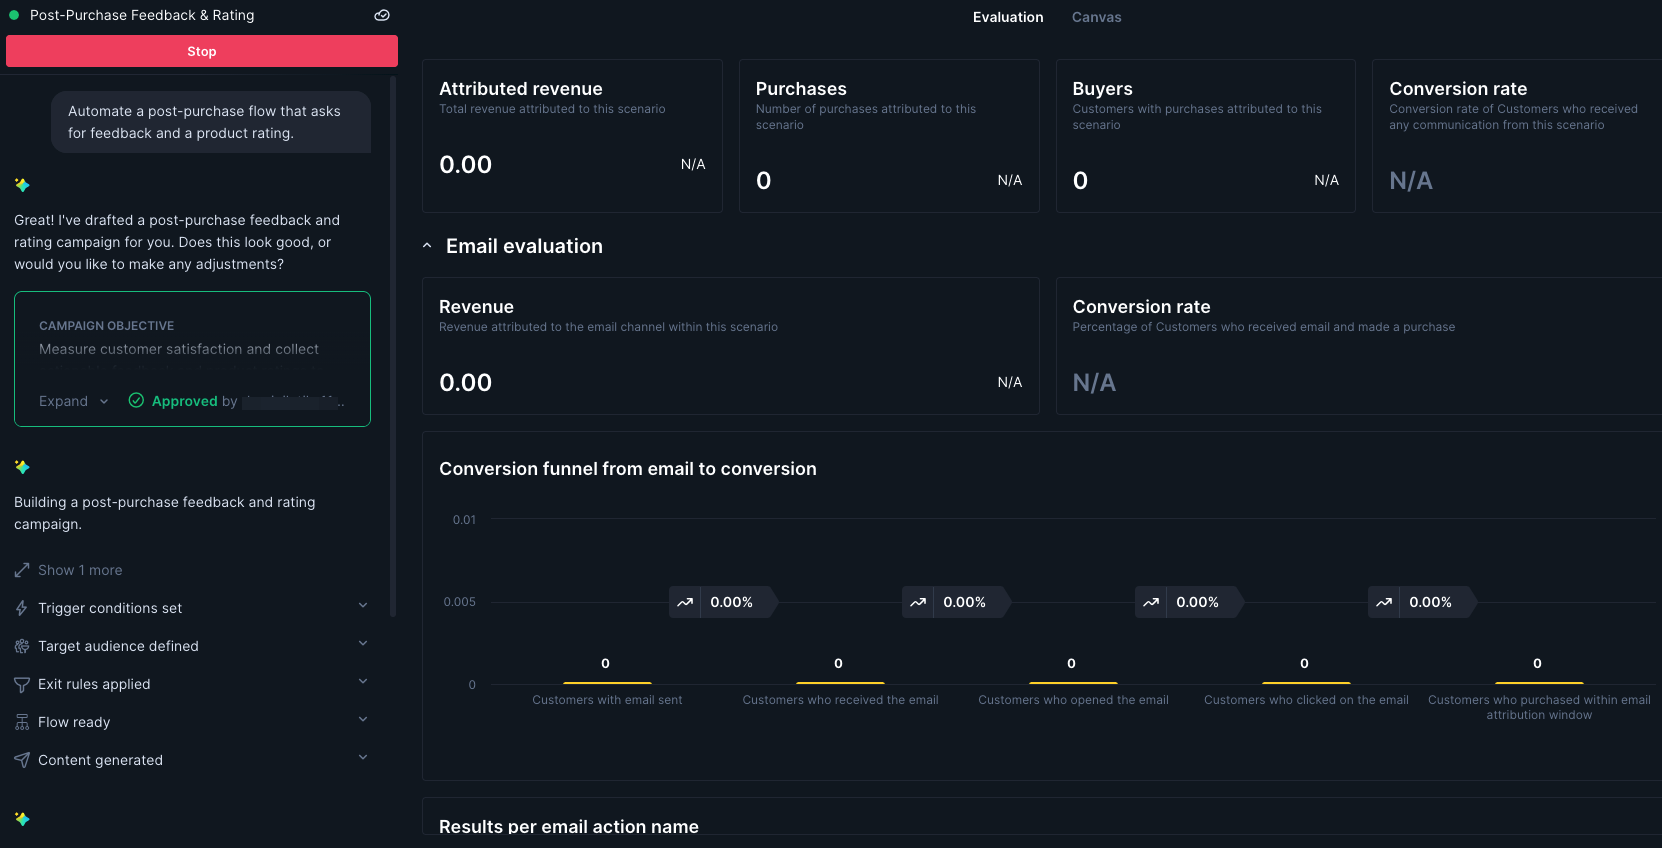
5. Launch and monitor
- When your campaign is ready, click Start campaign at the top of the Canvas to publish.
- After publishing, you'll be redirected to the Evaluation dashboard where you can monitor performance:
- Attributed revenue and conversions
- Email performance metrics (sent, opened, clicked, purchased)
- Conversion funnel analysis
You can continue adjusting campaigns after launch by switching between the Canvas and Evaluation tabs. Changes require relaunching of your campaign to take effect.
Updated 12 days ago